This underrated iPad feature revolutionized my workflow — here's how to try it
A simple feature turned my MacBook into a productivity powerhouse
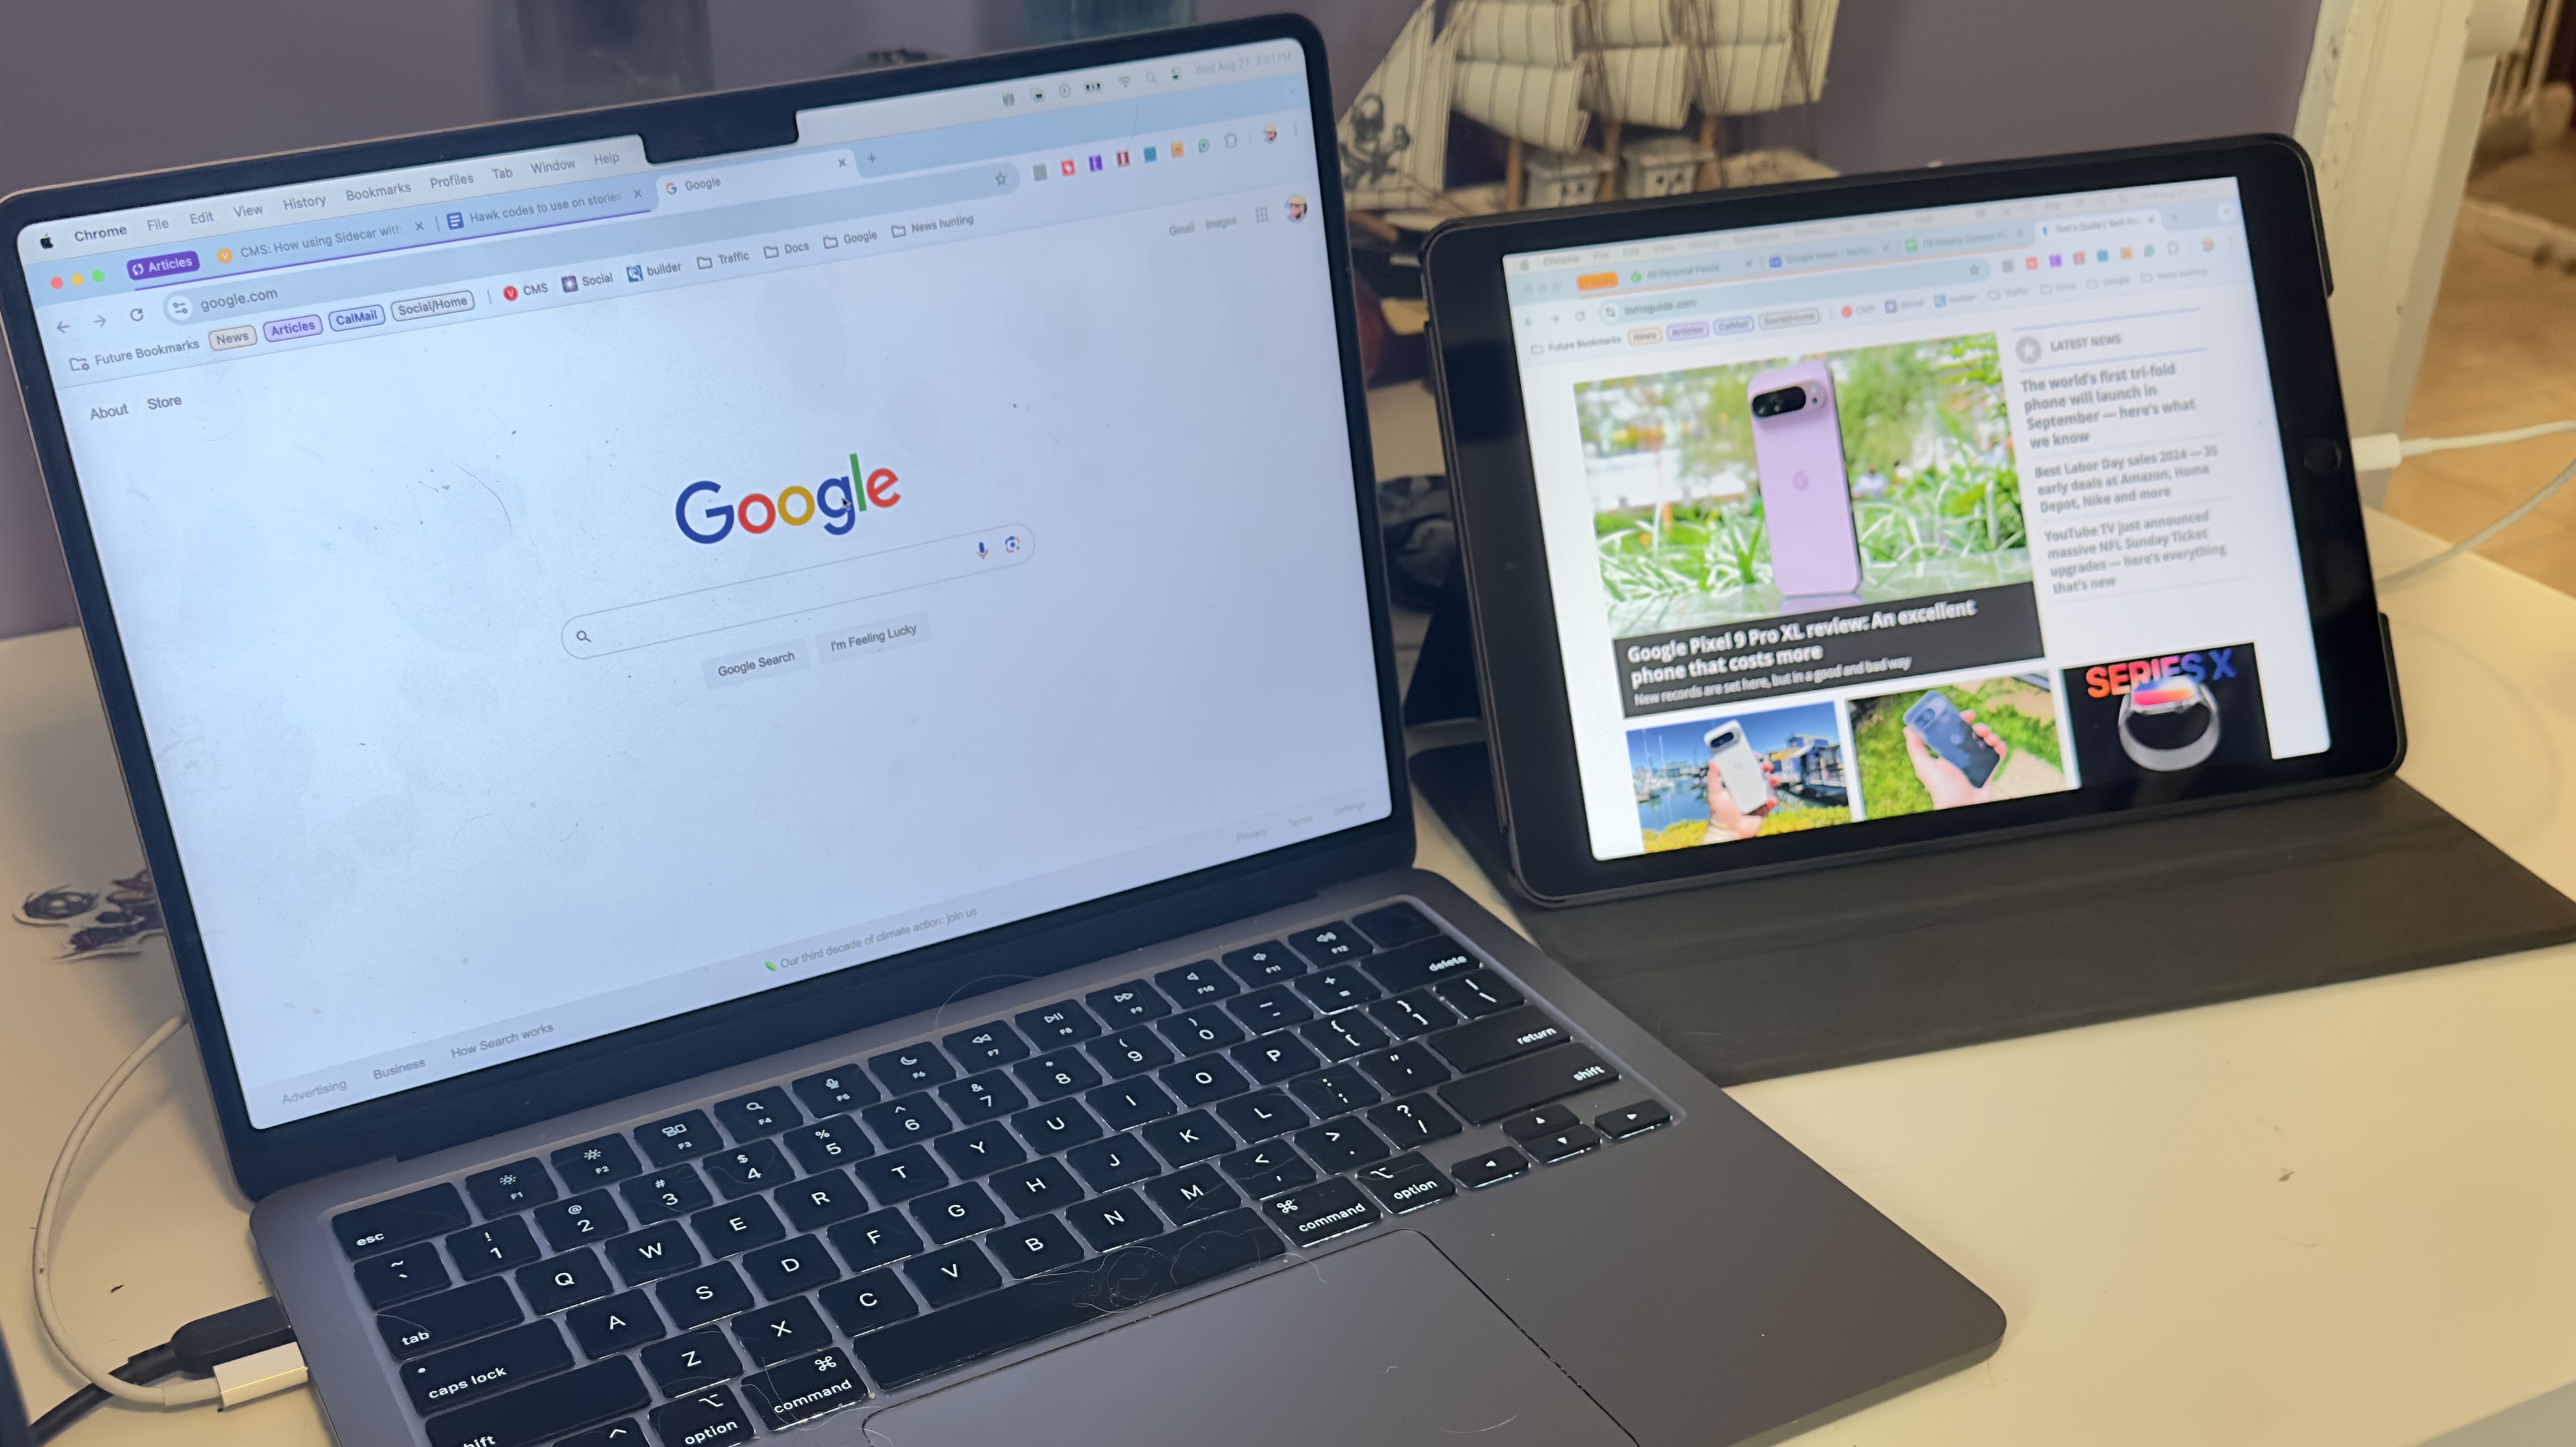
Using multiple monitors is one of the best things you can do to be more productive. Having double the screen space to work with lets you get more done.
Carrying around a second monitor isn't always feasible for laptop users. However, carrying around an iPad is easy and comfortable; most people always carry their iPad, easily one of the best tablets, in their bags.
Apple knows this, so the company created the Sidecar feature, which lets you seamlessly use your iPad as a wireless second display. If you stop at a coffee house to write a few lines of code or an article, you can quickly connect to your iPad and get more work done.
As a long-time multiple monitor user on my desktop, I started using Sidecar recently, and I can't imagine how I could have ever gotten anything done without it.
How to use Sidecar
Like most things Apple, it's quick and painless to get Sidecar up and running as long as you have the supported hardware. You must have a MacBook running macOS Catalina or later and an iPad with iPadOS 13 or later. Apple has a complete list of supported models on its support page, but essentially, if you have a 6th generation iPad or later connecting to a 2015 Mac or newer, you'll be able to use it. It works with both laptop and desktop Mac computers.
Here's everything you need to do to enable Sidecar and get it running on your device:
- On your Mac, click the Apple menu button on the top left of the screen.
- Click System Settings in the menu that opens.
- Click Displays in the sidebar (it's a bit of a scroll down).
- Click the + symbol to open a dropdown showing available displays.
- Click the name of your iPad to connect to it (it must be on the same Wi-Fi network or connected via USB).
- Once it's up and running, the Screen Mirroring menu will appear in the menu bar. You can click this to change it from mirroring to extended. You'll want to use extended to make it an actual second display.
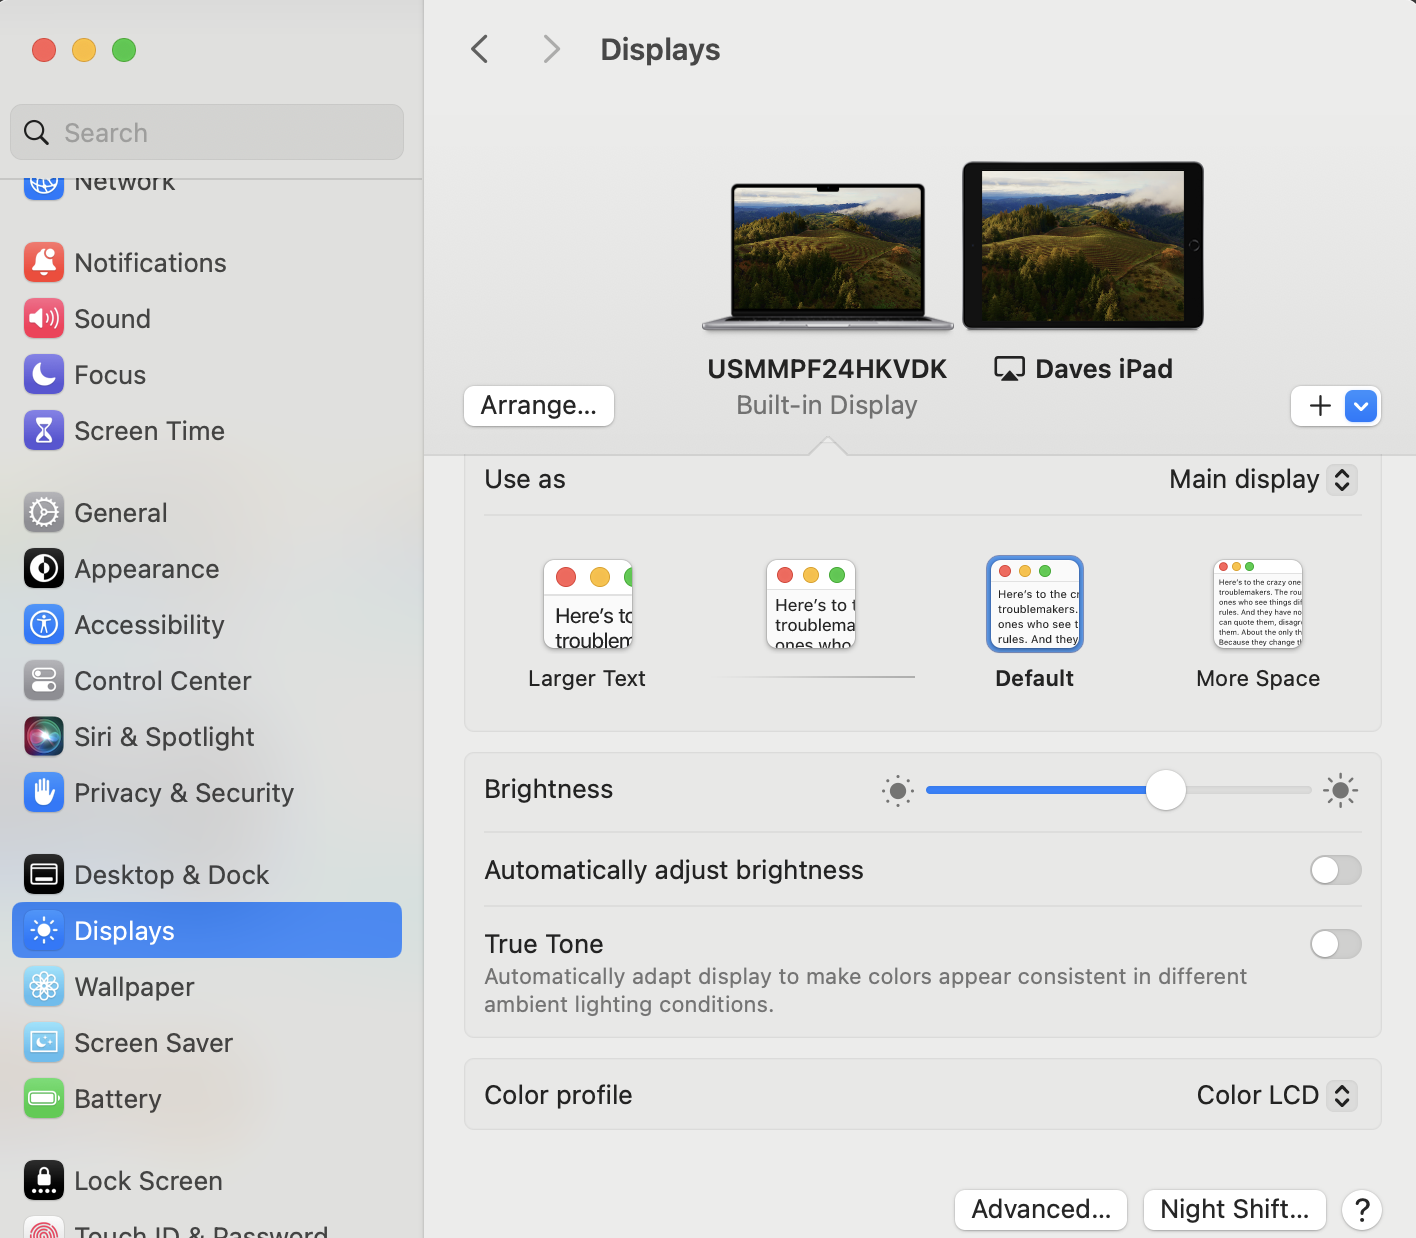
Once you have it up and running, you can use the Display settings we used to reposition the screen to the left of right of your main display. To do so, click Arrange and move it around to match where the display sits. I like having it to the right of my main desktop, but that's my preference.
Get instant access to breaking news, the hottest reviews, great deals and helpful tips.
How Sidecar saves time
I use Sidecar every day. The first thing I do when I start working is connect my iPad to my MacBook (I use USB for the feature as it drains the battery rather quickly).
Your devices will remember your settings, so if you extend the display, it will go back to that when you connect it again.
As the News Editor here at Tom's Guide, I use the second display to refer back to whatever source for an article. If it's another publication, I keep the page open to glance back for critical facts and information without switching tabs. The same applies to a press release, a YouTube video or an interview.
Generally, I have four tabs open on the second display: an RSS reader, Google News, a spreadsheet of the news stories we have in the works and the source for the story I'm writing. That's it. Everything else lives on the laptop's main display, organized with multiple desktops. No matter how many tabs I have open as I'm digging through information, I know I can get back to these four tabs quickly by sliding over to the other display and clicking the tab I need or simply turning my head if it's already open.
Suppose you're like me and have multiple tabs open all the time; having a second display with the key ones you'll refer back to while working is a game changer. This, of course, wasn't news to me, as I've used multiple displays with a desktop for years. But being able to do it without lugging around a portable monitor is a game-changer.
Sidecar was introduced more than five years ago, and I'm somehow just discovering its splendor now. If you own an iPad and a Mac, I hope this little tidbit of information was enlightening for you, and you'll now be able to have a multi-monitor set up when you're out and about.
More from Tom's Guide
- We’re holding on to our Macs longer than usual
- Apple TV Plus's best new feature in years has finally arrived
- Is Apple Intelligence a game changer or gimmick?

Dave LeClair is the Senior News Editor for Tom's Guide, keeping his finger on the pulse of all things technology. He loves taking the complicated happenings in the tech world and explaining why they matter. Whether Apple is announcing the next big thing in the mobile space or a small startup advancing generative AI, Dave will apply his experience to help you figure out what's happening and why it's relevant to your life.
 Club Benefits


