How to Edit Pictures on a Mac Using the Photos App
Mac owners: Perfect your pictures with these tips for the new, free Photos image-editing app for OS X Yosemite.

Want to make your pictures pop but don't have the time or money to invest in a photo-editing tool? If you have a Mac, you're in luck. With the latest version of OS X Yosemite, Apple is including the new Photos app, which packs effective, comprehensive image-editing tools to help you enhance your shots. The free app is installed when you upgrade to OS X 10.3.3 (by going to the App Store program and clicking OS X Yosemite on the right). Photos is easy enough for beginners to learn but also offers more-advanced editors the ability to fine-tune details.
The program supports a wide range of image file types, including JPG, RAW, TIFF, PNG and GIF. You can make changes and undo them in Photos (by pressing Command-Z) until you settle on something you like. Also, the edits are "nondestructive," which means you can always revert to the original version of the photo.
MORE: How to Take Great Photos with a DSLR or Mirrorless Camera
We'll help you learn some key maneuvers, such as how to crop, straighten, adjust exposure and use filters tastefully so you can make your pictures better with Photos for OS X.
Crop and straighten for better composition
Photographers often talk about the rule of thirds: Place your picture's subject along the vertical and horizontal thirds of the frame for a more interesting and pleasing composition. If you weren't able to frame your shot perfectly, you can still adjust it by using the crop tool in Photos.
Open your image; then click Edit on the top right of the program window.
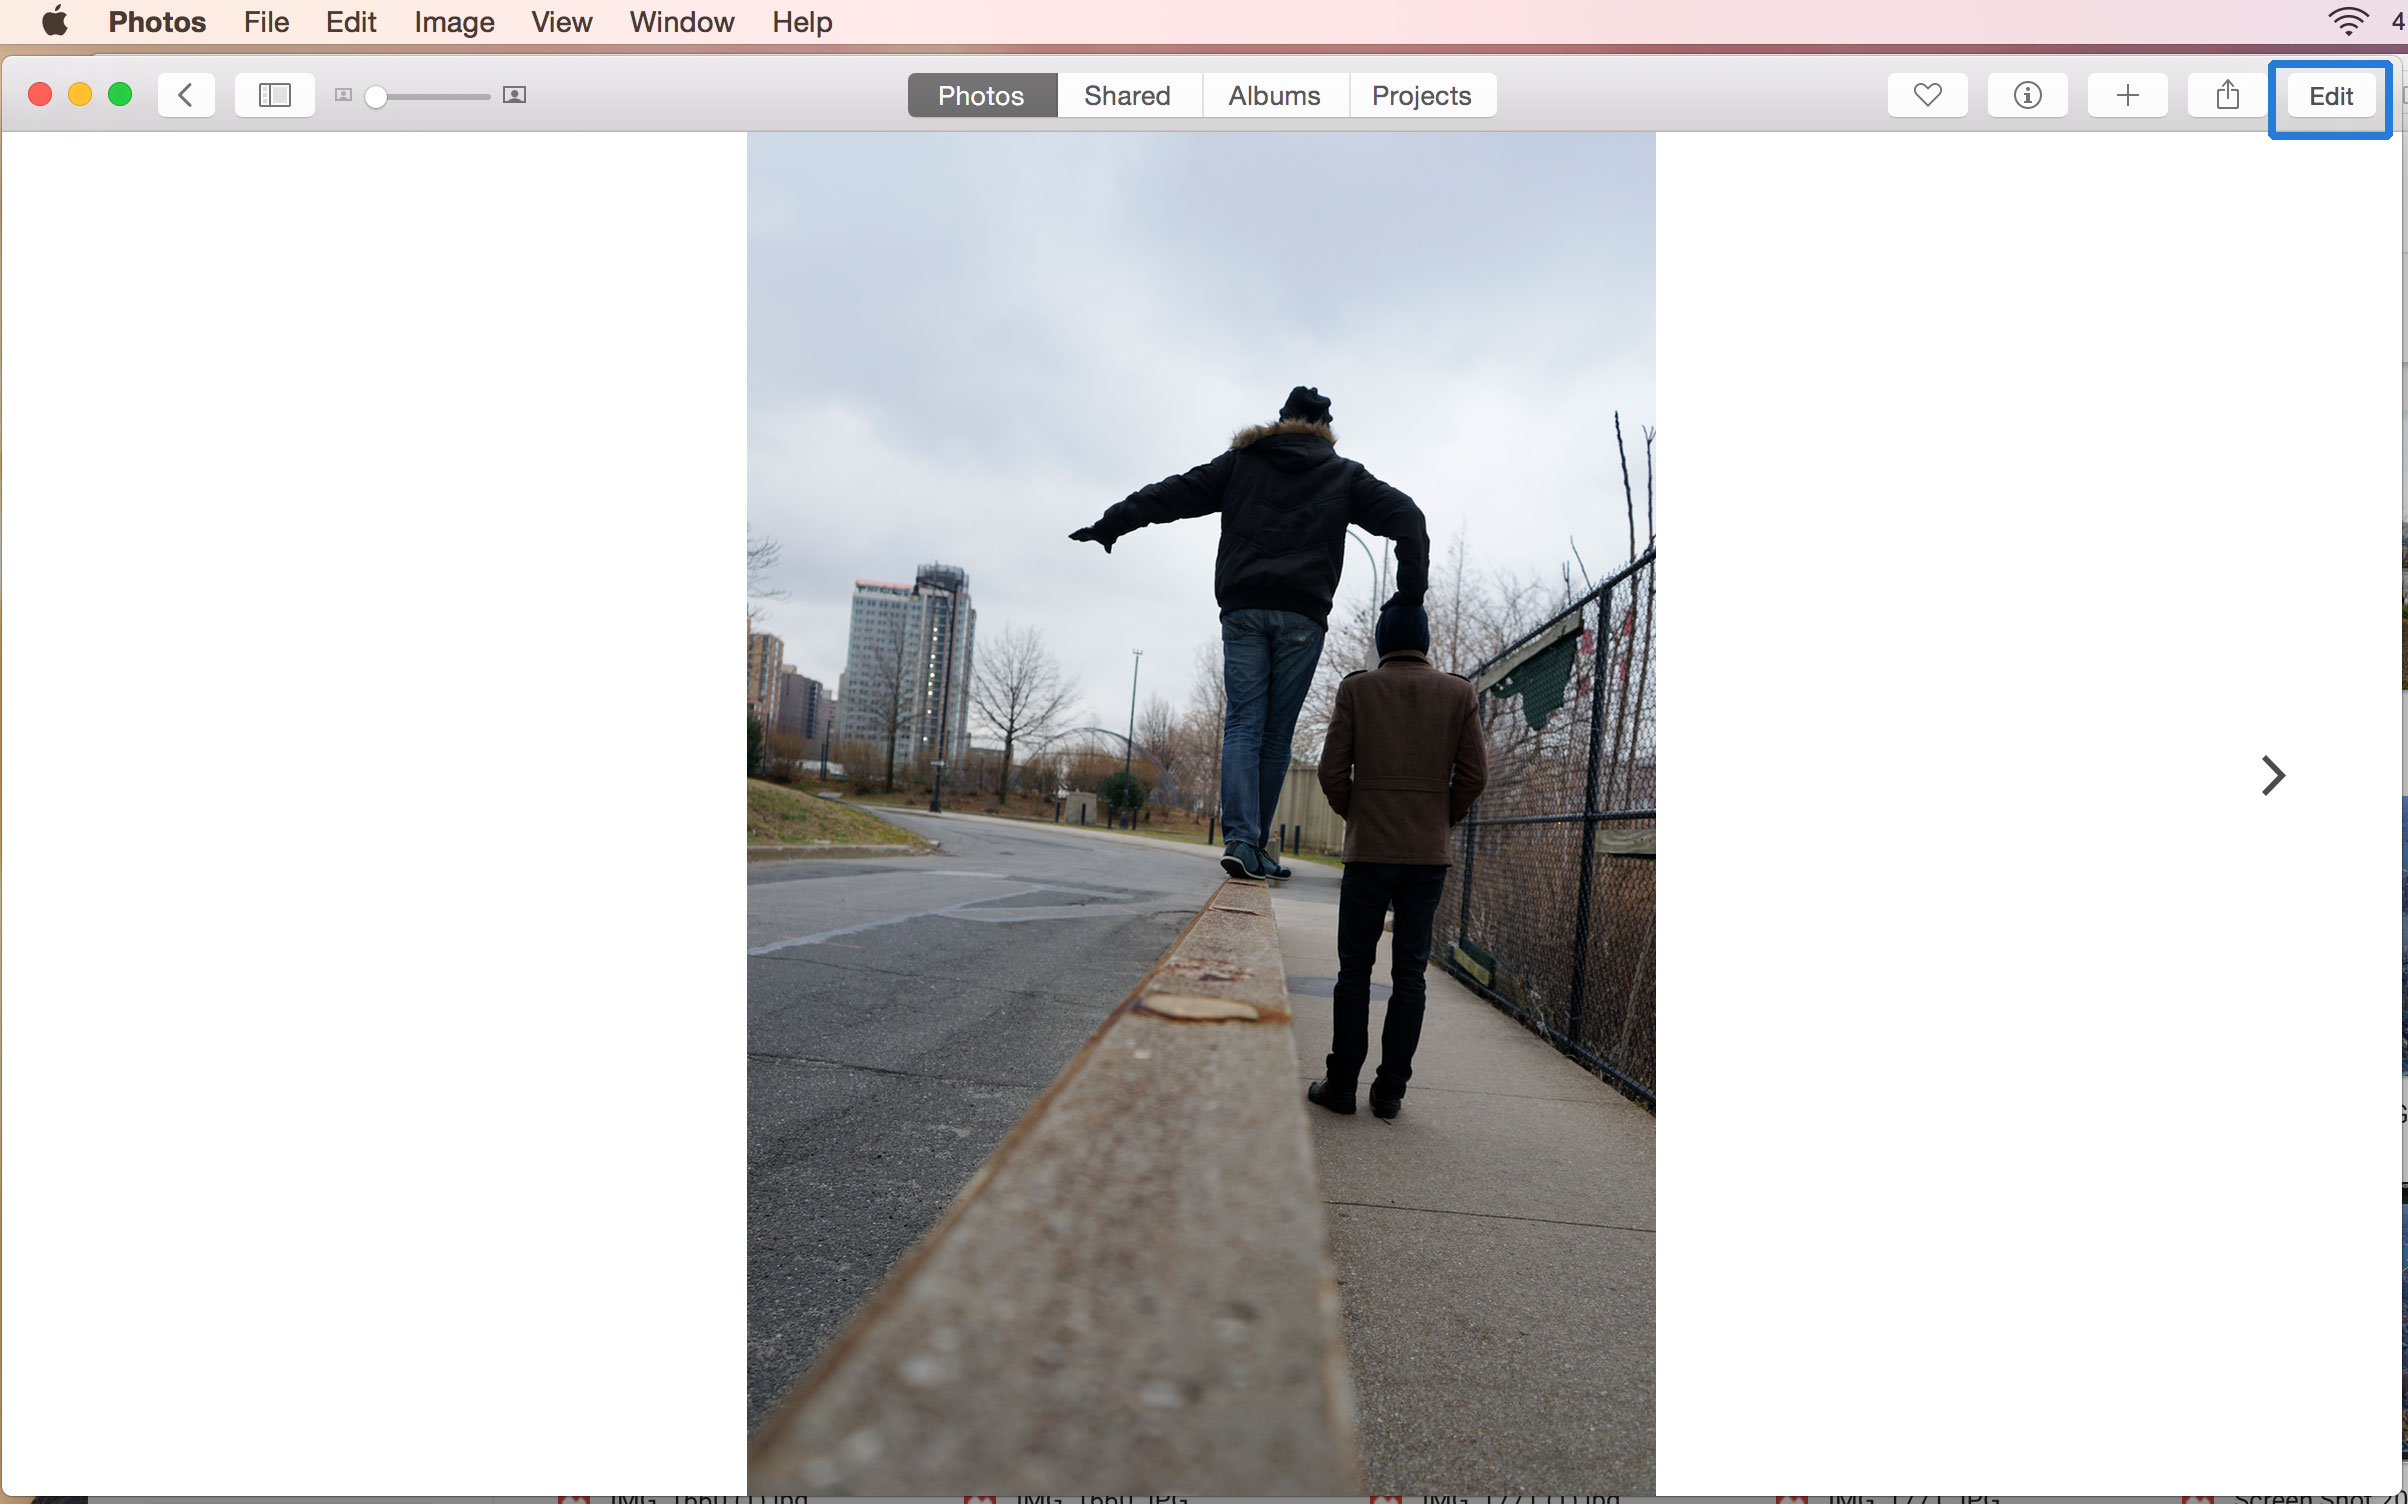
Select the Crop button (third from the top) on the toolbar at the right.
Get instant access to breaking news, the hottest reviews, great deals and helpful tips.

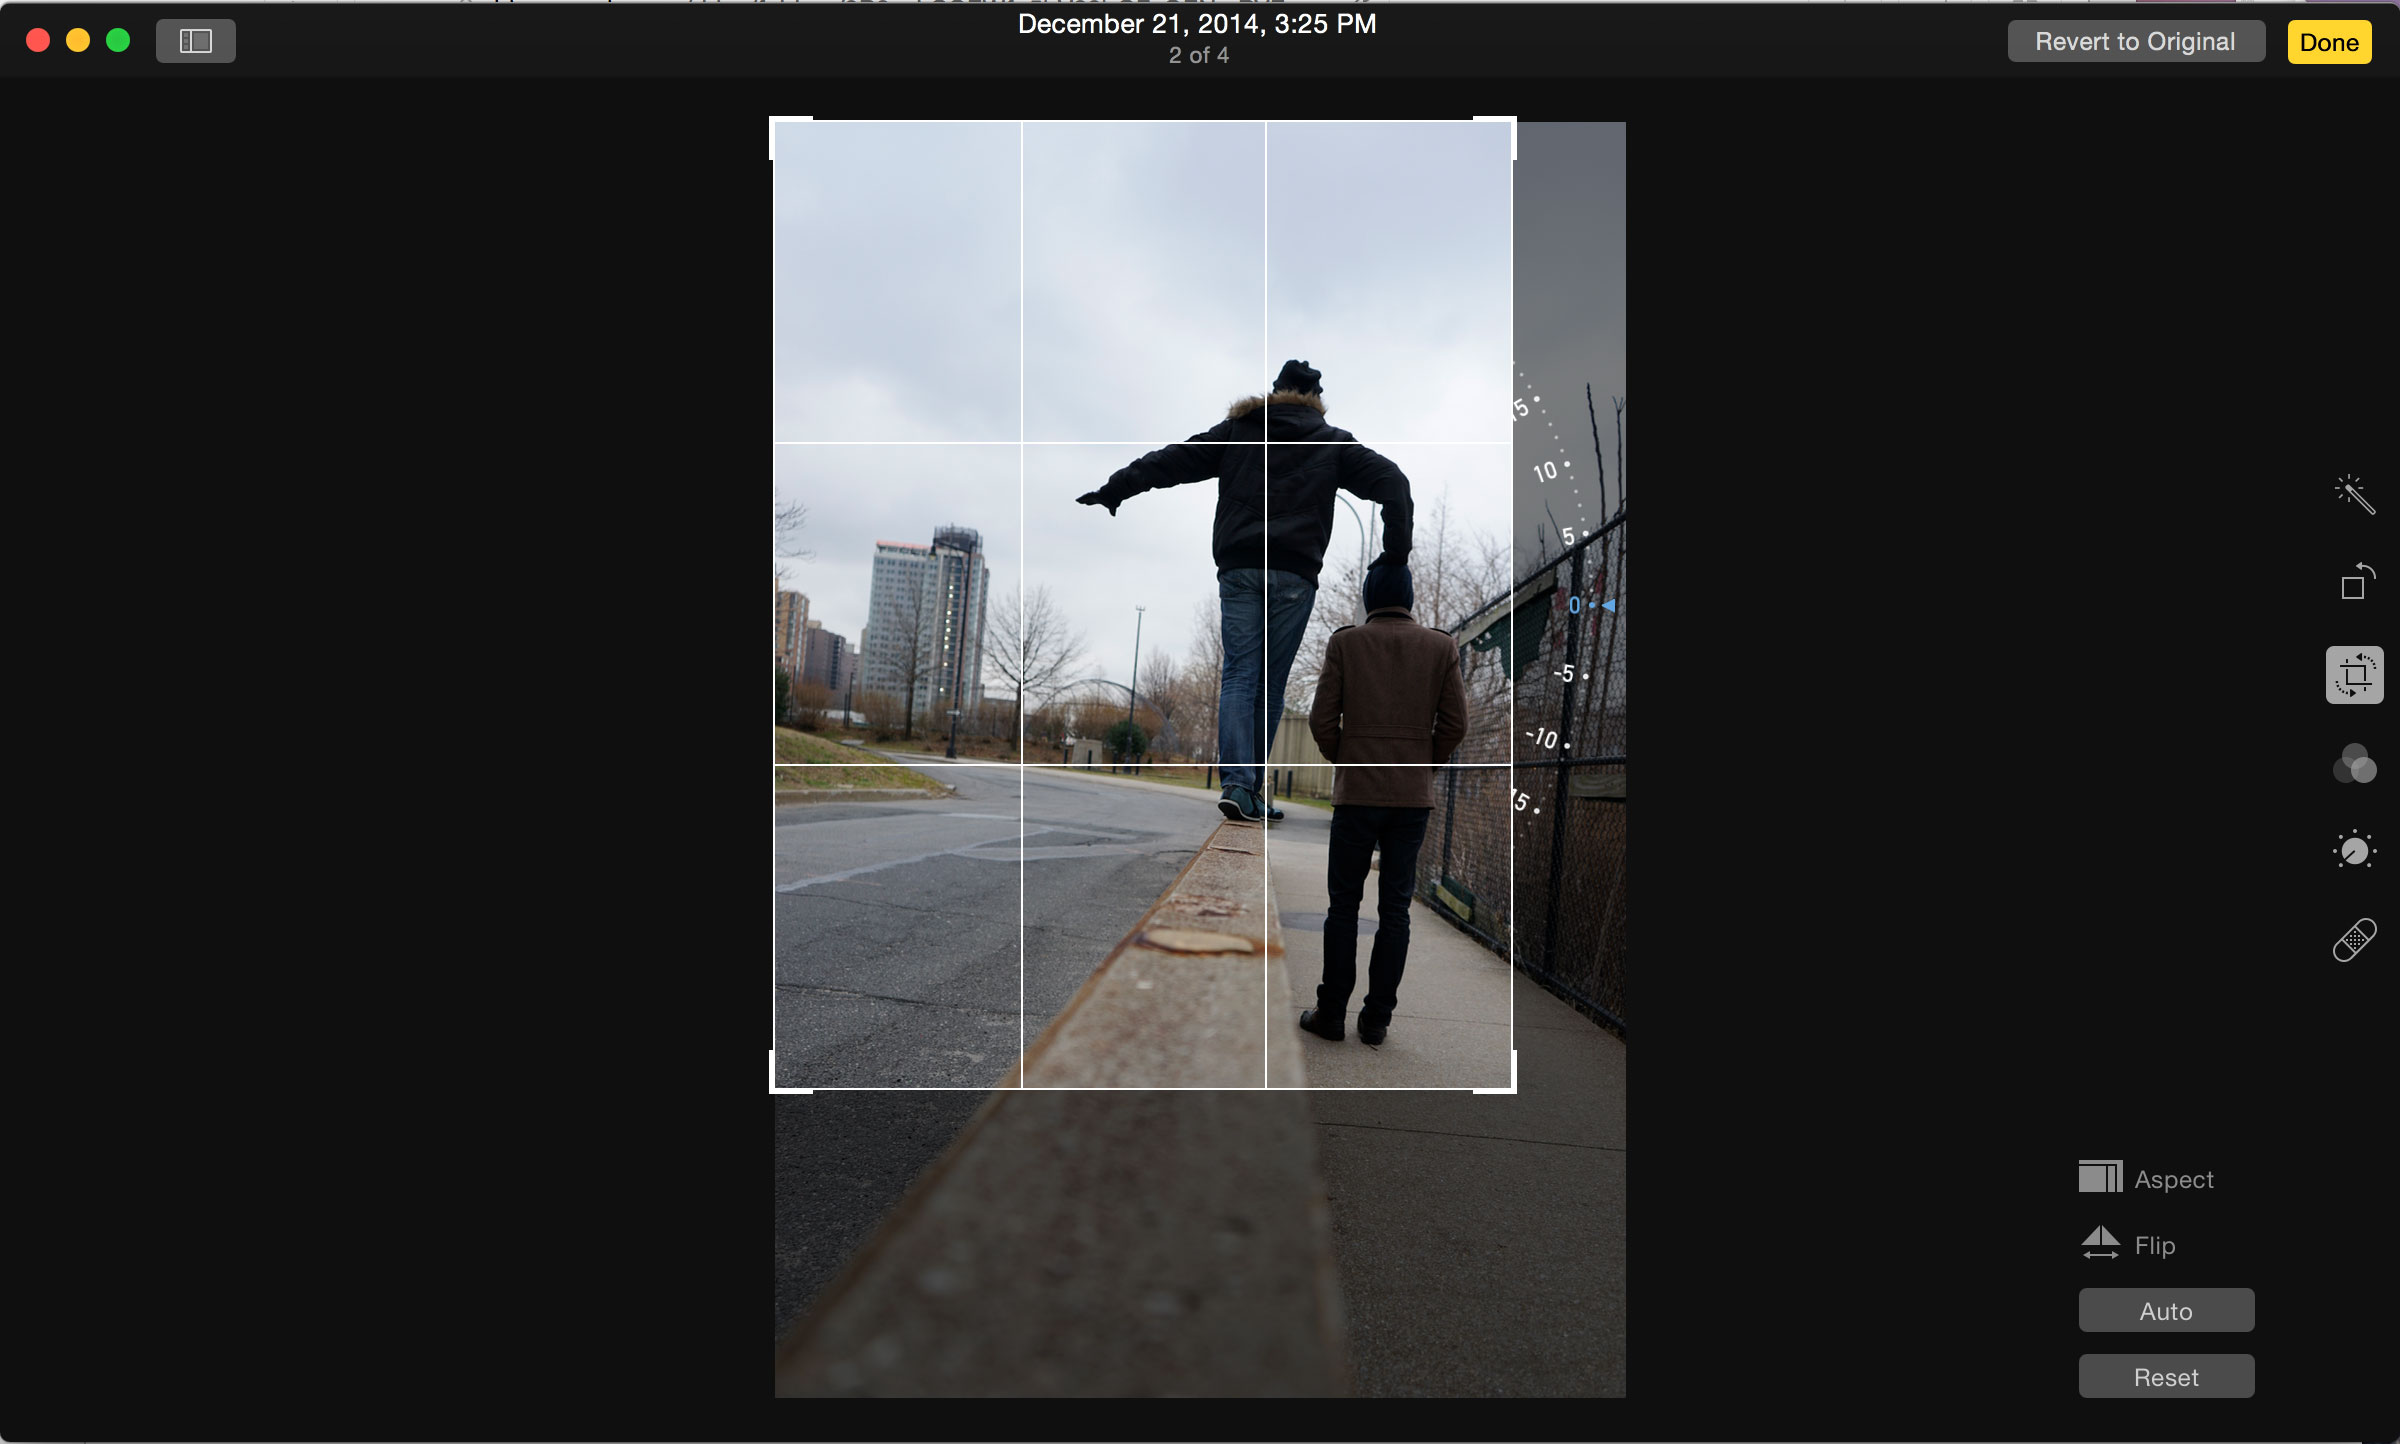
Drag the brackets at the corners of your image, and use the grid lines on the screen to help compose your picture.
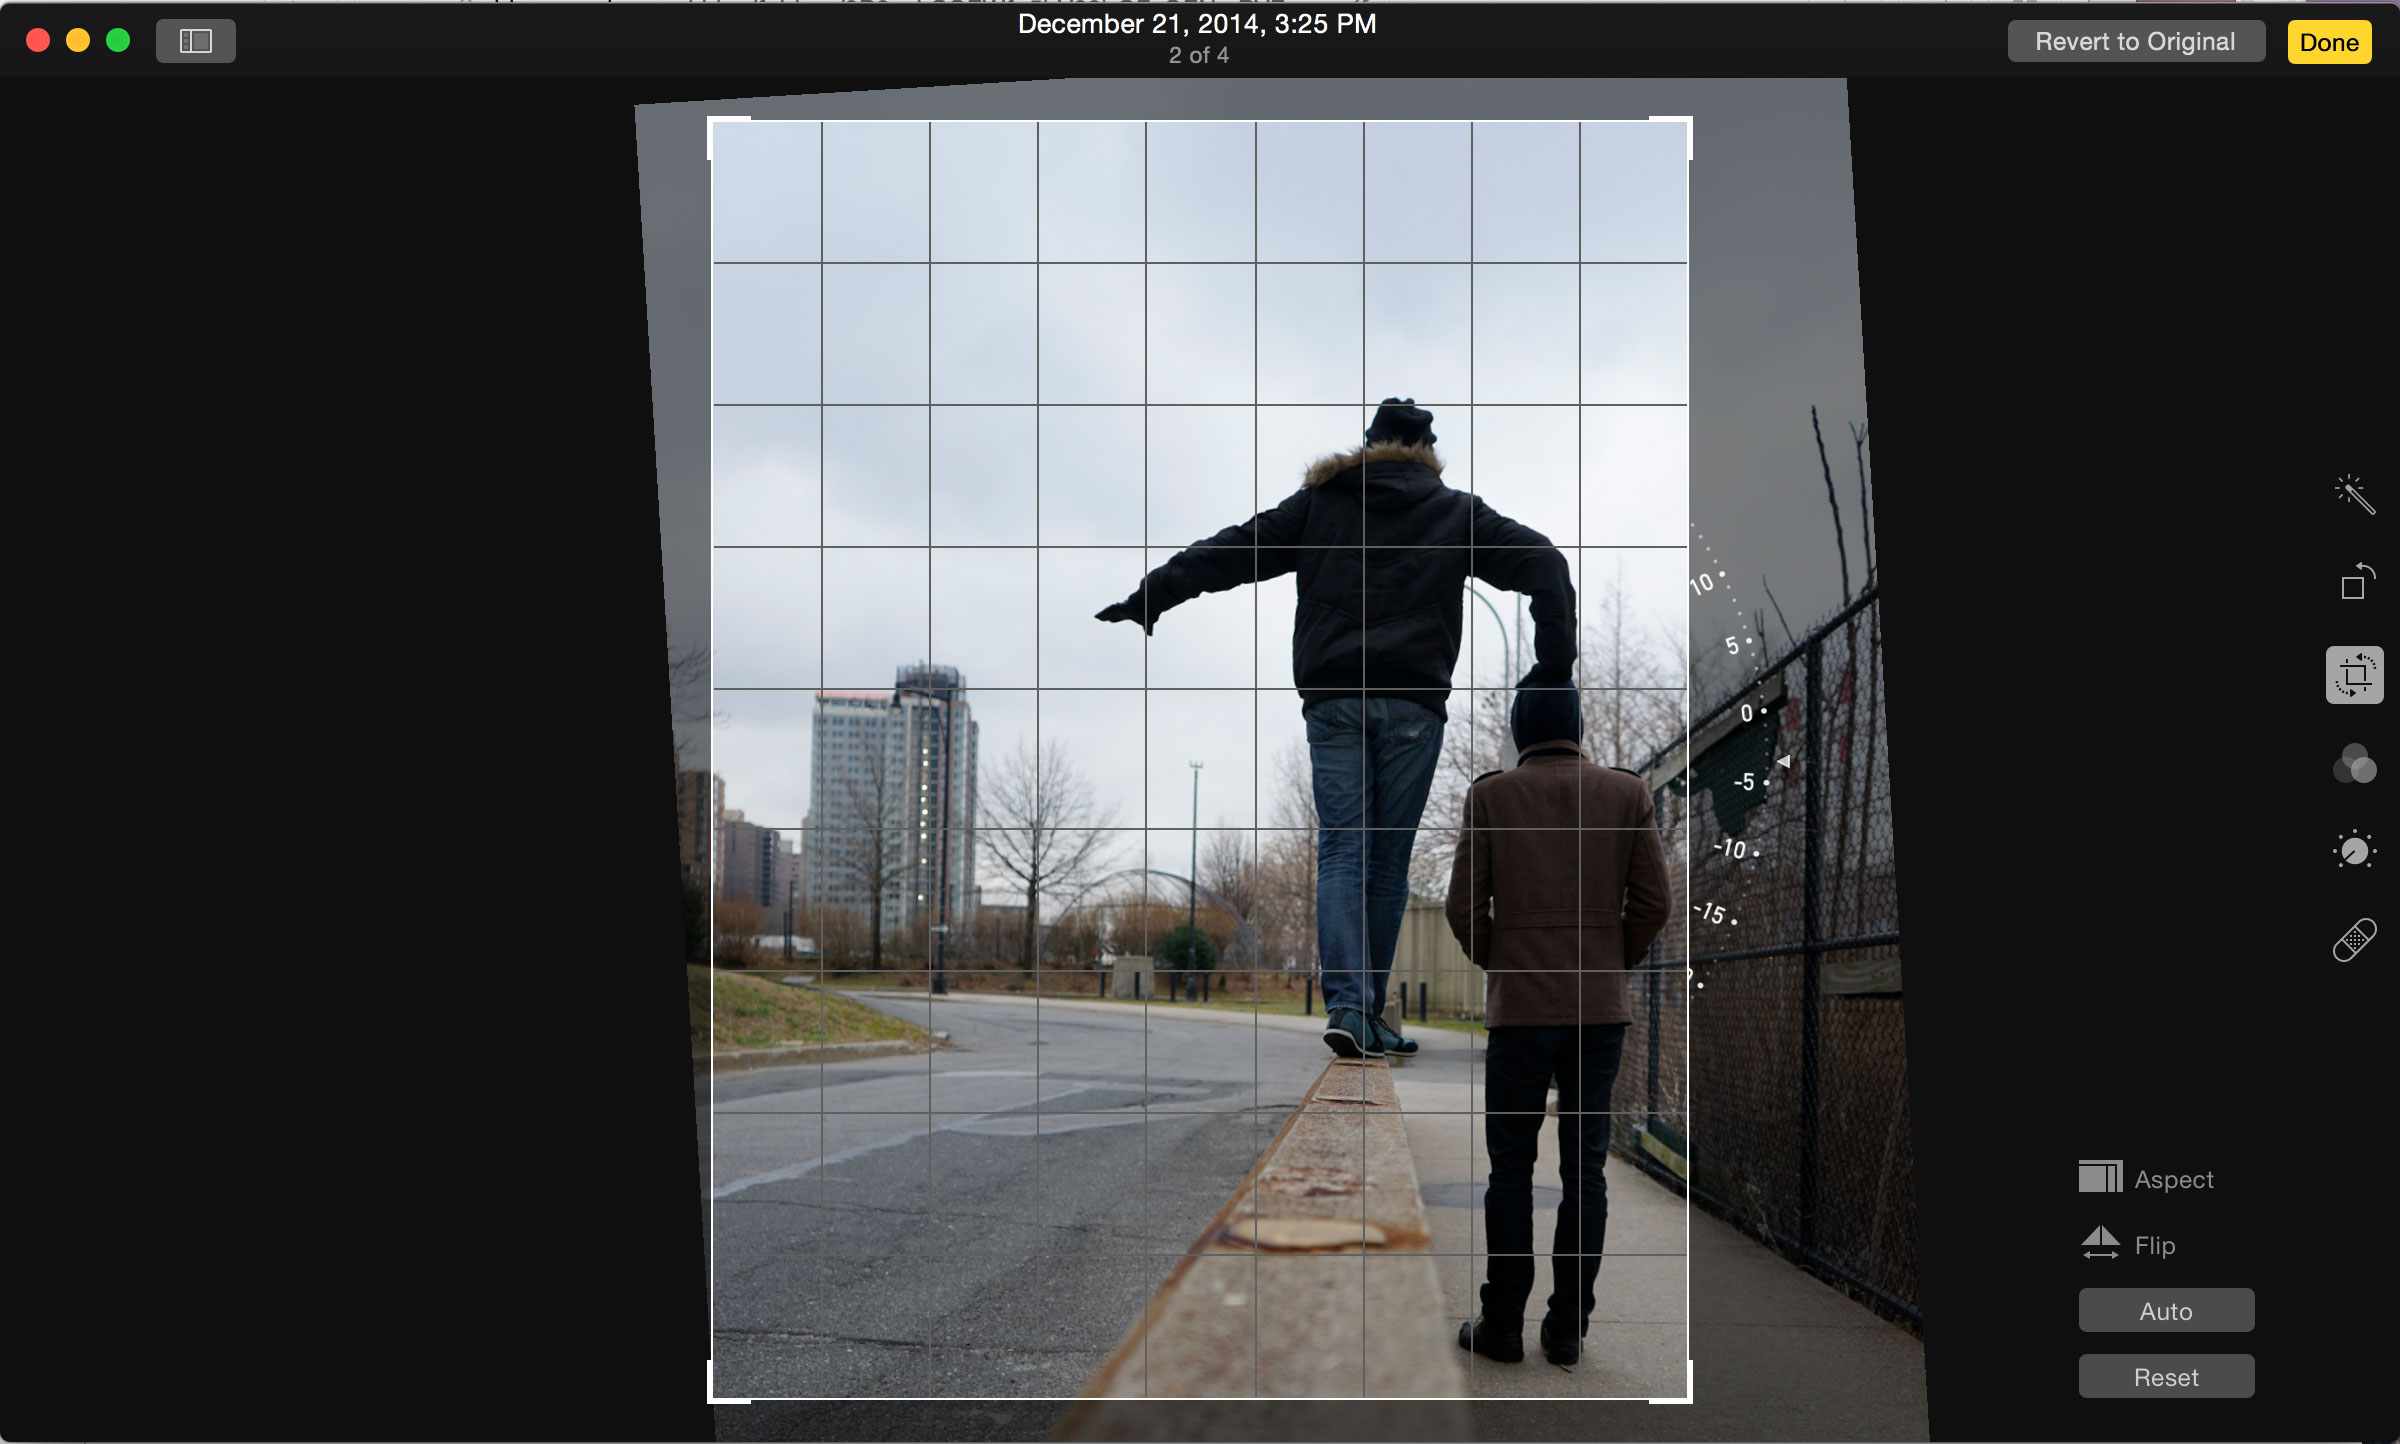
Turn the wheel on the right of the picture to tilt or rotate your shot. Again, use the grid lines on the screen to help make sure your picture is straight. When you're satisfied, hit the yellow Done button on the top right to save your changes.
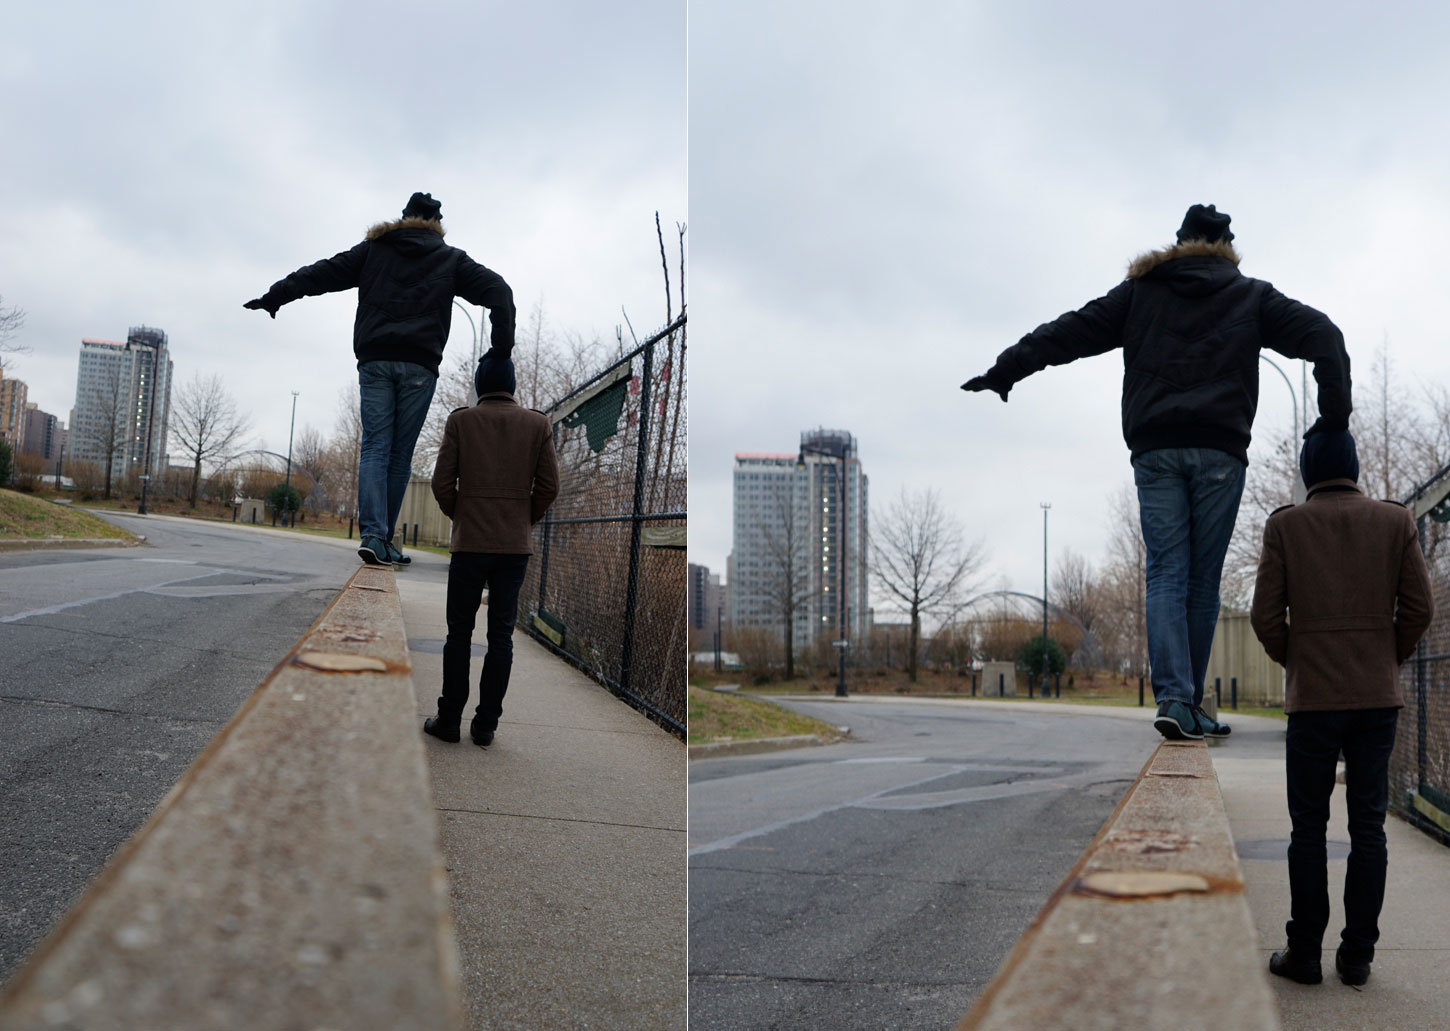
Here's a before (left) and after (right) comparison:
Adjust lighting and exposure to recover detail
Sometimes, a photo that you snapped in a hurry turns out darker or lighter than you expected. You can recover details by tweaking values in the Light section of Photos. Be warned, though, that this tool can't fix pics that have been burned out. If part of an image looks completely white and is close to a light source, it's probably overexposed beyond rescue. But you still may be able to save enough of the picture to make it worthwhile.
To brighten an image, tap the Adjust button (fourth from the top) on the toolbar.

You can either drag the slider on the Light spectrum next to the picture, or click the down arrow next to the word "Light" for more-precise controls, such as exposure, brightness and contrast.
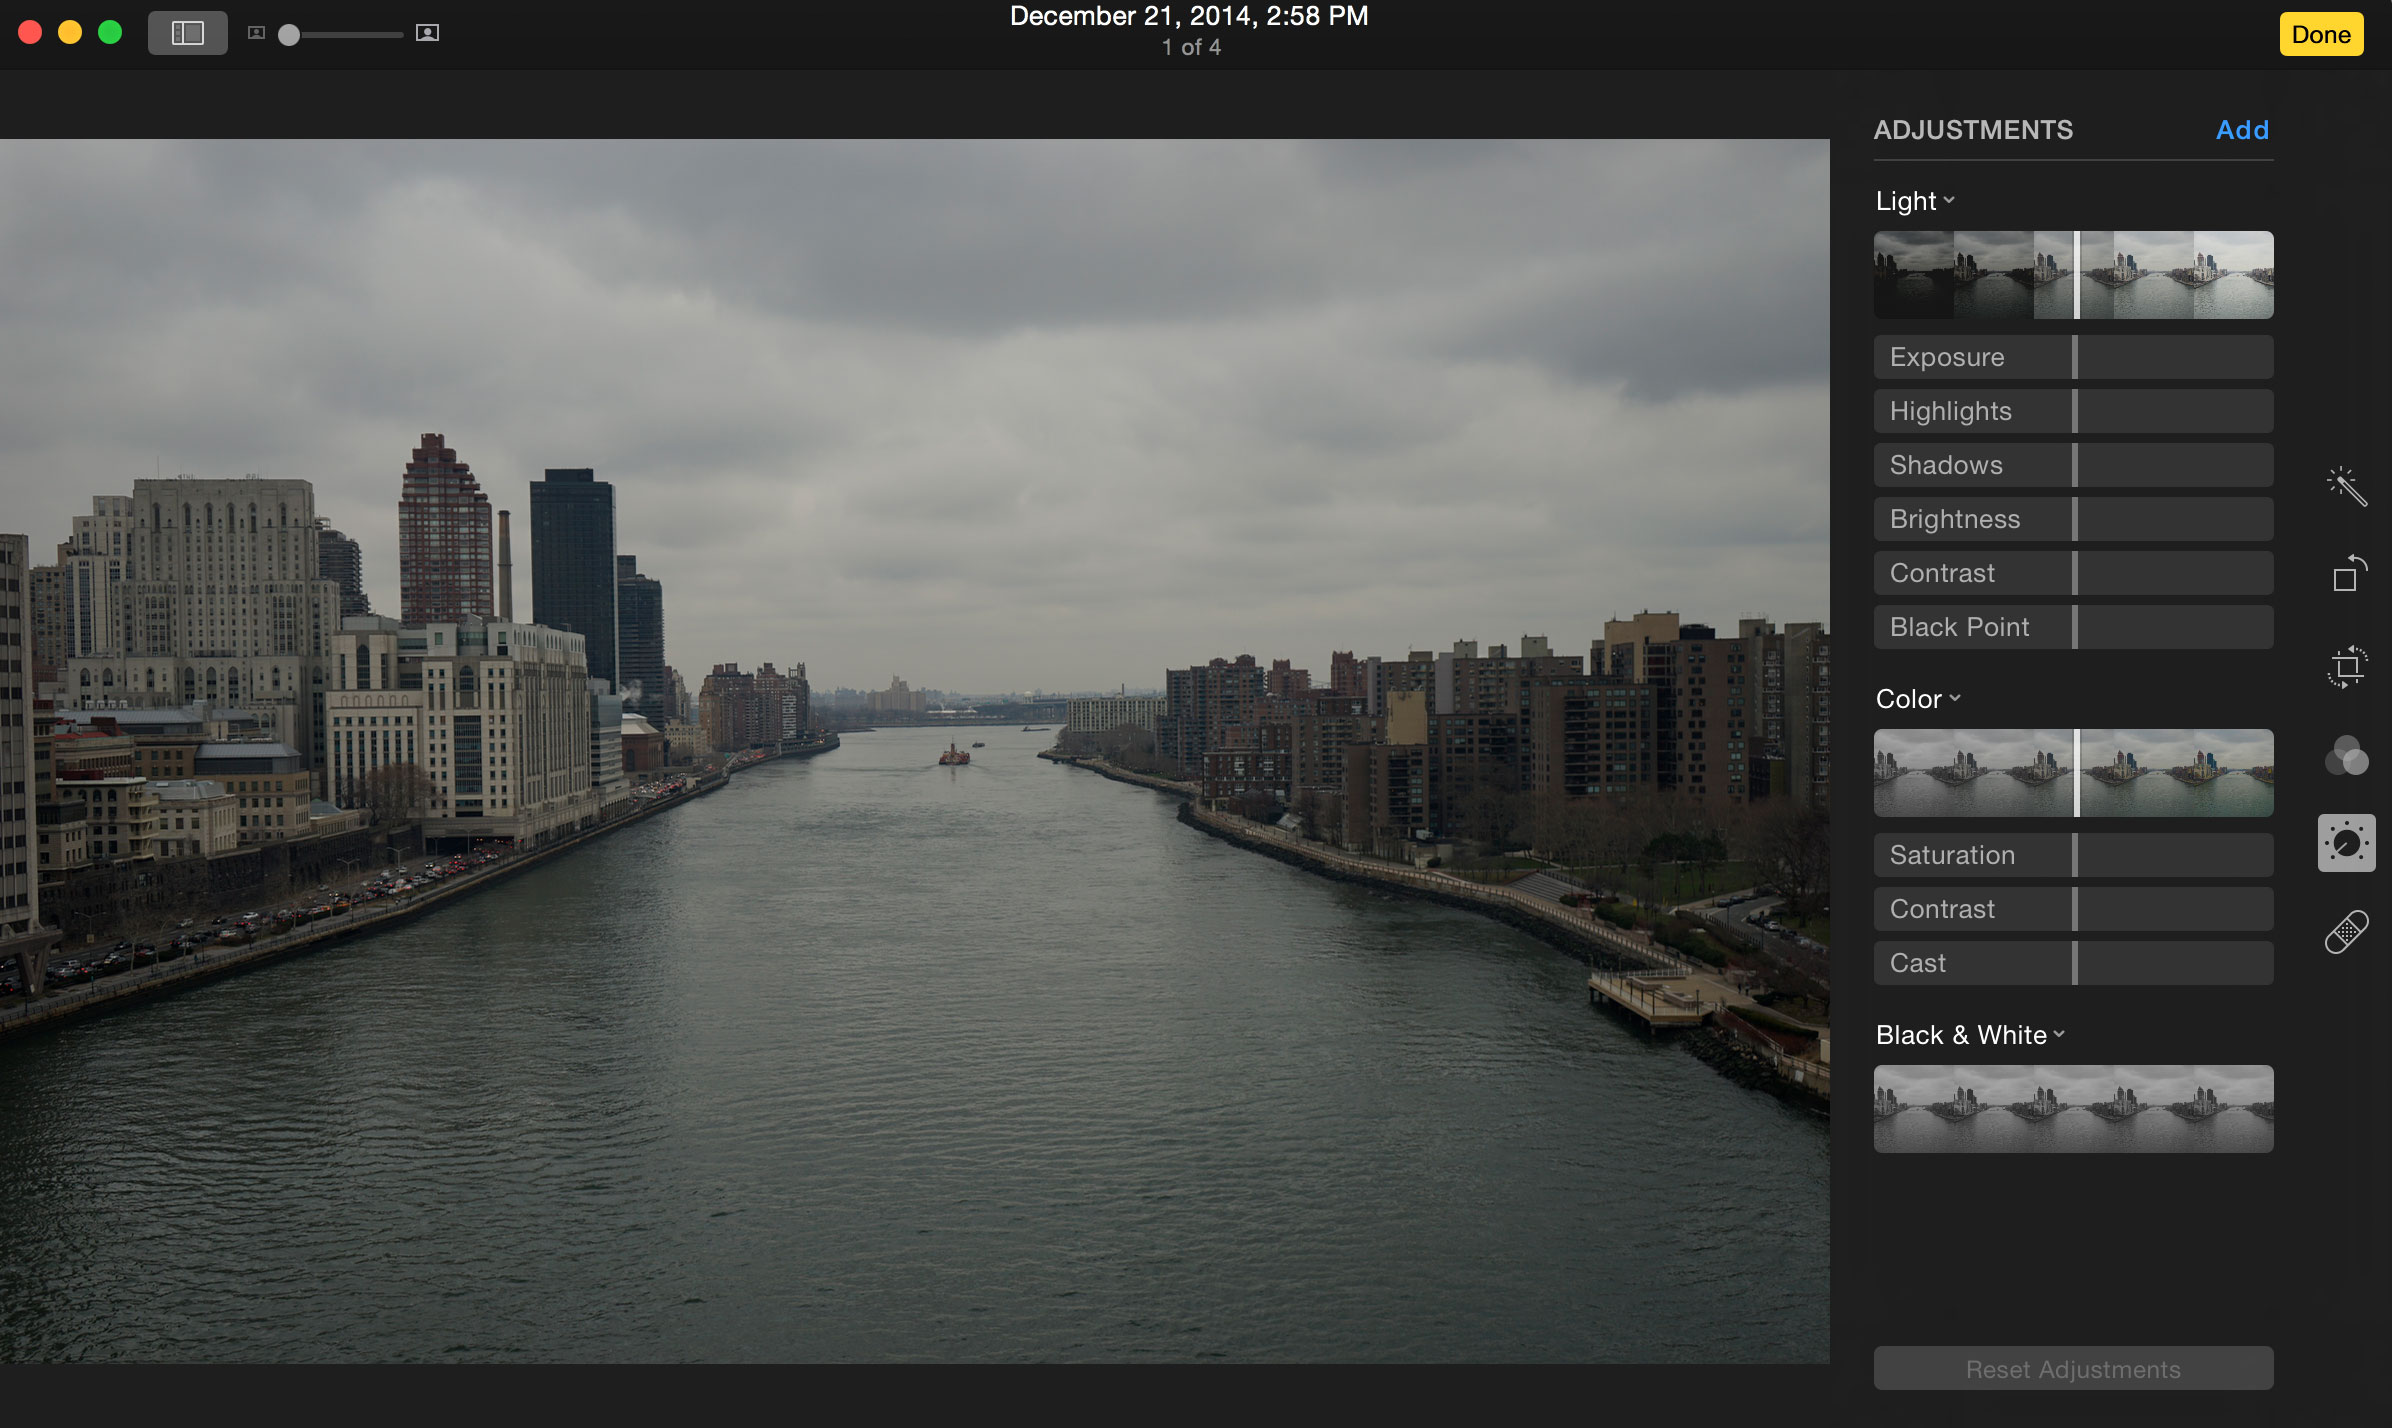
Pull the sliders to adjust what you think is lacking. Moving a slider to the right increases the strength of that setting. For example, sliding right on Brightness makes the picture lighter, and doing the same on Highlights lightens up the brightest parts. If you want more precise control, you can double-click the number at the end of each row to type in a specific value (0 to 1 in two-decimal-place increments).
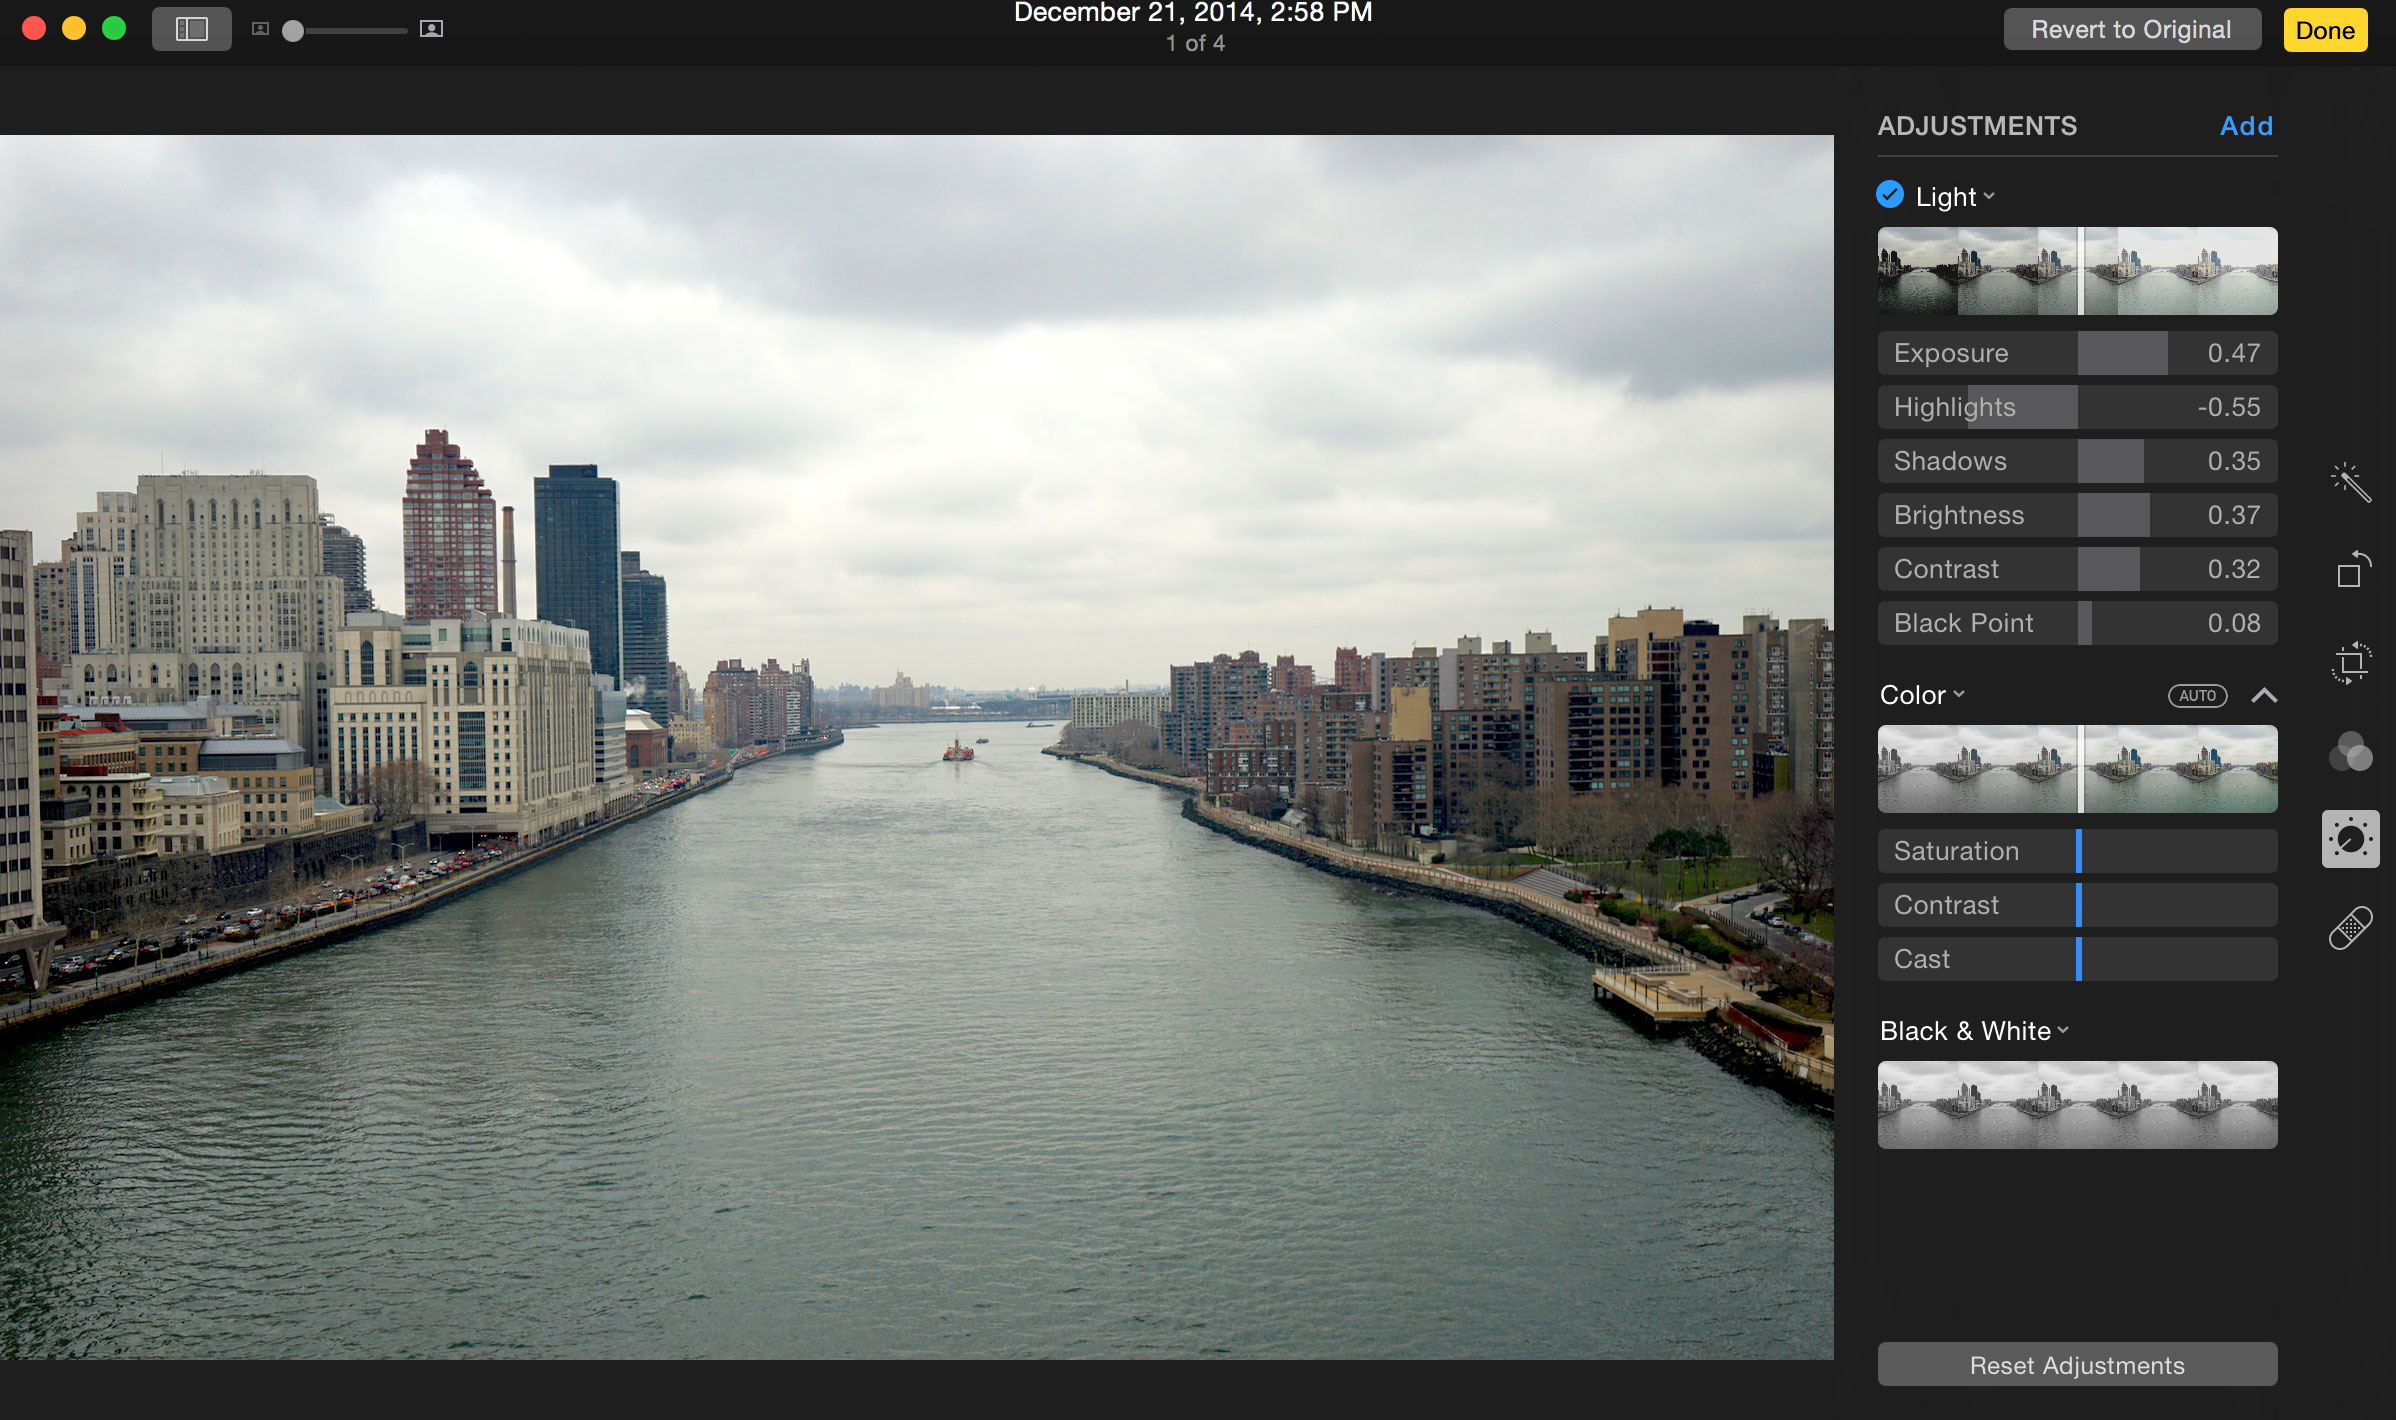
As you are setting the brightness or exposure values, keep an eye on the live preview, especially the lightest and darkest parts, to ensure that you're not blowing out the brighter parts of your picture or making the dark parts turn grayish and grainy-looking.
Increase color saturation, fix white balance
A dull-looking image can get some oomph with a boost in saturation, making colors more vibrant and eye-catching. In the Colors area, you can edit saturation (richness of color), contrast and cast (white balance, or overall color cast).
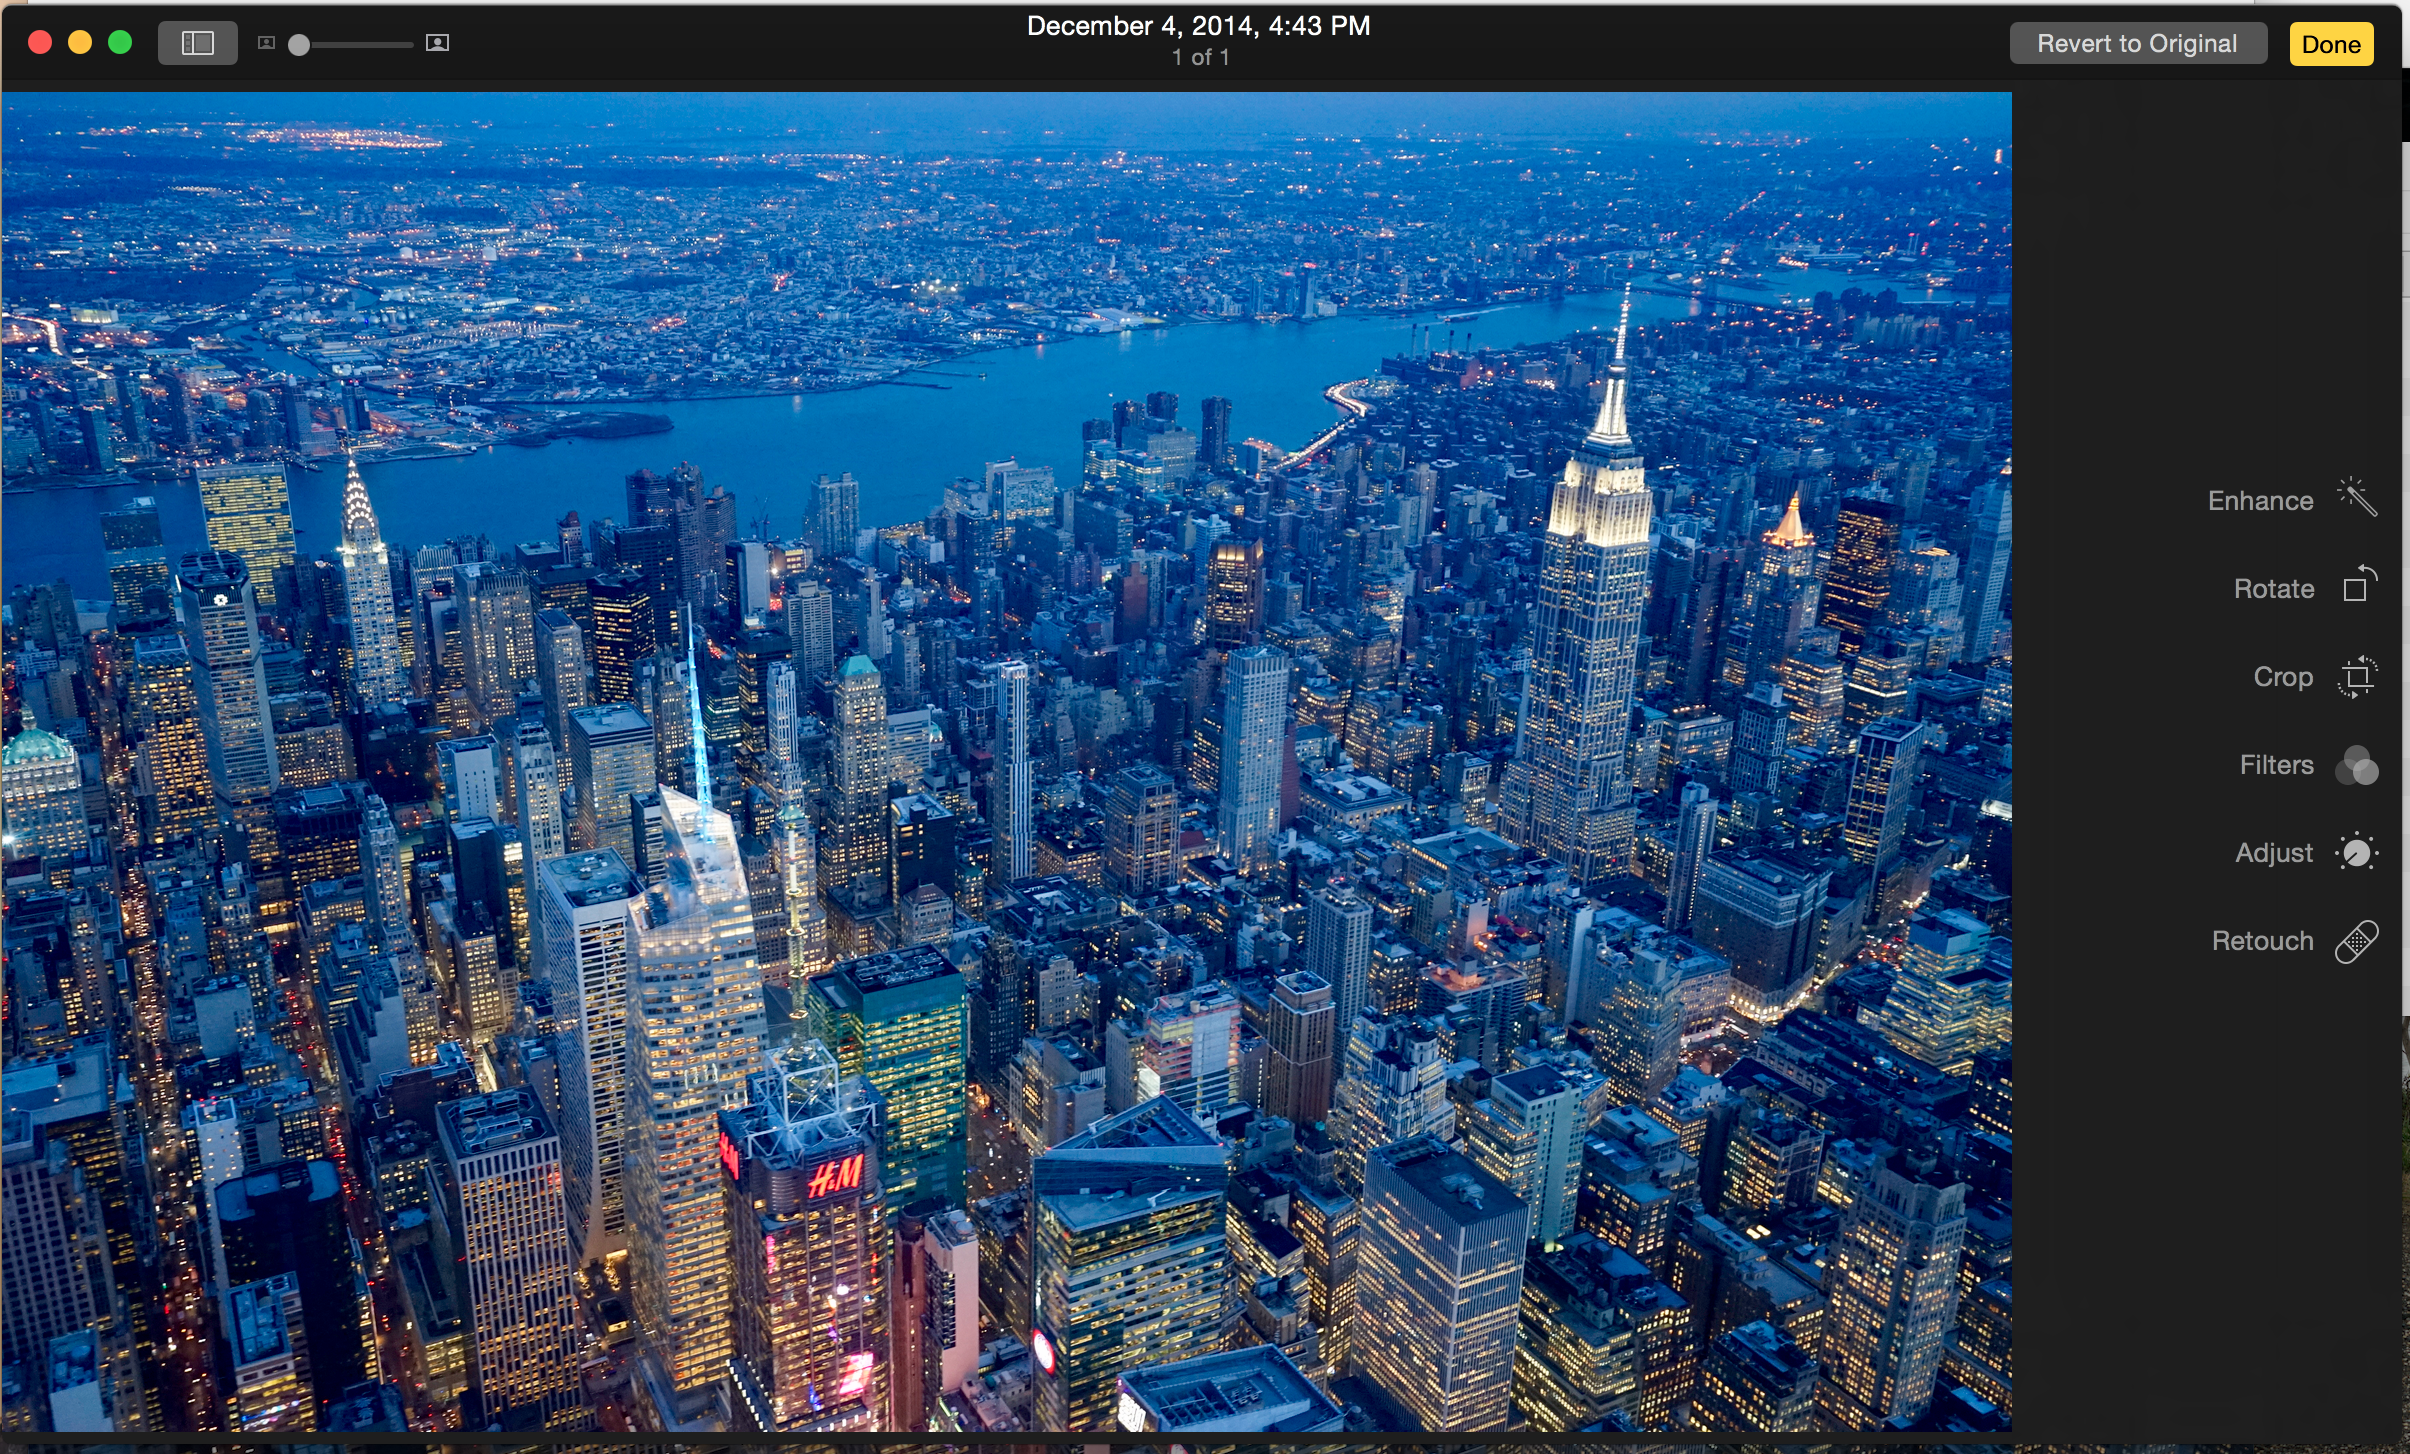
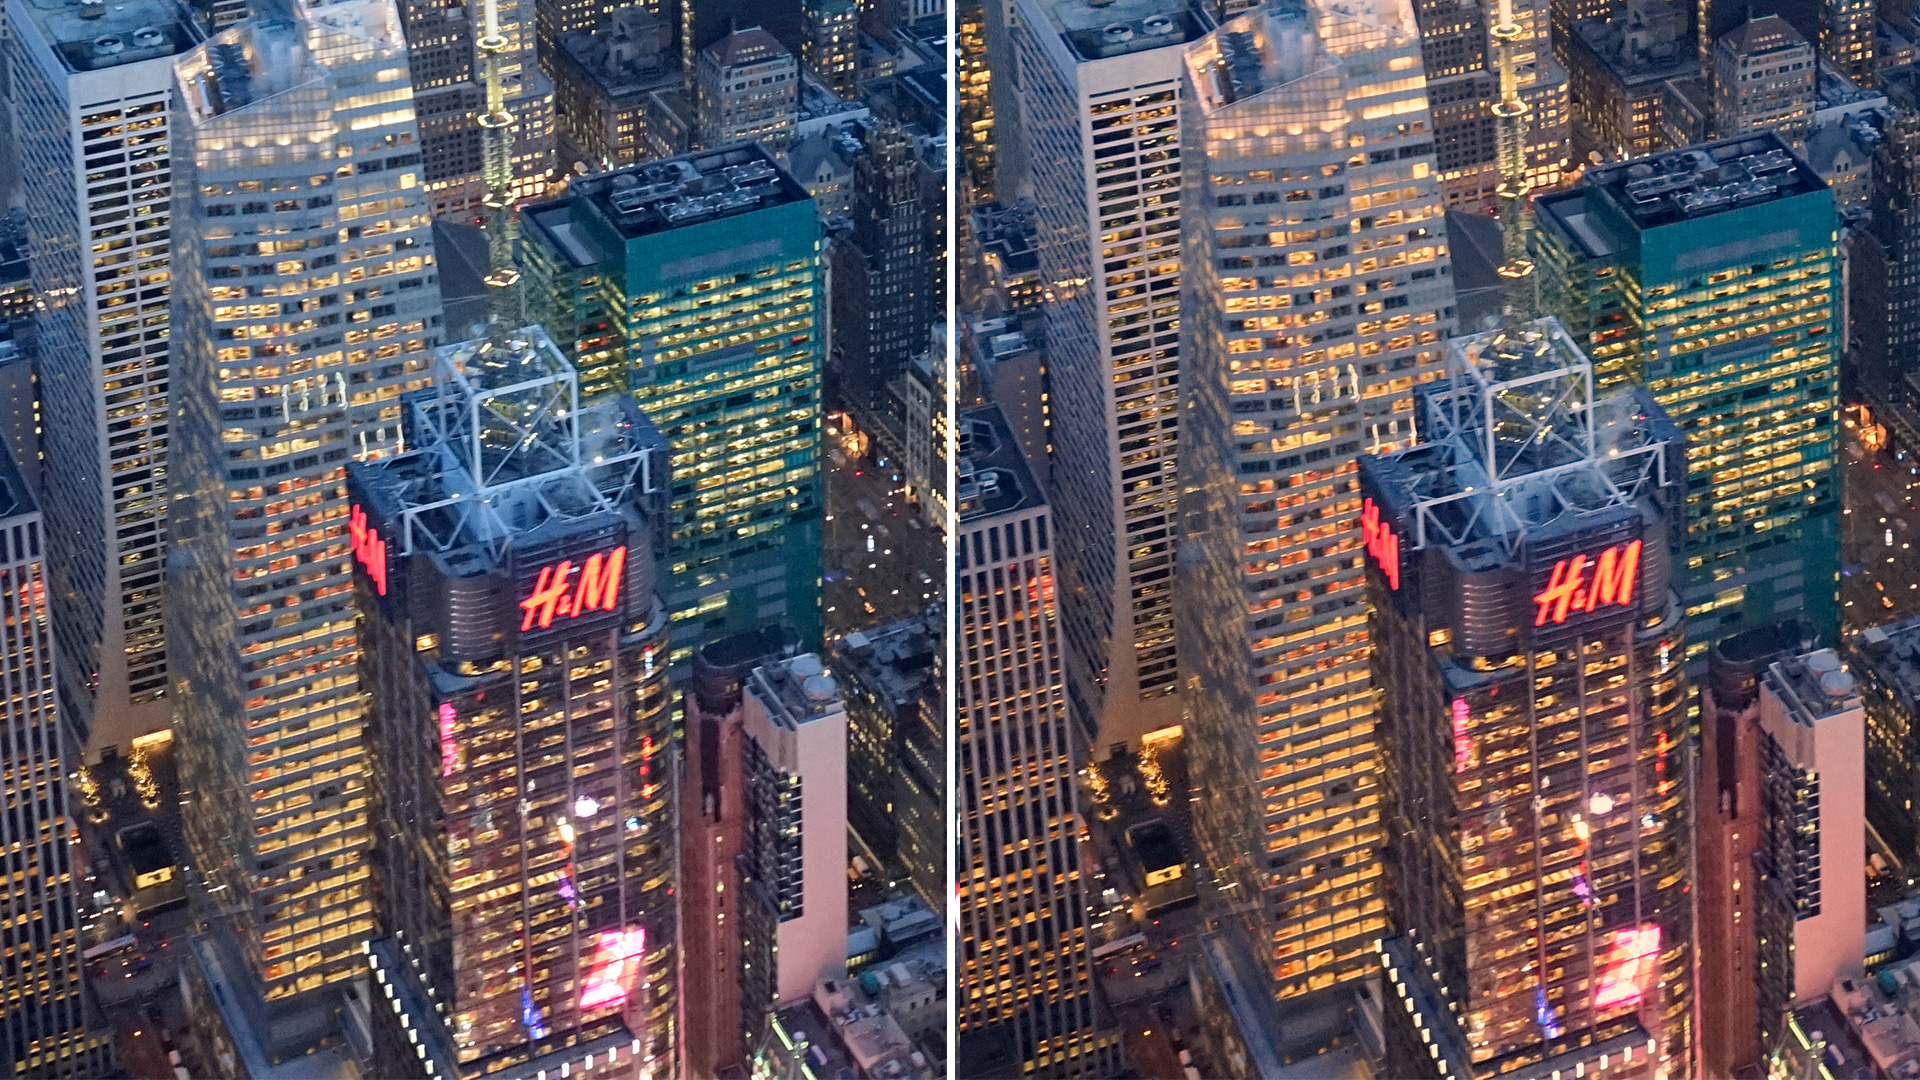
I found the picture I took from a helicopter of the Manhattan skyline at dusk was too blue, especially in the foreground, so I opened it in Photos. When I clicked the magic-wand icon (first on the toolbar) for auto enhancement, Photos actually made the image even bluer.
So I went to adjust the Color settings myself. Dragging the Cast slider to the right, I managed to get a warmer (less-blue) white balance, bringing out the yellow, orange and red neon lights.
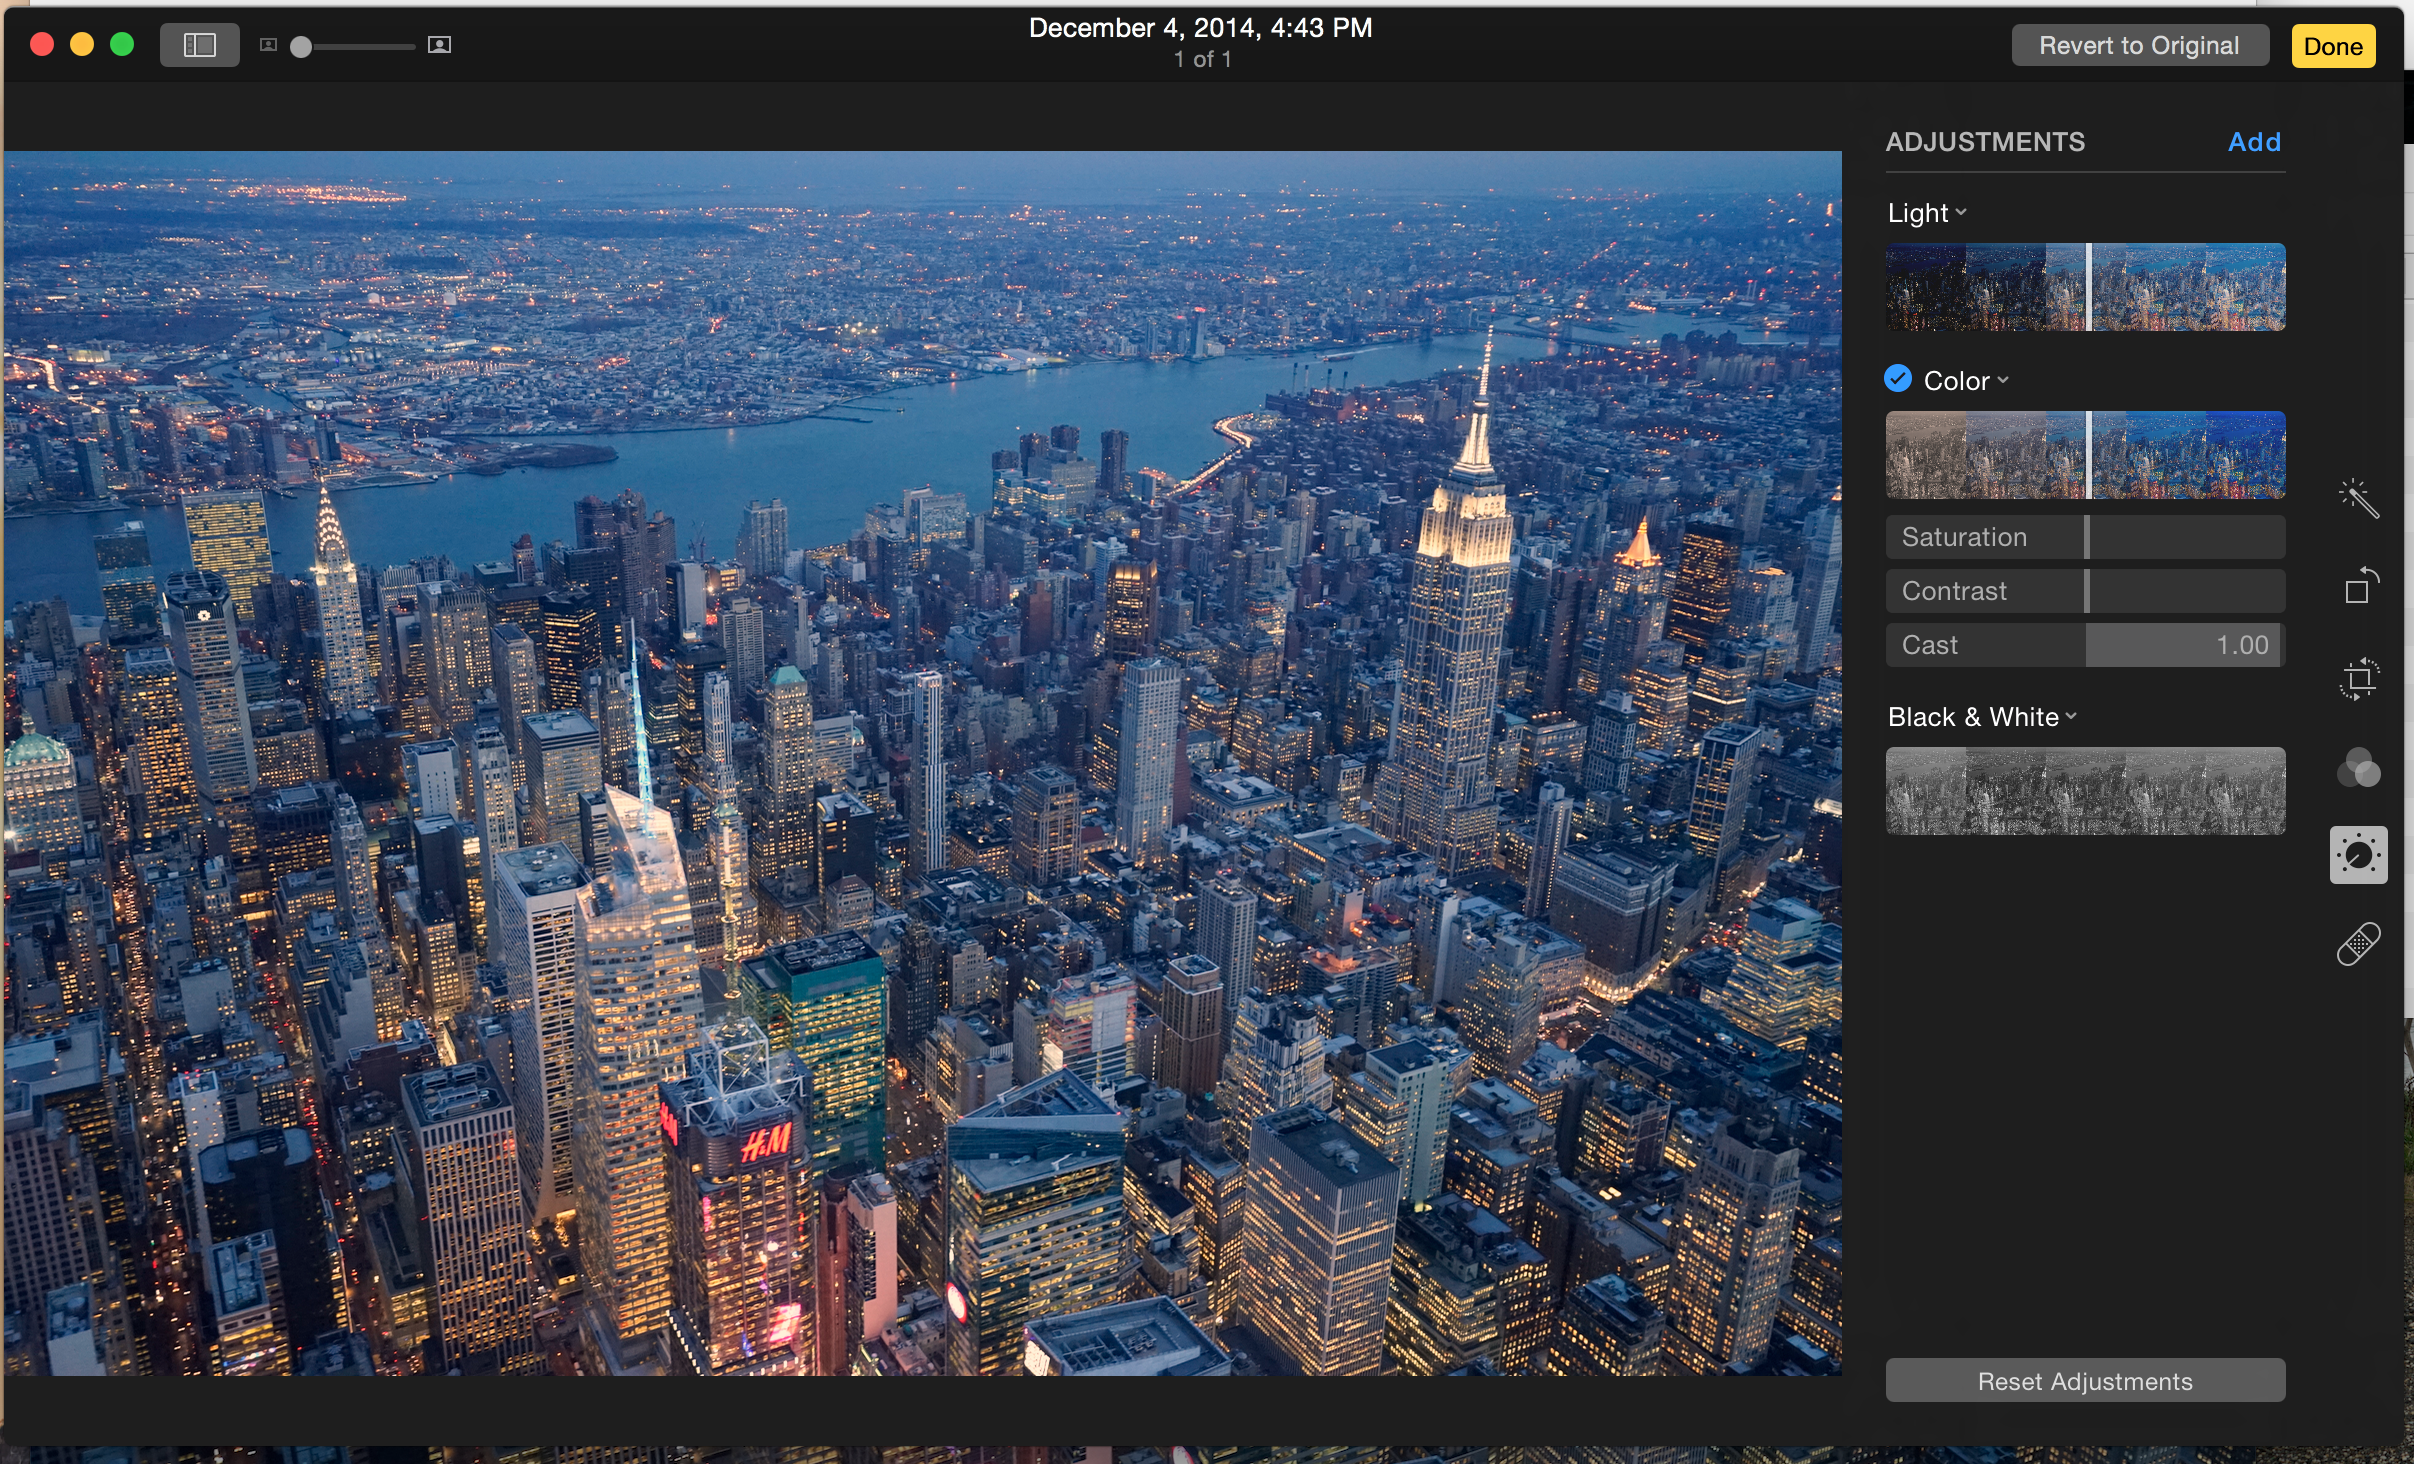
Before-and-after comparison:
Smooth away imperfections with the healing brush
One of my favorite new features in the Photos app is the healing brush (represented by a bandage on the toolbar). This baby makes imperfections — such as zits, scars or food stuck in your teeth — go away.
After clicking the bandage icon (last on the toolbar), select a brush size by dragging up and down on the vertical slider next to your image. You should set a size that's slightly larger than the offending mark and simply click on that spot. For smaller blemishes, I recommend zooming into the picture (pinch gesture on the touchpad) for a more natural-looking result.
Before-and-after comparison:
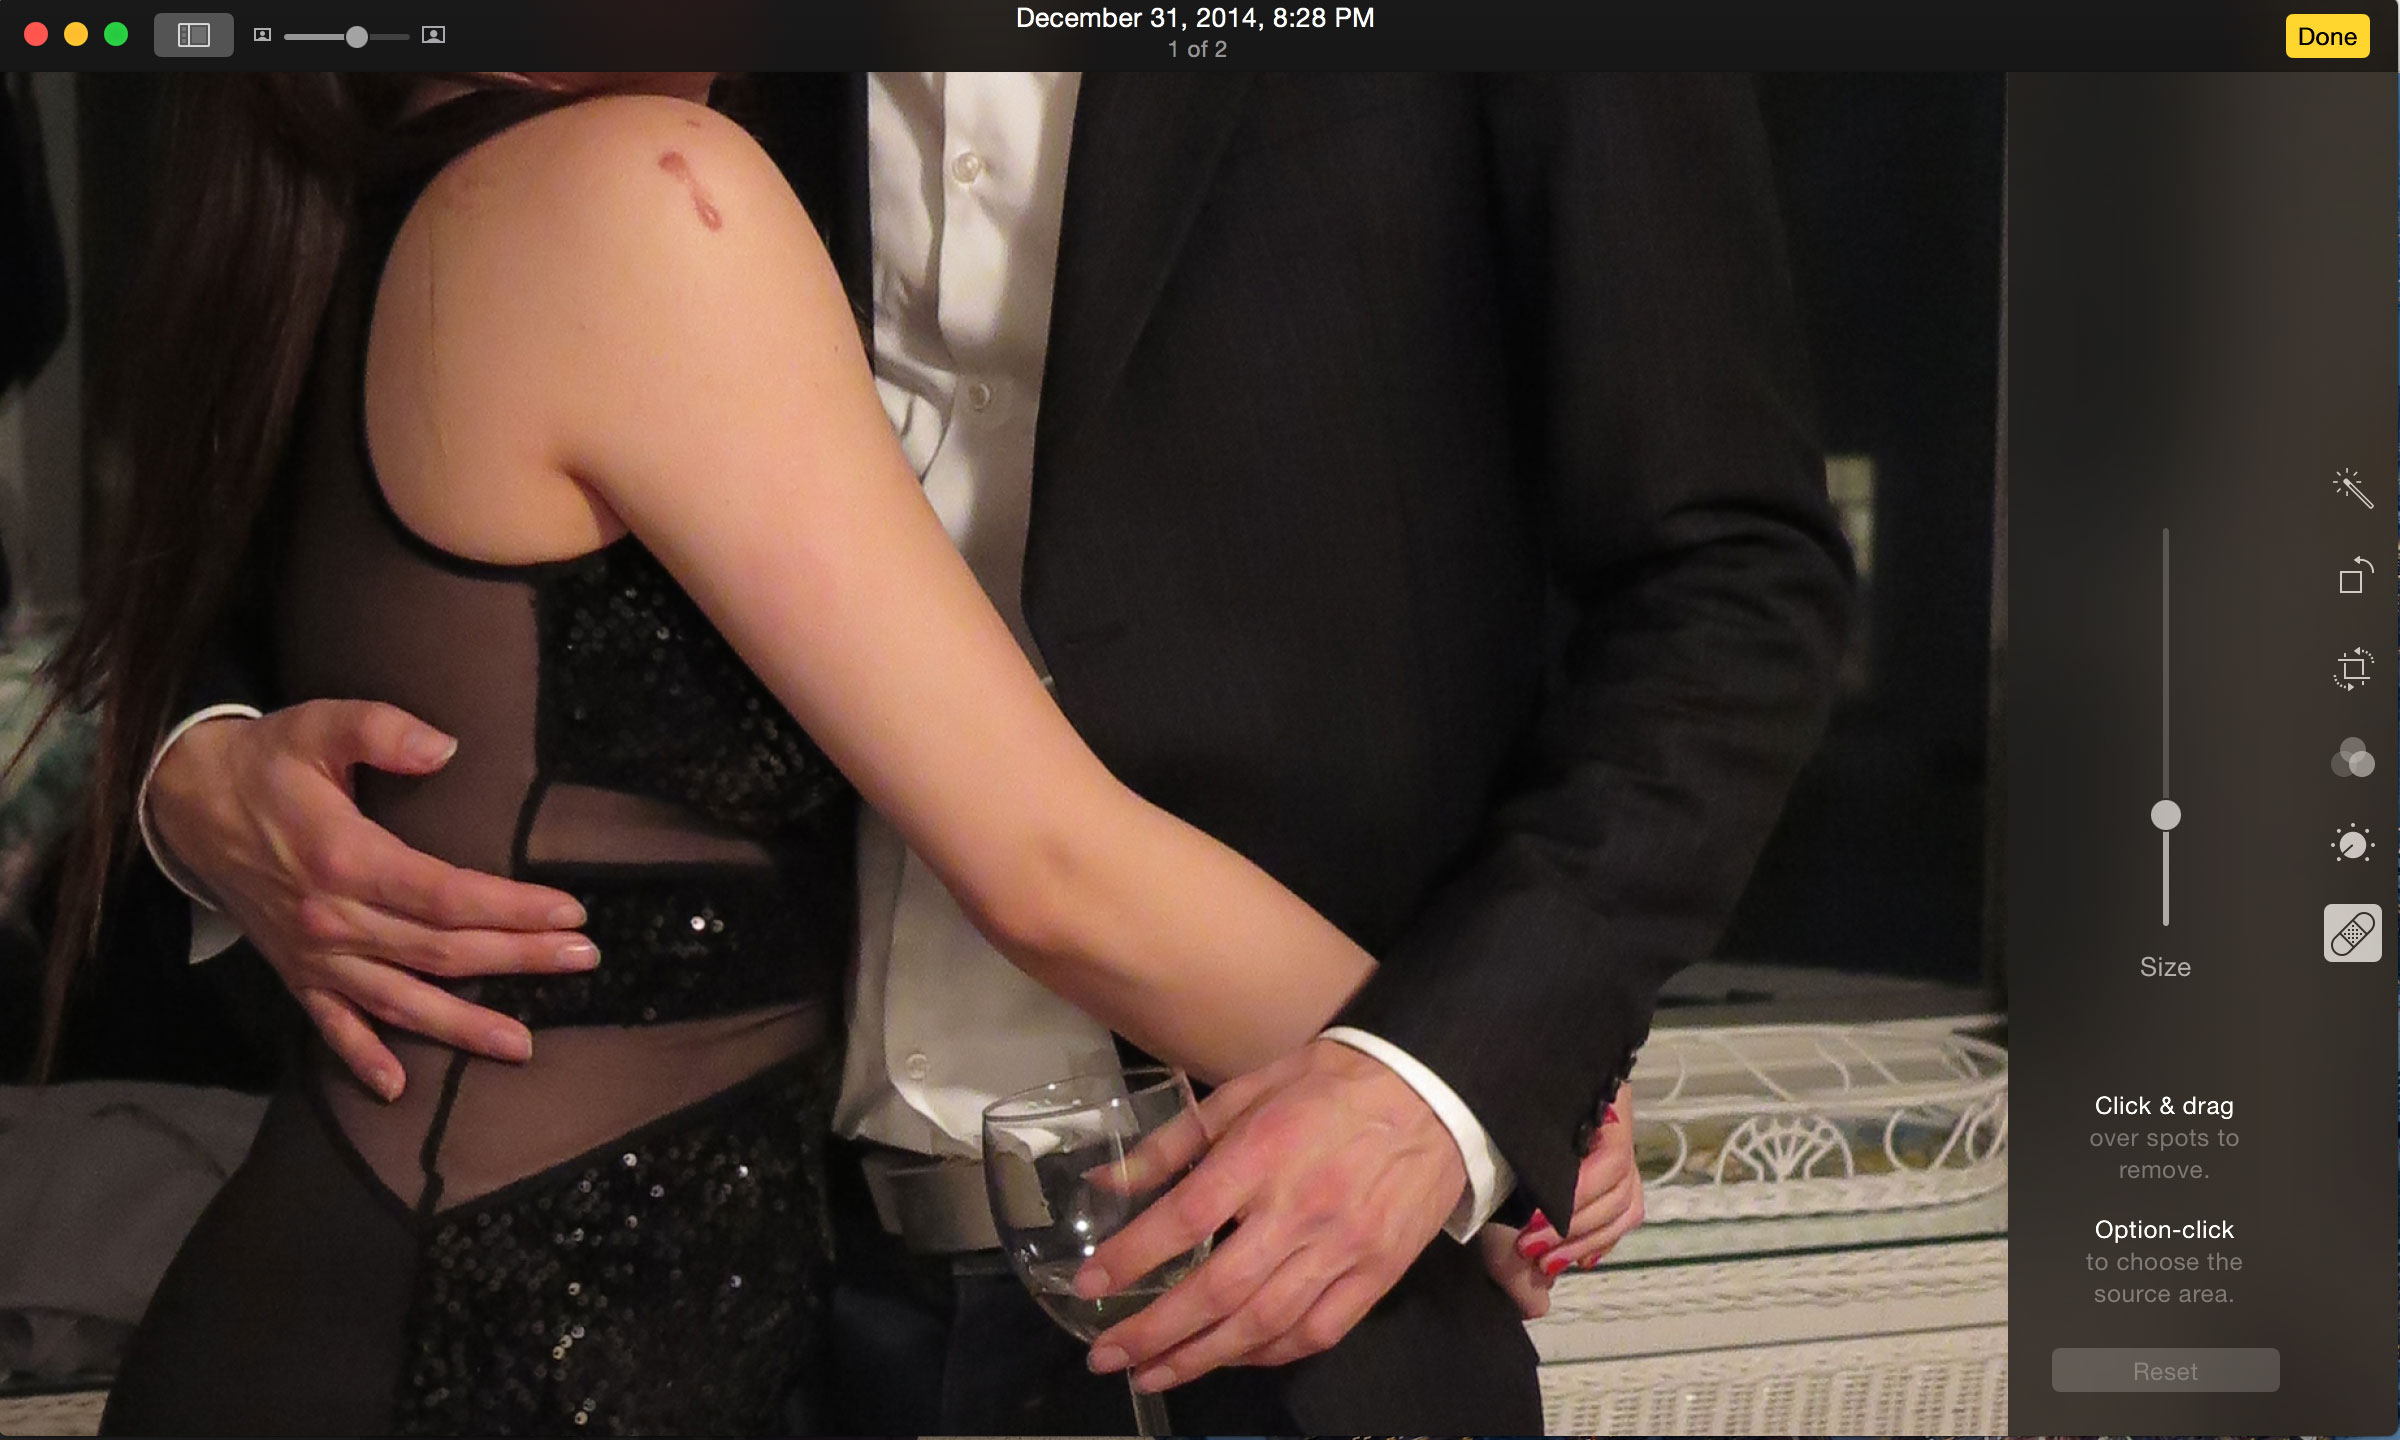
In one click, I got rid of a scar on my upper arm. Whenever possible, avoid dragging the healing brush on the picture, as that can create a smudged, artificial look.
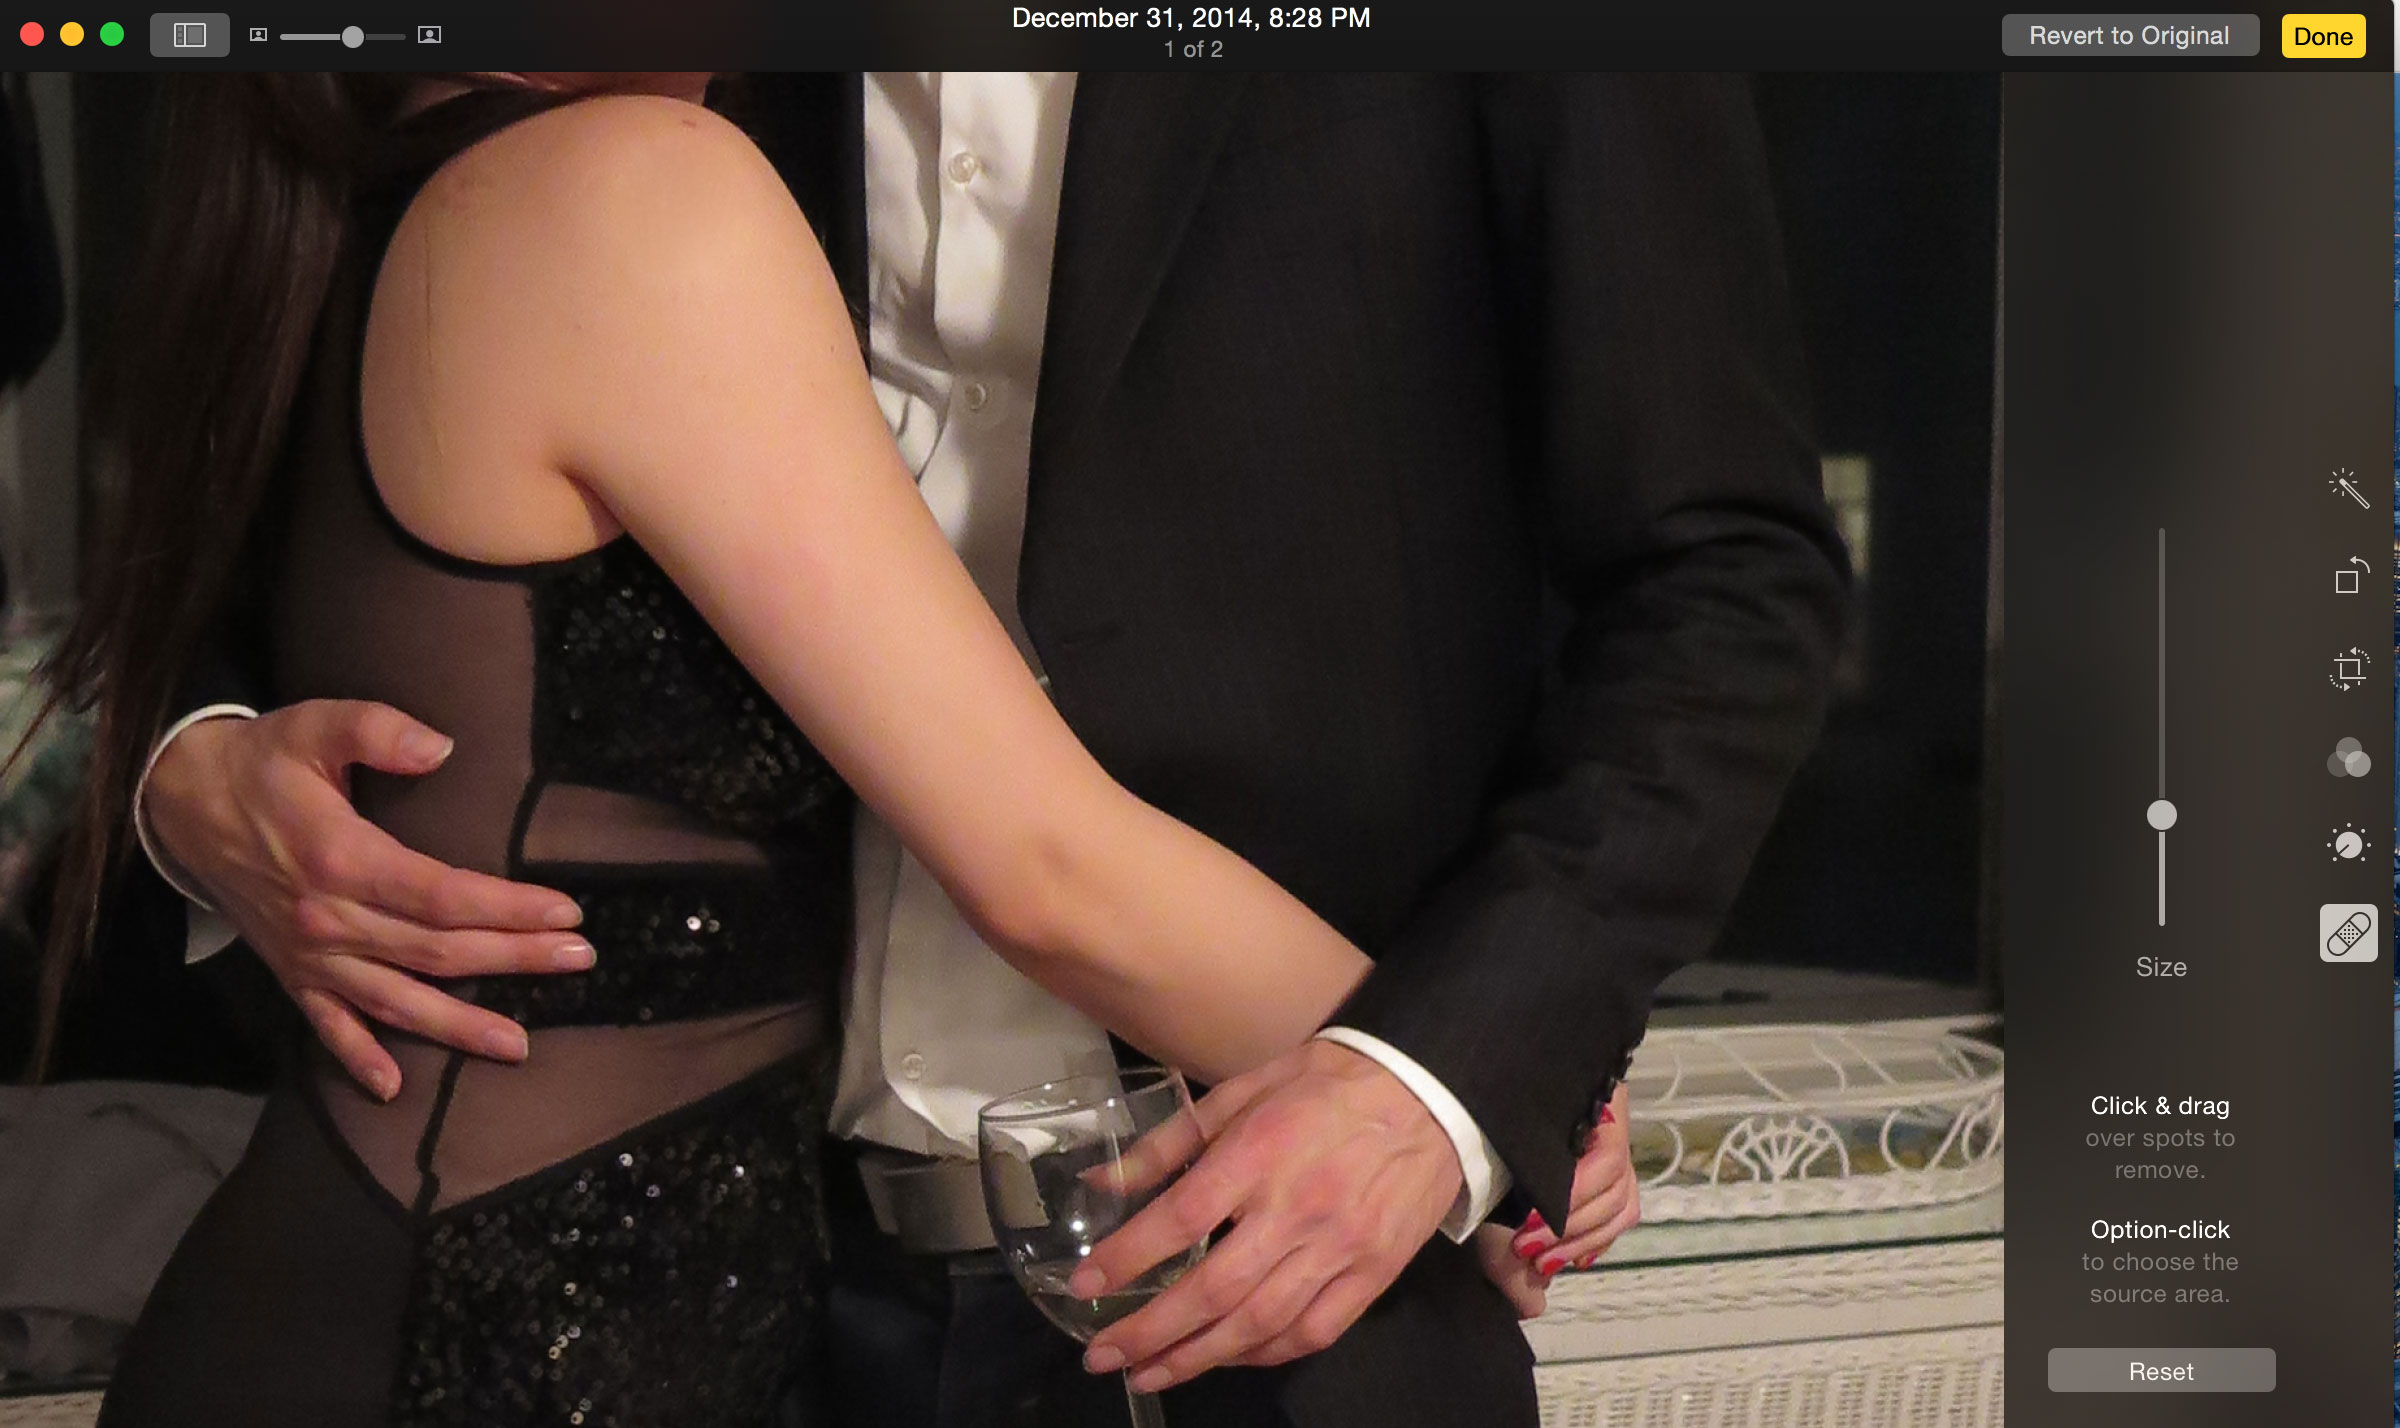
If you're trying to get the blemish to blend in with a specific part of the picture, hold down the Option button, and click the point you want it to look like.
Add filters for an artsy feel
Give your memories a vintage look, or make them stand out, with one of Photos' eight filters. Filters work best when you want to evoke a specific mood, such as nostalgia for a Throwback Thursday portrait, or reverence with black-and-white for a memorial picture.
Select the Filters button from the toolbar, and apply one of the effects to your picture. Unfortunately, there isn't a way to adjust the intensity of the filter, as you can on Instagram.
Before-and-after comparison:

Be careful when applying a filter, though. A bad time to use filters is when your picture is supposed to depict exactly what a scene looked like. Apple's range of filters are Fade, Chrome, Process, Transfer, Instant and three monochrome (black and white) ones, Mono, Tonal and Noir.
- The Best Cameras For Your Money
- How to Take Better Photos with Your iPhone
- Best PC and Mac Photo Editing Programs
Staff writer Cherlynn Low edits pictures on Photoshop, but also loves the simplicity of Photos. Follow her @cherlynnlow. Follow Tom's Guide at @tomsguide on Facebook.
Cherlynn is Deputy Editor, Reviews at Engadget and also leads the site's Google reporting. She graduated with a Master’s in Journalism from Columbia University before joining Tom's Guide and its sister site LaptopMag as a staff writer, where she covered wearables, cameras, laptops, computers and smartphones, among many other subjects.

 Club Benefits


