Sense Handheld 3D Scanner Review
The Sense 3D Scanner uses Kinect technology to create 3D models for 3D printing. It doesn't work well with smaller objects, though.
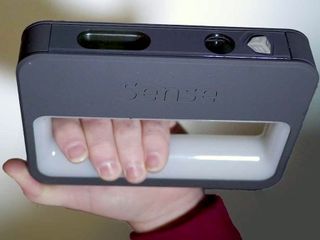
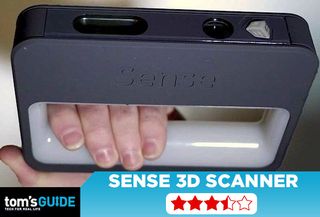
If you have a 3D printer, you have probably downloaded and printed a few objects, and then moved on to building your own — only to realize that 3D modeling is difficult. Often, it is easier to model an object in clay and then scan it, or just scan an existing object. That's what the $400 Sense 3D scanner from 3D Systems does: scans an object and creates a 3D model that can be modified on a computer and printed from a 3D printer or online printing service.
Overall, it does a good job of scanning large objects quickly and producing high-quality 3D models. It does have limitations, though: It can't do small objects, doesn't always pick up fine details and can't handle transparent or shiny objects.
How the Sense 3D works
The Sense 3D scanner itself is pretty light, and looks like it could double as a ray gun at a sci-fi convention. You hold it in your hand and move around the object to scan it. The scanner projects a patterned infrared (IR) beam onto the object from the bottom opening that is then detected by the middle webcam. On the PC (Windows only), the included software then translates the information into the shape of the object. At the top of the Sense is a normal webcam, which the same software uses to translate the images it captures into the surface colors of the object.
MORE: Best 3D Printers
If this process sounds rather familiar, it's because it is the same technology used in the first-generation Microsoft Kinect camera for the Xbox, created by a company called PrimeSense (which was recently acquired by Apple). A similar setup is used by the Scenect and ReconstructMe software, both of which can use a Microsoft Kinect sensor to create 3D scans. The Sense 3D comes with its own scanner, but the technology inside it is the same.

The scanning process is fairly simple: You start the software and choose the size of the object, with options for a person (head and shoulders, or full body), or for a size range: from small (at least 8 inches, or 20 centimeters), to large (up to 10 feet, or 3 meters).
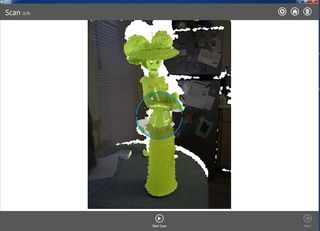
As prompted by the software, you point the scanner at the object, hit the space bar and walk around it, following a series of on-screen prompts that try to keep you the right distance from the object, and track the object as you move. If you are too far away, or it looses track of the object, you are notified with a beep and an on-screen note in the software. You can then try to reacquire the target by matching a ghost image of the last capture with the live overlay on the screen.
Sign up to get the BEST of Tom’s Guide direct to your inbox.
Upgrade your life with a daily dose of the biggest tech news, lifestyle hacks and our curated analysis. Be the first to know about cutting-edge gadgets and the hottest deals.
While the scan is in progress, the software creates a rough model of the object that is painted in as it detects the shape. This modeled object rotates with the scanner, but you can pause it (with the space bar) and rotate around it with the right mouse button. Pressing the space bar again restarts the scanning process, so you can check the scan and then continue.
How well the Sense 3D works
The scanner has a few minor annoyances. For example, the attached 6.75-foot (2-meter) USB cable isn't long enough to move the scanner very far from the computer. This means that when scanning a large object (such as a person), you have to carry both the scanner and the computer around as you scan, or buy a USB extension cable. A wireless connection (such as Wi-Fi or Bluetooth) would have been preferable here, and would have made the scanner more flexible. A way to start or pause the scan from the scanner itself, rather than using the keyboard, also would have been beneficial.
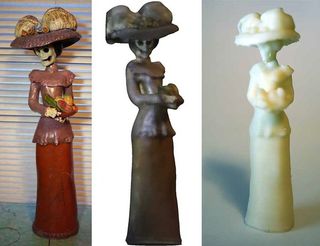
A bigger problem is that the scanner struggles with some objects — particularly, shiny, transparent or extremely matte-black ones. This is because such surfaces don't reflect the IR light pattern well. This can lead to either the object not being detected at all, or a grossly distorted version showing up in the scan. When scanning my head, for instance, the scanner failed to detect my thin, shiny, metal glasses, and instead interpreted them as part of my face, which made scans of my head look as though I was wearing a crime-fighter mask. (Staff writer Jill Scharr had better luck, after she removed her glasses.)
What can it scan?
The Sense 3D works best with medium-size objects. Although the product specs claim that the scanner can spot details down to a resolution of 0.9 mm, I found that small details on small objects were not accurately captured. The details of cherubs forming the base of an 8-inch-tall candy dish, for instance, were only roughly recognizable in the final scan, even though all the details were larger than 0.9 mm.
3D Systems says the smallest scannable object is a cube measuring 0.2 meters (just less than 8 inches) on each side, and that seems like a good baseline — anything smaller than a loaf of bread is unlikely to scan well. If you intend to scan smaller subjects, you might do better with the MakerBot Digitizer, which is designed for objects that would fit within an 8-inch-high by 8-inch-wide cylinder. But be prepared to pay more: It retails for $1,400 (though you can likely find it cheaper).
At the other end of the scale, the system can scan large objects up to 3 meters (just under 10 feet) on each side. That's enough for things like small couches or motorcycles. Cars are too big; they won't fit entirely into the scanner's field of view.
MORE: MakerBot 3D Scanner: 12 Minutes from Physical to Virtual
The system lets you rotate the object rather than the scanner (if you wish), so you can do head-and-shoulders scans on a rotating chair, or put someone or something on a motorized turntable. The lighting does have to be very even for this to work, though: If it is not, you get odd colors in the final model from the shadows as the subject rotates.
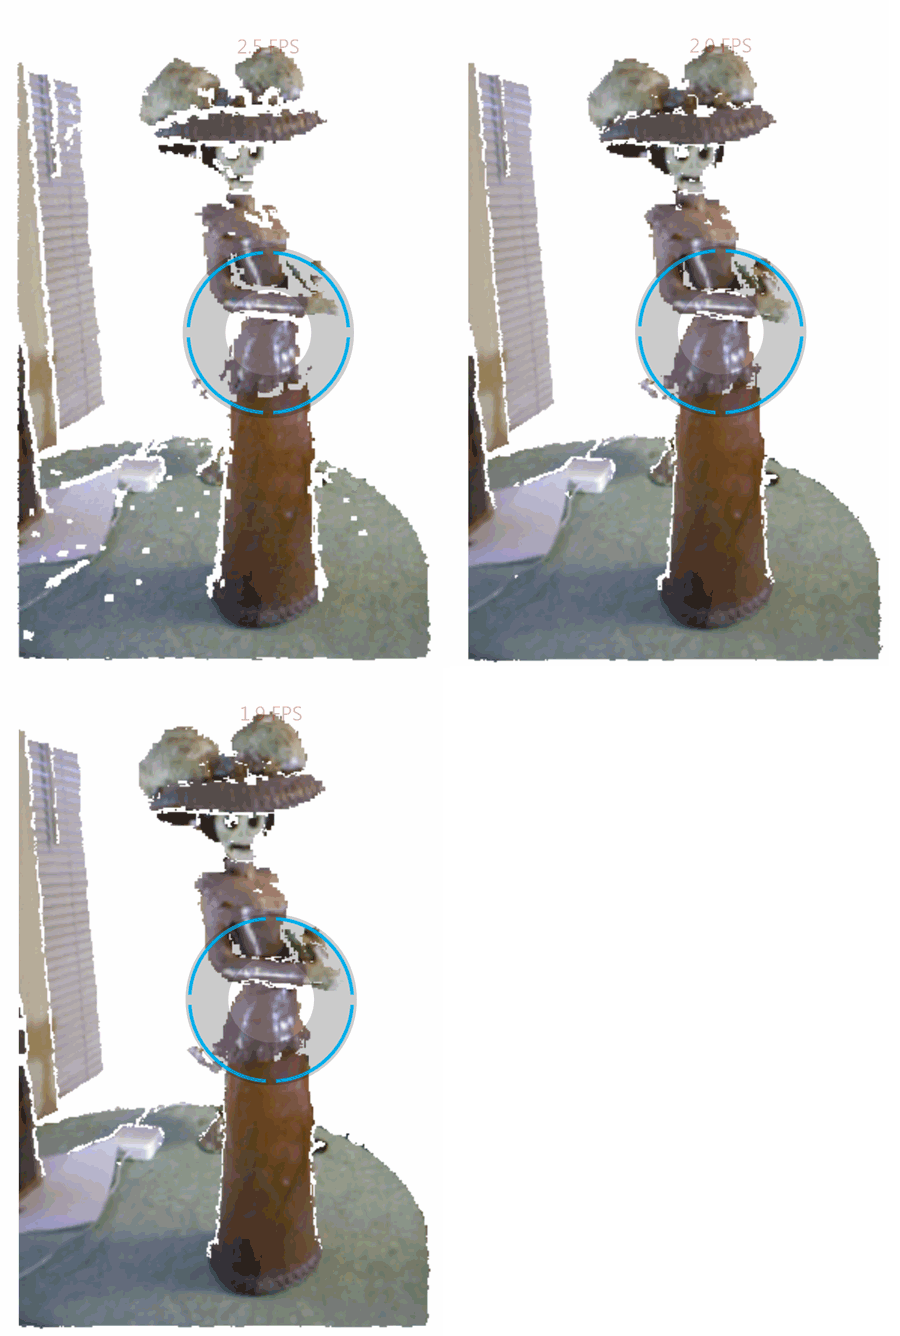
The scanning process also needs a lot of light. If part of the object is in a shadow or low light, the colors come out dull and muted, and the scanner struggles to track the object. Bright lights behind the object also confuse it (especially the sun, which gives off lots of IR light), again producing odd shapes or, more often, a loss of tracking, in which the system can't find the object in the image (an endemic problem with cheap 3D scanning apps).
I got the best results from scans done in bright but diffuse light, such as indirect sunlight, or with several softened surrounding electric lights. If you are planning to do a lot of scans with this device, it might be worth building a 360-degree lighting setup. If you are scanning outdoors, you should pick your location carefully and shoot with the sun high in the sky so it doesn't end up shining into the scanner and confusing it as you move around.
The results
Once the scan is complete, the program processes all of the scanned data and gives you the 3D model. You can then edit this, cutting out the bits that you don't need, (such as the surface that an object was sitting on or other nearby objects) and smoothing the object. This process is fairly intuitive: If you are comfortable using the mouse, you'll quickly learn how to edit objects.
You can also set the software to solidify the object, which fills in small parts that the scan misses, such as areas that are partially covered, or those that are too dark to be detected. However, this technique should be used with caution, as it can't fill in any larger missing parts of a scan. One scan I did of a deck chair missed parts of the legs, and the solidify feature mistakenly created a huge, solid mass underneath the chair rather than just filling in the missing sections of the leg.
The process generally produced good results with larger, well-lit objects that don't have overlapping elements or large holes in them, like people. It did an impressive job with both a head-and-shoulders scan and a full-person scan, building the 3D mesh (the mesh of scanned points and surfaces that form the object) and then creating a simple final object from this data.
MORE: 3D Printer Buyer's Guide
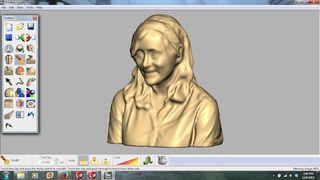
When the scan is finalized, it can be exported as a STL, PLY or OBJ file, which will work with most 3D design software. STL files are the most widely used, but they don't include any of the color information from the object. PLY and OBJ files do include this information, so those are the best formats to work with if you want to print the objects to a full-color process. Unsurprisingly, the Sense software links directly to 3D Systems' Cubify object service, where you can order a 3D print that will be shipped to you. This service also allows you to sell the 3D scan itself, or a 3D-printed model in various sizes and materials that Cubify's online printing service offers.
Bottom line
The 3D Sense is a capable scanner, but it is limited by the capabilities of the scanning system it employs. The PrimeSense sensor it uses is capable of decent resolution, but it can't detect and resolve the same level of fine detail that scanners like the MakerBot Digitizer or the David SLS-1 can; it just isn't suited for scanning the smaller objects that these printers can. It can't scan very large objects (bigger than about 10 feet), either, so it is best suited for subjects like people and statues. For these types of things, the 3D Sense does a great job of creating a decent 3D model. The process of scanning has its quirks, but it is generally easy to do once you figure them out, and it produces attractive 3D objects that can be quickly and easily printed.
| Pros | Cons |
| Inexpensive | USB cable too short |
| Easy to operate | Doesn't scan objects as small as promissed |
| Scans very large objects | Lighting objects is a bit tricky |
Dimensions
7 inches x 5 inches x 1.2 inches (17.8 cm x 12.9 cm x 3.3 cm)
Scan volume
Min: 7.8 inches x 7.8 inches x 7.8 inches (20 cm x 20 cm x 20 cm)
Max: 9.8 feet by 9.8 feet x 9.8 feet (3 m x 3 m x 3 m)
Field of view
Horizontal: 45 degrees
Vertical: 57.5 degrees
Diagonal: 69 degrees
Minimum hardware recommendations
Intel Core i5™ or equivalent processor
2GB of RAM
1280 x 1024-pixel screen resolution
32-bit color
4GB available disk space
Windows 7, Windows 8, Windows 8.1 (32-bit or 64-bit)
(No Mac OS X support)
Follow Richard Baguley @rbaguley on Twitter, or on Google+. Follow us @TomsGuide, on Facebook and on Google+.
Richard Baguley has been working as a technology writer and journalist since 1993. As well as contributing to Tom's Guide, he writes for Cnet, T3, Wired and many other publications.
