Bypass Windows 11's ridiculous system requirements with this hack
This Microsoft-approved hack helps you bypass Windows 11 install requirements
Windows 11 officially launched this week, but many people can't install it because of the strict hardware requirements that PCs must meet. Most notably, Windows 11 requires a fairly recent CPU and TPM 2.0, but there's a few ways to get around these requirements — including a registry hack provided by Microsoft itself.
This is a big deal because Microsoft is responsible for setting these painful system requirements in place, and it supposedly did so in the name of ensuring Windows 11 is a secure, modern operating system.
However, PC enthusiasts have quickly found ways in which you can actually upgrade to Windows 11 without a TPM, and now it seems Microsoft is admitting these requirements can and should be bypassed in some cases — though the company has issued strict warnings about Windows 11 PCs not qualifying for updates if they don't meet the minimum system requirements.
- The best Windows laptops you can buy right now
- Windows 11 vs Windows 10: Here's what's new
- Plus: This is ruining Windows 11 performance
And yet, on Microsoft's official Ways to install Windows 11 support page there's now a brief guide to editing your Windows registry in order to circumvent the TPM 2.0 and CPU requirements.
Here's how it works: first, your PC still needs to have at least TPM 1.2. These modules are far more common than TPM 2.0, which only started showing up in PCs a few years ago. Even if you have TPM 1.2, you may have to switch it on in your BIOS before you can install Windows 11 this way — the quickest way to see if you have it is to right-click the Start button and select Run, then type tpm.msc and hit Enter.
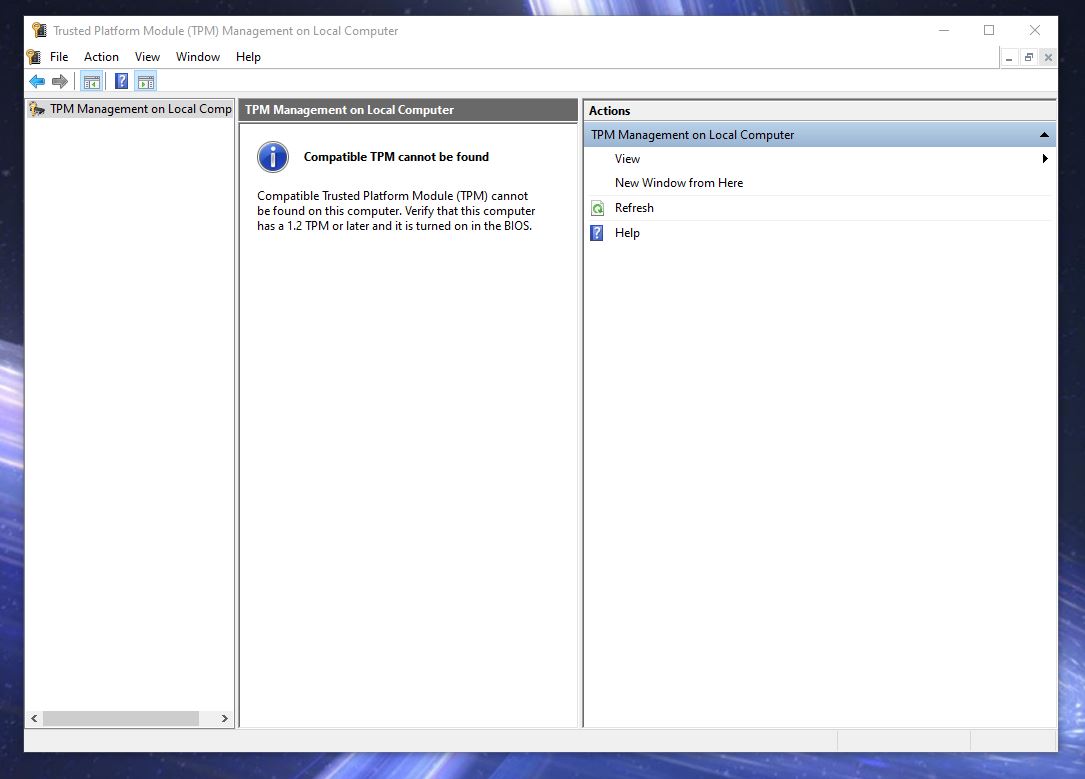
Running tpm.msc brings up the Trusted Platform Module Management app, which will show you whether you have TPM enabled. If you do, the version you have will be listed in the lower-right corner. Many modern PCs have TPM 1.2, so if you don't see it in your TPM app you should at least try to boot into your BIOS (don't forget to update to your motherboard's latest BIOS) and see if there's an option to enable it.
Once you've verified you have at least TPM 1.2, you're ready to start editing your Windows registry to install Windows 11. Editing the registry can be a dicey proposition, and if you're worried you might mess something important up, there's no harm in first backing up your system to either an external storage drive or one of the best cloud backup services on the market.
Get instant access to breaking news, the hottest reviews, great deals and helpful tips.
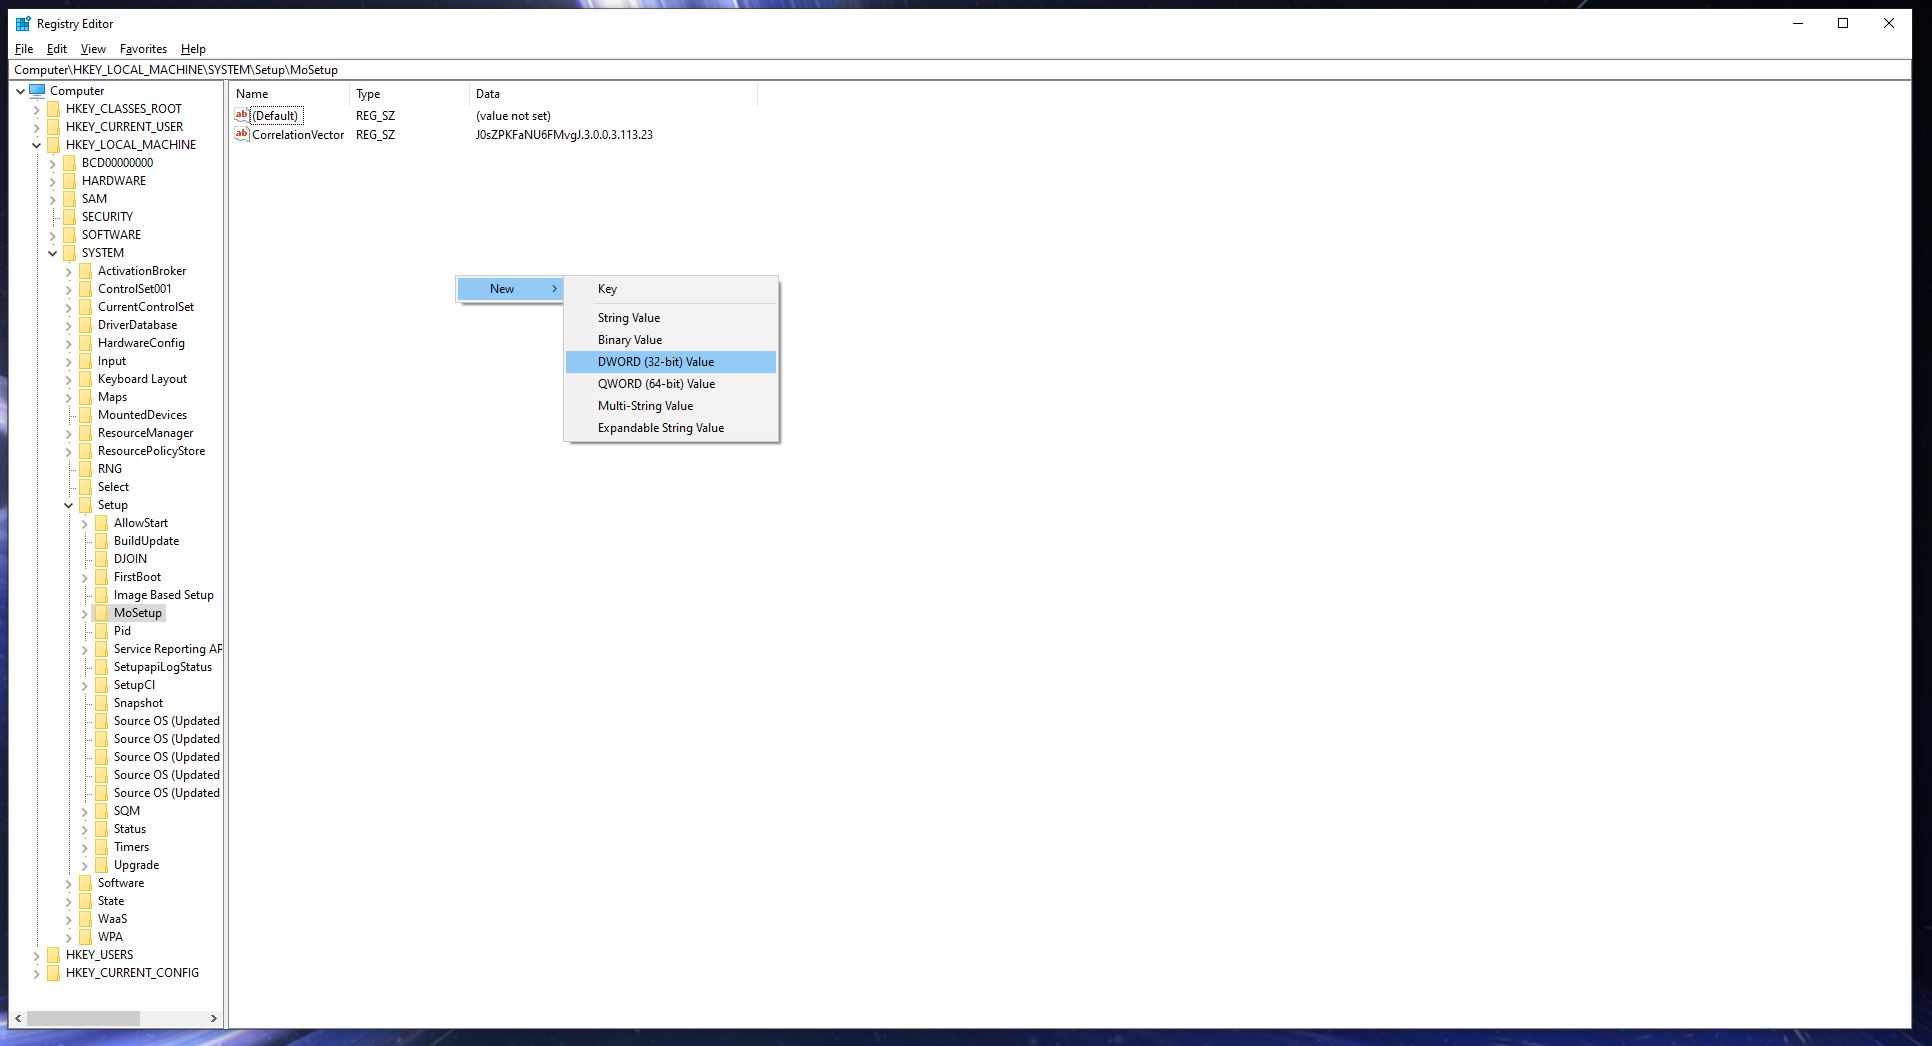
Once you feel ready, open Run again (either by right-clicking the Start menu and selecting Run, or hitting the Windows key + R) and type regedit, then hit Enter. This will bring up your Windows registry editor. Navigate to the the HKEY_LOCAL_MACHINE\SYSTEM\Setup\MoSetup section in the left-hand window pane, then right-click anywhere in the big right-hand window and select New > DWORD (32-bit) Value from the context menu.
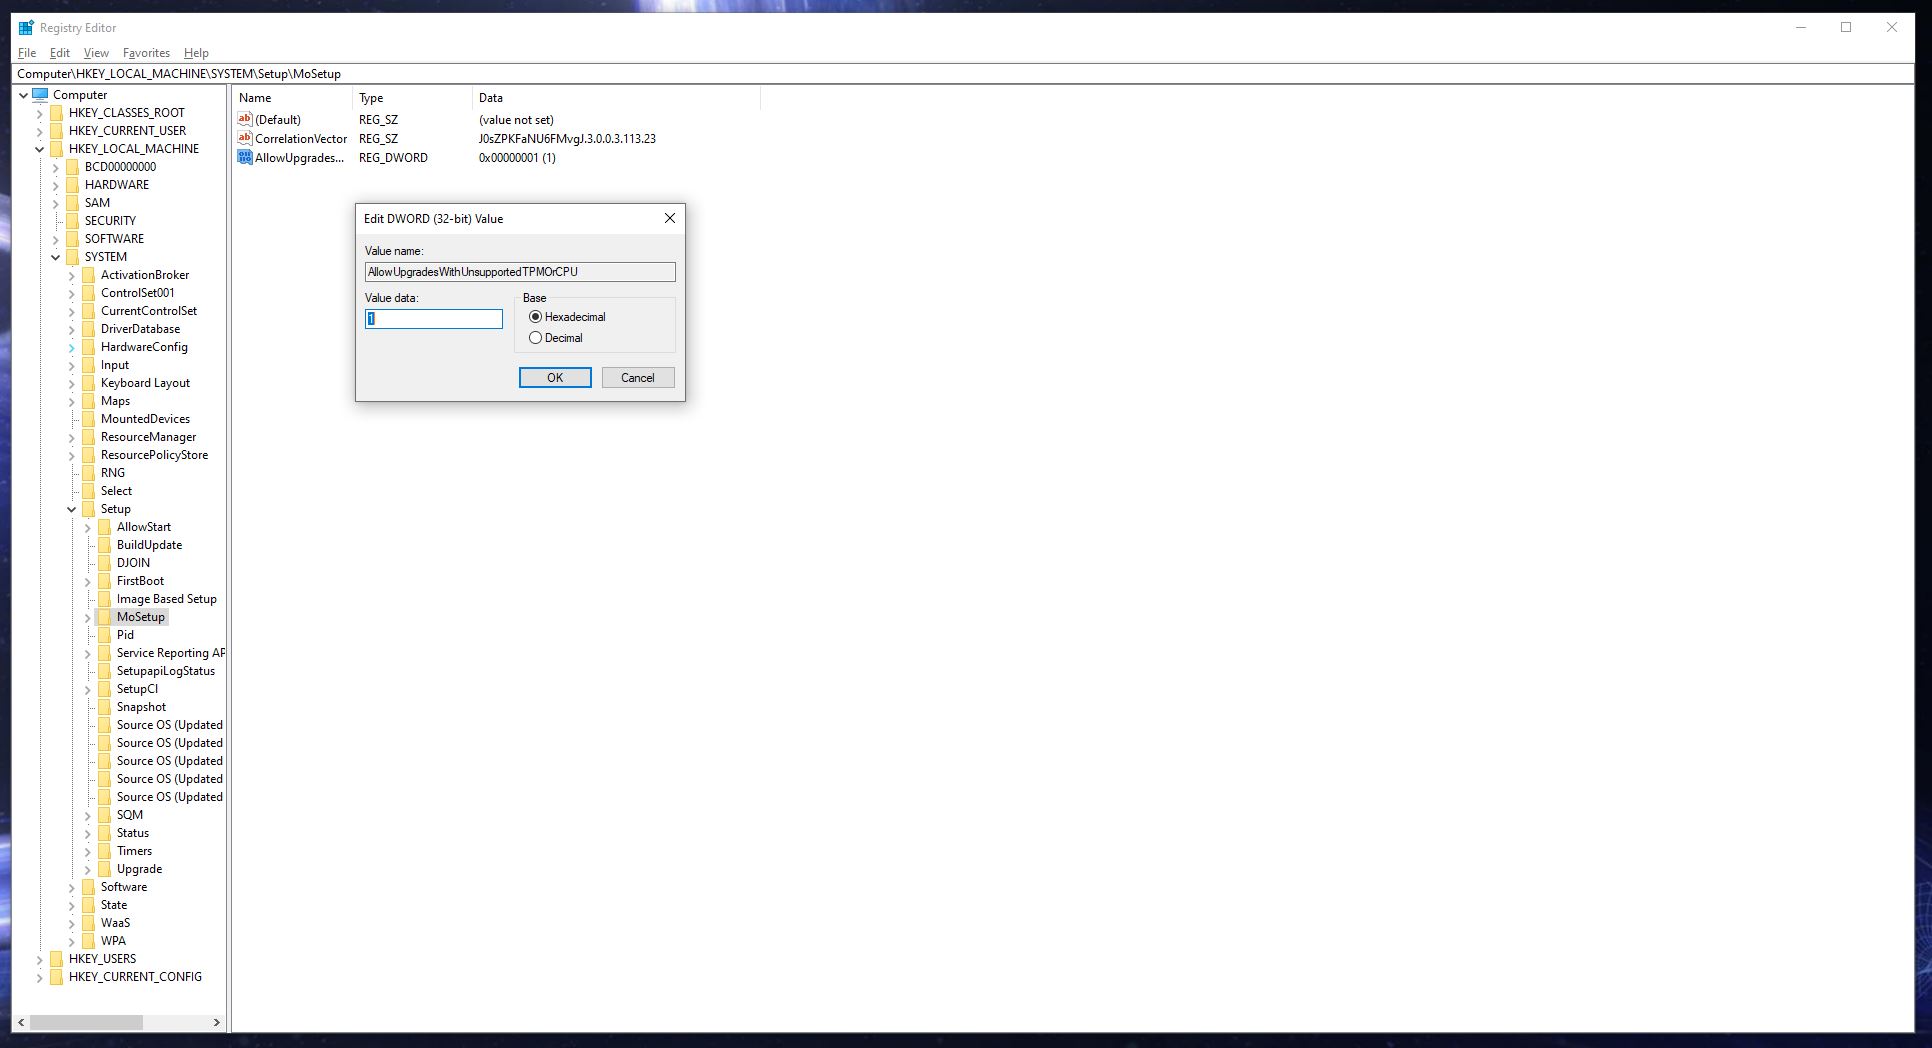
Now you'll see a new DWORD Value in the registry. Double-click (or right-click) to edit it and rename it to AllowUpgradesWithUnsupportedTPMOrCPU. Then, set its value to 1.
With that done, you should have no trouble installing Windows 11 on your PC even if it has an outdated CPU and TPM 1.2, as long as you meet all the other system requirements.
- Plus: Windows 11: This is the one feature that will convince me to upgrade

Alex Wawro is a lifelong tech and games enthusiast with more than a decade of experience covering both for outlets like Game Developer, Black Hat, and PC World magazine. A lifelong PC builder, he currently serves as a senior editor at Tom's Guide covering all things computing, from laptops and desktops to keyboards and mice.
