Do you know how to clean your PC safely and thoroughly? Whether you built your own PC or picked up one of the best gaming PCs, keeping your desktop computer clean is extremely important.
Over time, dust can build up in your desktop PC which can lead to overheating and all manner of issues. This extra heat can also damage the components inside your computer. Fortunately, cleaning a desktop PC isn’t difficult even if you’re not that tech savvy.
As a general rule of thumb, you should clean your computer once every six months or twice a year. While you can do a quick clean to get rid of dust, you can also give your PC a more thorough cleaning by removing some of the components like the video card and cleaning them separately.

Here’s everything you need to know about how to clean your PC along with some helpful tips to make the job easier.
How to clean a desktop PC
- Turn off your computer and unplug all of the cables
- Open your computer case by removing the panels
- Take out and wash dust filters
- Remove your video card and other components for cleaning (optional)
- Use compressed air or an electric duster to get rid of interior dust
- Wipe down the side panels and the top and front of the case
- Clean the exterior vents using rubbing alcohol and cotton swabs
- Tidy up any loose cables (optional)
- Reassemble and test your computer
Read on to see detailed instructions for each step.
1. Turn off your computer and unplug all of the cables

Turn off your computer and unplug all of the cables to get started. It’s also a good idea to remove any USB flash drives, dongles or other devices from your computer’s USB ports.

2. Open your computer case by removing the panels

In order to open your computer and get it ready for cleaning, you’ll need to unscrew the case screws at the back of your PC to take off the panels. These screws are often thumb screws so you may not need a screwdriver to remove them. Set the screws aside somewhere safe and remove your PC’s side panel as well as its back and front panels if your case has them.
3. Take out and wash dust filters

Dust filters help trap external dust so that it doesn’t end up inside your PC. They are often found underneath the bottom of your PC or at the front of the case. Locate your dust filters, remove them from your PC, give them a wash under hot water and set them aside to dry.

Depending on your PC’s case, there may be multiple dust filters. For instance, this PC case also has a dust filter behind its removable front panel. When in doubt, consult the manual that came with your PC or case for help finding all of the dust panels.
4. Remove your video card and other components for cleaning (optional)

If you want to give your PC a more thorough cleaning, then you should remove some of its components. While you can take out its RAM, power supply and hard drives if you want, taking out the video card should be enough. If you’ve built your own computer before, this won’t be difficult.
For those that haven’t, you want to carefully unplug the wires connecting your video card to your power supply and unscrew the screw that anchors it to your PC’s back panel. You also need to push down the tab that holds your video card to your motherboard before removing it from your PC. You will need to follow this process in reverse to reinstall your video card after you're done cleaning.
5. Use compressed air or an electric duster to get rid of interior dust
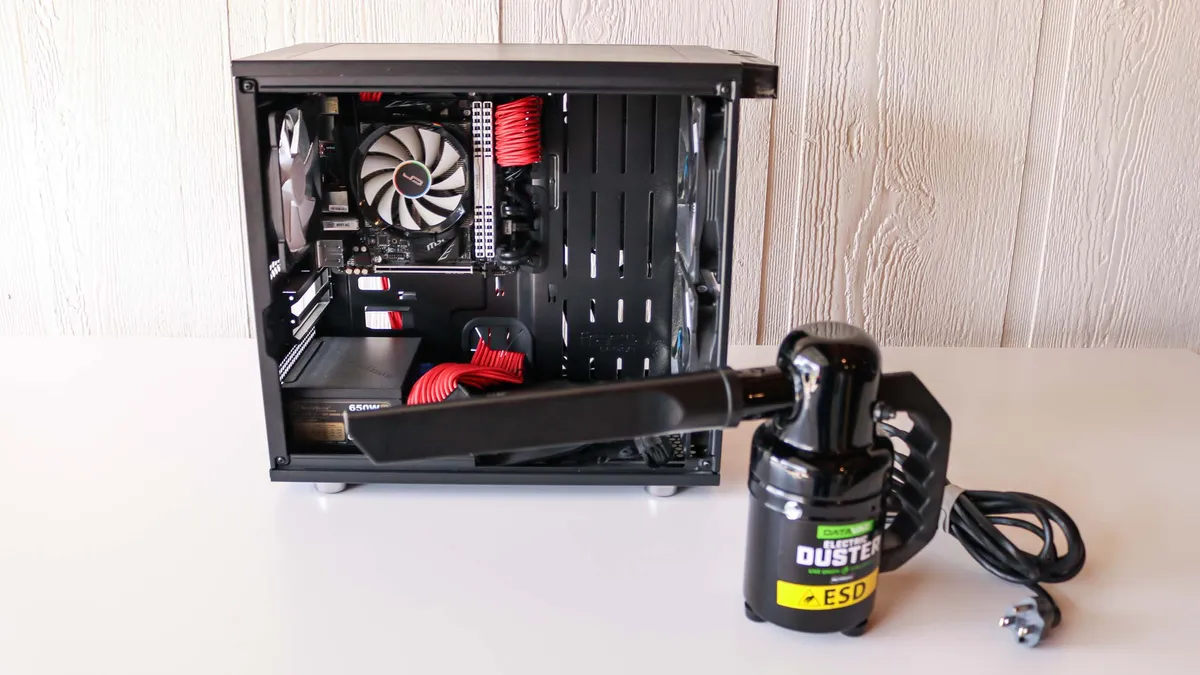
Compressed air can be used to blow the dust out of your PC but since it’s expensive and also terrible for the environment, you’re better off picking up an electric duster instead — especially if you frequently clean your PC and other electronics.
Either way, take your PC outside and blow the dust off of its fans and other components. Make sure to do several passes and avoid blowing air too close to the fans as you may damage them if they’re spinning too fast.
6. Wipe down the side panels and the top and front of the case

Since there aren’t any electric components on your PC’s side panels, you can use wet wipes to wipe them down. Afterwards, you want to use paper towels to remove any excess liquid.

At this point, you also want to wipe down the top of your PC case. Use a paper towels instead of wet wipes to avoid damaging any USB ports on the top of the case.
7. Clean the exterior vents using rubbing alcohol and cotton swabs

Dust can build up on the exterior vents on your PC’s back panel too. If you still see some dust after blowing off your case, you can use cotton swabs and rubbing alcohol to wipe the vents down and remove any dust you may find. Likewise, you can also use this method to clean your case’s fans without removing them.
8. Tidy up any loose cables (optional)

Since you are cleaning your PC, now is the perfect time to tidy up any loose cables. Messy cables take up additional space which limits the airflow inside your computer’s case. To tidy up your cables, you’re going to want to use cable ties in order to group wires running the same way together. Just be careful you don’t pull too hard on them as you’re tying them together or you might accidentally unplug or damage them.
9. Reassemble and test your computer

Now that your PC is clean, it’s time to put all of the pieces back together. Reinsert any components like the video card you may have removed and reattach the side panels to your computer’s case.
From here, you want to plug your PC back in along with any other cables you unplugged and boot up the device. Try running a few of your favorite programs and test out the keyboard to make sure your PC is functioning properly.
There you have it, you now have a clean PC and know exactly what to do six months from now when it’s time to clean it again. If you’re still in the mood for cleaning, here’s how to clean a mechanical keyboard along with how to clean a computer screen. We’ve also put together a list of 5 easy ways to upgrade your PC.