Chair sit-ups: How to do the seated ab exercise and the benefits for your midsection
Plus, the variations to try
Here at Tom’s Guide our expert editors are committed to bringing you the best news, reviews and guides to help you stay informed and ahead of the curve!
You are now subscribed
Your newsletter sign-up was successful
Want to add more newsletters?
Daily (Mon-Sun)
Tom's Guide Daily
Sign up to get the latest updates on all of your favorite content! From cutting-edge tech news and the hottest streaming buzz to unbeatable deals on the best products and in-depth reviews, we’ve got you covered.

Weekly on Thursday
Tom's AI Guide
Be AI savvy with your weekly newsletter summing up all the biggest AI news you need to know. Plus, analysis from our AI editor and tips on how to use the latest AI tools!

Weekly on Friday
Tom's iGuide
Unlock the vast world of Apple news straight to your inbox. With coverage on everything from exciting product launches to essential software updates, this is your go-to source for the latest updates on all the best Apple content.

Weekly on Monday
Tom's Streaming Guide
Our weekly newsletter is expertly crafted to immerse you in the world of streaming. Stay updated on the latest releases and our top recommendations across your favorite streaming platforms.
Join the club
Get full access to premium articles, exclusive features and a growing list of member rewards.
Whether you’re a complete beginner looking for a low-impact way to challenge your core, or you have mobility issues that make getting down on one of the best yoga mats difficult, seated ab exercises are a brilliant way to fire up the midsection. One of the most popular seated ab exercises to add to your routine is the seated, or chair sit-up, along with its variations, to challenge the muscles in your core. But how do you do chair sit-ups, what are the benefits, and what muscles are you targeting? Read on to find out more.
As a reminder, if you’re new to exercise or you’re returning to exercise following an injury, a long time off, or a pregnancy, it’s a good idea to check in with your doctor, or a personal trainer, before adding anything new to your routine. Strong abs are far more than just an aesthetic goal — a strong mid-section can help you sit with better posture, and protect your spine from injury. If building visible abs is your goal, check out some of the best ab exercises to try here, as well as our guide to calculating your body fat percentage, and why it matters.
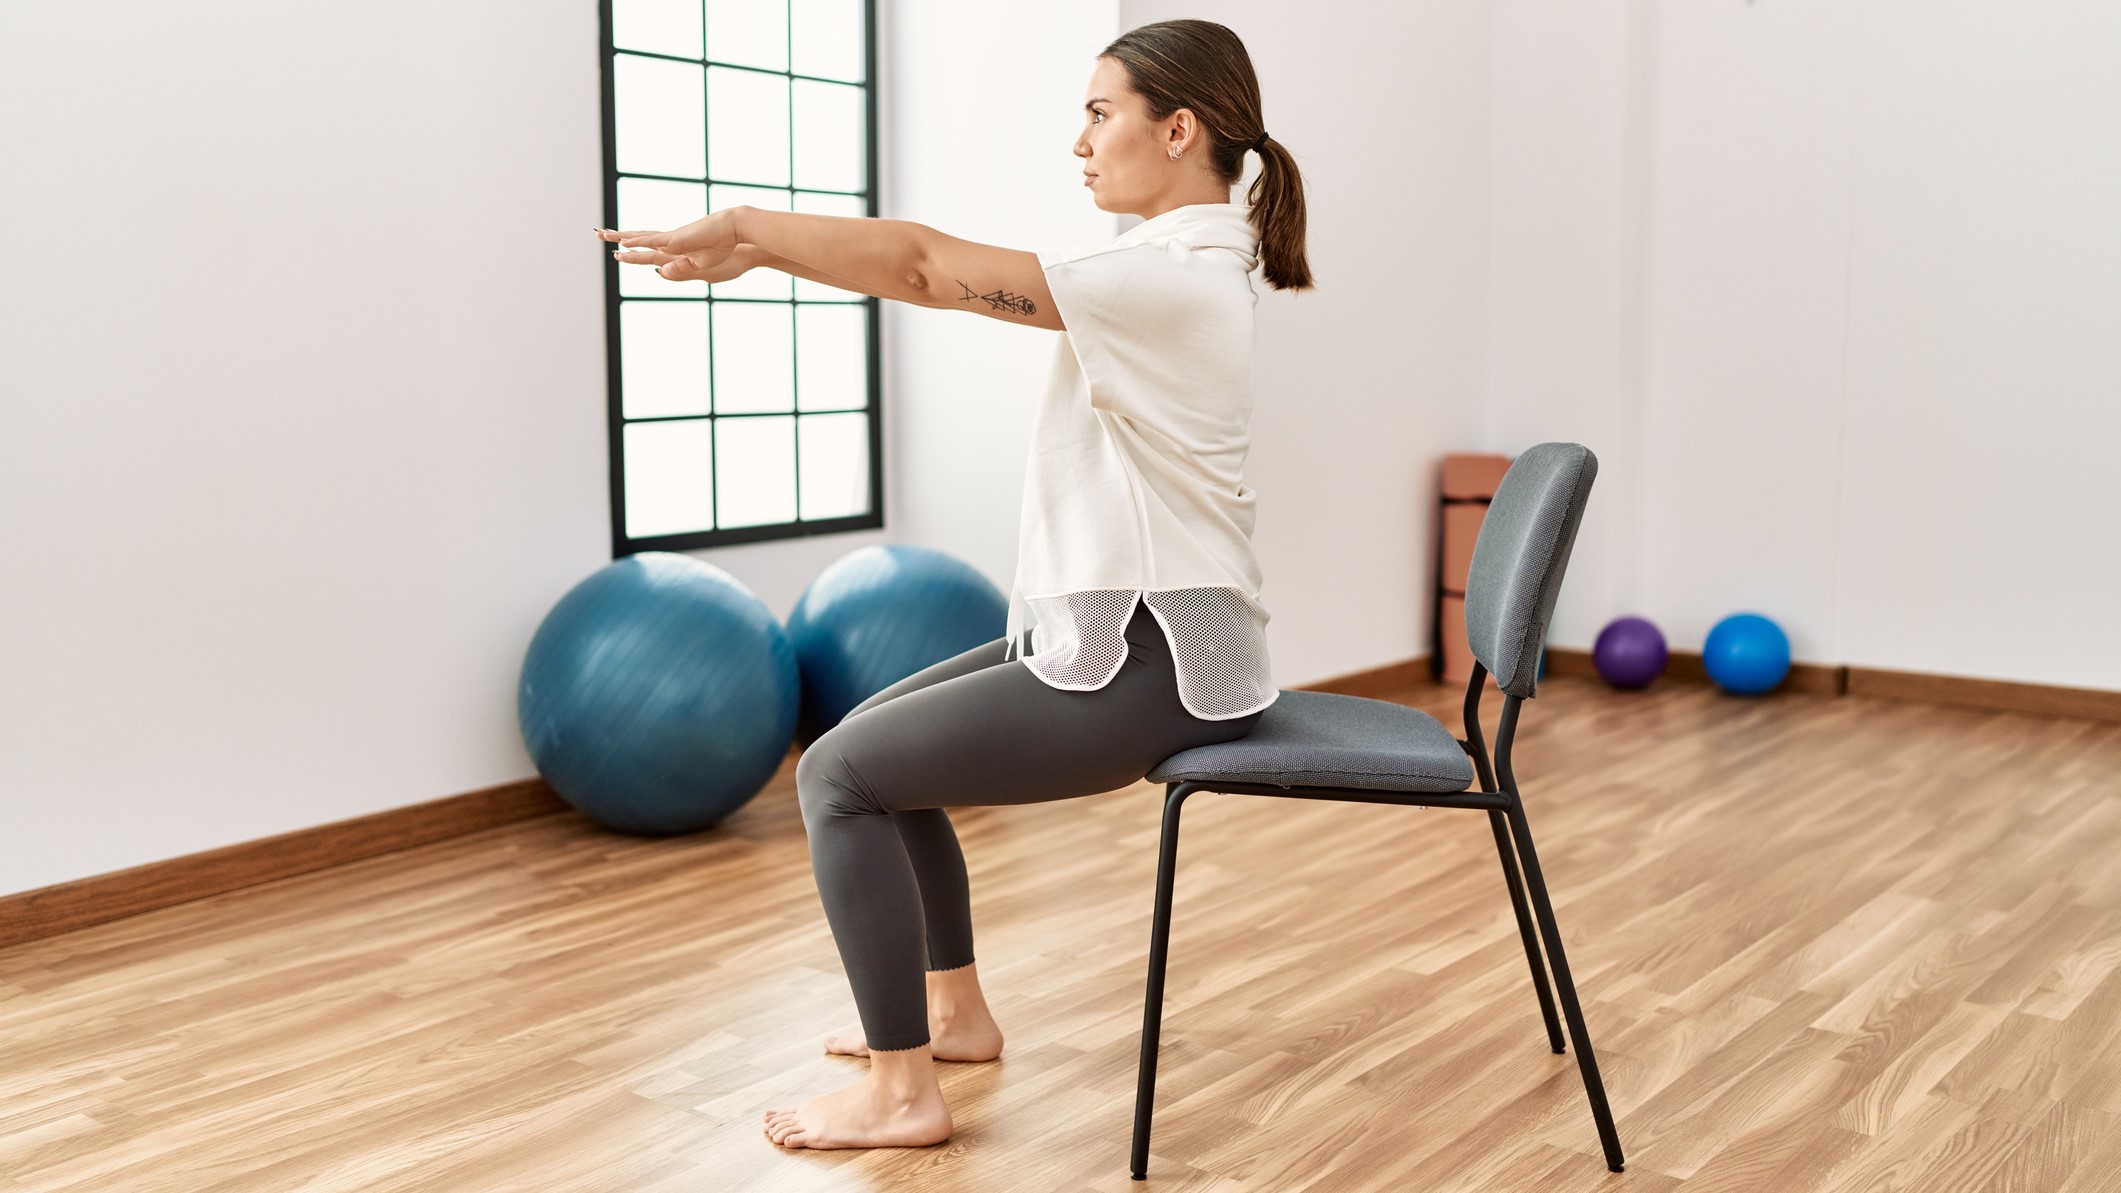
How to do a chair sit-up
It sounds obvious, but to do a chair sit-up, you’ll need a sturdy chair. By this we mean a chair with a back, that isn’t likely to tip over if you lean back on it. Don’t try these on office chairs with wheels.
- Start by shifting yourself forward in the chair, so you are on the edge of the seat with both feet flat on the floor.
- Either cross your arms over your chest, or extend your arms straight away from your torso, and sit upright in the chair and engage your abs. By this we mean think about sucking your belly button into your spine.
- Slowly, and with control, lean you torso back towards the back of the chair, and pause when you are leaning as far back as you can. You should feel your abdominal muscles working hard to hold you here, and might even notice a slight shake.
- Moving from your abs, raise your torso back to your starting position.
- That’s one rep.
It’s important not to over-extend during this exercise. You shouldn’t be leaning so far back that your lower back arches — instead, your lower back should be straight throughout the exercise. If you do find yourself rounding at the lower back, reduce your range of motion. As soon as your back arches your abdominal muscles stop working as hard, and you risk injury.
Still confused? Here's a YouTube video demonstrating a chair sit-up.
Chair sit-ups: What are the benefits?
Like sit-ups you might do on the floor, these chair sit-ups target most of the muscles in your mid-section, including your deep core muscles, the transverse abdominis, the six-pack muscles, known as the rectus abdominis, and the obliques, which run along the sides of your trunk. These muscles help support your lower back and hold your torso upright, so it’s important to work on them. Working from a seated position helps you isolate your abdominal muscles, helping you strengthen and support your spine.
Chair sit-ups: Form mistakes to look out for
As mentioned above, you want to be careful not to arch your back during this exercise, as this can put pressure on your spine. Move slowly and with control — you don’t want to rush this exercise and shouldn’t be jerking your torso back and forth.
Get instant access to breaking news, the hottest reviews, great deals and helpful tips.
It’s also important to relax your head, neck, and shoulders during this exercise. Remember, the movement should come from your abdominals, not your upper body.
Chair sit-ups: Variations to try
Once you’ve mastered the chair sit-up, why not try these other seated ab variations?
Seated bicycle crunches
Starting on the edge of your chair, with your feet flat on the floor, place both hands behind your head, resting on your temples. Twist from your core, and lower your left elbow towards your right knee. At the same time, lift your right foot off the floor to touch your elbow (don’t worry if they don’t actually meet). Return to the resting position, then repeat, this time with your right elbow and your left knee.
Make sure the move is coming from your midsection, and you’re not pulling on your neck to move your body.
Seated v-sit-ups
V-ups are a more challenging variation. Starting on the edge of your chair, engage your core and raise both legs up and off the floor, keeping a slight bend in your knee. From here, use your abs to lower your torso back a few inches, so that your torso and knees form a V-shape. Bend your knees and crunch your legs into your chest as you move from your core to raise back to your starting position, then lower back into the V-sit again. Remember to move slowly and with control.
Seated side crunches
This exercise helps work the oblique muscles, which run down the side of your body. Again, starting from the edge of your chair with your feet flat on the floor, sit up tall, engage your abs, and raise your hands behind your head, with your elbows out to the side. Moving from your core, lower your right elbow down towards the right-hand side of your body, pausing when you reach as far as you can go. You should feel a stretch along the left side of your torso. Pause here, then move from your core, and reverse the movement to come back to your starting position. Do all of your reps before switching sides.
More from Tom's Guide
- Forget planks — this seated ab workout sculpts your core in just 10 minutes
- I did 50 standing oblique crunches every day for a week — here’s what happened to my abs
- I did the Leaning Camel exercise every day for a week — here’s what happened to my body

Jane McGuire is Tom's Guide's Fitness editor, which means she looks after everything fitness related - from running gear to yoga mats. An avid runner, Jane has tested and reviewed fitness products for the past five years, so knows what to look for when finding a good running watch or a pair of shorts with pockets big enough for your smartphone. When she's not pounding the pavements, you'll find Jane striding round the Surrey Hills, taking far too many photos of her puppy.
 Club Benefits


