
 Club Benefits


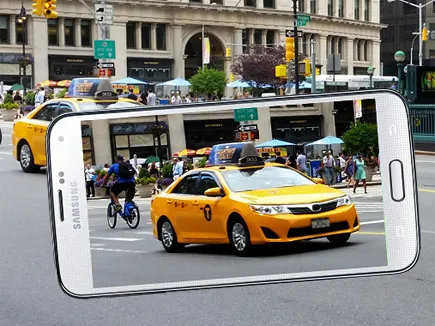

Packing a sharp, 16-megapixel camera and a host of nifty shooting modes, the Samsung Galaxy S5 is one of the best smartphones around. And while the device makes it easy to take good photos out of the box, it does take a bit of photography know-how to get the best possible shots in every situation.
From utilizng key features like Selective Focus and real-time HDR to fiddling with subtle-but-important camera settings, there's no shortage of ways to turn your S5 into the ultimate pocket camera. Here are the 10 best tips.
Use HDR for high-contrast subjects
Like many other smartphones and cameras, the Galaxy S5 packs a high dynamic range (HDR) function. With this mode activated, your Galaxy S5 will take multiple photos at various exposure levels, and combine them to display a wider range of dark to light that's closer to what you see with your own eyes.


To activate HDR, tap the icon, which looks like a sun and moon overlapping, on the top left of the camera interface. The S5 is one of the few phones that offer a real-time HDR preview, so you'll be able to see the difference when you toggle the setting on and off. Notice how the non-HDR photo is covered in shadows, while the HDR shot is bright and filled with rich colors, yet not overexposed. You're not going to need HDR in every single setting, but it certainly comes in handy when you have very dark and light elements in the same scene.
Change exposure value to brighten or darken photos
HDR isn't your only option when it comes to customizing how bright your shots are. The S5's Exposure value menu item lets you manually adjust exposure (how much light the camera sensor is exposed to), ranging from an exposure value of -2.0 (darkest) to 2.0 (brightest). To find the exposure menu, you'll have to tap the camera app's settings icon and scroll all the way down. You'll need to have HDR off to adjust the Exposure value.
MORE: Take Better Photos with Your iPhone
Tinkering with exposure is ideal for getting vastly different versions of the same shot, especially outdoors, as in these three images of a skyscraper I took against a blue sky above. The first was taken at default exposure, the second at minimum exposure (-2 EV) and the third at max exposure (+2 EV).

The darkest picture turns the building into a near-silhouette while bringing out the blue of the sky, while the brightest image emphasizes the details of the building while making the sky look blown out. These images represent the extremes. Feel free to tinker with this setting based on how you want the photo to look.
Select metering modes to optimize exposure
Another exposure tool you can use is metering mode, which tells the camera what part of the photo is most important, so it will optimize exposure for that area (possibly at the expense of slightly over- or underexposing other parts).

To access the metering modes, tap the gear icon and go to the second item from the left on the second row of settings. (The icon looks like a dot inside a circle.) By default, the S5 uses center-weighted metering, giving preference to the middle portion of the image. If you want to even out exposure over the entire frame — say, in a group photo — you can select Matrix metering. If the very center of the photo is most important, such as a performer on stage, try Spot metering.
Use Selective Focus for a blur effect
The Galaxy S5's Selective Focus mode allows you to blur out the foreground or background of a photo for an artistic effect To activate Selective Focus, simply tap the icon of two silhouettes on the top right of the camera app's interface. Make sure your foreground subject is within 1.5 feet of your camera, and that part of the background is at least 5 feet behind your subject.
With Selective Focus activated, you can choose your subject by simply tapping it on the display. After your shot is taken, tap the edit icon to the top left of the image, which will pull up your focus options.

Select the Near Focus icon to highlight the foreground, the Far Focus icon for the background or the Pan Focus icon to spread the focus evenly. This mode is a great way to put the focus on a friend standing in a crowded city, for example.
Take action photos with Burst Mode
Trying to capture a fast-moving object with just a single shot often ends in blurry disappointment. Fortunately, the S5's high-speed Burst Mode lets you pick out the perfect moment.
MORE: Why Autofocus is the New Megapixel
To activate Burst Mode, tap the settings icon on the top left of the camera interface, and toggle burst shots on. After that, you simply hold down the camera button to take up to 30 shots in about 3 seconds. Each burst shot will be saved individually in your gallery, allowing you to thumb through them until you find the clearest shot of a fast-moving sports game or an exciting street performance.s

Let's say you're trying to snap a photo of a fire truck speeding down the street, as we did above. We pressed the shutter button as soon as the truck came close, and held it until the truck had passed by. Then, from the multitude of photos, we picked the one in which the vehicle was sharp and in the center.
Focus faster by turning off stabilization
You can also avoid missing quick moments by configuring your S5 to focus faster. Once you go into the settings menu and switch picture stabilization to Off, you'll notice your S5's camera focusing quicker than it did with the feature on.

We were able to shave up to half a second off the focus time by doing this, which could mean the difference between catching a fleeting photo opportunity and missing it. If you are taking a posed, rather than an action, shot, however, turning on image stabilization will improve your chances of getting a clean shot — so toggle it on or off depending on your subject.
Use the flash (sparingly)
As with many smartphones and point-and-shoots, it's best to keep the S5's flash off unless you absolutely need it. The S5 typically takes crisp and bright shots by default, and the flash tends to lead to overexposure.

Nevertheless, you will often need to activate the flash in dim environments. Using the S5's flash in a low-lit conference room helped bring out each of my co-workers' skin tones.
MORE: Phone Camera Face-Off: iPhone 5s vs. Galaxy S5
The flash also comes in handy if the sun is behind your subject, creating a dark shadow on the person or object. Using the flash in this type of environment will light up the shaded part of the photo. It may overexpose the background a bit, but you'll get a much brighter and clearer view of your subject.
Use Shot and More in busy surroundings
You've probably been here before. You just snagged a great shot of your best friend against a beautiful background, but someone just had to walk right behind your friend at the same time. Fortunately, the S5 has a fix for that.

By activating the Shot and More function in the S5 camera's Mode menu, you'll gain access to Eraser Mode after taking a photo. Once you're in Eraser Mode, you can tap away anything that the S5 camera detects as a distraction, such as the hurried city walker that swoops in at the last second to steal your best bud's thunder.
MORE: How Many Megapixels Do You Really Need?
Your S5 will always take shots in Burst Mode with Shot and More activated, which also gives you access to features like Best Face and Best Shot for easily picking the best photos in a big bunch. But remember, you need to activate Shot and More before taking the photo, so if you are in a setting that's likely to involve photobombers, enable this feature.
Pretty up your selfies with Beauty Face

The S5's 2.1-MP front-facing camera already captures solid selfies, but you can take things a bit further with the phone's Beauty Face feature. To activate Beauty Face, just tap the sparkly head icon on the right of the screen when in the camera's in front-facing mode, before you take your photo.
This feature gives an airbrushed look to your selfies, and lets you choose from five different levels of intensity. I personally prefer the way my face looks in its raw, natural glory, but Beauty Face was able to rub away a few birthmarks and blemishes.
Reduce resolution for smaller files and faster uploads
The Galaxy S5 takes super-high-res photos by default, but you'll rarely need to shoot at max resolution to get a solid shot. If you open the settings menu and tap Picture Size, you can choose between photo outputs of 16 MP, 12 MP, 9 MP, 8 MP and 6 MP for the rear camera. For the front cam, you can choose 2 MP, 1.6 MP, 1 MP or 0.3 MP.

Not only does this give you different aspect ratios to work with, but it makes it much easier to send photos to friends. Plus, you can save precious storage space on your phone, and bandwidth on your data plan. The highest-resolution rear-facing shots will take up around 4.25MB apiece, and you can whittle those down to less than half that size while still retaining plenty of detail, even for small prints.
For example, you need only 0.69 megapixels for a good Facebook photo, and 7.2 megapixels is just fine for a 8 x 10-inch print.
Mike Andronico is an associate editor at Tom's Guide. He doesn't use Beauty Face for his selfies. Follow Mike @MikeAndronico and on Google+. Follow us@TomsGuide, onFacebook and onGoogle+.

