How to use MidJourney's new consistent character feature
Keeping the face going

Here at Tom’s Guide our expert editors are committed to bringing you the best news, reviews and guides to help you stay informed and ahead of the curve!
You are now subscribed
Your newsletter sign-up was successful
Want to add more newsletters?

Daily (Mon-Sun)
Tom's Guide Daily
Sign up to get the latest updates on all of your favorite content! From cutting-edge tech news and the hottest streaming buzz to unbeatable deals on the best products and in-depth reviews, we’ve got you covered.

Weekly on Thursday
Tom's AI Guide
Be AI savvy with your weekly newsletter summing up all the biggest AI news you need to know. Plus, analysis from our AI editor and tips on how to use the latest AI tools!

Weekly on Friday
Tom's iGuide
Unlock the vast world of Apple news straight to your inbox. With coverage on everything from exciting product launches to essential software updates, this is your go-to source for the latest updates on all the best Apple content.

Weekly on Monday
Tom's Streaming Guide
Our weekly newsletter is expertly crafted to immerse you in the world of streaming. Stay updated on the latest releases and our top recommendations across your favorite streaming platforms.
Join the club
Get full access to premium articles, exclusive features and a growing list of member rewards.
MidJourney seems to be getting new updates every week since the launch of version six in December and one of the most recent — and useful — is consistent character.
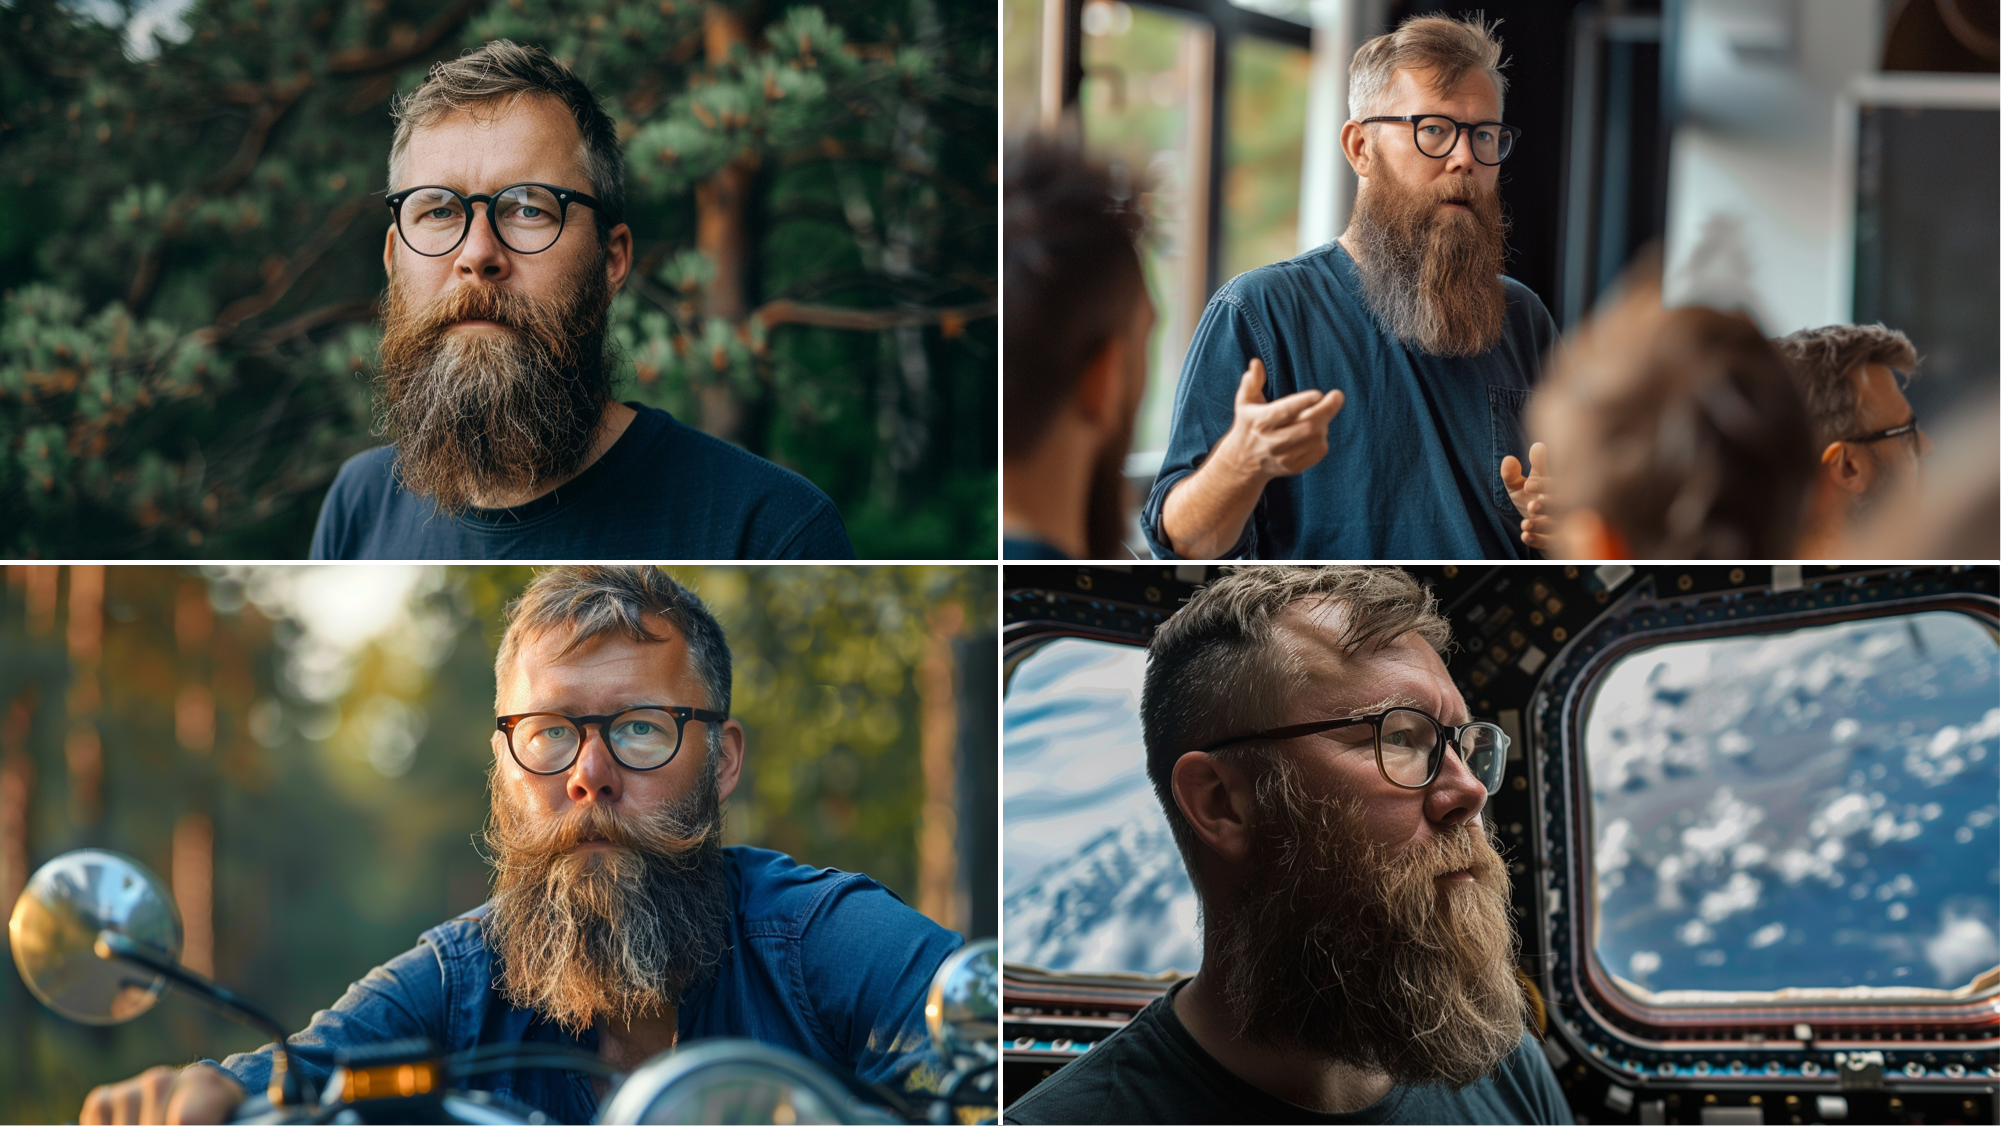
This tool allows creators to apply the same facial features and other characteristics across multiple image generations using a simple cref tag.
Consistent character works best when used with an image generated first in MidJourney itself and the consistency can be tweaked from one image to the next.
How to use MidJourney consistent character
Using the tools is fairly straightforward as it’s just a tag on an existing prompt within the Discord bot, perfecting it across multiple generations will take some tweaking.
For this guide, I’m going to assume that you already have a MidJourney account and some familiarity with the platform. If not, we have a helpful guide to getting started.
1. Open the MidJourney bot in Discord

MidJourney does have a web interface but right now you need to have made at least 1,000 images on the platform to get access. There is even a hint of a bot that will work with X but no date on when that will be available
So for most of us the journey will begin inside Discord. Click on the MidJourney bot in your DMs to start the process.
2. Create your first image

We need a character to draw inspiration from. This could be an image you’ve previously created, a photograph or something you create specifically for this guide.
Lets create something fresh. Type /imagine and then the description of your character. For me I went with “a 42 year old bearded geek who writes about technology”. Why not make what you know?
Pick the best of the four images by clicking U<number> to create an upscaled version.
3. Copy the URL of your newly made image

We need the Discord URL of the image to use it as a reference. Click on the image then right click the mouse on a desktop and select Copy URL from the context menu. On iPhone tap the image, long press to open the context menu and tap share, then Copy.
4. Create a new image referencing the original

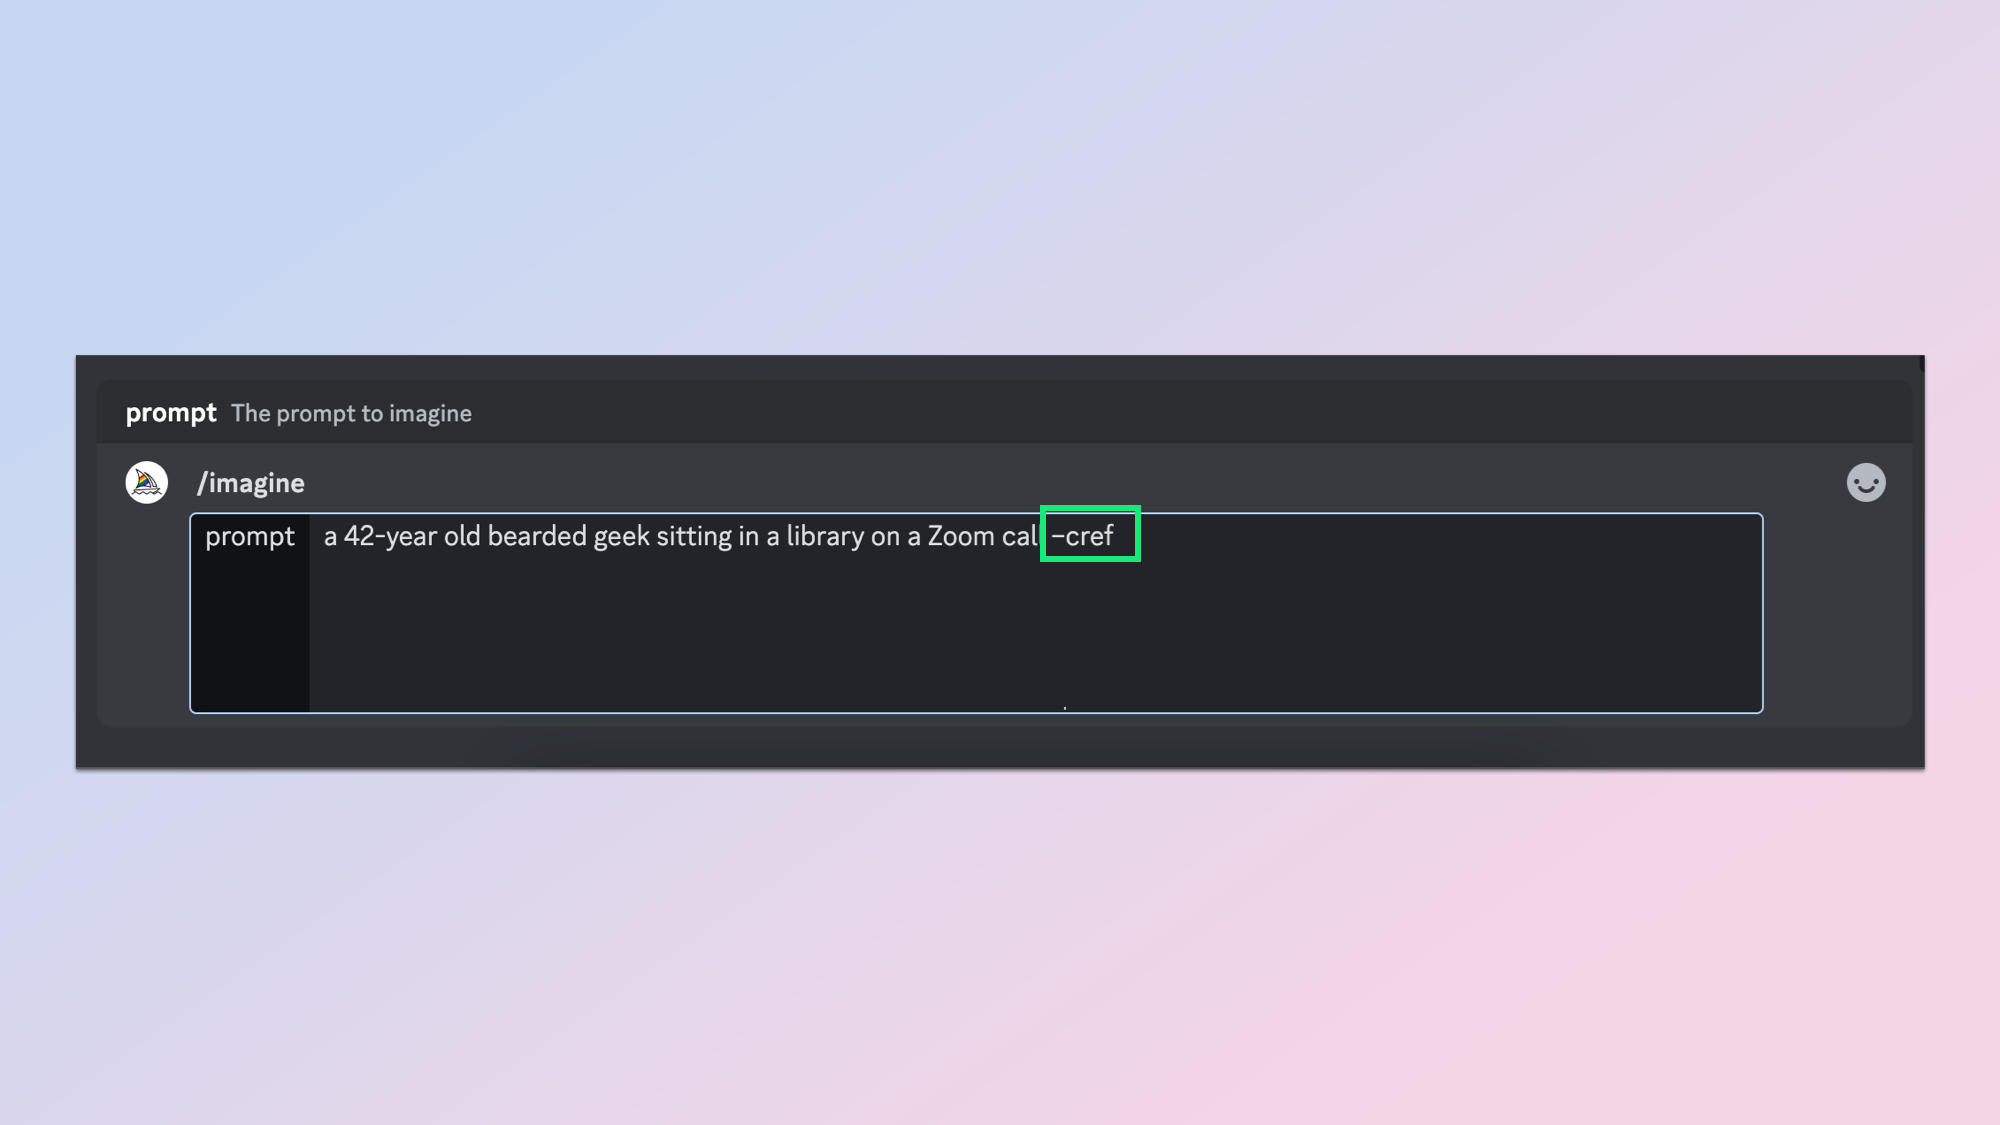
This next step is the bulk of the guide. We need a new prompt and then we have to append the –cref tag and the URL in our clipboard (you did keep it in the clipboard? If not go back to step two).
Just type /imagine then your description then add --cref and paste the URL from the clipboard.
I used this prompt, which will give you a guide. /imagine a 42-year old bearded geek sitting in a library on a Zoom call –cref <your URL>.
5. Adjust how close it should resemble the original

Now try the same prompt again but add –cw <a number from 1-100> at the end. So it would look like:
/imagine a 42-year old bearded geek sitting in a library on a Zoom call –cref <your URL> –cw <number>
6. Go wild

Once you’ve got the basics you can start putting your character in a range of situations, outfits and even give them a hair cut.
To change the situation just type /imagine and repeat the previous step but with a different description.
I decided to put my ageing geek on a motorbike. I used hte prompt /imagine /imagine a 42 year old bearded geek riding a motorbike --cref <image url> --cw 60
One thing I have noticed is that you get the best consistency by always going back to the original source image. In a previous story I tried using the net generated image as the source and it very quickly lost consistency.
7. Put the character anywhere

You can keep changing the environment or features. With the –cw <number> the higher the number the more closely it will resemble the original image.
Setting it to 100 will keep the face and clothes identical, just changing the situation based on the prompt. Setting it to 0 will have it no use the –cref at all. I’ve found about 80 is good if you want the clothes to remain the same, 60 if you want a change of clothes but not too extreme.
I put my character on the ISS using the prompt: a 42 year old bearded geek on the International Space Station --cref <original image> --cw 60 --ar 16:9
More from Tom's Guide
If you liked this guide why not try out our guide to making anime with MidJourney, creating AI video in Runway or using ChatGPT to make AI images.
Get instant access to breaking news, the hottest reviews, great deals and helpful tips.

Ryan Morrison, a stalwart in the realm of tech journalism, possesses a sterling track record that spans over two decades, though he'd much rather let his insightful articles on AI and technology speak for him than engage in this self-aggrandising exercise. As the former AI Editor for Tom's Guide, Ryan wields his vast industry experience with a mix of scepticism and enthusiasm, unpacking the complexities of AI in a way that could almost make you forget about the impending robot takeover.
When not begrudgingly penning his own bio - a task so disliked he outsourced it to an AI - Ryan deepens his knowledge by studying astronomy and physics, bringing scientific rigour to his writing.
 Club Benefits


