I built my own future-proof laptop — and it's a game changer
Here's what it's like to build your own DIY Framework laptop
Here at Tom’s Guide our expert editors are committed to bringing you the best news, reviews and guides to help you stay informed and ahead of the curve!
You are now subscribed
Your newsletter sign-up was successful
Want to add more newsletters?
Daily (Mon-Sun)
Tom's Guide Daily
Sign up to get the latest updates on all of your favorite content! From cutting-edge tech news and the hottest streaming buzz to unbeatable deals on the best products and in-depth reviews, we’ve got you covered.

Weekly on Thursday
Tom's AI Guide
Be AI savvy with your weekly newsletter summing up all the biggest AI news you need to know. Plus, analysis from our AI editor and tips on how to use the latest AI tools!

Weekly on Friday
Tom's iGuide
Unlock the vast world of Apple news straight to your inbox. With coverage on everything from exciting product launches to essential software updates, this is your go-to source for the latest updates on all the best Apple content.
Weekly on Monday
Tom's Streaming Guide
Our weekly newsletter is expertly crafted to immerse you in the world of streaming. Stay updated on the latest releases and our top recommendations across your favorite streaming platforms.
Join the club
Get full access to premium articles, exclusive features and a growing list of member rewards.
The first time I cracked open a computer to modify the hardware inside was in 1989, when I wanted to add an expansion card to my Apple IIGS. (Yes, Apple let you do that back in those days.) Further upgrade adventures followed. Like so many others, I needed to add memory to my PC to play Ultima VII, and then eventually I got into all-out system building.
Ever since I started down that road, my view has been that the best computer you’ll use is the one you build yourself. It will always meet your needs as tempered by your budget, and as either changes, so will the computer — the new part(s) and a screwdriver are all you need.
If you’ve been craving a laptop you can upgrade and repair with ease, look no further."
The key caveat here, though, is that these have all been desktop computers. I’ve upgraded RAM and storage in laptops over the years, and some enterprising companies have attempted to make fully buildable laptops a thing, but they’ve never really caught on.
The closest they’ve come to popular success was the Framework Laptop, a system that debuted last year as what the company calls “a thin, light, high-performance notebook that’s upgradeable, repairable, and 100% yours.” Against the odds, it caught on, at least as much for its impressive performance as the internal changes it allows you to make.
Though I toyed with last year’s model a bit, I wasn’t able to spend much quality time with it. With the release of this year’s 12th Gen Intel Core–based DIY Edition, I decided that needed to change, and Framework sent me its top-of-the-line $2,220 model so I could see whether this was, well, a framework worth building on.
Framework Laptop: Putting it together
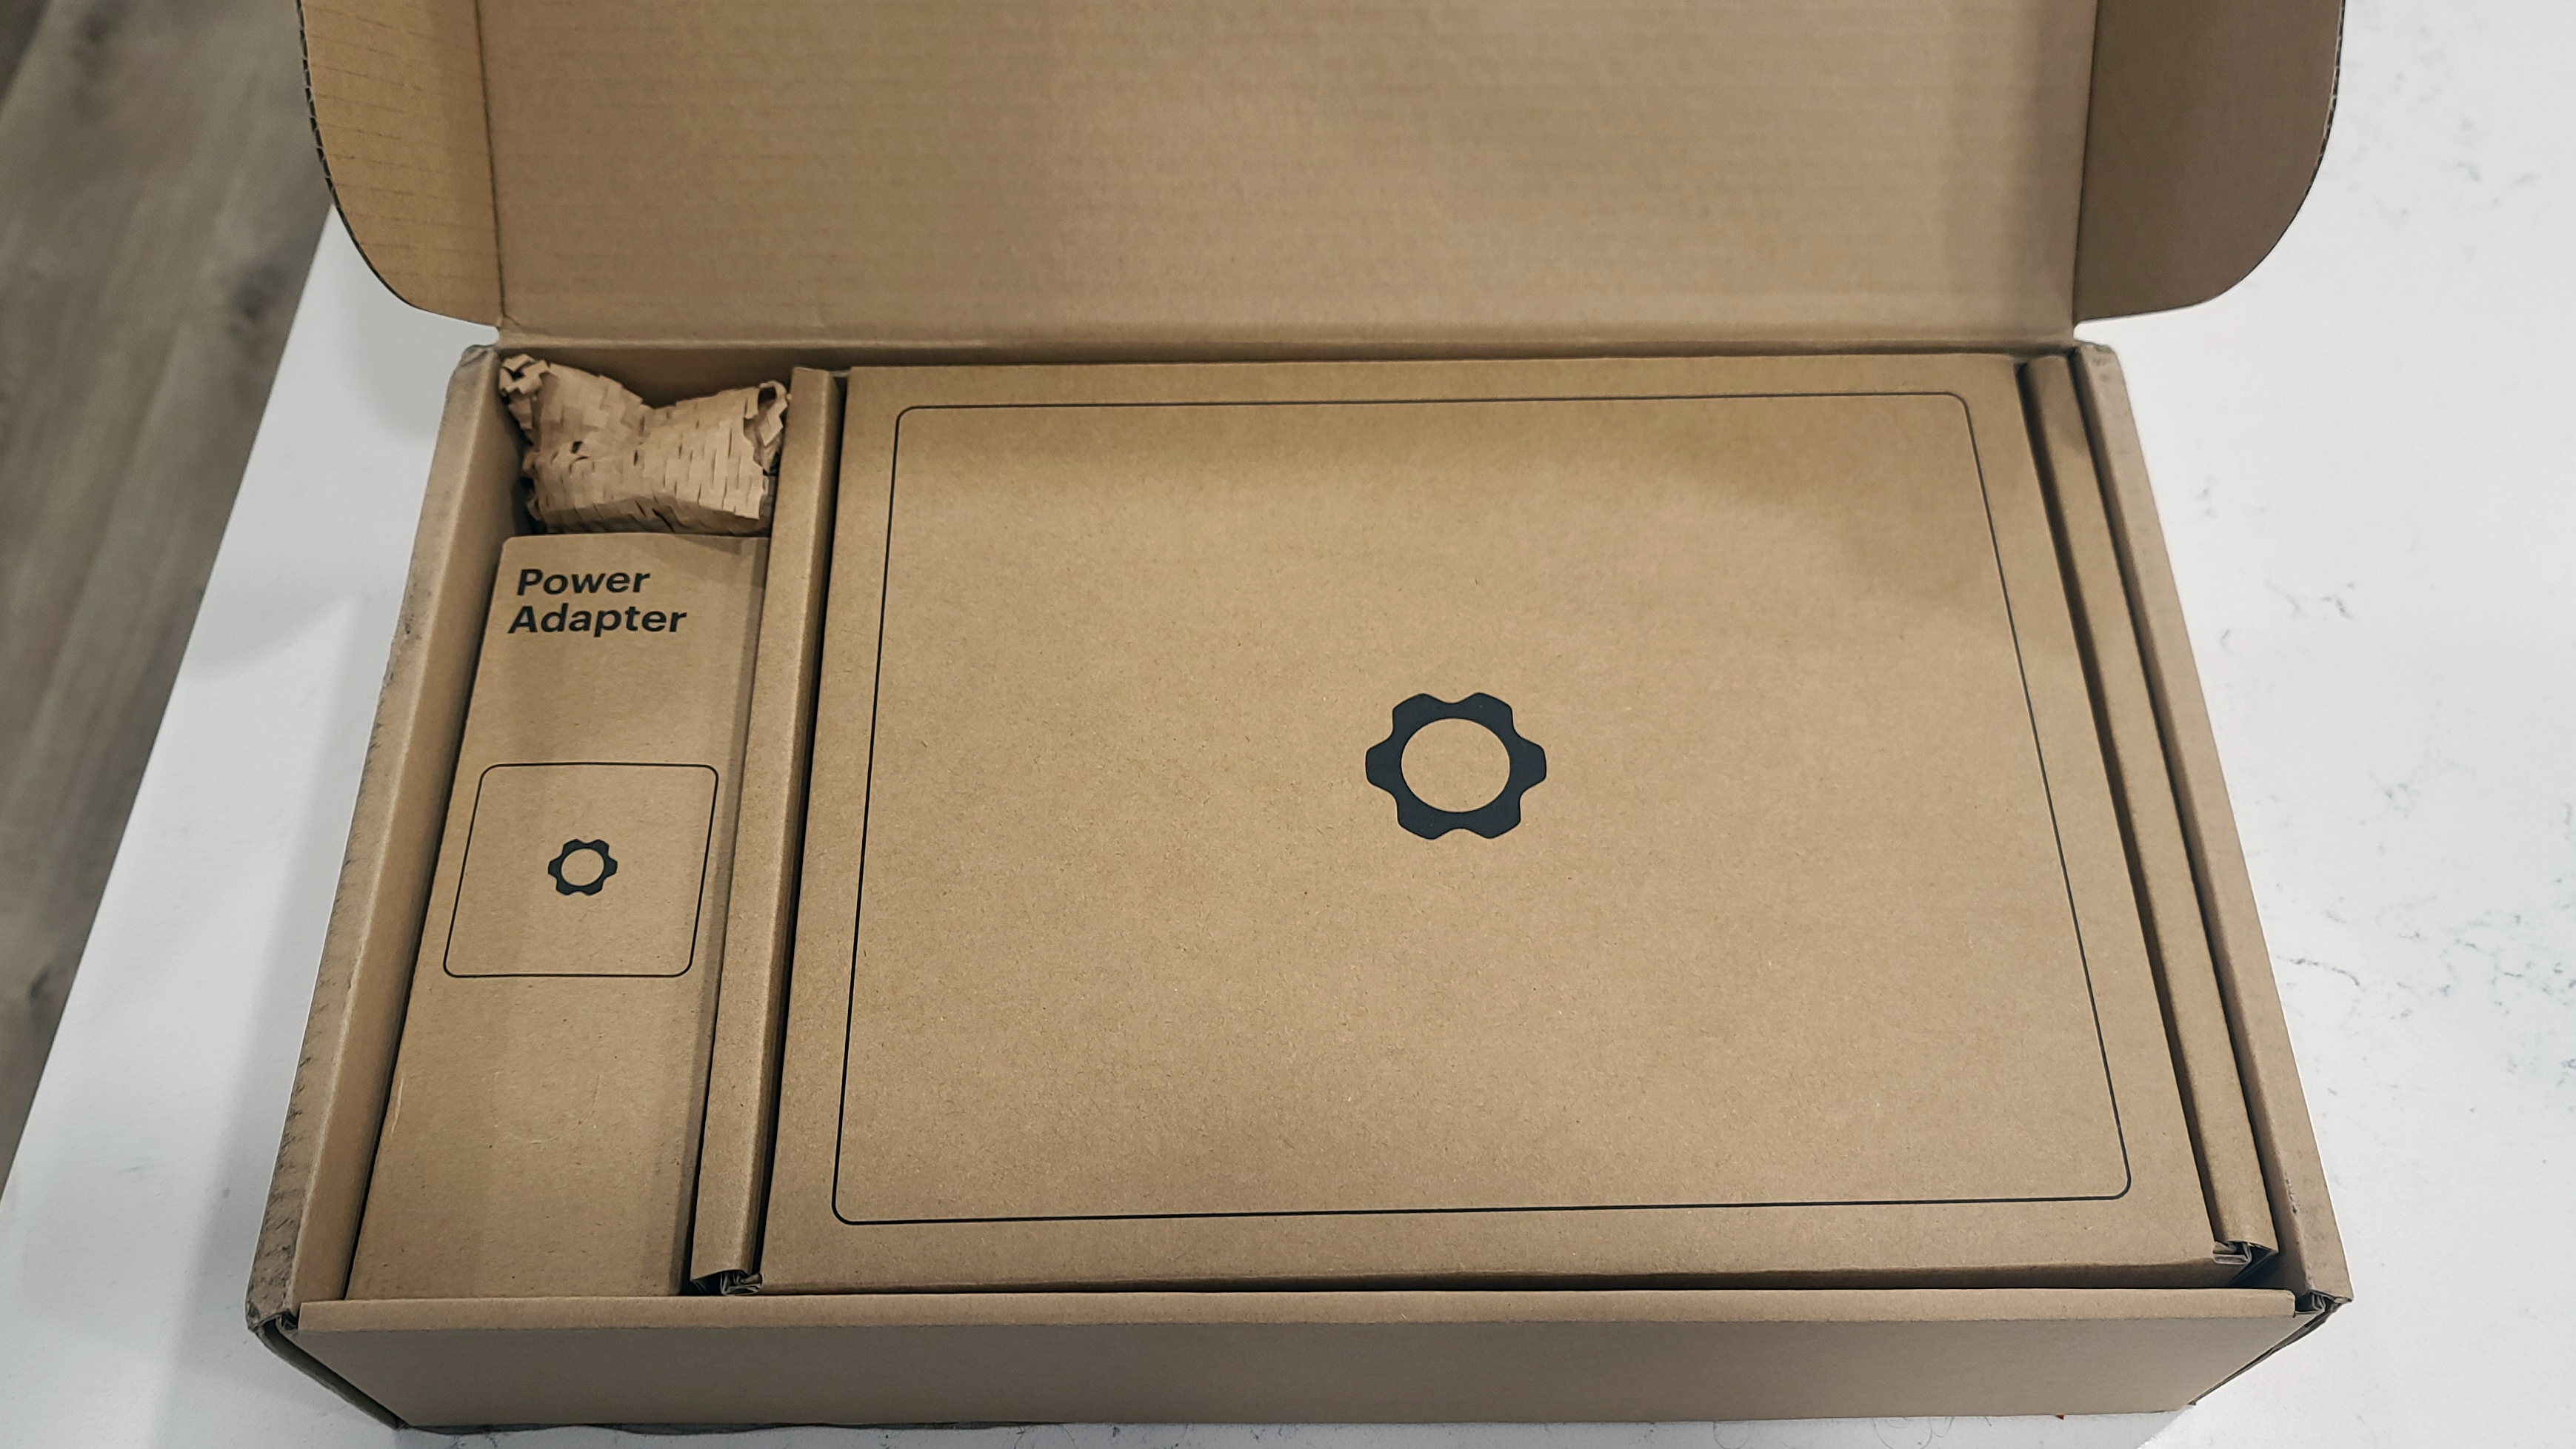
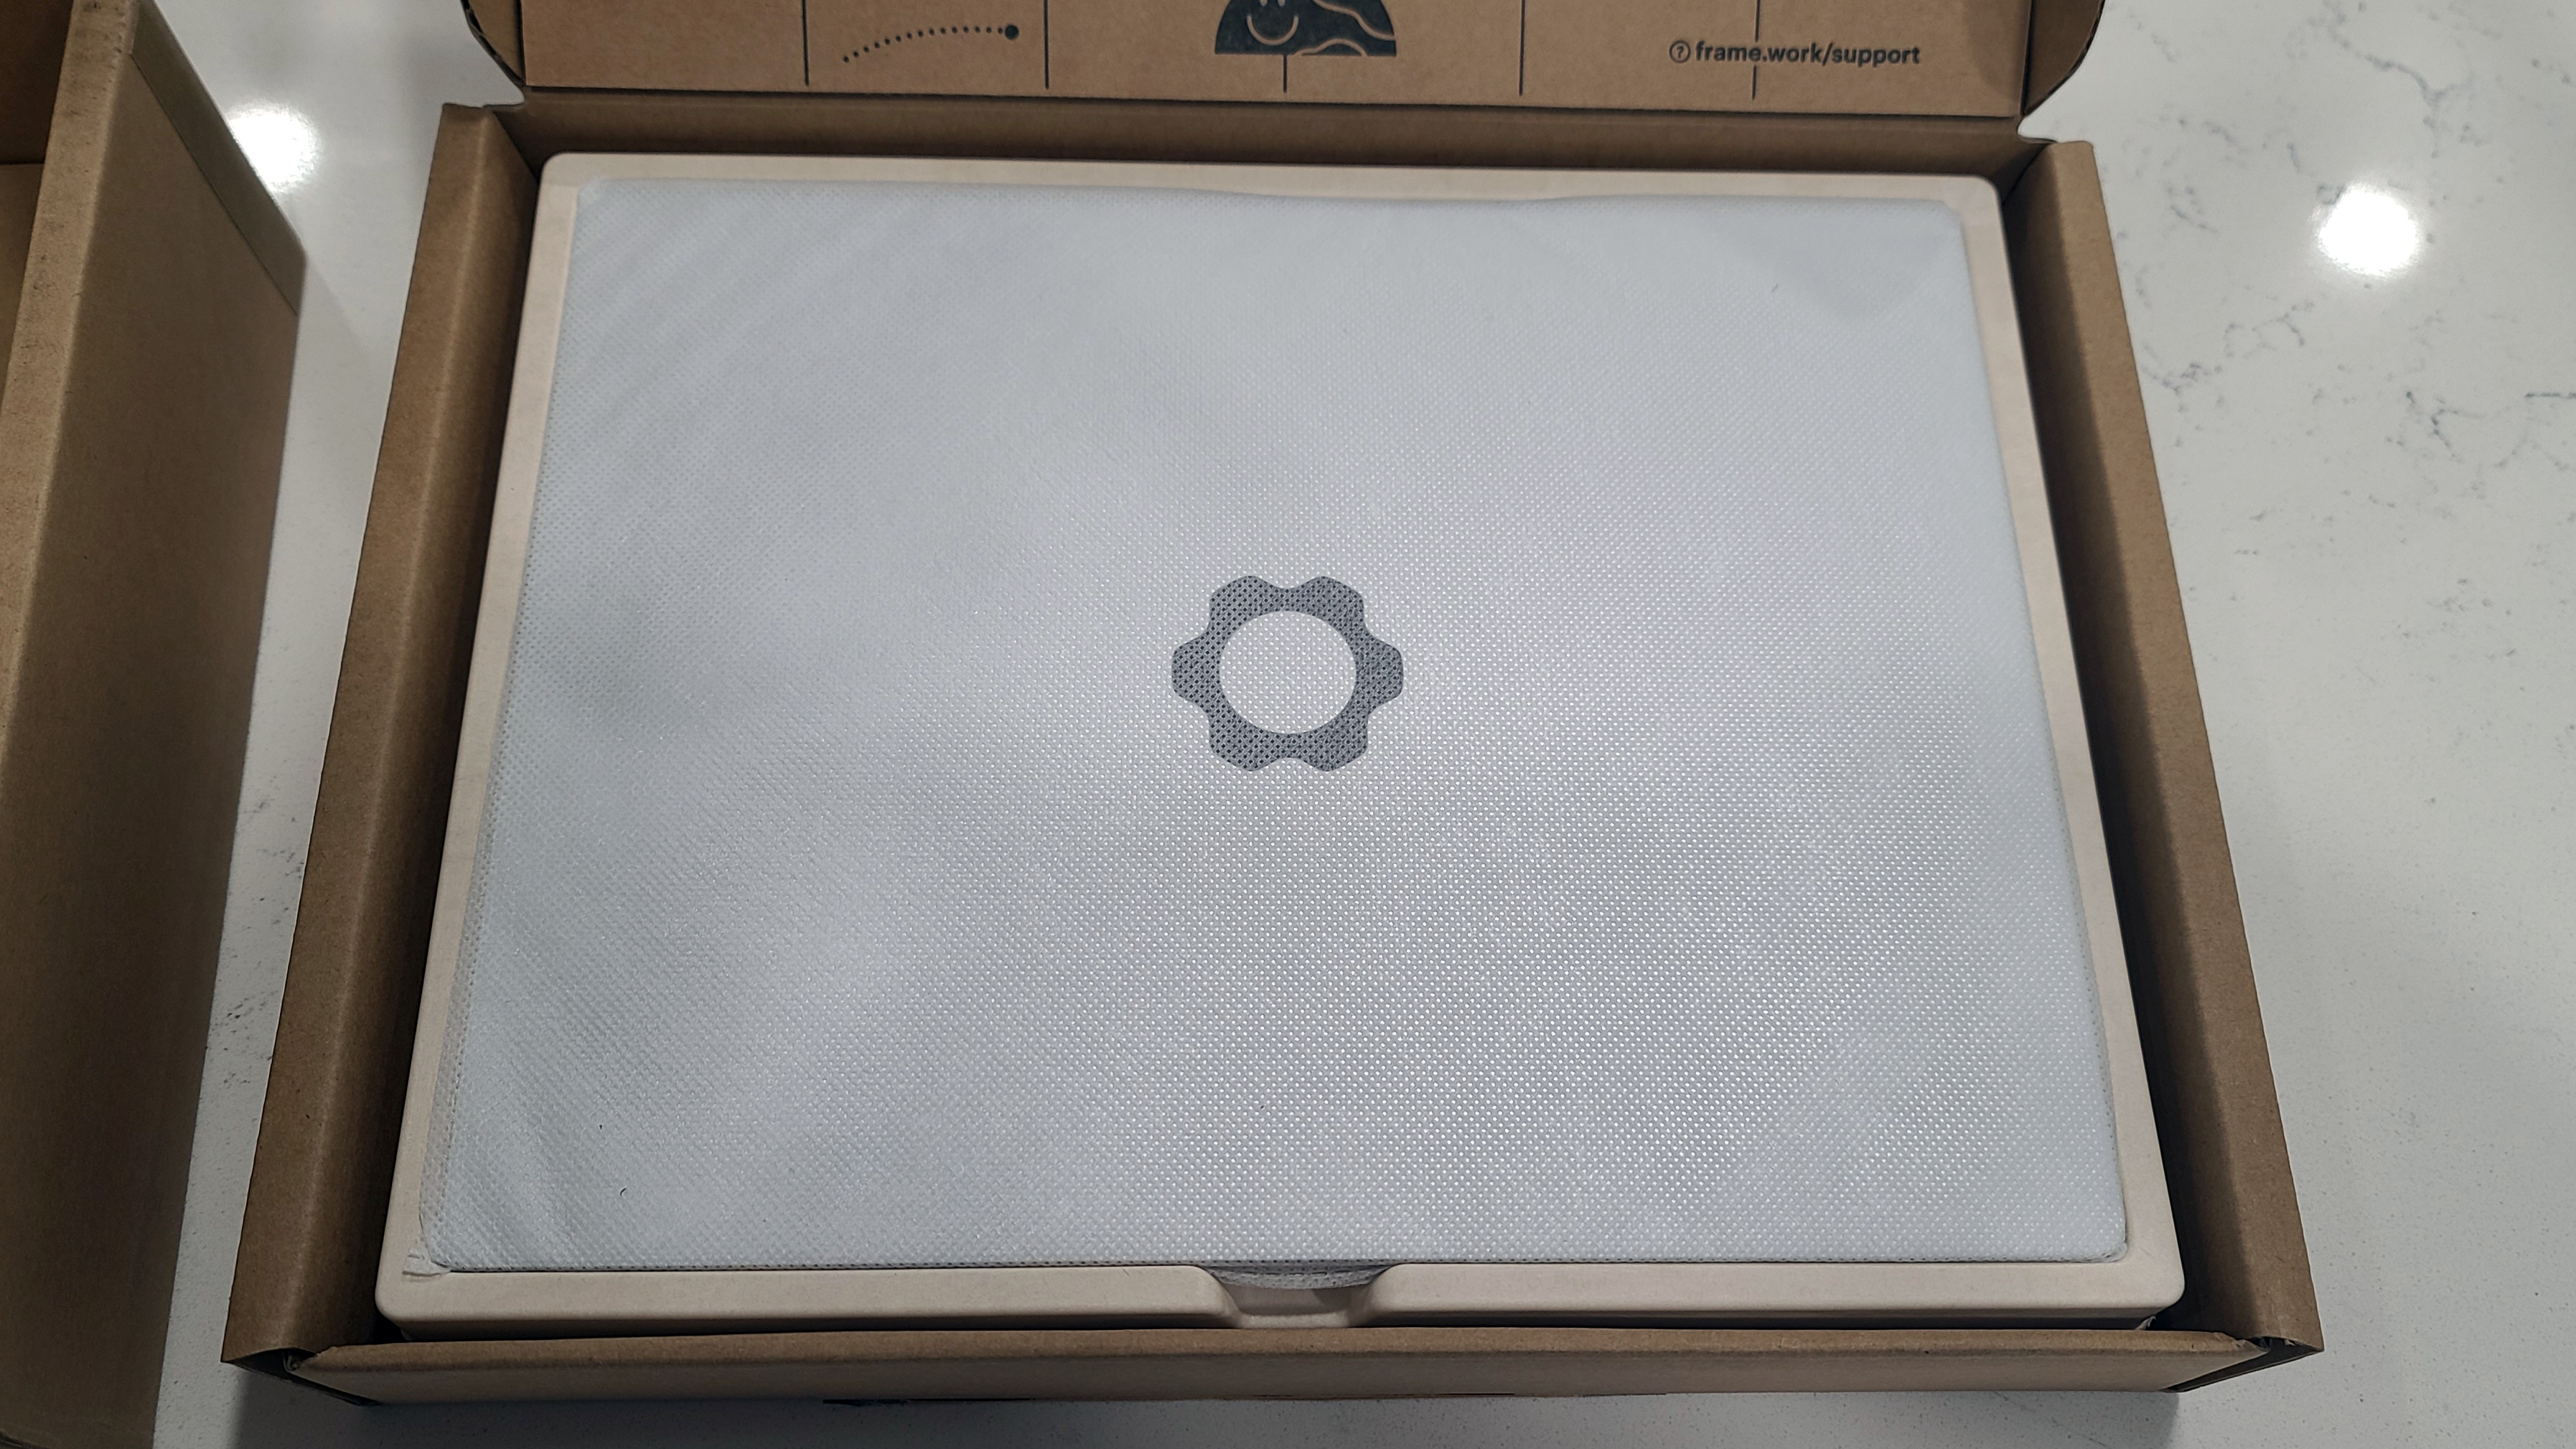
The Framework DIY Edition’s shipping package has been designed to leave no question about what any individual part does or where to find it. The laptop body and the included installation tool, a one-size-fits-all screwdriver on one end and a plastic prybar on the other, come together in one box. The power adapter is in another.
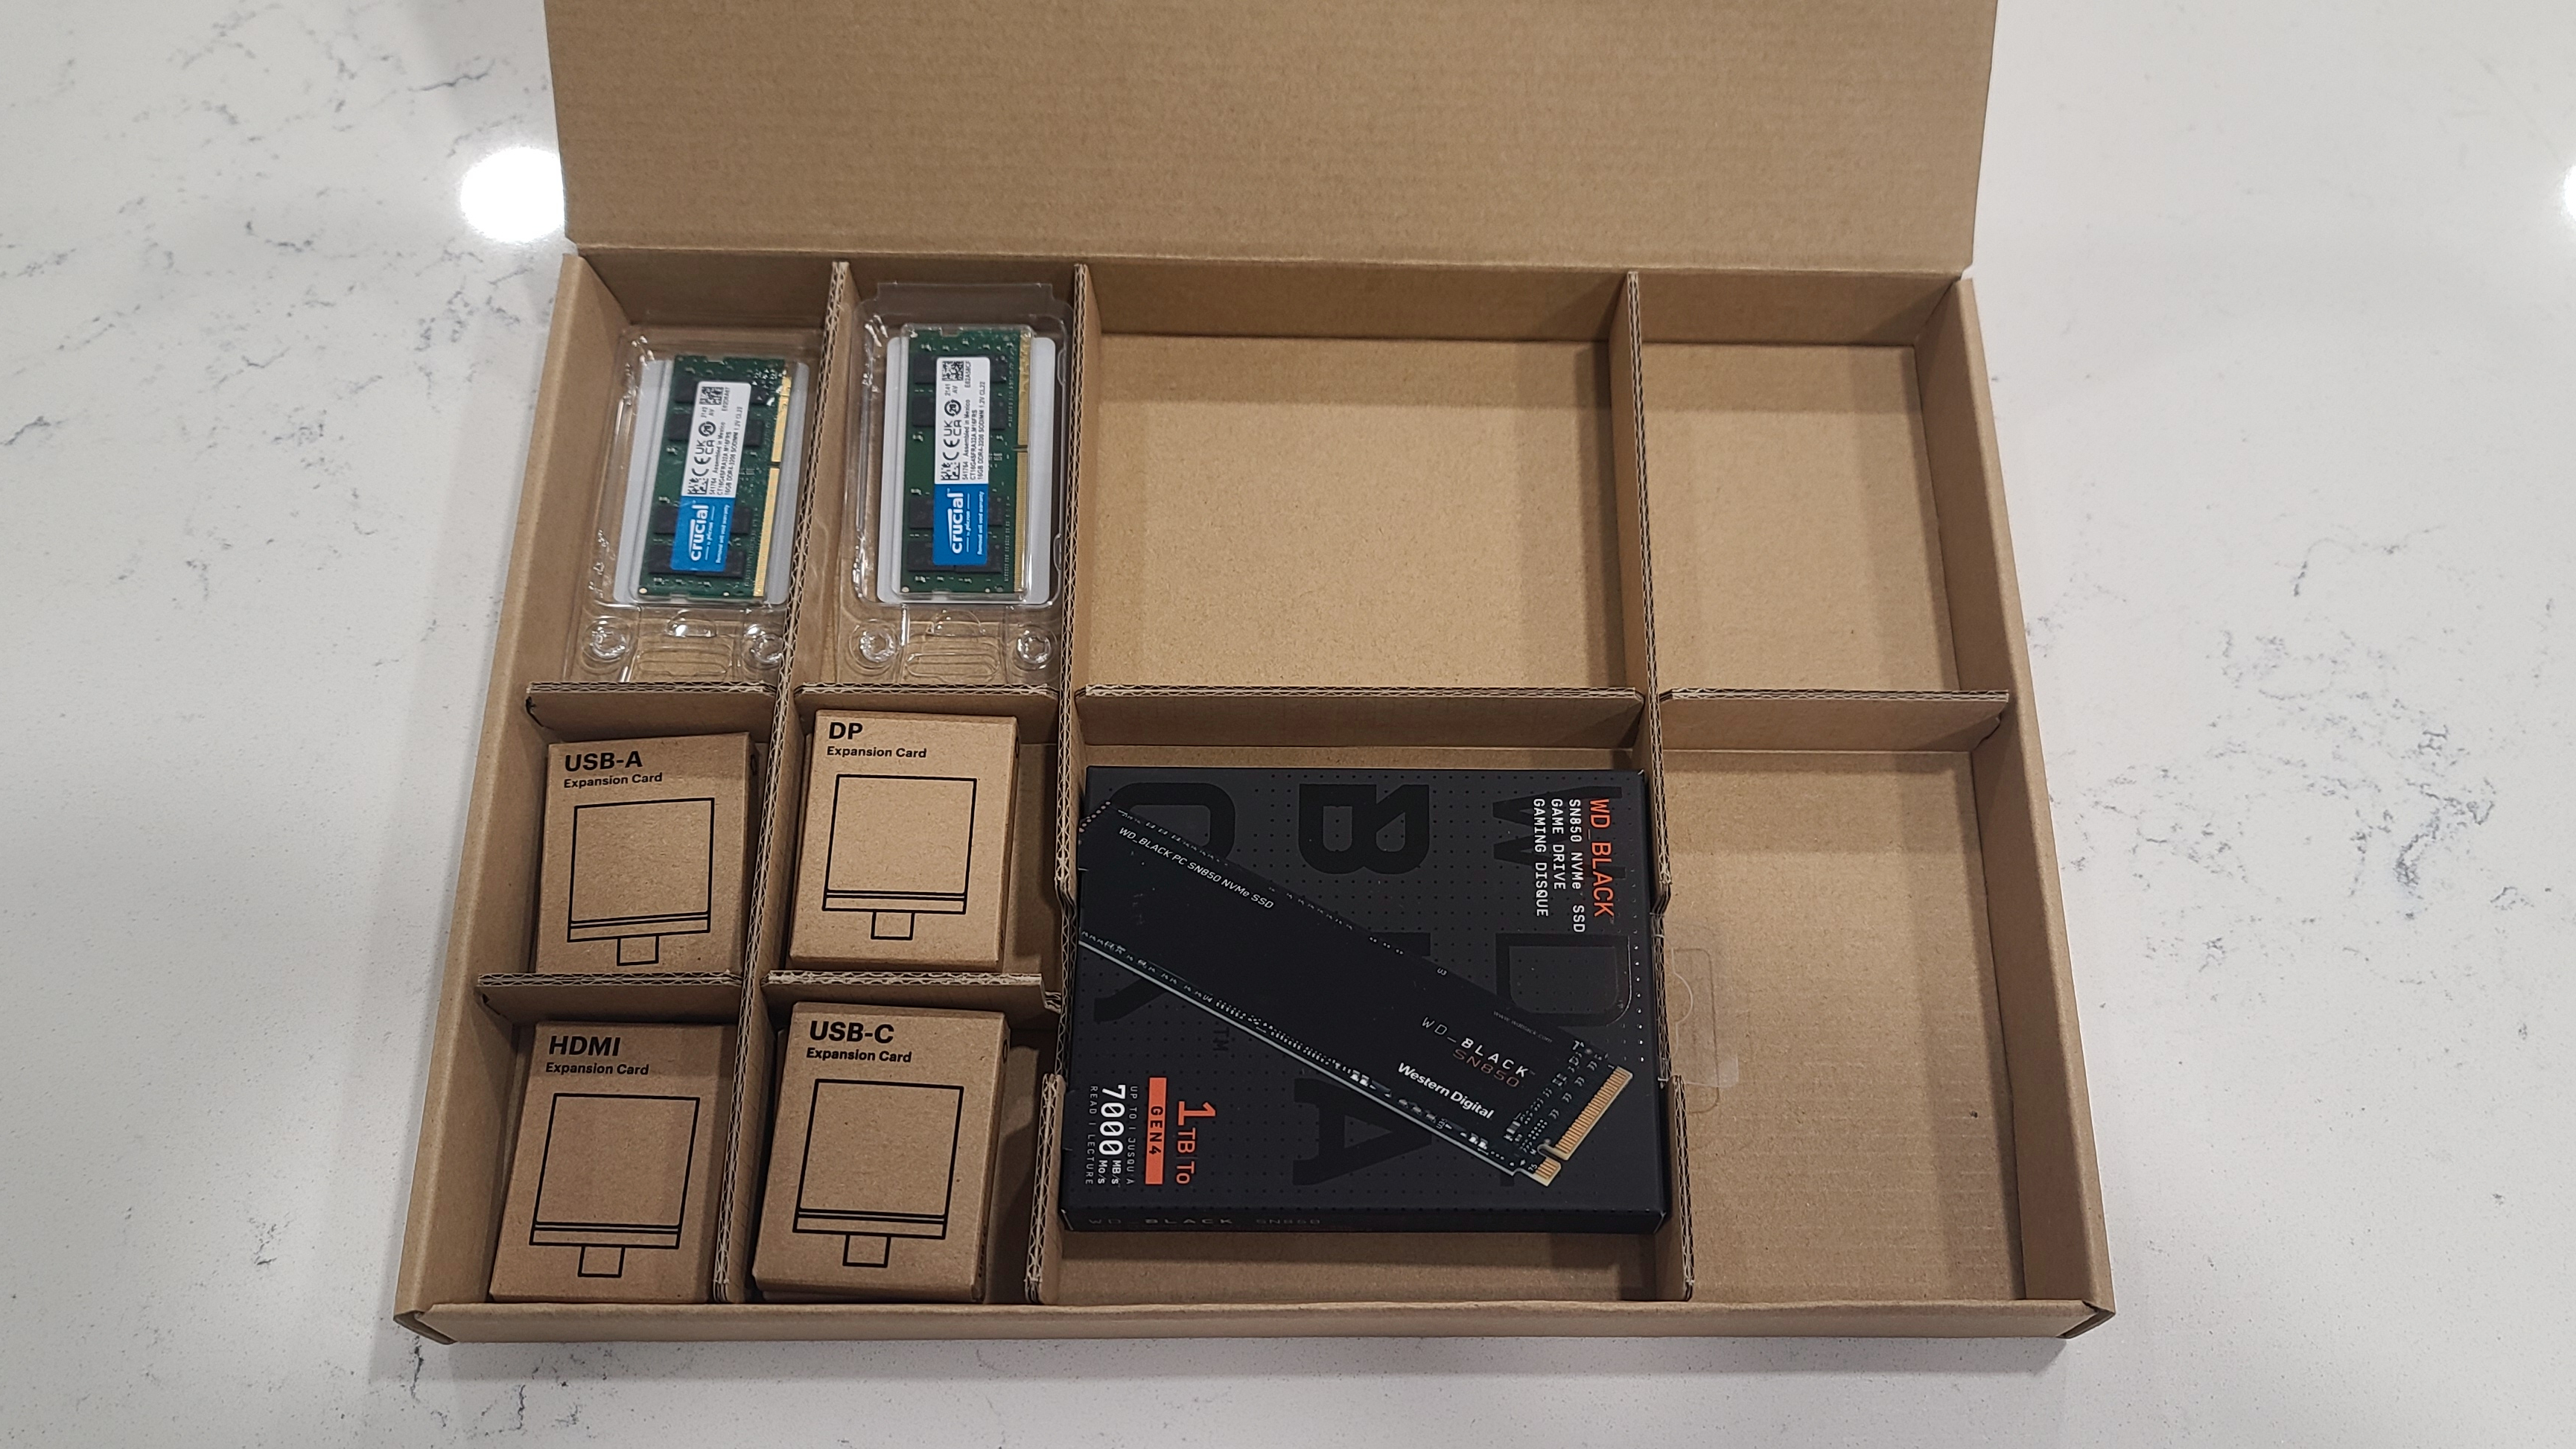
And all the individual components are arrayed, bento-like, in a third divided into tiny compartments. The RAM (in my case, two 16GB SO-DIMMs) and NVMe M.2 SSD (a 1TB WD_Black SN850) are especially distinguishable; the other hardware, which allows you to customize the ports to your personal preferences, come in their own cardboard boxes. (My selection comprised USB Type-A port, two USB Type-C ports, and HDMI, a DisplayPort connector, and a microSD card slot.
Get instant access to breaking news, the hottest reviews, great deals and helpful tips.
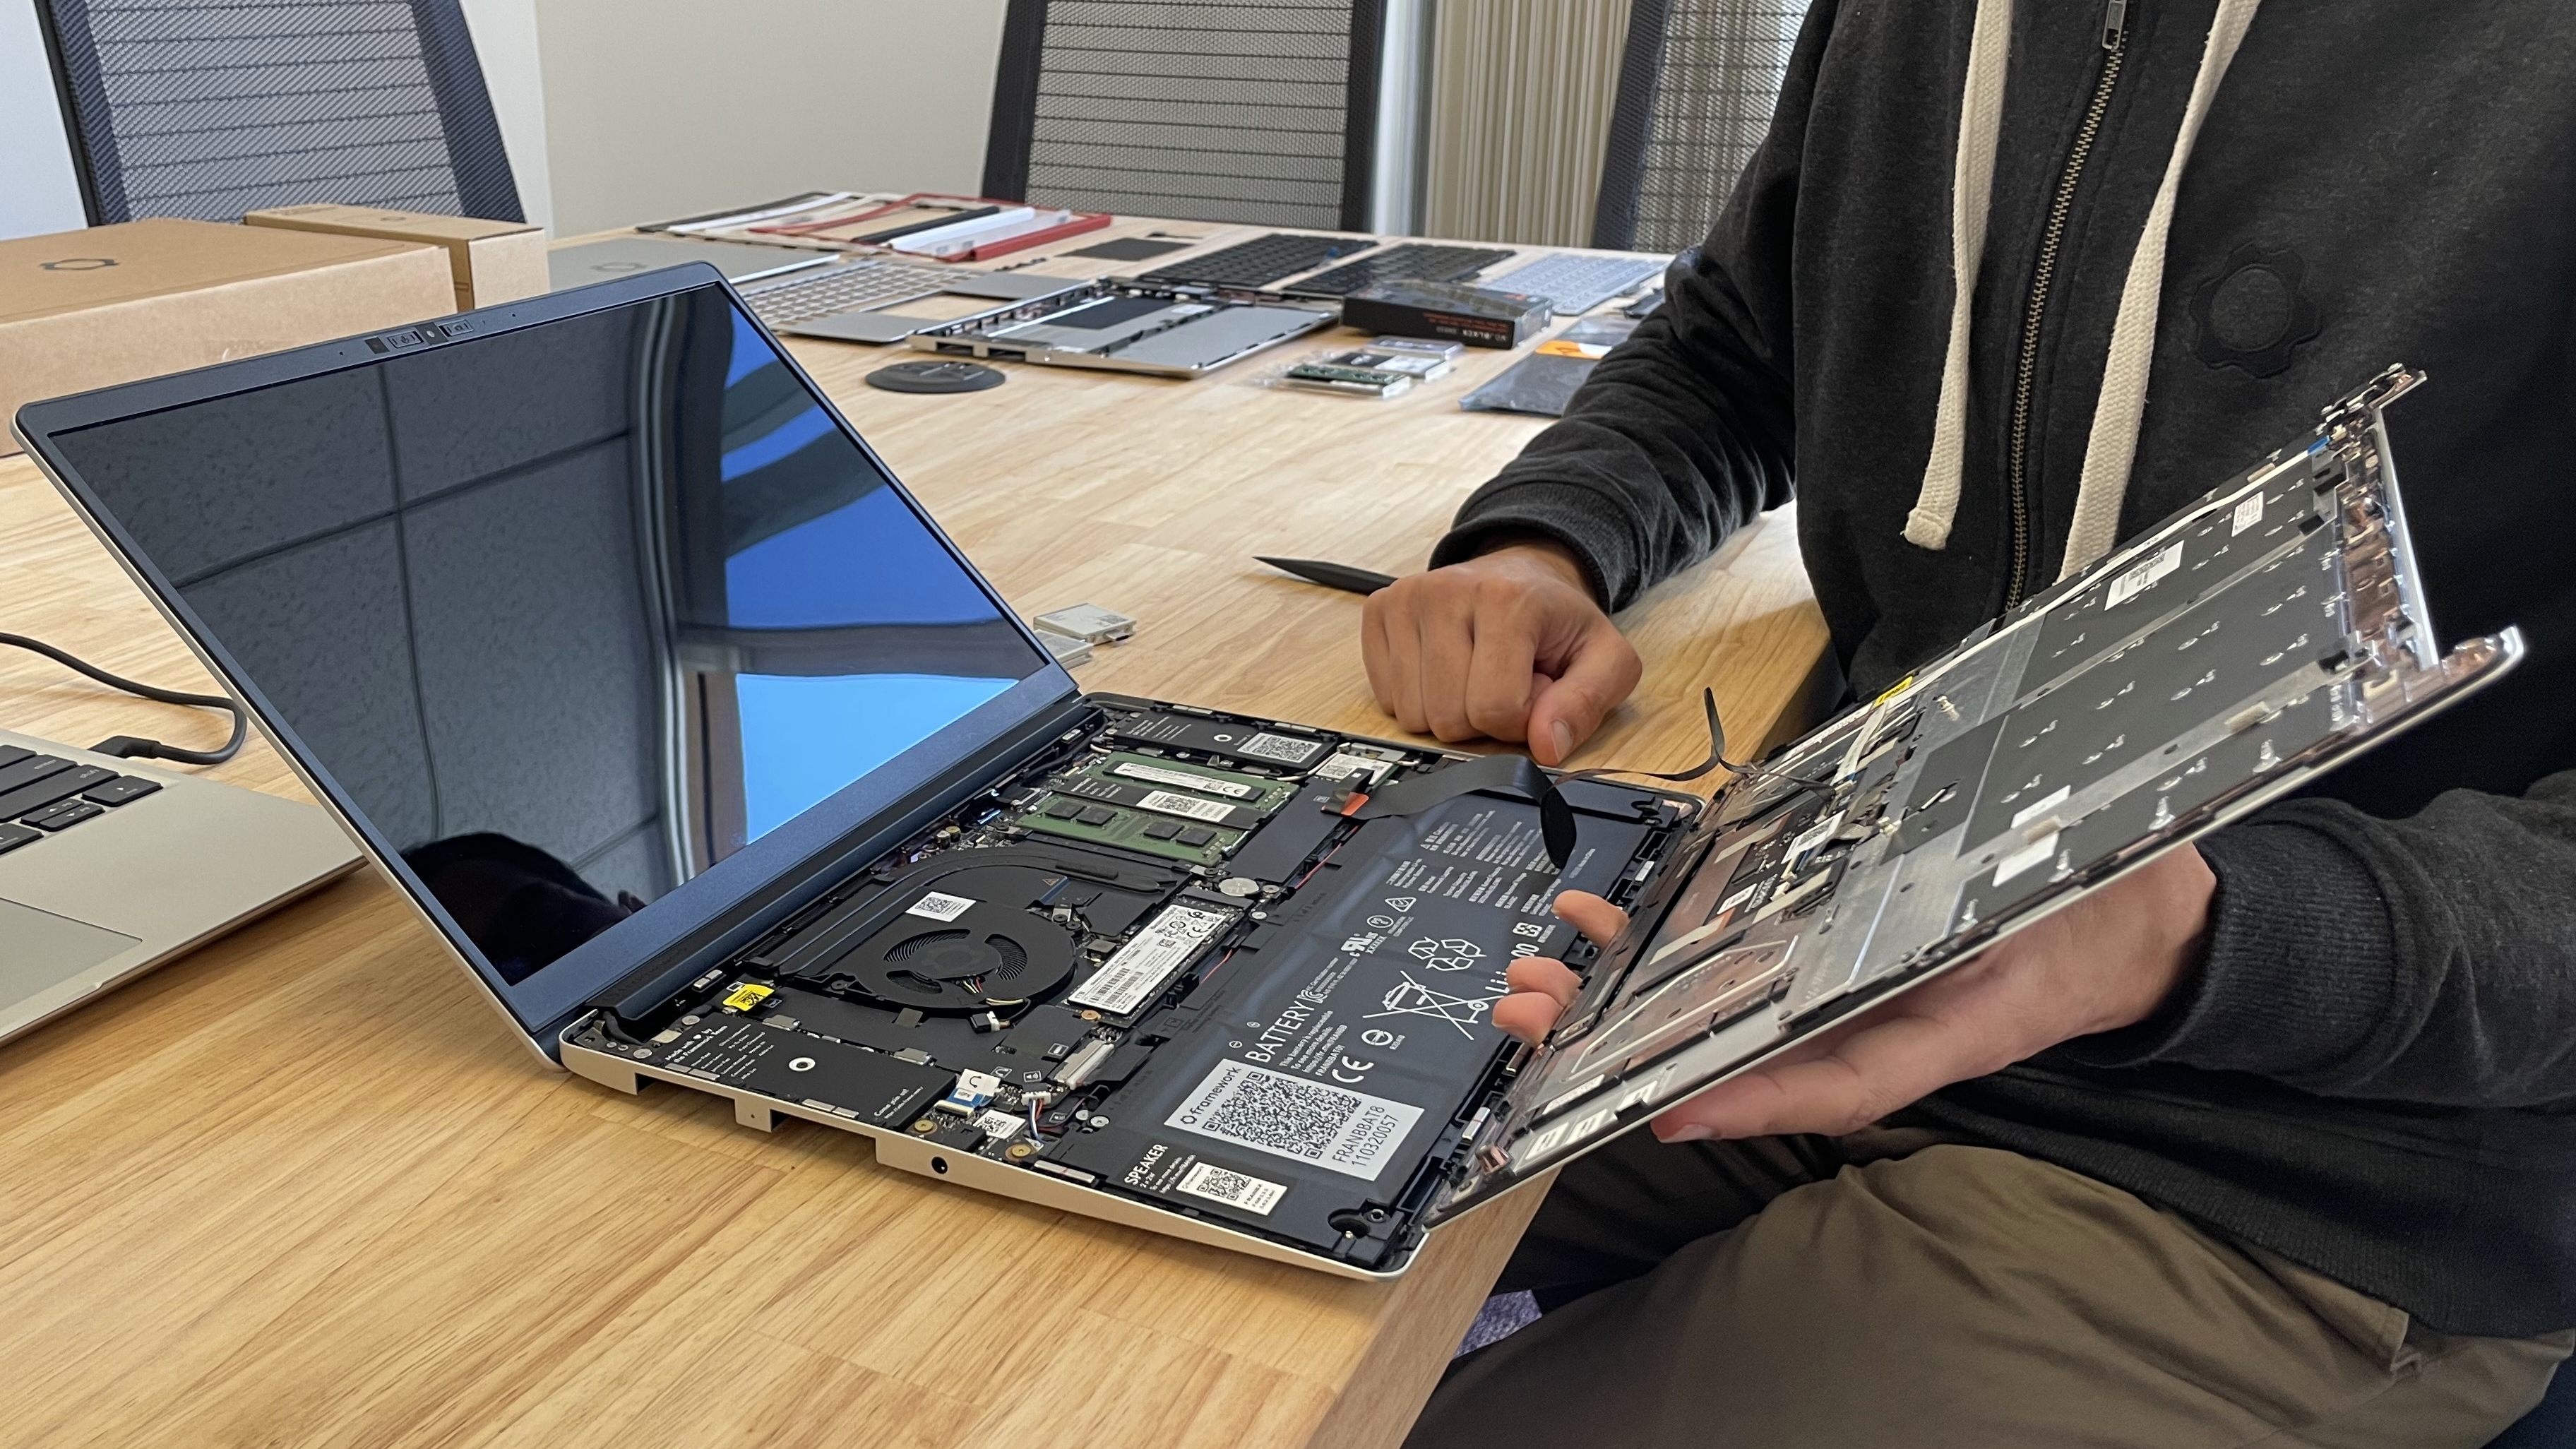
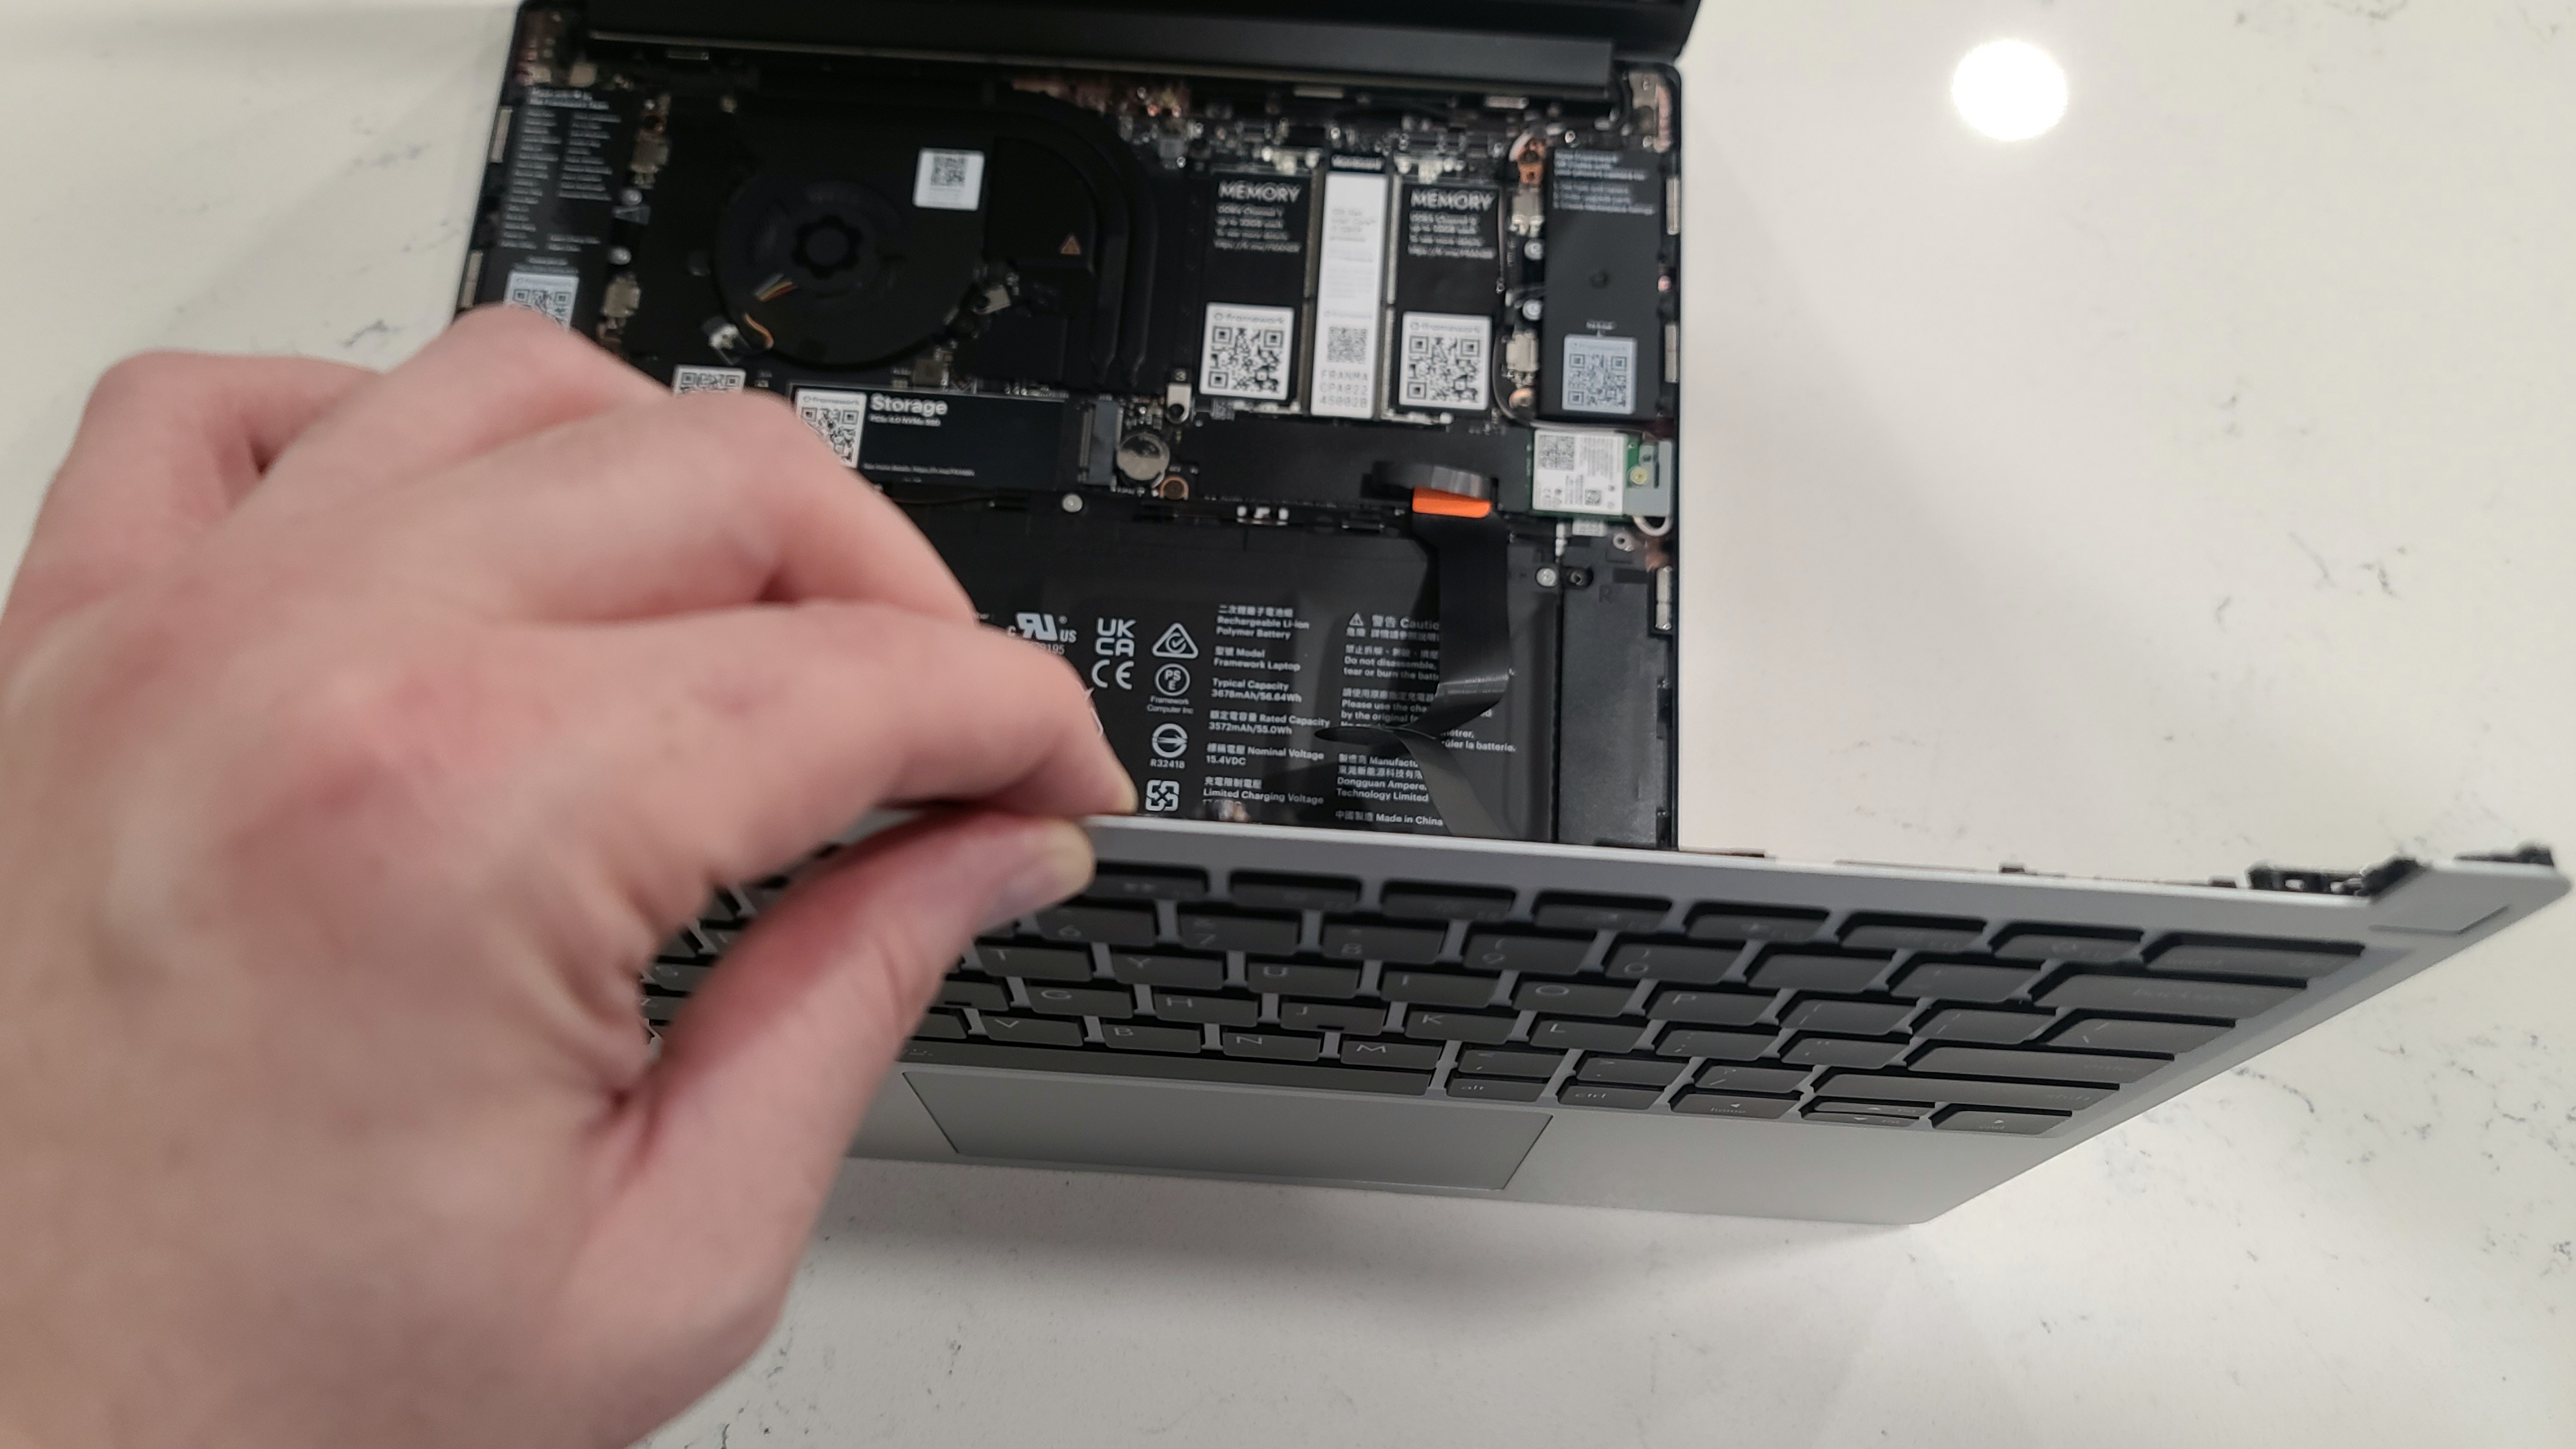
After opening what you need, all you have to do is open the laptop. Use the tool to loosen the five screws on the bottom of the case (don’t worry—they won’t fall out) and pry off the keyboard deck, and you’re already inside. The keyboard is connected to the motherboard by a flat cable on the right; I found it most convenient to unplug this, but you might not need to. Take care whatever you do, though—I came close to scratching the laptop’s screen while detaching the keyboard.
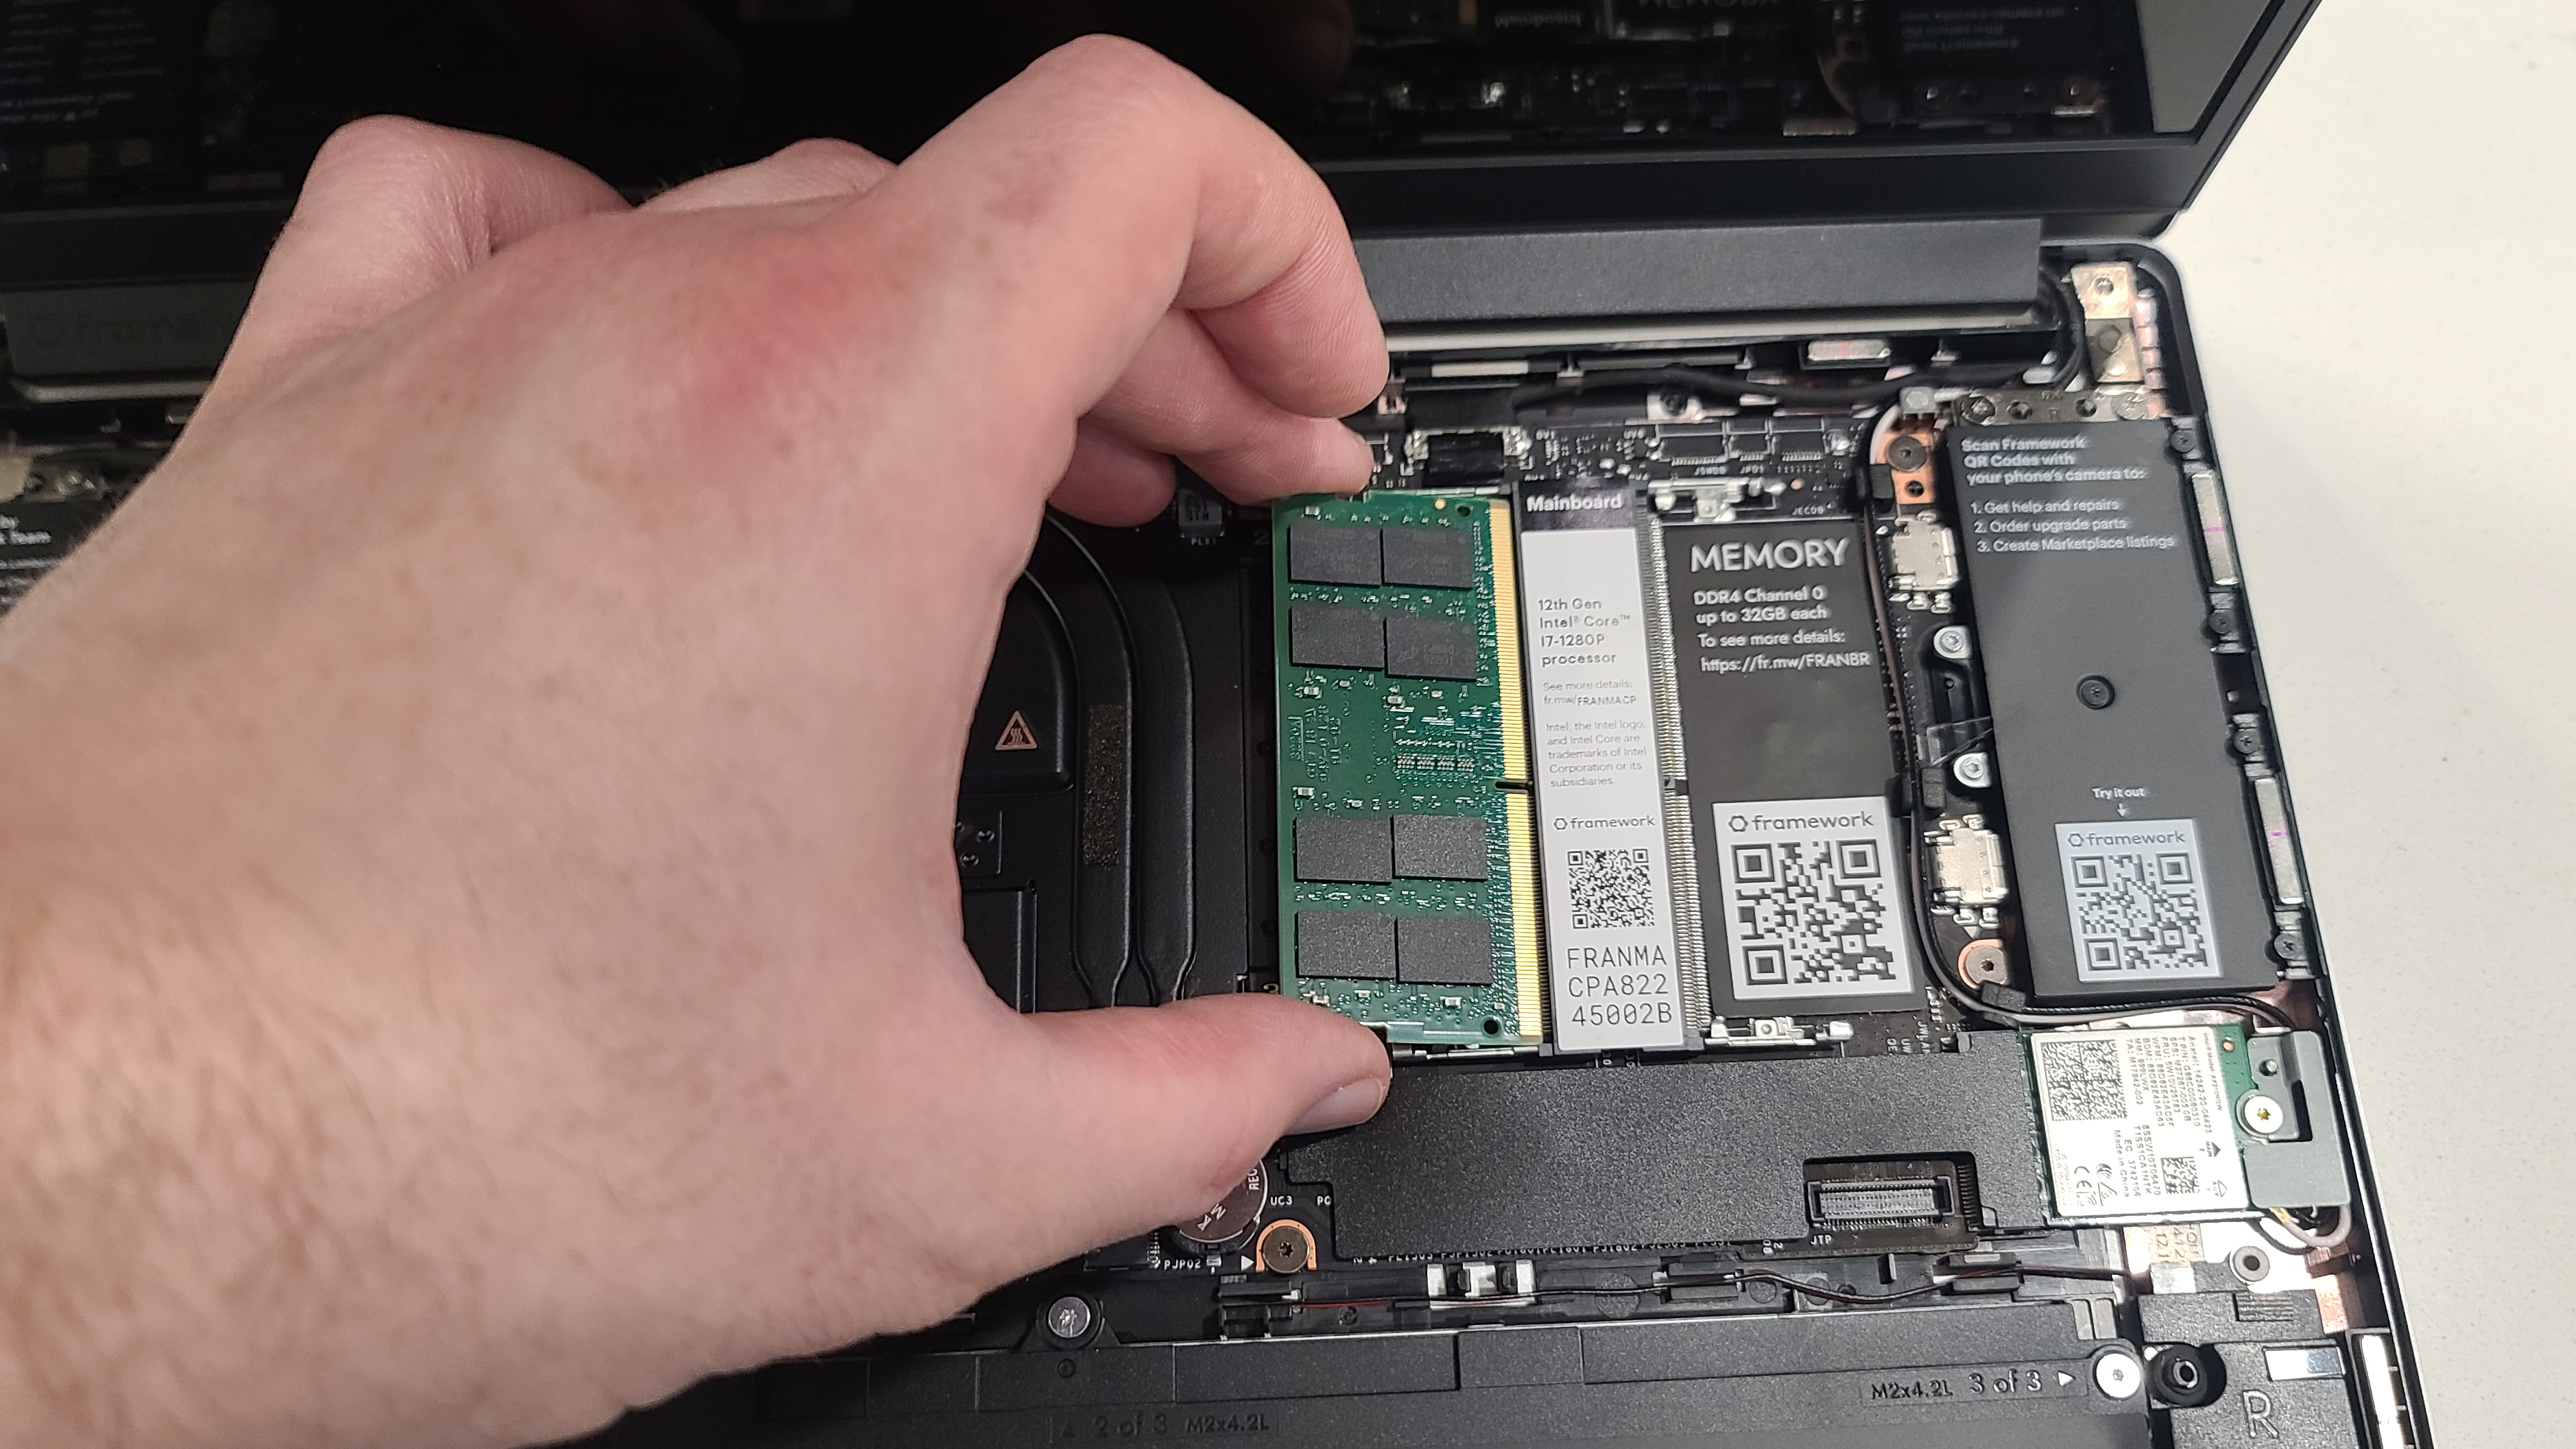
It’s bordering on cliché to say this, I realize, but that really is the hardest part. Adding the RAM is a simple matter of sliding the SO-DIMMs into their (clearly labeled) slots and then pushing them down until they click into place. (Since they only go in one way, you can’t mess this up.) The storage is essentially the same, though you will need remove and replace another screw to hold it in place.
On some models, you may also need to connect the Wi-Fi card and touchpad connector, but mine both came preinstalled. With less than ten minutes of work, I was finished with the interior and could close everything back up.
The final step is, if anything, the easiest. Adding the ports is a simple matter of turning over the laptop and inserting the cartridges (up to four) into their sockets until they click. If you change your mind or want to do something different later, just hold down the release lever (one per pair of sockets) and push the cartridge out. Note that you will need at least one USB Type-C port to power the laptop, but everything else is up to you.
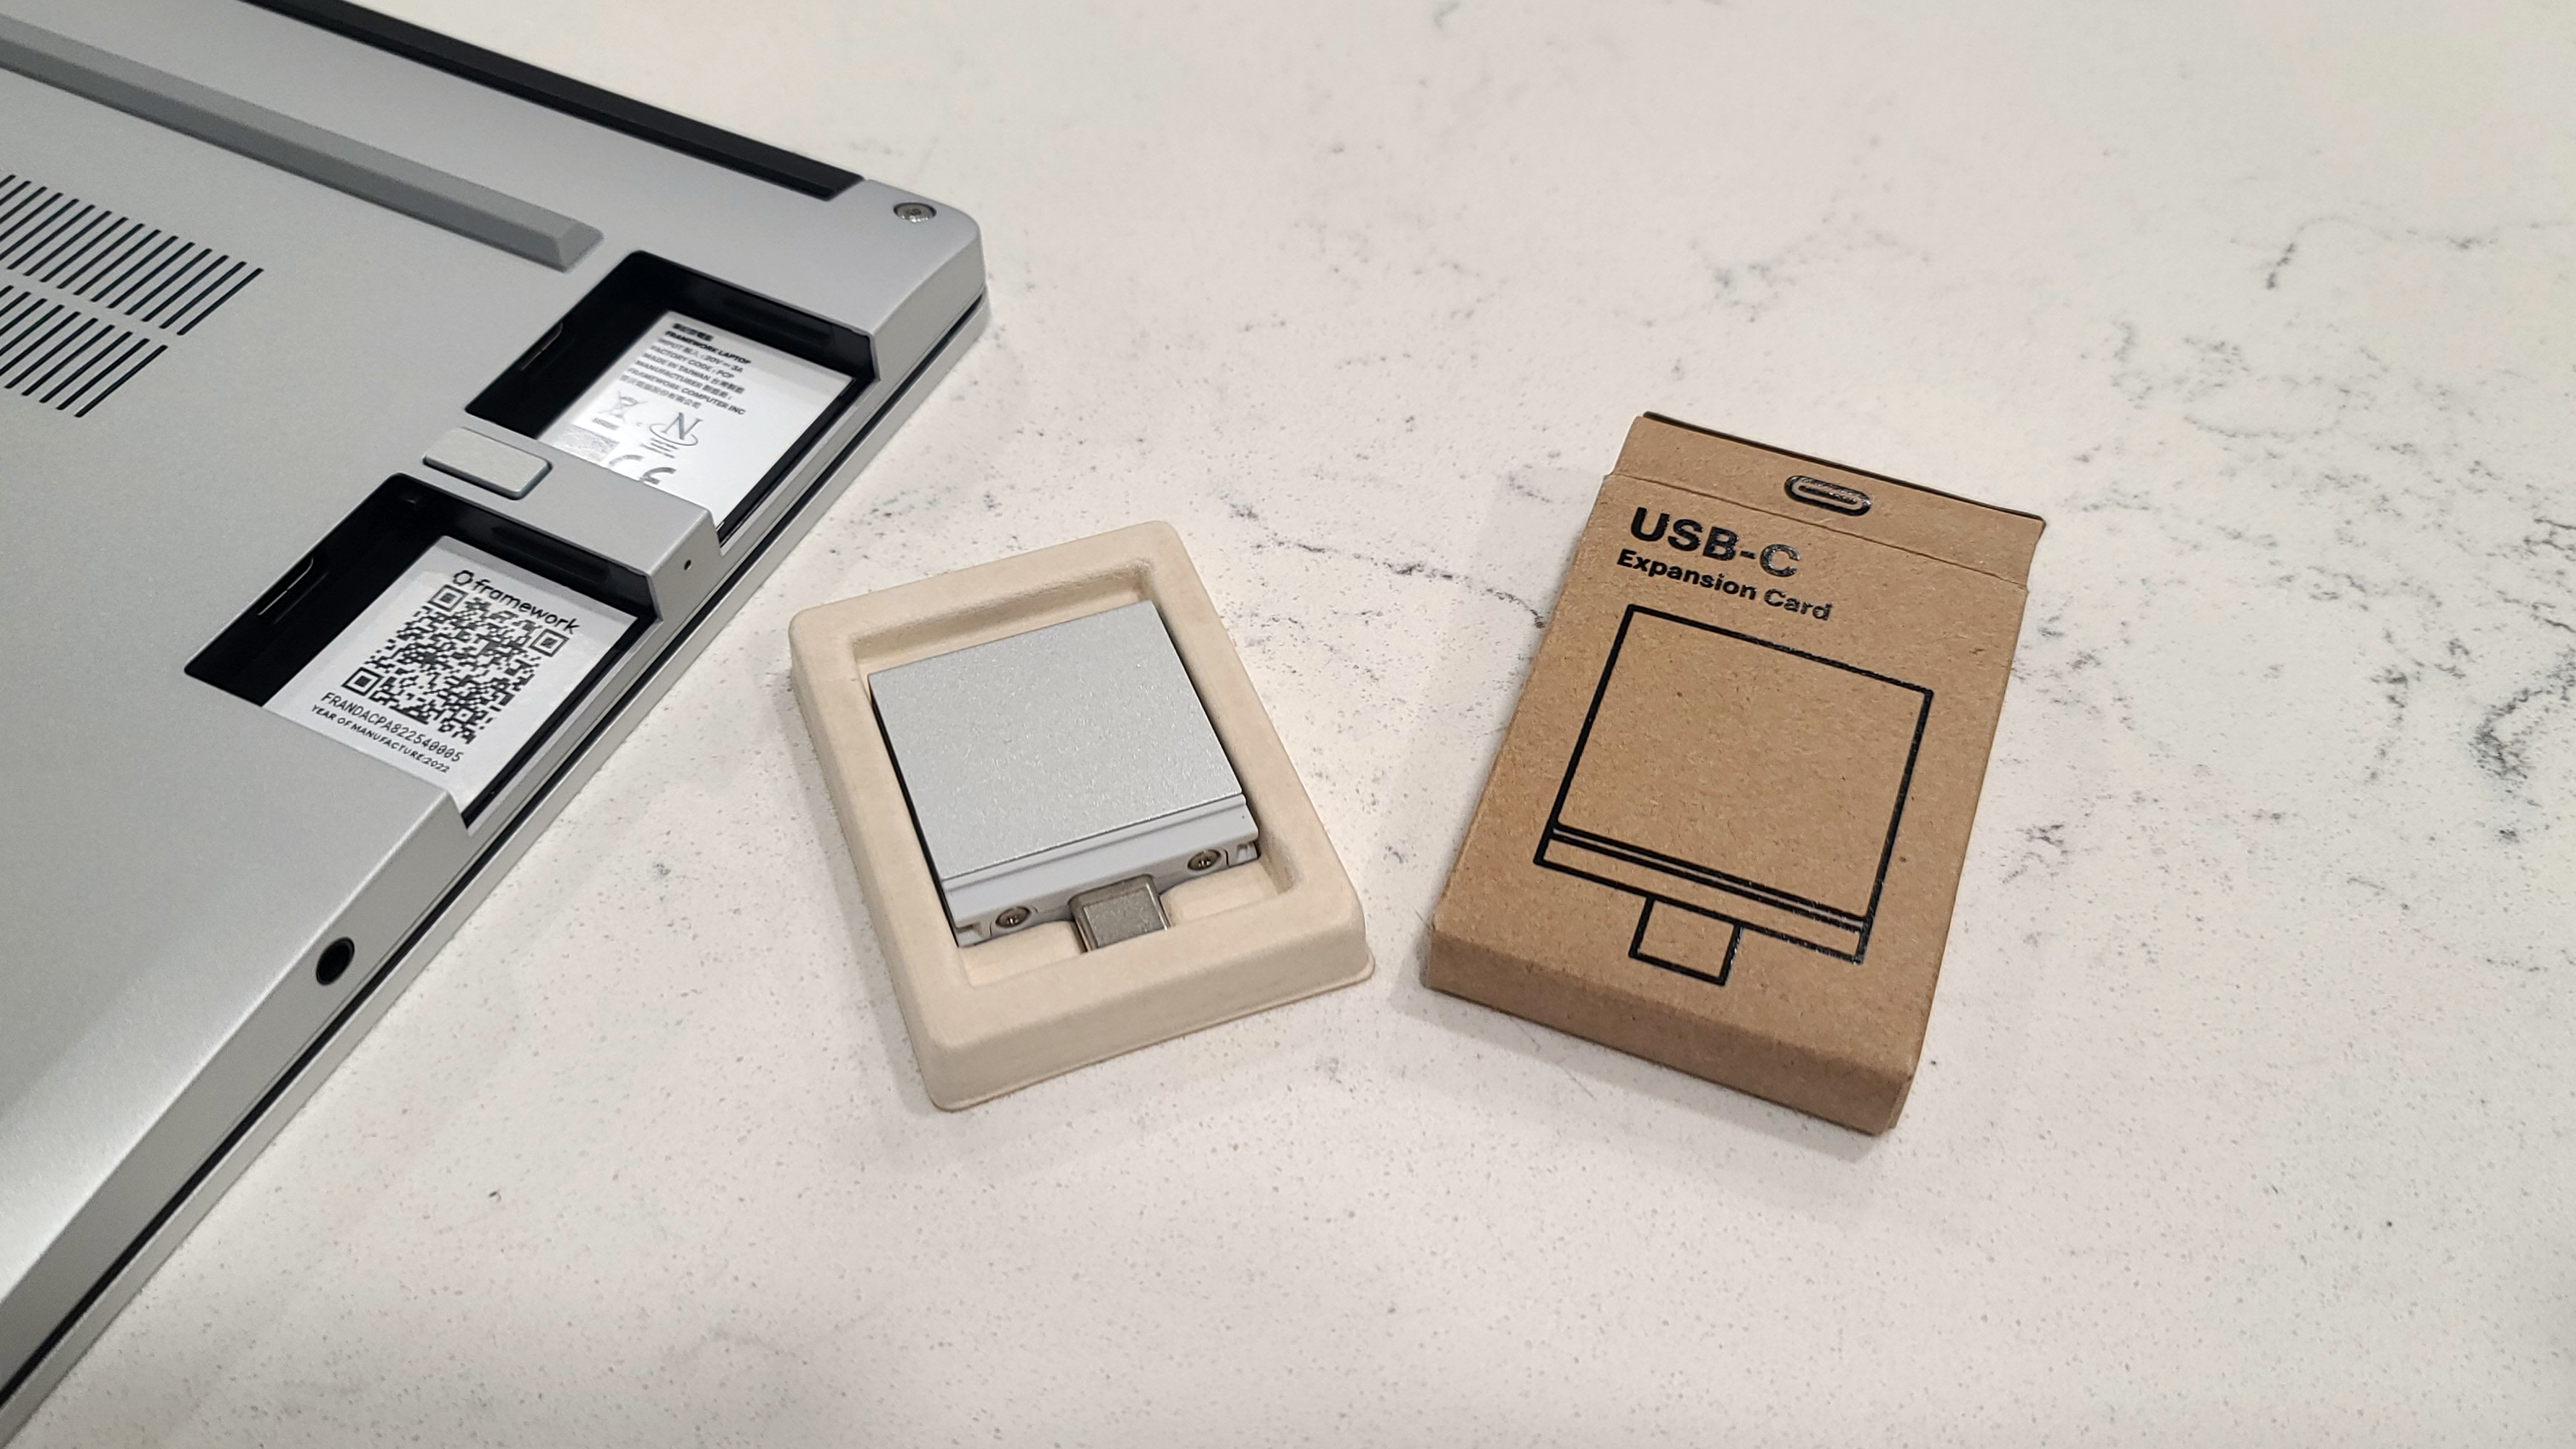
My unit came preloaded with Ubuntu; I’m not against it, but I knew I’d prefer Windows 11 for this application. That was just a matter of creating an installation key on another Windows PC then booting the Framework to it. After running through the standard setup procedure, the Framework was finished—and the same as any other laptop.
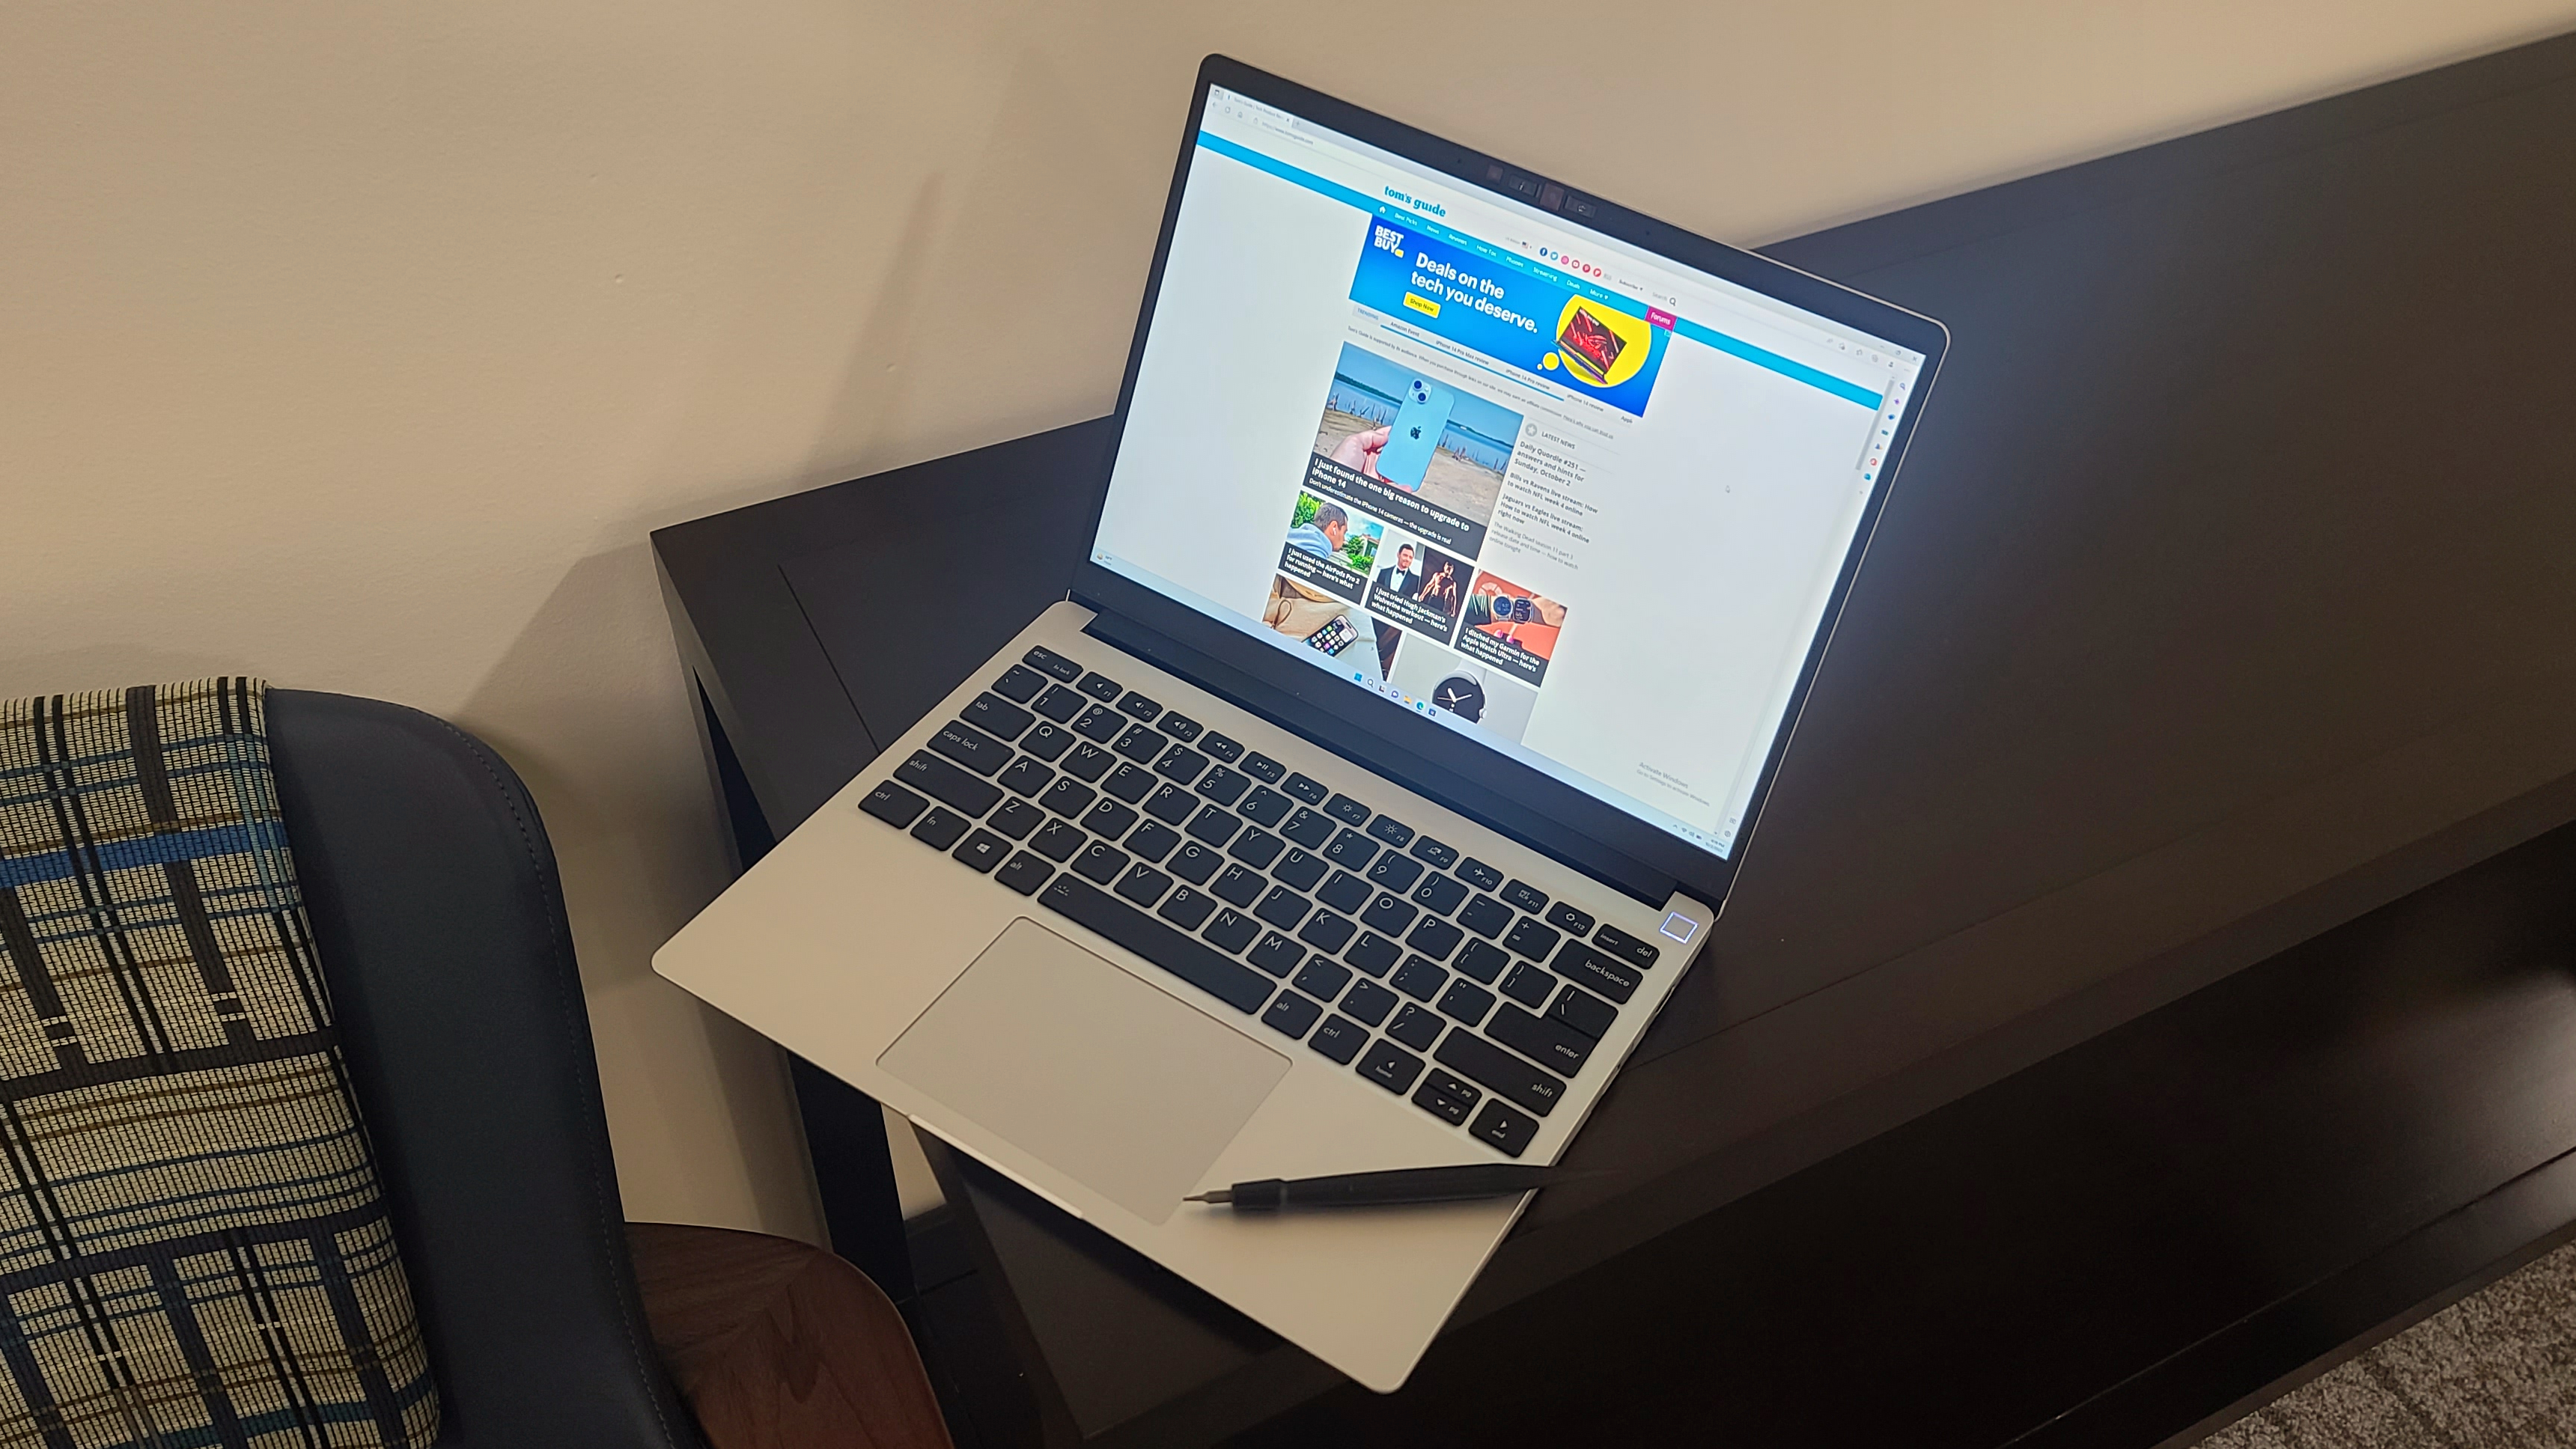
(It’s worth noting that although Framework provides highly detailed, illustrated installation guides on its website, you’re unlikely to need them if you have any kind of a computer hardware background. I didn’t even look at one until after I closed the cover and didn’t feel like I missed much, but first-timers may appreciate the guidance.)
Framework Laptop: Ready for work
For all that’s made of Framework’s design, we shouldn’t neglect that it’s a shockingly good performer.
As head of testing for Future, I work with scores of laptops every year—and the experience isn’t always great. I’m currently working on a budget laptop project for one of Tom’s Guide’s sister publications, so I’ve seen a lot of systems lately that haven’t met my entry-level requirements for port functionality and convenience.
That’s not a problem with the Framework. It offers a little of everything, so if I need lots of USB ports, I can add them, or if I need to connect to a certain kind of monitor, making that happen is a snap. If it’s handier to have the power jack on the left rather than the right, I can change it in seconds. No other laptop gives you this degree of dongle-free flexibility, and I love that aspect of it.

For all that’s made of Framework’s design, we shouldn’t neglect that it’s a shockingly good performer. The Intel Core i7-1280P processor, 32GB of RAM, and speedy storage in my unit were luxurious, and key to making the laptop as winning to use as it was to “build.” It starts quickly, loads programs rapidly, and made quick work of our usual suite of benchmark tests. The lack of a discrete graphics card means it’s not a gaming machine, but it doesn’t have to be. It’s thin (about 0.6 inches at its thickest when closed) and light (just under 3 pounds), and its comfortable keys with good travel and attractive, bright display (13.5 inches, 2,256 x 1,504 resolution) facilitate taking and using it anywhere for the kind of everyday computer purposes I most need a laptop for.
The one thing that could be better is battery life. In our test, which involves visiting a series of webpages over an active Internet connection until the power drains, it averaged around 7 hours, 39 minutes, which is fine if hardly exceptional. Given what else the Framework gets right, however, that’s not too terrible a sacrifice.
The world inside a Frame
Framework has labored tirelessly to future-proof this laptop to a degree I hadn’t thought possible. It’s worked with outside companies on its expansion cartridges to keep it current with new technologies. (The only two currently available that I didn’t see were the Ethernet port and the external storage expansion, but that’s today—tomorrow could easily be different.)
The company has also crafted open-source reference designs to allow the proprietary motherboards to find fresh, post-laptop life with other stands and cases of enterprising users’ design. In this way, the Framework could well be joining the Raspberry Pi as a new foundation of homebrew projects beyond what we can imagine now.
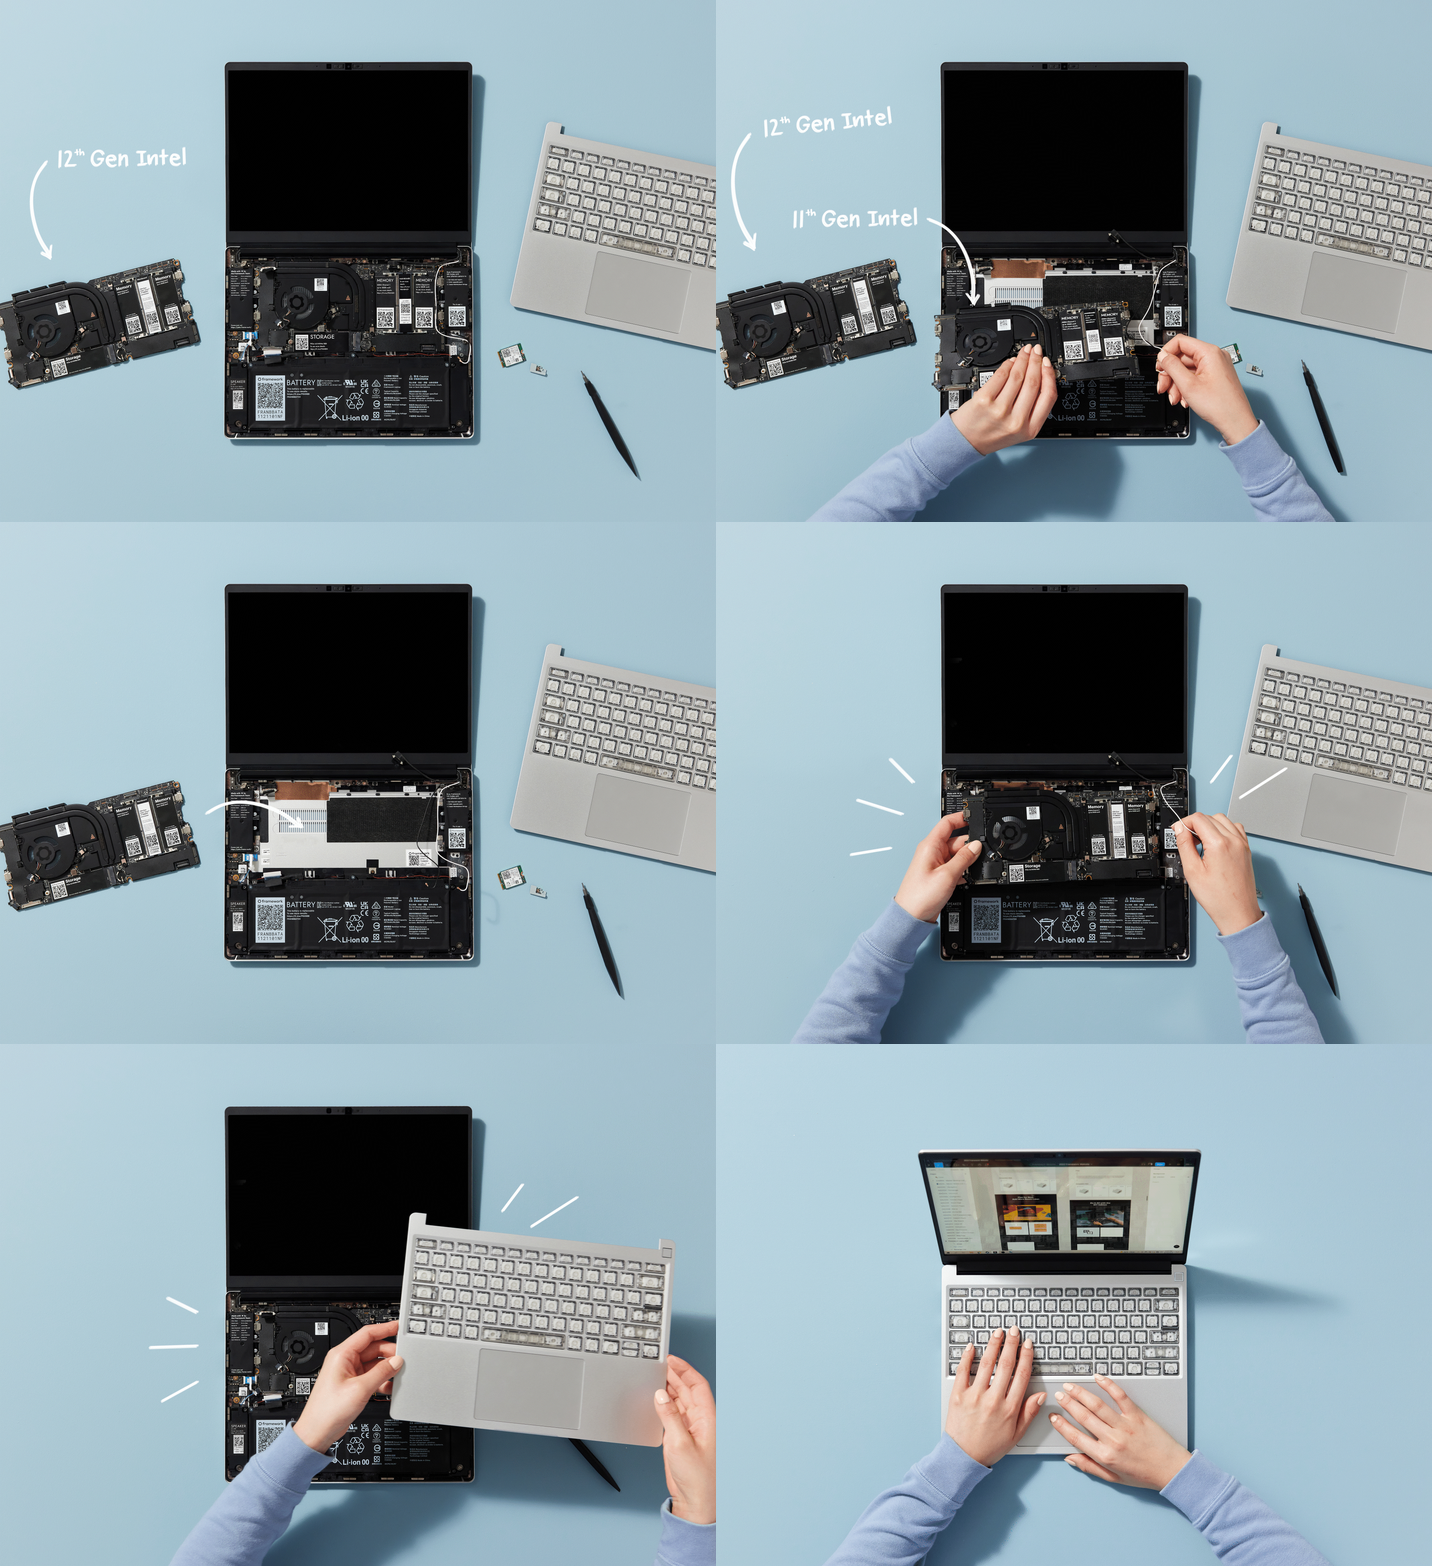
Those potential applications of the Framework strike me as far more exciting than the standard laptop. For as much as I like that for what it is, it still leaves me wanting more. While the cartridges’ swappability was a revelation, I still rarely had everything (the laptop I typed this on has eight ports), and older ports to ensure broader-base compatibility might not be in the cards.
The Framework collection of keyboard styles and bezels gives you some control over the system’s underwhelming aesthetics, but not much, and none of the current hardware will give you the oomph you need for demanding professional projects or games.
That’s part of why cracking open a desktop case and taking charge has always captivated me—there are no bounds on what your computer can do or what it can look like. Despite all the doors Framework has opened, there are still some unavoidable limitations. Of course, I’m old-school. Maybe too old-school these days given that I started my computing journey on Apple II compatibles (yikes) 40 years ago. But system building still has an inexorable power even the youngest among us can recognize in 2022.
I spent this past Labor Day helping a friend of mine and his 10-year-old son build their first-ever gaming desktop from scratch. Watching the kid solve problems on the fly with fan and wire orientation, figure out the best way to mount the power supply, and then turn on the computer and have it work the first time — it was magical. And it’s something that family will always remember and that will benefit the son for years to come in ways just beyond having a PC for his, cough, schoolwork.
He’ll know that he built it with his own hands and has control over its present and future, with everything—from the CPU to the motherboard to the graphics card—within his control. The knowledge of what he’s capable of will serve him in ways he won’t understand for years to come.
For its many virtues, the Framework DIY Edition laptop doesn’t offer that. It won’t replace what you get from building a real system, and if you’re a born tinkerer or technological malcontent, it’s probably not going to be for you, either. But for everyone else, it’s an all-around winner that more than lives up to its hype. So what if this isn’t something you can build completely from the ground up? It’s okay to leave that to the die-hard enthusiasts. If you’ve been craving a laptop you can upgrade and repair with ease, look no further.
Next: Here's what to expect from the big Surface event, including the Surface Pro 9 and Surface Laptop 5.And how to watch the Microsoft Surface October event 2022. And the Nintendo Switch Pro Controller is so good I wish I'd ditched the Joy-Cons years ago.
Matthew Murray is the head of testing for Future, coordinating and conducting product testing at Tom’s Guide and other Future publications. He has previously covered technology and performance arts for multiple publications, edited numerous books, and worked as a theatre critic for more than 16 years.
 Club Benefits


