Tom's Guide Verdict
This powerful, high-quality 3D printer offers a huge build space and excellent software. For those who need to produce large, high-quality prints, it will be a great pick.
Pros
- +
Fully enclosed design makes printing quieter and less stinky
- +
large print area
- +
excellent print quality
Cons
- -
Detachable print bed is a little awkward and takes a long time to heat up
- -
occasional printing glitches on some objects.
Why you can trust Tom's Guide
Who it is for: Designers or others who need large, high-quality prints.
The $1,899 TierTime UpBox is a high-end 3D printer that offers a lot of features for the serious user, without some of the more off-putting aspects of other printers. The device has a larger print area than most 3D printers, and an enclosed design that makes printing quieter and produces less of the popcorn or burning-plastic smell that other 3D printers leave hovering in the air. It also comes with great software that is simple to use. The UpBox does have some quirks, though: It struggled with some of the fine detail on some of our test prints, and the removable print bed is sometimes awkward to remove and replace.
Design: Fully Enclosed & Filtered
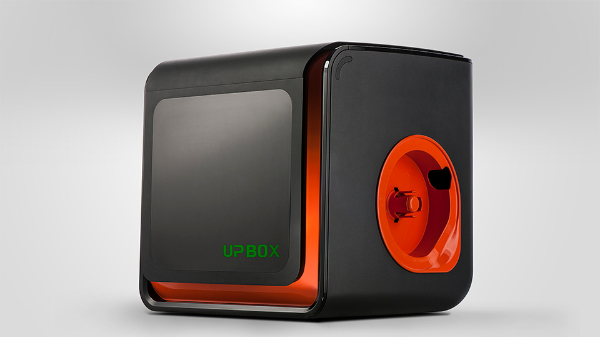
A square box that's more than 19 inches wide and deep, and 21 inches high, the UpBox is certainly an imposing printer. With a black plastic exterior and orange details, it looks like a modernist sculpture. That certainly ties in with the industrial approach to printing that this device offers: The UpBox is all about professional quality printing in quantity.
The case features two doors: one on the top and one on the front, providing access to the interior. The front door includes a tinted plastic panel that allows for a view of the inside, but only when the LED lighting is turned on. On the right side, a round panel covers the filament spool.

The magic happens inside the case, with a large print bed measuring just over 10 inches wide and 8 inches deep. This provides one of the largest print areas we have seen in a 3D printer — the maximum print size the UpBox can handle is an impressive 10 x 8 x 8 inches, for a total of 640 cubic inches. Compared to the 456 cubic inches that the current (and more expensive) MakerBot Replicator offers, the UpBox feels positively spacious.
MORE: 8 Awesome 3D Printing Trends to Watch
Most printers use a glass or metal print bed. The UpBox takes a different approach, with a metal print bed covered by a detachable sheet of perforated plastic. Rather than having to remove a print from a fixed print bed inside the case, you can detach the perforated board after the print is completed, and then remove the print from the board outside the printer. The approach works well, though we did run into some issues when replacing the print bed, which we'll detail below. The UpBox's single printhead is located at the top of the case; the print bed rises up to meet it when printing.
Get instant access to breaking news, the hottest reviews, great deals and helpful tips.
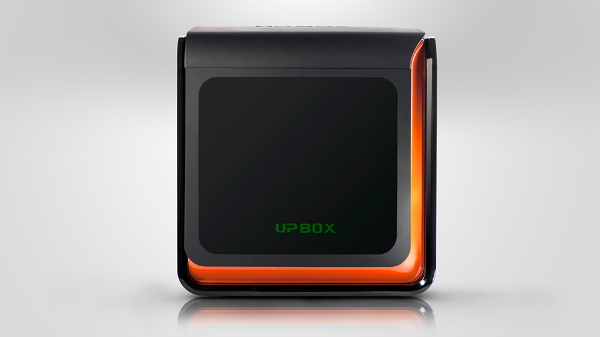
One definite plus here is a HEPA air filter built into the UpBox's case, which cleans and recirculates the air inside the printer case. This definitely helps to get rid of the smells often associated with 3D printing: We didn't detect any of the usual melting plastic or popcorn aromas from printing using ABS or PLA filament. The UpBox is the only 3D printer that we have tested that uses a filter this way, but we wish more did so.
Print Materials: ABS and PLA, with Others Coming
The UpBox can use any 1.75-millimeter filament on a standard spool. There are no chips or special spools that restrict the materials you can use for printing. This means you can use the supported materials (ABS, PLA) or experiment with the new filaments that are now available to simulate materials like wood, stone and others, as well as flexible ones like NinjaFlex. Currently, TierTime supports only PLA and ABS, but it plans to add support for other materials in the future.
Print Quality: Excellent Detail
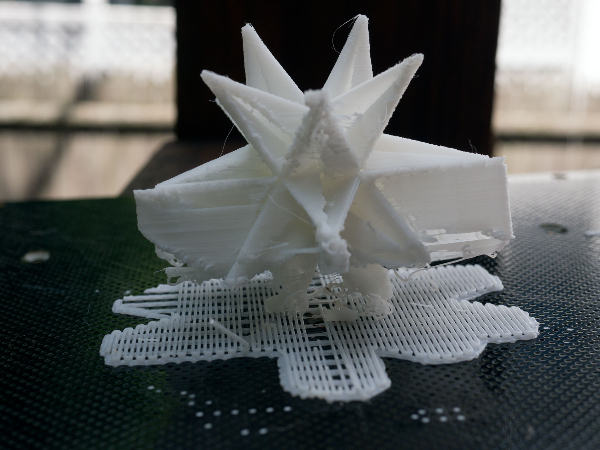
The UpBox turned out very-high-quality prints in our tests, consistently producing 3D prints with excellent detail, smooth surfaces and very few glitches. We test our 3D printers using three models: a geometric sculpture, a set of gears and a scan of Rodin's "The Thinker." The geometric sculpture model is a tough one to print, as it involves a lot of overhangs and sharp edges that test the printer's ability to control the movement of the printhead. The UpBox struggled with some of the fine details on this print. The edges and tips of the sculpture were not sharp, with some edges looking more like saw blades than smooth planes. And some of the sculpture surfaces didn't form properly, leading to a few missing parts, like the pointed tips of the sculpture on the bottom of the print.
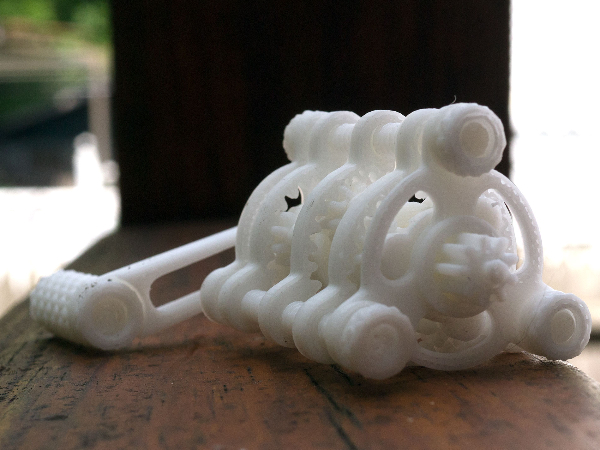
The set of planetary gears proved to be no issue for the UpBox, though. The 3D-printed parts that form the gears were printed without hassle, and we could assemble them easily. Because these parts have to screw into each other for the model to work, this is a tough test; the prints that many 3D printers produce require a lot of trimming before they will fit. The UpBox produced one of the cleanest prints of this complex model that we've seen, with only a few whiskers of plastic needing to be trimmed from the printed parts. The printed parts fit together easily, including the often finicky screw bolts that hold the final mechanism together.
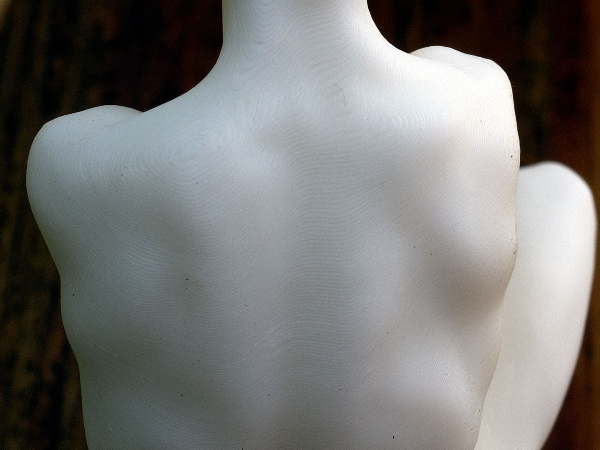
Rodin's classic "Thinker" sculpture proved to be no challenge for the UpBox: It produced an excellent print of the sculpture from the 3D scan. This print had excellent levels of detail and clean, smooth lines that mirrored the original.
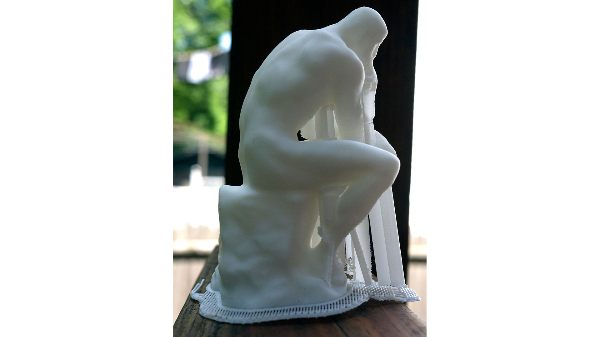
There was little evidence of layering; the different layers of the print were blended smoothly, even on difficult areas such as the shoulders and head that tend to show the layer-cake effect.
Setup: Simple and Straightforward
It took us about 35 minutes to get the UpBox up and running — one of the quicker setup times we have seen. Unpacking the printer and installing the filament is a straightforward process, with plenty of guidance in the manual. The only issue was some confusion over how the filament fed into the printhead. It feeds through a small hole on the right side that isn't labeled or marked. I did find it eventually (right below the fan that cools the printhead), but it took a little time.
MORE: How to Buy the Right 3D Printer
Once the filament is in place and the software is installed, you can run the setup routine. This automatically tests the UpBox, checking the level of the print bed and determining the distance between the printing nozzle and the surface. We had no problems using the automatic setup, which is certainly much easier than the manual process involving manual tweaks and screw adjustments that many similar printers use.
Interface: Simple Software, No Screen
The UpBox has only three buttons, located on its right side. There is no screen here; instead, the printer uses the color of the LED light behind the logo and a strip of LEDs above that to indicate its status (blue for ready, green for heating up, and so on) and the progress of the print. Everything else is controlled through the included Up software.

This software is simple to use and provides the features that 3D printing requires, including the ability to import 3D models in STL format. Other formats are not supported, but there are a number of online tools available that can convert those formats to STL.
Once you've loaded the model, you can scale it, rotate it, shift it on the print platform and easily manipulate it. The software can also combine several 3D models to print at once (a process sometimes called plating), and provides a preview of the model and the 3D-printing process. The preview of the model is cleanly rendered, allowing you to spin the model around and zoom in and out to spot any possible problems.
The Print button starts the printing process, with the software first slicing the model into the layers that the 3D printer will work on one at a time. You're given an indication of how long printing should take, and how much plastic filament it will use. When you hit OK, the software sends the model to the 3D printer.
Print Process: Quiet and Straightforward
The UpBox is unusual in that it can run untethered. Once the Up software has sent the model to the printer itself, you can turn the computer off, and the printer will run on its own. That definitely makes it easier to produce larger prints. The Up software can also connect and monitor several printers at once — a definite plus for anyone who wants to produce lots of prints.

The UpBox is a very quiet printer. The main noise that you hear while printing is the whoosh of the air filter and a quiet whirring from the mechanisms that move the printhead. Neither of these sounds is audible from more than a few feet away, and they are certainly less obtrusive than the sounds that come from most 3D printers. In fact, the loudest noise the printer makes is the beeping noises it makes when starting or finishing a print. You aren't likely to miss those; my cats found them rather annoying.
MORE: Top-Rated 3D Printers on the Market Now
The UpBox's removable print bed did cause a few hassles, though. The removable perforated piece of plastic is held in place by a number of metal lugs. You slide it into place, but getting the board into place on these lugs is rather awkward. If you miss one, the bed won't be level.
The print bed's distinct style means it needs to be heated to only about 80 degrees Celsius (176 degrees Fahrenheit) — most printers require temperatures higher than 100 C (212 F) — and the printer took about 15 minutes to get up to that temperature — which is a little longer than most printers take. TierTime told us that it's upgrading the UpBox to use a larger power supply that should allow for faster heating, though it didn't provide specifics about the timing. Even with this lower temperature, the prints stick to the perforated board very well — perhaps too well, in fact, as it is often hard to remove the prints. We often found ourselves having to remove the print bed and using a metal scraper to lift the plastic off the print bed. TierTime does supply four print-bed boards with each printer, though, so you can start another print while you hack away at the previous one.
Print Speed: A Slight Edge
The UpBox is a slightly faster printer than most, but the difference is not huge. It took 5 hours and 23 minutes to print our 3D scan of "The Thinker" on the Turbo preset quality setting and 8 hours and 48 minutes on the Fine preset, the highest-quality setting. That's a good spread of speeds that compares well with those of other similar printers, like the LulzBot Mini (whose times ranged from 4 hours and 46 minutes to 7 hours) and the SeeMeCNC Orion, whose times ranged from 6 hours and 32 minutes to 17 hours and 32 minutes).
Bottom Line: Smart, Powerful Printing — at a Price
The UpBox is a smart, sophisticated printer that we recommend, particularly for anyone who needs large, high-quality prints. The straightforward software and untethered printing would make it a good pick for an office or design studio that needs to produce a large volume. It's also flexible, and capable of producing large prints and several smaller prints at once. The UpBox isn't glitch-free, though. The sharp edges of our geometric sculpture test proved to be a challenge for it, and the removable print bed is rather frustrating to replace. Still, these are small problems for a large, flexible and well-equipped printer in this price range.
- 100+ Tech Gift Ideas
- 3D Printing Services Reviewed: Do They Really Work?
- The Best Gaming Desktops Available Now
Follow Richard Baguley @rbaguley or on Google+. Follow us @TomsGuide, on Facebook and on Google+.
Richard Baguley has been working as a technology writer and journalist since 1993. As well as contributing to Tom's Guide, he writes for Cnet, T3, Wired and many other publications.
-
fios-dave I'm waiting for a combination 3D scanner/3D printer!Reply
I can envision making 3D busts of all my family and friends.
This would also allow you to make replacement parts before they are needed,
like those pesky trap doors for the battery compartments that always seem to disappear!
