 Club Benefits


Get a Strong Wi-Fi Connection and Keep It


Soon you’ll be able to browse the net and check Facebook from your favorite spot in the home, without worrying about getting disconnected. If you’re a performance hog, or enjoy streaming shows from Hulu or online gaming, you might also see an improvement when near the edge of your Wi-Fi coverage.
Before you fix the problem, you might want to know why you’re here in the first place. Well, there are numerous causes for poor wireless range. If you’re lucky, it’s simply because you have a large home. Newer wireless N routers can give you up to a few hundred feet of range. However, the reach of the signals vary greatly upon the inter-makeup of the building. Plaster walls, for example, slow the signal down more than plain drywall. So, even if you don’t have your mansion yet, your stock wireless router might not even cover your rental or starter home.
Article continues belowFind the Sweet Spot for the Router
Before you throw money at the problem, you should first check that your wireless router is placed in the right spot. Remember, the router is sending the Wi-Fi signal in all directions equally, more or less.
The illustration below shows an example of how a router placed in the corner of the home might not provide whole-house coverage.

Therefore, putting the router as close as possible in the center of your desired coverage area (think vertically and horizontally) will usually give you the best range, as depicted in the next illustration. Don’t just pick the middle of your home, think about which rooms really need coverage.

As you might remember, your Internet modem is connected to the router. So you need to consider the locations of cable or telephone outlets; cable if you have a cable Internet connection and telephone if you have DSL Internet. This will limit where you can place the router.
If it looks like there is a better spot for the router where you can also hook up the Internet modem, go ahead and try it. Then see if it fixes your connection problems. If not, you can try the other techniques that follow.
Create a Virtual Access Point
A new feature that debuted in Windows 7 lets you create what Microsoft calls a Wireless Hosted Network. It essentially makes your wireless adapter a virtual wireless router, even when you’re connected to another wireless network. Other Wi-Fi users can connect to the virtual router. They’ll get Internet access through the host’s connection.
This can be a temporary or permanent solution to get the Wi-Fi signal extended to a computer outside the router’s coverage area. If you have a Windows PC or laptop that gets a good connection to the router, and it’s in between your router and the computer that’s having problems connecting, you can use the Wireless Hosted Network as a “repeater.” This isn’t the best solution, though, if you want full performance on that faraway computer.
The illustration bellows depicts this technique.

On the Windows machine, connect to your regular wireless network. Then you can use a utility like Connectify (screen shot below) to create the virtual router, instead of using the Command Prompt. Now, on the computer or device that was having connection problems, connect to the virtual router instead of the real router.

Upgrade Your Wireless Router
Like most other technologies, Wi-Fi keeps improving. Wi-Fi products have, over time, gotten faster and reach further. They are based on a standard developed by the IEEE (an engineering consortium). The first major standard was 802.11b. Then 802.11g was released, increasing the speed and range. Now we have 802.11n, which again allowed for dramatic improvements.
Like you may see elsewhere, we’ll drop the funny number for the standard and just call them wireless B, wireless G, and so on.
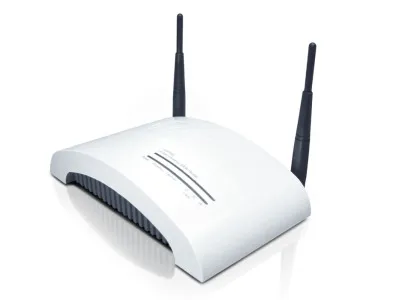
The point here is that if you’re still using wireless B or G, you should think about upgrading to wireless N. As the photo below shows, most wireless N routers have three antennas. Upgrading just might increase the range of your wireless router enough to get that problem computer connected. Areas where you currently get spotty coverage, for instance, should get a good connection after upgrading.

If you aren’t sure which wireless standard you’re sporting, take a look at the router. It should give you some type of clue. If you’re unsure, get the model number and search for it online to find the product details.
For optimum range and performance, you want both the router and the wireless adapter on the computer to be wireless N. You’ll typically have to lay down $50 – 100 for a router and $30 – 70 for each computer you want to upgrade.
You can pick a “normal” router, which is what you’ll find on most shelves and sites. But for even more range, there are “special” routers that come with features like hi-gain antennas that boost coverage.
Editor's Note: Here is a link to our favorite wireless AC routers, the latest Wi-Fi standard.
Slap on a Better Antenna
Not all antennas are created equal. Wi-Fi vendors almost always slap on the cheaper antennas. But you can buy antennas that are enhanced, generally giving you better range and performance. Replacing the antenna(s) on your router can give you better overall coverage. Replacing the antenna(s) on the wireless adapter will give you better range for that particular computer.
Keep in mind when shopping, the higher the gain (measured in dBi), generally means the further it will transmit and receive. However, the higher the gain also means the more directional the antenna. For the router you’ll probably want to stick with a non-directional antenna that sends and receives in all directions, which they call omni-directional. For wireless adapters, you could consider a directional antenna though. You’ll just have to make sure it points toward your wireless router.
First, check the vendor website of the router or adapter you want to upgrade. See if they offer replacement antennas for your particular model. For example, D-Link offers the Xtreme N 2.4GHz Antenna (ANT24-0230) for about $30, pictured below. It works with both the desktop adapters and routers of their Xtreme N and RangeBooster N product lines.

There are also numerous companies that offer universal antennas. If you’re using wireless N, make sure the antenna supports it. You’ll probably want to find a wireless adapter that comes with the high gain antenna, as opposed to purchasing just an antenna that connects to your current adapter. If you do look at lone antennas, make sure you get one that has the same connectors as your adapter or router.
Upgrading your router’s antenna(s) shouldn’t require any tools. They should screw off by hand fairly easy. If not, they probably aren’t detachable or replaceable. Then you should be able to screw on the new antenna(s). Make sure they screw on tight and point them up.
Upgrading your laptop usually means you’ve bought a new wireless adapter with a better antenna(s), rather than just the antennas. If this is the case, simply plug it into the USB or PC card port.
Upgrading a desktop PC is usually easy, too. If you purchased just an antenna or a set of antennas, screw the old ones off and put the new ones on. However if you bought a whole new adapter as well, you’ll have to open up the computer case if it’s a PCI adapter by following the directions that came with it. USB adapters are easier; you’d just have to plug them into a port.
If you’re looking for a directional antenna for a computer, consider Hawking Technology’s Hi-Gain Wireless-150N USB Dish Adapter for around $60, released this last July. If you have a MacBook or an Apple desktop, check out the new BearExtender n3 for about $45. If you’re still using wireless B or G, look into the Wi-Fire directional antenna and adapter for $49, pictured below.

Use a Wi-Fi Repeater
Another way to extend your Wi-Fi signal is to use a repeater. The idea is along the same lines as creating a virtual access point with Windows, which we discussed earlier. You can buy a wireless repeater and place it in-between your wireless router and the computer having problems connecting. The problem computer can connect wirelessly to the repeater, and the repeater connects wirelessly to the router.

Keep in mind that this isn’t the best approach, performance-wise. The throughput or speeds for connections between computers on the router and repeater are cut almost in half. This isn’t a big deal if you just browse the web. But it can be noticeable if you do network or online gaming, download large files, or if you transfer files between computers. However, it may mean the difference between getting some signal on a computer with a repeater, and getting no signal without one.
When shopping around for a repeater, you’ll find most vendors call them range expanders or extenders. If you are the DIY type, consider the free DD-WRT software that you can load onto supported routers to get repeating and numerous other cool features for free.
Editor's Note: Here are our favorite Wi-Fi extenders.
Use Powerline Networking
Wi-Fi isn’t the only un-wired type of network for a home. There’s also powerline networking, standardized by the HomePlug Powerline Alliance. This technology makes it possible to transfer data across your home’s electrical system. You can potentially make any electrical outlet a network port or additional wireless access point (such as depicted in the illustration below).

Extending your network with powerline adapters generally provides better speeds and performance than using a wireless repeater as we previously discussed. However, performance varies depending upon the condition of your electric lines, the other electrical devices plugged into the home, and the powerline adapters you use. Nevertheless, this approach might be good if you don’t want to run wires around the house, like we’ll discuss next.
You might look at the 200Mbps Powerline AV Adapter Kit (TPL-303E2K) from TRENDnet for about $90, pictured below. Plus check out the new Powerline AV 200 Wireless-N Extender Kit (XAVNB2001) from Netgear. ZyXEL offers a 200 Mbps Powerline HomePlug AV 802.11g Wireless Access Point (PLA450V2) for over $100. Powerline is one of the pricier options included in this article.

Install Another Router or Access Point
You can double your wireless coverage by installing another wireless router or wireless access point (AP) in the home. Consider this only if you find the first few methods don’t work and you really want to increase your Wi-Fi coverage with the best performance possible. You have to connect each additional router or AP back to your main wireless router, so this task is a little bit more complicated than some of the other options we’ve discussed. However, this is one of the cheaper approaches for expanding coverage.

You can buy another regular wireless router like you already have, or a wireless AP which is the same thing but doesn’t have the routing capability. If you have a spare router(perhaps you upgraded from wireless G to N) consider using it. You’ll also need a run of Ethernet cabling (Cat 5 or 6) long enough to reach the new router or AP. You can find the cabling online or at a local electrics store for as low $10. It will look something like below.

Before installing the additional router or wireless AP, you want to configure the wireless and network settings. The documentation should help you log in to the web-based configuration screens or the vendor may provide a setup CD. Keep in mind that you want to set this additional router or AP to a different channel than the main wireless router. But both can be set with the same network name (SSID). If using an AP, you want to enable DHCP so it automatically gets an IP address for itself.
Unless you think the Ethernet cabling adds to the décor, you’ll want to hide it by running it through a crawlspace, basement, or attic. You can drill holes in closets to bring the wires up into the house. Once the cable is in place, connect it to one of the four Ethernet ports on the main wireless router. If you’re using an additional router, you connect the other end to one of its four ports as well. If it’s a wireless AP, you connect into the single port.
| Related Buying Guides: |
| Best Wi-Fi Routers |
| Best Wi-Fi Extenders |
