It's a moment every houseplant parent dreads. You walk into a room to find your once-vibrant houseplant drooping, yellowing, or shedding leaves at an alarming rate. Before you resign yourself to another plant funeral, know that many struggling houseplants can be saved with the right intervention.
Most indoor plants decline for predictable reasons — improper watering, poor light conditions, pest infestations, or nutrient deficiencies. The key to successful plant revival lies in correctly identifying the underlying problem and taking appropriate action before it's too late.
In this guide, I'll walk you through the essential steps to diagnose what's wrong with your struggling houseplant and how to nurse it back to health. With some patience and the right care, you might be surprised at how resilient your houseplant can be.

1. Assess the symptoms

Before attempting any treatment, take time to carefully observe your plant's condition. Different symptoms point to different problems:
Yellowing leaves often indicate overwatering, especially if accompanied by soft, mushy stems. However, if yellowing occurs mainly on lower leaves while new growth appears healthy, this might simply be normal aging.
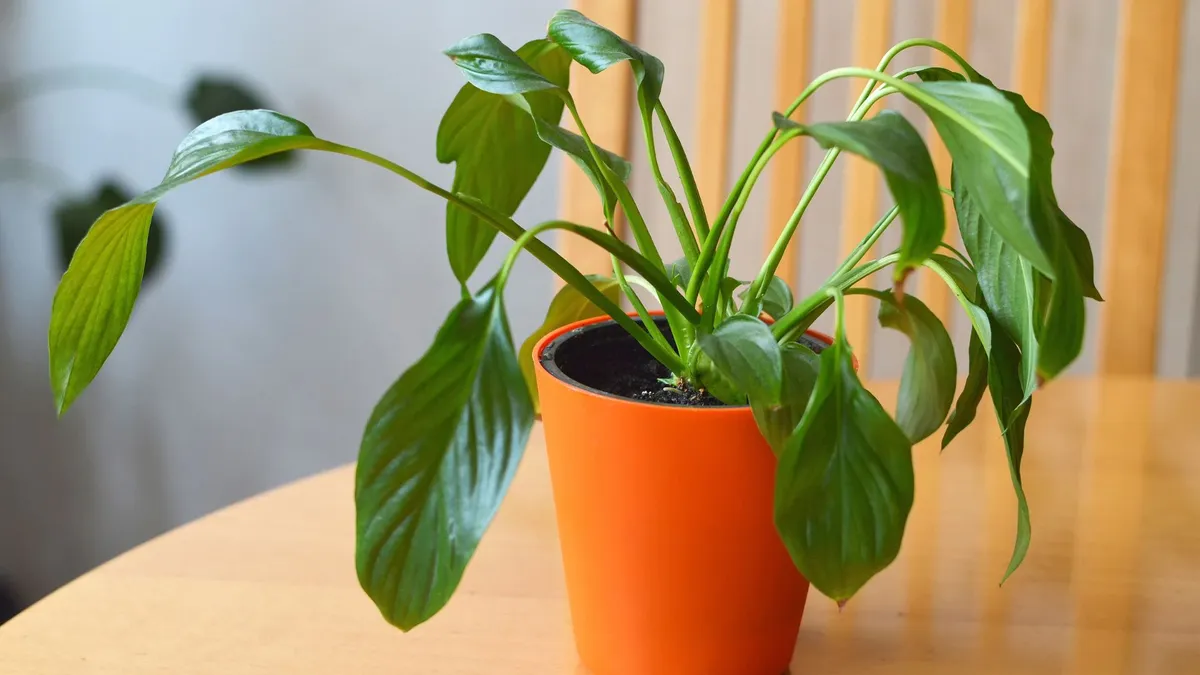
Brown, crispy leaf edges typically suggest underwatering or low humidity. This is common in plants with thin leaves like peace lilies or ferns. Wilting despite moist soil could signal root rot, a serious condition caused by overwatering that prevents the plant from absorbing water properly.
Pale, leggy growth with extended stems and smaller leaves points to insufficient light. Plants naturally stretch toward light sources when they're not receiving enough. Spotted leaves or visible webs are telltale signs of pest infestations. Inspect both the tops and undersides of leaves carefully, as many pests hide beneath foliage.
2. Check the watering situation

Improper watering is the number one killer of houseplants, with overwatering being more common than underwatering.
To check if your plant is overwatered, gently remove it from its pot and examine the roots. Healthy roots should be firm and white or light tan. Black, brown, or mushy roots indicate root rot from excessive moisture.
For an underwatered plant, the soil will feel completely dry and may have pulled away from the sides of the pot. The plant itself might feel lightweight when lifted.
If overwatering is the issue, immediately repot the plant in fresh, well-draining soil after trimming away any rotted roots with clean scissors. Allow the soil to dry out more between waterings in the future.
For underwatered plants, place the pot in a basin of room-temperature water for 15-30 minutes, allowing the soil to absorb moisture from the bottom up. Going forward, develop a more consistent watering schedule based on your plant's specific needs.
3. Evaluate lighting conditions

Many plants decline simply because they're placed in inappropriate light conditions. Research your specific plant's light requirements and compare them to its current location.
Plants needing bright light but placed in dim corners will grow weak and eventually fail. Conversely, shade-loving plants placed in direct sunlight will develop scorched leaves and stress symptoms.
If your plant needs more light, gradually move it to a brighter location to prevent shock. For plants receiving too much direct sun, introduce some filtering through sheer curtains or relocate to a spot with bright indirect light.
Remember that lighting conditions change with seasons — a perfectly placed plant in summer might receive insufficient light in winter months. Be prepared to adjust accordingly.
4. Address pest problems
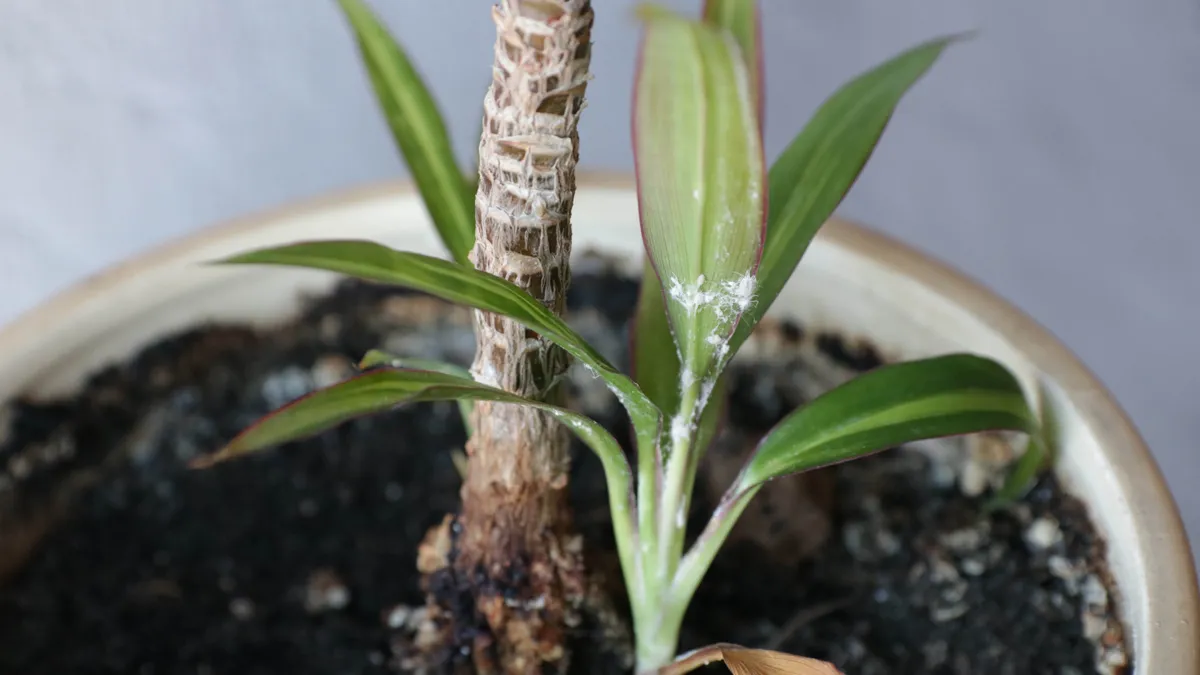
If you've identified pests as the culprit, isolate the affected plant immediately to prevent spreading to your other houseplants.
For small infestations, wipe down leaves with a soft cloth dampened with insecticidal soap or a mild solution of water and dish soap. Pay special attention to leaf undersides where pests often hide.
Larger infestations might require more aggressive treatment. For mealybugs or aphids, apply rubbing alcohol directly to the pests using a cotton swab.
For spider mites, increase humidity around the plant and treat with neem oil and for dreaded fungus gnats, allow the soil to dry completely between waterings and consider using sticky traps
Regular treatment over several weeks, and sometimes months if the infestation is severe, is typically necessary to completely eliminate pests and their eggs.
5. Prune damaged areas

Once you've addressed the underlying cause of your plant's decline, pruning away damaged portions can help redirect energy to healthy growth.
Using clean, sharp scissors or pruning shears, remove any dead leaves, stems, or flowers. Cut back to healthy tissue, making cuts at a 45-degree angle just above a leaf node (the point where leaves emerge from the stem).
Also, let the leaf go completely dry and crispy before removal. If the leaf is still partially green, the plant can redistribute those nutrients to healthy parts of the plant.
It's important to be conservative with pruning. Removing more than one-third of a plant at once can cause additional stress. If extensive pruning is needed, spread it out over several weeks.
6. Consider repotting

If your plant has been in the same pot for a while and seems to be struggling or dying, it might be telling you it’s time for a new home.
Over time, soil can become compacted, and roots may start circling inside the pot or even push out through the drainage holes, all of which limit the plant’s ability to absorb water and nutrients.
Other signs to watch for include water running straight through the pot without soaking in, slowed growth despite your usual care, or a plant that’s become top-heavy and prone to tipping over.
I ran into this with my monstera not long ago. She’d been living in the same pot for what felt like forever, and even though I was caring for her the same way I always had, her growth had completely stalled. When I took a closer look, her roots were packed tight and circling the bottom. I moved her into a bigger container and within a few weeks she was thriving.
When you repot, choose a new container that’s just 1–2 inches wider than the current one and has good drainage holes. Use fresh, high-quality potting mix that suits your plant’s needs, and you’ll likely see it perk up and grow much more happily.
7. Provide appropriate aftercare
After you’ve taken steps to revive your plant, it’s important to create a recovery environment that minimizes additional stress. Aim to keep temperatures stable and place the plant in a spot that’s free from drafts, heating vents, or blasts from air conditioners.
If your plant enjoys higher humidity, you might want to group it with other plants or use a humidifier to give it an extra boost. And hold off on fertilizing until you start to see new growth, once that happens you can begin feeding again, but at half the usual strength to avoid overwhelming the plant.
Most of all, be patient — recovery can take time. Some plants bounce back within a few weeks, while others might need a few months to fully regain their strength. Keep monitoring your plant closely and adjust your care as needed along the way.
When to say goodbye

Despite your best efforts, not every struggling plant can be saved. If your plant shows no signs of improvement after 4-6 weeks of adjusted care, or continues to decline despite your interventions, it might be time to say goodbye.
Before discarding the plant entirely, consider taking healthy cuttings from any viable sections to propagate a new plant — even severely declined specimens can sometimes produce healthy offspring.
Remember that plant care is a learning process, and occasional failures are part of the journey. Each experience builds your knowledge and improves your skills as a plant parent, preparing you for greater success with your future green companions.
More from Tom's Guide
- Discover how to tell if you're overwatering your houseplants
- And 5 houseplants that will help prevent mold in your home
- Plus, how to spot a thirsty houseplant: 7 telltale signs