How to Add Photos and Drawings to Notes in iOS 9
You can add rich media like photos, drawings and formatted text to iOS 9's built-in Notes app. Here's how to make the most of this feature.

Notes aren't just about text anymore. Starting in iOS 9, you can also add photos, drawings, and rich text to notes you've composed with built-in note-taker on your phone, turning them from simple text-laden affairs to true multimedia extravaganzas. Here's how to add all those fancy features to your vanilla text notes.
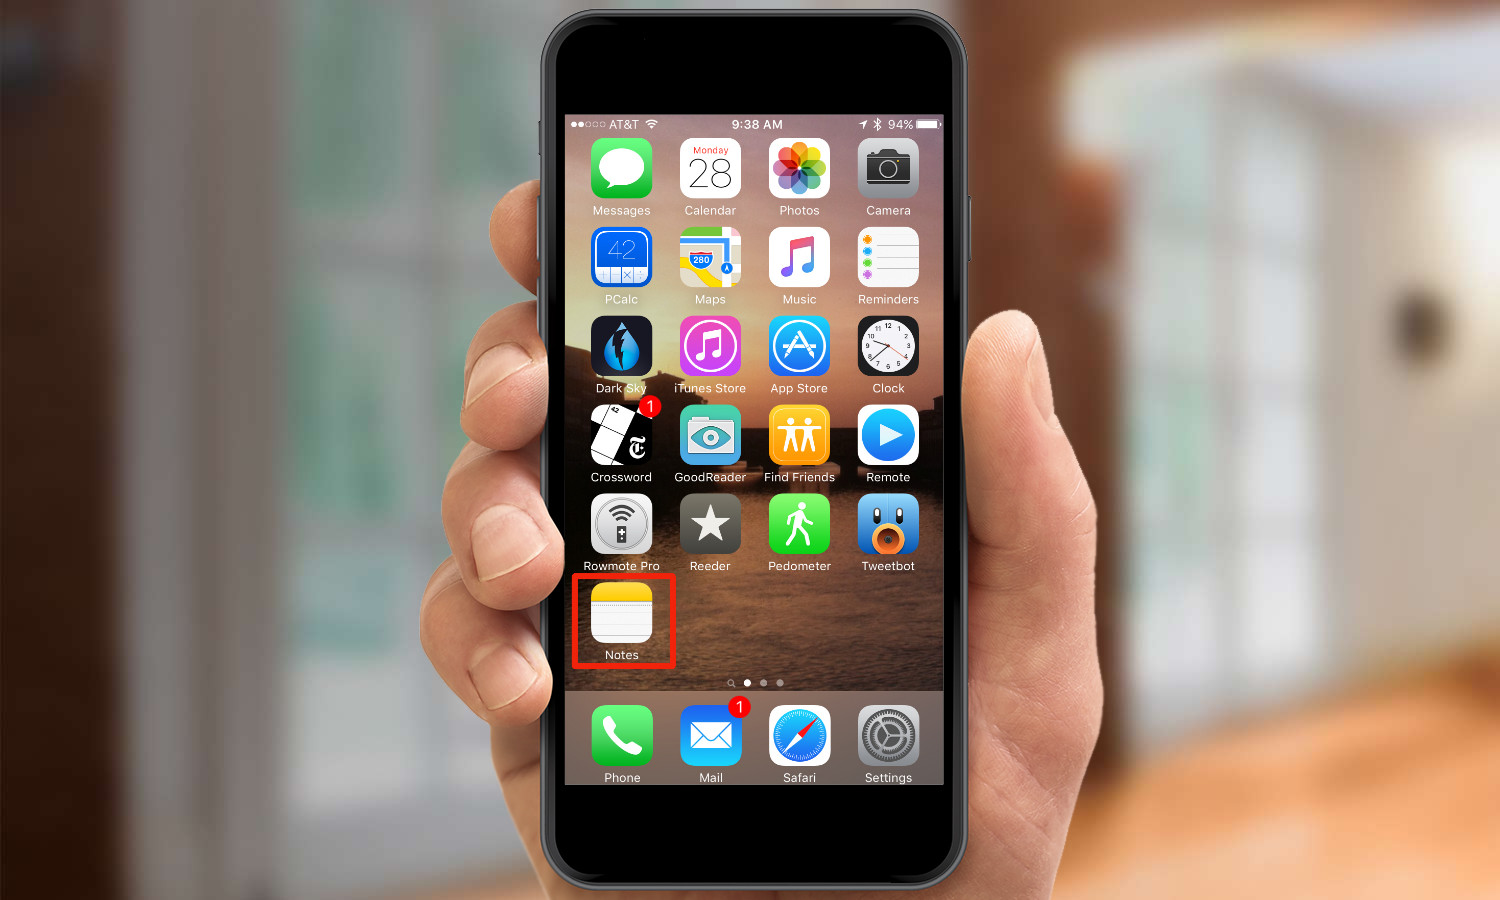
1. Open the Notes app.

2. Select a folder of notes if necessary.

3. Tap the compose button in the bottom right.

4. Tap the Plus (+) button above the keyboard on the right side to bring up the rich media toolbar.
From there, you can insert a photo or drawing; you can also format the text of your note. (You can also create a to-do list, but that's another tip entirely.) Here's what you can do with the different parts of the rich media toolbar.
MORE: 25 iOS Tips, Tricks and Secrets You Need to Know
Insert a Photo

1. Tap the camera button in the middle of the rich media toolbar.
Get instant access to breaking news, the hottest reviews, great deals and helpful tips.

2. Choose whether you want to use an existing picture or video from your Photo Library or take a new picture or video.
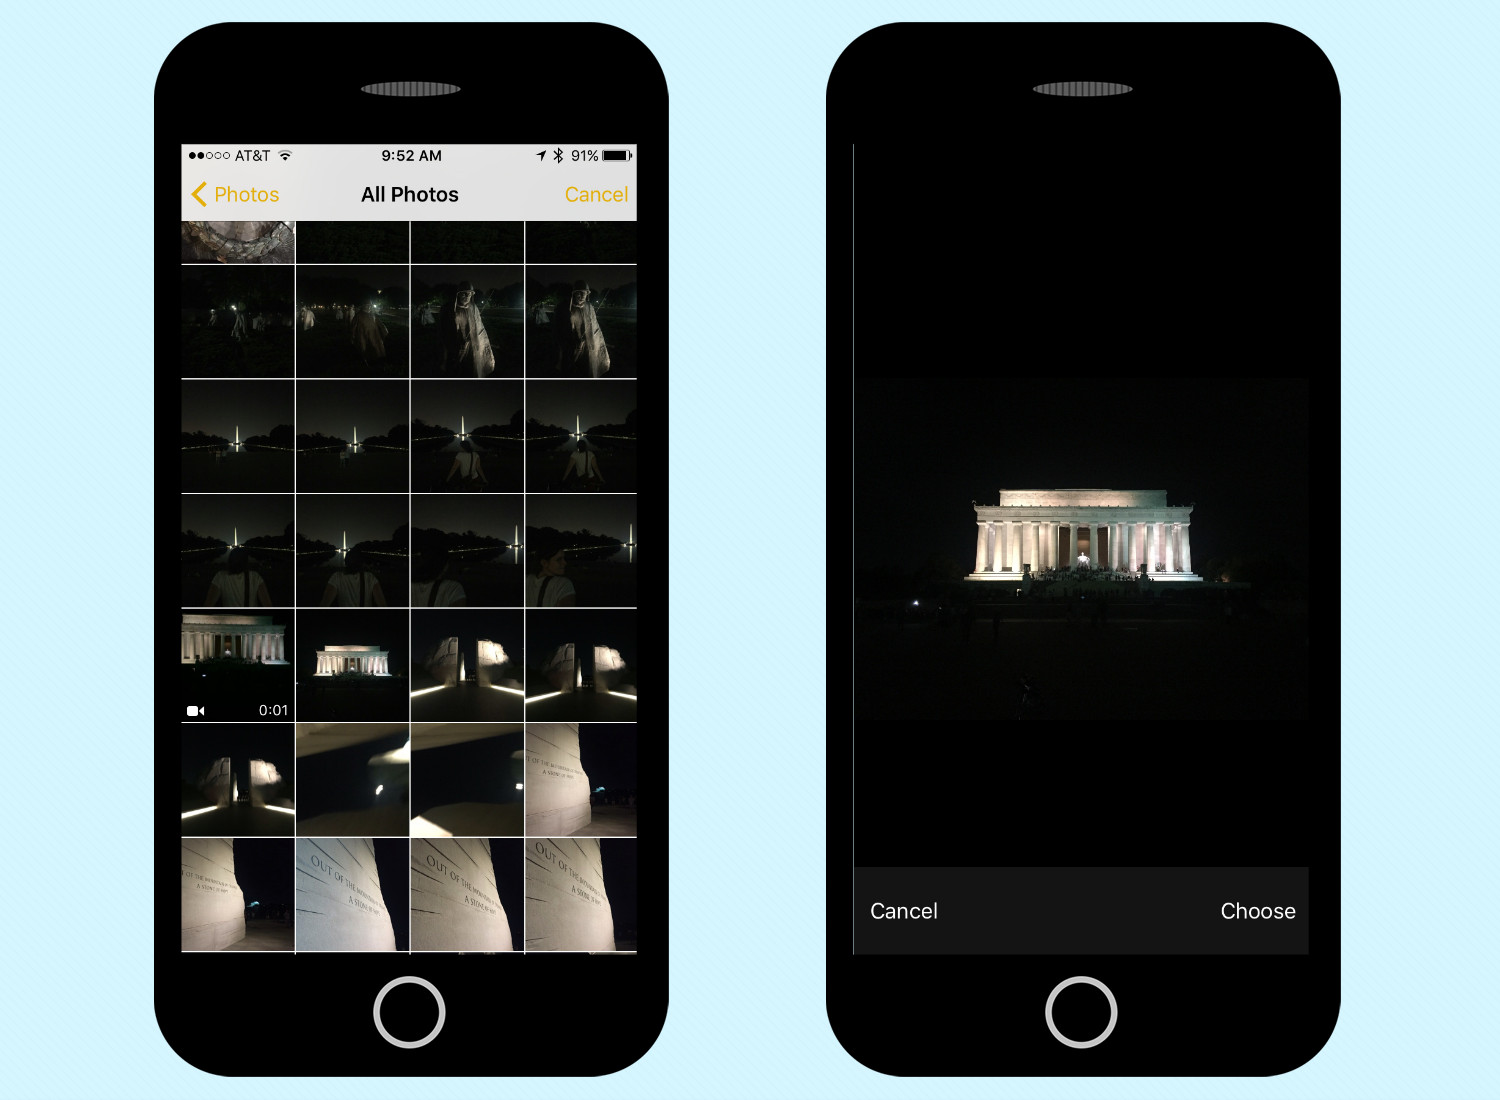
3. To use an existing photo, navigate your photo library and select a picture.

4. If you opt to take a new picture, review your shot, and then tap Use Photo.
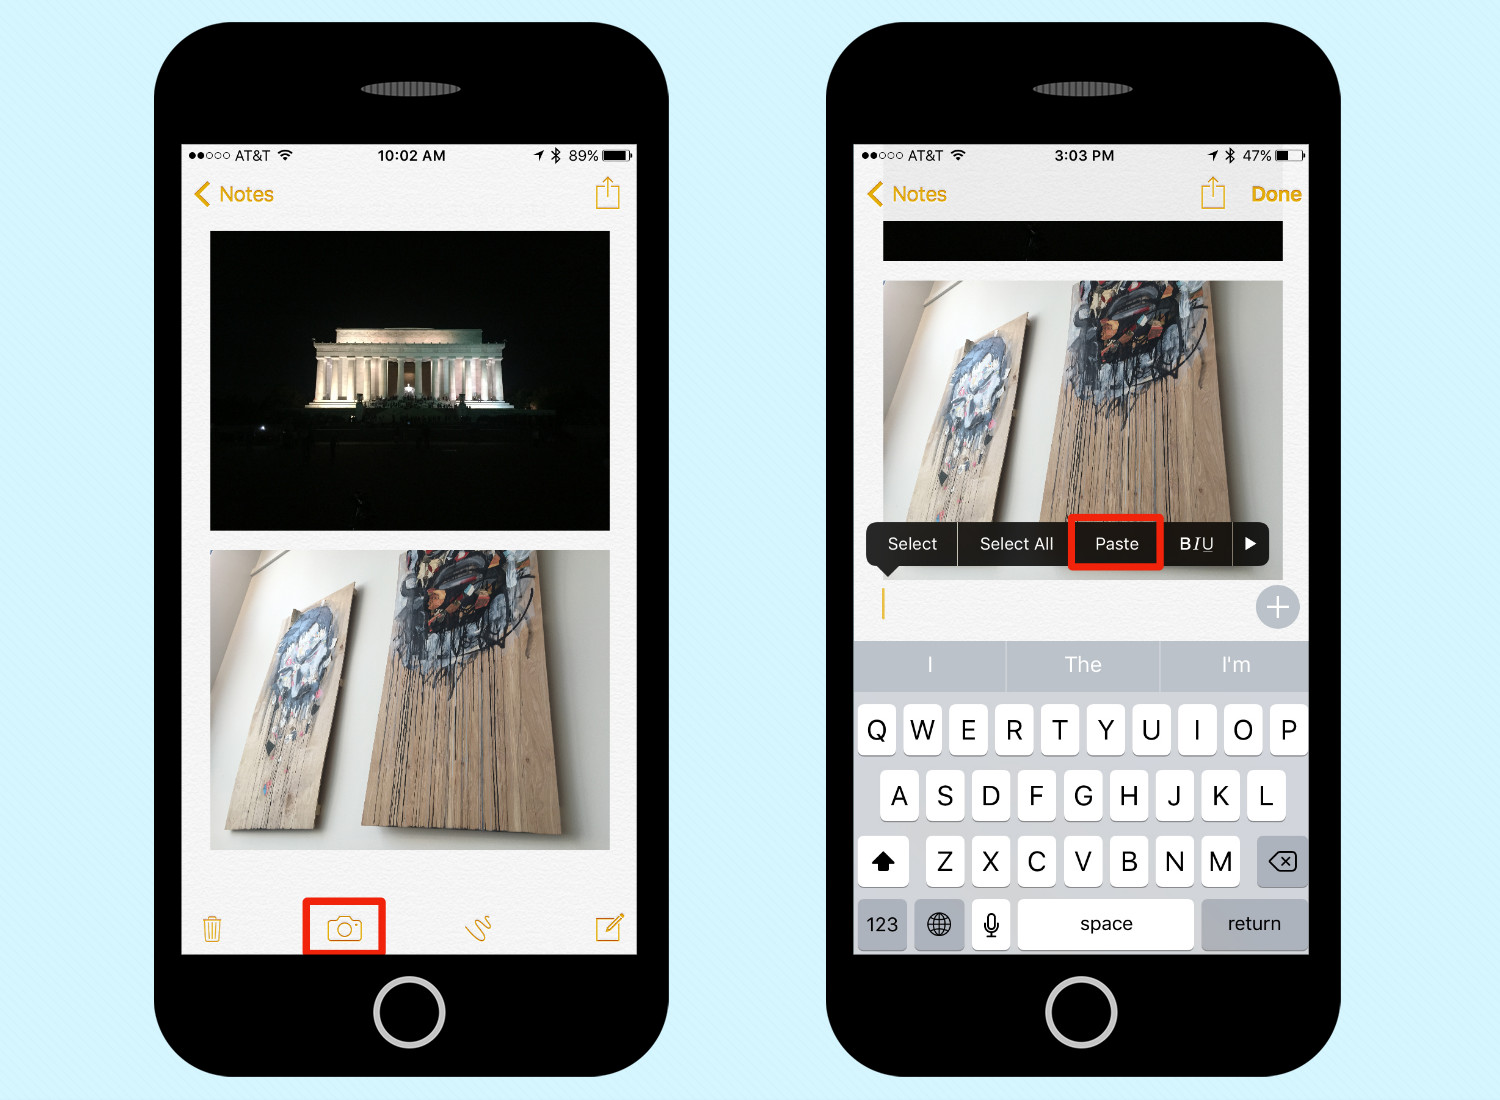
You can also insert a picture when the keyboard is not present by tapping the camera icon at the bottom of the screen. Or, if you find a picture from somewhere else on your phone — say, in Safari — copy that picture and paste it in a note using the standard copy and paste controls.
Insert a Drawing

1. Tap the drawing button on the toolbar. It looks like a squiggle.

2. Draw your picture using your finger in the new canvas that appears. The tools at the bottom include a pen (for thin lines), a marker (for translucent drawings), a pencil (for fainter lines), a ruler (to draw straight lines), and an eraser (to remove drawings). There's also a swatch you can tap to choose what color you'd like to draw in.
3. To undo a step, tap the Undo button (the left-facing arrow) in the top left corner. You can redo that step by tapping the Redo button (right-facing arrow).
4. To rotate the canvas, tap the rotation button (the square with the counterclockwise arrow next to it) in the top left.

5. Tap the Ruler tool to draw straight lines. A translucent straightedge will appear on the screen. You can move it by tapping and dragging it or change its angle by tapping with two fingers and turning your fingers. Draw a line near the edge using any of the other tools and it will "stick" to the ruler.
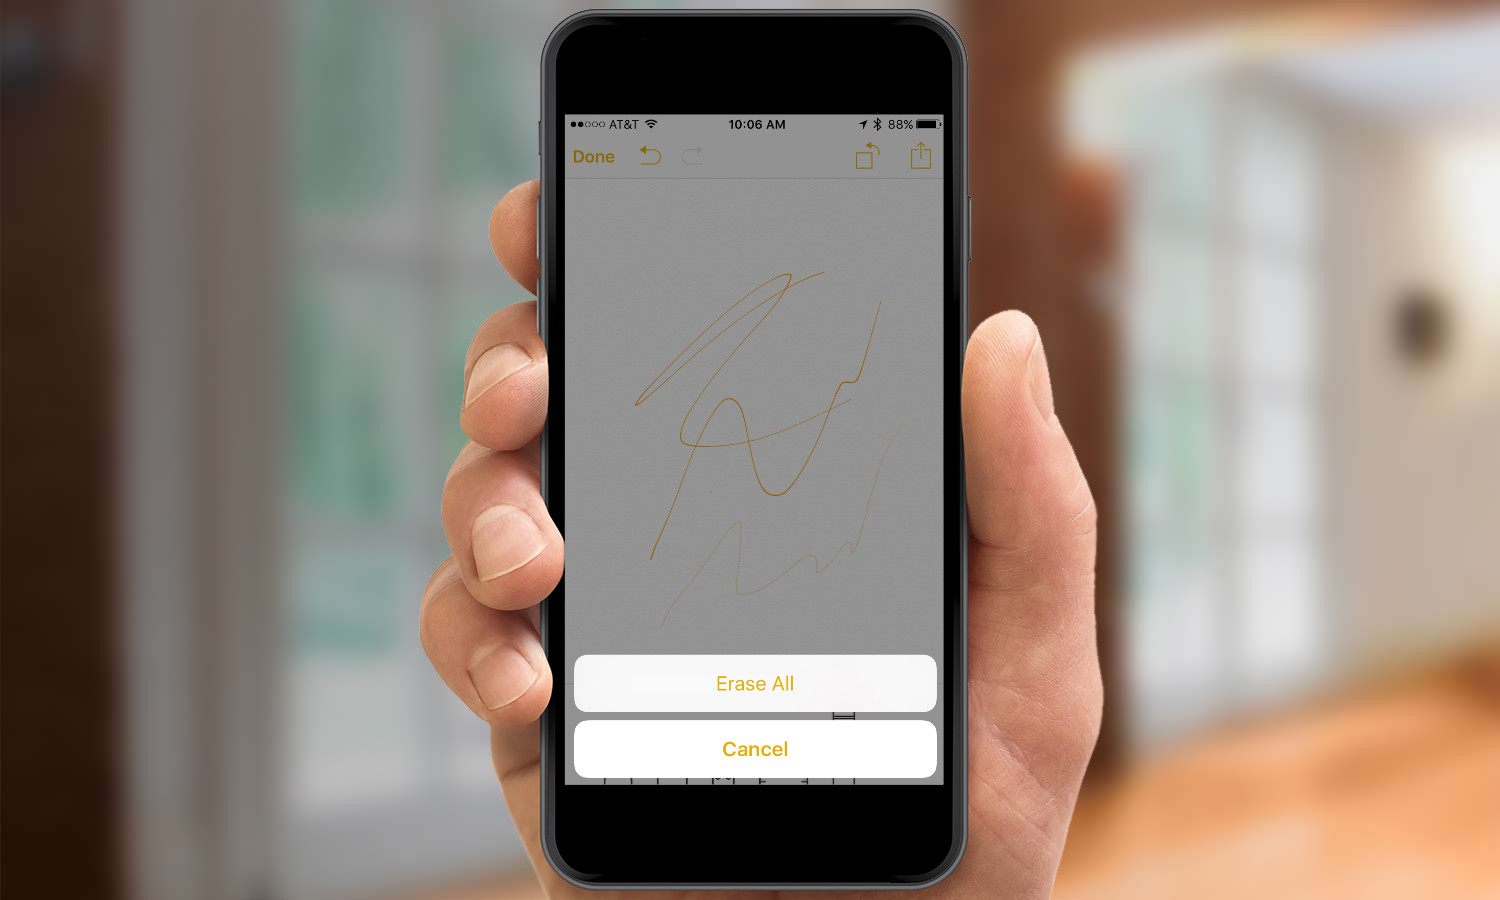
6. Tap and hold on the eraser and then tap Erase All to erase all your drawings.
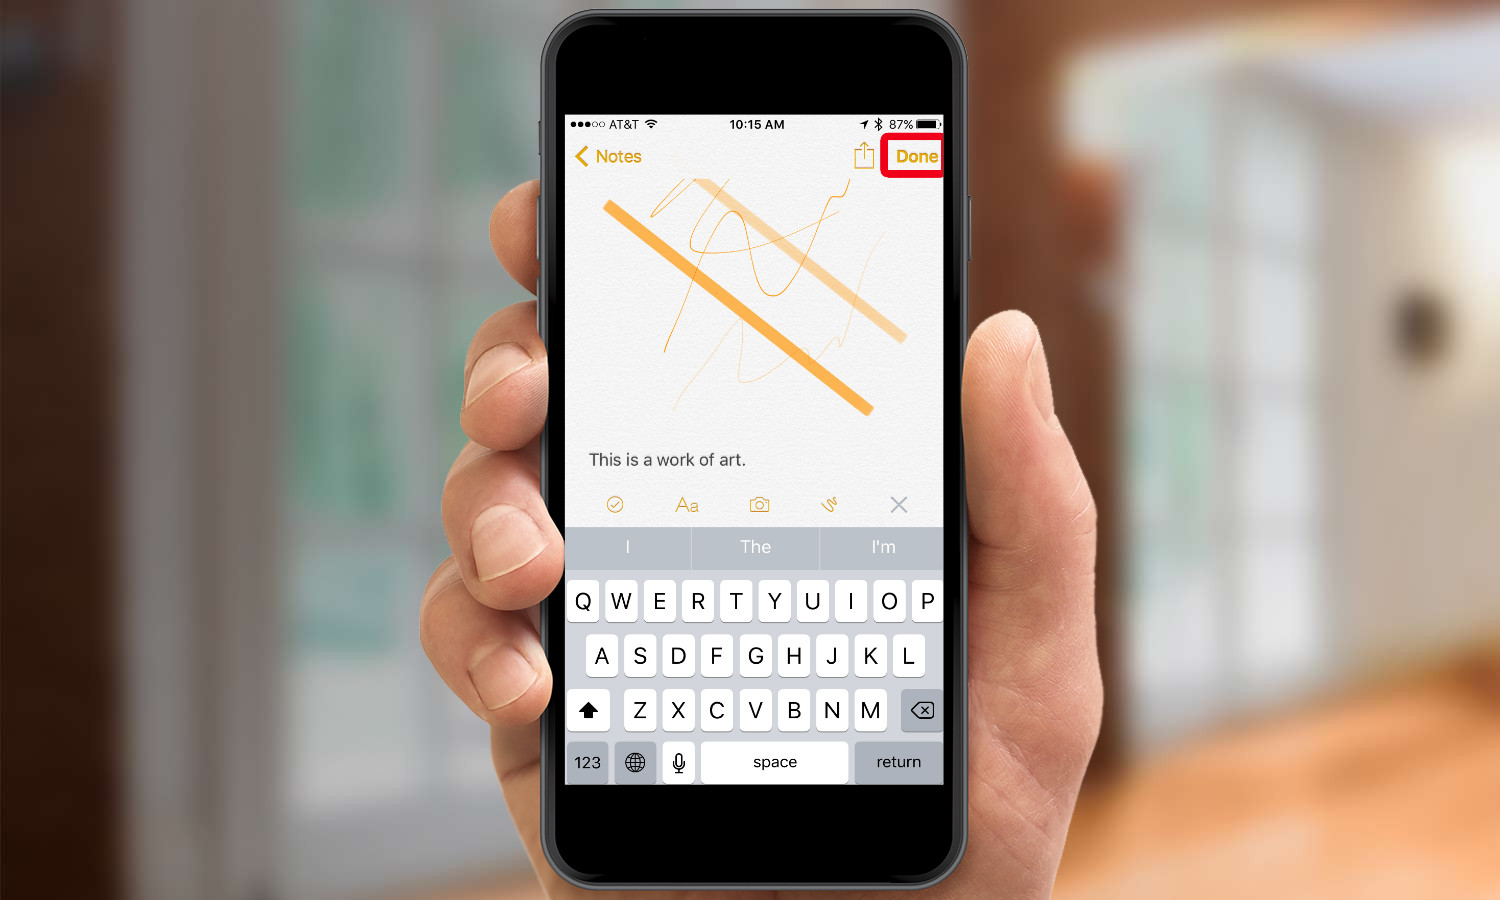
7. Tap the Done button in the top left when you're finished drawing. The image will be inserted into your note.
To edit your drawing at any time, tap the image, and you'll be taken back to the drawing canvas.
Format text
1. Enter some text in a note.

2. Tap and hold on that text to bring up the popover, then tap Select.
3. Select the text you want to format. A popover menu will appear once you're done.

4. Tap the arrows until you see the BIU button. Tap it bring up the formatting popover.

5. Tap bold, italic, or underline to choose the formatting for that text.
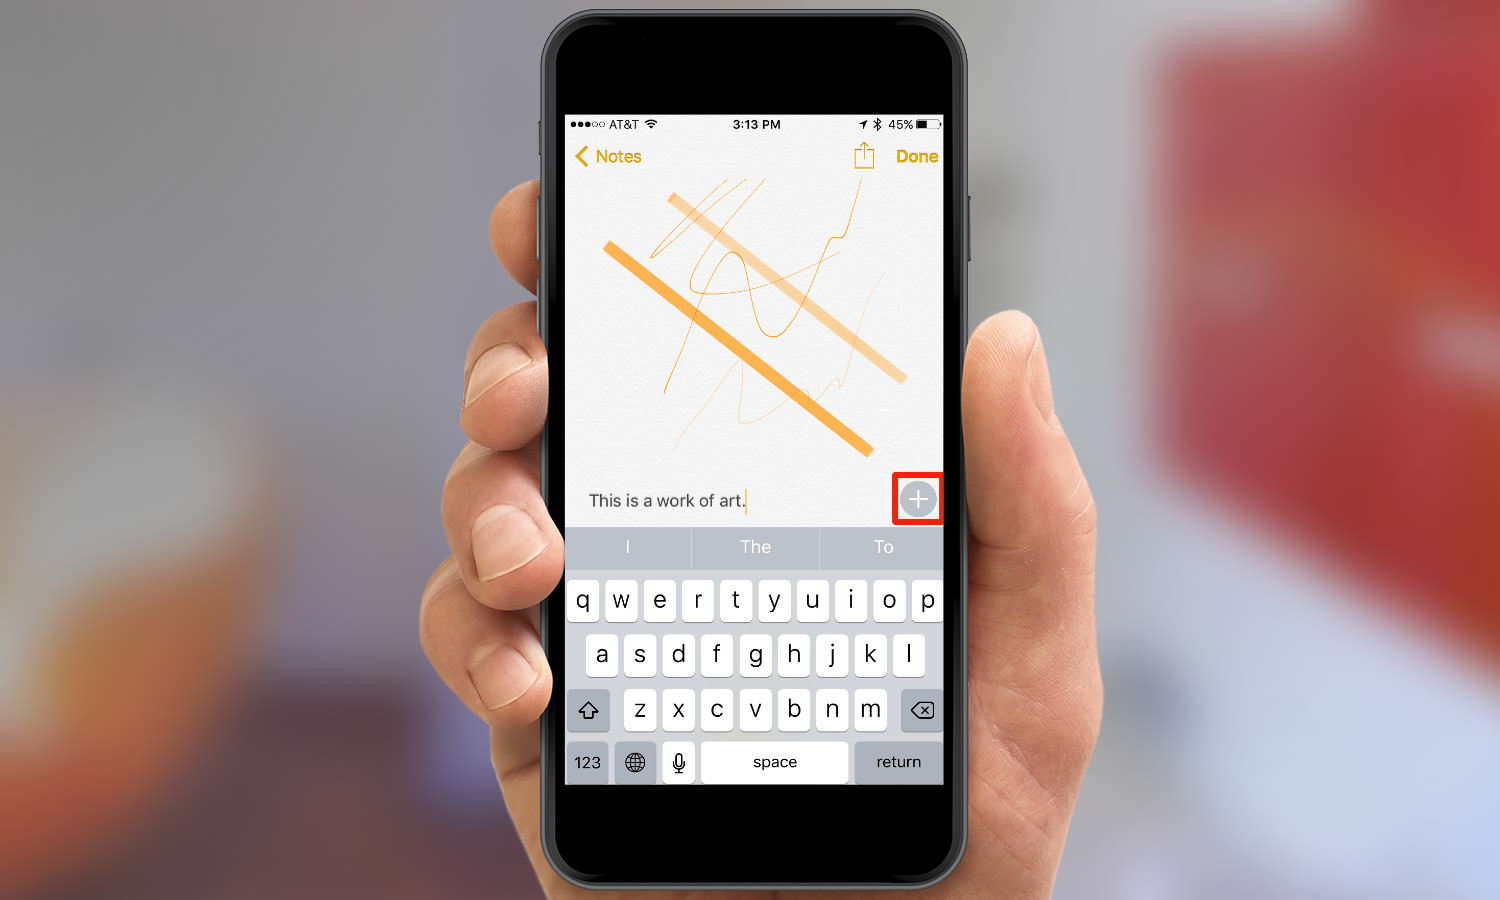
6. To type in a particular style, tap the Plus (+) button above the keyboard to the right.
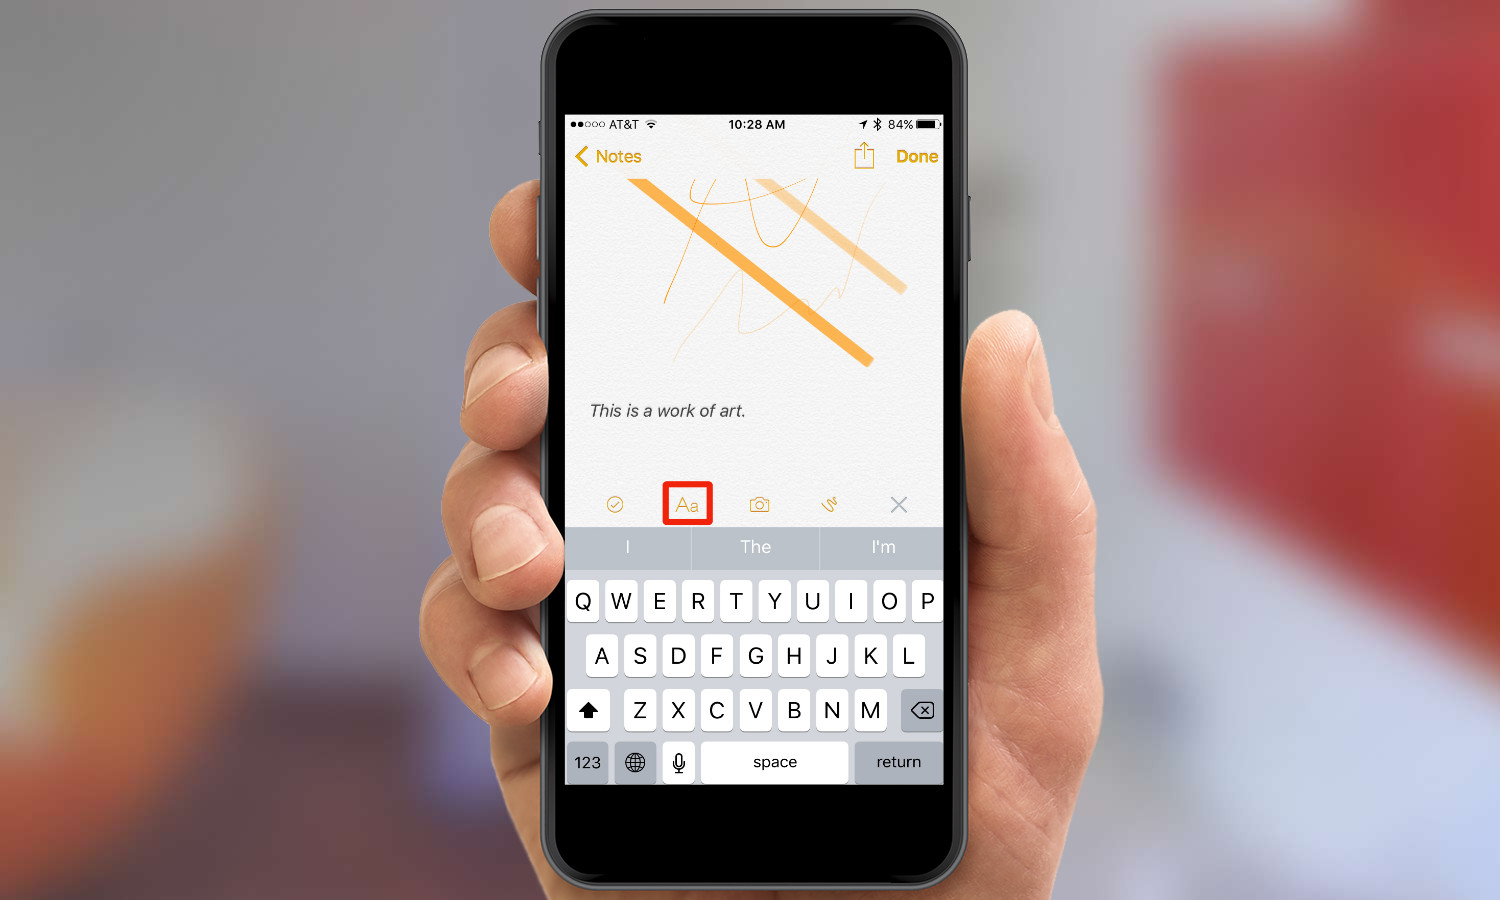
7. Tap the format button (Aa).
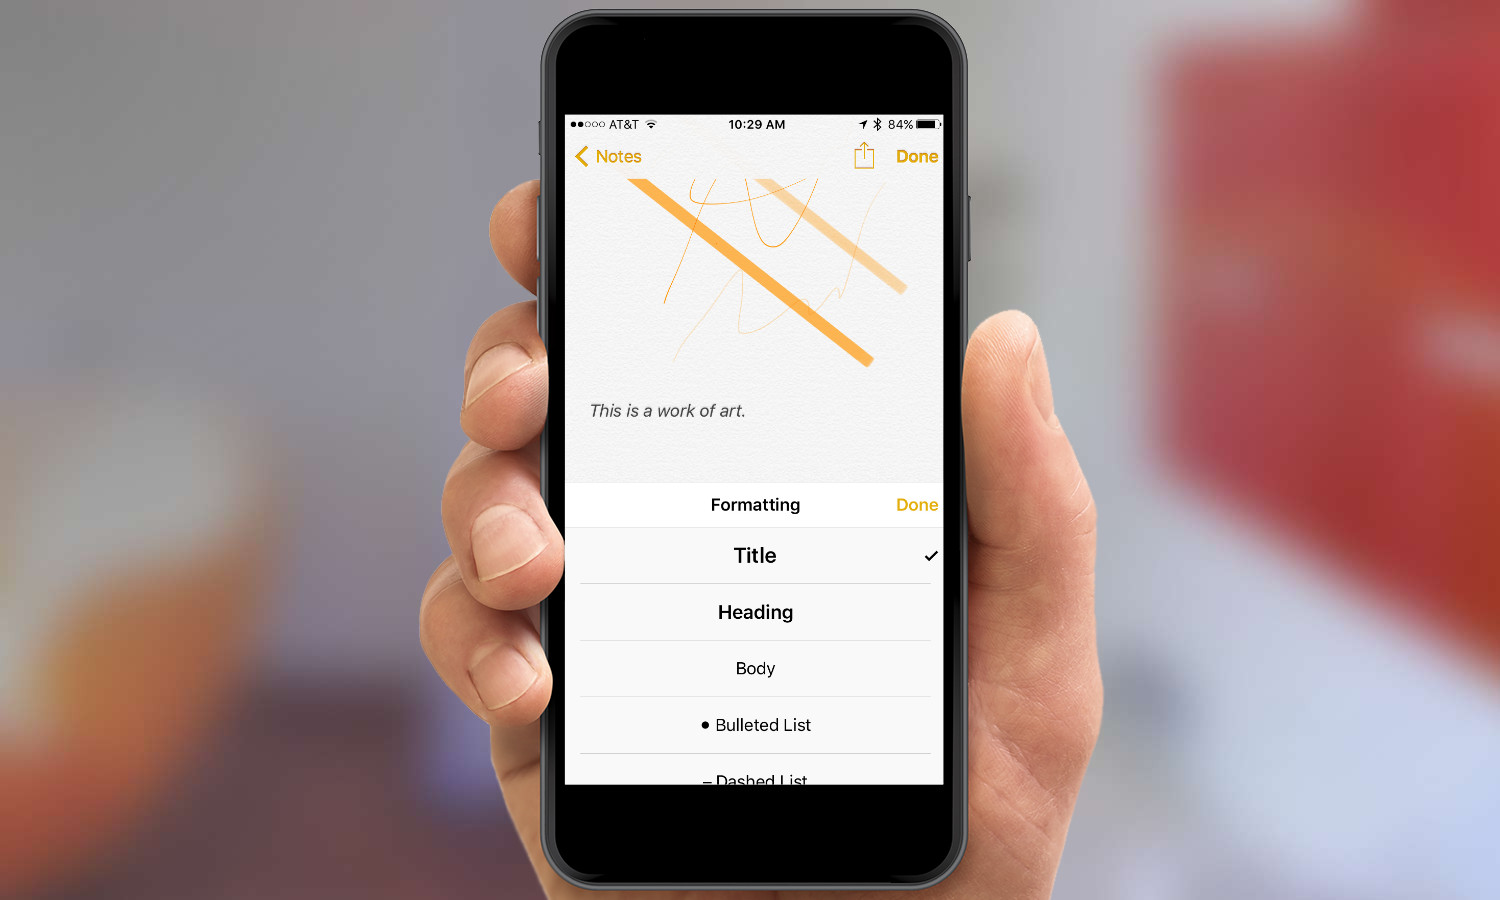
8. Select a style from the menu: Title, Heading, Body, Bulleted List, Dashed List, or Numbered List.
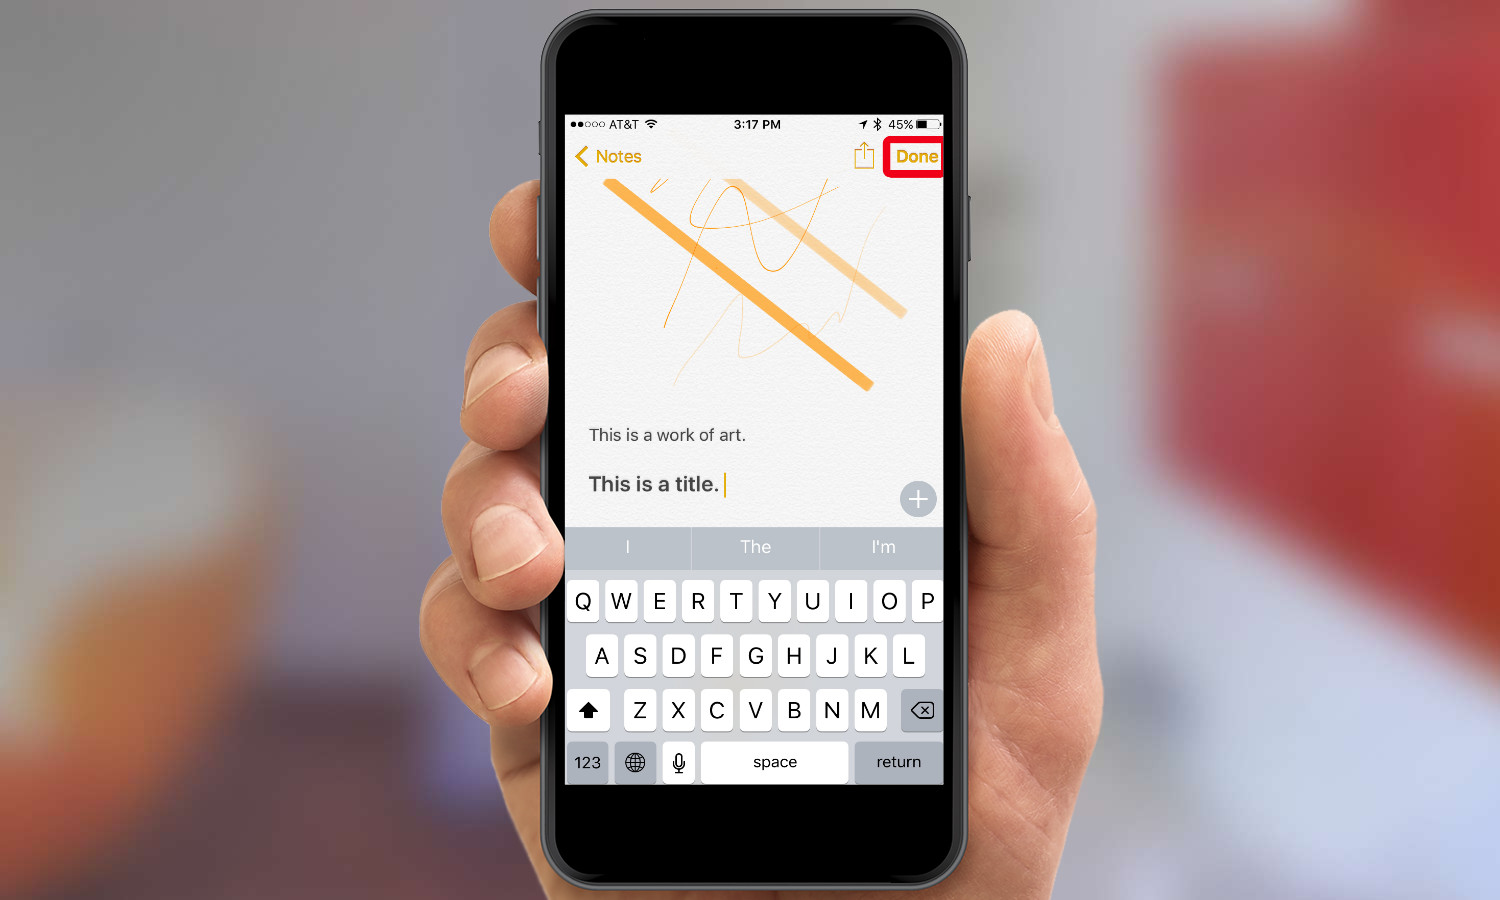
9. Tap Done.
From here, you can enter your text, and it will appear in the style you selected. You can also select existing text, as above, and tap the format button to change the style of that text.
Dan Moren is the author of multiple sci-fi books including The Caledonian Gamibt and The Aleph Extraction. He's also a long-time Mac writer, having worked for Macworld and contributed to the Six Colors blog, where he writes about all things Apple. His work has also appeared in Popular Science, Fast Company, and more
