


Have you ever found that your phone just will not charge, no matter what cable or plug you use. While it might be easy to think that the phone is forever broken, and then run to Amazon's Spring sale to buy a new one, there might be another culprit completely.
I used to work as an engineer, and as such I've seen more broken phones than I care to count. One thing people often don't realize is the amount of dust and lint that build up in their pockets. This detritus can then build up in the charging port of a phone and can, over time, block your charger from working properly.
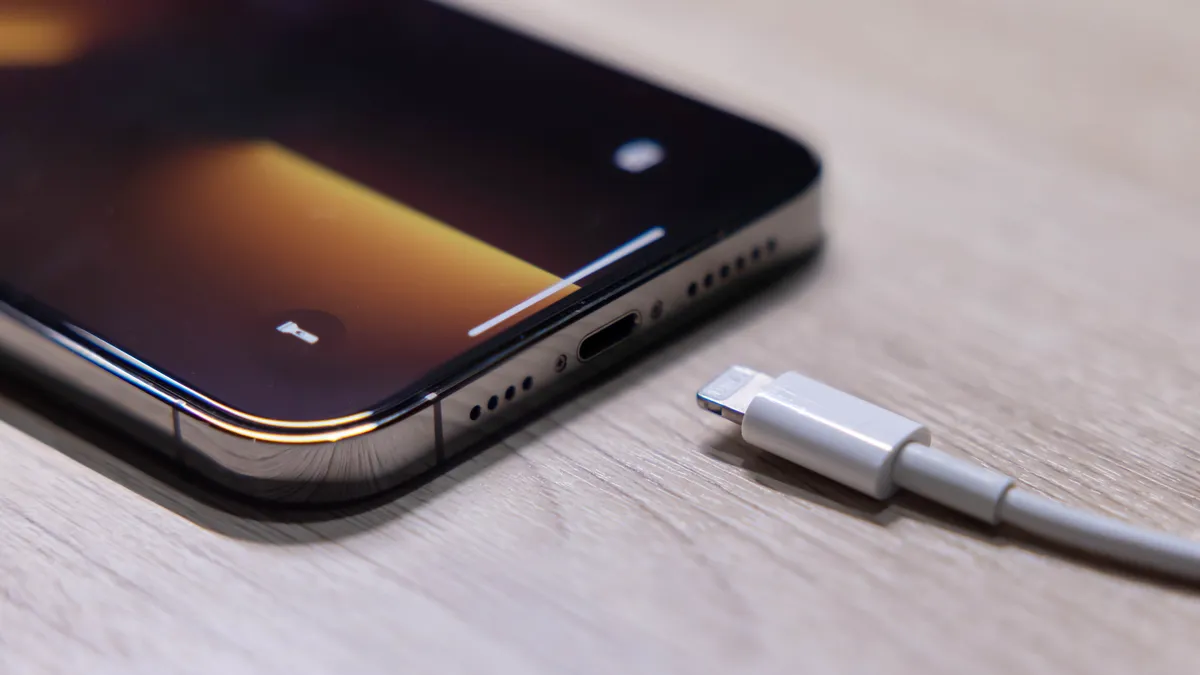
This can happen to any phone, but thankfully it's actually very easy to fix. This is especially true now that Apple has started to use the same USB-C charging port as most of the best Android phones. However, the tips that I will be detailing here will work for most modern phones.
Let's walk through how to safely restore your phone's charging capabilities without any fancy tools or risky moves.
What you'll need
- Flashlight
- sewing needle
- Compressed air (optional)
Why is my charging port dirty?

You might question how so much gunk has actually built up in your charging port in the first place. It’s not surprising really when you consider that most of us carry our phones around in our pockets and bags.
There’s all sorts of lint and debris that can get caught up in the recesses. Every time you plug in your charger, this dust also gets pushed further into the port and so it will inevitably build up.
Step 1)

First things first, switch off your iPhone if you haven’t already done so. Next, grab a flashlight and have a look at what you’re dealing with. It’s a good idea to do this after each step as well so you can see your progress.
Step 2)

Apple doesn’t recommend using compressed air to clean iPhones. However, it's a well-known, successful method, so we’ve provided directions for those who choose to use it.
Using a can of compressed air, such as Falcon Dust, hold it upright and give the port a few short blasts to clear away any dust. The trick here is to not get too close, you don't want to place the pipe that the air is coming from directly into the port. Instead, you want to angle it at a slight diagonal tilt to try and catch the edge of the dust clot.
Afterward, try plugging in your iPhone to see if the problem is resolved. If not, proceed to the next step.

Step 3)

If you can't get the debris out with air, you'll have to use a pick. While it might be tempting to use a toothpick to do so, don't. While it might have worked with the lightning cable, USB-C ports have a much smaller area to work with.
The best item you can find around the house is actually a sewing needle. These are thin enough that you have less chance to damage the pins. However, the overall technique remains the same. You want to start by using the needle to try and loosen one of the corners of the buildup.
The thing to avoid is trying to force the blockage, you want to try and catch it with the needle. When you can move the blockage, you'll want to try and roll it towards the edge and slowly lift it out.
Step 4)
If you’ve opted to use compressed air, you can also give the port a couple of blasts between insertions. If you're concerned about using any metal in the port you can wrap the needle in tape, or you can look for plastic picks online.
Step 5)

You can continue this cycle of cleaning until the iPhone responds. If there’s no luck, you will need to take it to an Apple service center.
Clearing out charging ports is one of those things that you should do relatively often to stop any up. However, it's also imperative that you do this as often as possible as a build-up of fluff and other pocket lint can be a fire hazard. The issue is that, while phones are much more waterproof, fluff and the like can become conductive when it gets wet.
Cleaning ports is just a part of making sure your phone lasts as long as possible. Other things to be aware of is excessive heat, as well as keeping your phone's battery healthy.

