Club Benefits


Composting is an easy way to turn everyday food scraps and yard waste into something useful. Instead of tossing organic material in the trash, you can recycle it into a nutrient-rich soil amendment that improves your garden’s health and reduces your overall waste.
While composting might seem complicated at first, it’s actually a straightforward process once you understand the basics. You don’t need a fancy setup — just the right mix of ingredients, a bit of patience, and a spot to let nature do its work.
Compost helps improve soil structure, supports healthy plant growth, and cuts down on the methane emissions produced when food waste goes to landfill. These steps will show you how to start composting at home. Let's dig in!

1. Set up your compost location and structure

Choose a dry, shaded spot near a water source for easy maintenance and decide between a bin or open pile system. The location is crucial for success. The ideal spot gets morning sun but afternoon shade, has good drainage, and sits close enough to your house for convenient daily use — but far enough so any rodents won't find their way indoors.
For structure, you have several effective options. A simple three-bin system works well for continuous composting. Use one bin for fresh materials, one for active composting, and one for finished compost. Plastic tumblers are excellent for small spaces and make turning easy, though they limit the volume you can process.
Open piles cost nothing and handle large volumes but require more active management. Wire bins or wooden pallets create good airflow while containing materials. Whatever system you choose, ensure it's at least 3 feet wide and 3 feet tall to generate the heat needed for proper decomposition.
2. Get the balance right
Aim for a 3:1 ratio of brown to green materials by volume, and chop larger items before adding them. This carbon-to-nitrogen balance gives composting microbes the fuel they need to break things down efficiently.
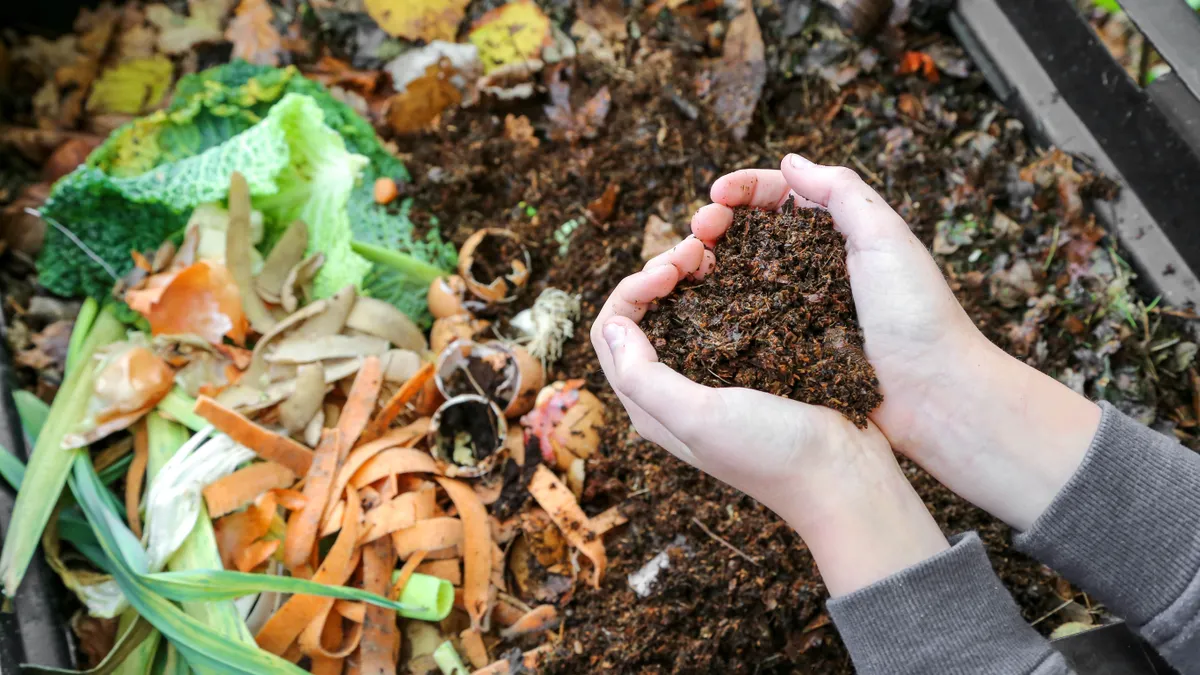
Brown materials (carbon-rich) include dried leaves, cardboard, newspaper, wood chips, sawdust, and straw. Green materials (nitrogen-rich) include fruit and veggie scraps, grass clippings, coffee grounds, tea bags, and fresh plant trimmings.
Smaller pieces decompose faster, so break down cardboard, shred leaves, and cut up food scraps into 1–2 inch chunks where possible.
Layer your materials like compost lasagna: alternate 6 inches of browns with 2 inches of greens. Thin, even layers help the pile break down evenly and prevent it from getting too wet or too dry.
3. Maintain proper moisture and aeration

Keep your compost pile as moist as a wrung-out sponge and turn it every 2–3 weeks. The pile should feel damp when you squeeze a handful — not dry, but not dripping. Too little moisture slows decomposition, while too much can lead to soggy, smelly conditions. Water it during dry spells and cover with a tarp in heavy rain to avoid waterlogging.
When turning the pile, use a pitchfork to move outer materials to the hot center. This helps ensure even breakdown by adding oxygen, redistributing moisture, and maintaining heat, which are all essential for healthy decomposition.
If turning feels like too much effort, try aerating by pushing a broomstick or pipe into the pile to create air channels. Well-aerated compost breaks down faster and smells earthy, not rotten.
")
4. Follow composting do's and don'ts

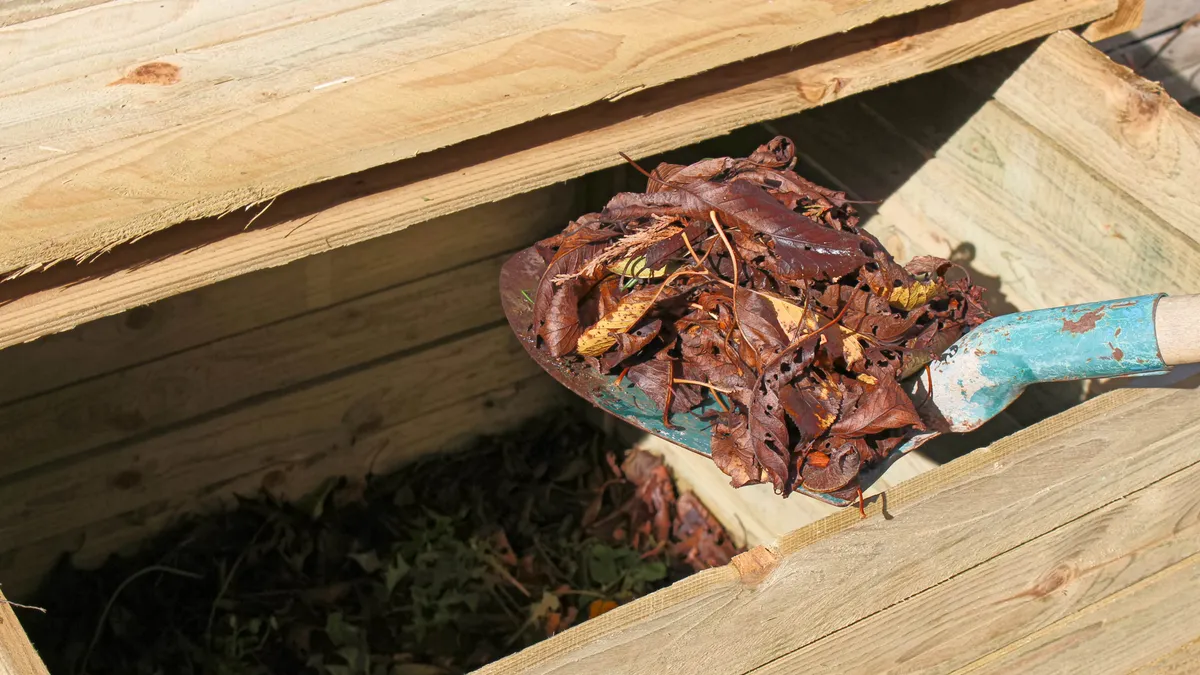
Stick to vegetable scraps, yard waste, and paper products, and avoid adding meat, dairy, oils, pet waste, and diseased plants. These materials can attract pests, create foul odors, or introduce harmful pathogens. Meat and dairy rot instead of breaking down cleanly, while oils coat materials and block airflow.
When adding food scraps, bury them at least 10 inches deep and cover with browns to mask smells and deter animals. This also helps balance moisture and speed up decomposition.
Keep a sealed container in the kitchen to collect scraps during the day, then empty it into your pile regularly. Avoid coal ash, black walnut leaves, and chemically treated yard waste — all of which can harm the beneficial microbes your compost depends on.
5. Monitor your progress
A healthy compost pile should heat up within a few days and smell earthy, not sour or rotten. At its core, the temperature should reach 130–160°F in the first week — a sign that beneficial microbes are actively breaking down materials.
You can test this with a compost thermometer or by inserting a metal rod and checking if it feels warm. This hot phase usually lasts 2–3 weeks.
Smell is your best everyday indicator. If it smells like rich soil, you're on track. Ammonia odors suggest too much nitrogen, so add more browns and turn the pile. If you notice a sour or rotten smell this points to excess moisture or poor airflow. Mix in dry browns and aerate more often.
After a few weeks, you should see visible breakdown: materials darkening, shrinking, and blending together.
6. Signs of mature compost

Finished compost should be dark brown to black, crumbly like coarse potting soil, and smell earthy. You shouldn’t recognize much of the original material, maybe a few woody stems, and the pile will have shrunk to about one-third its original size. It should also feel cool to the touch, a sign that active decomposition is complete.
To test readiness, try a germination test: plant fast-growing seeds like radishes in compost mixed with soil. If they sprout and grow normally, your compost is mature. If not, it may still be too fresh.
For a finer texture, sift compost through a half-inch screen to remove large pieces. Return these bits to the active pile — they’ll continue breaking down and help jump-start the next batch with beneficial microbes.
7. Apply your compost effectively

Work 2–3 inches of compost into garden beds before planting to boost soil structure, moisture retention, and nutrient availability. For existing plants, apply a 1–2 inch layer around the base, keeping it a few inches from stems to avoid rot and pests.
In containers, mix compost with potting soil at a 1:3 ratio — straight compost is too dense for most potted plants. For lawns, spread a light quarter-inch layer and rake it in evenly. Around fruit trees and shrubs, apply compost in a 3–4 foot ring extending from the drip line.
Timing matters: apply in early spring to prep beds, or in fall to feed soil over winter. Compost works slowly but steadily, supporting long-term soil health, better water retention, and stronger plant growth season after season.
Now you've learned seven easy steps to make compost at home, why not take a look at our other useful gardening guides?
Check out 5 common items that will fertilize your yard for free, 9 tips for making your grass greener than ever this year and how to stop ground ivy taking over your lawn. And, if you're wanting more hummingbirds around, here's 7 tips for attracting them into your yard.
More from Tom's Guide