How to Transfer Save Data On Nintendo Switch
Move to a new system with ease
With a refreshed Switch with better battery life in stores and the $199 Nintendo Switch Lite on the way, you may be thinking about trading in your current Switch for one of the new ones. However, transferring save data on the Nintendo Switch can be surprisingly difficult.

Generally speaking, there are two ways to transfer data on the Switch: from one console to another, and to and from a system to a microSD card. But even then, save data can only be transferred one way.
Our how-to will help you determine how to transfer data with your Switch and a bundled microSD card. Read on to learn more:
How to Transfer from Switch to microSD Card
According to Nintendo, only screenshots and gameplay videos you capture can be moved from system memory to a microSD card, and vice versa. Downloadable software and game save data cannot be copied to your microSD card.

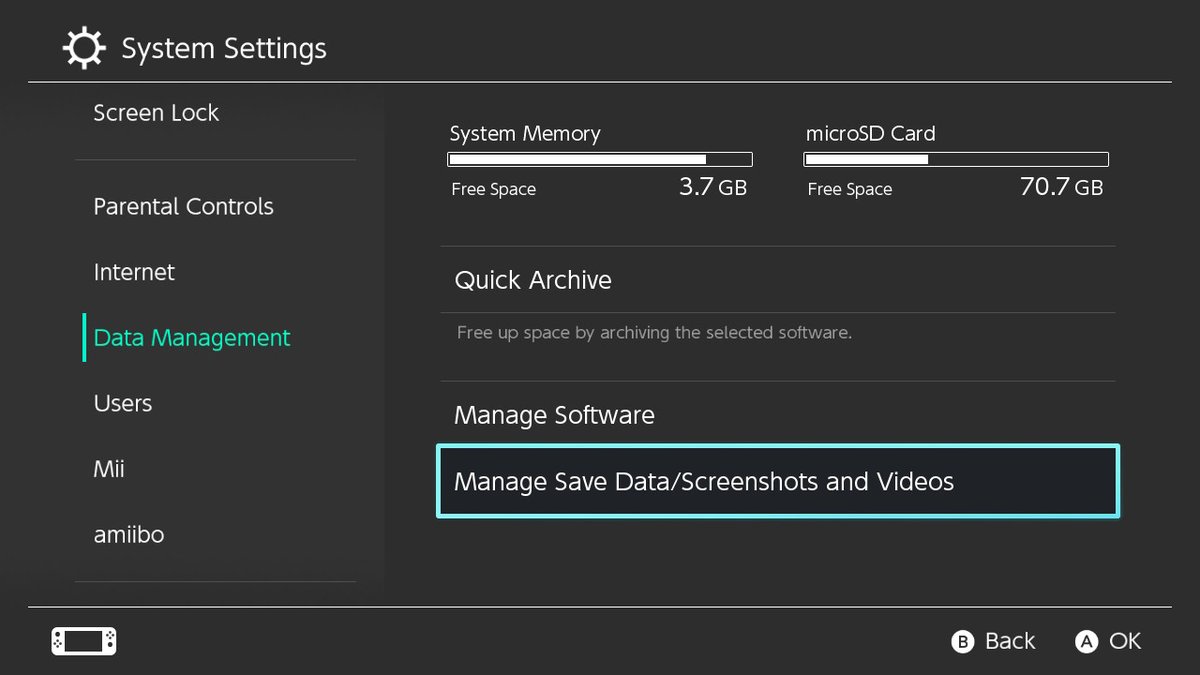
Additionally, when a microSD card is inserted into the Switch, it becomes the default save option for downloadable software. To transfer screenshots and videos from one source to another, go to System Settings > Data Management > Manage Save Data/Screenshots and Videos > Manage Screenshots and Videos. From here, you can copy all of your screens and videos at once, or handpick specific ones you want to move over.
How to Transfer from One Switch to Another
If you have a new console or simply want to transfer your data from one Switch to another, there’s a process for doing that. But you’ll need both Switch consoles turned on and a Nintendo Account to make it happen.
On the Console You’re Moving FROM:
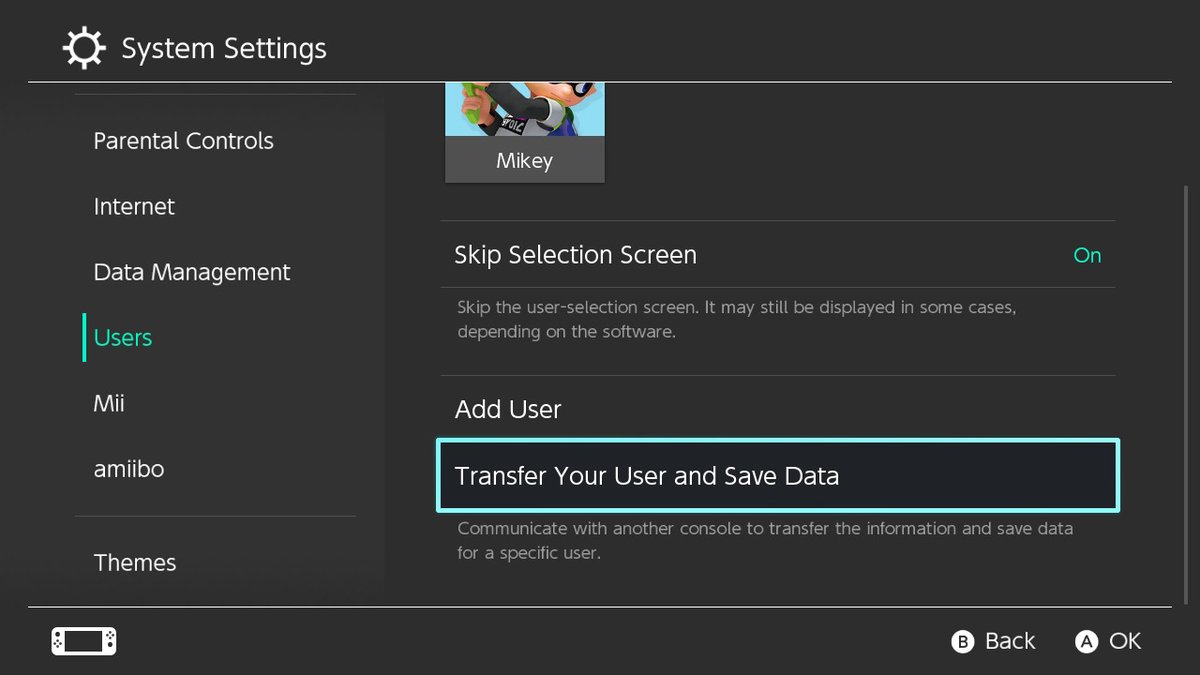
1. Go to your Switch Home menu and select System settings.
Get instant access to breaking news, the hottest reviews, great deals and helpful tips.
2. Scroll down to Users.
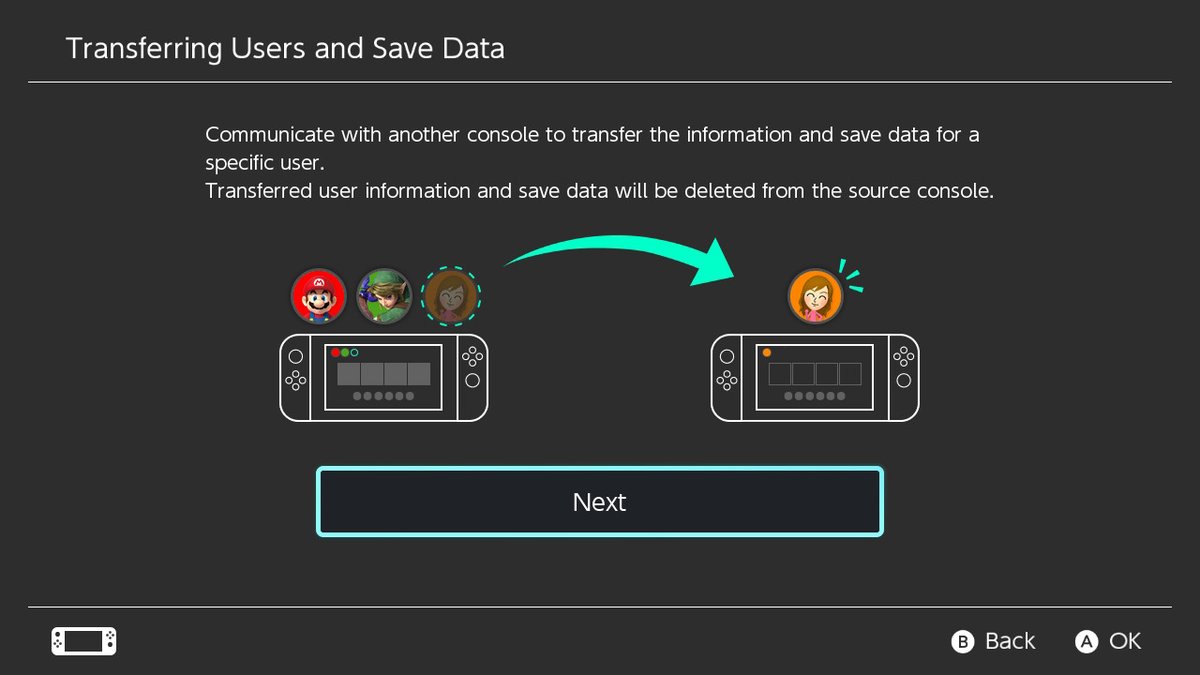
3. Scroll down and select Transfer Your User and Save Data.

4. Choose Next and then Next again.

5. You’ll see here an option for Source Console or Target Console. Choose Source Console.
6. Select Continue.
On the Console You’re Moving TO:
1. Follow steps 1-4 again.
2. You’ll see here an option for Source Console or Target Console. Choose Target Console.
3. Sign in with your Nintendo Account.
4. Choose Next.
Back On the Console You’re Moving FROM:
1.Wait for the target console to pop up, and select Transfer. Your data will now begin to be transferred. It could take some time depending on the amount of data you have, so go get a cup of coffee.
2. Once the transfer is done, choose End. Your data has now been transferred.
Don Reisinger is CEO and founder of D2 Tech Agency. A communications strategist, consultant, and copywriter, Don has also written for many leading technology and business publications including CNET, Fortune Magazine, The New York Times, Forbes, Computerworld, Digital Trends, TechCrunch and Slashgear. He has also written for Tom's Guide for many years, contributing hundreds of articles on everything from phones to games to streaming and smart home.
 Club Benefits


