Nintendo Switch just got this seriously useful feature — here's how to use it
Nintendo Switch finally gets fan-requested folders
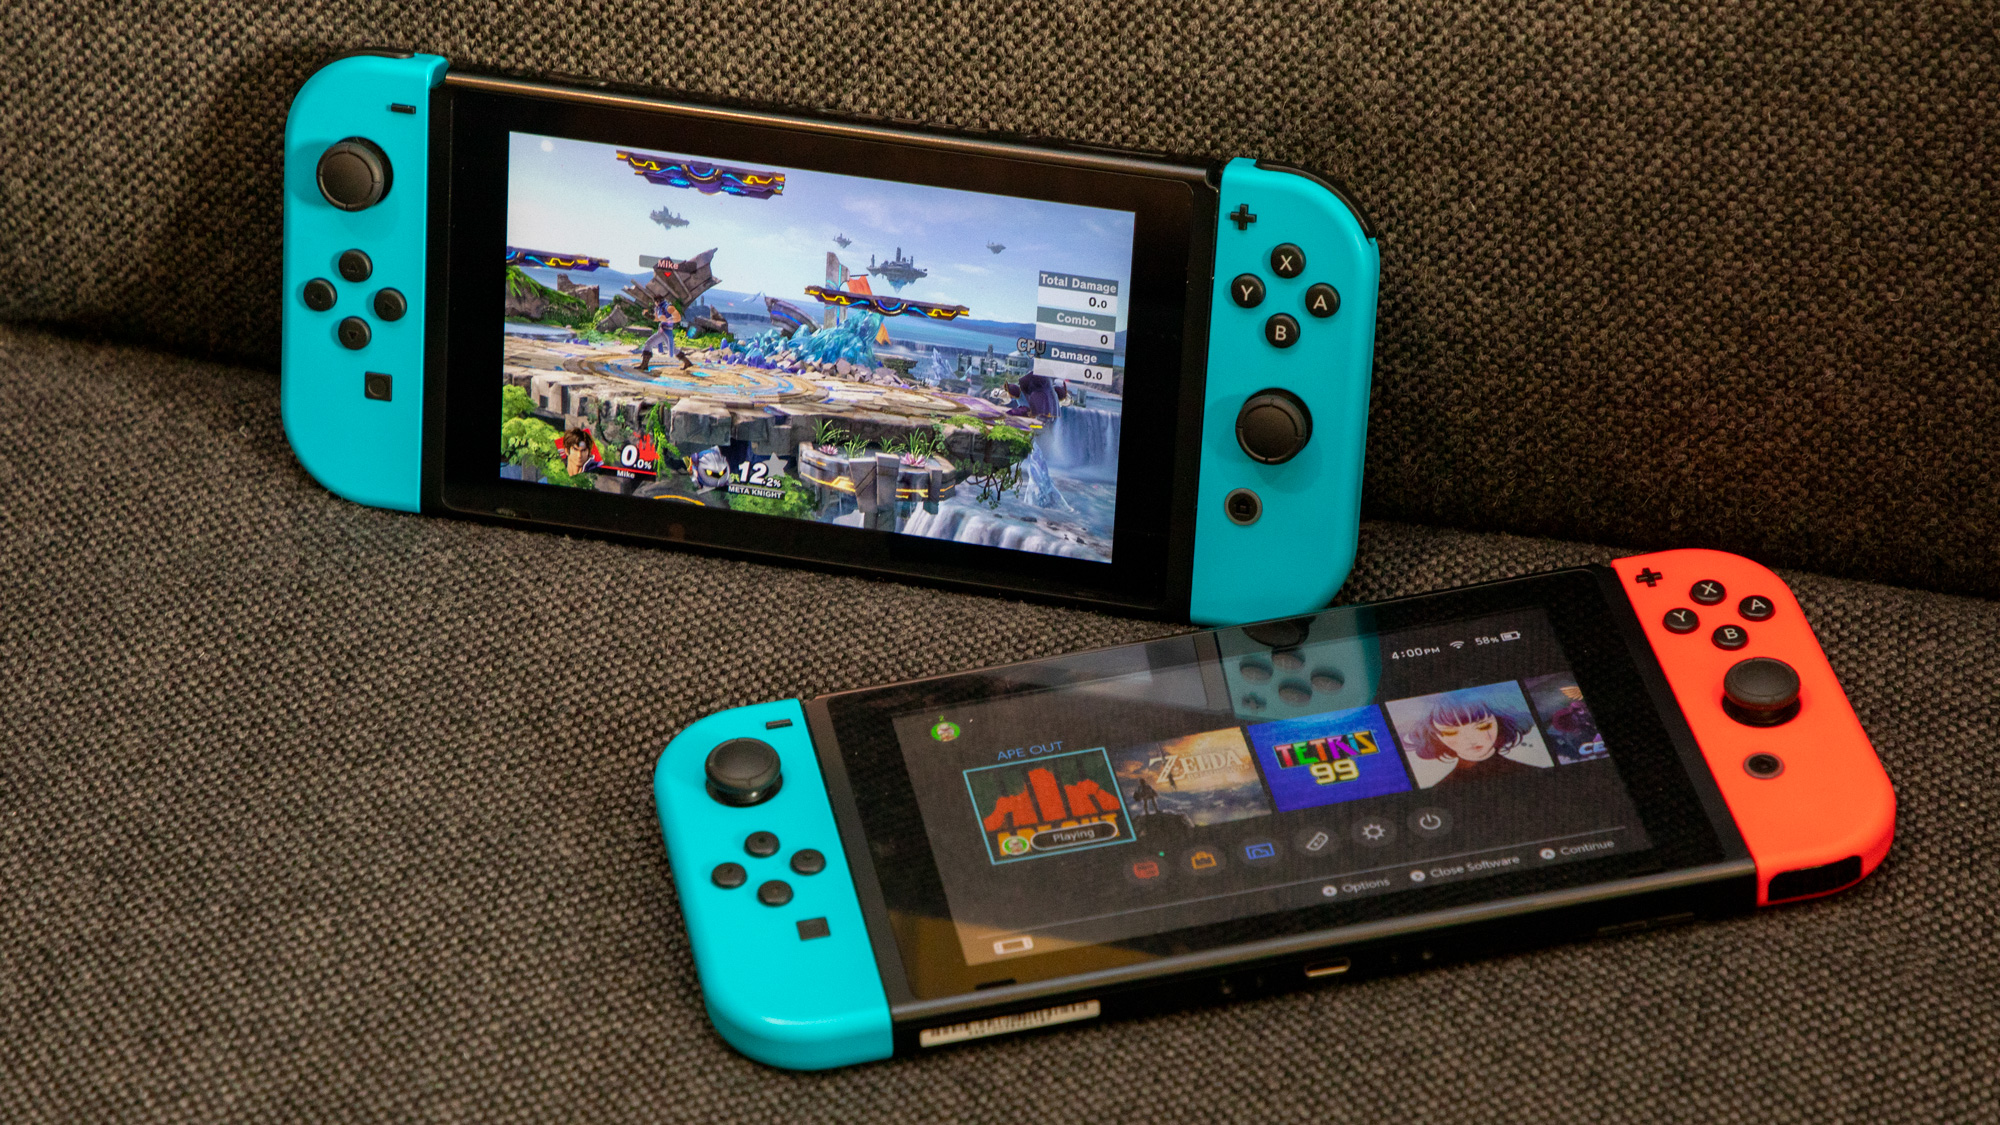
The latest Nintendo Switch software update has gone live and it offers a high-requested feature: folders.
It’s taken almost five years, but at long last the ability to sort your Nintendo Switch game icons into folders on the console’s home screen is here. Nintendo refers to these folders as “groups” and Switch players can create up to 100 groups with a maximum of 200 games per group — a limit that we’re pretty confident almost nobody will ever actually hit.
The latest #NintendoSwitch update is now available, including a new feature to create groups for software on the console.More information: https://t.co/RuNTfgEKBl pic.twitter.com/UFiwuOc1fwMarch 22, 2022
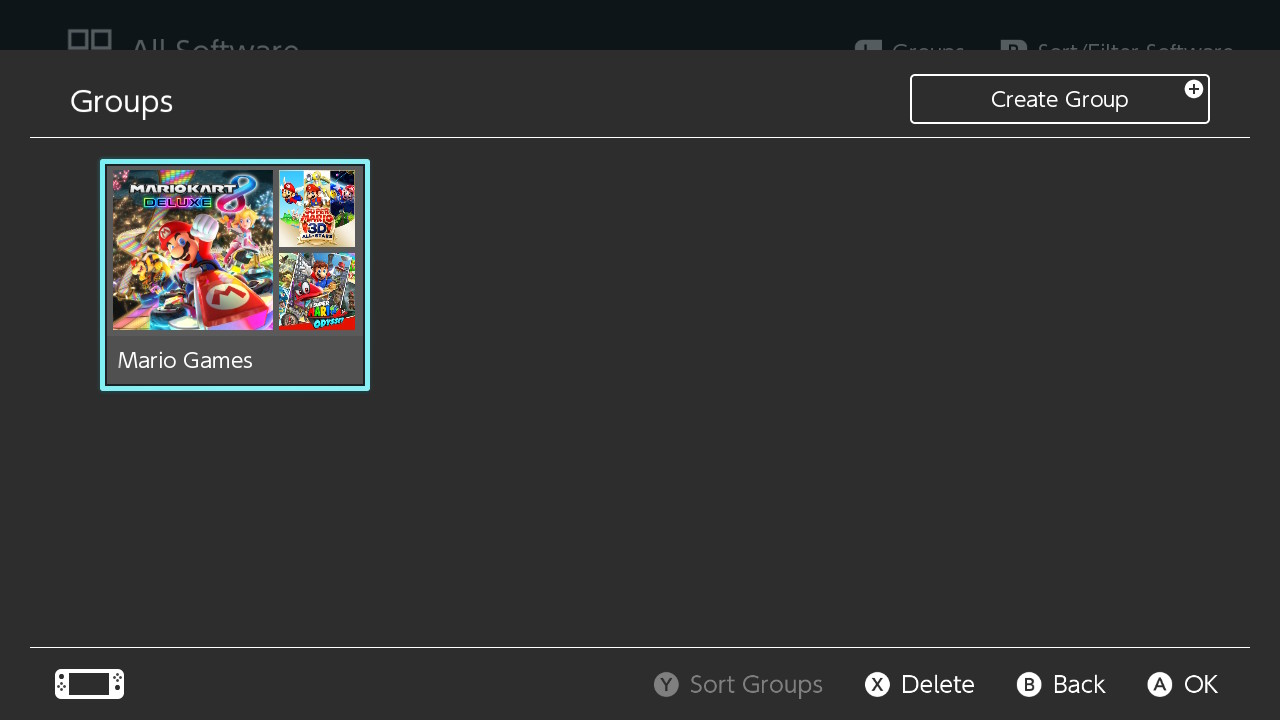
This user interface has been warmly received by Nintendo fans, but there is a somewhat frustrating limit on the Switch's folders feature. You can only view groups when you’re in the All Software menu and can’t place them on your home screen. However, groups are at least highly customizable and you can set a name and rearrange the order of the games within it.
The Nintendo Switch Version 14.0.0 update doesn’t just add the ability to place software titles in folders. It also comes with subtle improvements to the console’s Bluetooth functionality. You can now adjust the volume on either the Switch or via volume controls on the connected Bluetooth device itself (assuming it has them). Plus, the maximum volume for some Bluetooth audio devices has been increased.
Folders are definitely the flagship feature of this update, and if you’re not sure how to place your software titles in groups, then read on below as we’ll walk you through the process. First make sure your Nintendo Switch is updated to Version 14.0.0, then follow the steps below to learn how to place your games into groups.
How to create groups on Nintendo Switch
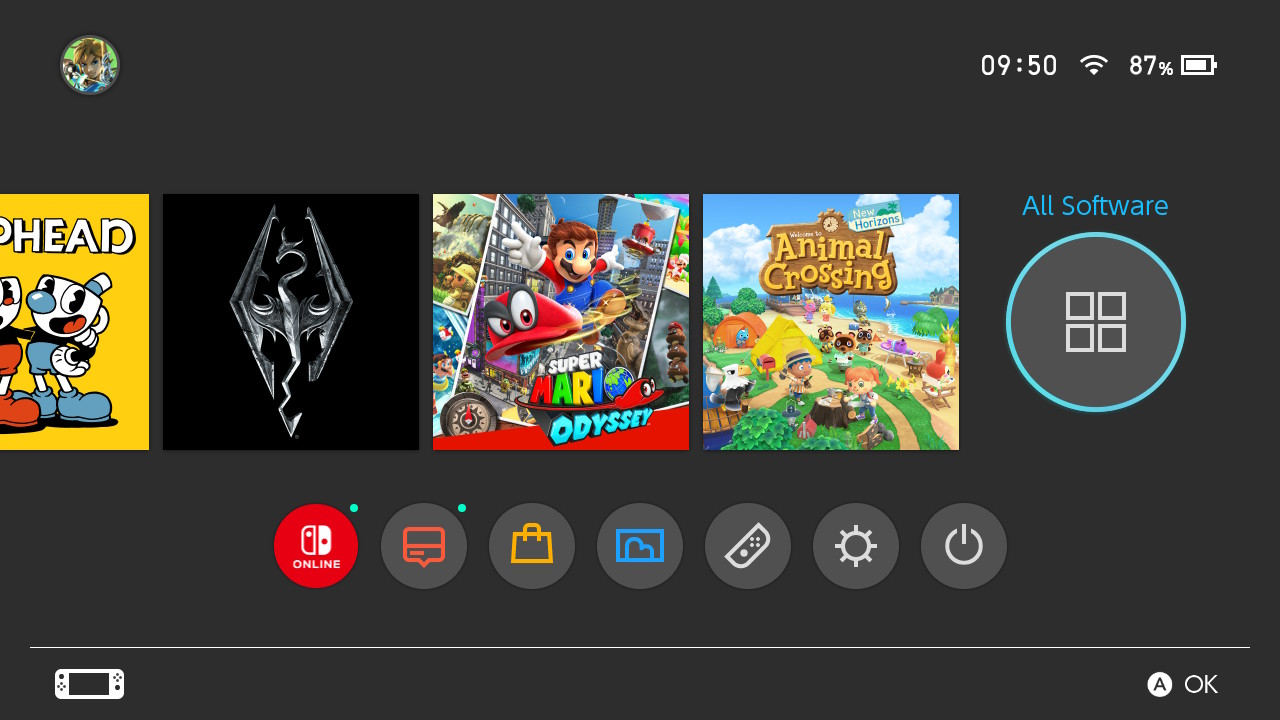
1. From the Nintendo Switch home screen scroll right and select All Software
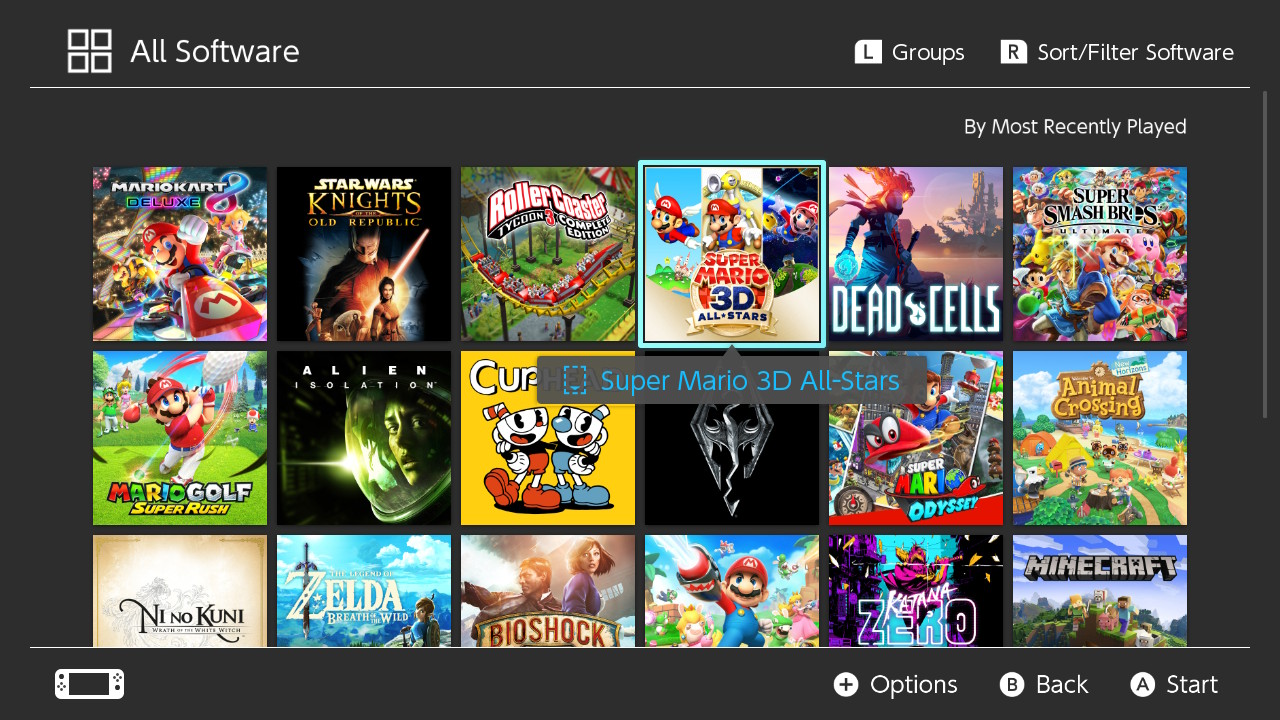
2. Press the L Button to view software groups
Get instant access to breaking news, the hottest reviews, great deals and helpful tips.
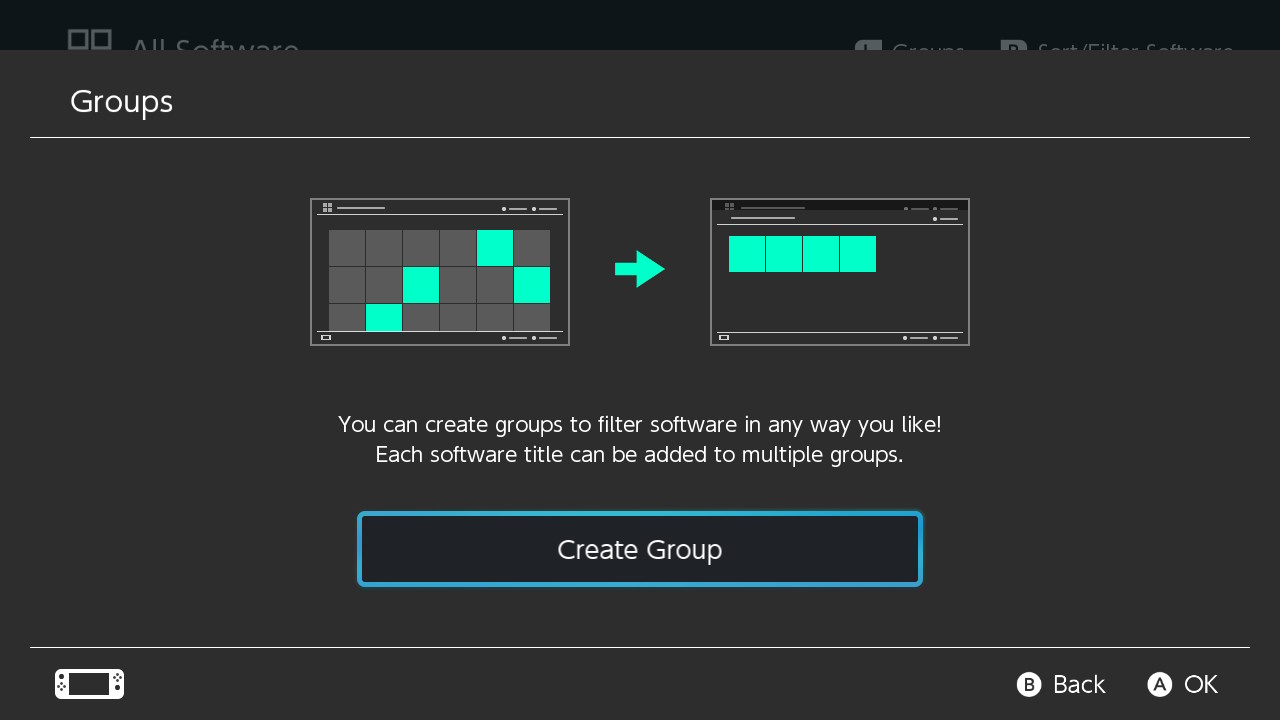
3. If this is your first time creating a group, you’ll get a pop up notification where you can select Create New Group. If you’ve made a group before, click the + Button to create a new group.
4. Select the software titles that you wish to add to the group.
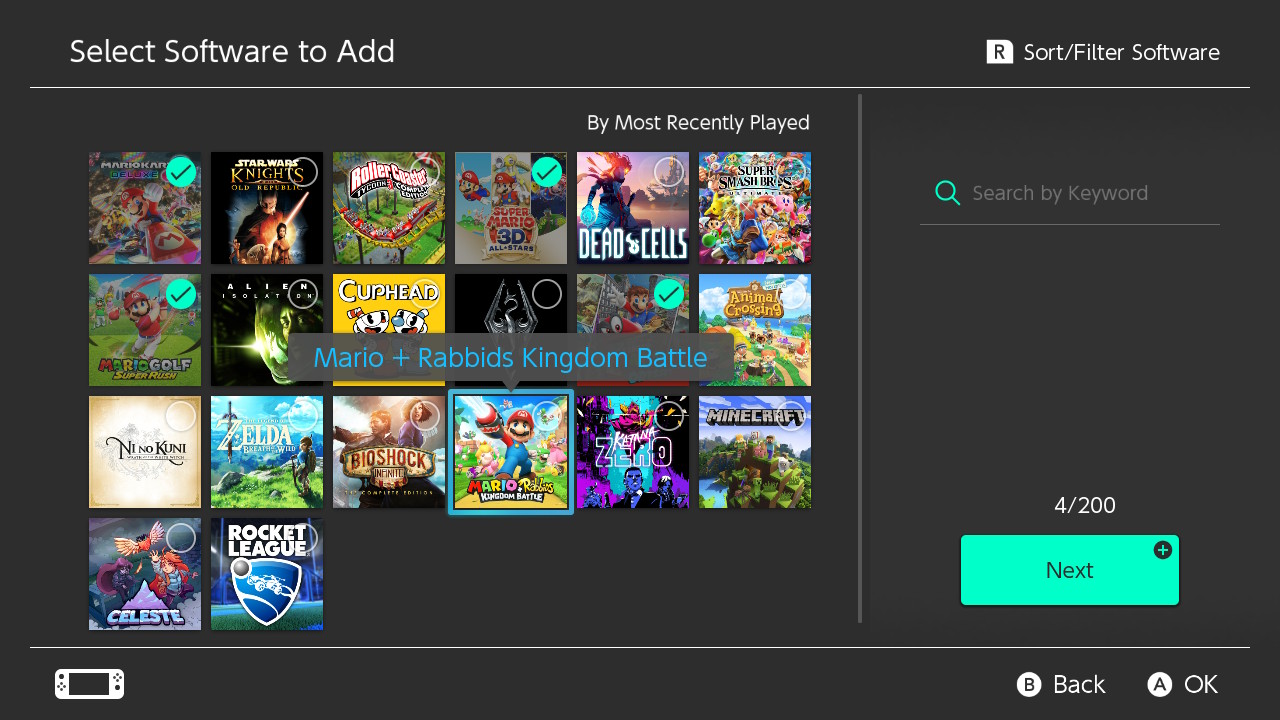
5. Arrange the software titles in the order you wish.
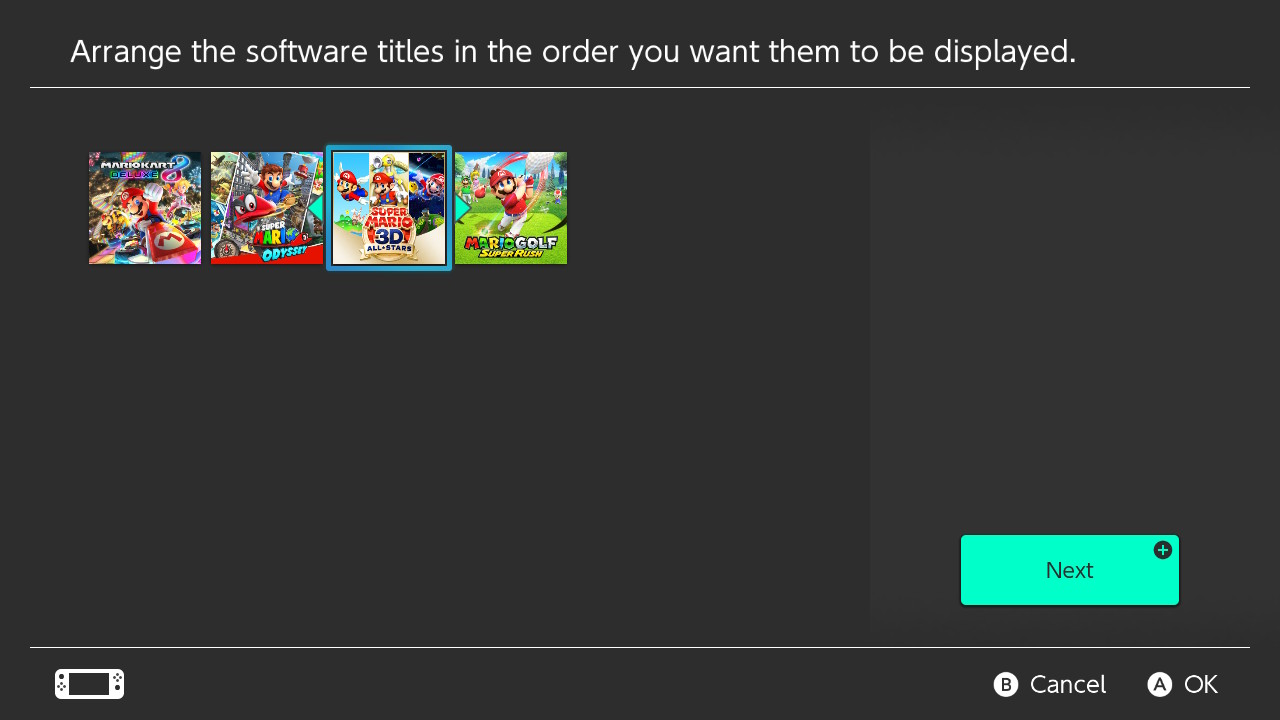
6. Select a name for the group.
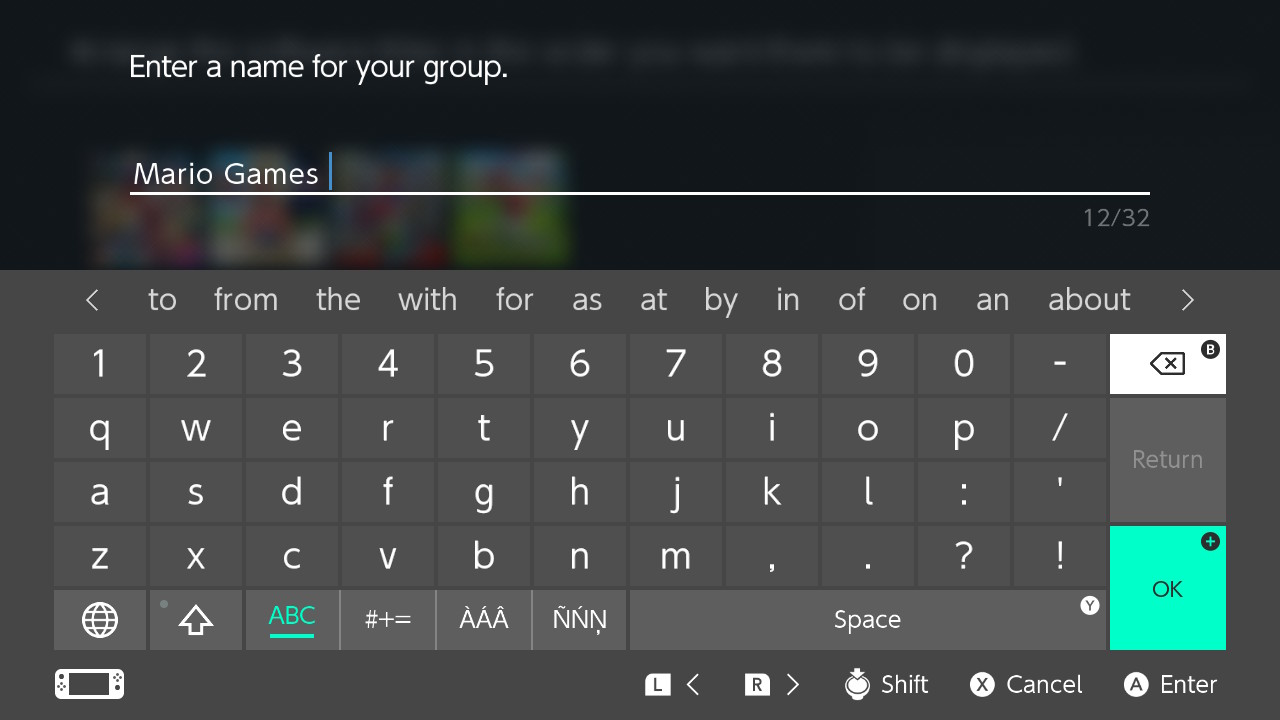
7. Your created group will now appear in the Software Groups section. It can be found by pressing the L Button in the All Software menu.
For more on the Nintendo Switch, check out how to set up your Nintendo Switch, how to use a Nintendo Switch Pro controller on your PC and our list of the best Nintendo Switch games.

Rory is a Senior Entertainment Editor at Tom’s Guide based in the UK. He covers a wide range of topics but with a particular focus on gaming and streaming. When he’s not reviewing the latest games, searching for hidden gems on Netflix, or writing hot takes on new gaming hardware, TV shows and movies, he can be found attending music festivals and getting far too emotionally invested in his favorite football team.
