How to rotate an image in Lightroom
This is how you rotate an image in Adobe Lightroom
Here at Tom’s Guide our expert editors are committed to bringing you the best news, reviews and guides to help you stay informed and ahead of the curve!
You are now subscribed
Your newsletter sign-up was successful
Want to add more newsletters?
Join the club
Get full access to premium articles, exclusive features and a growing list of member rewards.
Learning how to rotate an image in Lightroom is something you'll need to pick up pretty quickly when you start using Adobe's legendary photo studio application.
Rotating images is a key transformational tool that photographers will often apply before they've made other edits. For example, you may have deliberately taken an image upside down or in the wrong orientation, or been forced to by the angle you had to shoot at. In these cases, you'll want to quickly rotate the image to set it up as you'd imagined. Then you can get to editing it properly.
As you'd expect from one of the best photo editing software applications out there, rotating an image is easy in Lightroom. But that doesn't mean it's obvious how to do it. As with any professional Adobe application, there's a learning curve involved to get familiar with Lightroom, and myriad tools in front of you that aren't initially explained.
To complicate matters further, there are even two different versions of Lightroom. There's the standard Lightroom, which looks and feels like the app versions and is better for casual photographers editing the odd image. Then there's Lightroom Classic, which offers the classic Lightroom interface that long-term users will be used to, and provides much better professional workflow features, such as the catalog organization system. I'll be using Lightroom Classic here today, but the steps will essentially be the same on non-classic Lightroom anyway.
Without further ado, here's how to rotate an image in Lightroom.
How to rotate an image in Lightroom
Firstly, we'll look at how to simply rotate an image with no crop. These steps will be the same on both Lightroom and Lightroom Classic. This rotates around a central point, 90 degrees. If you need to rotate to a specific degree to straighten a slightly wonky image, check out the section below.
1. Click Photo > Rotate [Left/Right]
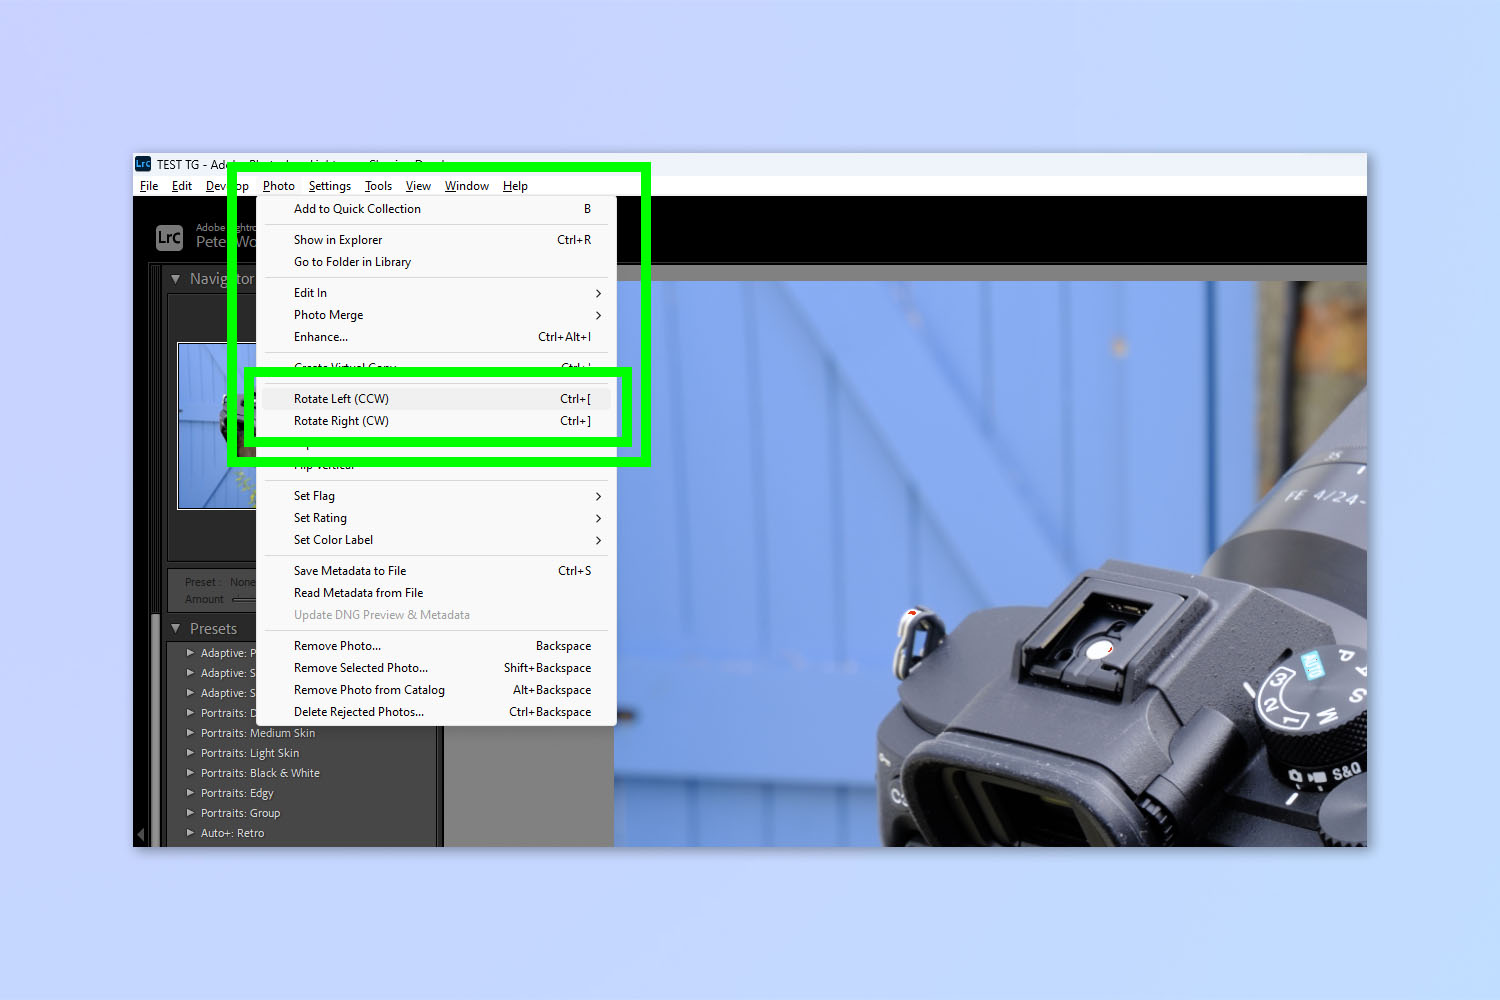
With an image open in Lightroom, click Photo in the top toolbar. Now click Rotate Left (counter clockwise) or Rotate Right (Clockwise).
That's all there is to it! Your photo will rotate 90 degrees, so you can just repeat this step until you're happy with the level of rotation.
How to straighten an image in Lightroom
If you need to rotate to a specific angle, you'll need to use a different method, called straightening. This method will allow you to rotate an image to whatever angle you'd like, so it's perfect for making small adjustments to slightly wonky images to straighten them up. Bear in mind, though, that this method crops the image too, so you will lose some of your original pixels.
Get instant access to breaking news, the hottest reviews, great deals and helpful tips.
This method is virtually the same in both Lightroom and Lightroom Classic. You'll be using the Crop and Straighten menu, denoted by the crop symbol, with an arrow above and below. In Lightroom Classic, this is located at the top of the Developer panel; in Lightroom, the menu is called Crop & Rotate, and is permanently located on the right hand side of the window.
1. Click Develop (Lightroom Classic)
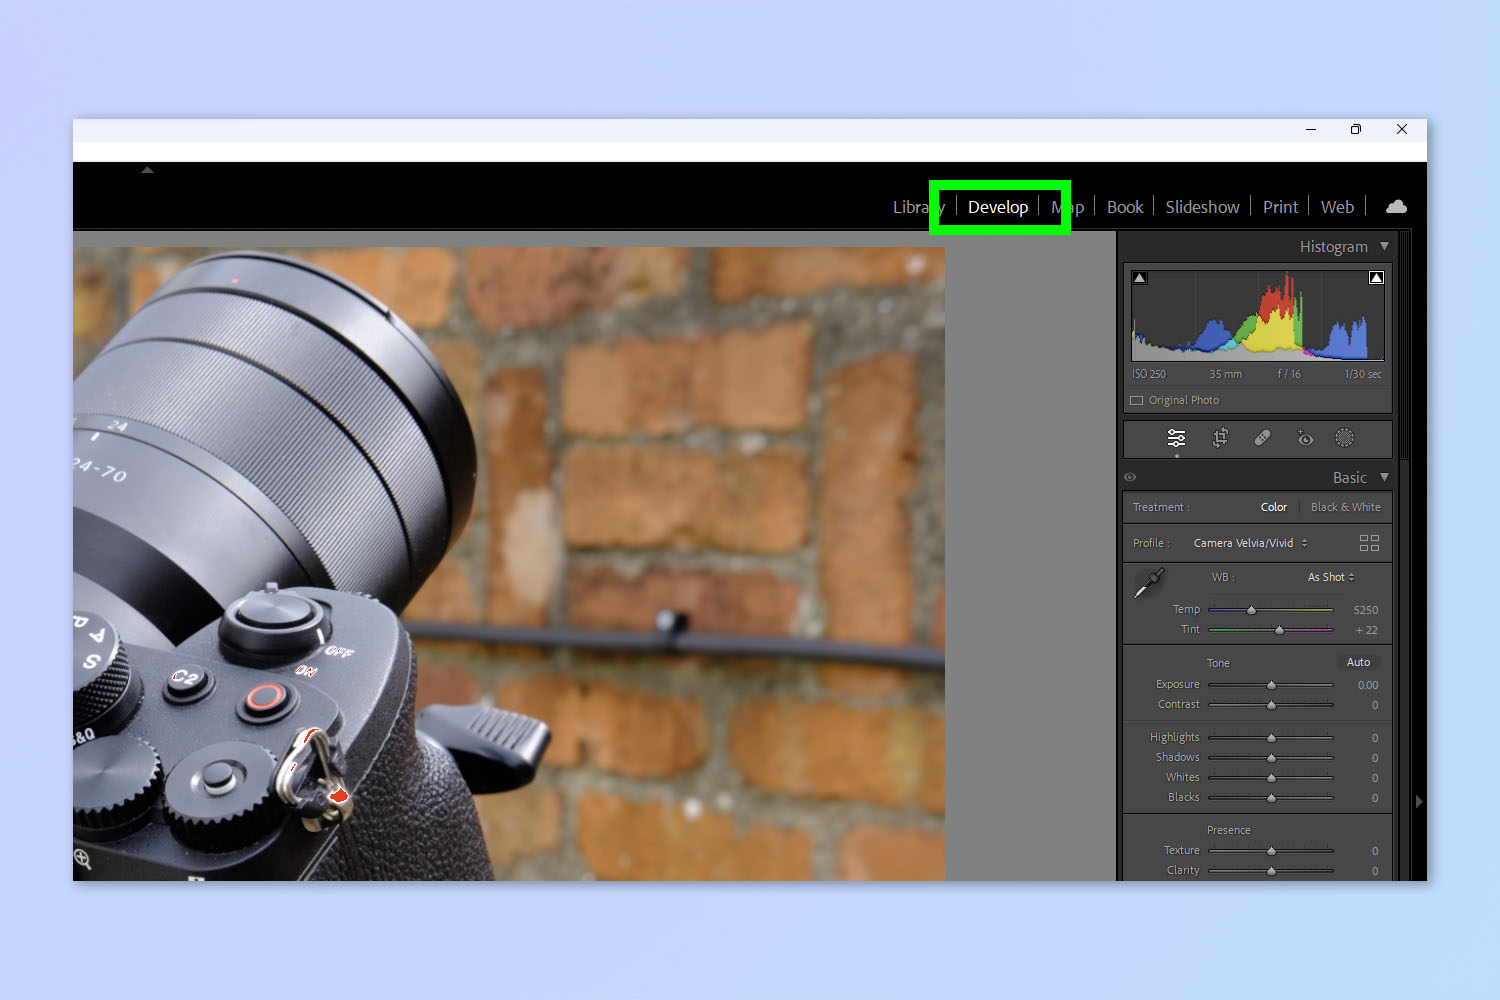
In Lightroom Classic, with an image open, click Develop. This is not required in Standard Lightroom, as the develop tools are permanently strapped to the right hand side of the screen.
2. Click Crop & Straighten (Classic) / Crop & Rotate (Standard)
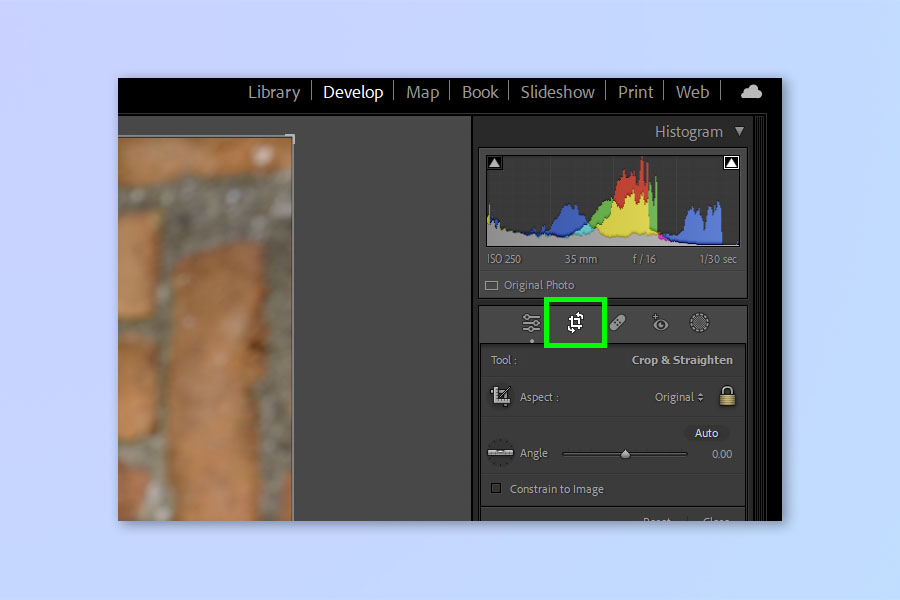
Now click the Crop and Straighten icon in the developer panel.
In Standard Lightroom, look for the same icon in the right side bar.
3. Drag the rotation slider
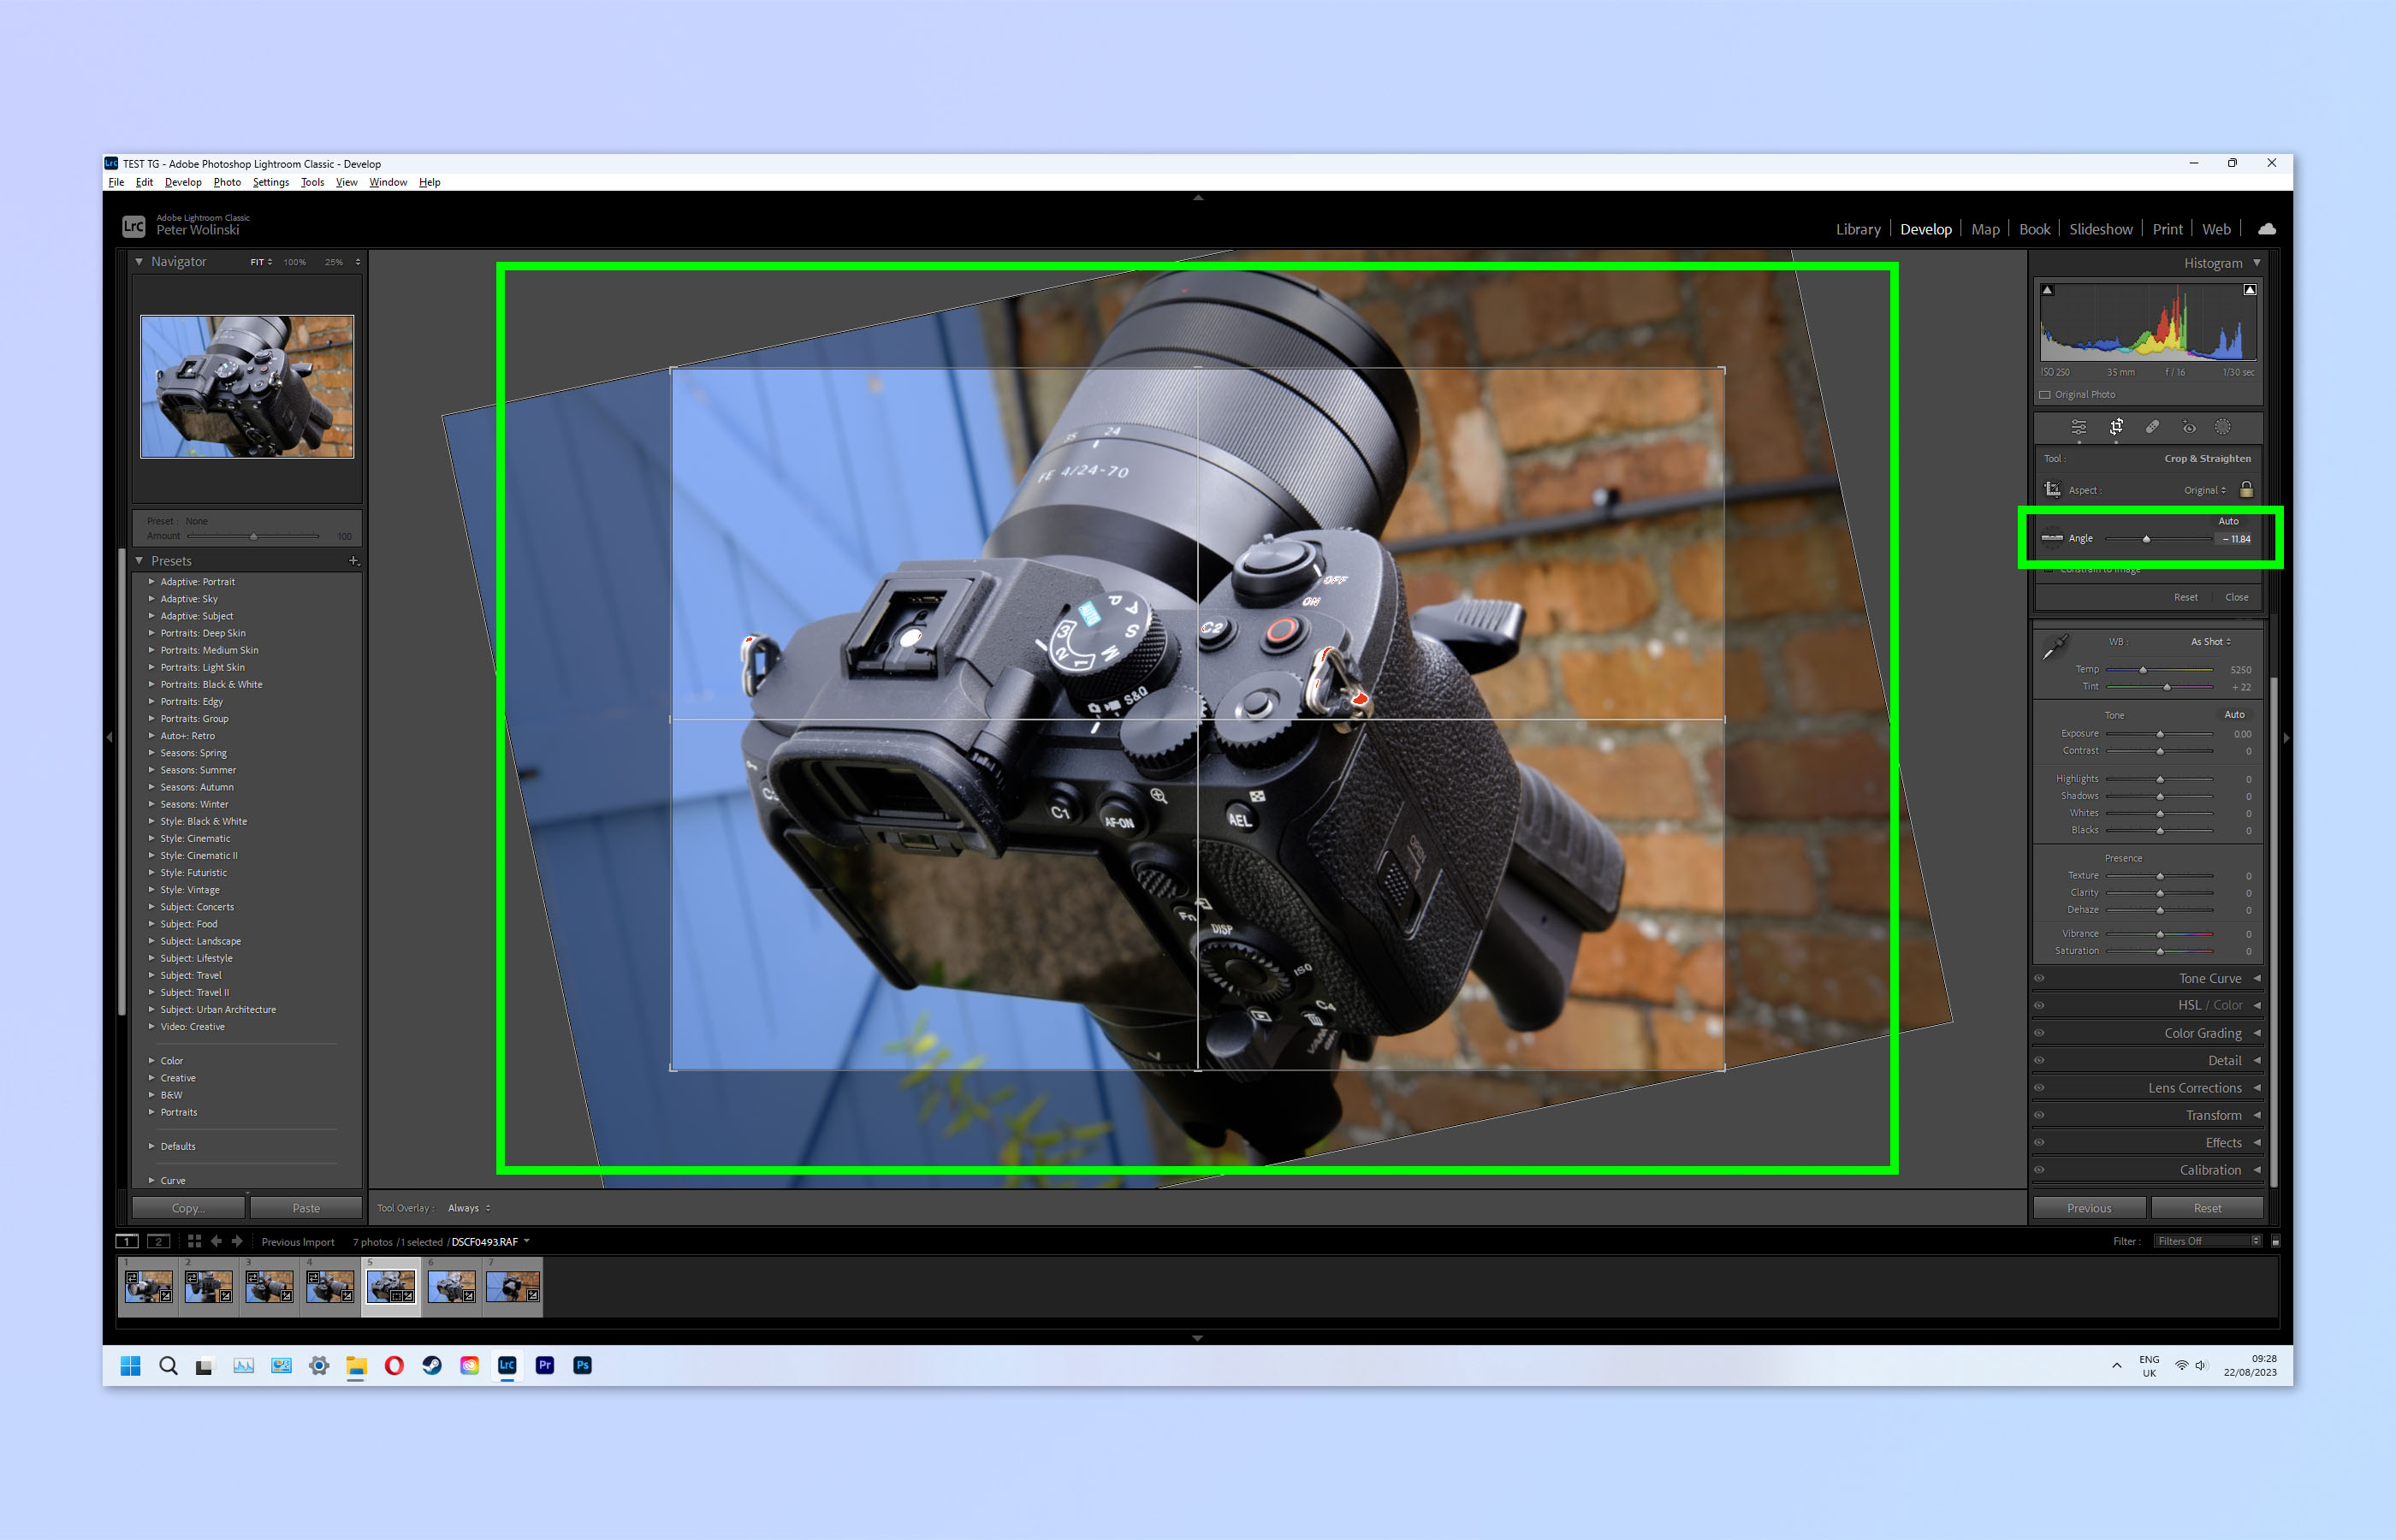
Now simply drag the rotation slider until your image has reached the desired rotation angle. Notice that your image is cropped to fit with the new angle — whatever crop present you have applied already will be used.
There you have it. You now know both ways of rotating an image in Lightroom. We also have other handy photo editing tutorials, so why not check out our guides on how to resize an image in Photoshop, how to flip an image in Photoshop and how to resize a canvas in Photoshop.

Peter is a Senior Editor at Tom's Guide, heading up the site's Reviews team and Cameras section. As a writer, he covers topics including tech, photography, gaming, hardware, motoring and food & drink. Outside of work, he's an avid photographer, specialising in architectural and portrait photography. When he's not snapping away on his beloved Fujifilm camera, he can usually be found telling everyone about his greyhounds, riding his motorcycle, squeezing as many FPS as possible out of PC games, and perfecting his espresso shots.

 Club Benefits


