How to screen record on iPhone
Learn how to screen record on iPhone in a few easy steps
Learning how to screen record on iPhone can be surprisingly useful. If you need to show a non-tech-savvy family member how to use a specific iPhone feature, for example, you can use the iPhone screen record function to film yourself doing it and send them a walkthrough. Perhaps you're an aspiring game streamer and you want to capture your greatest mobile gaming moments to impress your followers. Or maybe you want to make a copy of a video you've seen online without downloading it.
Whatever the reason, recording your screen on iPhone is super easy, and this guide is here to show you how, including how to add the screen record function to Control Center to make sure you have quick access to the function.
Ready? Here's how to screen record on iPhone.
How to screen record on iPhone
- Open Control Center
- Tap Screen Record to begin
- To end, tap the red status bar and tap Stop
Read on to see detailed instructions for each step.
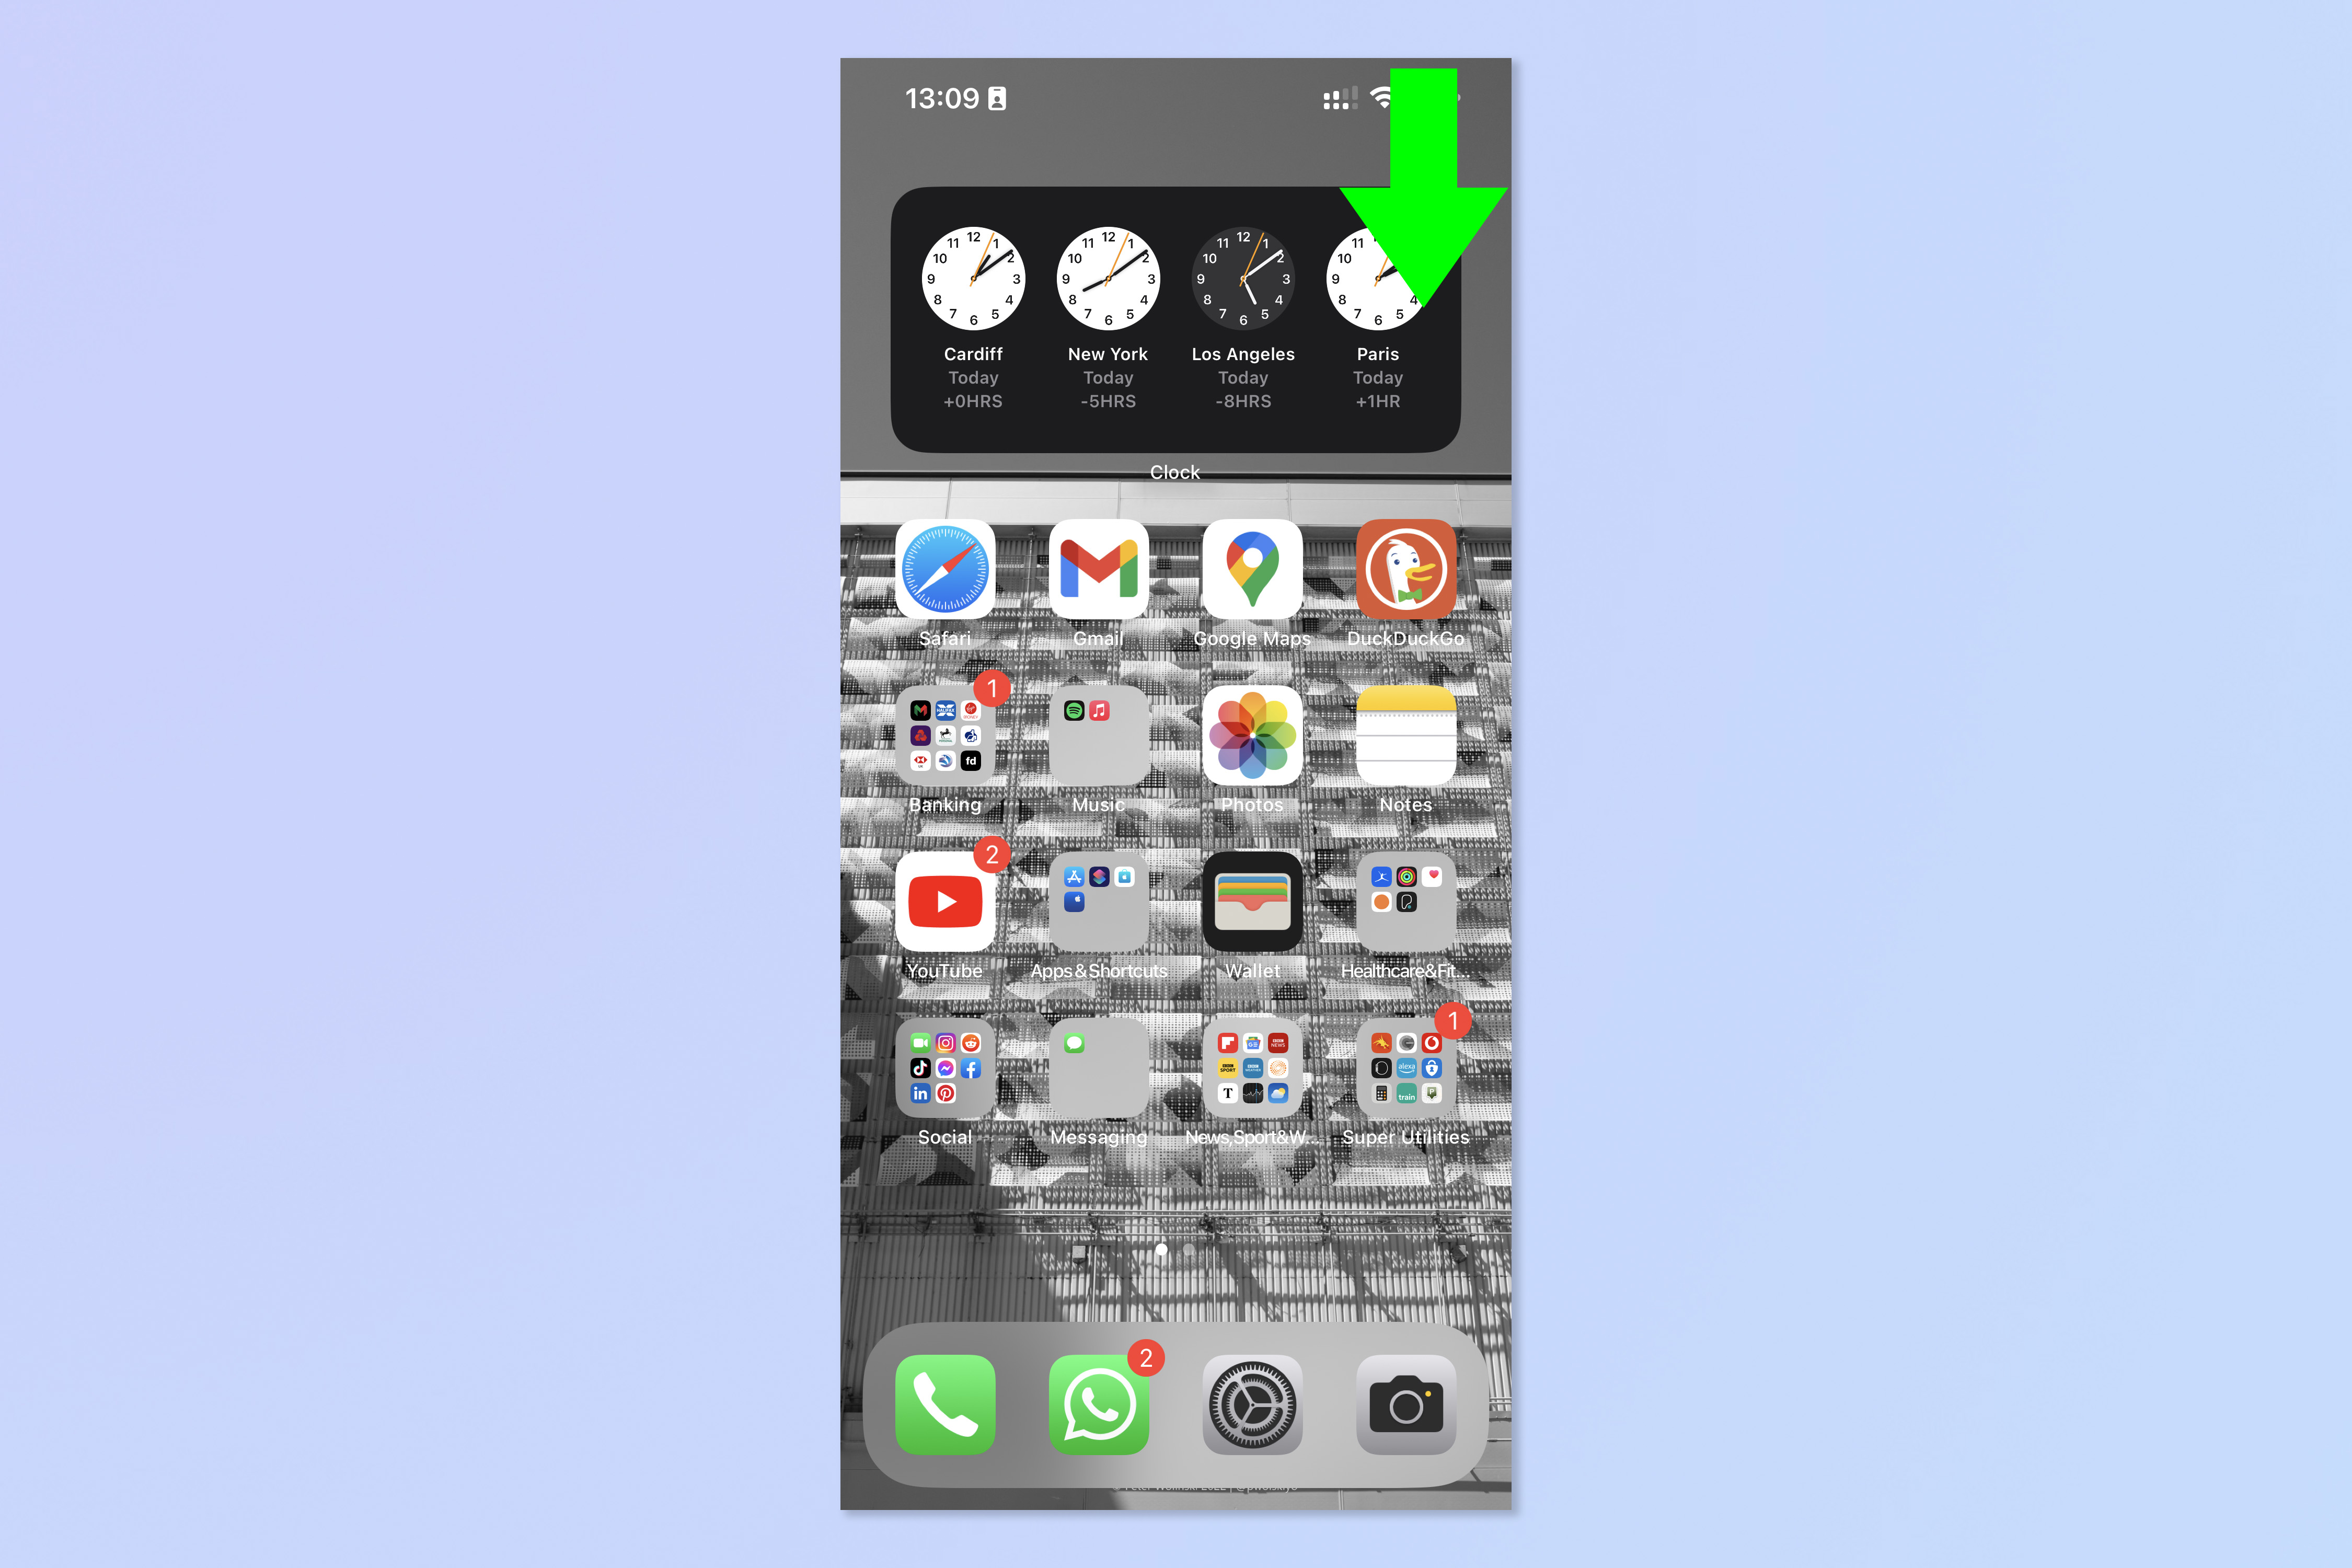
1. Open Control Center. On an iPhone with Face ID (iPhone X or later), swipe down from the upper-right corner of your iPhone display.
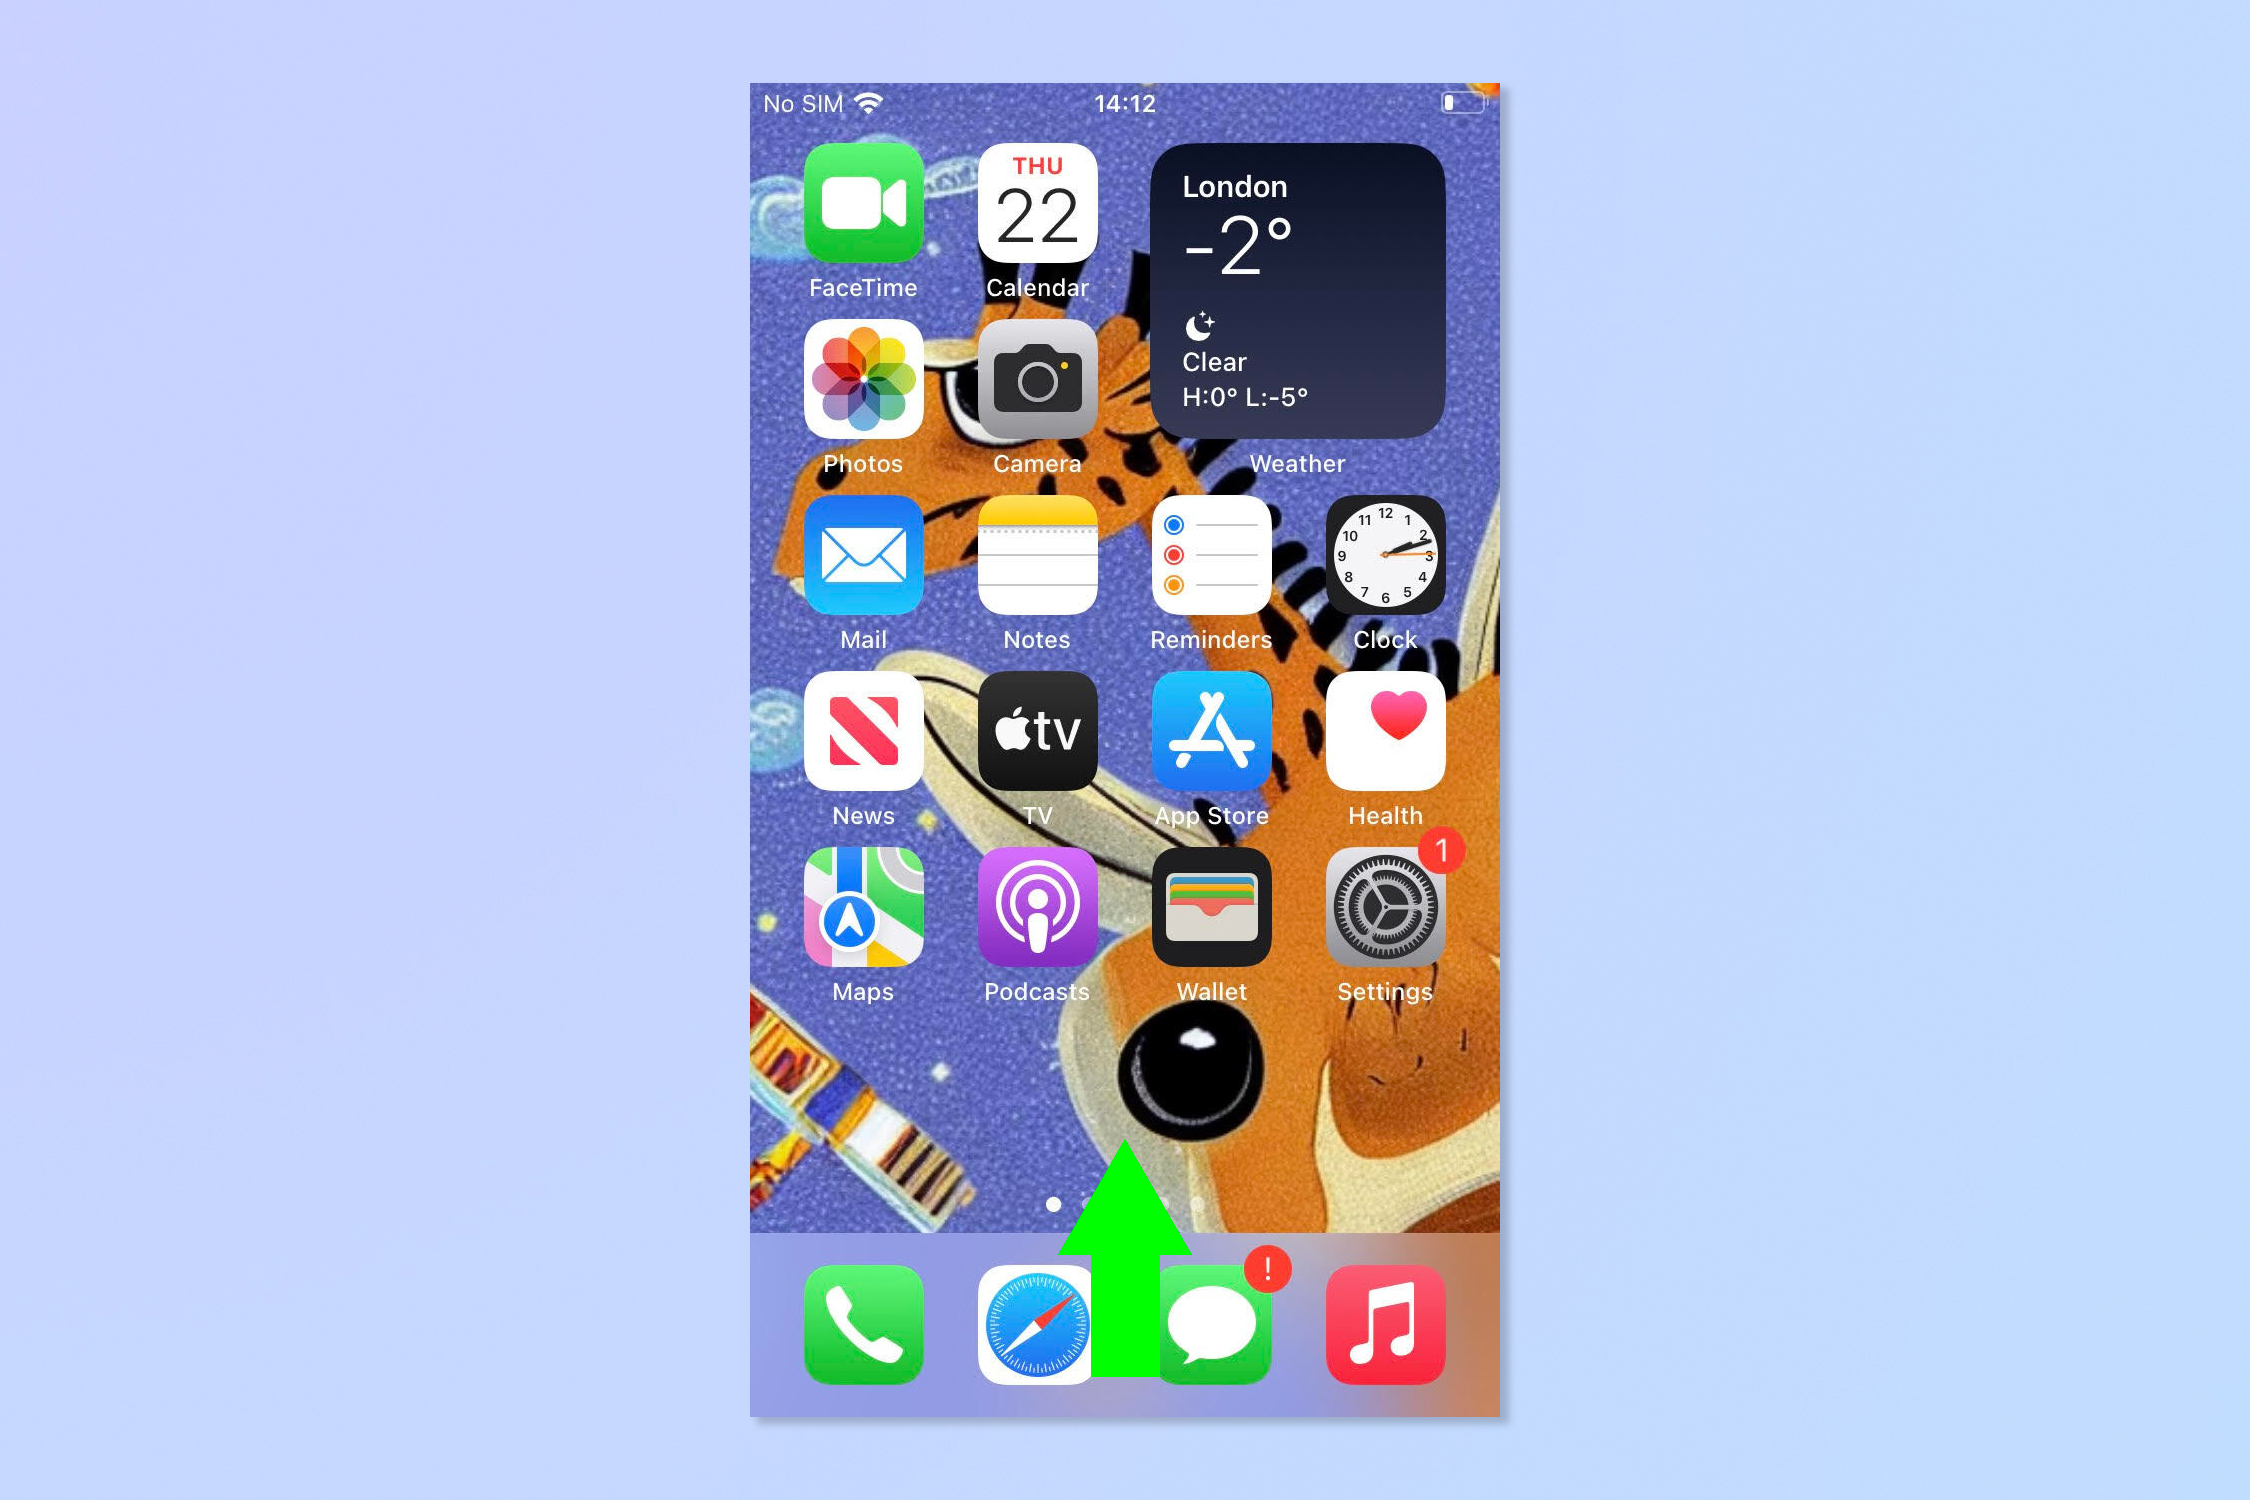
On an iPhone without Face ID (iPhone 8 or earlier; iPhone SE), swipe up from the bottom of your iPhone display.
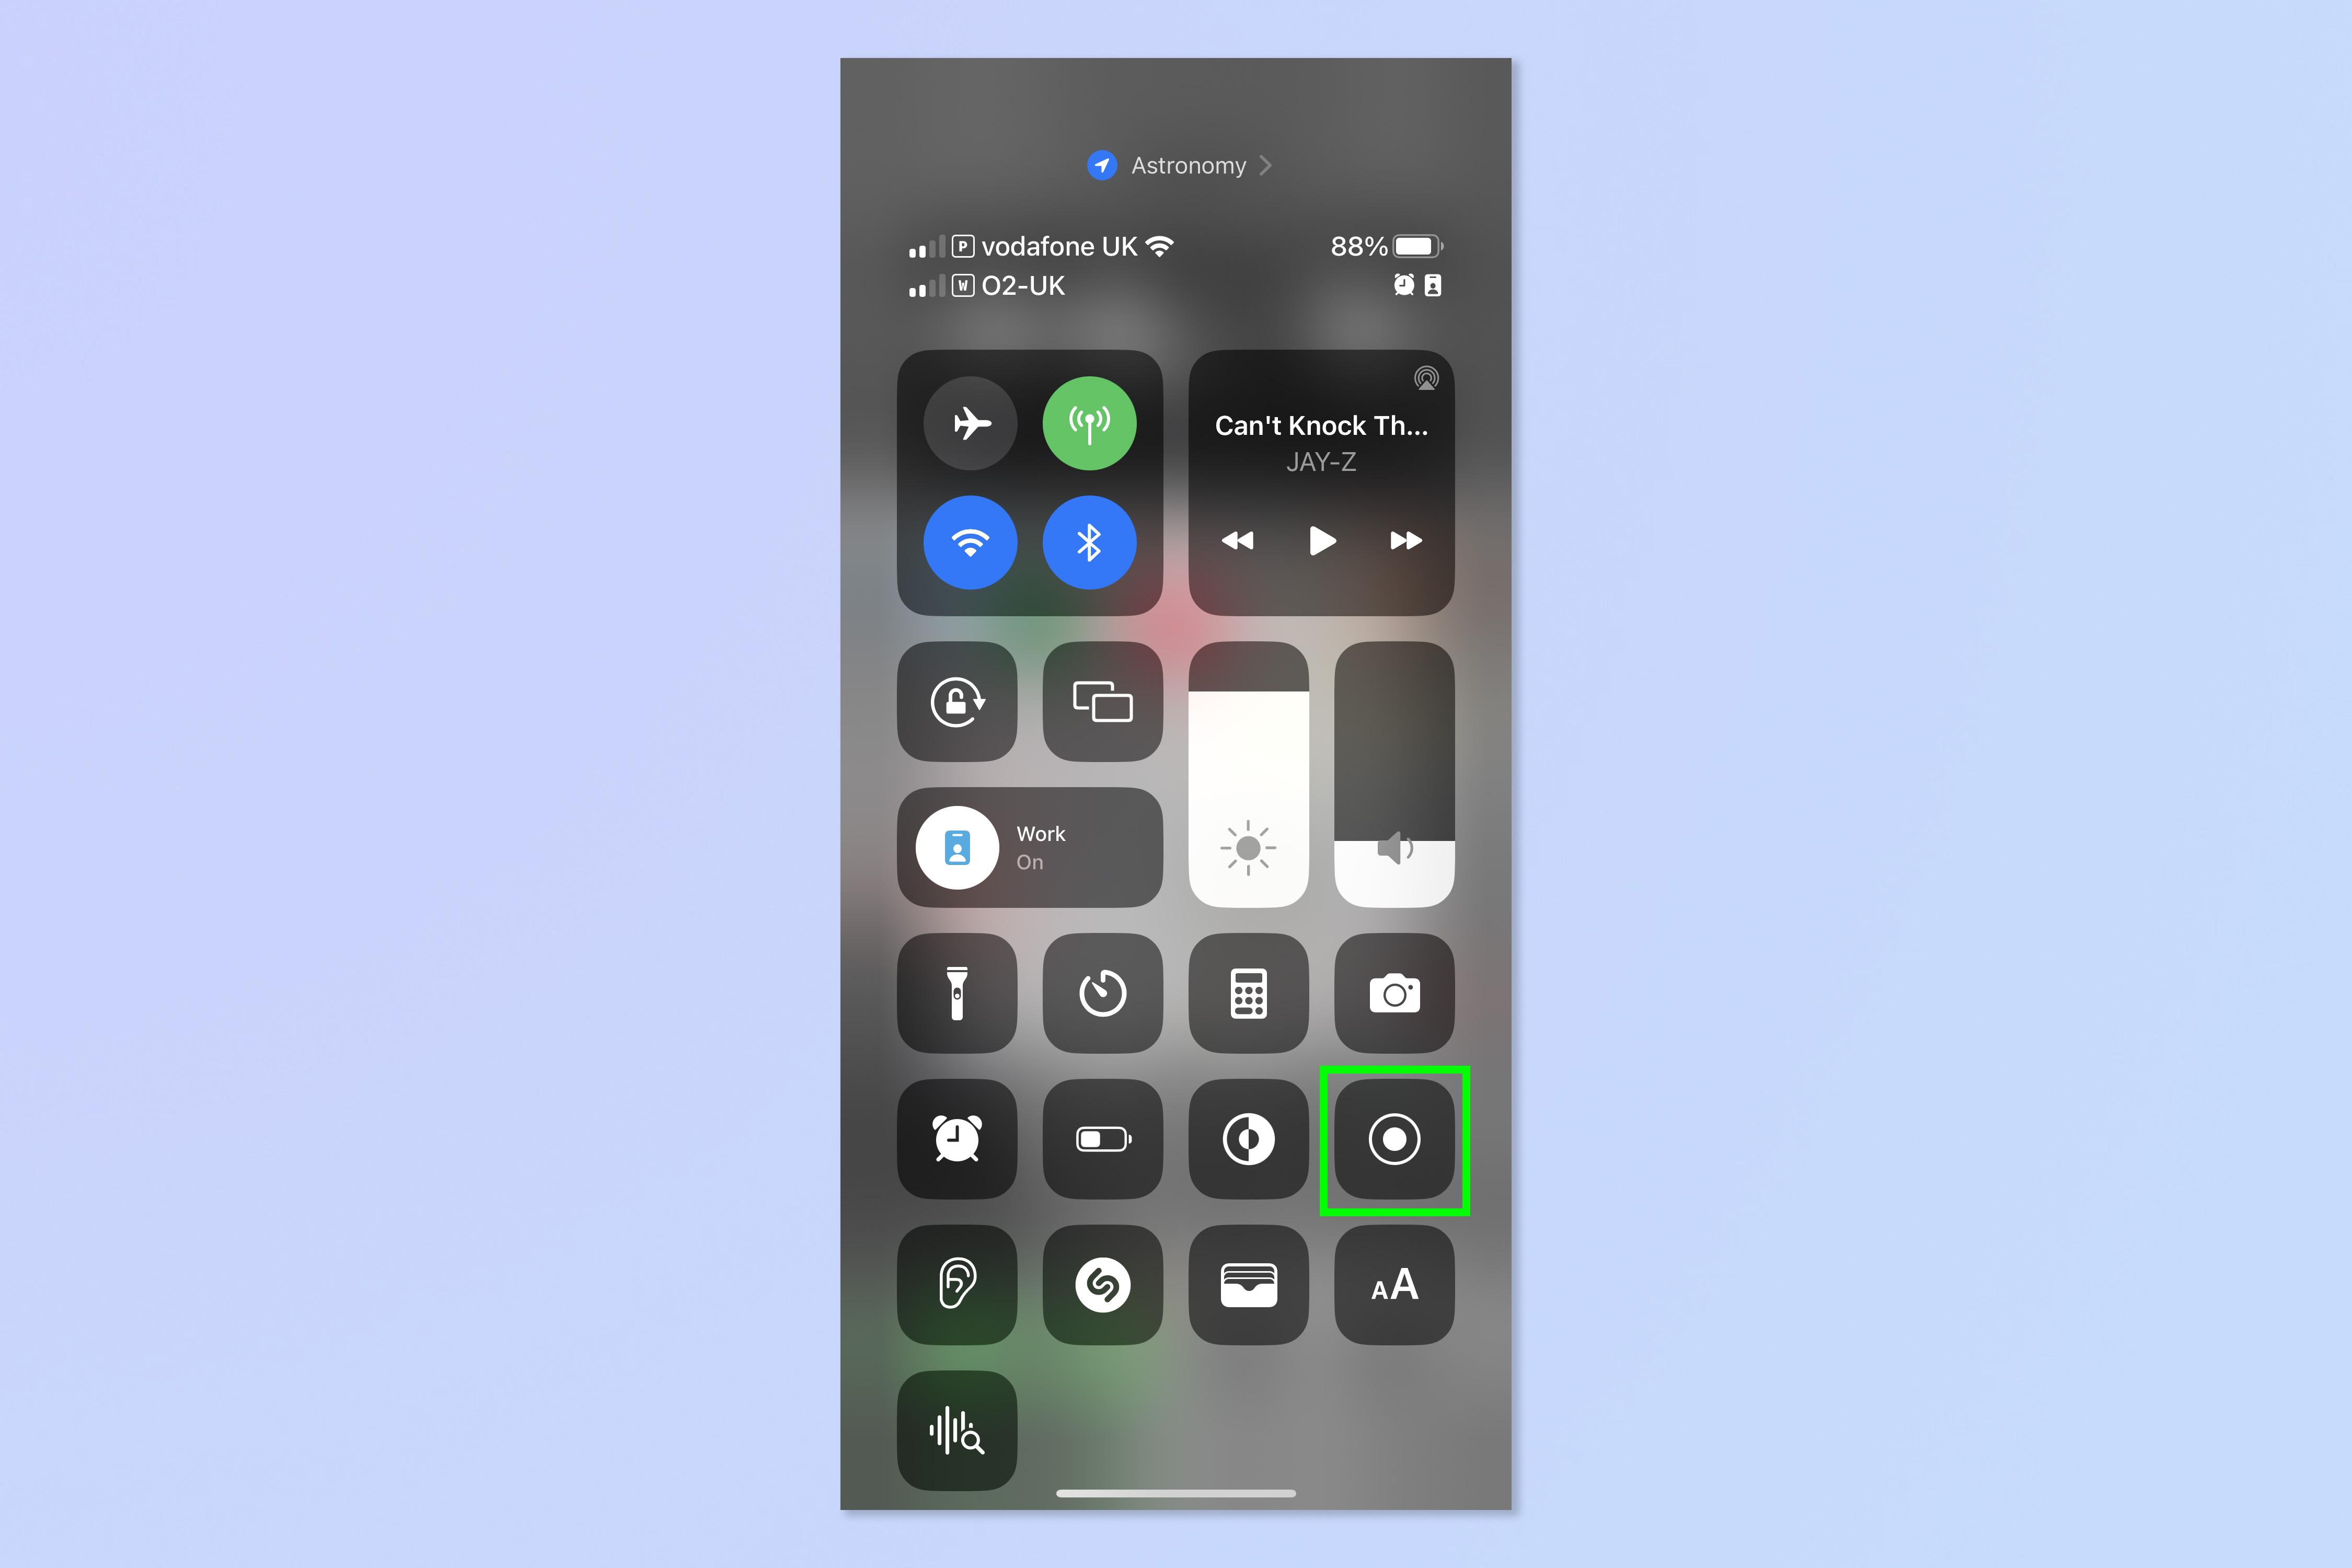
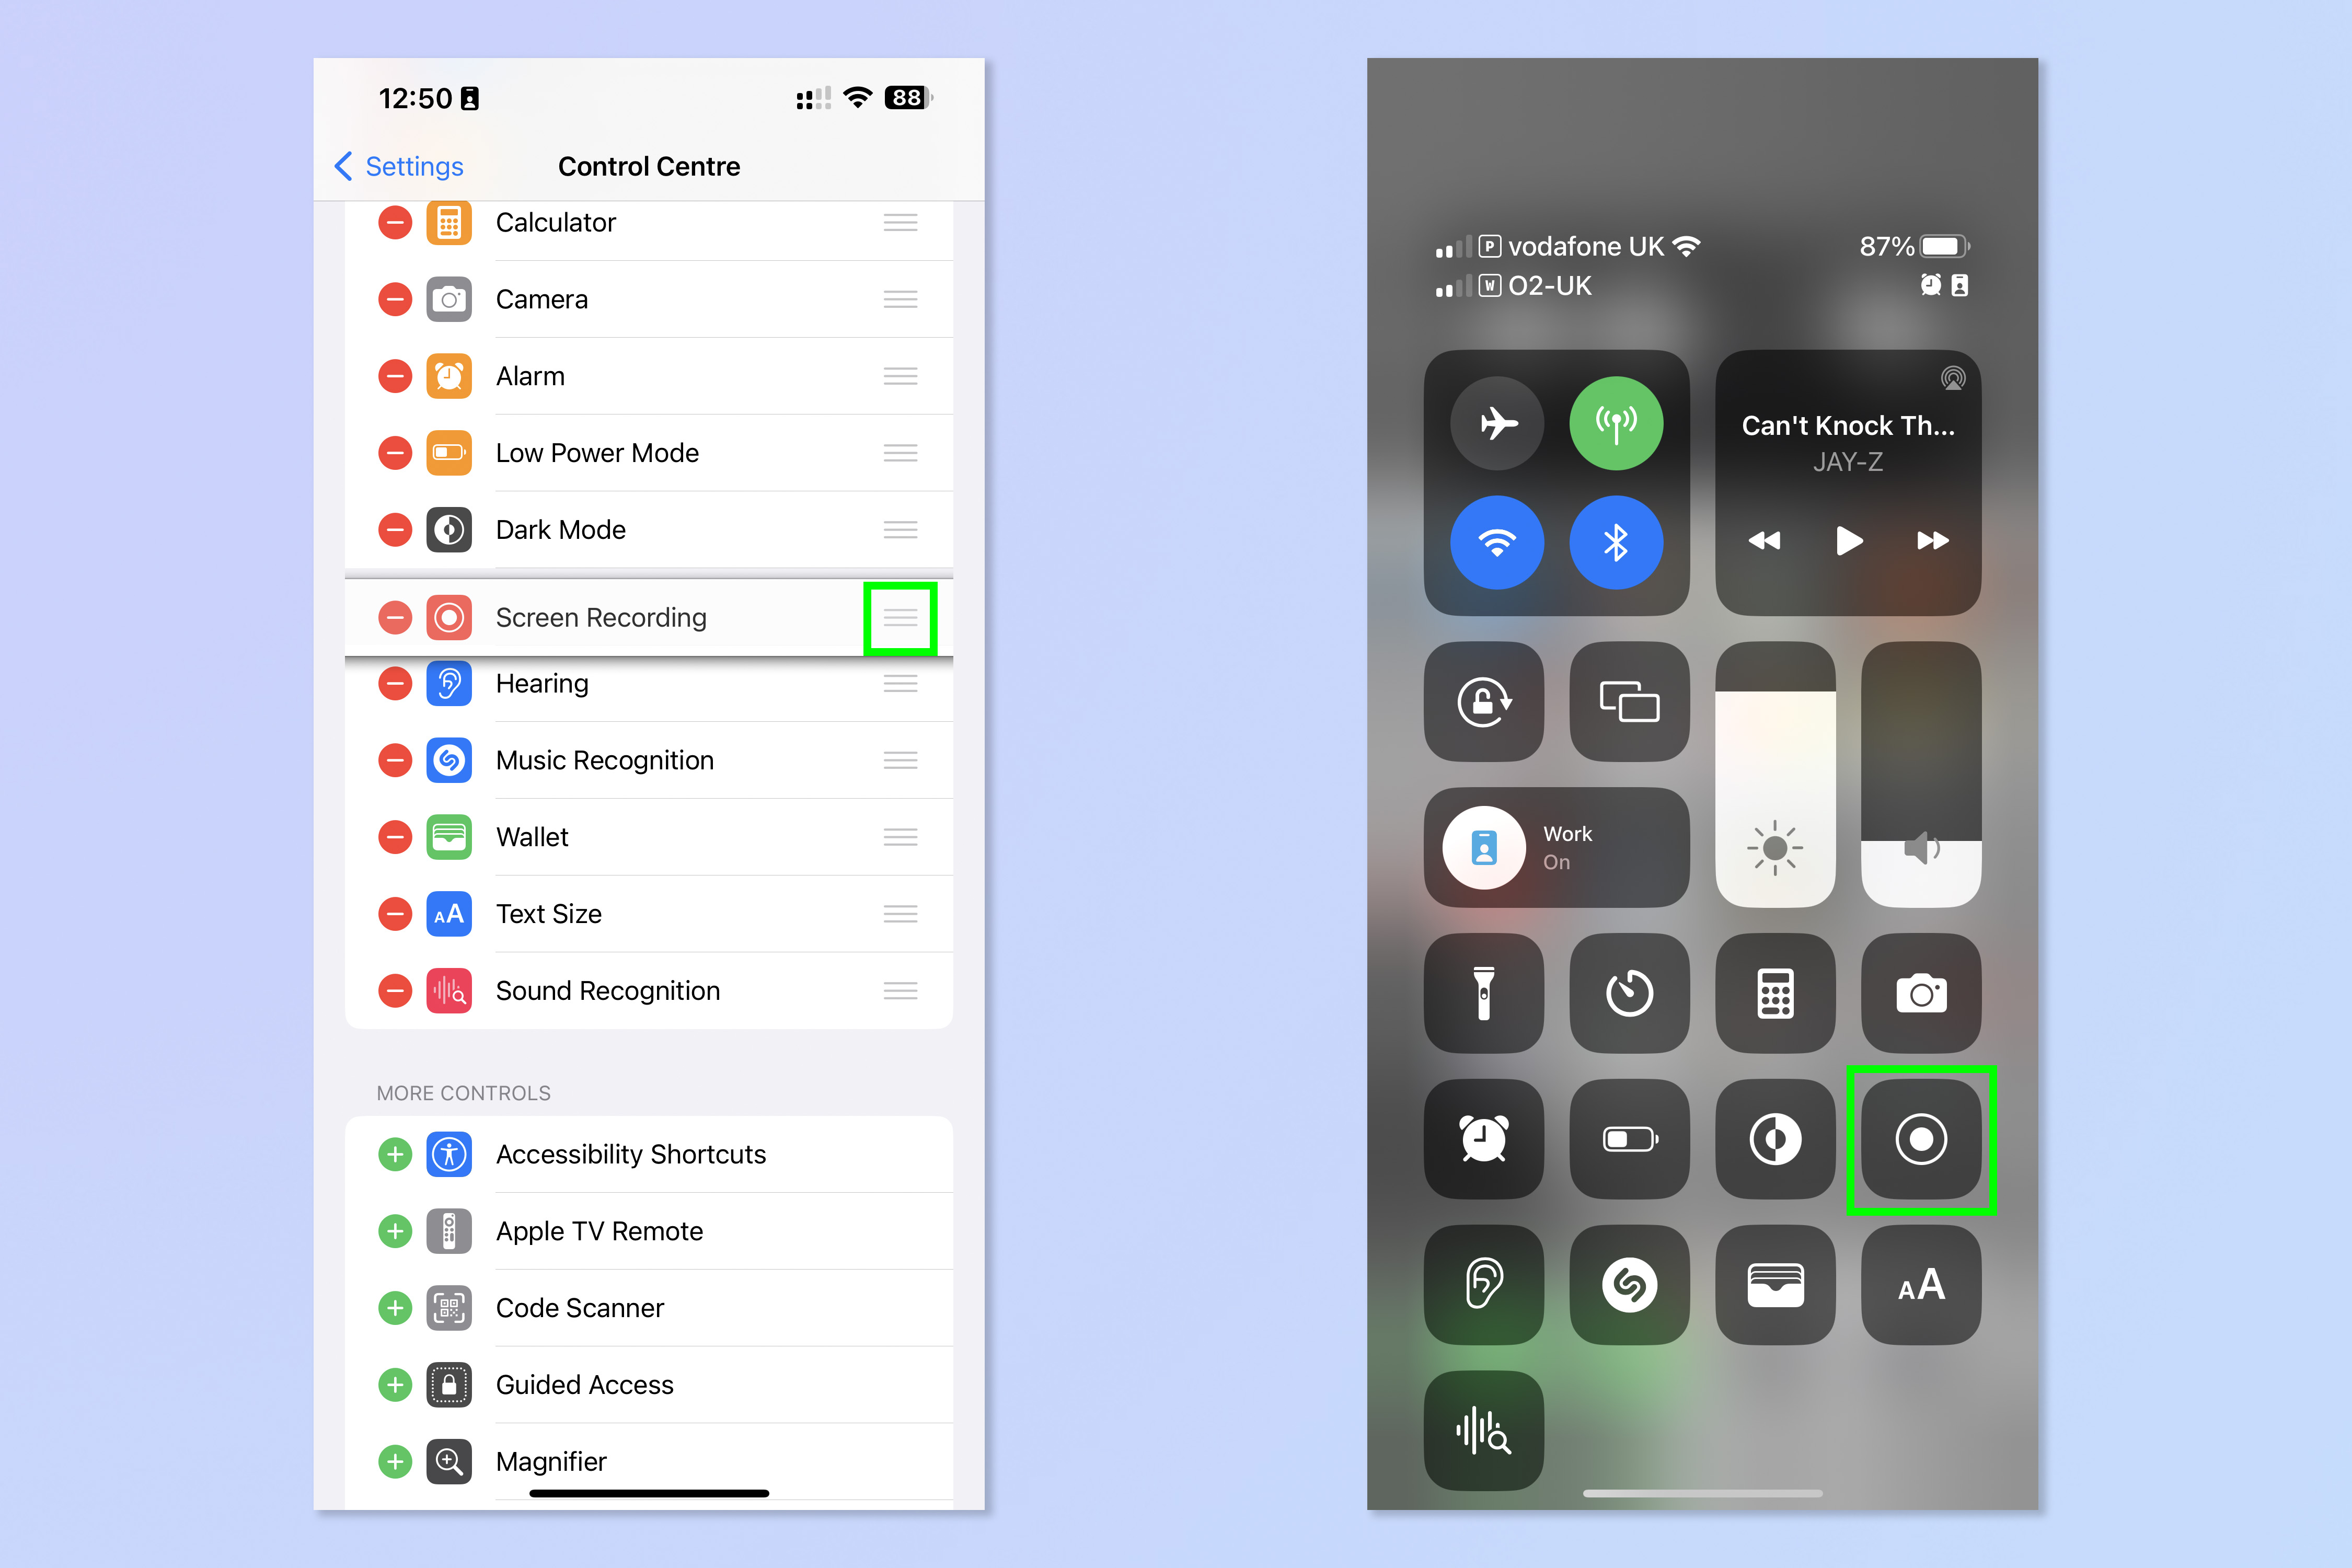
2. To record without your voice, tap the Screen Recording button. You'll need to wait 3 seconds for recording to begin.
Get instant access to breaking news, the hottest reviews, great deals and helpful tips.
If you can't see the Screen Recording button, skip down to the section below where we'll take you through how to add it to Control Center.
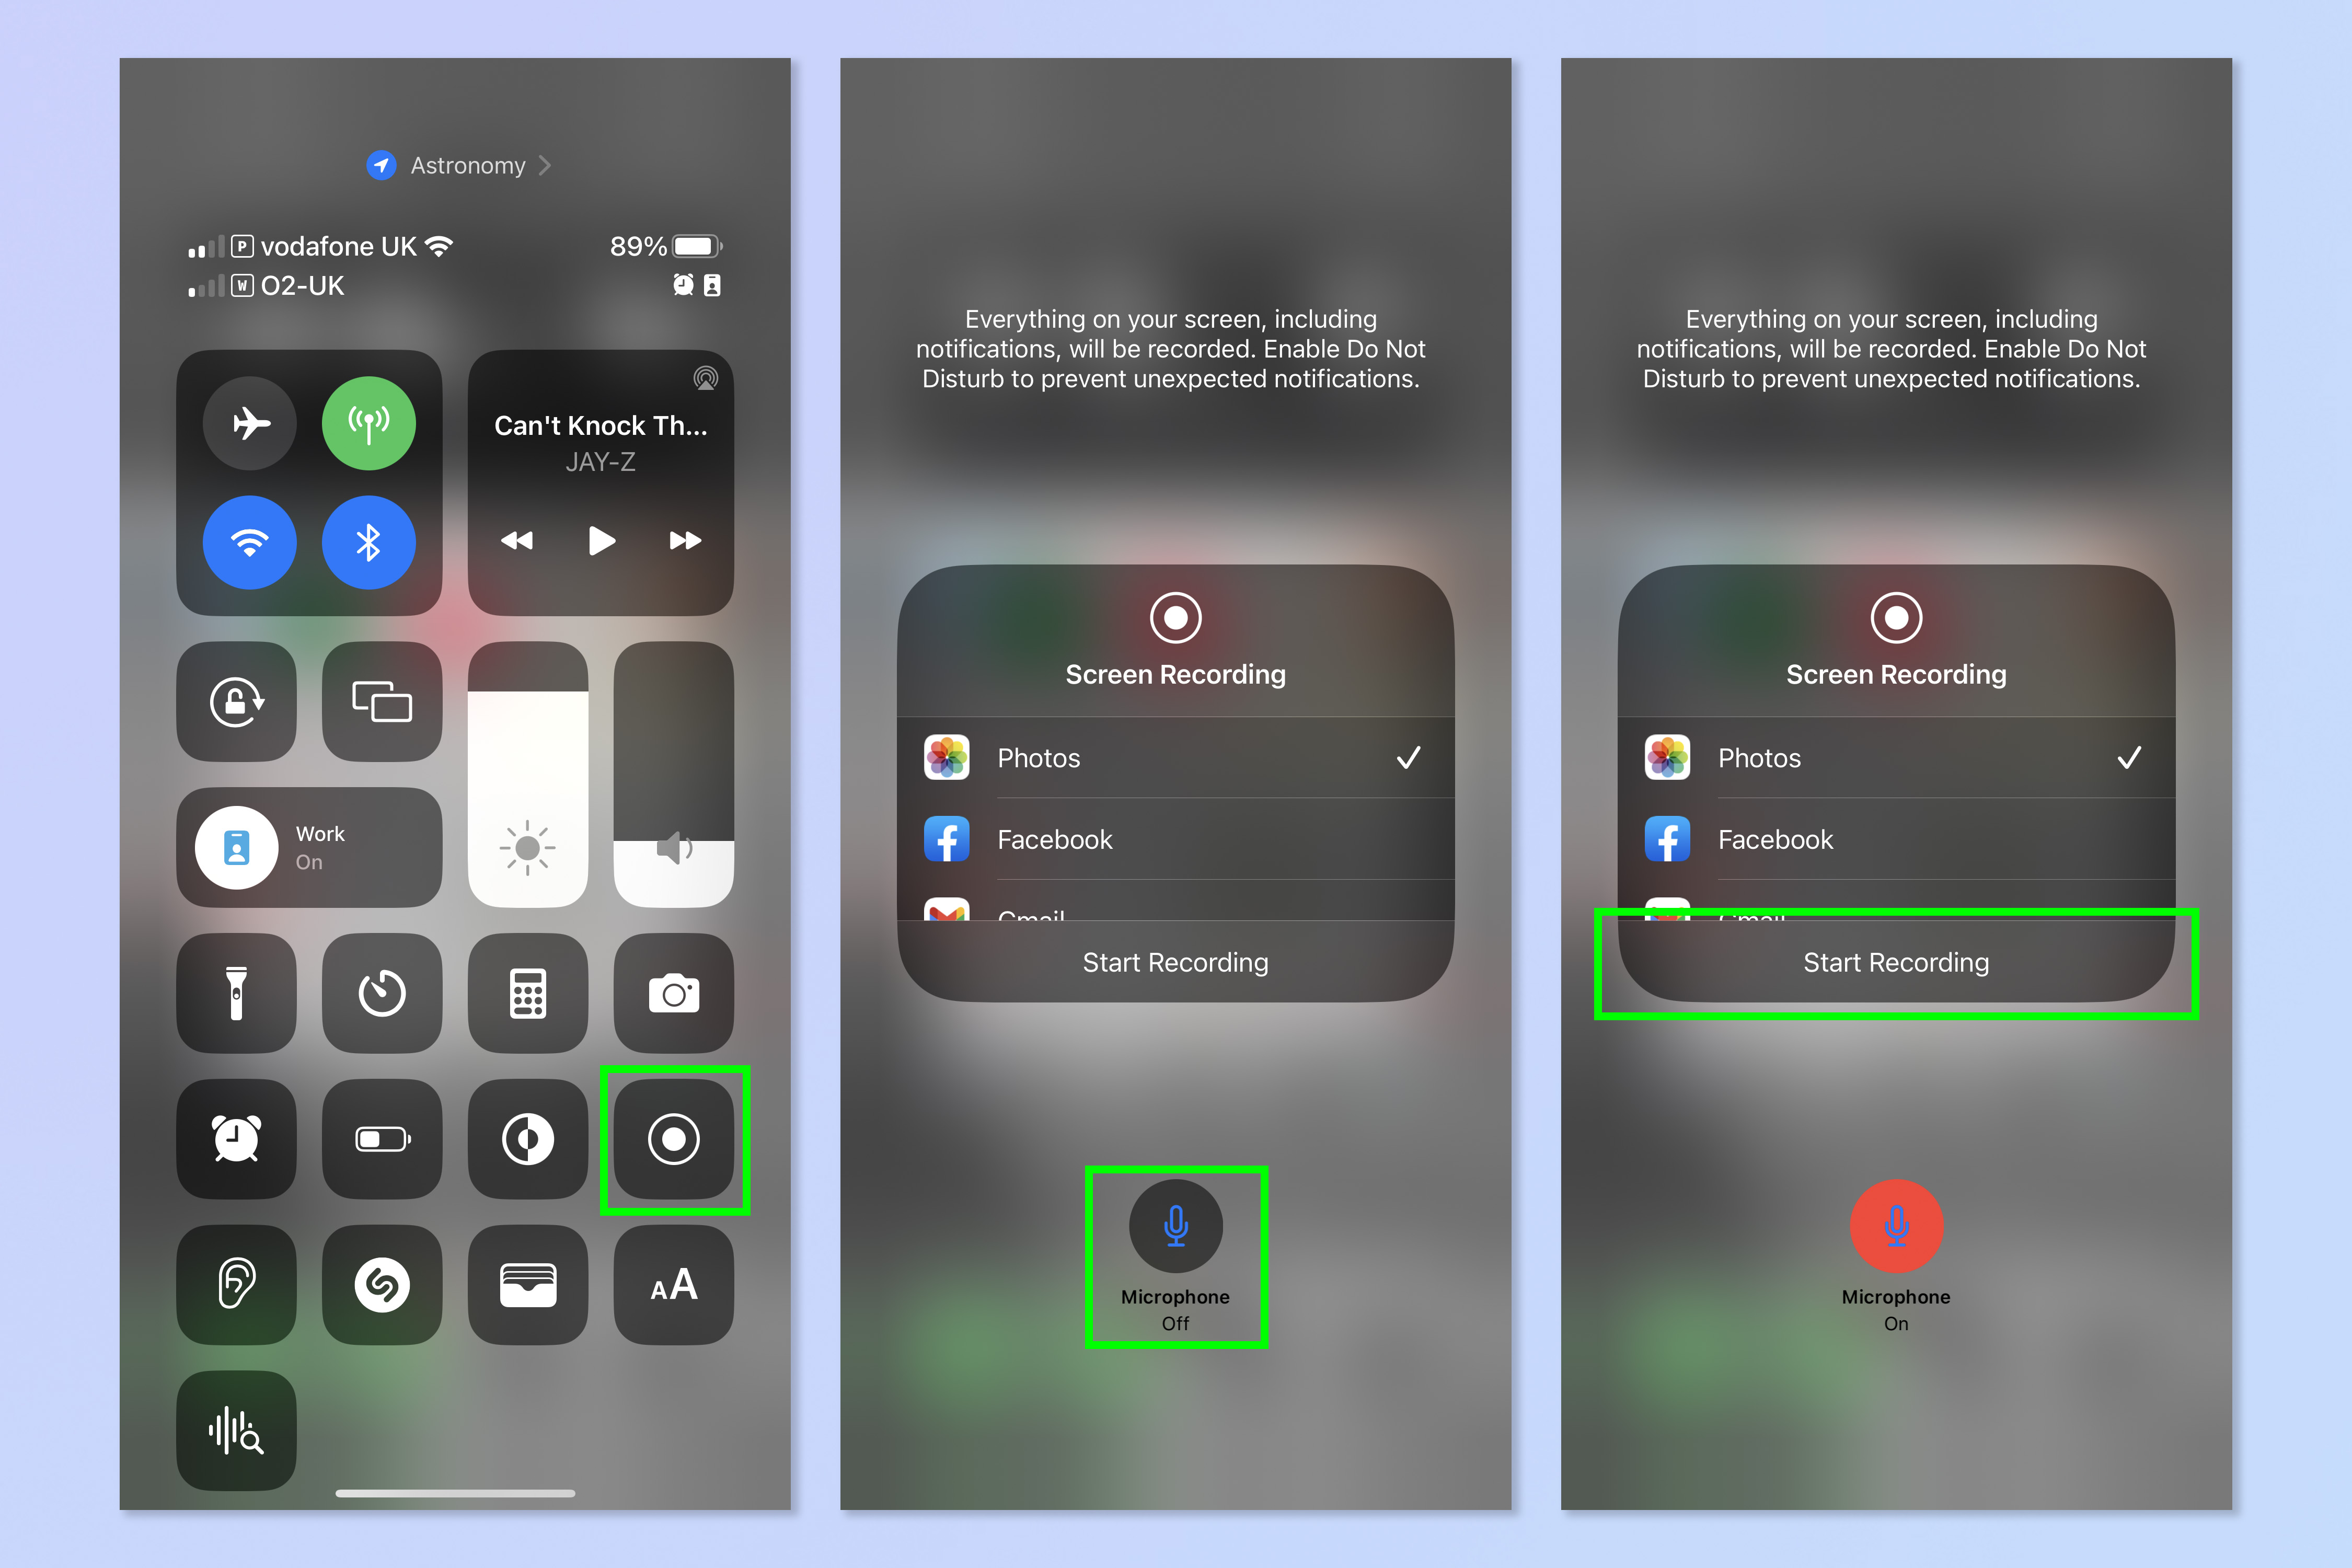
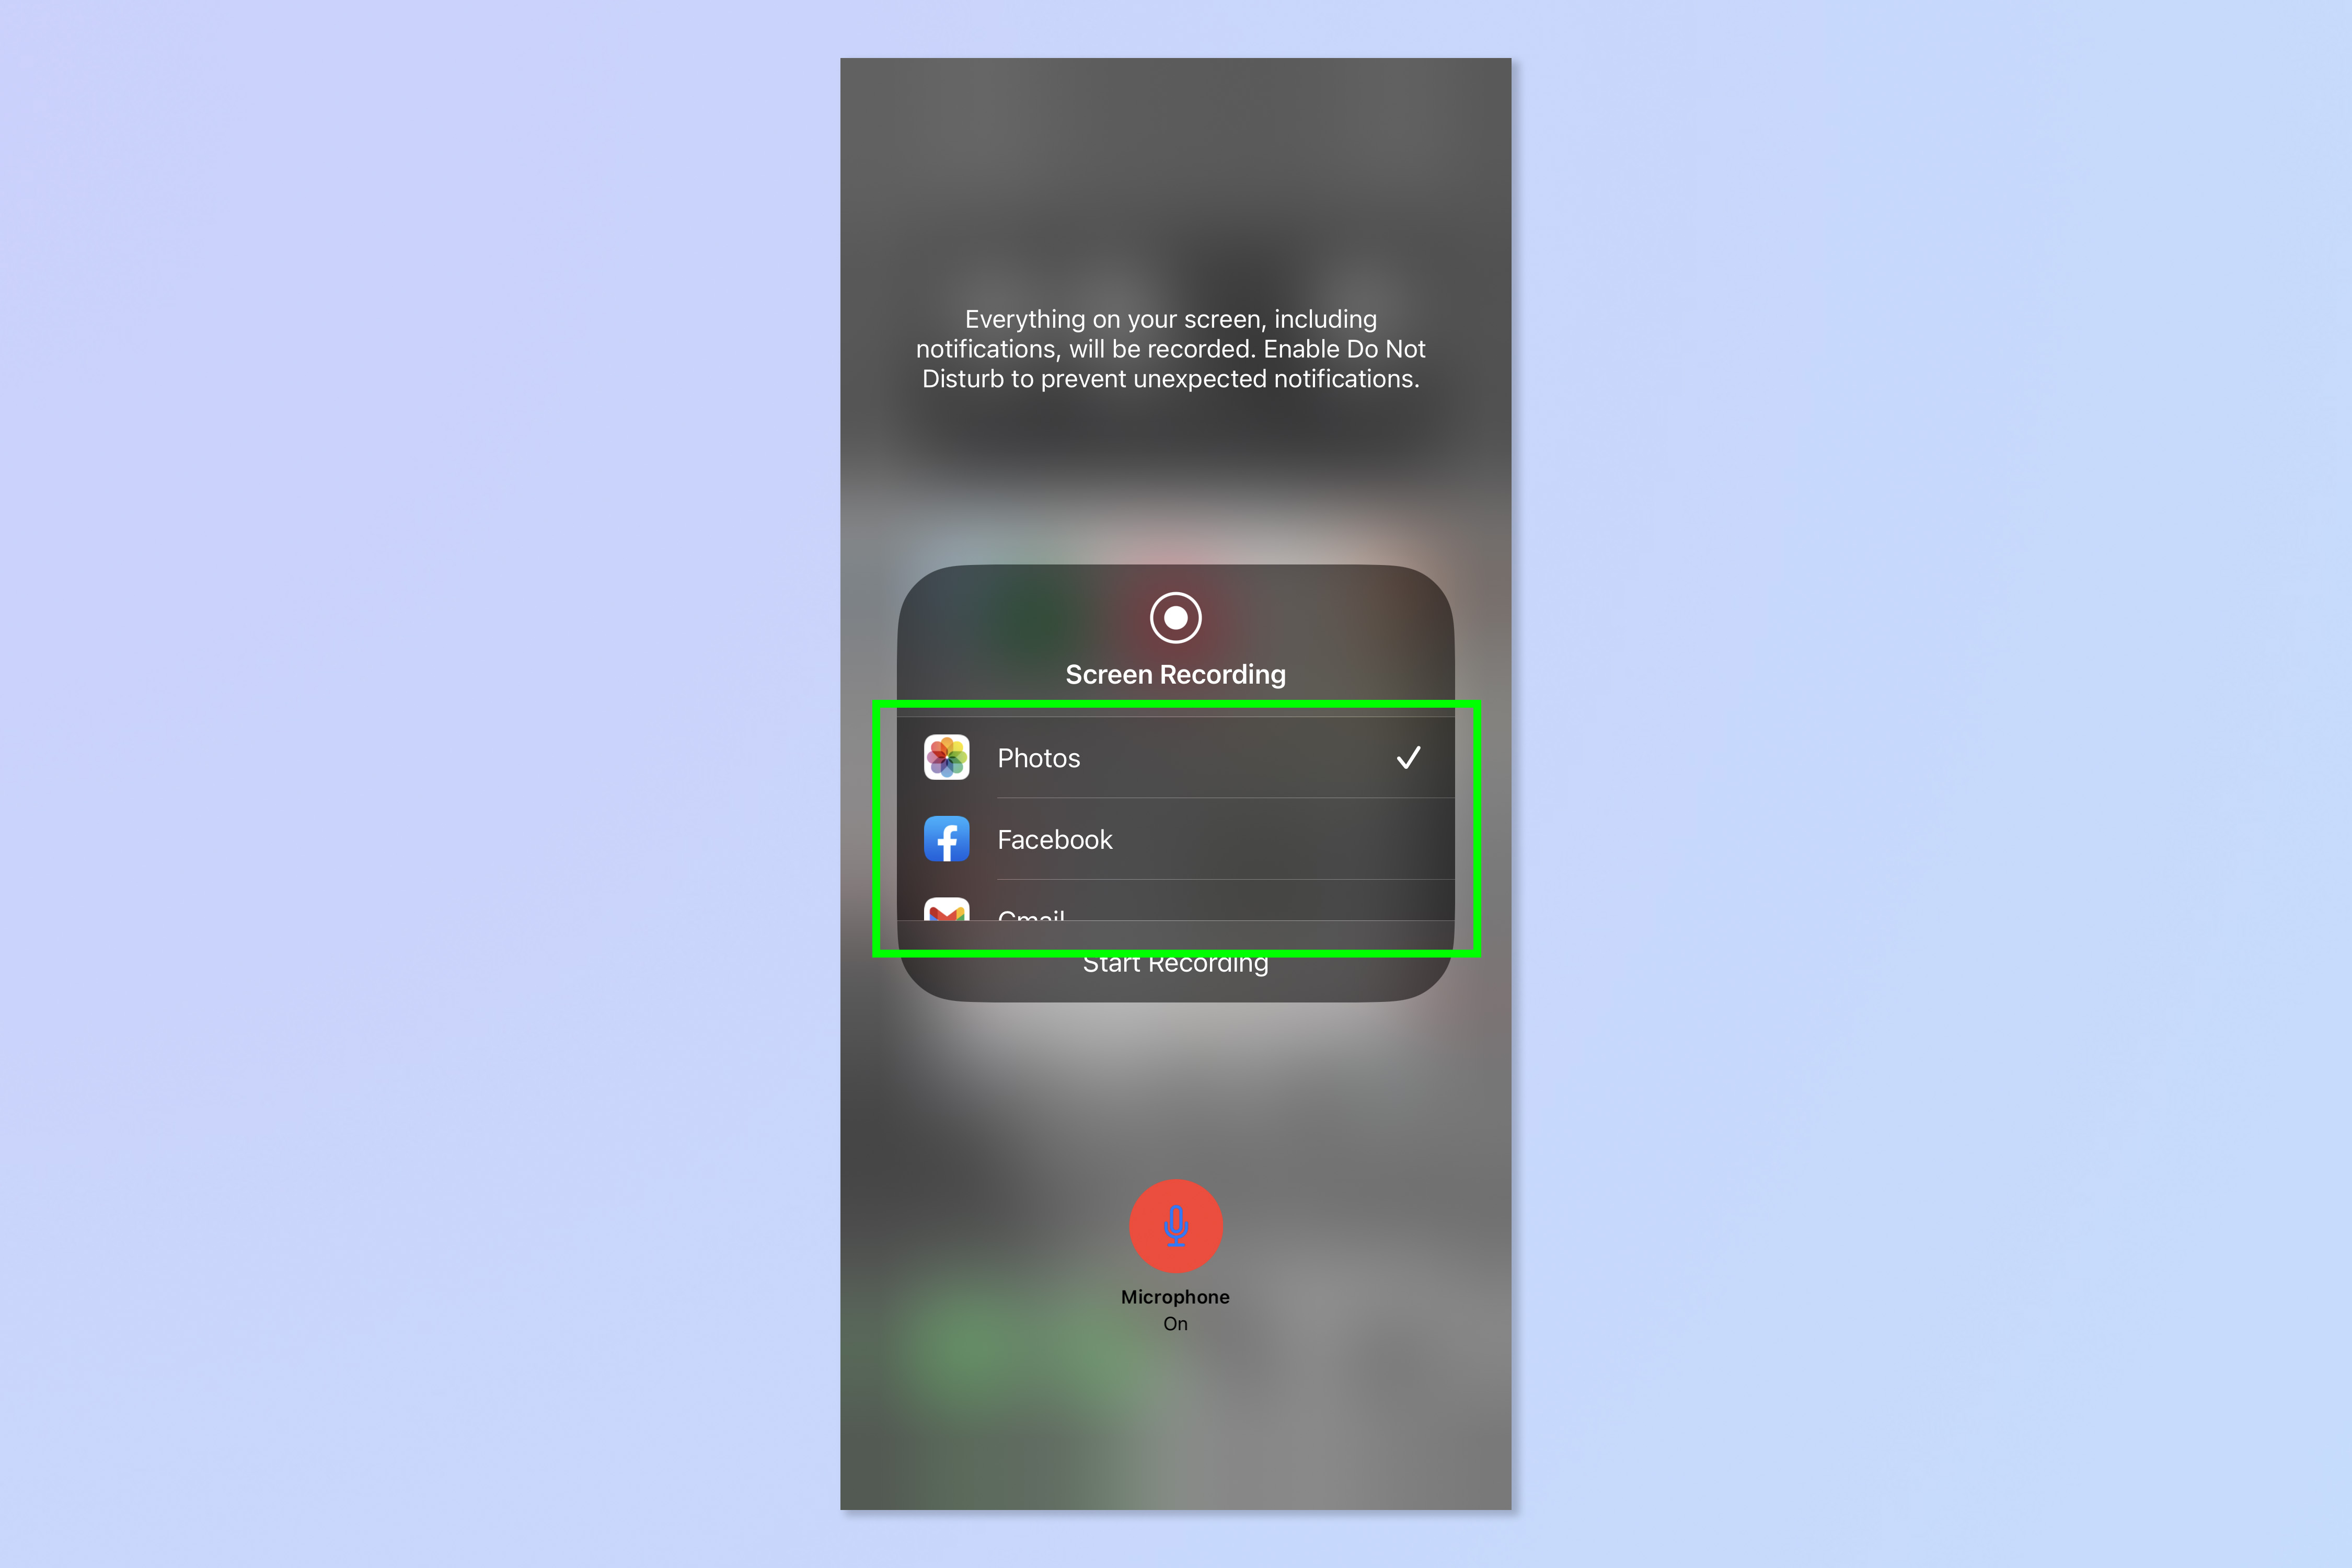
3. To record with your voice, tap and hold the Screen Recording button. Tap Microphone (the icon should turn red) and then tap Start Recording. You'll need to wait 3 seconds for recording to begin.
Note: You can also choose a save/broadcast location for your screen recording, to immediately send it or turn it into a broadcast. Tap an app to set that as the save/broadcast location.
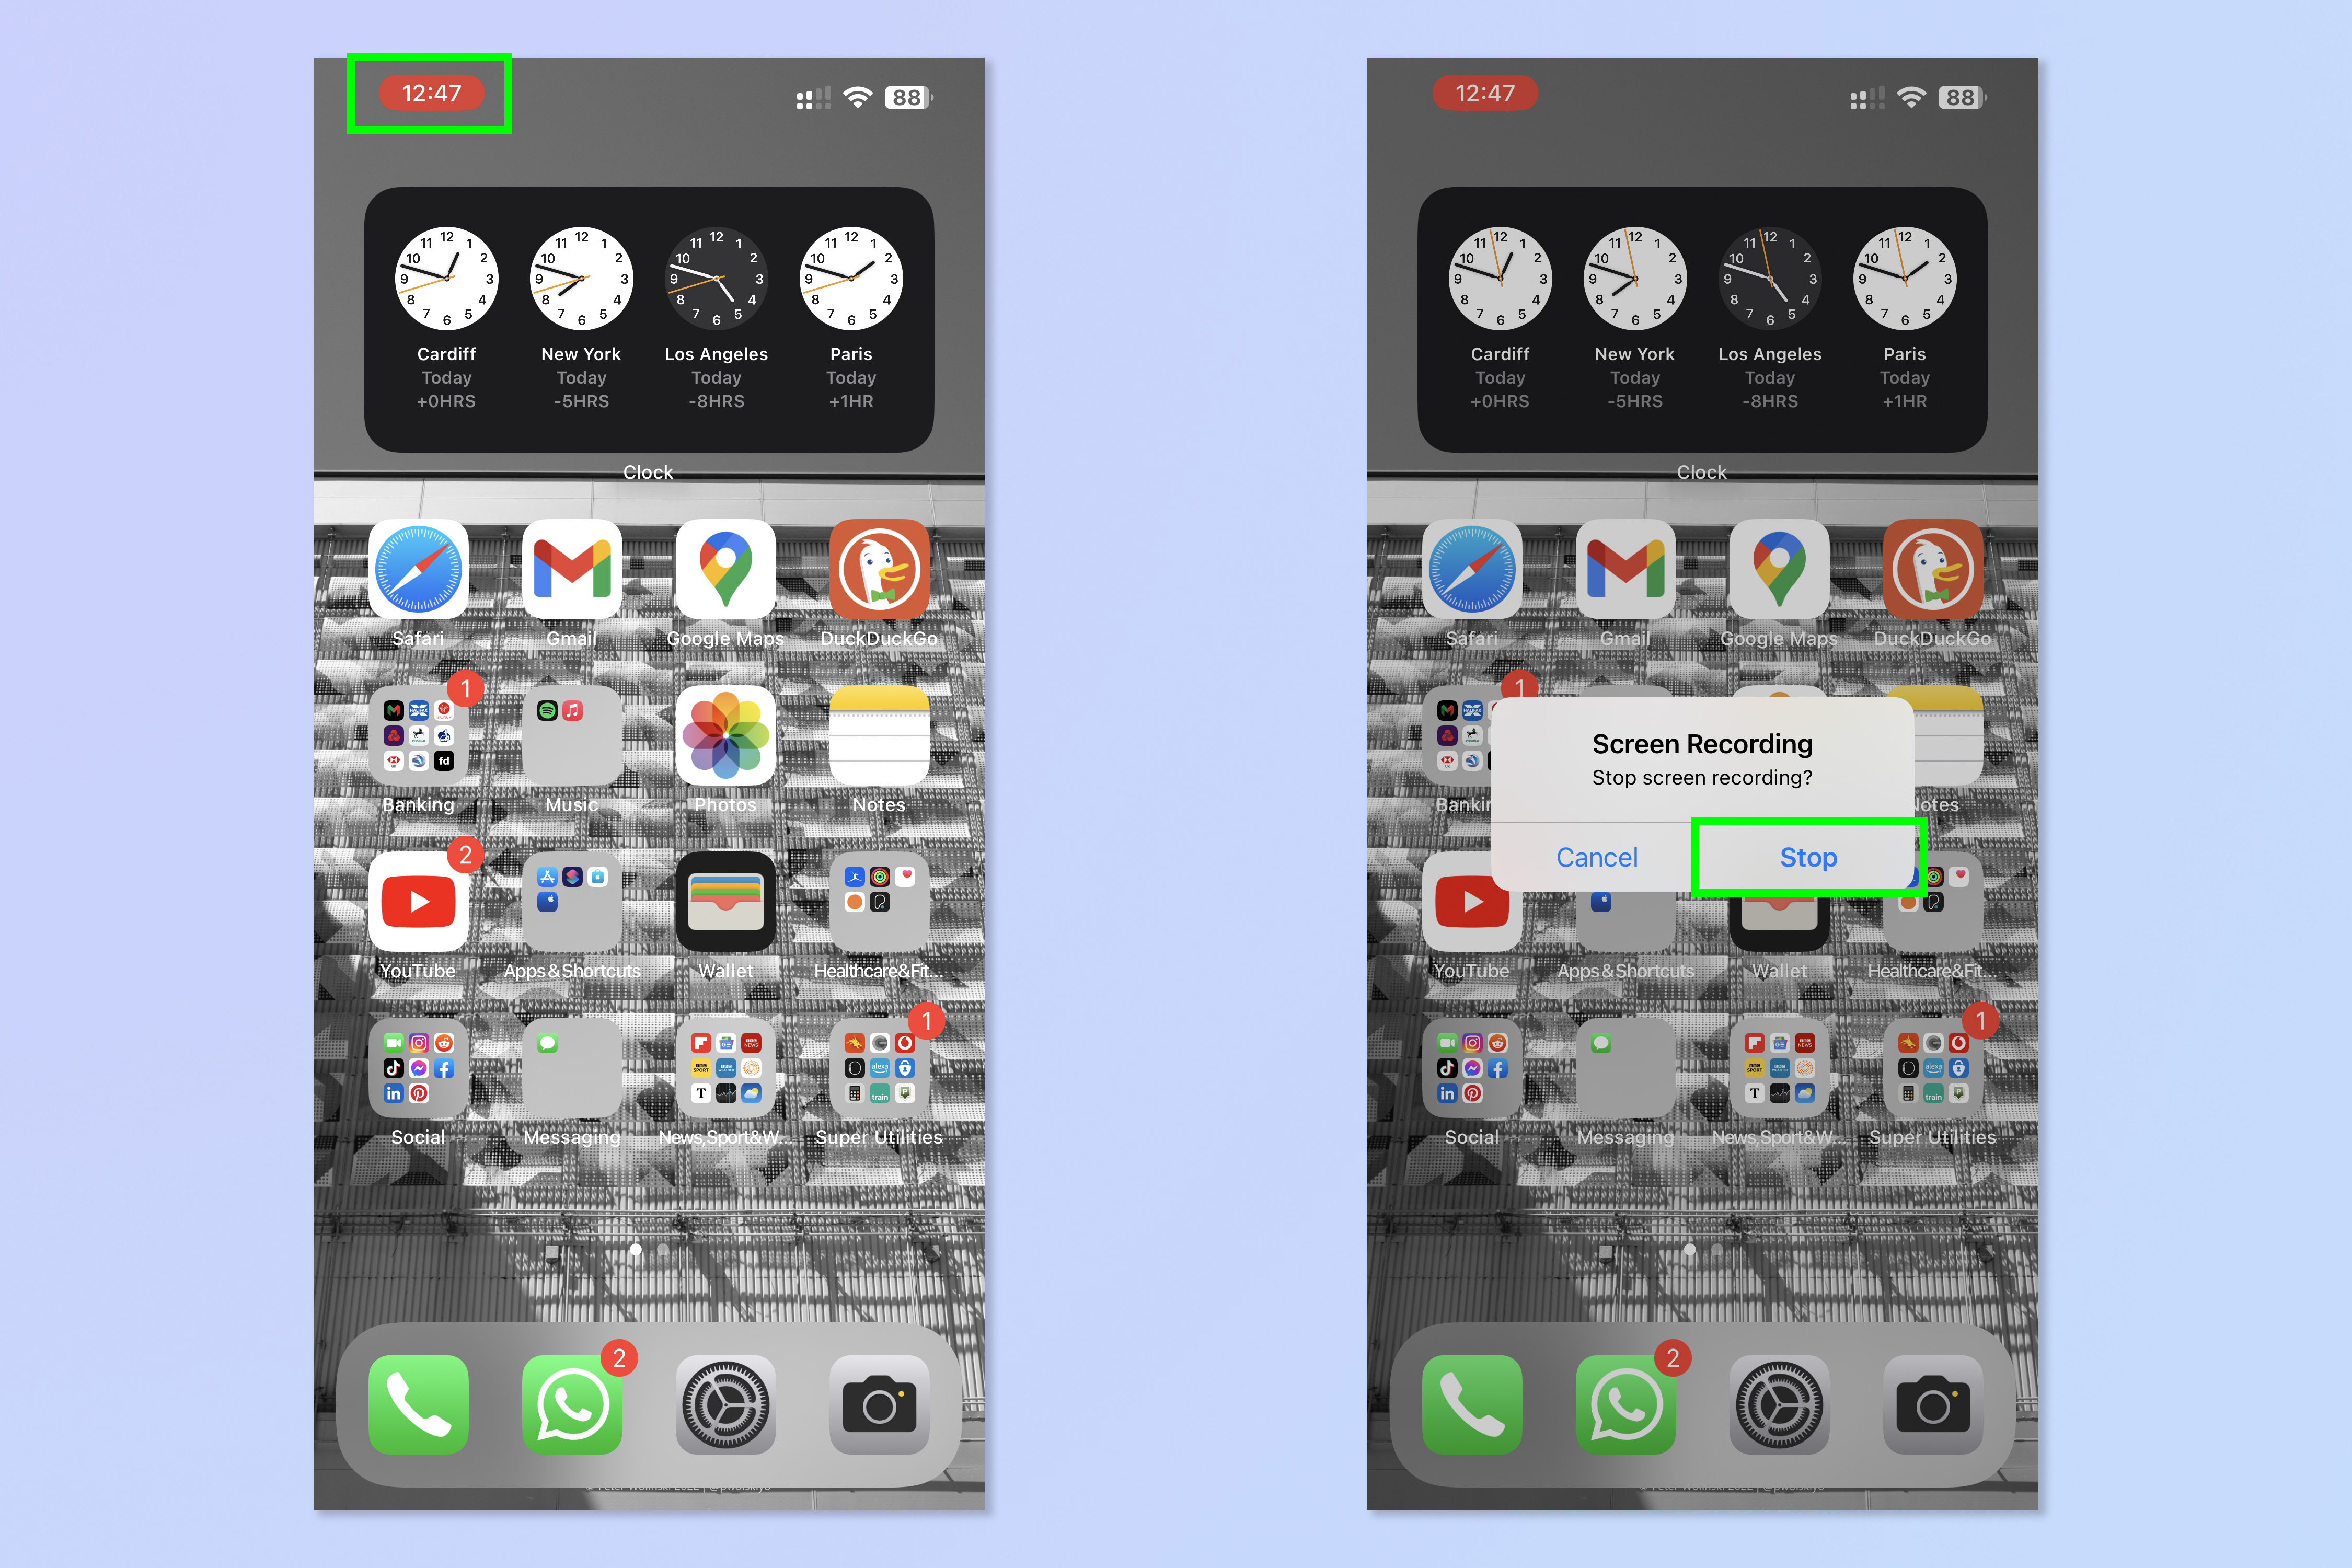
4. To end recording, tap the red bar in the top left, then tap Stop.
Unless you specified a separate app in step 3, your screen recording will be saved to your Photos library, where you can view, edit and share it.
How to add the Screen Recording button to Control Center on iPhone
By default, Control Center should feature the Screen Recording button. However, if it doesn't or you've removed it in the past, here's how to add the Screen Recording button to Control Center.
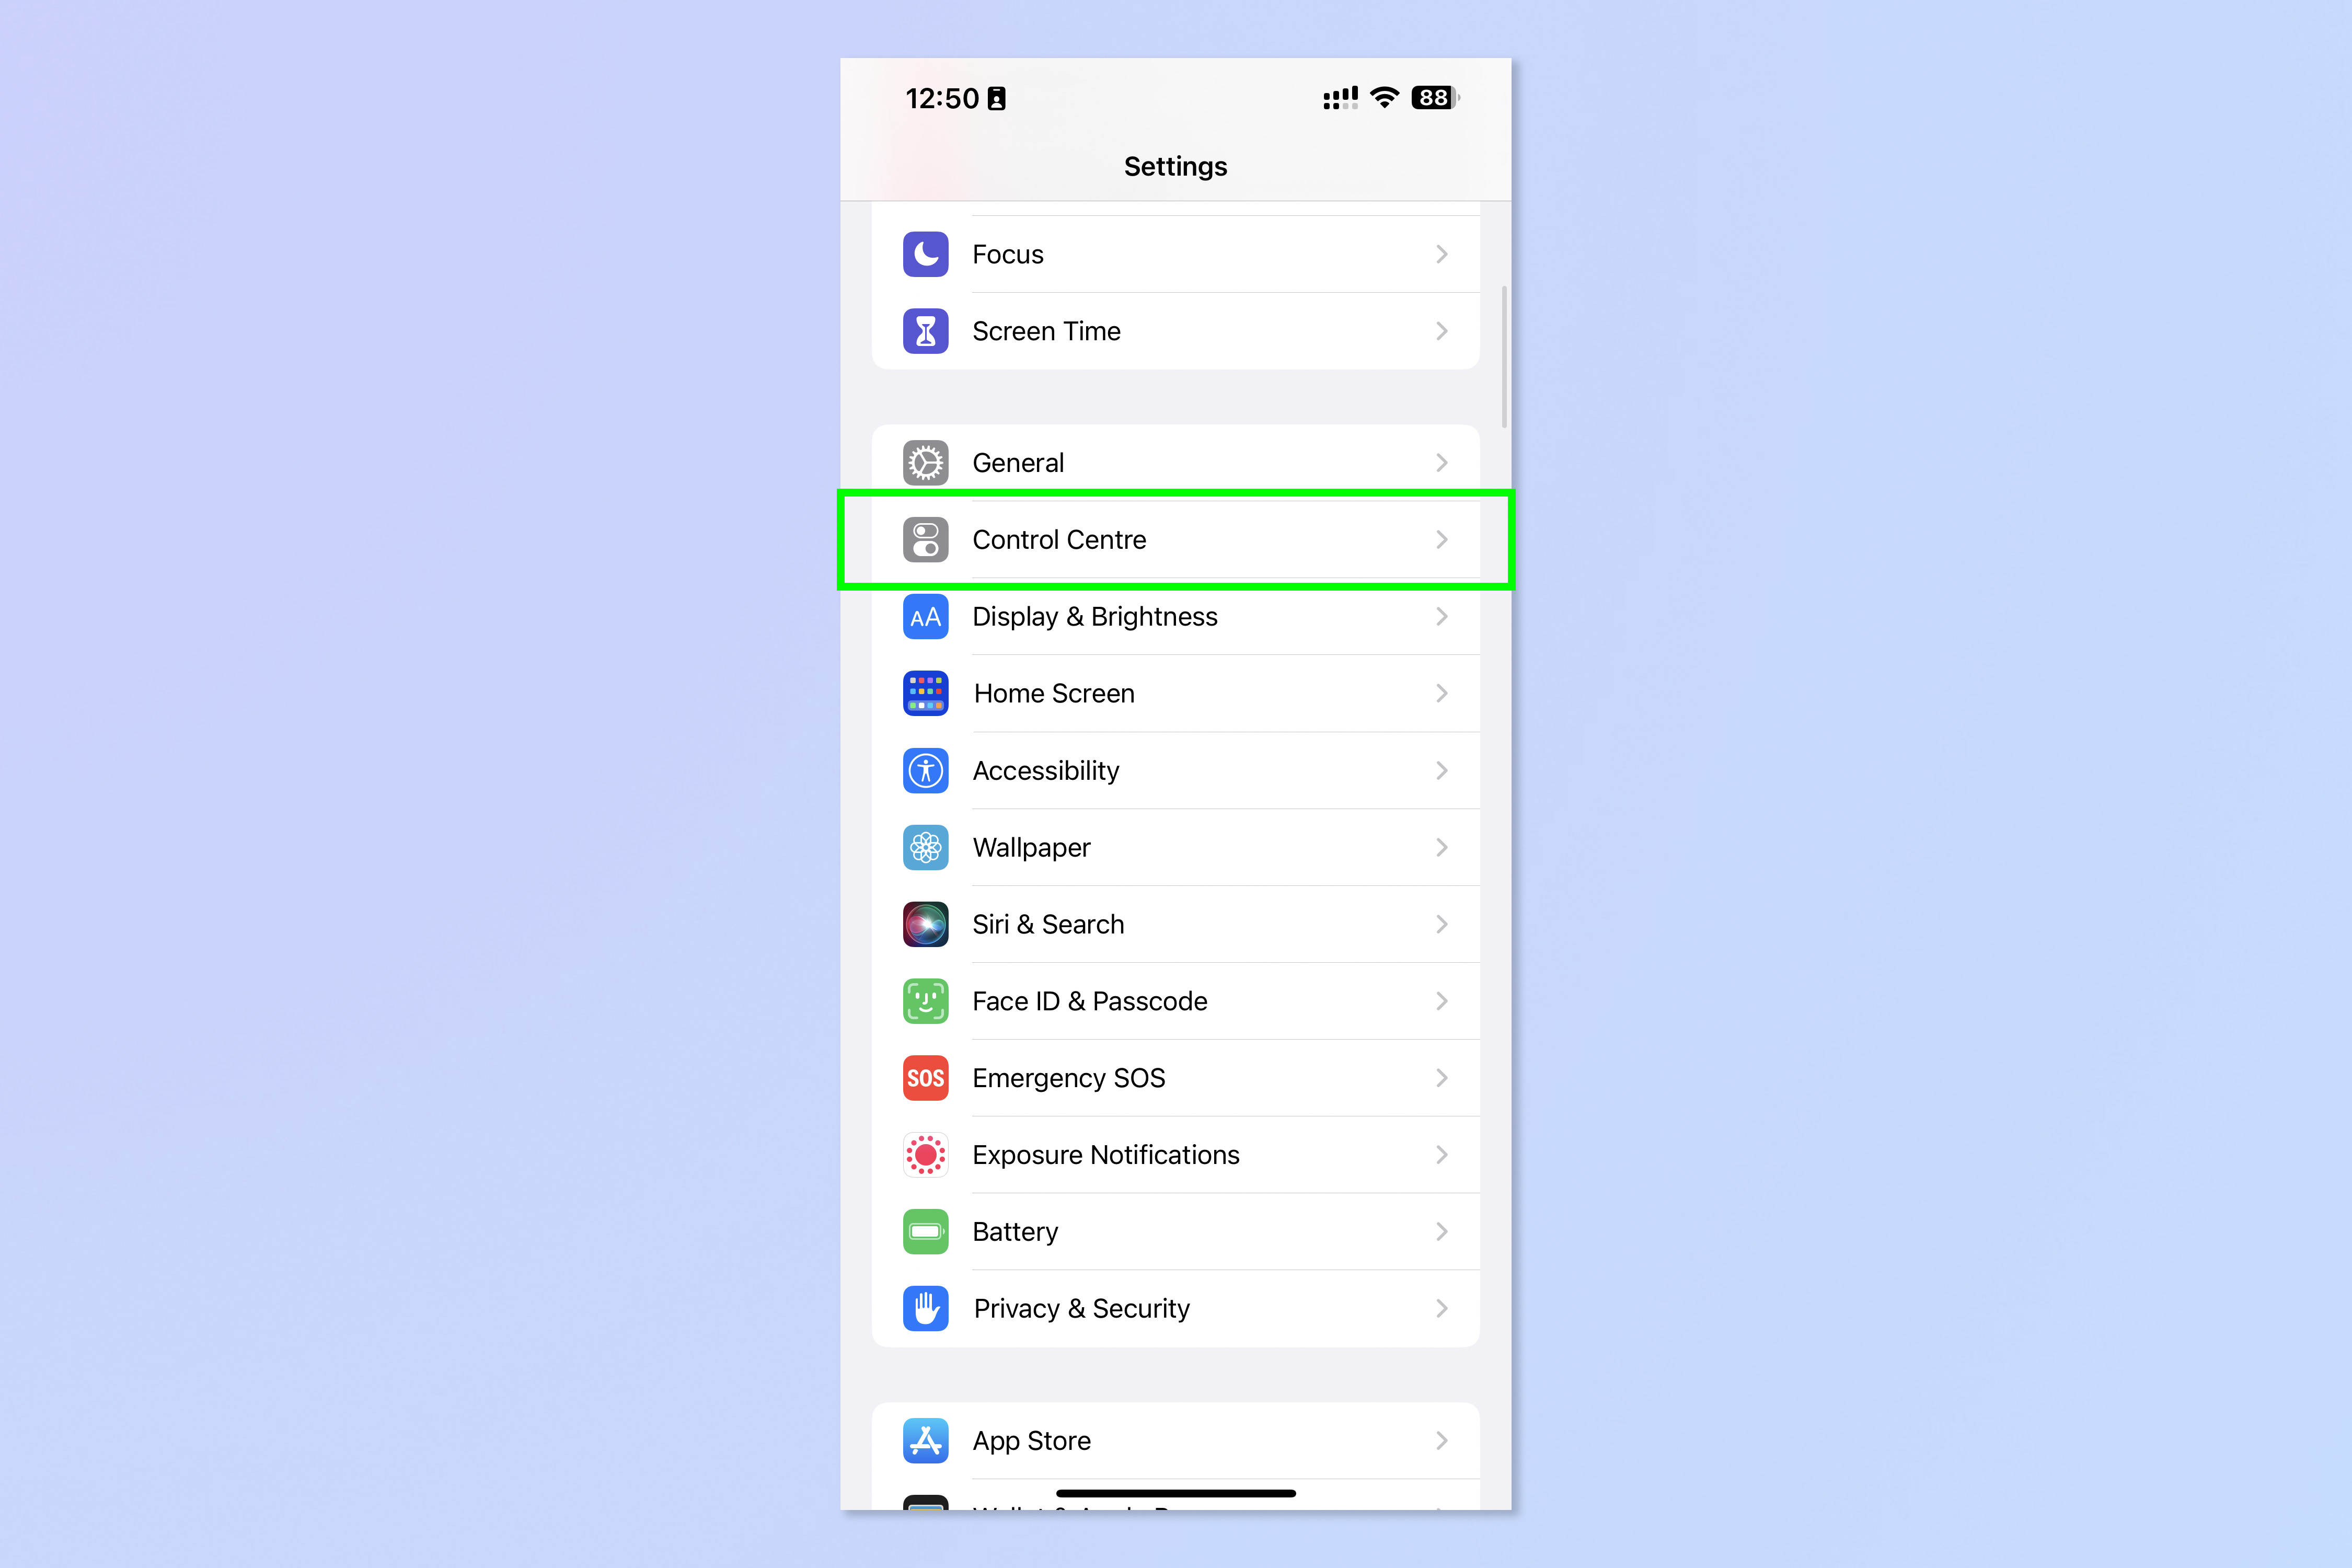
1. Open the Settings app and tap Control Center.
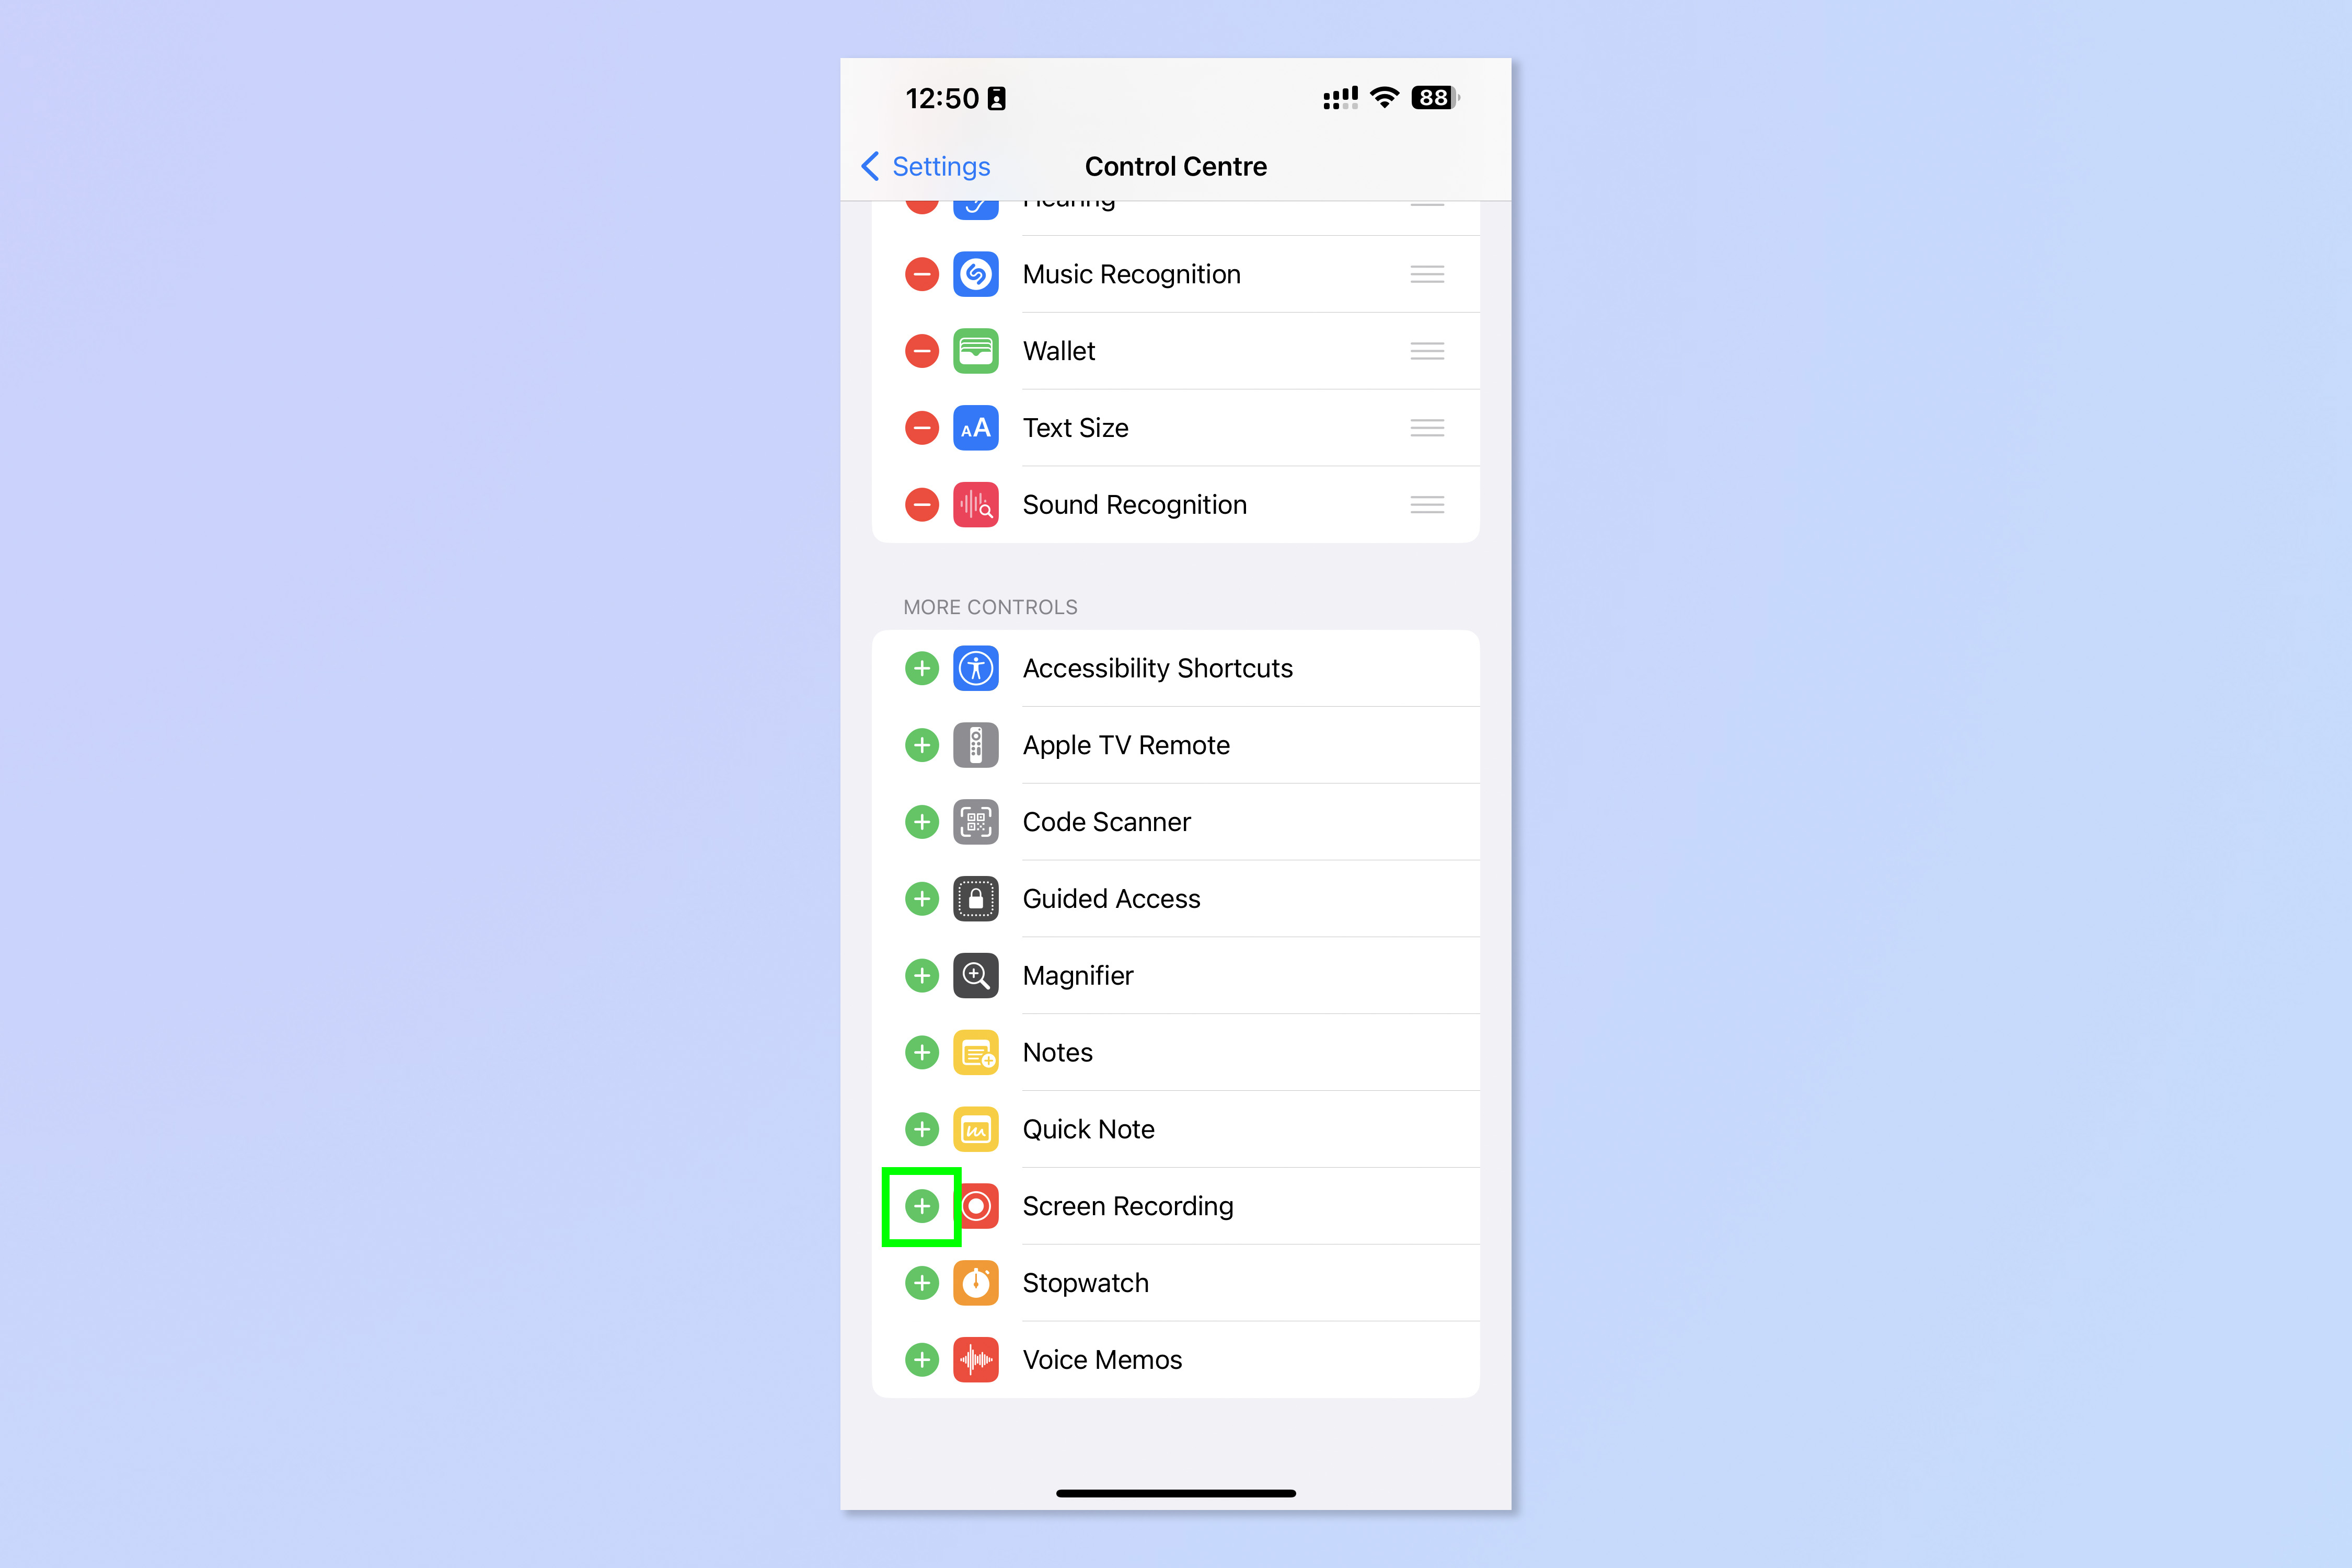
2. Scroll down to the More Controls section and tap the green plus next to Screen Recording.
3. To change where the Screen Recording button sits in Control Center, tap and hold the three lines next to the Screen Recording bar and drag it to where you want it to sit. Higher up the list will appear earlier.
And there you have it. You now know how to screen record on iPhone. If you'd like more tutorials on getting the most out of your iPhone, make sure you read our other handy guides, like how to screenshot on iPhone. It's like screen recording, just for still images.
New iPhone? Learn how to transfer data from iPhone to iPhone and transfer everything over safely. Is your iPhone a little sluggish? Learn how to clear RAM on iPhone to try and speed things up a little. Want to delete a load of contacts quickly? Learn how to delete multiple contacts on iPhone. Need to send an important attachment? Learn how to attach a file in iOS Mail.
Android user? Read how to screen record on Android instead.

Peter is a Senior Editor at Tom's Guide, heading up the site's Reviews team and Cameras section. As a writer, he covers topics including tech, photography, gaming, hardware, motoring and food & drink. Outside of work, he's an avid photographer, specialising in architectural and portrait photography. When he's not snapping away on his beloved Fujifilm camera, he can usually be found telling everyone about his greyhounds, riding his motorcycle, squeezing as many FPS as possible out of PC games, and perfecting his espresso shots.
 Club Benefits


