


Knowing how to dethatch a lawn can give you healthier grass all year round. But it helps to understand what causes thatch and why it’s a problem before you learn how to remove it.
Thatch is a layer of dead plant matter and debris that gradually forms on the soil’s surface. It’s produced faster than it can break down, so it will grow thicker and thicker over time. If it’s not removed once it reaches a certain depth, it will overcrowd the surface and reduce access to water, oxygen, and the essential nutrients the lawn needs to thrive. It can also increase the risk of disease and pest infestation.
Ignoring thatch is one of the many lawn care mistakes you could make and will lead to an unhealthy lawn. So, to help you avoid the problem, we’ve put together this useful guide to simplify the process. Discover the signs that indicate your lawn needs dethatching, the best time to dethatch your lawn, and how to do it. Once you’re finished, your grass will be free to grow and flourish again.
Plus, here’s how to get rid of moss in your lawn and keep it green. Before you compost anything, check out these 11 things you should never throw on the compost heap.
Signs your lawn needs dethatching
One of the first ways to tell if your lawn needs dethatching is to gain the feel of it. Mark Marino, owner at Lawn Phix says it will feel “spongy” when you walk on the grass. You’ll also be able to see an excessive buildup of thatch that’s over half an inch deep. However, if you walk on the grass and it feels firm rather than spongy, it probably doesn’t need to be treated.
Alternatively, grab a pair of the best gardening gloves and dig up a small patch of turf. Using a small trowel dig deep enough to include some soil, then examine the thatch, turf and soil from a side angle. From here you can measure the depth of the thatch and determine whether it’s deep enough to need dethatching.
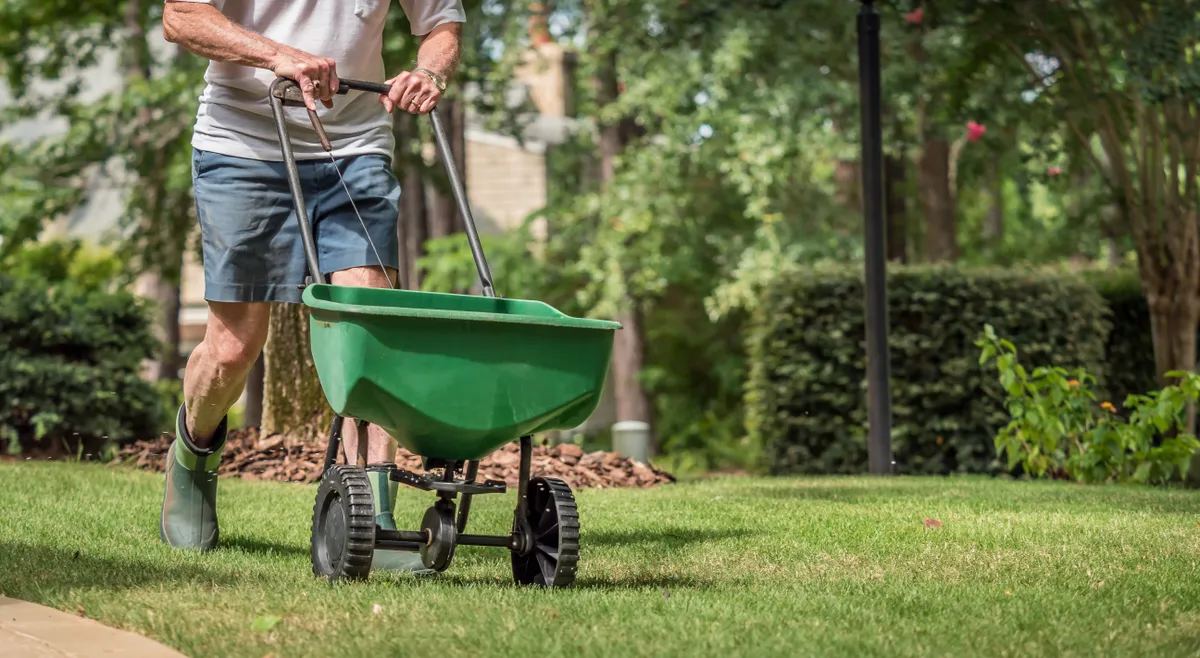
How to dethatch a lawn
Thatching rake
Power rake/electric dethatcher (optional)
Vertical mower/scarifier (optional)
Before you begin dethatching, check how thick the layer of thatch is using the method above — if it’s less than ½ inch, dethatching won’t be necessary. A healthy layer of thatch is actually good for your lawn; it locks in moisture and insulates the soil. Plus the necessary water and air can still pass through. But if you lawn does need dethatching here are the step you’ll need to follow.
1. Choose the right tool

If you choose the right tool for the job, the process will be a lot easier. An everyday rake can work for small lawns, but for the best effect, invest in a dedicated thatching rake, such as the Bully Tools 24-Tine Leaf and Thatching Rake ($57.74, Amazon). The long and sturdy tines on rakes such as these make them ideal for removing thatch.
If you’re dealing with a larger yard, another option is to use a power rake or an electric dethatcher. These look a lot like lawnmowers and work in a similar way — you push them along while the machine digs tines into the ground to remove and deposit the thatch. An example of this would be the Greenwork DT13B00 13 Amp Corded Dethatcher and Scarifier ($159.99, Amazon). These machines are better suited if you’re dethatching a larger space. They can be rented from home department stores if your storage is limited. However, the alternative is to call in a professional lawn care company.
Finally, there’s the option of using a vertical mower or scarifier. These should only be used on lawns which are suffering from an excessive build-up of thatch that can’t be removed otherwise. These devices are a last resort because they feature blades which will literally tear the thatch away, damaging any grass roots in the process.
Electric dethatchers often double up as scarifiers, as the above recommendation demonstrates.
Dethatching tips
Marino shares his three top tips when dethatching a lawn.
1. Adjust the dethatching machine to the appropriate depth to avoid gauging and damaging your lawn.
2. Avoid dethatching your lawn when the soil is wet.
3. Dethatching adds stress to your lawn, so follow-up with a fertilizer to promote recovery and growth, and overseed, particularly if you are dethatching in the fall.

2. Mow your lawn

You’re going to want to mow your lawn down to about 2 inches in height before dethatching. This will help your tools effectively reach the thatch layer. But before dethatching the lawn, be sure to rake up any clippings and leaf debris.
3. Get to work
If you’re using a rake, protect your hands with a pair of working gardening gloves, such as the Bionic Relief Grip Gardening Gloves ($37.24, Amazon) mentioned in our buying guide and prepare for some hard work. The motion isn’t exactly complicated — you’re literally going to use the rake just as you would when collecting leaves. Drop the tines onto the ground, making sure you pass through the grass blades to reach the thatch, and then pull back to rake it loose. This takes more effort than you’d think.

Our Audio Editor, Lee Dunkley, said “I started dethatching my lawn using a manual rake, thinking this should be quick and easy, however I got about a quarter of the way through the task and realized I needed to get the electric dethatcher out. This is far more taxing than you’d imagine.“
Because of this, we’d recommend using an electric dethatcher if you want to save time and energy, or if you suffer from back pain. You literally push these back and forth, much like a lawnmower, and it gives you the same finish. Some can even collect the thatch as you go, so you don’t need to collect it off the ground afterwards. You may need to make up to three passes to completely dethatch the lawn, and you should work perpendicularly with each pass for the best results. Make sure you mark and avoid any sprinkler heads or tree roots if you opt to use an electric method.
Vertical mowers or scarifiers work in the same way; you pass over the grass much like you would with a lawnmower. However, start on the highest setting with the first pass and then work your way down as necessary with subsequent passes. This will help loosen the thatch and will give your lawn as gentle a treatment as possible. If the above seems like a lot of work, you can always call in a professional to help as well.
4. Dispose of the thatch

Now you’re going to want to collect what’s been left behind. Use a standard rake to gather the exposed thatch. You can either throw it away or add it to your compost heap. Avoid the latter if crabgrass and dandelions frequent your yard though.
5. Care for your lawn
Now that the process is complete, your lawn might look a little worse for wear. There’s likely exposed areas of soil dotted around and the grass isn’t looking too happy. Take the time to learn how to overseed your lawn, then feed and water it to give it what it needs to recover. Be sure not to use too much water or fertilizer though; by speeding up the growth, you’re encouraging more thatch to build-up. Check out how much you should water your lawn for guidance.
You might want to learn how to aerate a lawn as well to give it the full treatment once it’s dethatched.
When should you dethatch your lawn?
For general guidance, you’ll want to dethatch your lawn every two or three years. You should aim to do it while your grass is at its peak of growth, and you should only go ahead while it’s healthy as well. Dethatching will take its toll on your grass, so you will want to make sure it’s in its prime of health for the best chance of recovery.
So, is there a particular time of year when you should dethatch your lawn? Marino explains, “The best time is late summer into early fall when the grass is actively growing. Early-to-mid spring is the next best time.”

For reference, cool-season grass, such as Kentucky bluegrass, is best dethatched in the early spring or early fall. While warm-season grass, such as Bermuda grass, should be dethatched in late spring or early summer.
You also want the soil to be moist for the best conditions. If it’s too wet, you could pull everything out by the roots, while if it’s too dry the tools will struggle to dig and effectively reach the mulch.
Remember to keep an eye on how thick the layer of mulch is as well — if it’s less than ½ inch, you can put the rake away.
Your lawn should now be free of thatch. This will help your grass grow stronger and healthier in the long run, but remember to keep an eye on it immediately after dethatching. This task does leave it vulnerable and it will need time to recover before it can flourish.
More from Tom's Guide

