How to check air quality on Google Maps
Make sure the air is safe to breathe with Google Maps
Here at Tom’s Guide our expert editors are committed to bringing you the best news, reviews and guides to help you stay informed and ahead of the curve!
You are now subscribed
Your newsletter sign-up was successful
Want to add more newsletters?

Daily (Mon-Sun)
Tom's Guide Daily
Sign up to get the latest updates on all of your favorite content! From cutting-edge tech news and the hottest streaming buzz to unbeatable deals on the best products and in-depth reviews, we’ve got you covered.

Weekly on Thursday
Tom's AI Guide
Be AI savvy with your weekly newsletter summing up all the biggest AI news you need to know. Plus, analysis from our AI editor and tips on how to use the latest AI tools!

Weekly on Friday
Tom's iGuide
Unlock the vast world of Apple news straight to your inbox. With coverage on everything from exciting product launches to essential software updates, this is your go-to source for the latest updates on all the best Apple content.

Weekly on Monday
Tom's Streaming Guide
Our weekly newsletter is expertly crafted to immerse you in the world of streaming. Stay updated on the latest releases and our top recommendations across your favorite streaming platforms.
Join the club
Get full access to premium articles, exclusive features and a growing list of member rewards.
As we dive headlong into summer, there’s one thing you can be sure of. The weather is going to heat up, and with it pollution levels will rise. That’s going to be especially true as the wildfire season kicks into gear, and the recent Canadian wildfires caused New York City to experience the worst pollution levels ever recorded.
It helps to know how clean or dirty the air is in your local area. That way you can prepare yourself (and your lungs) to handle any spikes in particularly poor air quality, Whether that’s by covering up with an N95 mask, or using one of the best air purifiers to clean up the air you breathe.
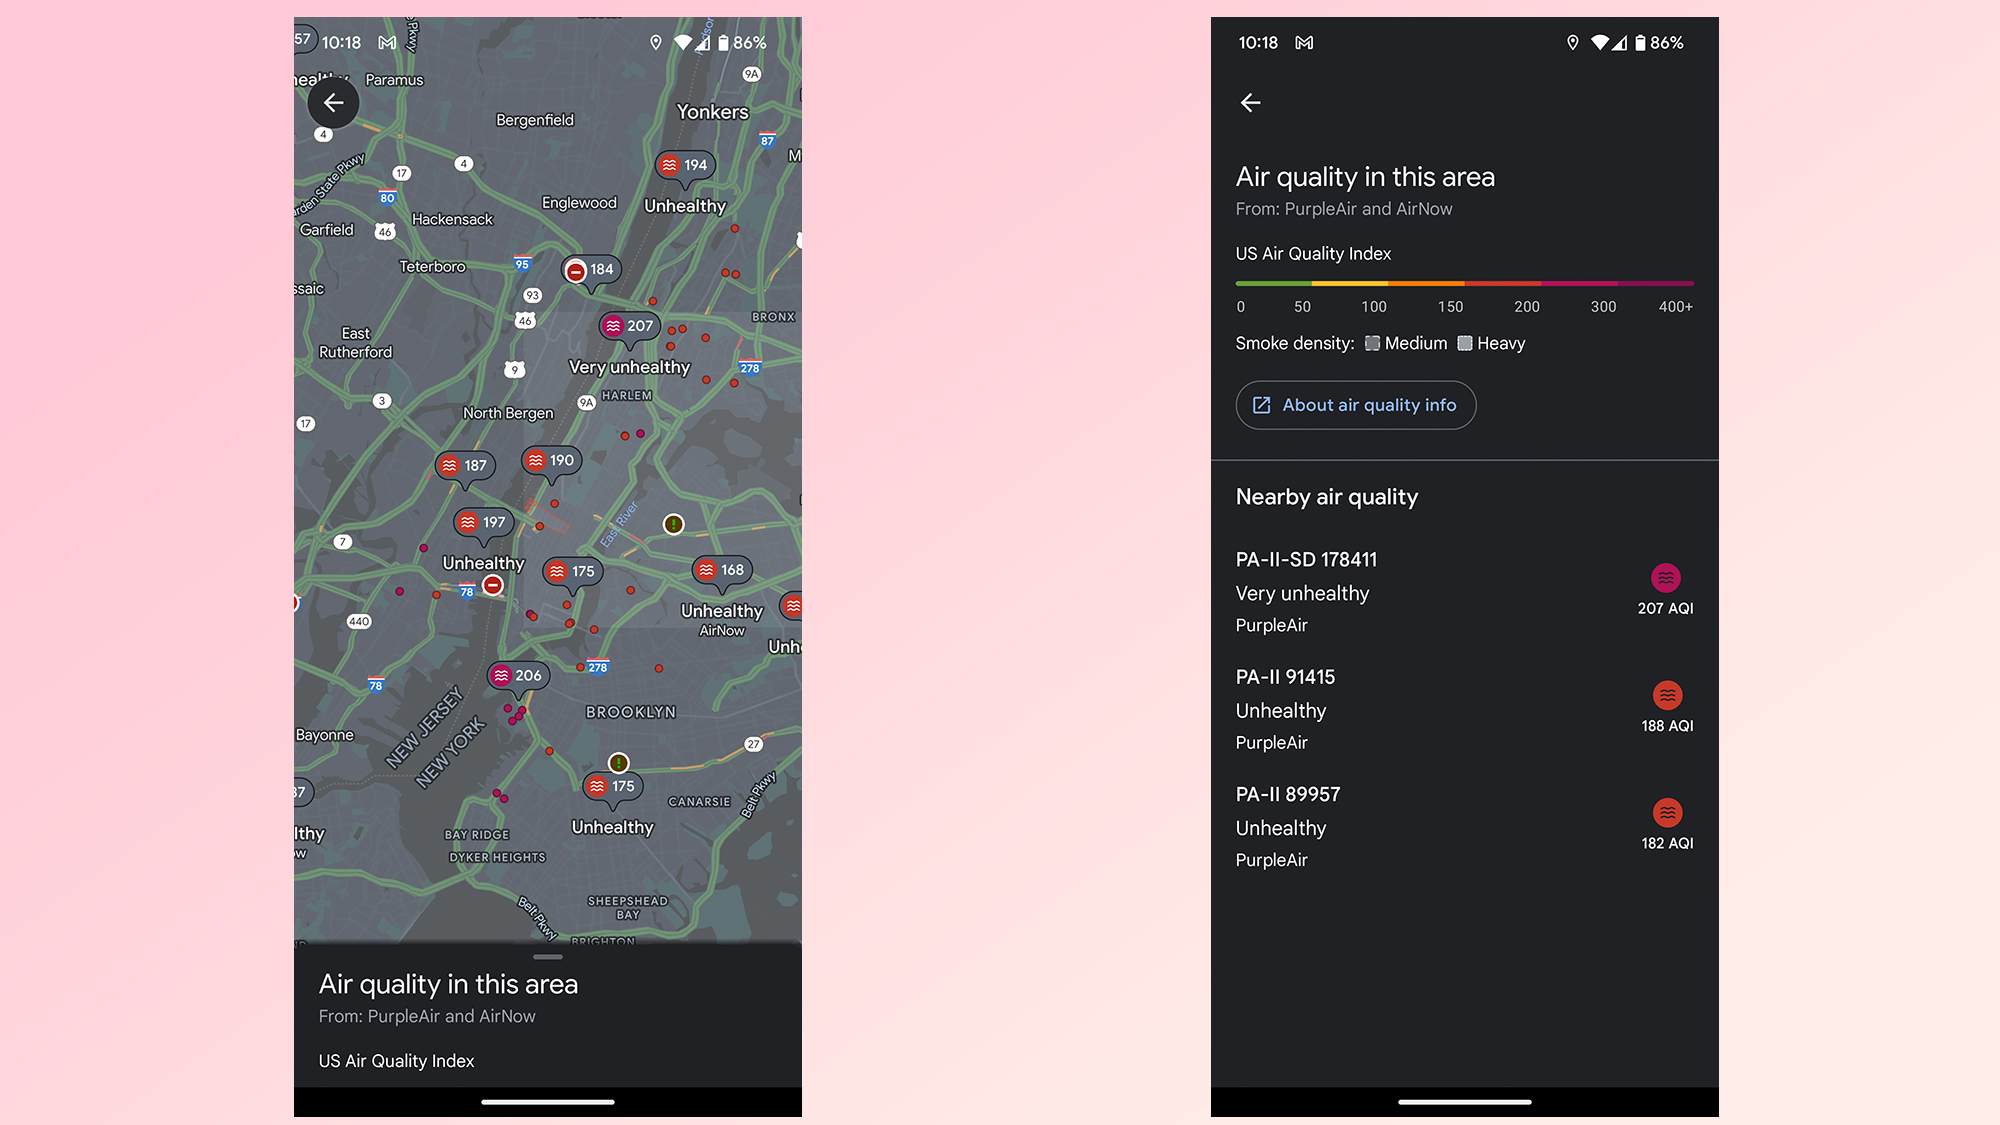
Fortunately Google Maps comes with a free and simple tool to check the air quality in your neighbourhood. The air quality layer sits on top of the normal Google Maps, and uses a simple color-coded scale to show just how clean or dirty the area is in a supported area. Here’s how to check local air quality in Google Maps.
How to check air quality with Google Maps
- Open Google Maps on mobile or desktop
- Zoom into a location to check
- Open the layer menu
- Tap Air quality
Read on to see full illustrated instructions for each step.
1. Open Google Maps on your device
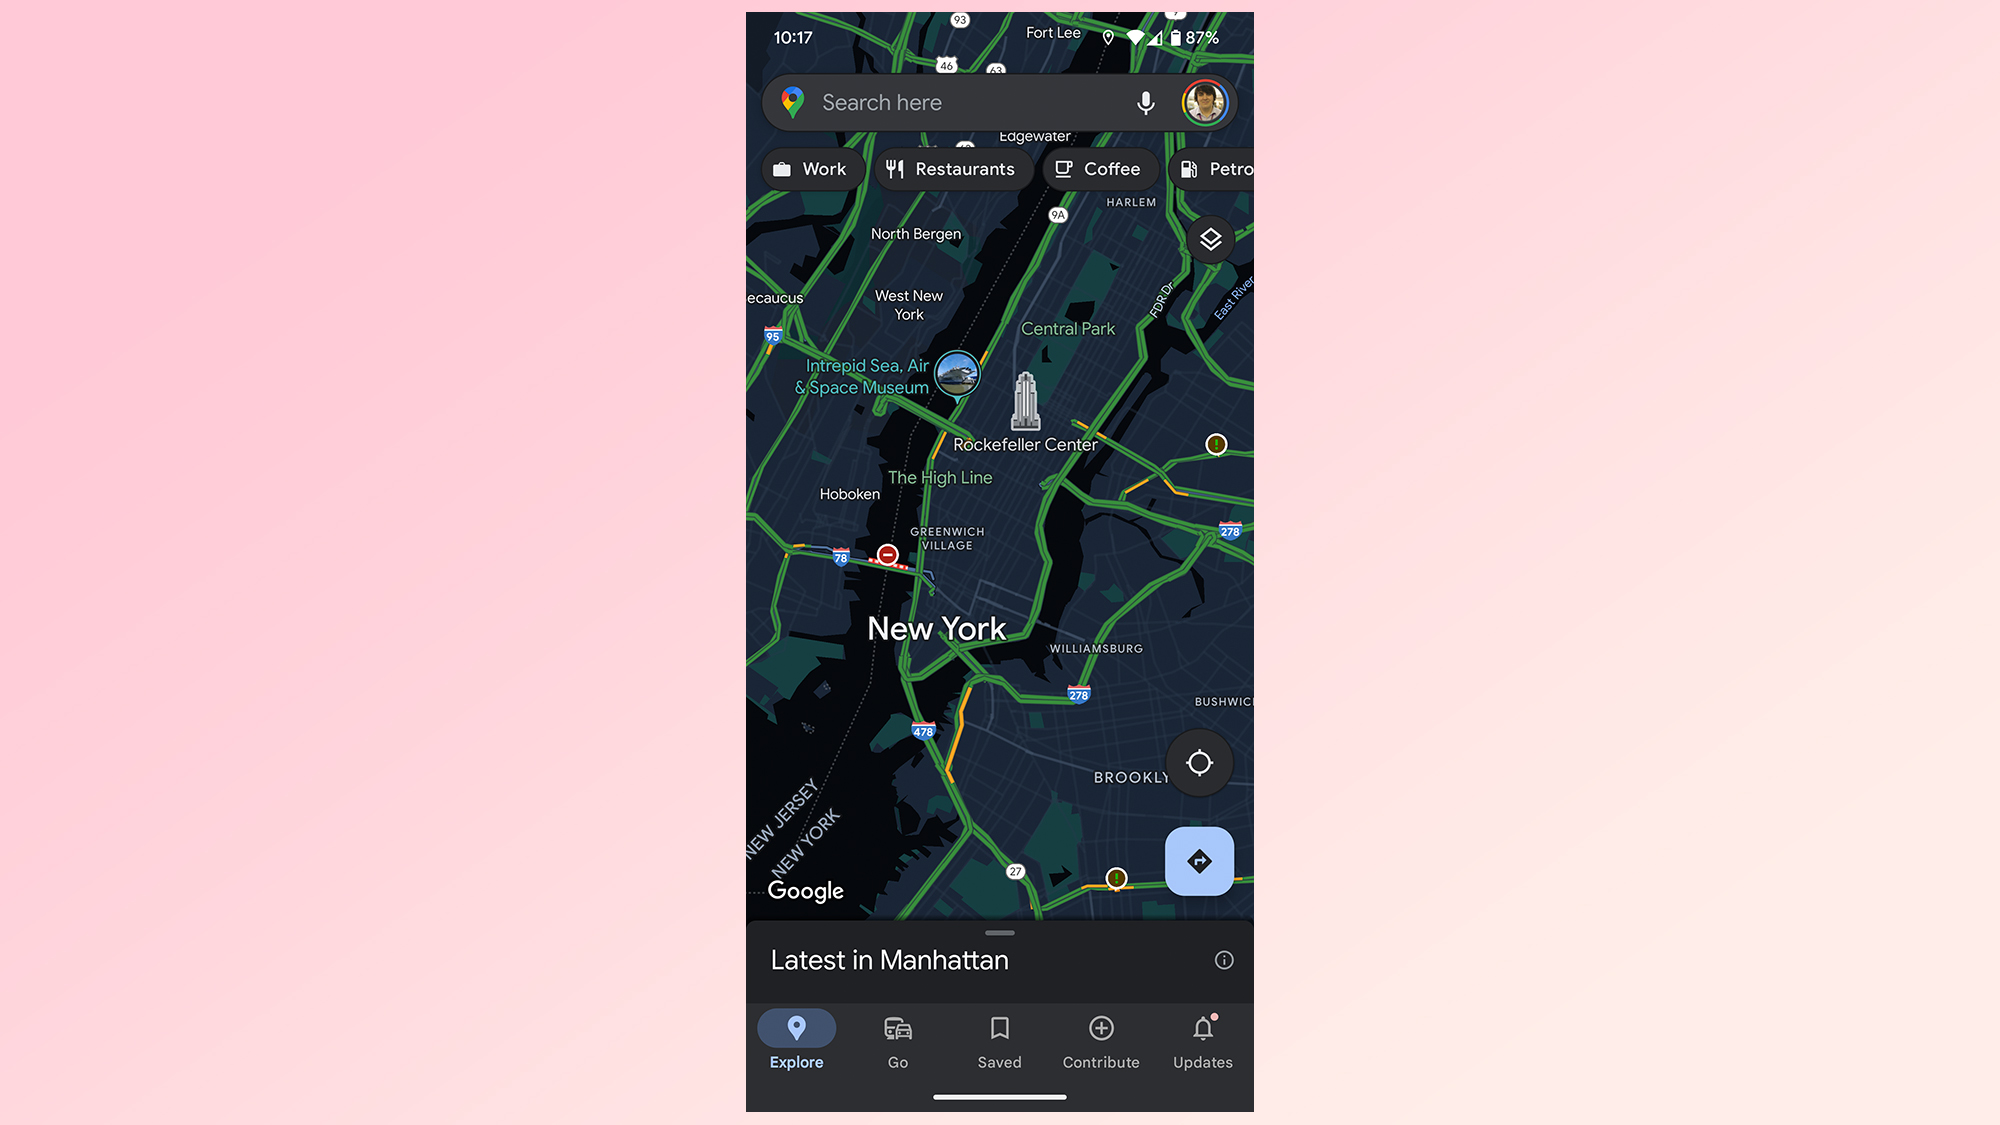
Mobile users should open the Google Maps app. Desktop users should head to the Google Maps website.
2. Find the area you want to check
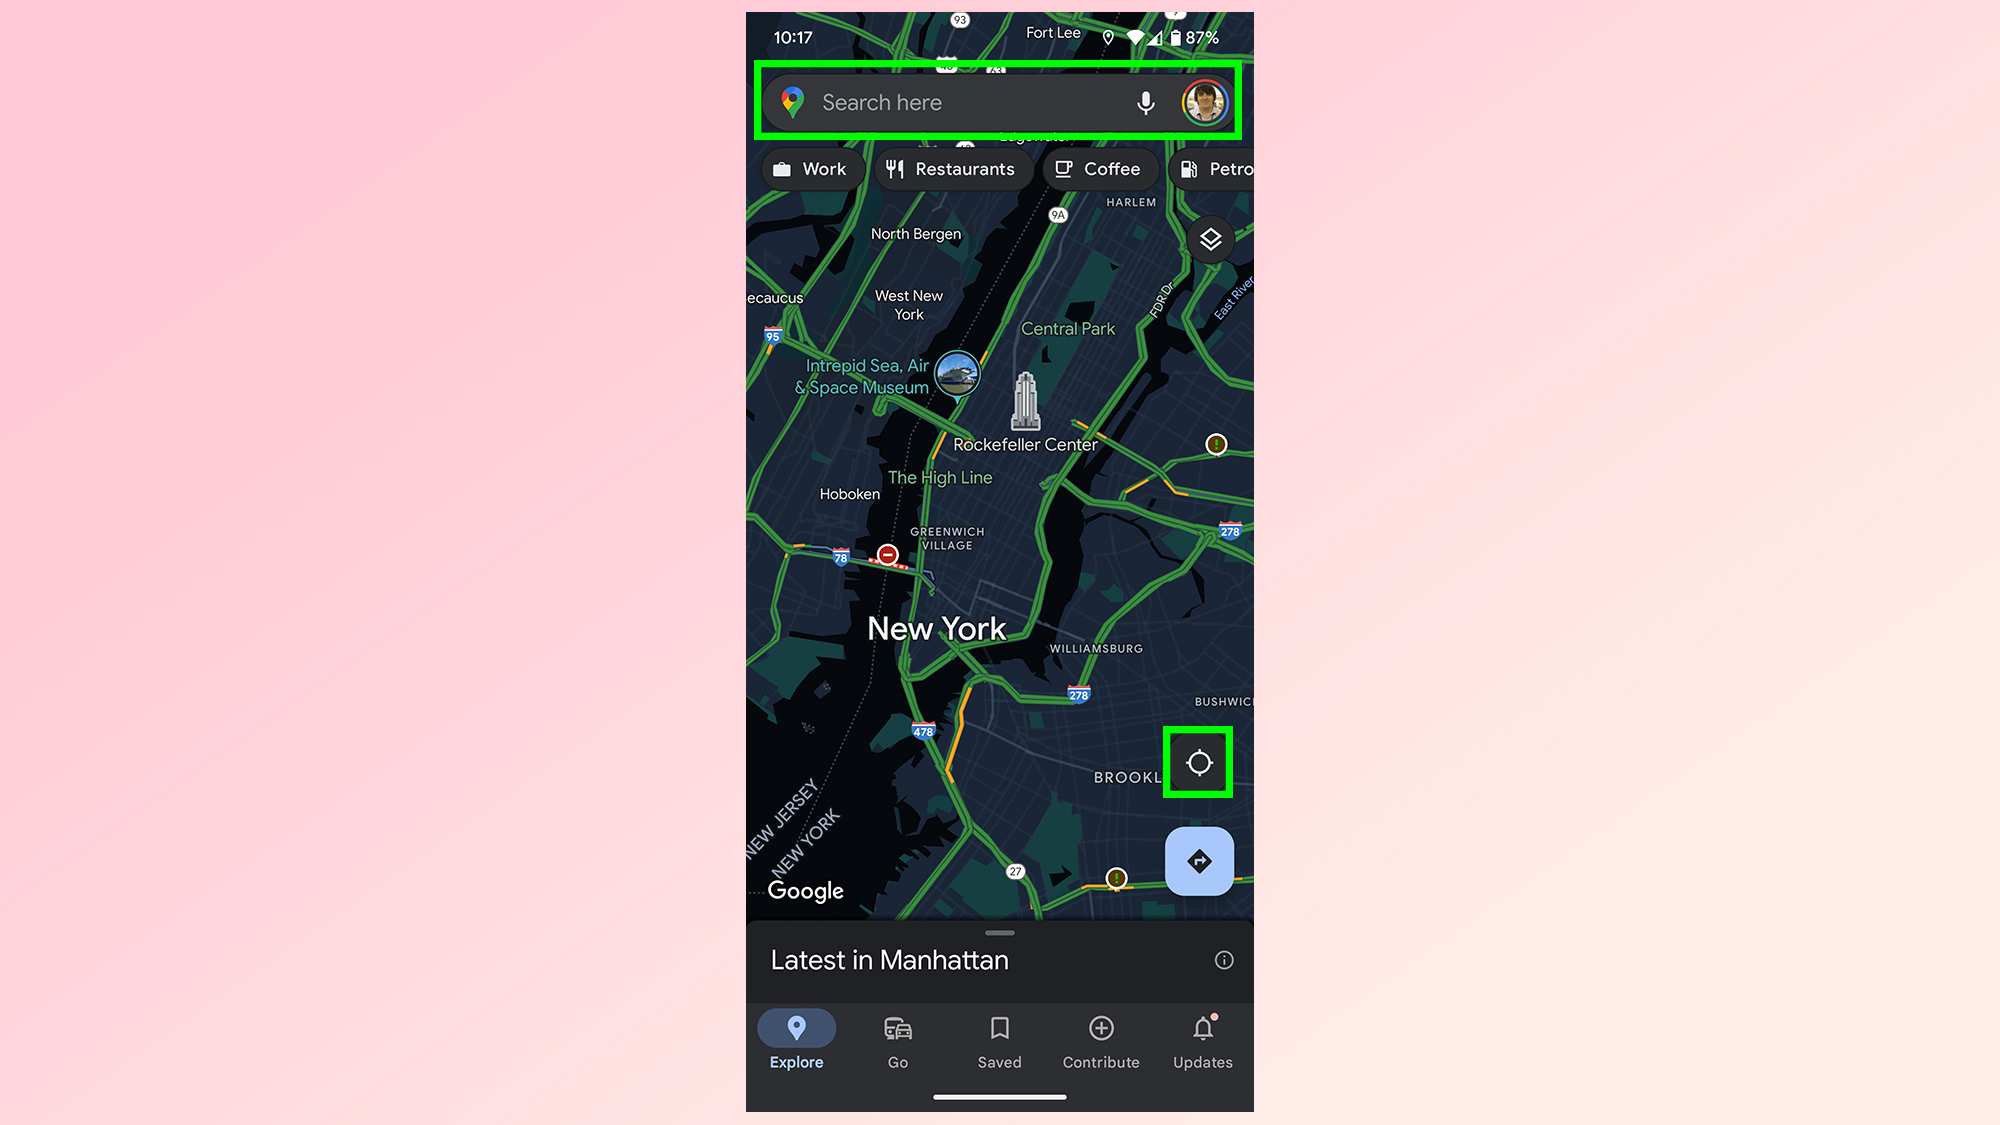
You’ll need to do all your navigation before checking air quality data. The easiest way is to search for a specific address or location with the search bar at the top of your screen. Alternatively, hit the compass icon in the bottom right to go directly to your current location.
Just be aware that Google Maps doesn’t offer air quality data for every single location, primarily serving urban and built up areas across the United States.
3a. (Mobile) Open the layer menu
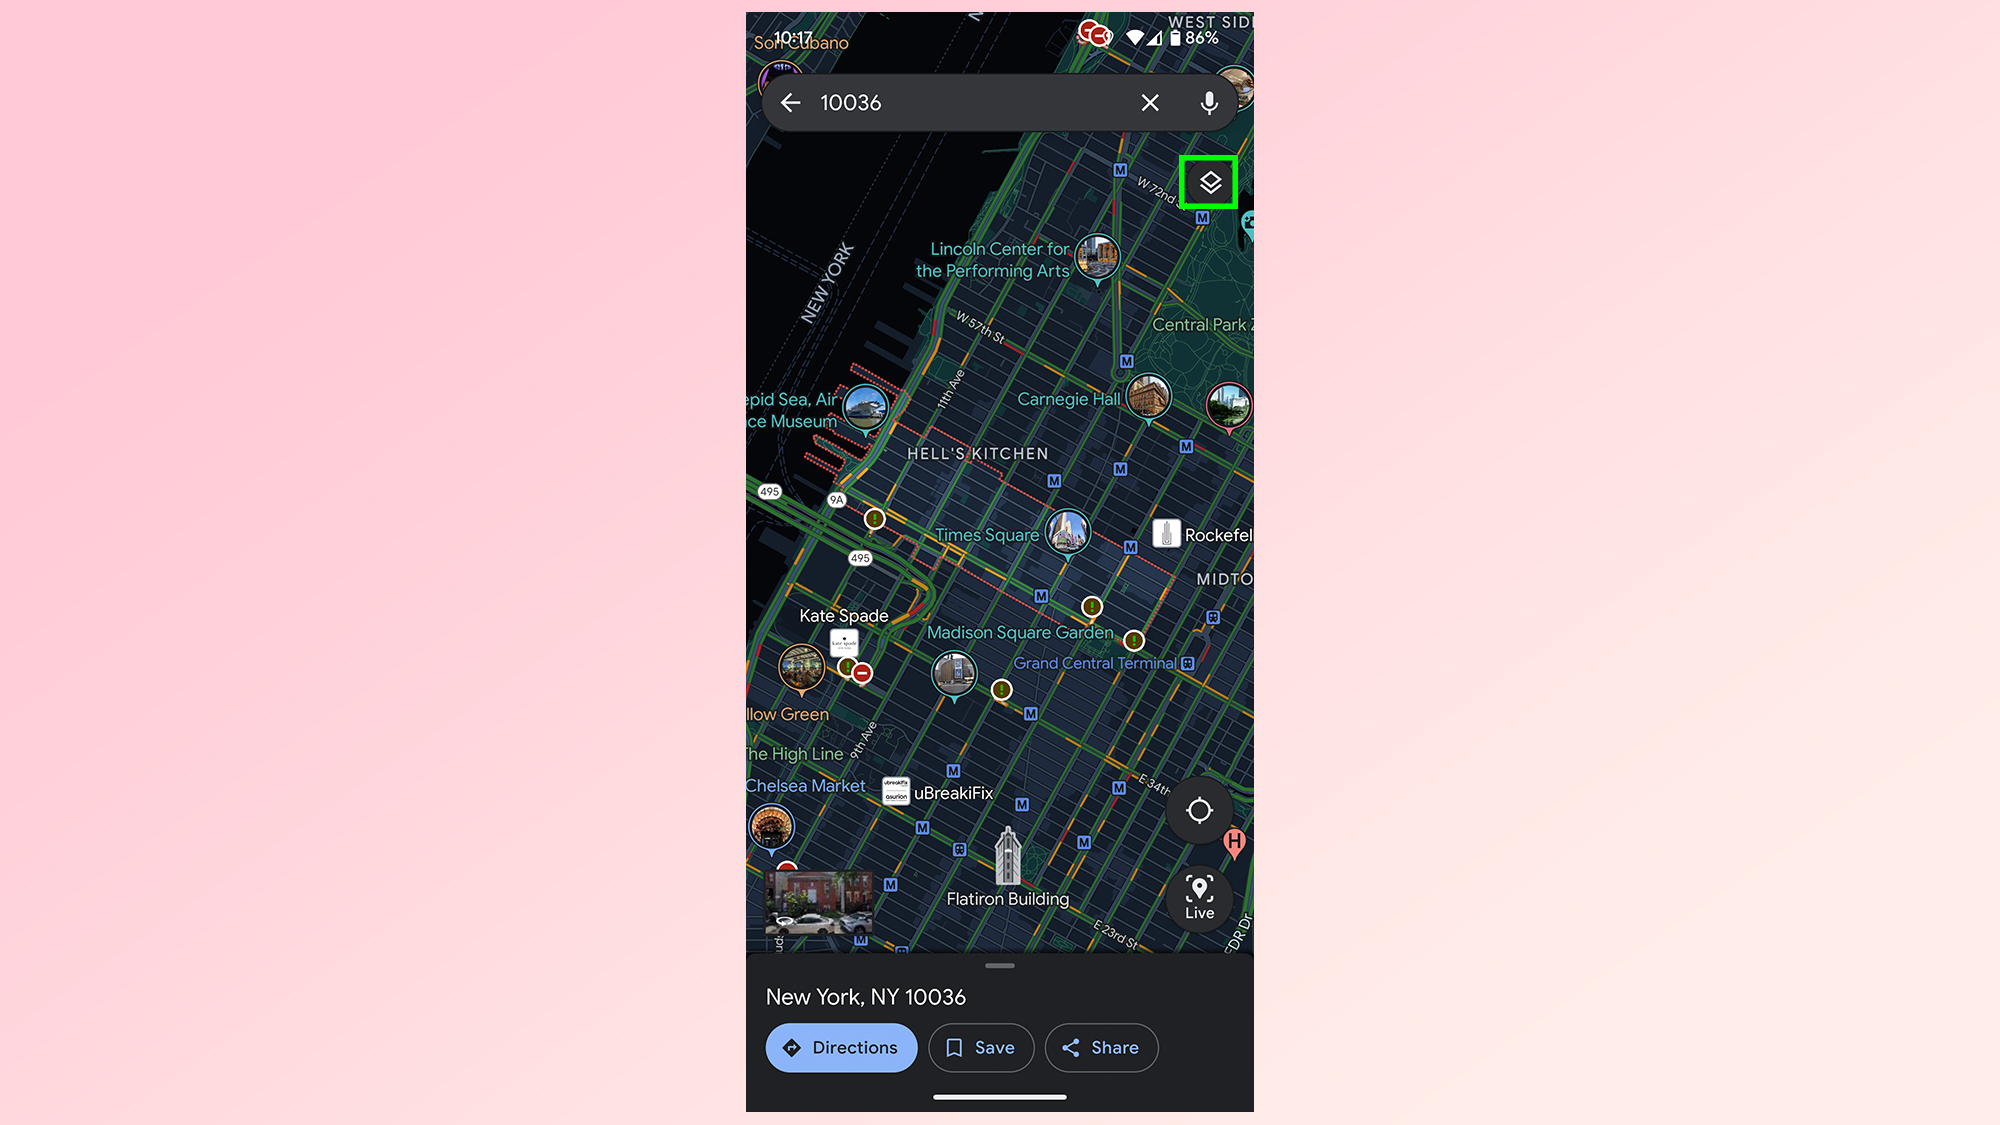
On Android and iOS devices Google Maps’ layer menu can be found in the top right, underneath the search bar. It looks like a square above a downward-facing chevron. Tap it to open the layer menu.
3b. (Desktop) Open the layer menu
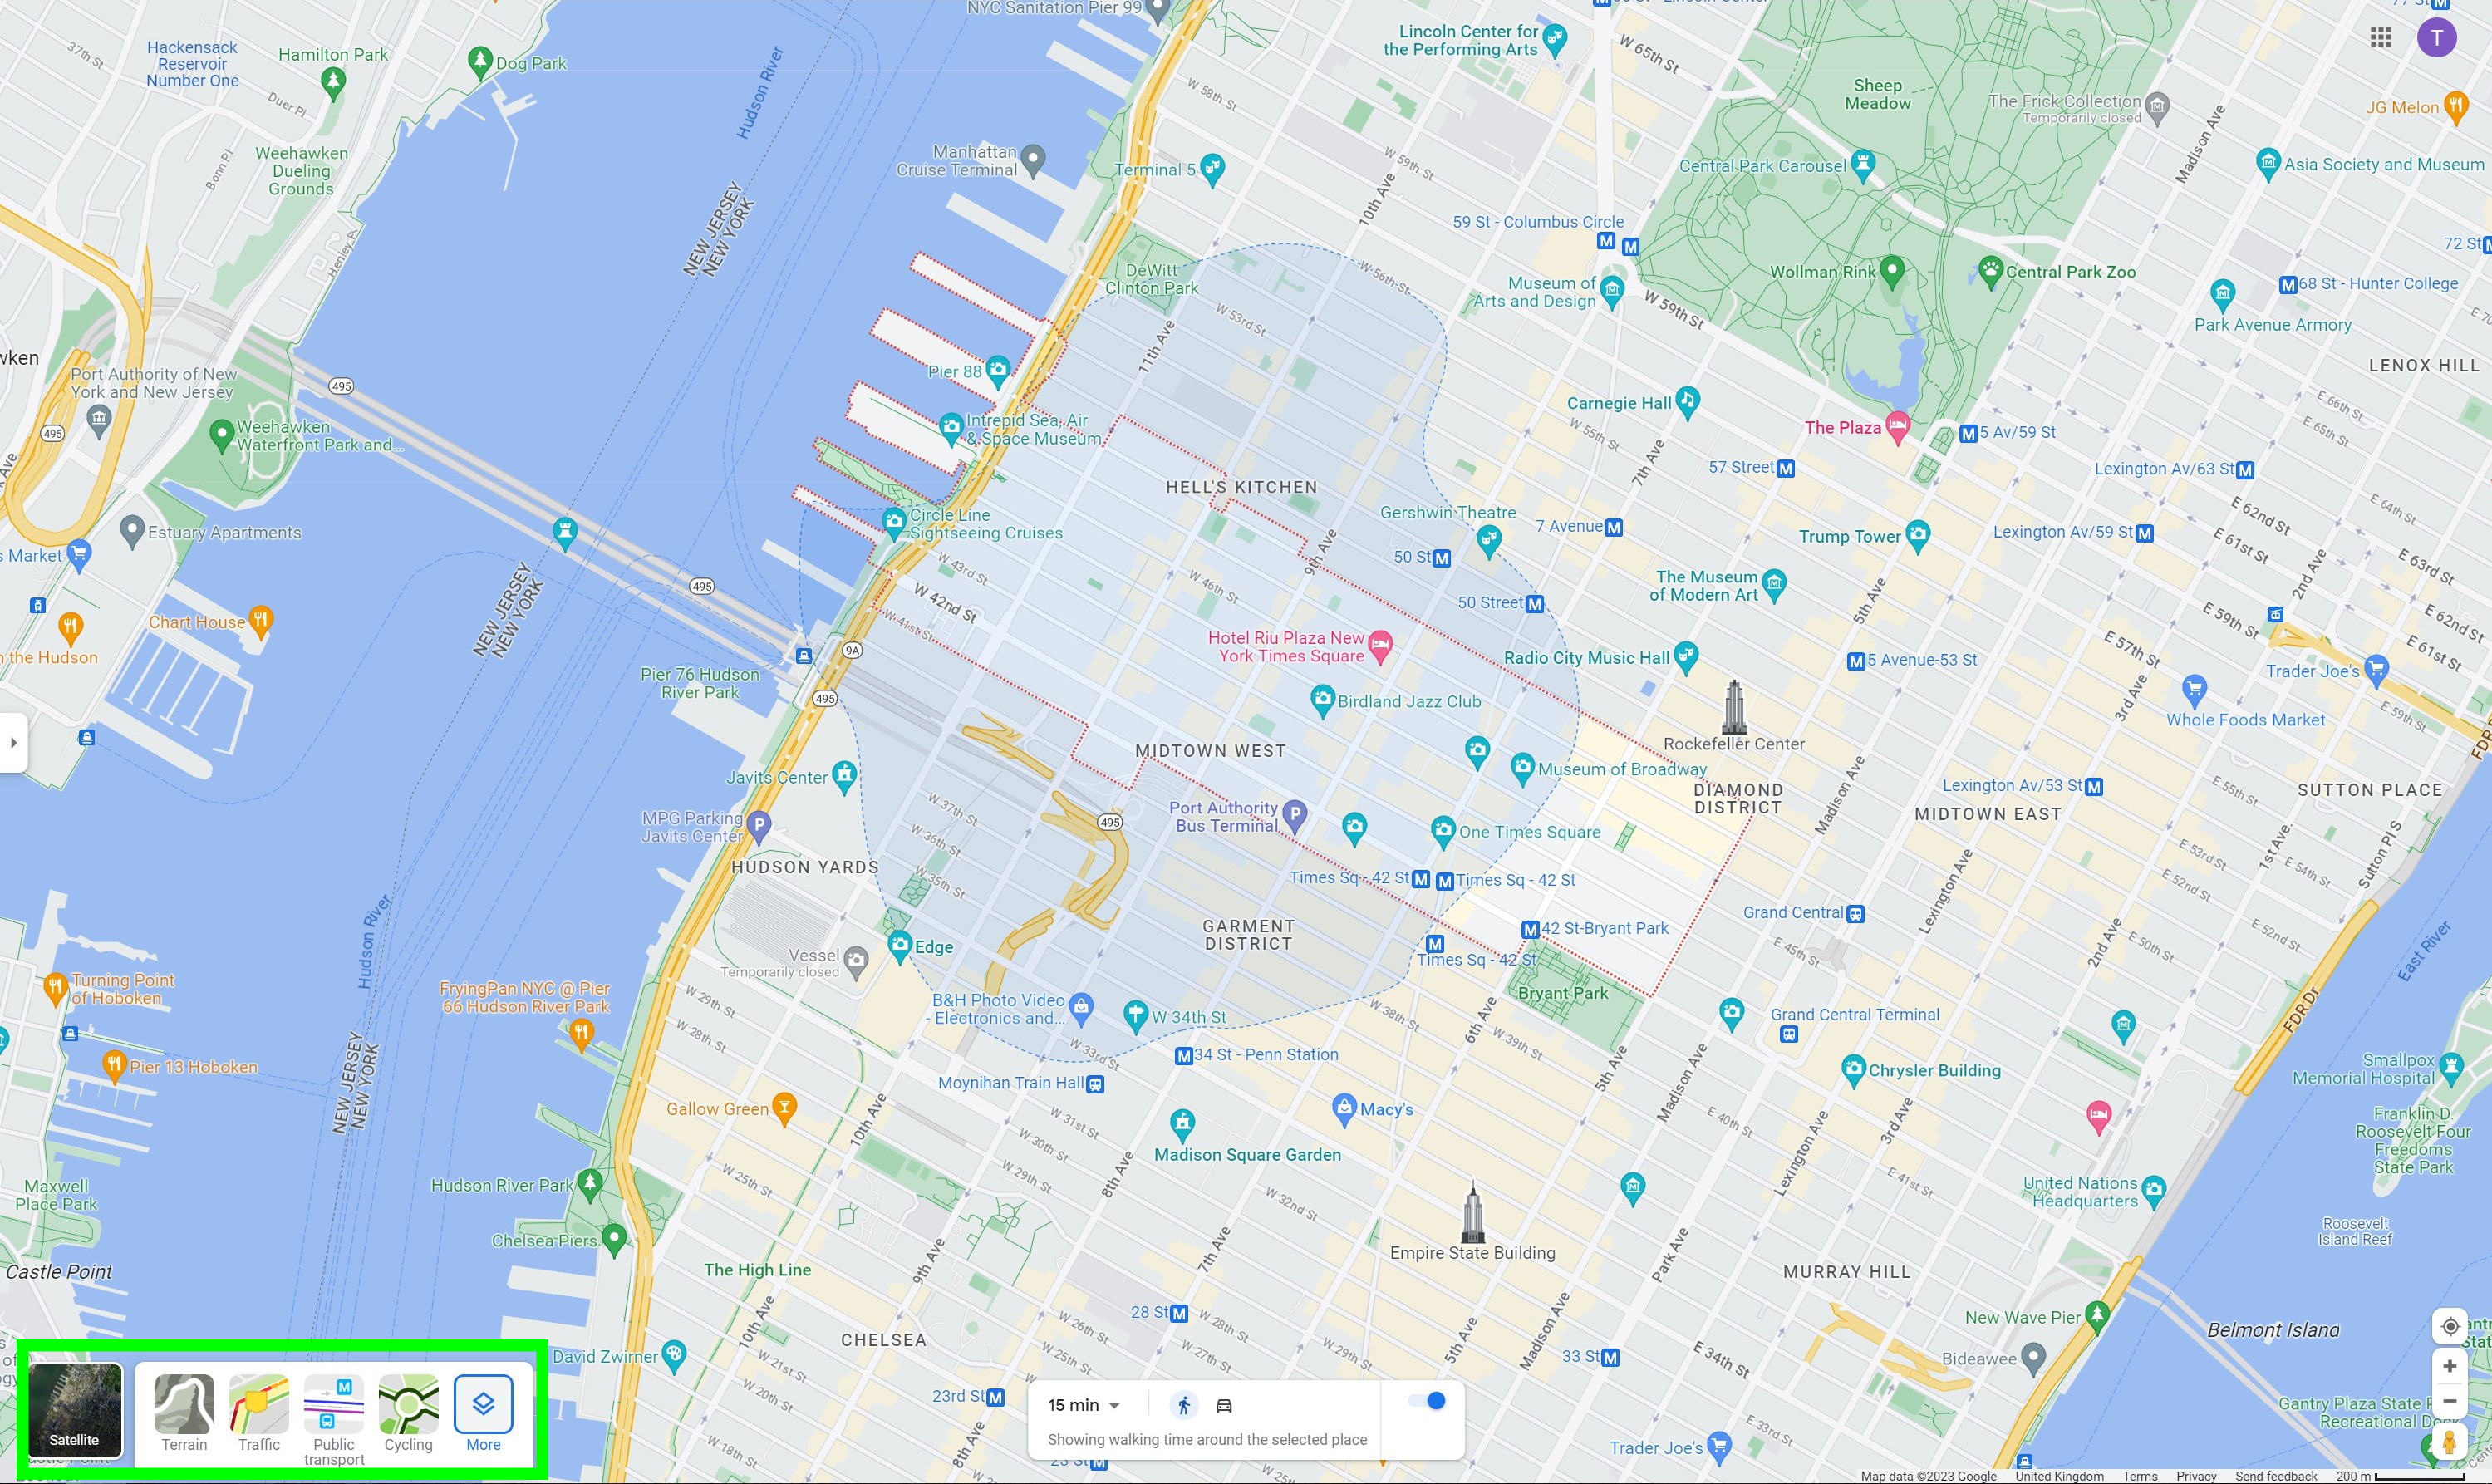
On desktop the layer menu is on the bottom left. Here you’ll find a box that says “Layers” with the same square and chevron icon. Hover over the square with your mouse then click the More option on the right.
4. Select Air Quality
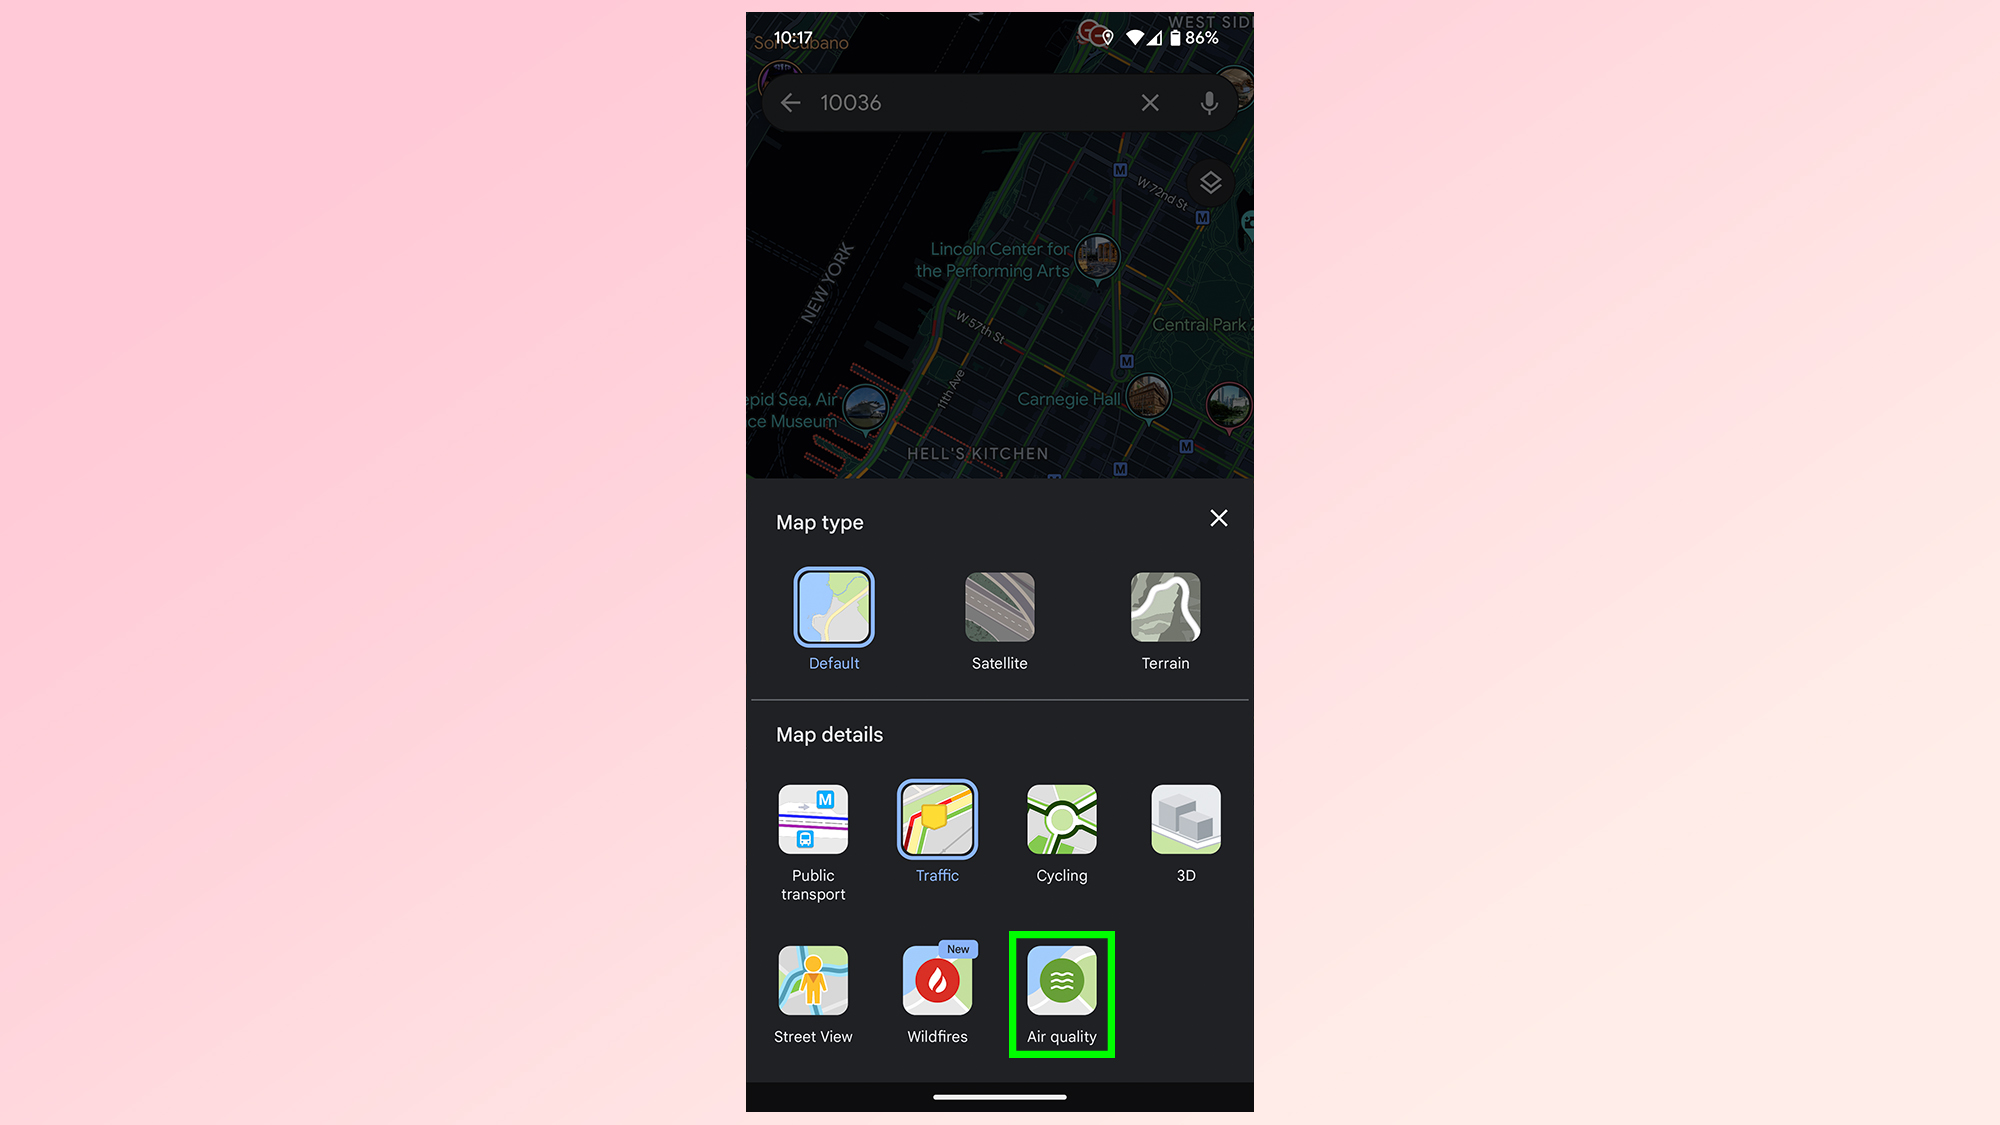
Air quality can be found at the very end of the Map Details section of the layer menu, represented by a green circle with three wavy lines in the middle. Select this to switch on the Air quality layer.
The air quality layer overlays various bits of information onto the standard Google map. Smoke plumes are presented when they’re happening, but the main focus is the color-coded dots spread over various areas of the U.S.
These dots are color-coded from green to purple. Green is good quality air, yellow is moderate and orange is designated “unhealthy for sensitive groups”. Red is unhealthy for everyone, maroon is very unhealthy and purple is hazardous.
For more help with using Google Maps, check out our guides on how to use Google Maps Live View and how to use Street View on Google Maps. We've also rounded up our picks of the 9 hidden Google Maps features everyone should know.
Get instant access to breaking news, the hottest reviews, great deals and helpful tips.
More from Tom's Guide
- Apple Maps is getting a new feature in iOS 17 — 8 years after Google Maps
- I was skeptical of the Dyson Zone — until NYC's worst pollution ever
- This laptop's screen is so good, I've stopped using my 77-inch OLED TV

Tom is the Tom's Guide's UK Phones Editor, tackling the latest smartphone news and vocally expressing his opinions about upcoming features or changes. It's long way from his days as editor of Gizmodo UK, when pretty much everything was on the table. He’s usually found trying to squeeze another giant Lego set onto the shelf, draining very large cups of coffee, or complaining about how terrible his Smart TV is.
 Club Benefits


