How to build a website with GoDaddy
Learn how to build a website with GoDaddy in no time at all
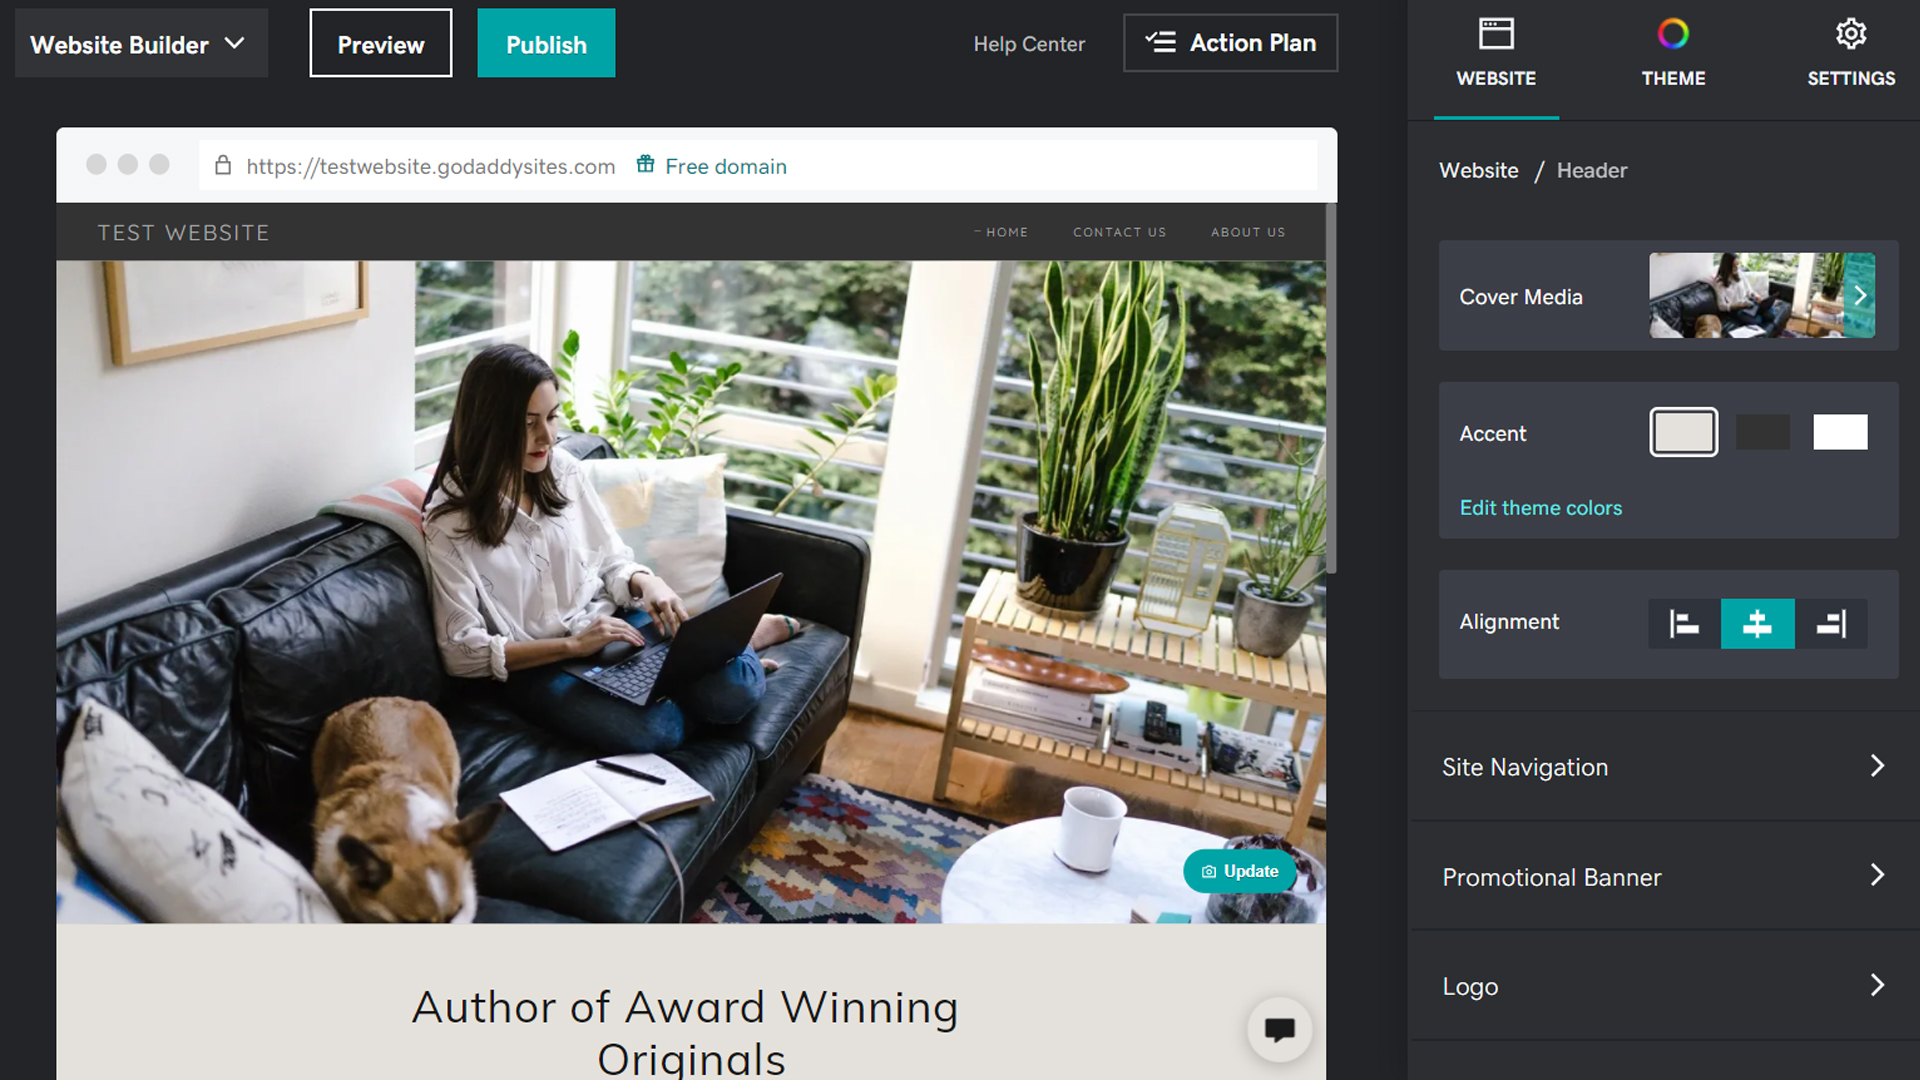
As with many of its competitors among the best website builders, GoDaddy offers a streamlined website creation experience, particularly when it comes to building a basic website. As one of the best web hosting services, and certainly one of the largest, GoDaddy also offers competitive rates on both storage and bandwidth, as well as domain name registration.
This step-by-step guide will take you through the process, and help you to build a website with GoDaddy.
How to build a website with GoDaddy: Preparation
You’ll need a GoDaddy account to get started, but signing up takes just a few seconds. You can also sign up with your Amazon, Facebook, or Google account.
Just click on the "Start for Free" button on the GoDaddy home page, sign up or sign in, and you’ll be taken to the GoDaddy website builder. If you end up on your account page, no problem. Just go back to the GoDaddy.com home page, and hit any of the "Start for Free" buttons.
You’ll start with a free website that you can later upgrade to a paid plan for additional features, more storage and bandwidth, and e-commerce options—but you don’t have to. If you’d like to keep your website free, you can do so for as long as you like.
Just bear in mind that free websites are found on the GoDaddy subdomain, so your web address will be yoursite.godaddysites.com. For a custom domain name, you’ll need to sign up for a paid plan.
Step 1: Choose a category and pick a name
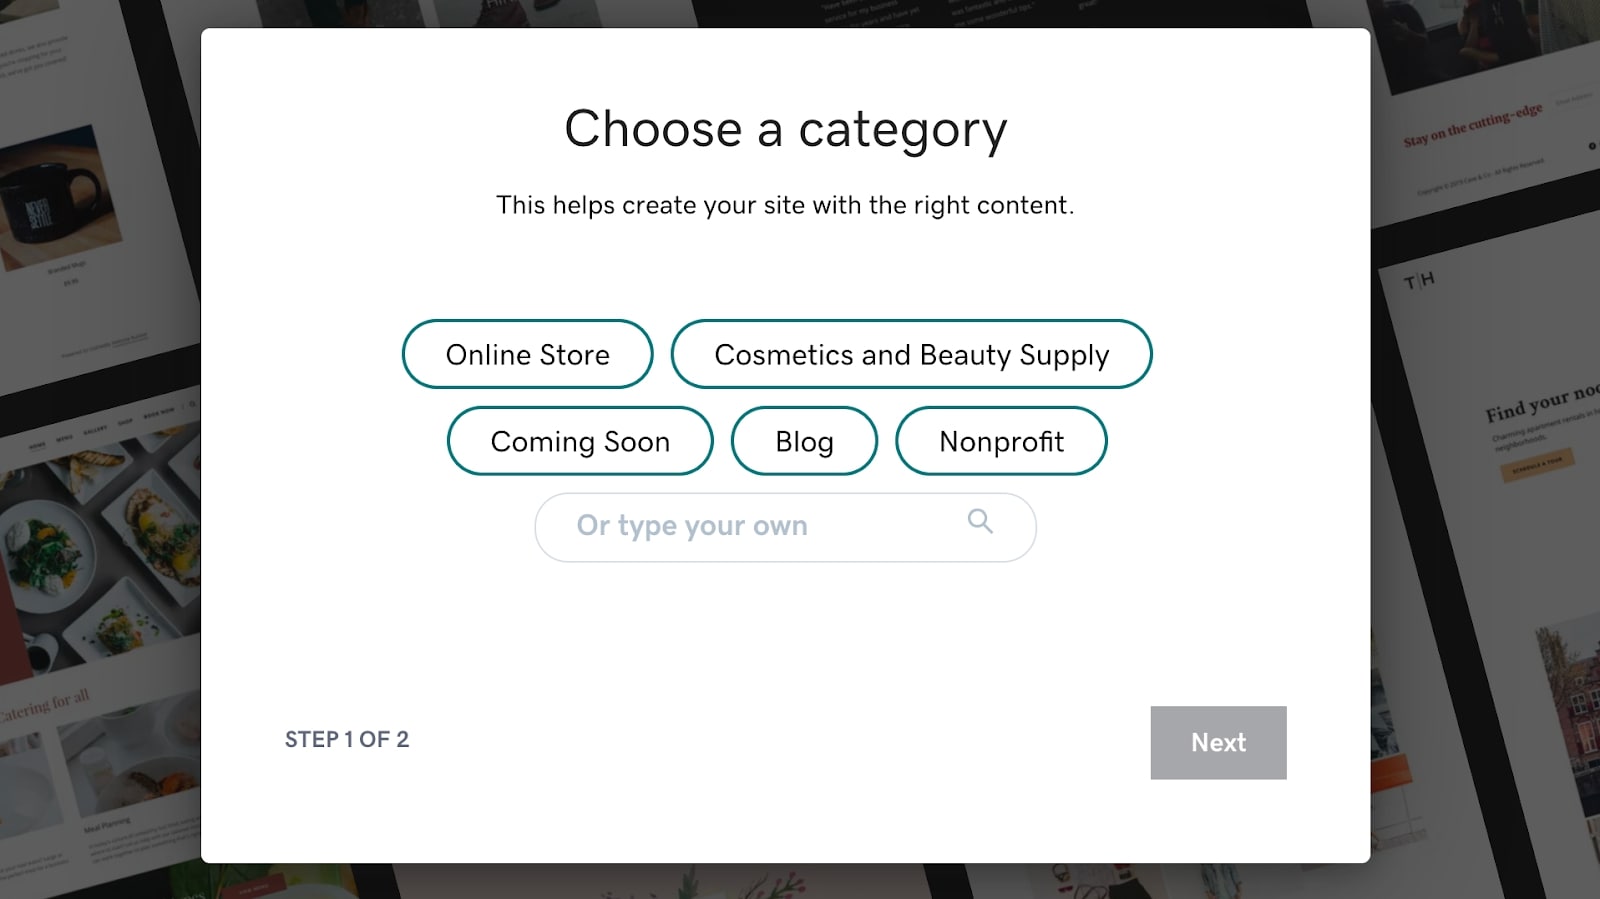
Your first step is to choose a category. There are a number of options to choose from, so just start typing what your website is about (e.g., photography, wedding cakes, food and drink), and hit "Next".
Get instant access to breaking news, the hottest reviews, great deals and helpful tips.
You’ll be asked to choose a name for your website. Don’t stress about this too much, as you can change it later if need be. You’ll see your website’s name appear on the mock homepage behind the dialogue, to get an idea of how it will look. But don’t worry if you don’t like this theme: you can change it later, and GoDaddy has many options.
When you’re happy with the name, click "Next".
Step 2: Choose a theme
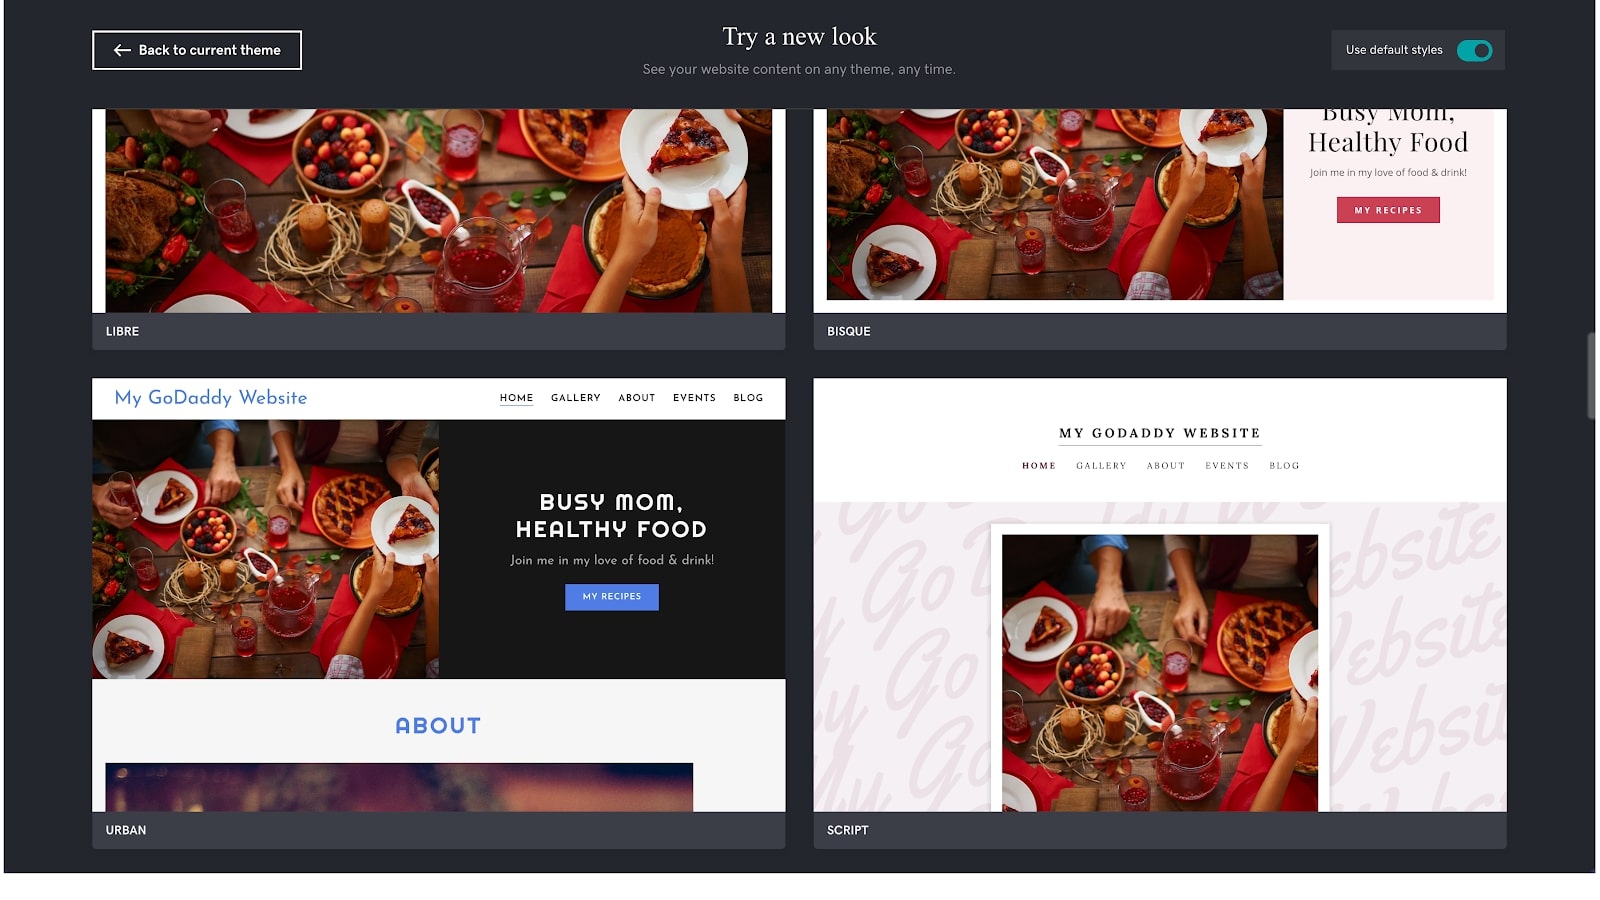
The next major step is to choose a theme. You can stick with the one that’s been supplied or try another one. Switching between themes is easy, and your content will never be lost by doing so. Visual changes you make to themes, however, will be erased if you decide to change later, so it’s worth trying out a few different themes to find one you plan on sticking with.
To choose a new theme, click on "Theme" from the menu to the right, between "Website" and "Settings", then "Try a new look". You also have the option of changing the accent colors, fonts, and button styles. In addition, you can change any of the images used in your theme, for a more personal touch.
Step 3: Adjust your basic settings
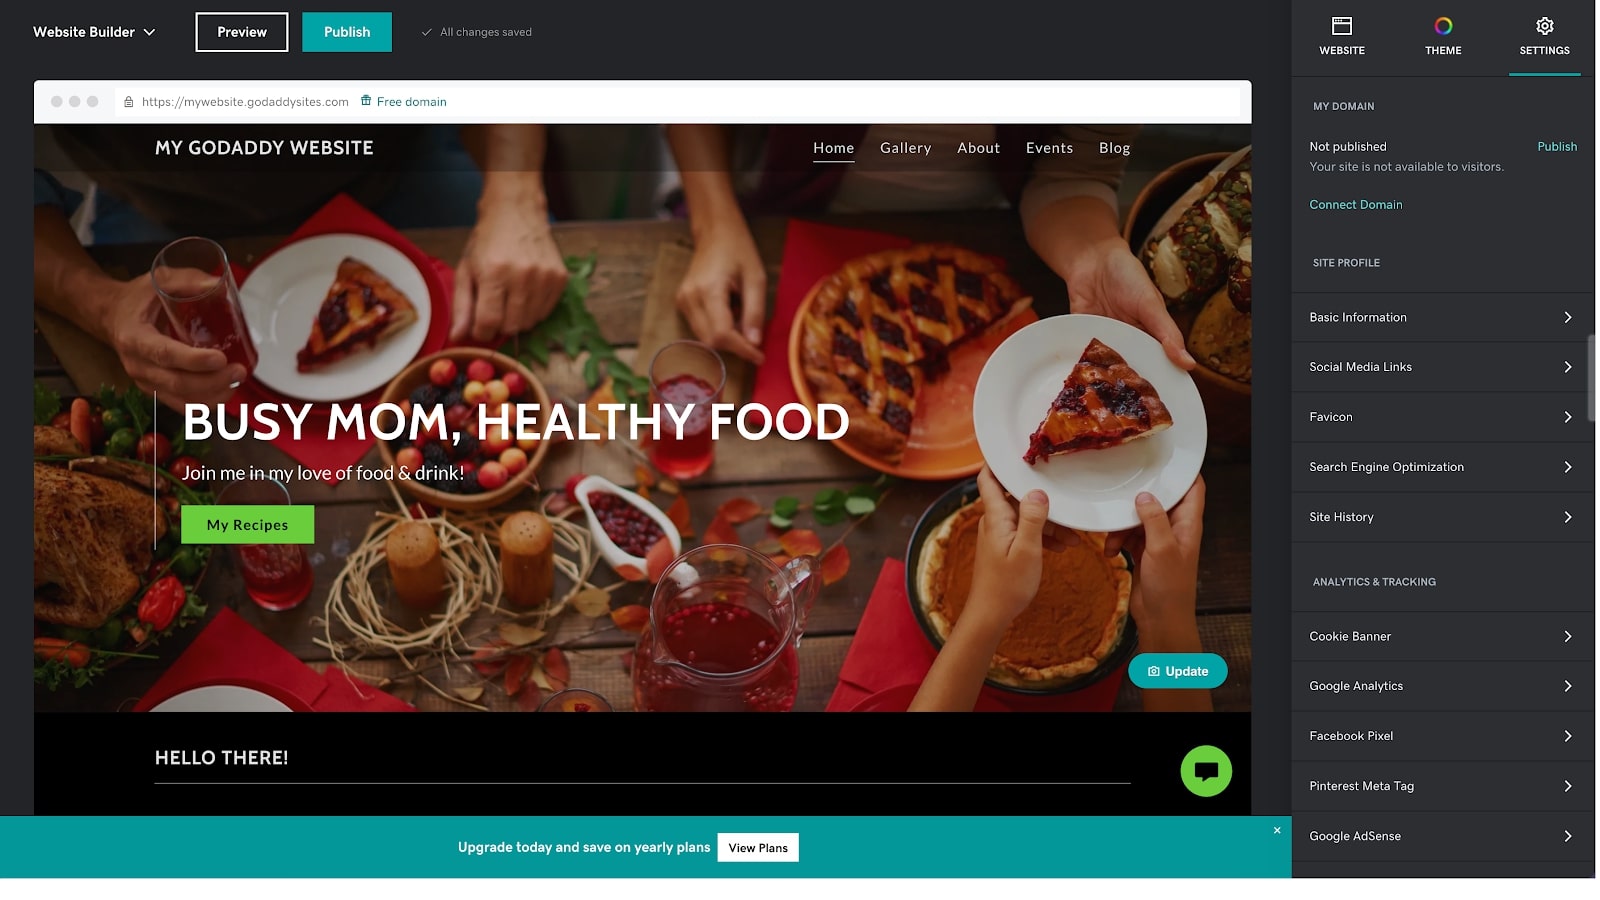
Click on the "Settings" tab in the menu bar to the right, and go through each of the settings under "Site Profile" and "Analytics & Tracking".
The first section lets you provide basic information about your website that will help users (and search engines) understand who you are and what your website is all about. You can include an email, address, and phone number, add links to your social media, upload a Favicon, add a headline (title tag) and (meta) description for each of your pages, and even restore to a previous version of your website.
The "Analytics & Tracking" section is important for making the most of Google, Facebook, and Pinterest analytics, as well as Google AdSense. Each of these requires that you set up a Cookie Banner informing your users of the use of cookies, which you can customize by changing the text, adding a Decline Button, and turning on or off advanced tracking.
Step 4: Add new pages
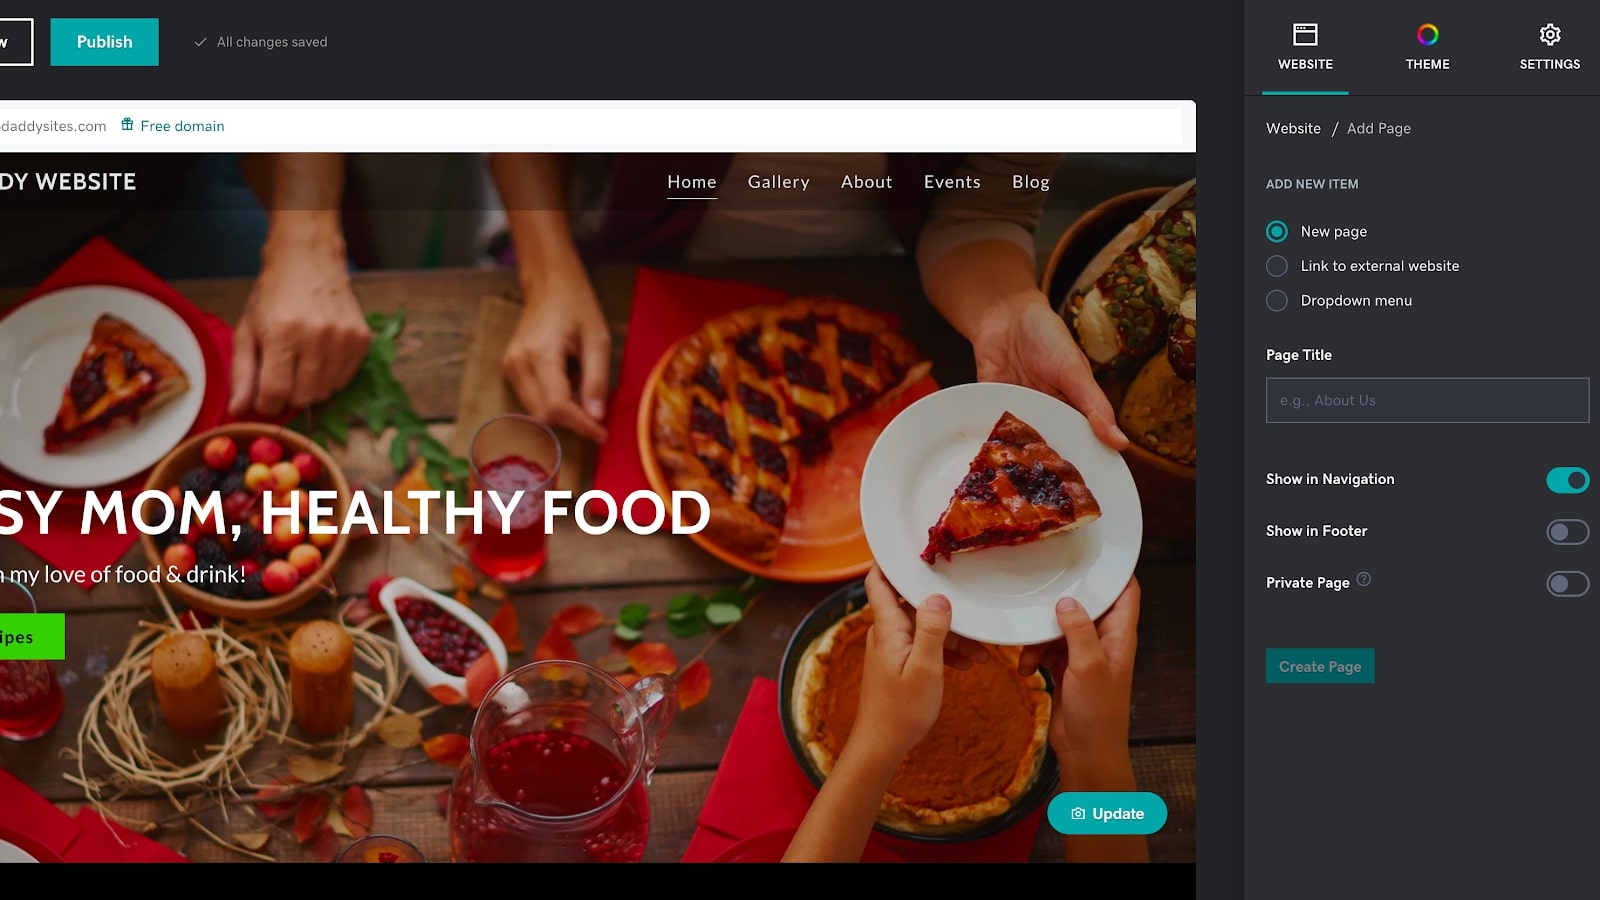
By default, your GoDaddy website includes a few different pages. Depending on the website type you choose in the beginning, this might include a Gallery, Events, Blog, About page, and more. You have free reign to edit and customize each of these pages, and can reorder the menu by clicking on the "Reorder" icon next to "Site Navigation" on the right-hand panel.
You can also add as many new pages as you like. It’s easy to link to new pages as you create them as well; just select the text you want to link to the new page, select the hyperlink icon (🔗), and then choose "Page and Section on page" from the right-hand menu.
Step 5: Add images, text, dynamic elements, and more
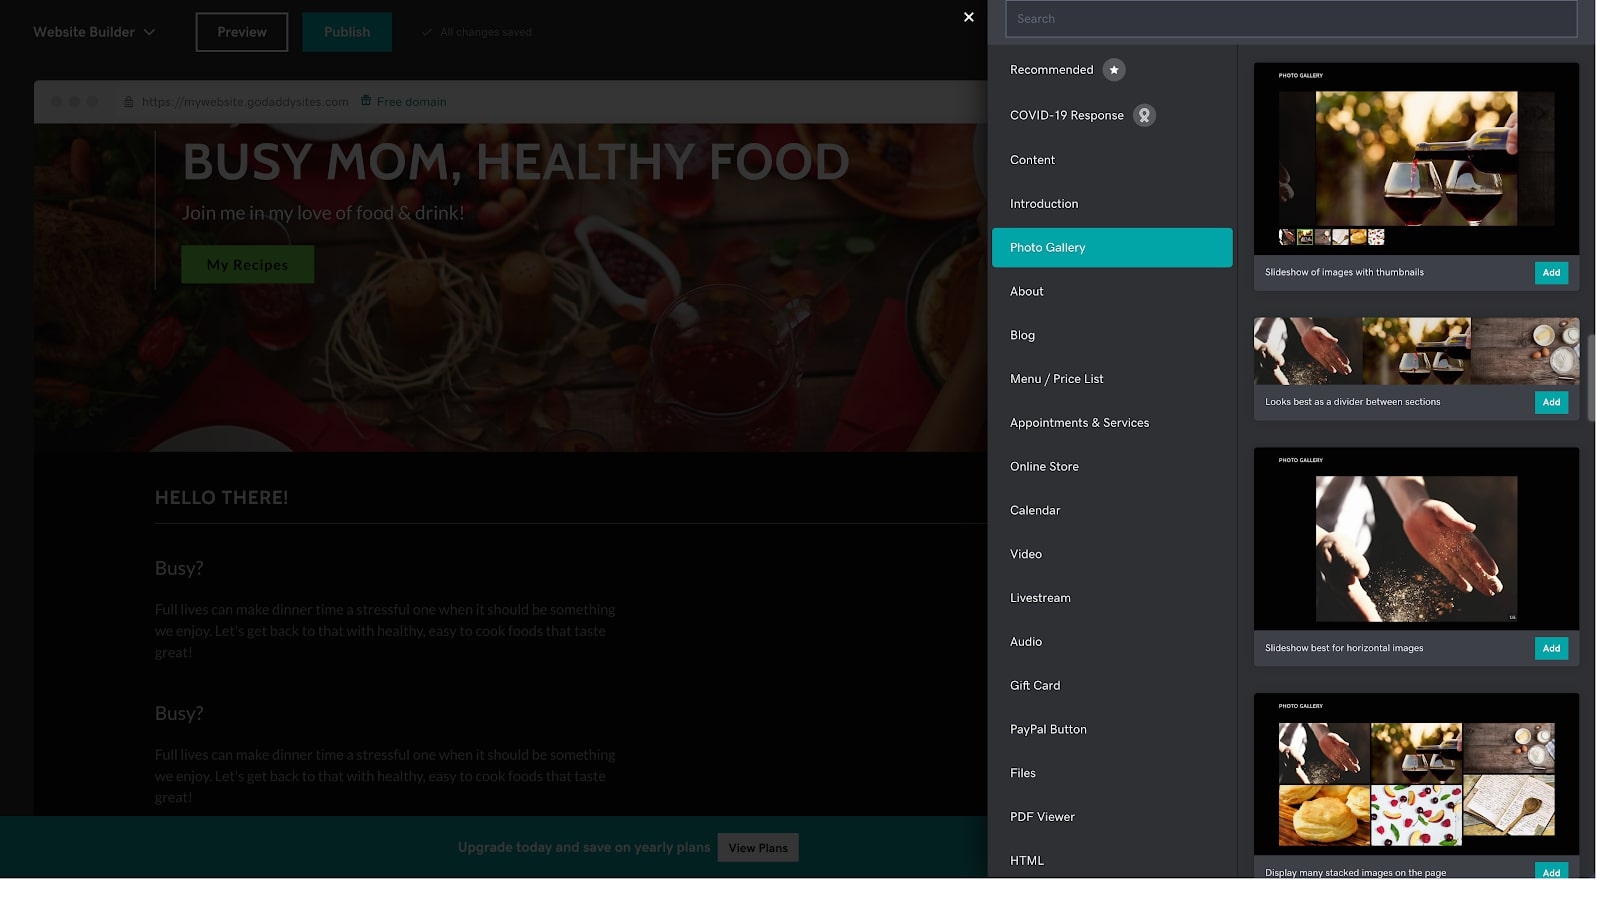
Now it’s time to get to the meat of your website. You can use the GoDaddy Website Builder to add a huge variety of elements to your page. Just click on “Add Section” above or below any of the current sections.
It’s worth taking the time to explore the different sections that can be added, including a variety of polished layouts for long- and short-form content, photo galleries, a calendar, online store (you’ll need a paid plan to be able to take payments), social feeds, and more. There’s a lot here, so feel free to dig around, and try adding different elements to your pages.
Each section can be customized using the menu bar to the right, and by adding text and images. Each section has its own set of customizations; just click on any element to see what can be done. You can add lists and hyperlinks, change the colors and alignment, and more.
Step 6: Preview and publish
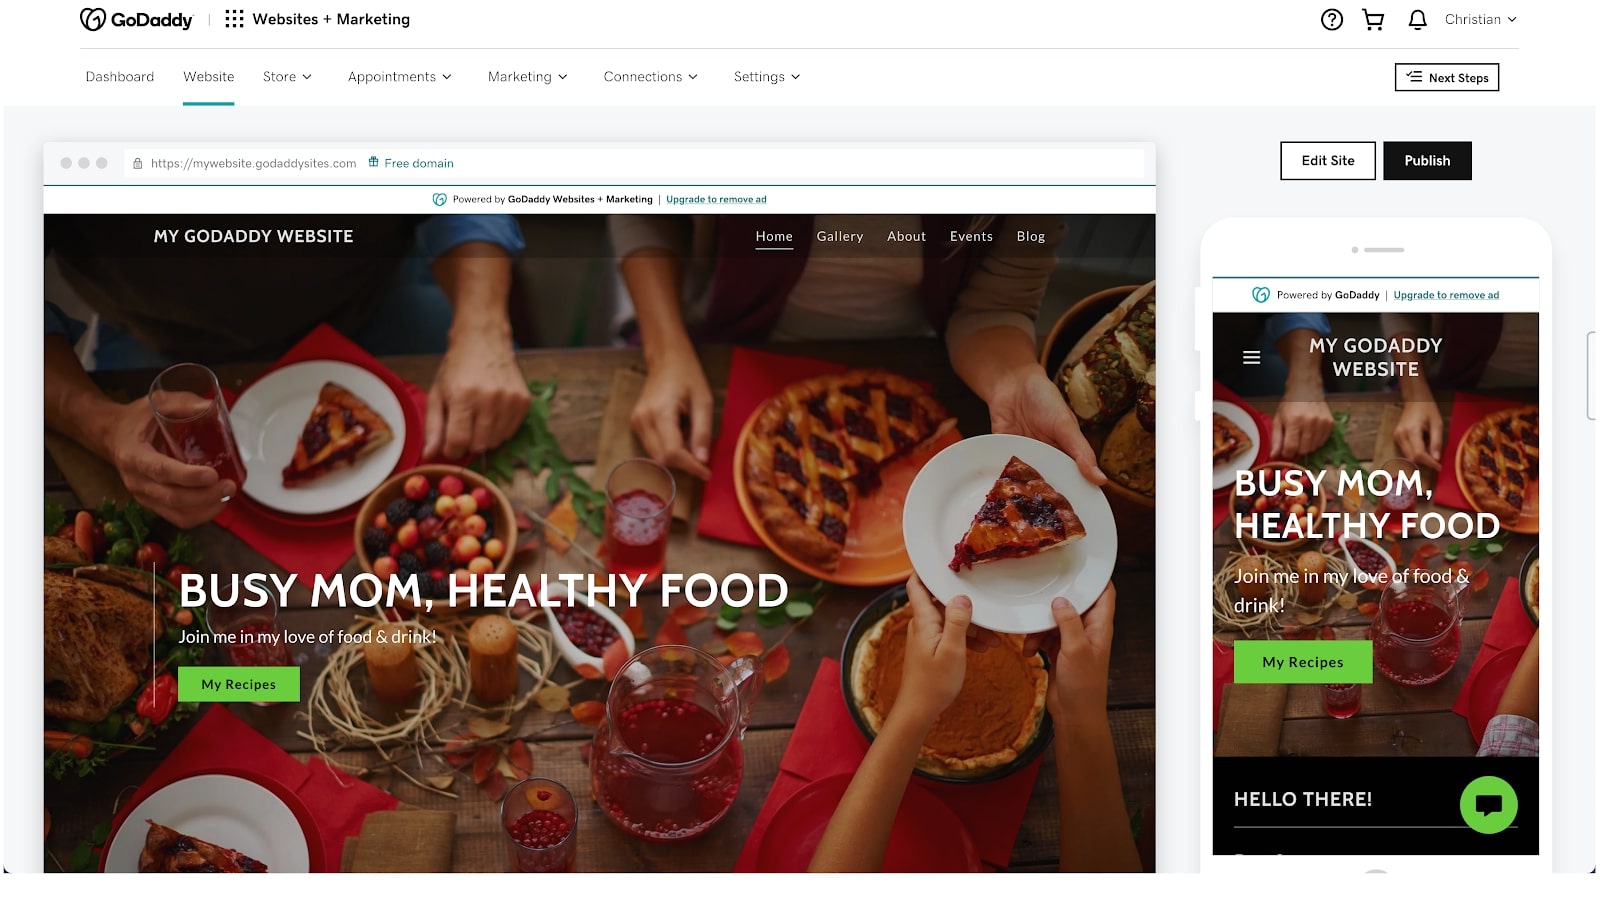
You can preview your website by clicking on the "Preview" button at the top. When you’re happy with how everything looks, you can go ahead and "Publish your website online". Remember that on free plans, your website is published to yourwebsite.godaddysites.com, but you can upgrade any time for a custom domain name and plenty of other features.
If you’re building a professional website, this is an important next step. A private domain name looks much more serious, and if you’re planning on making money with your website by adding an online store, you’ll want to upgrade as well.
How to build a website with GoDaddy: Summary
It's quick and intuitive to build a website with GoDaddy's website builder. In just six simple steps, you can build your first website and have it published online. Simply sign up for an account, choose an industry and name, pick a theme, customize your settings and content, and then preview and publish your website online.
There’s a huge number of sections and elements that can be added to each of your pages, and an almost unlimited number of customizations. GoDaddy has excellent customer support, and it’s available 24/7, even for free members, so don’t hesitate to ask questions as you’re building your site.
Further reading on website builders
See how GoDaddy matches up to other website builders in our GoDaddy vs Wix and HostGator vs GoDaddy vs IONOS comparisons. It's also worth looking at our other how-to guides, including how to build a website with Shopify; with Wix; with Squarespace; and with the HostGator website builder.
Christian is a freelance writer and content project manager with over six years' experience writing and leading teams in finance and technology for some of the world's largest online publishers, including TechRadar and Tom's Guide.
 Club Benefits


