How to use the free Windows 10 video editor
Confusingly, it involves the Photos app

Not only may you not know how to use the free Windows video editor, but you may not even know these options are present on your Windows laptop or desktop in the first place.
It turns out that the Windows 10 Photos app may actually be misnamed, as you can make some limited edits to video using it. Microsoft also offers two free video editors — Video Editor and Clipchamp — in Windows 10, but these are more detailed tools. Using Photos lets you make basic edits — and a few more advanced ones — from a familiar interface, and without costing you anything extra.
Read on for instructions on opening your video in the Photos app, and for a brief rundown of what tools are available. Once you've read this guide on how to use the free Windows 10 video editor, you'll have some valuable knowledge next time you need to make some changes to some footage.
How to use the free Windows video editor
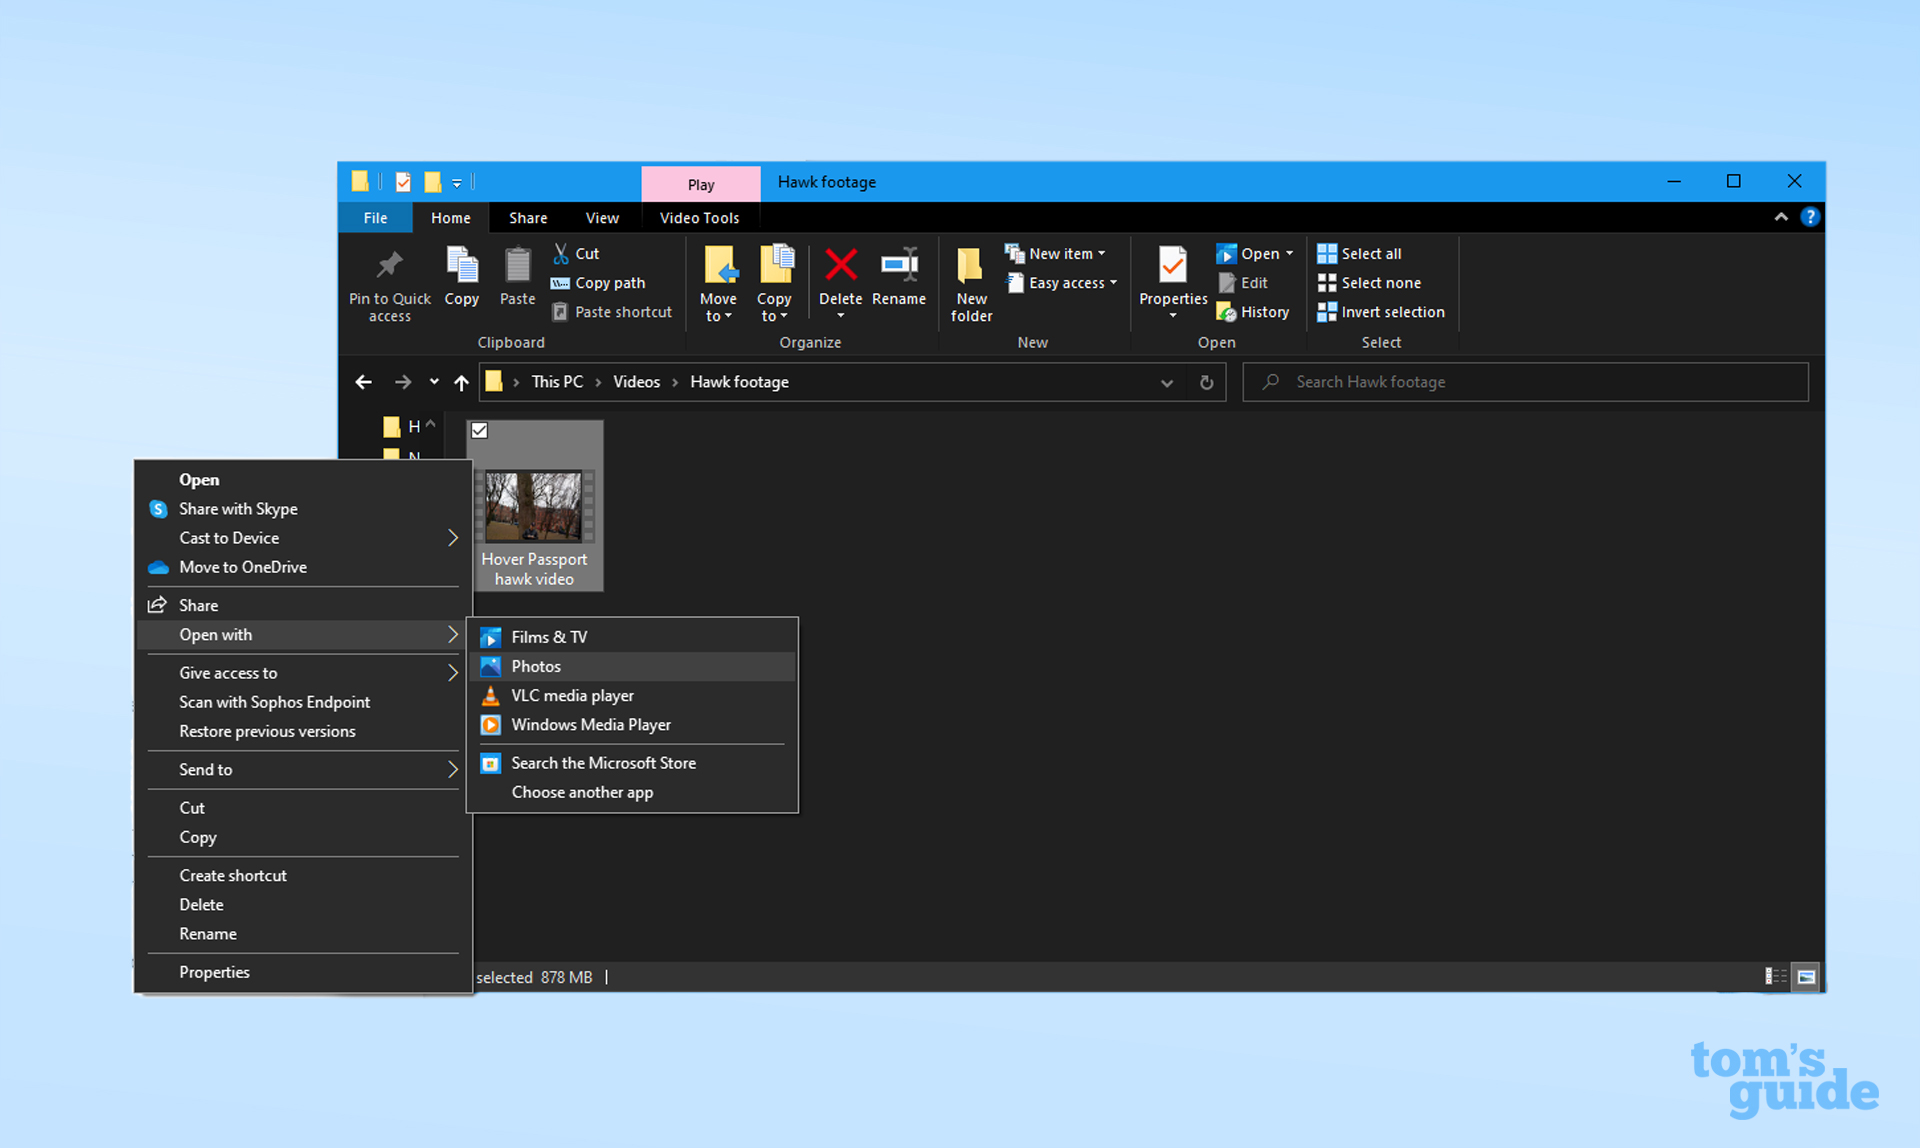
1. Right-click on your video file and either open it in Photos OR select "Edit in Photos" from the Film and TV app
2. Make use of the diverse tools in Photos to edit and enhance your clip, such as the video trim, mark-up or slo-mo tools.
Read on to see detailed instructions for each step.
1a. Open a video clip in the Photos app. You may need to right-click and then select Open with and then Photos in order to make sure you get the file to open in the right app.
Get instant access to breaking news, the hottest reviews, great deals and helpful tips.
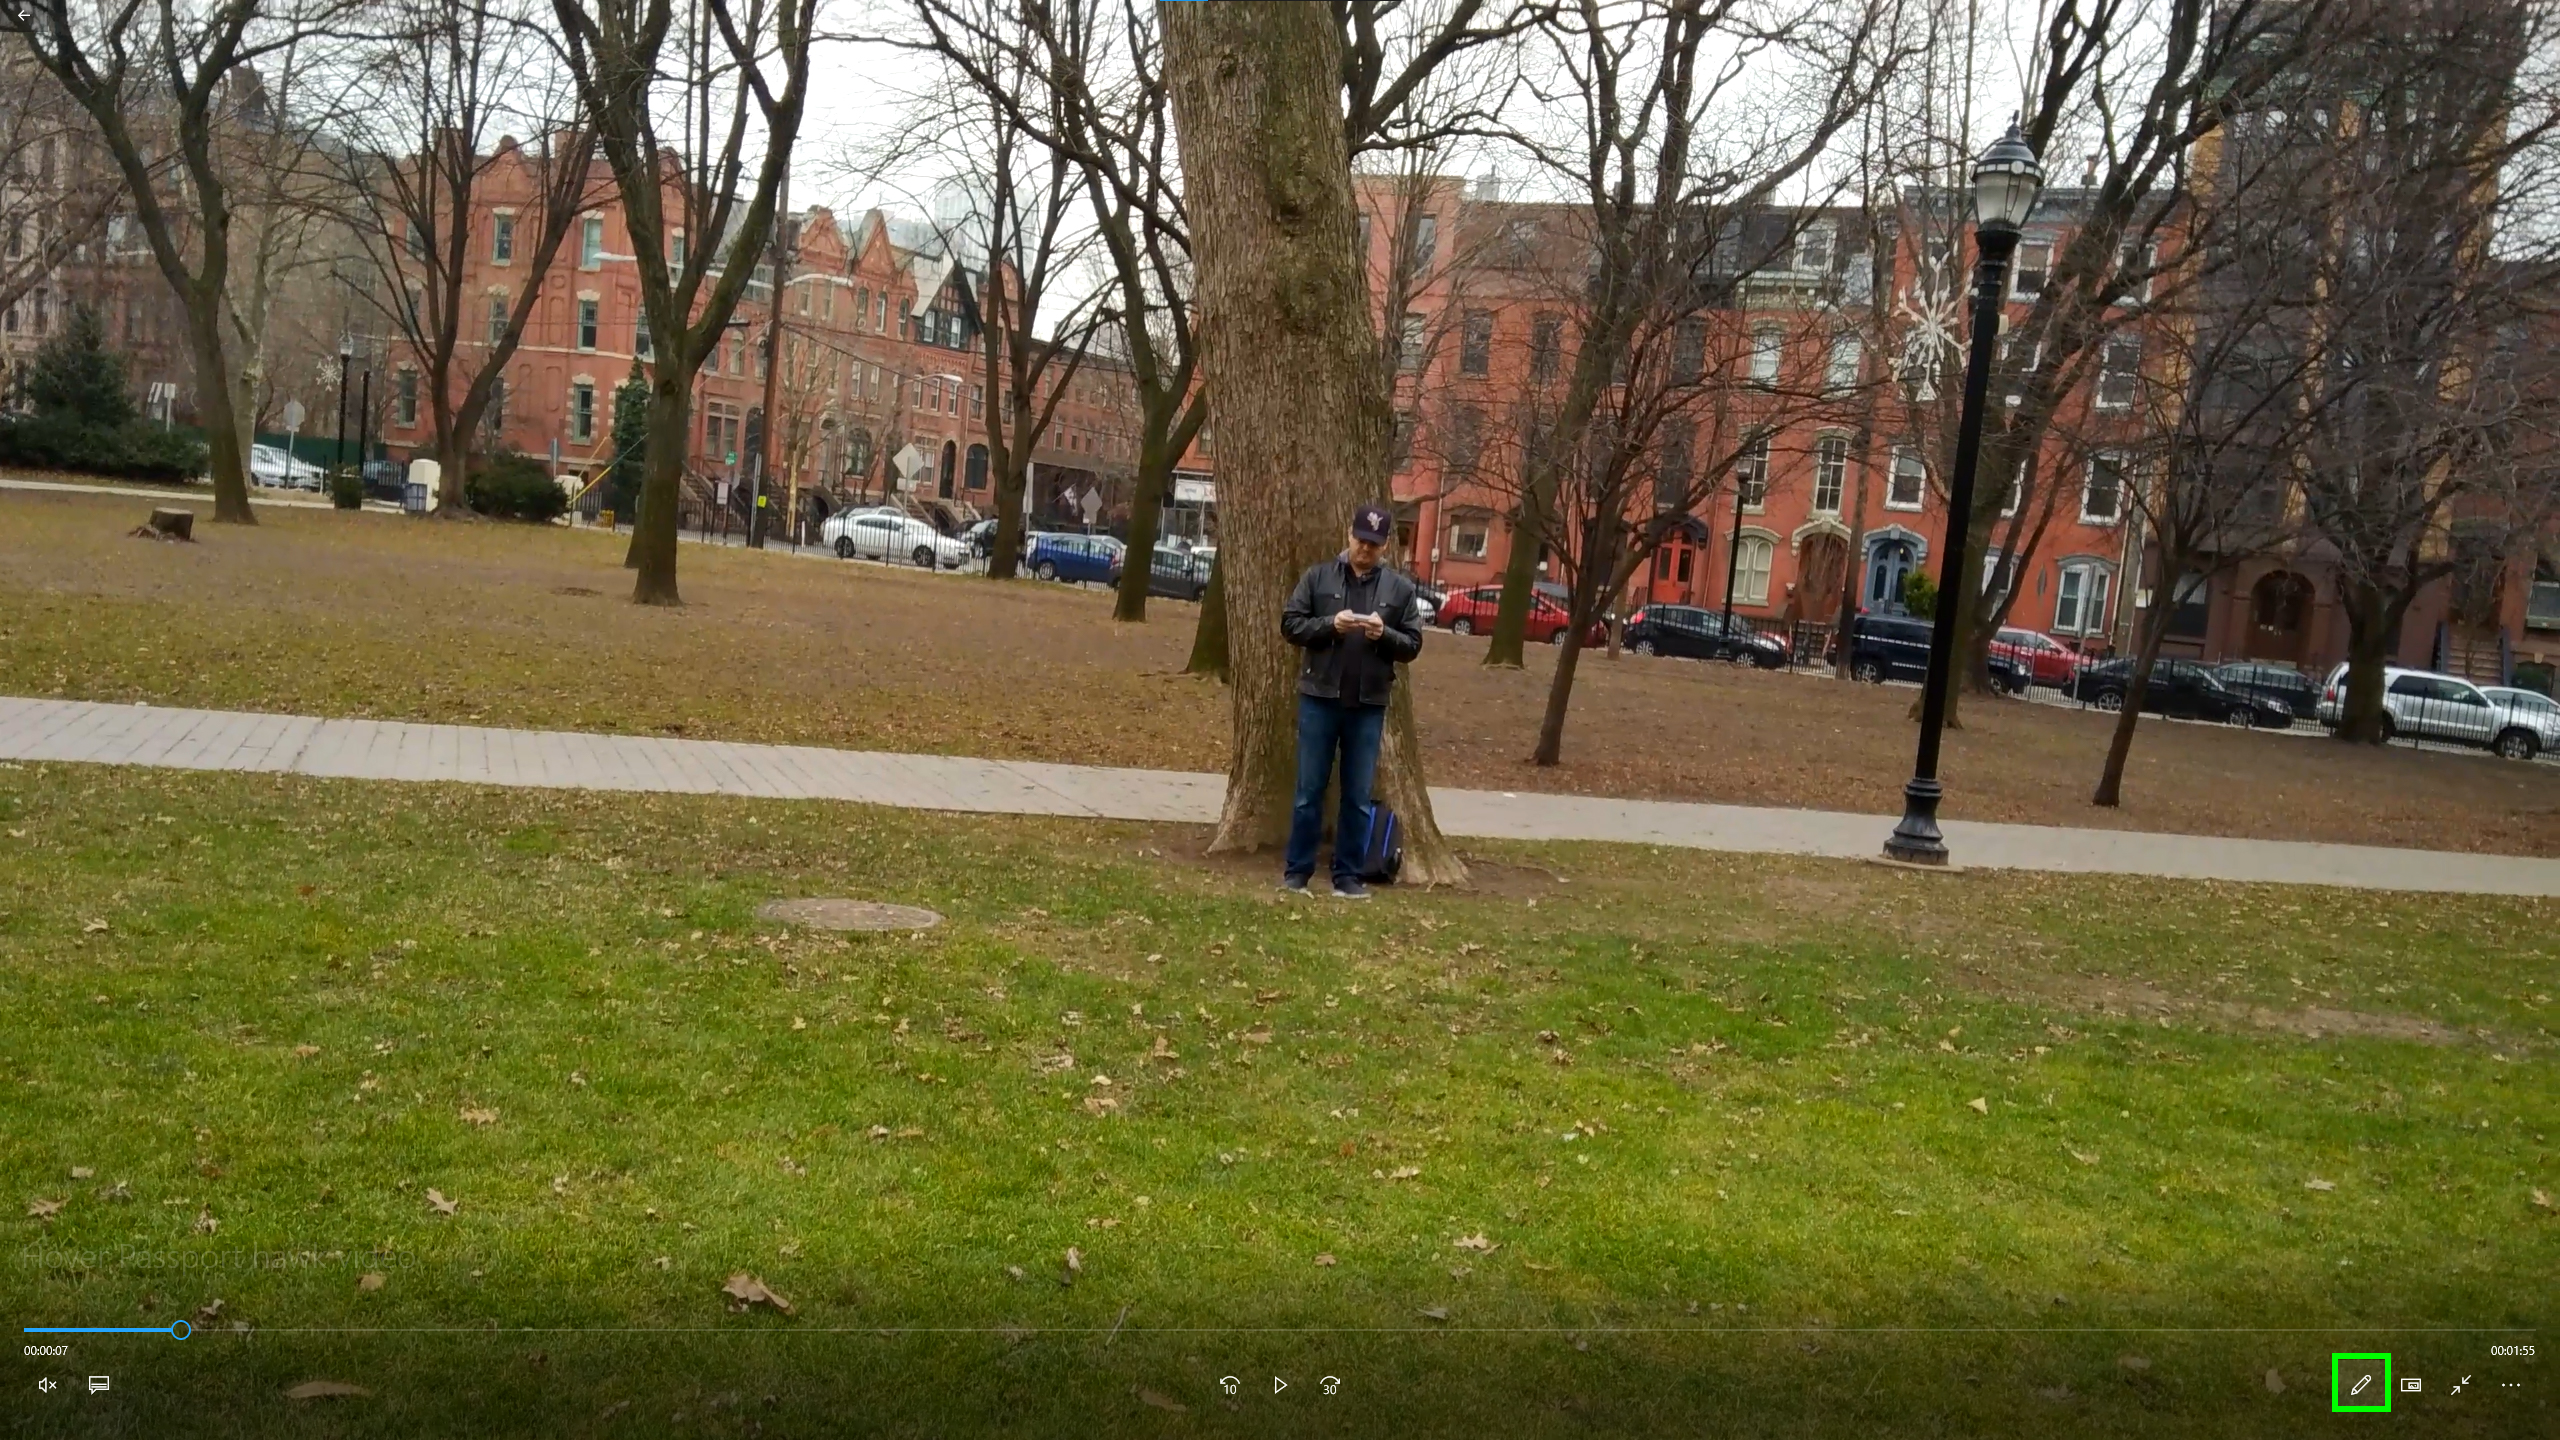
1b. Alternatively, after opening a video in the default Film and TV app, select the Edit in Photos button on the bottom right of the window.
From here, you have a surprising number of editing options, but they're not particularly well signposted. Just as well you've got us here to point you in the right direction.
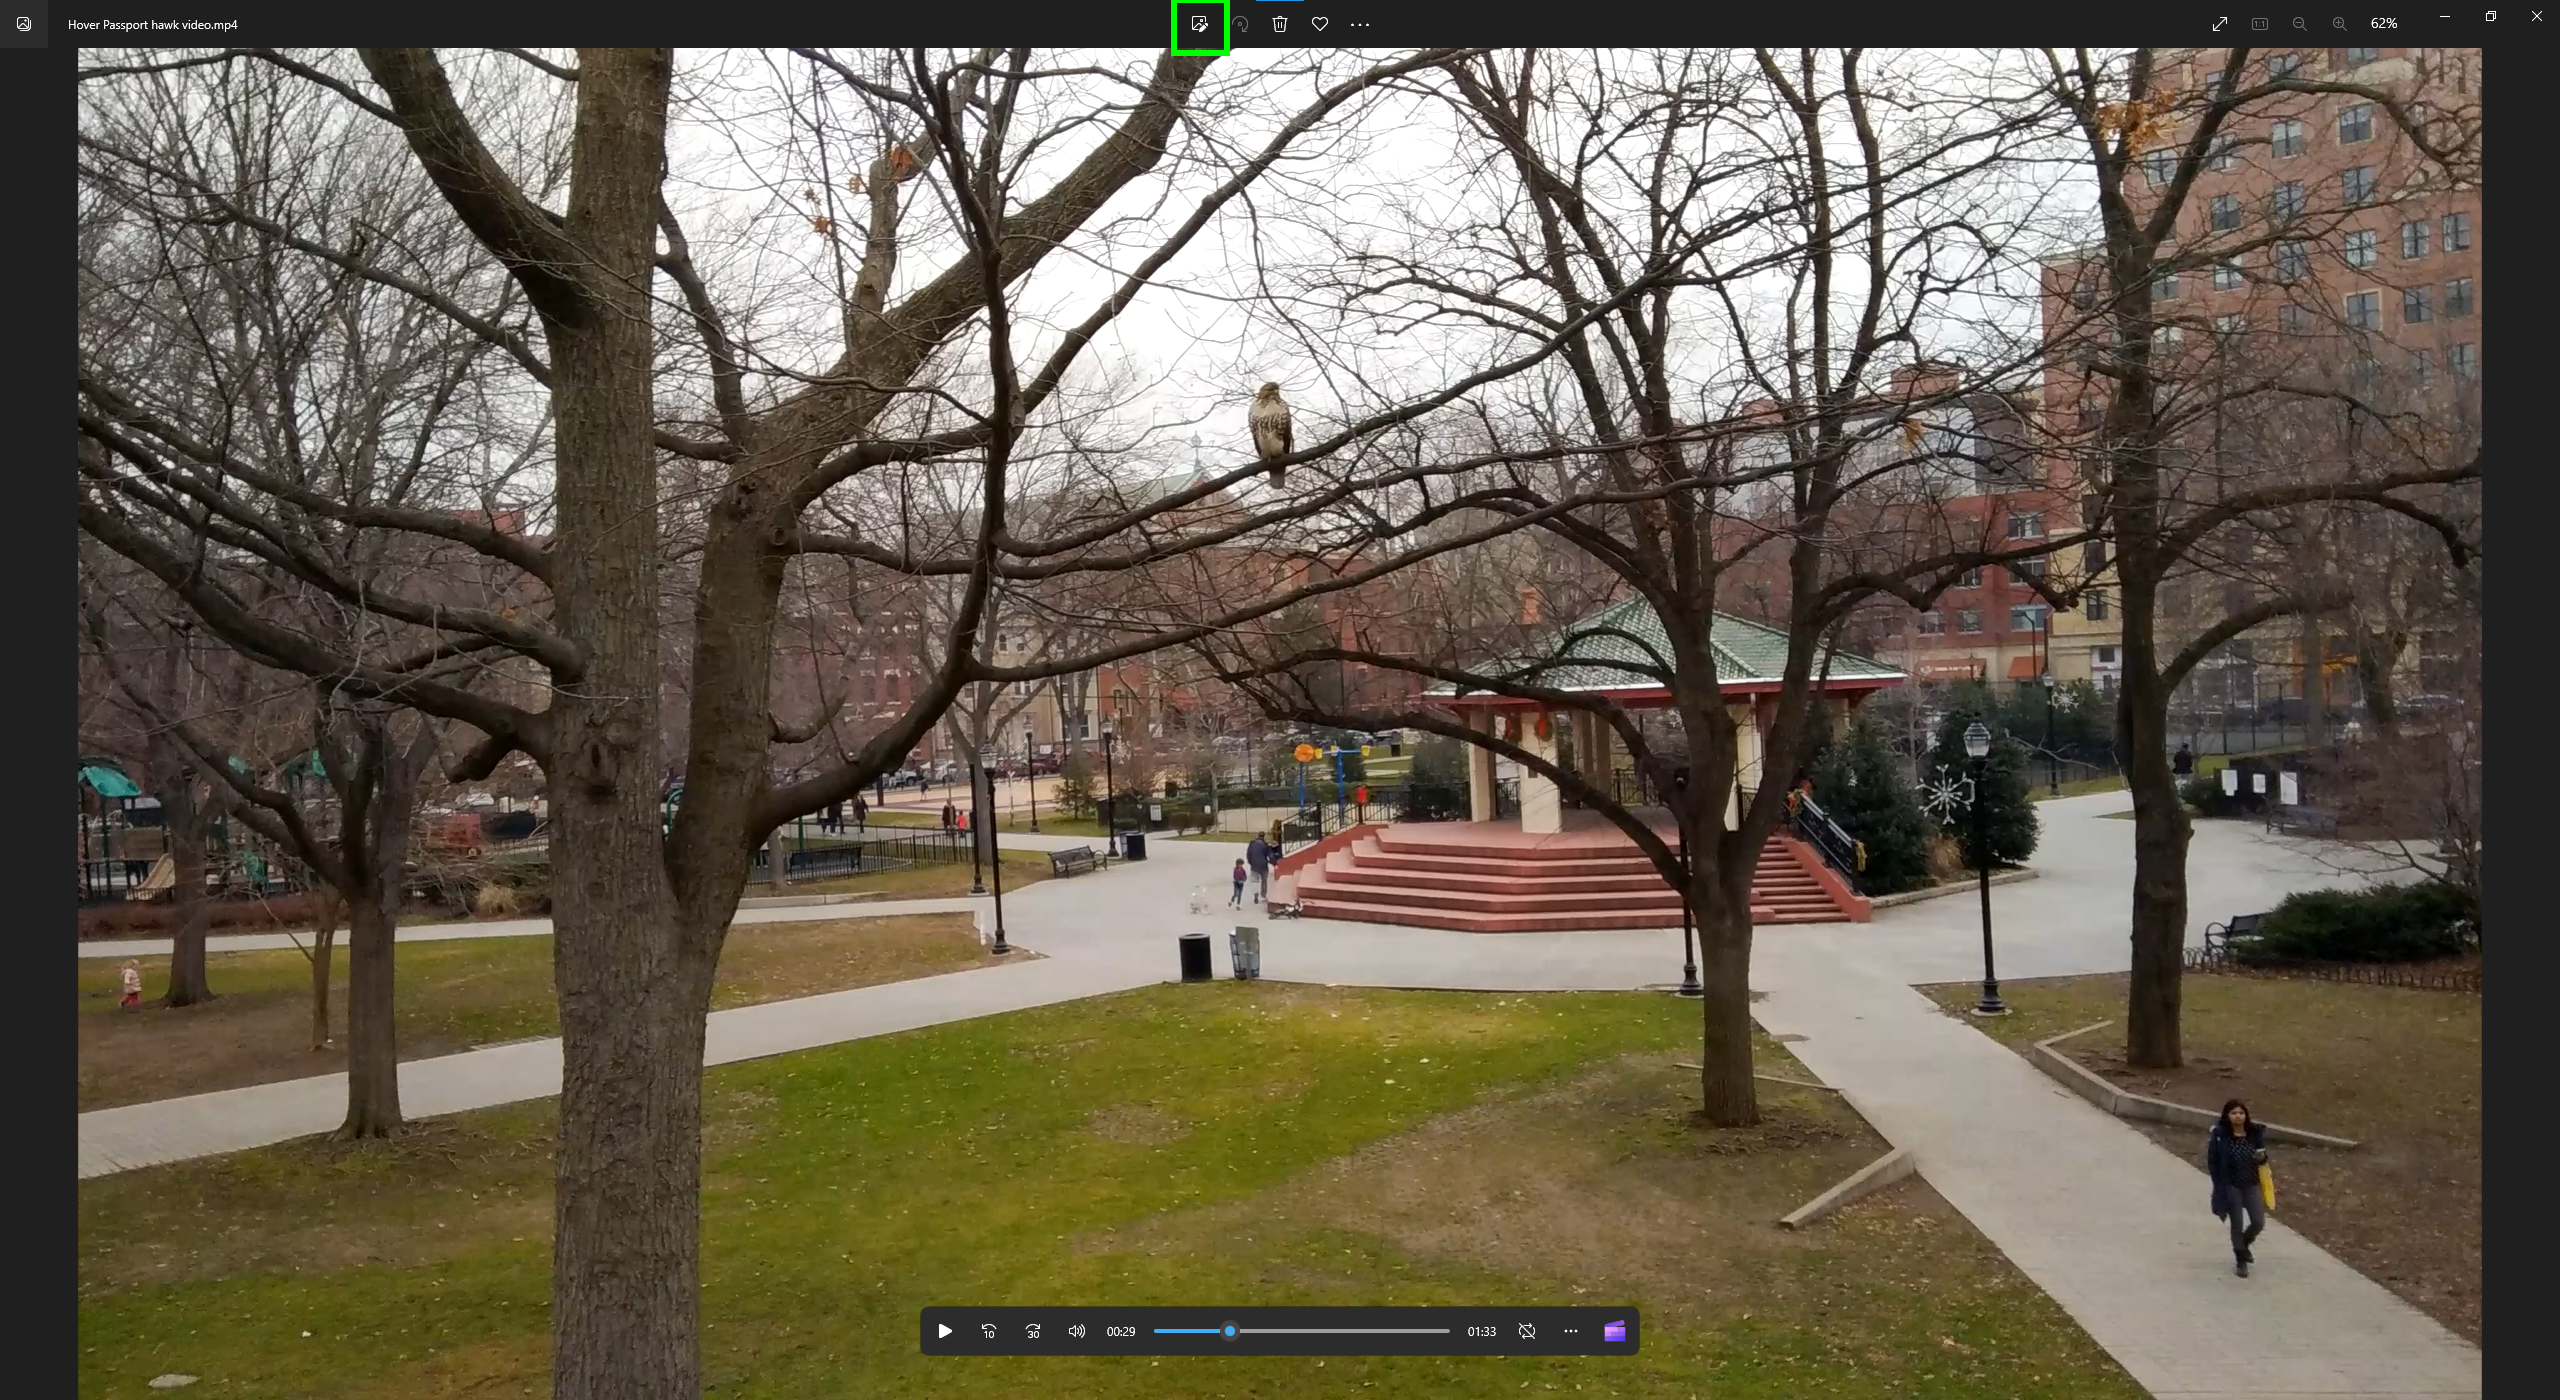
Video trim: Either select the left-most icon in the top center of the window (which looks like an image and a pen) or use the shortcut Ctrl + E.
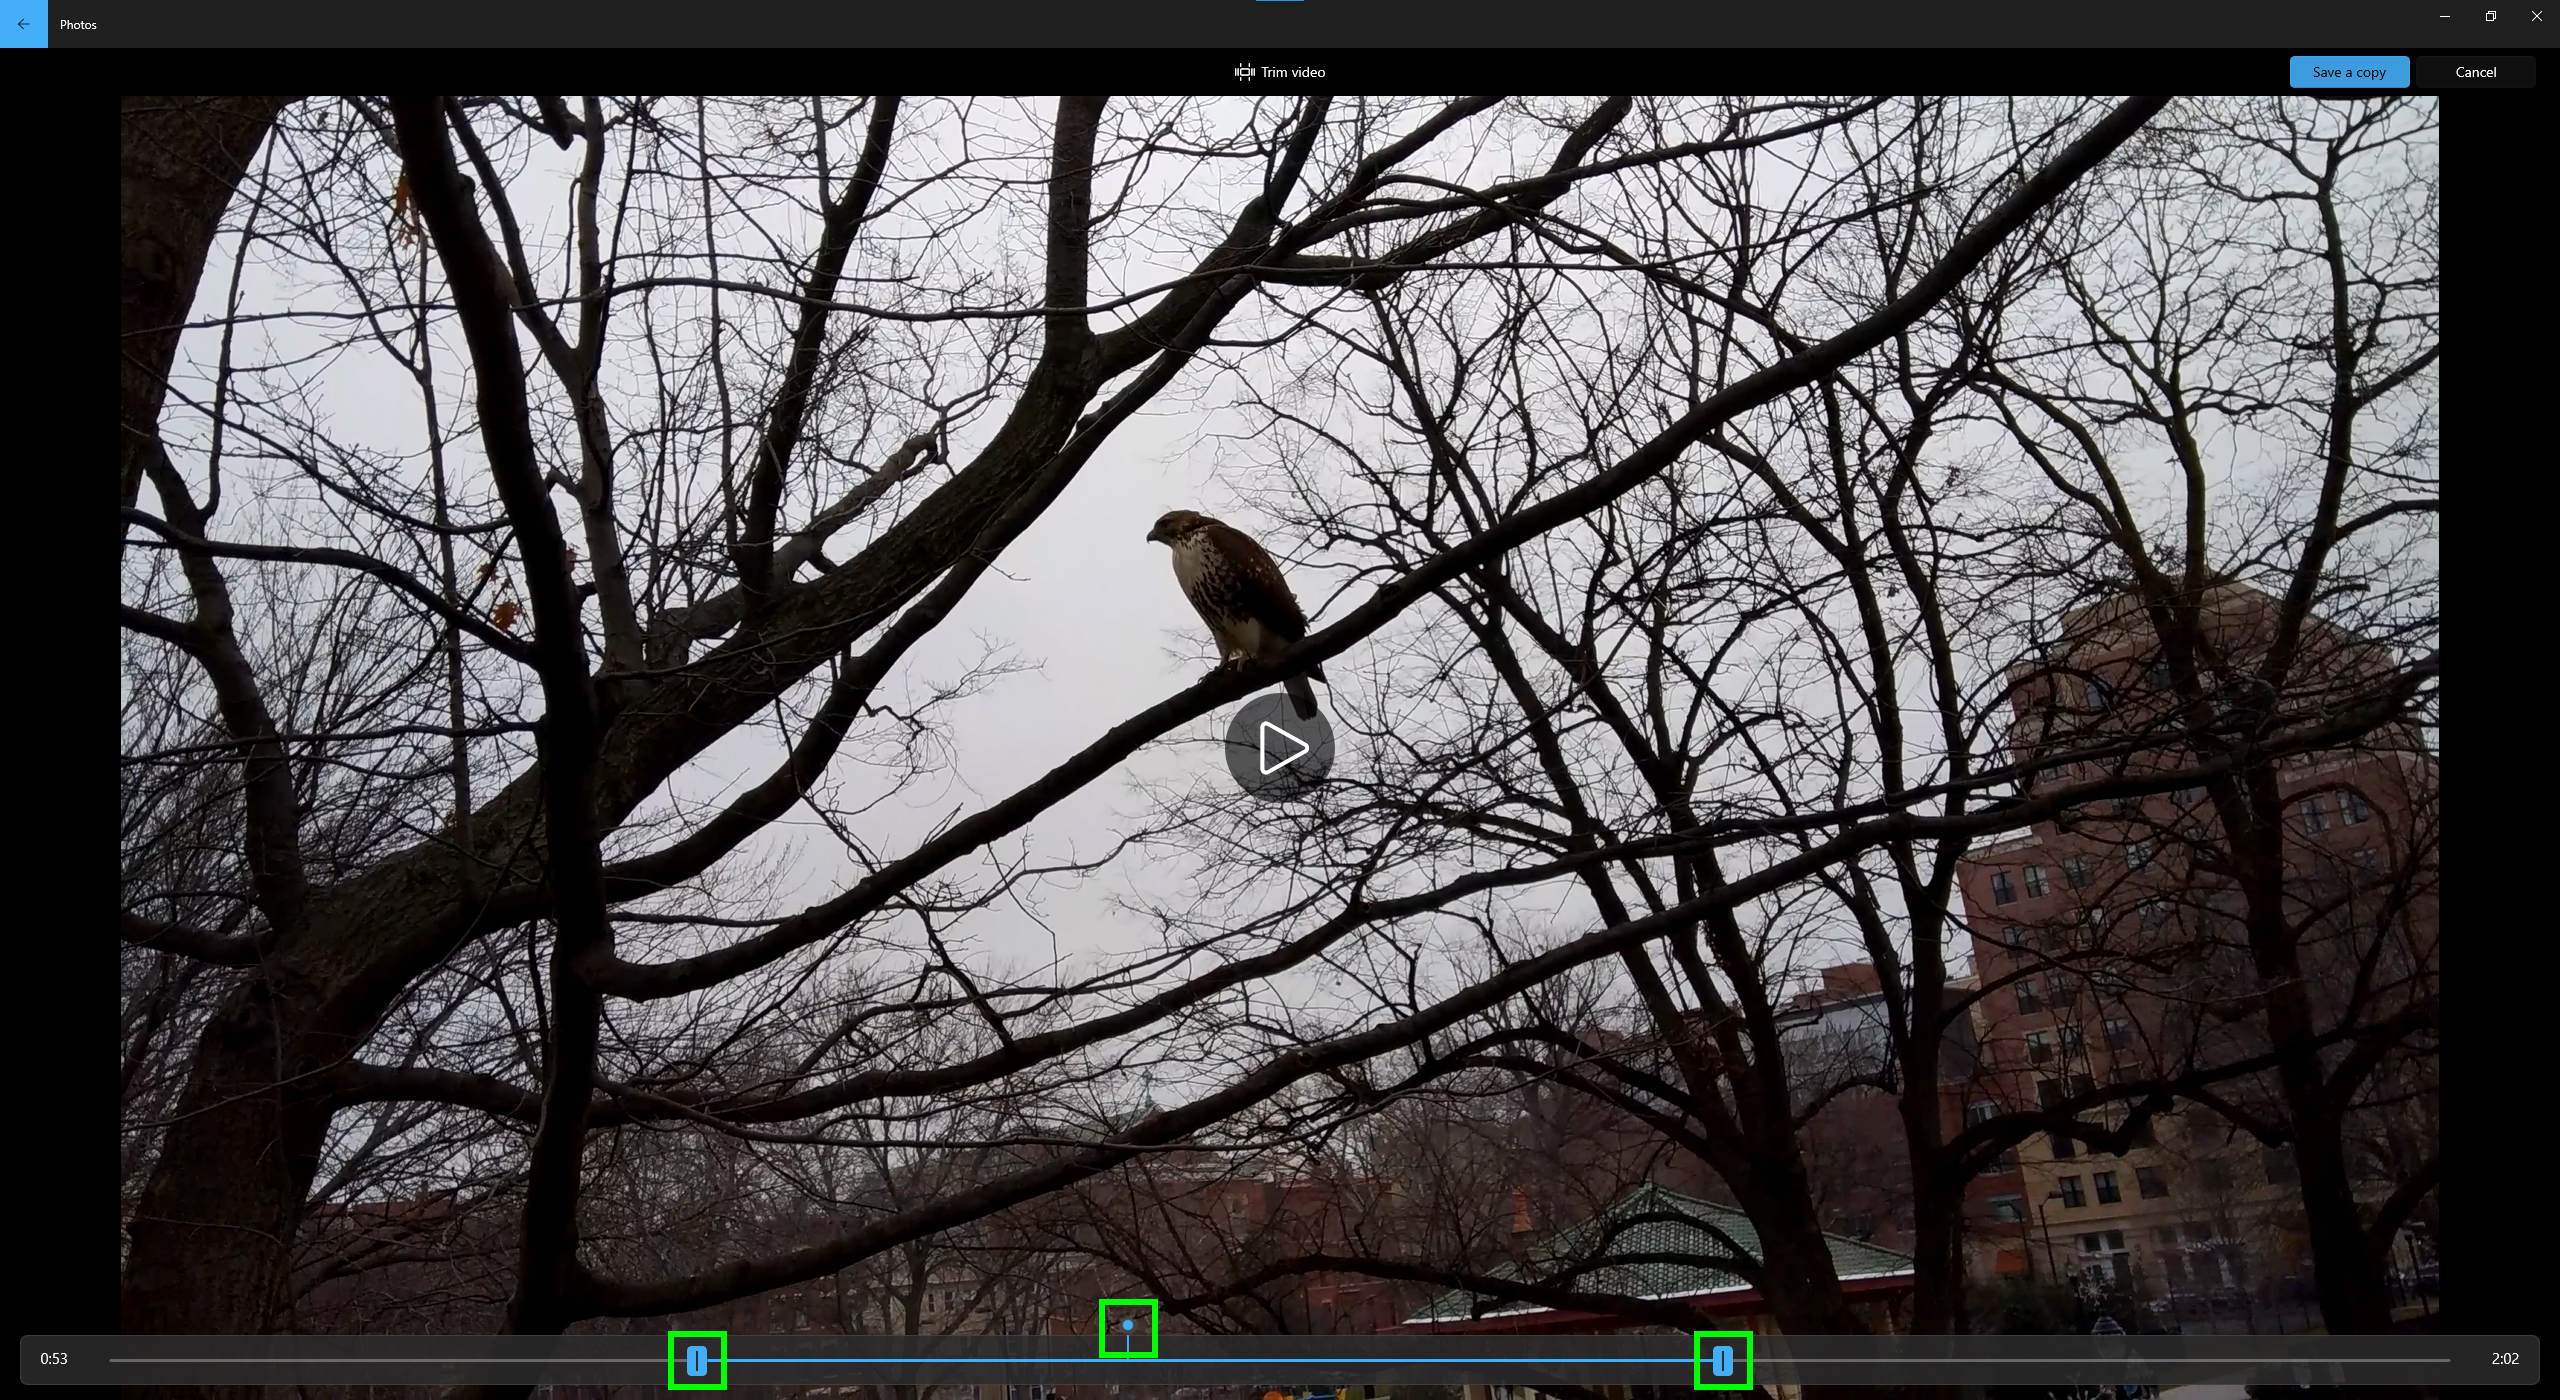
From here, you can change the start or stop point of your video clip, or remove portions to focus only on the best parts of your footage Just drag the blue handles to choose the beginning and end points, and use the blue pin to see what's happening at a given moment in the image.
Click Save a copy when you're done, which will then create a new file with your edits.
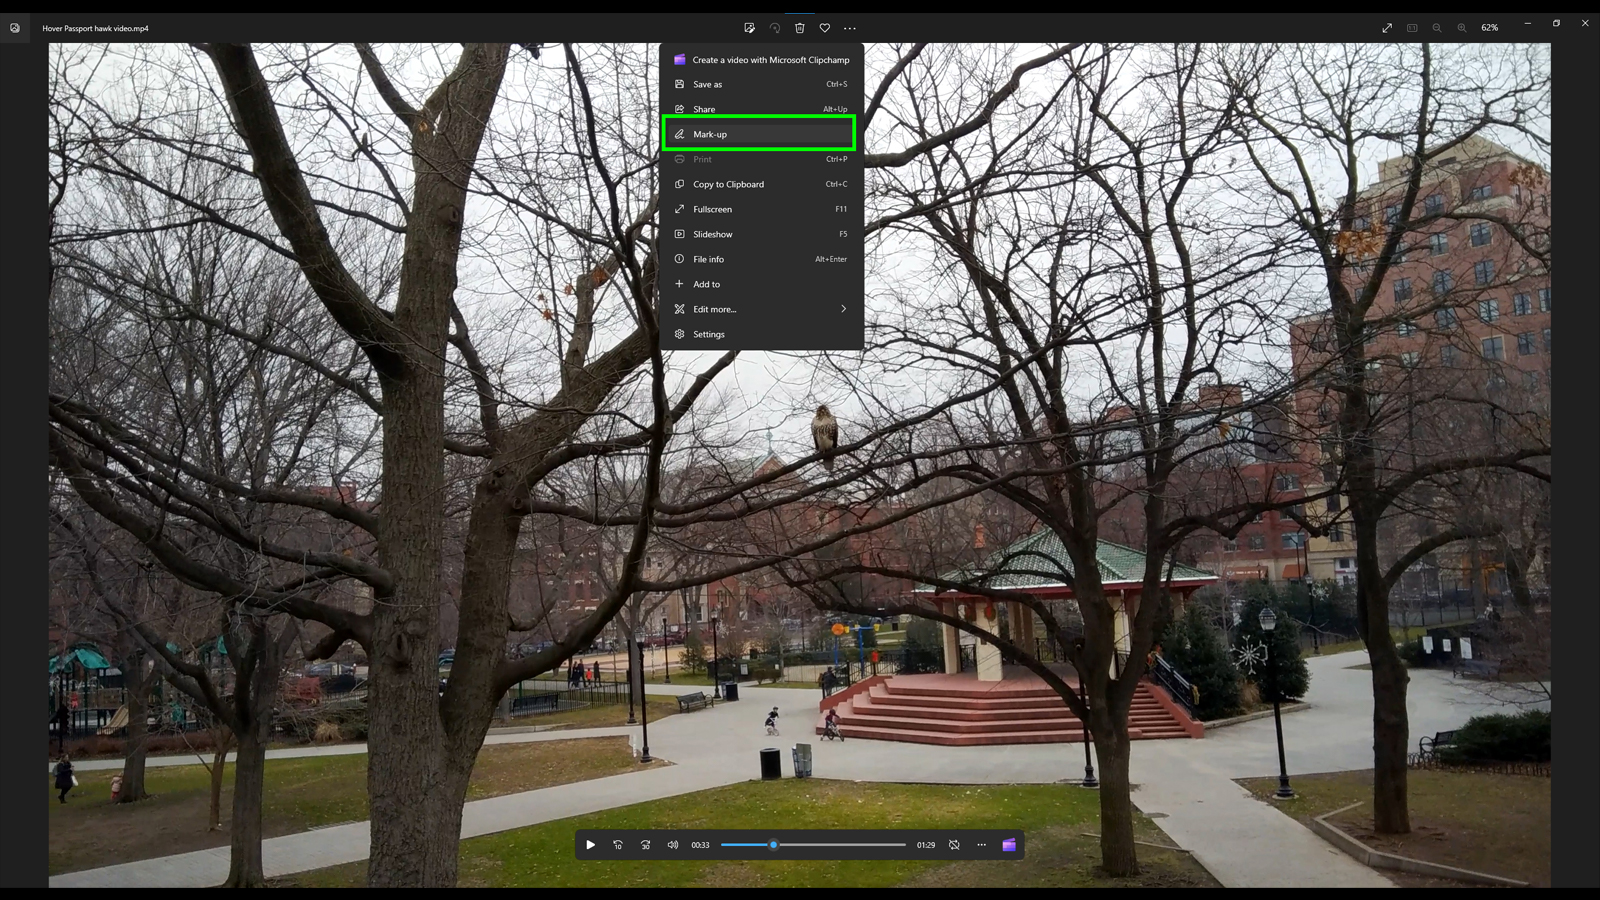
See more: Under the three dots icon on the right side of the top-center buttons, you'll find a few different options. The ones we're interested in for video editing are Mark-up and Edit more….
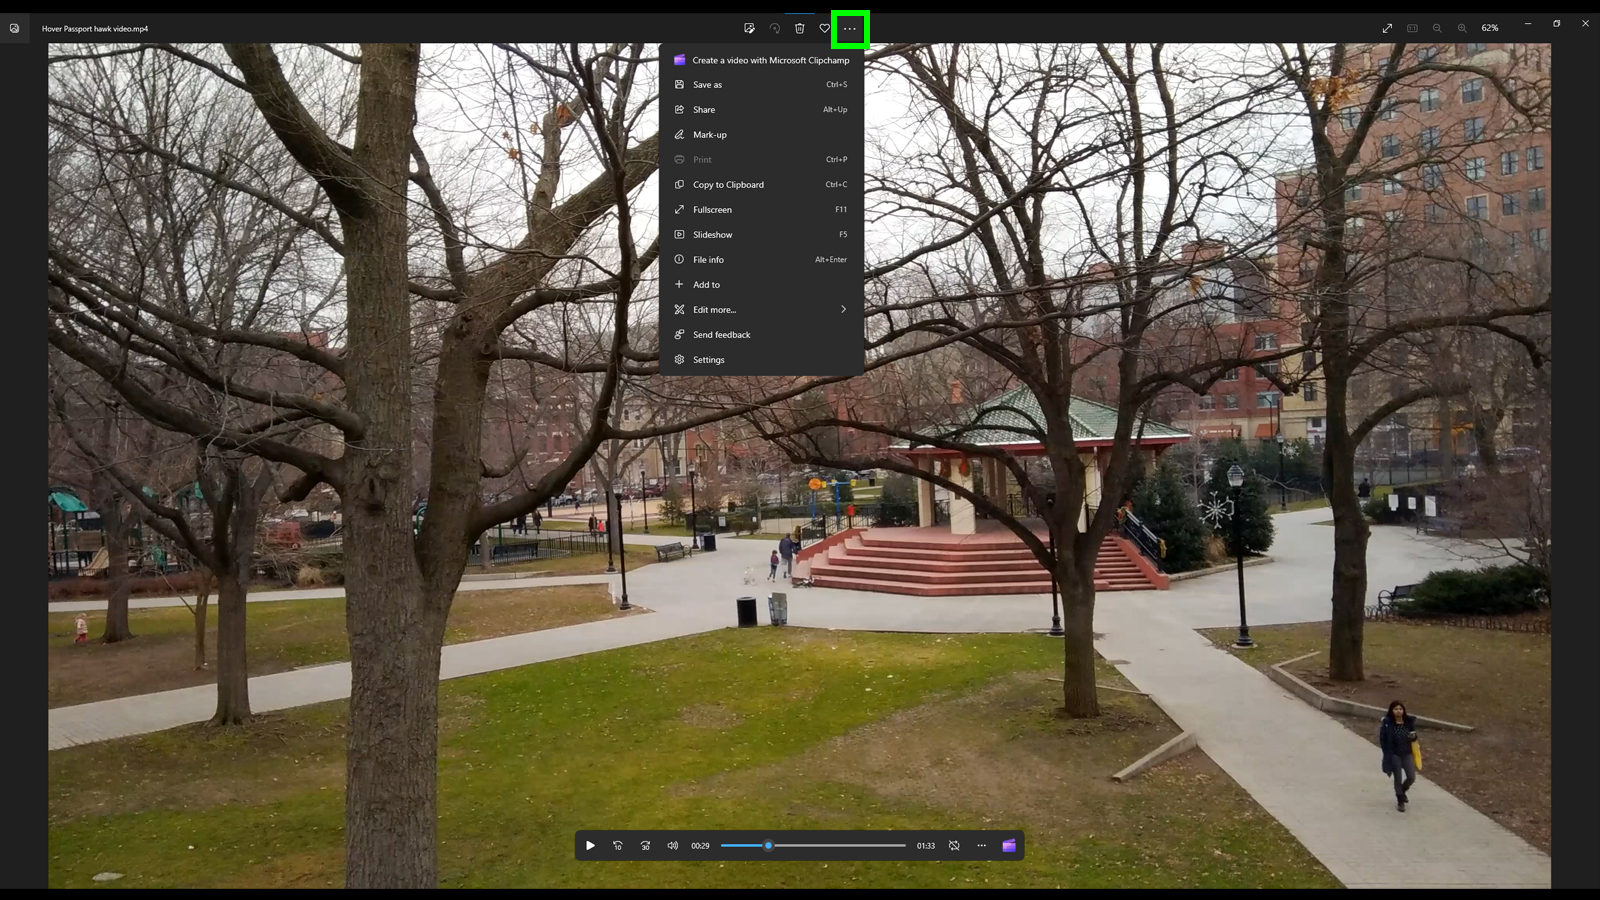
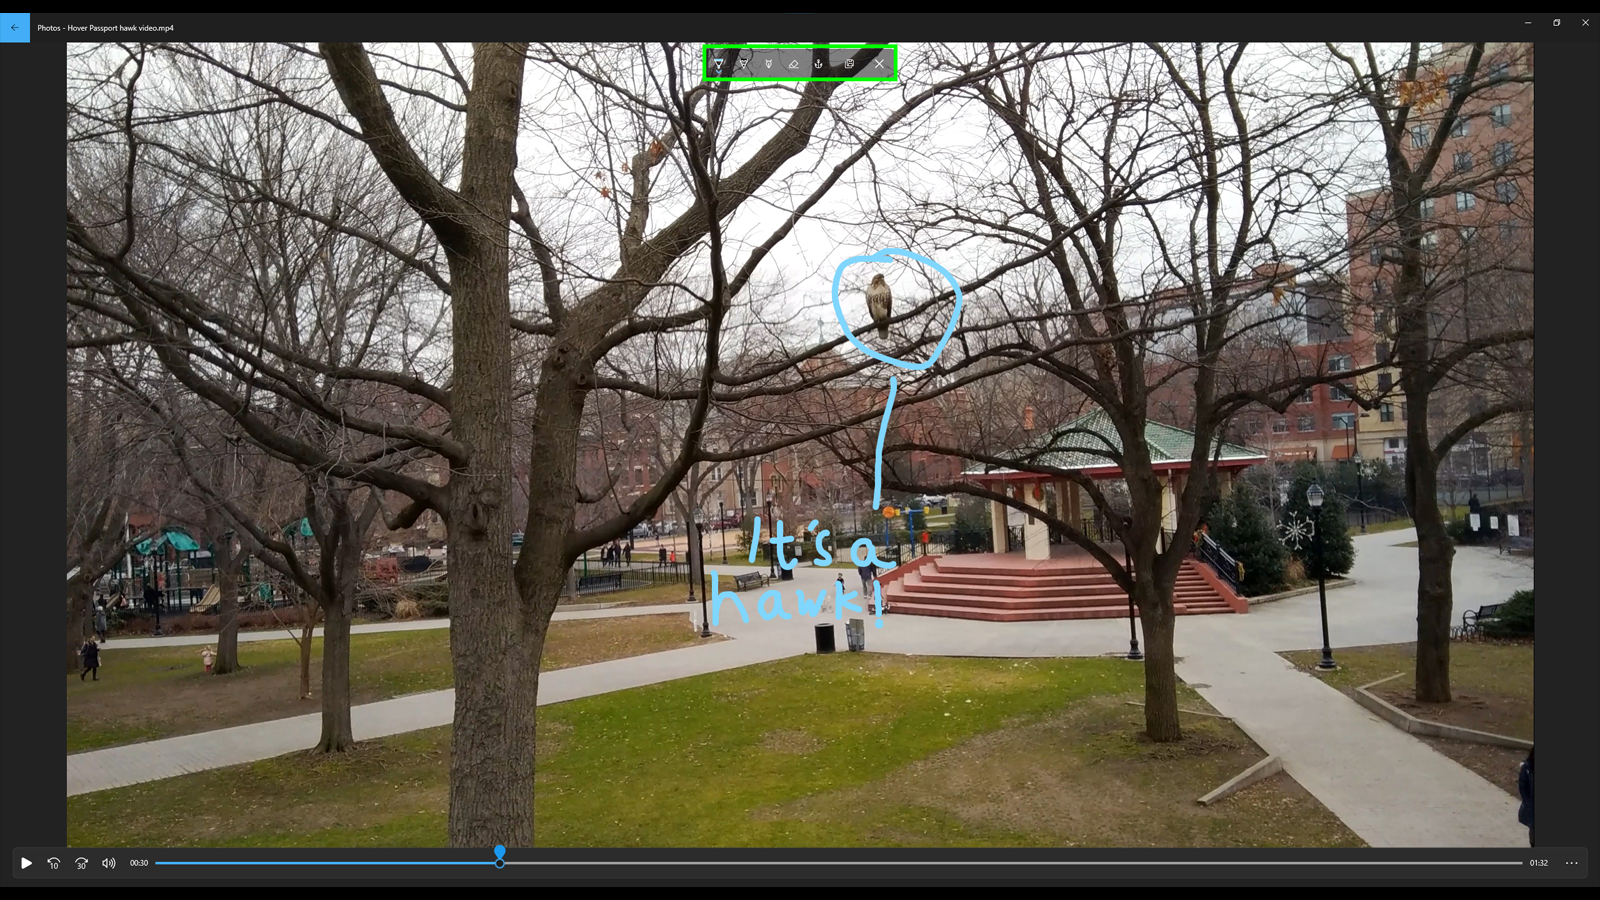
Mark-up: Doodle over the video to add annotations.
You can select multiple pen types and colors using the toolbar at the top of the screen, and then save a copy when you're done.
Under the Edit more… menu, you'll find even more options.
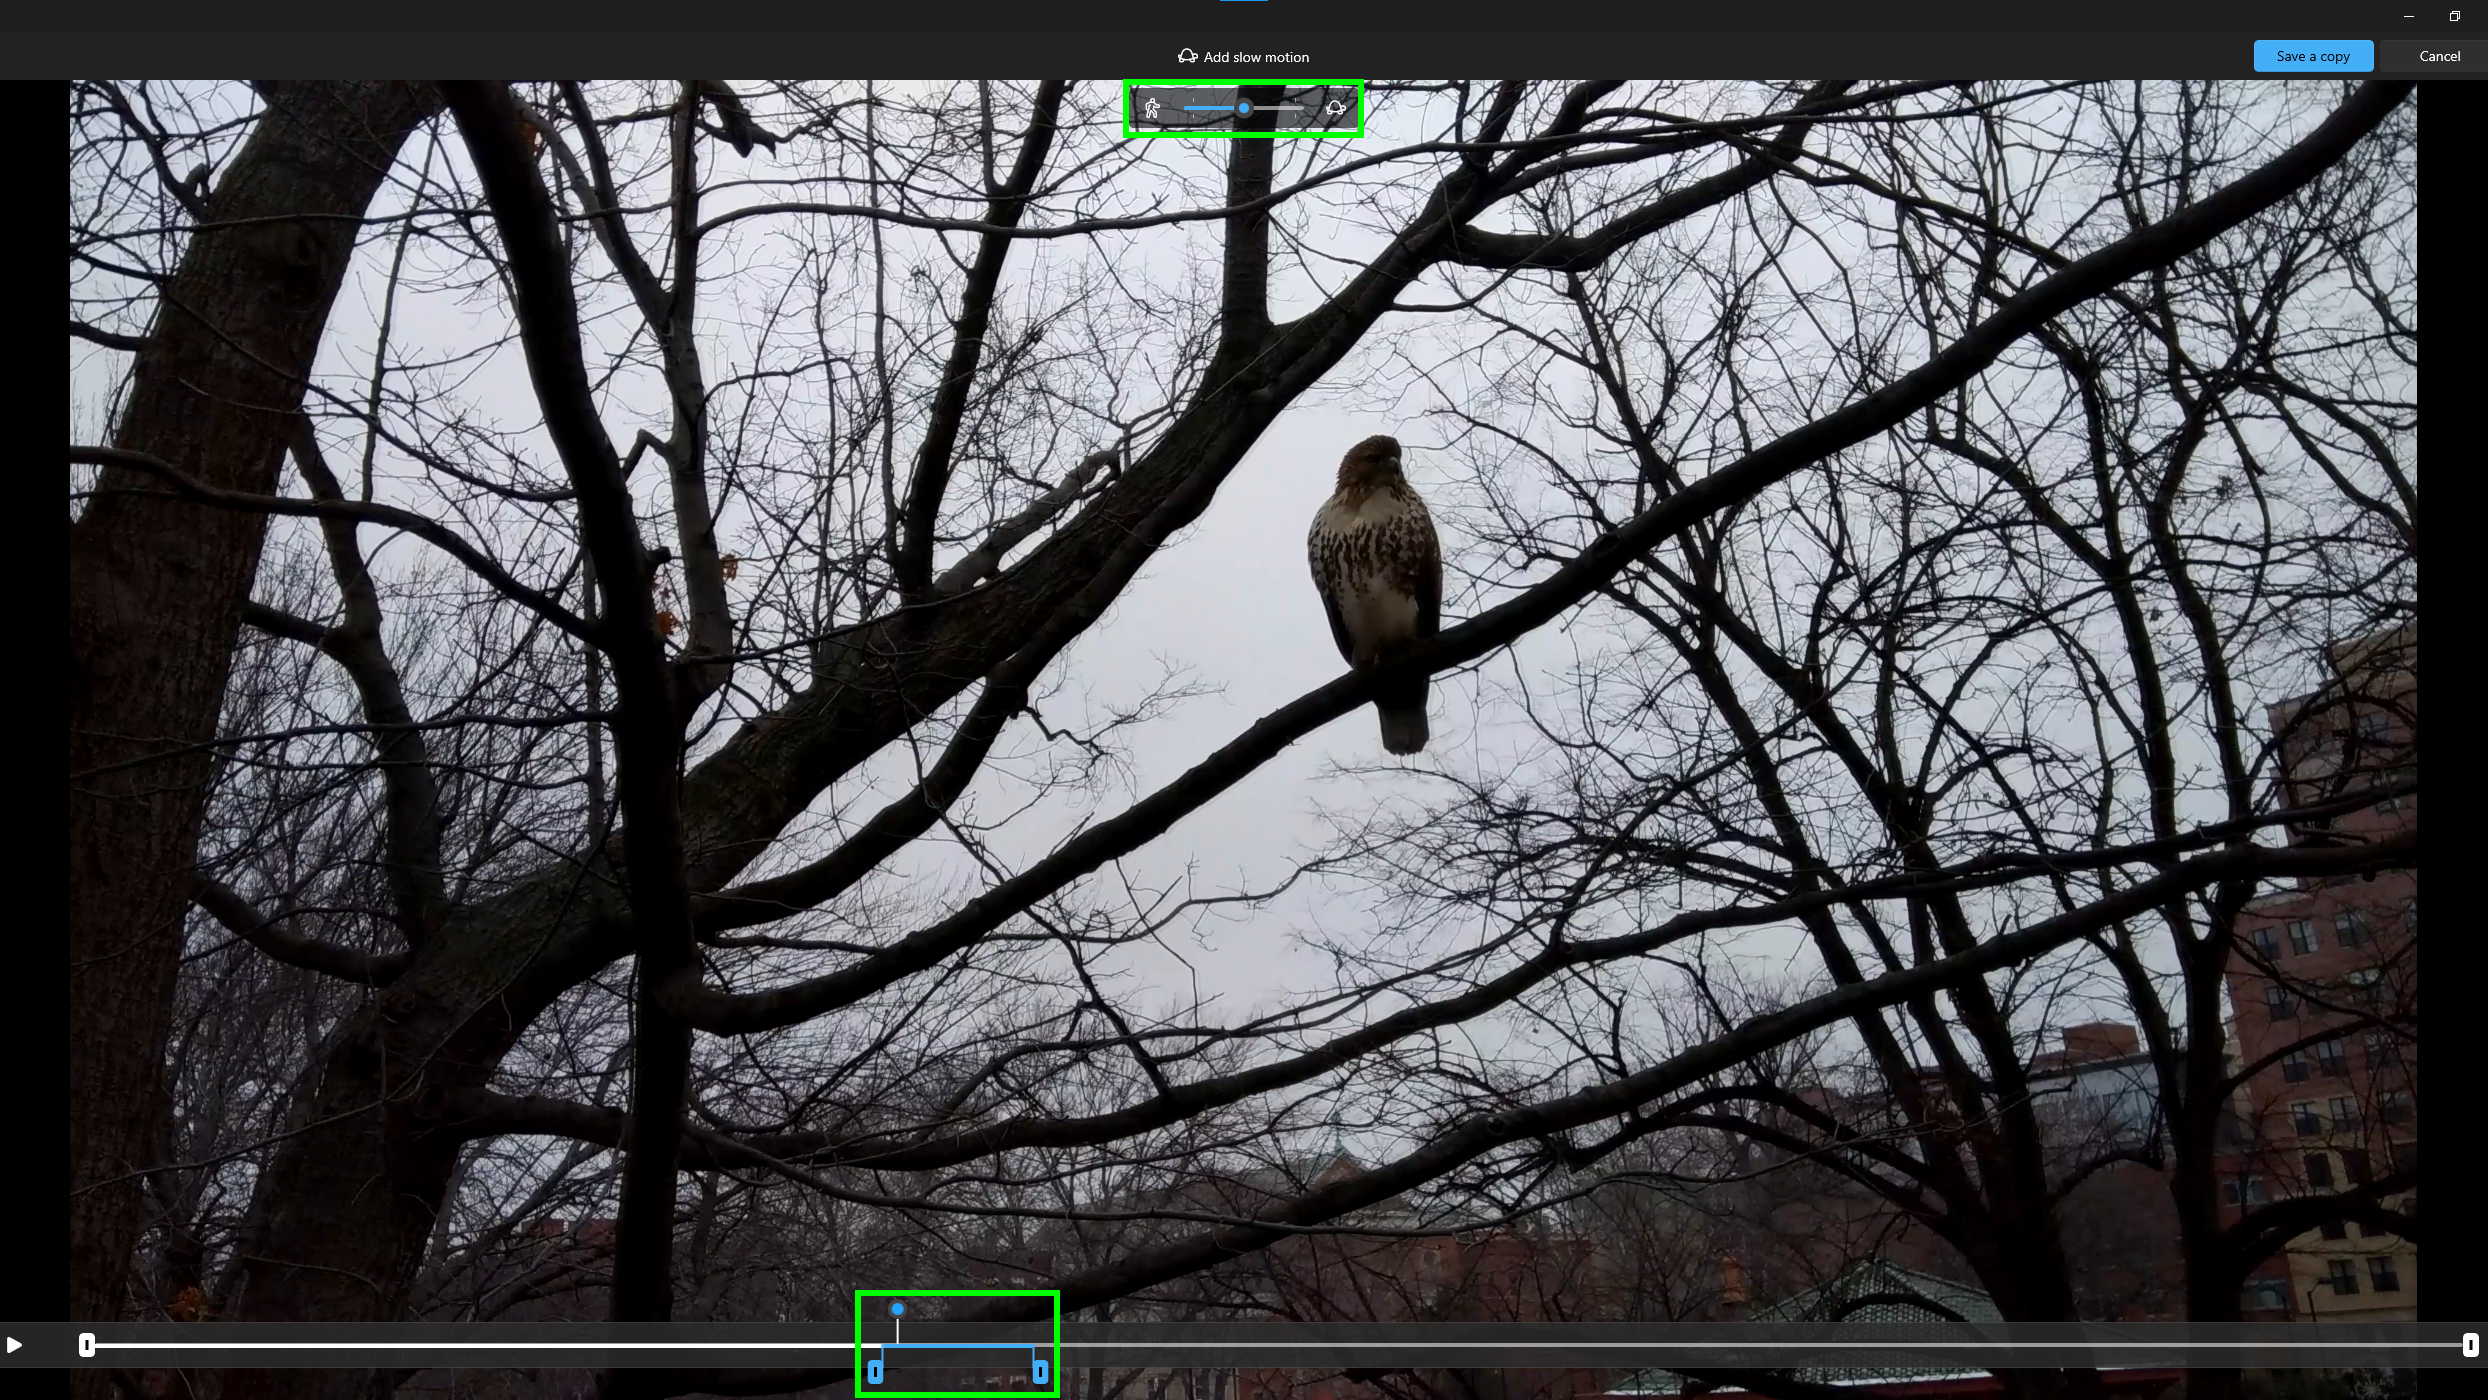
Add Slo-mo: Clicking this opens a new editing window that lets you play part of your clip at 0.5x normal speed, or a brief moment at 0.25x speed. Use the slider at the top of the window to move between normal, slower or super-slow motion, the white handles on the playback bar to trim the clip, and the blue handles to choose where to apply the slo-mo effect.
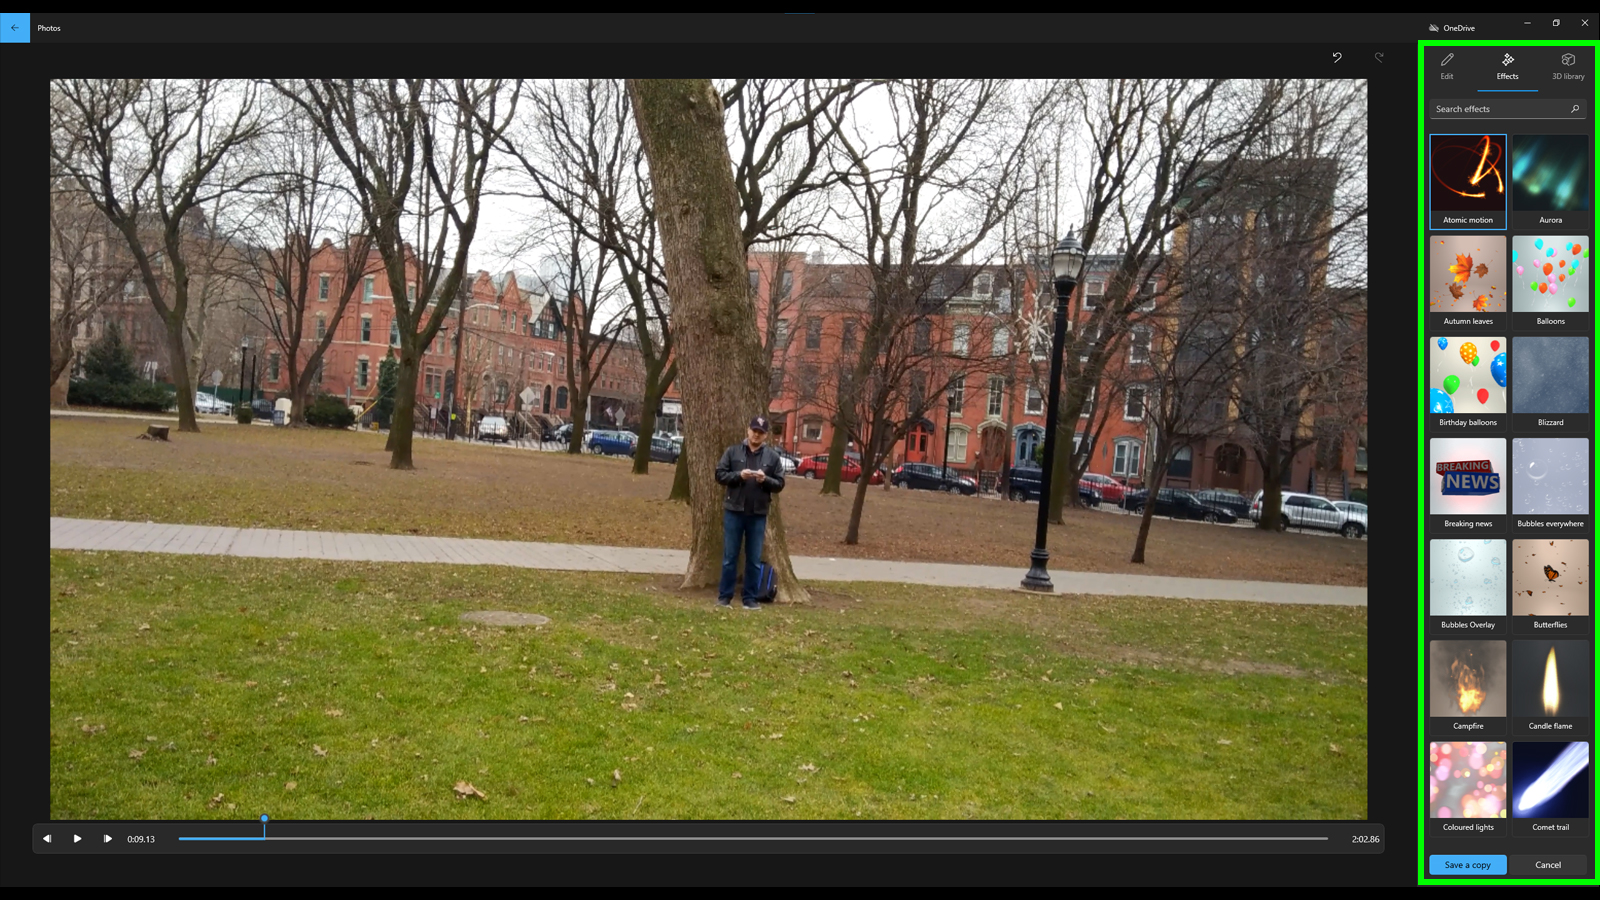
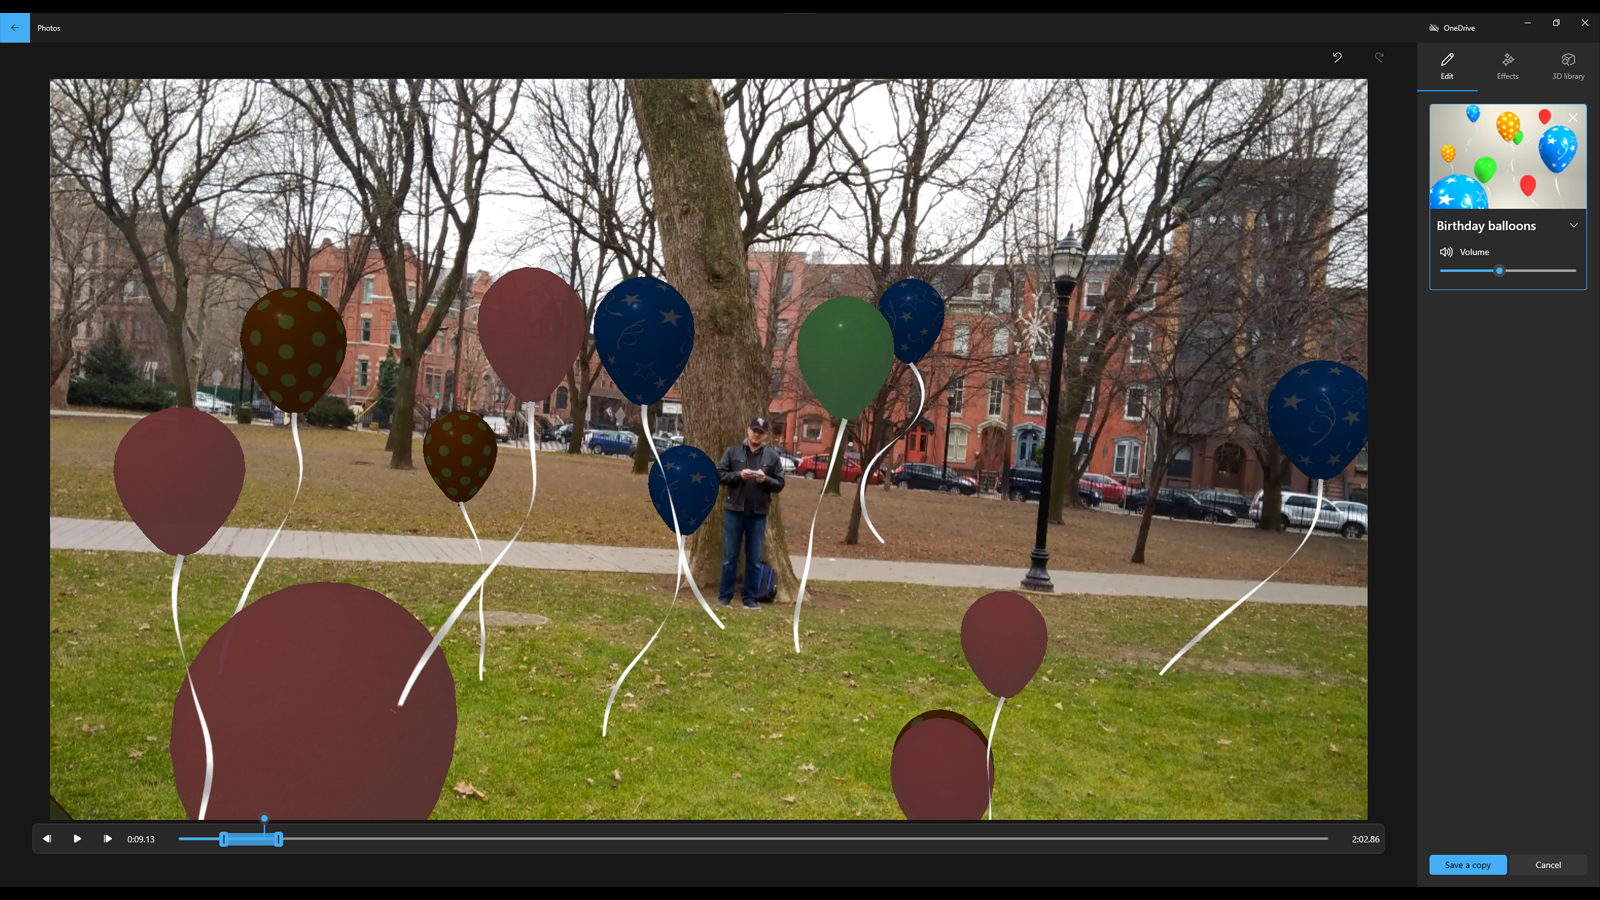
Add 3D effects: If your video's lacking in falling leaves, party balloons or other CG effects, you can add them in this sub-menu with lots of pre-installed options.
Just click an effect you like, and then drag it and resize it on the video as you see fit.
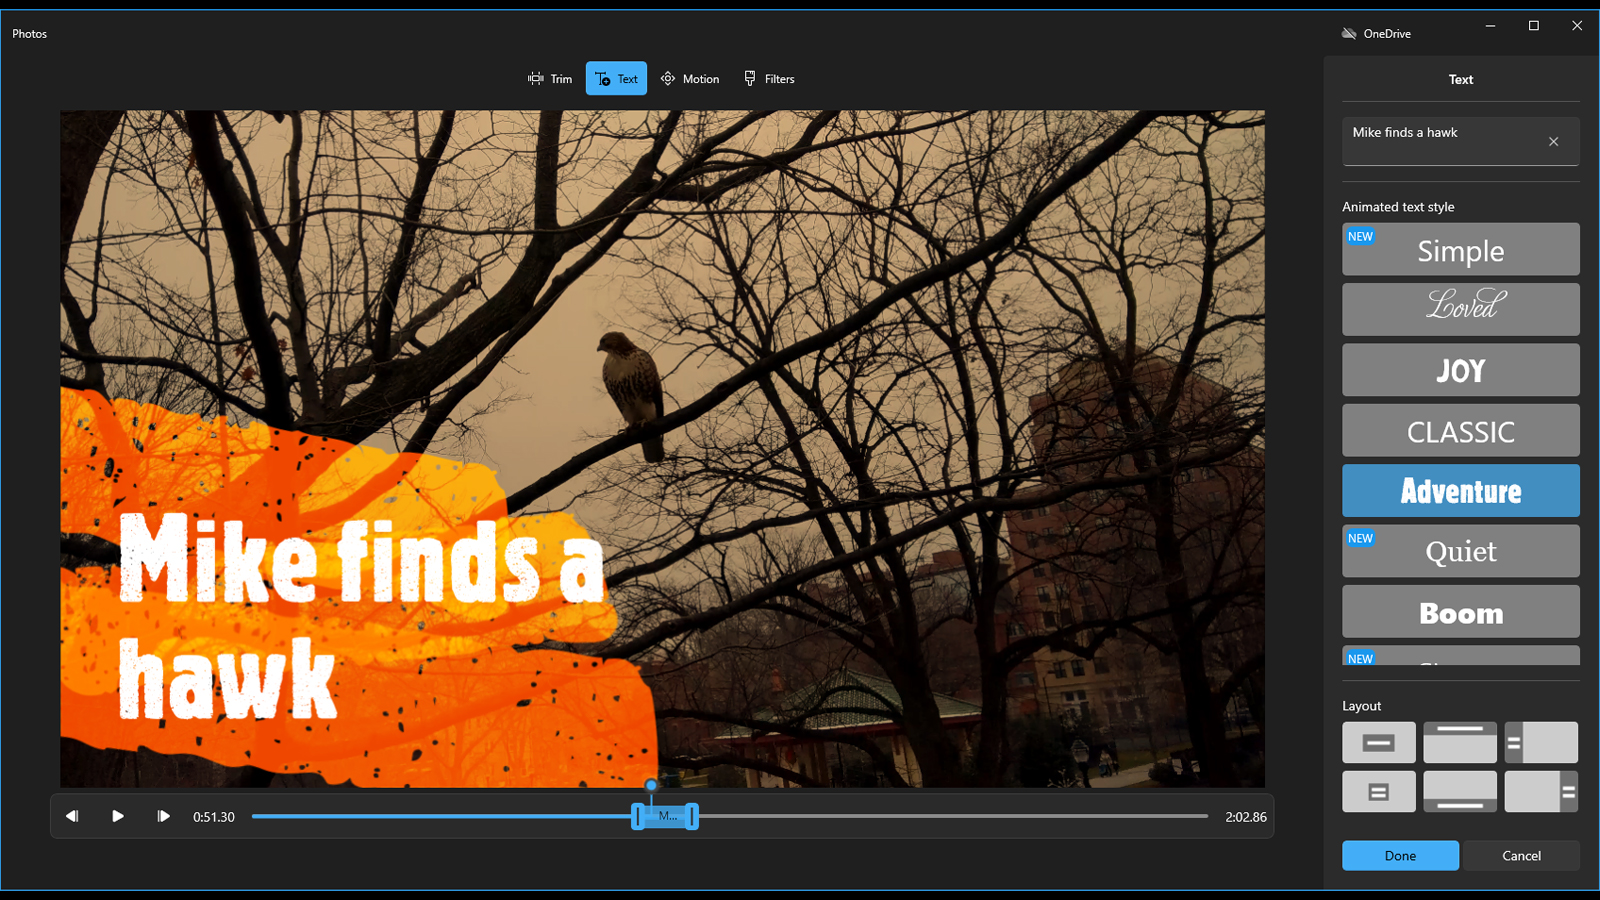
Add animated text: Similar to the 3D effects menu, selecting this opens a new window where you can pick text presets, make them move around and so on.
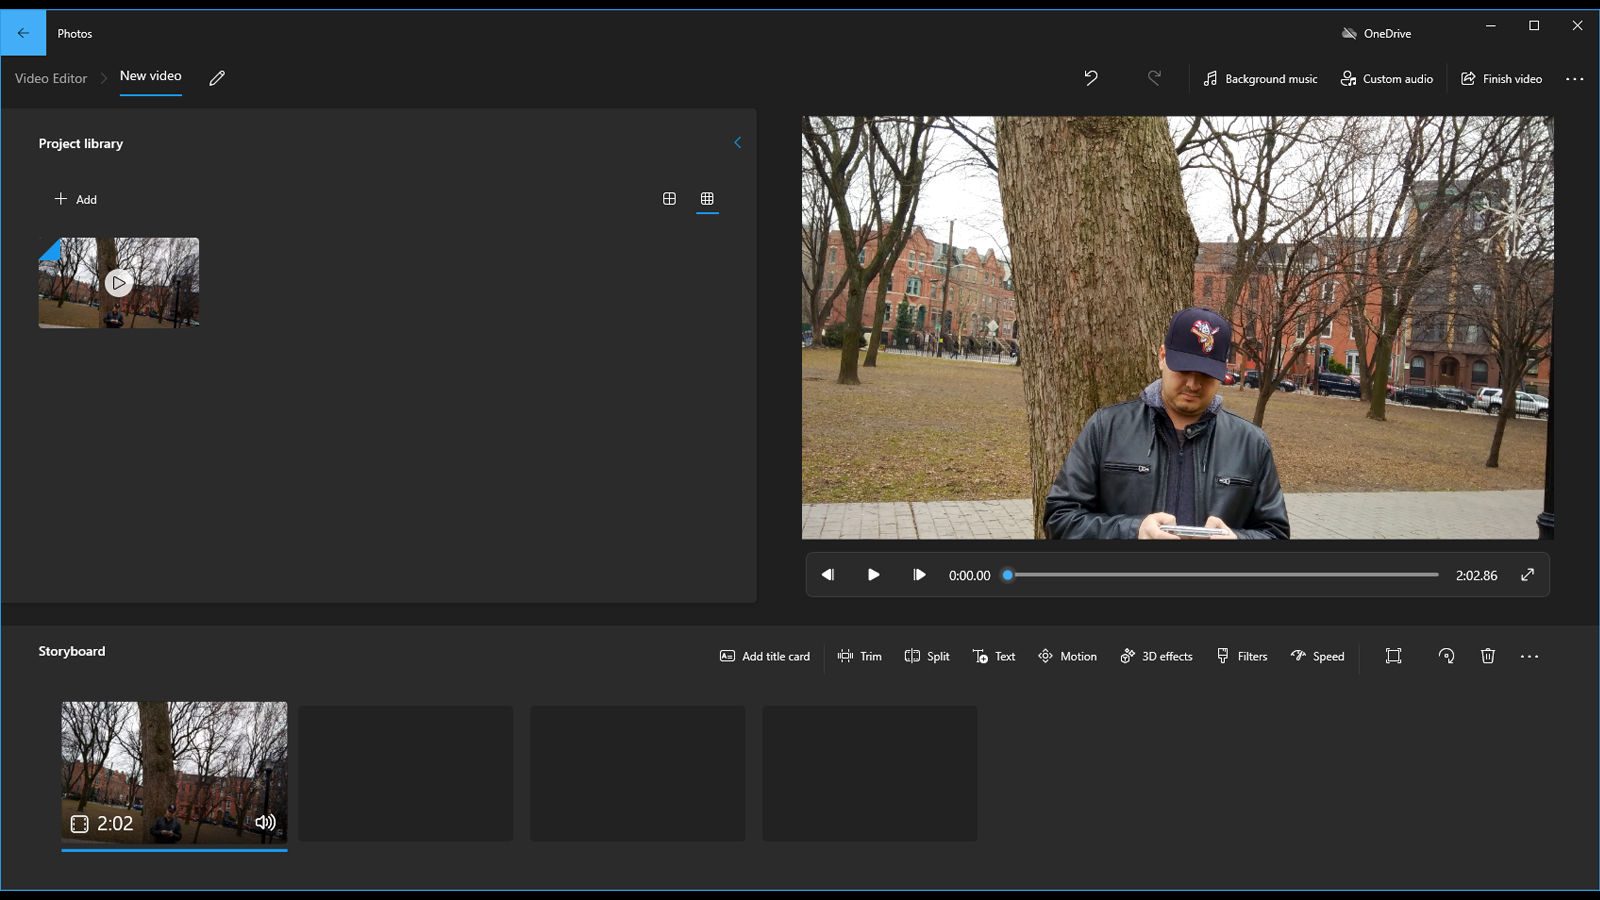
Create a video with text: This opens the built-in Microsoft Video Editor app, a more detailed video editor app. We'll save how to use this app for another article though.
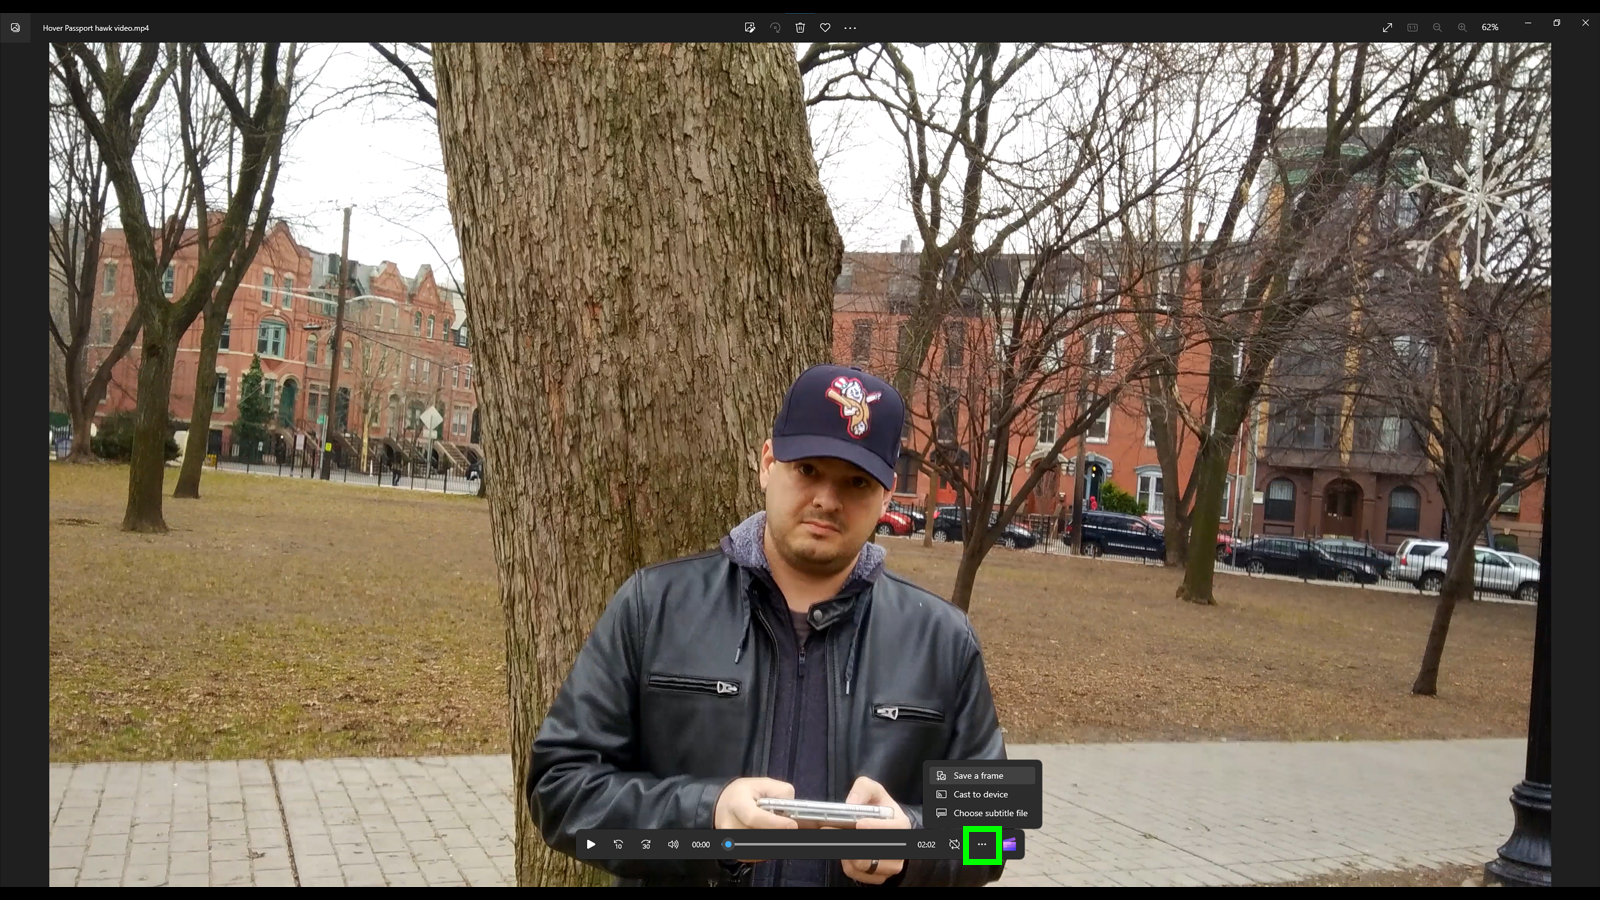
More options: This is another three dots icon, this time located on the video playback bar towards the bottom of the window.
Clicking this gives you the abilities to:
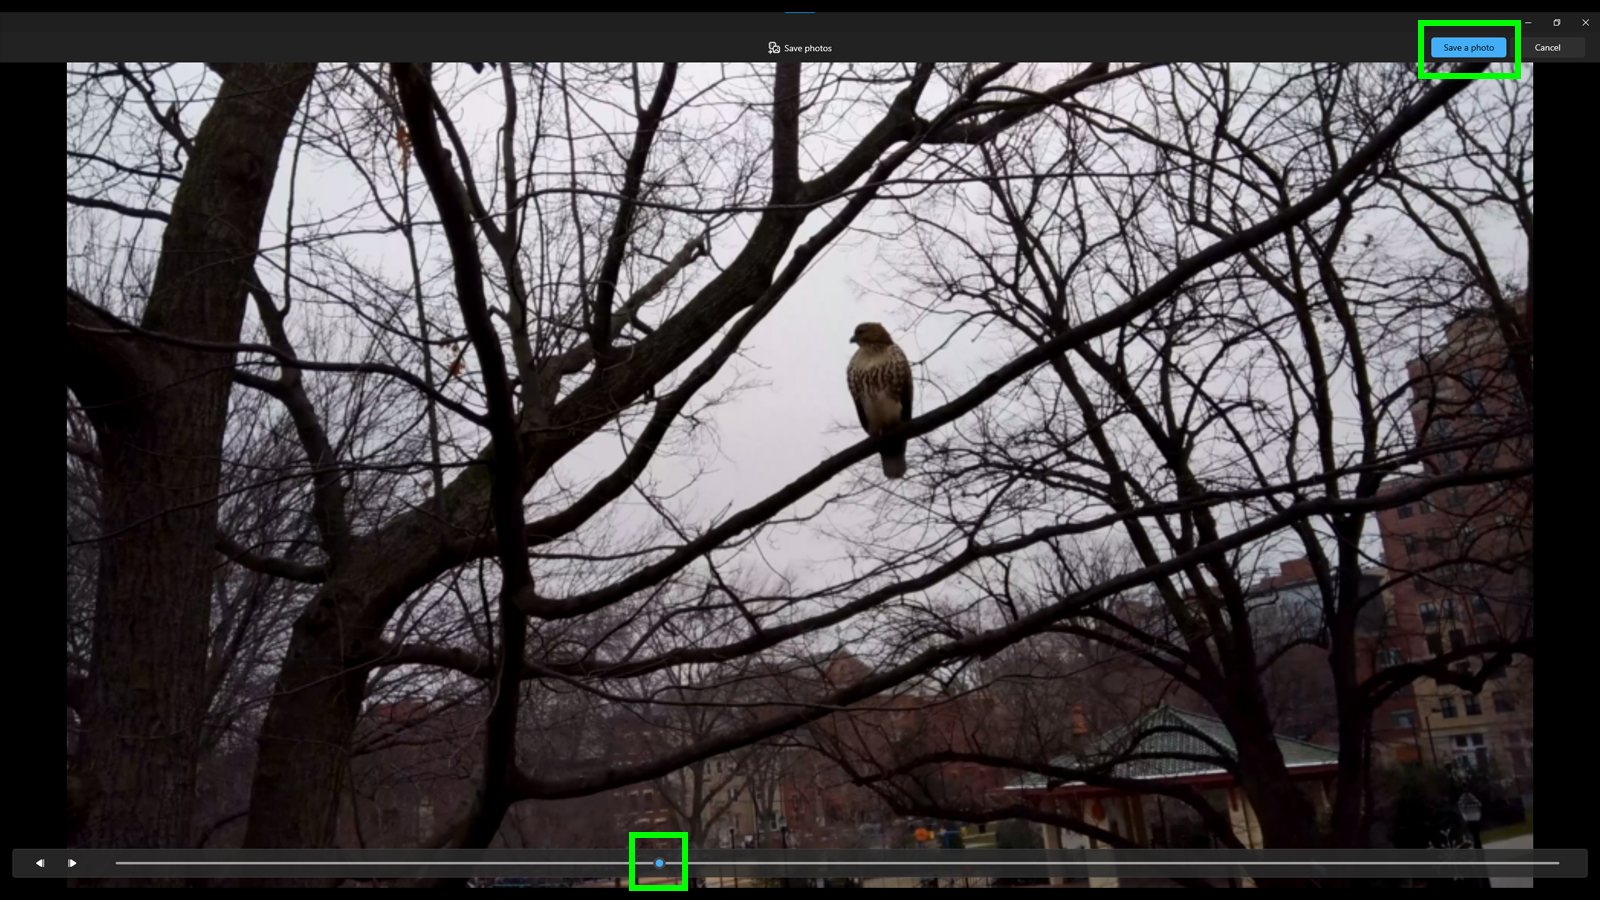
Save a frame: Pick a highlight from the video and save it as a still image by dragging the blue dot to the point in the video you want to capture.
Choose subtitle file: If you're trying to make your video accessible to those with hearing impairments, you can upload subtitles with this option. It'll take you to a File Explorer window where you can then select the correct file.
We've got more Windows tips to share if you're in the mood to learn more. If you're struggling with incompatible images, maybe take a look at how to open HEIC files on Windows, while using wanting to capture their desktop may need our guide on how to screenshot on Windows 10. Users needing a better file search tool should take a glance at how to enable Enhanced Search on Windows 10, while anyone who's upgraded their OS but prefers how things used to be should see how to change the Windows 11 Start menu back to Windows 10.

Richard is based in London, covering news, reviews and how-tos for phones, tablets, gaming, and whatever else people need advice on. Following on from his MA in Magazine Journalism at the University of Sheffield, he's also written for WIRED U.K., The Register and Creative Bloq. When not at work, he's likely thinking about how to brew the perfect cup of specialty coffee.
 Club Benefits


