Your iPhone Pro camera has a professional RAW mode — turn it on now
Here's how to take RAW photos on iPhone using the Apple ProRAW mode
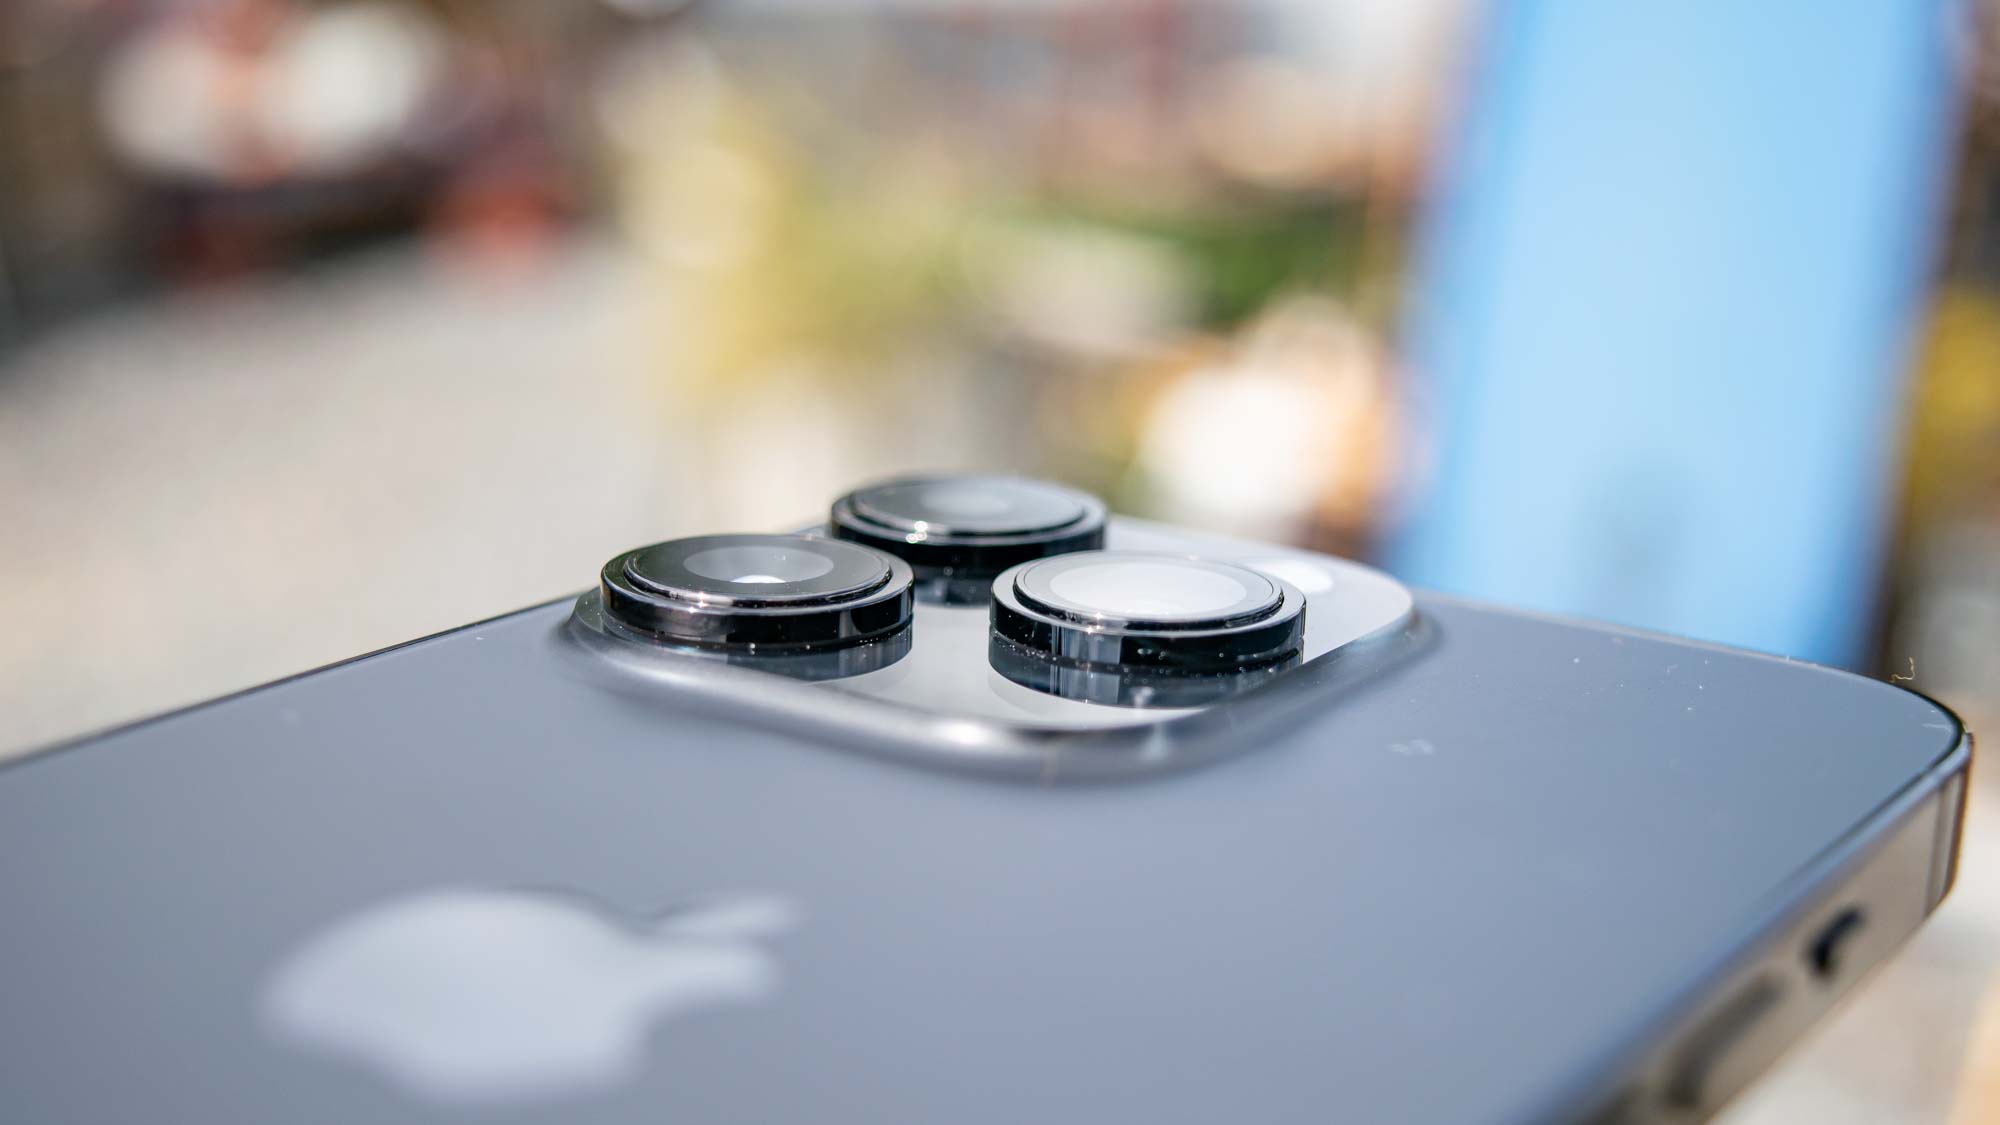
If you aren’t already, you should be taking RAW photos on iPhone. RAW files are essentially totally or mostly uncompressed images. In short, they’re exactly what your camera’s sensor saw and contain all of the image data your camera originally captured (this gets lost with compression).
Your iPhone takes images and saves them as HEIC files by default, although some people choose to change their iPhone’s default photo format to JPEG. Both of these file types are compressed, meaning some of the image data is lost and potentially irreversible filters or parameters (like added contrast) have been applied.
By instead saving RAW photos on iPhone, you can keep your images raw and untouched, giving you more flexibility with post production. See, while you may not notice the difference from a quick look, HEIC files give you much less freedom when editing photos on iPhone or in post production software. This is why professional photographers almost always choose to take photos in RAW format if they know they will be editing them later on. Thankfully, you can set your iPhone to take RAW photos using Apple’s ProRAW file format.
For anyone who likes editing their phone pictures, this is really useful, and yet another reason why iPhones are some of the best phones out there. What’s more, if you’ve just splashed out on the 48MP iPhone 14 Pro, using ProRAW will really help you make the most out of the huge sensor that phone has. Setting up your phone to take photos in ProRAW is really quick, and we’ve laid out all of the steps below.
Before we get started, though, we should note that this feature is only available on the iPhone 12 Pro, iPhone 12 Pro Max, iPhone 13 Pro, iPhone 13 Pro Max, iPhone 14 Pro and iPhone 14 Pro Max.
How to take RAW photos on iPhone
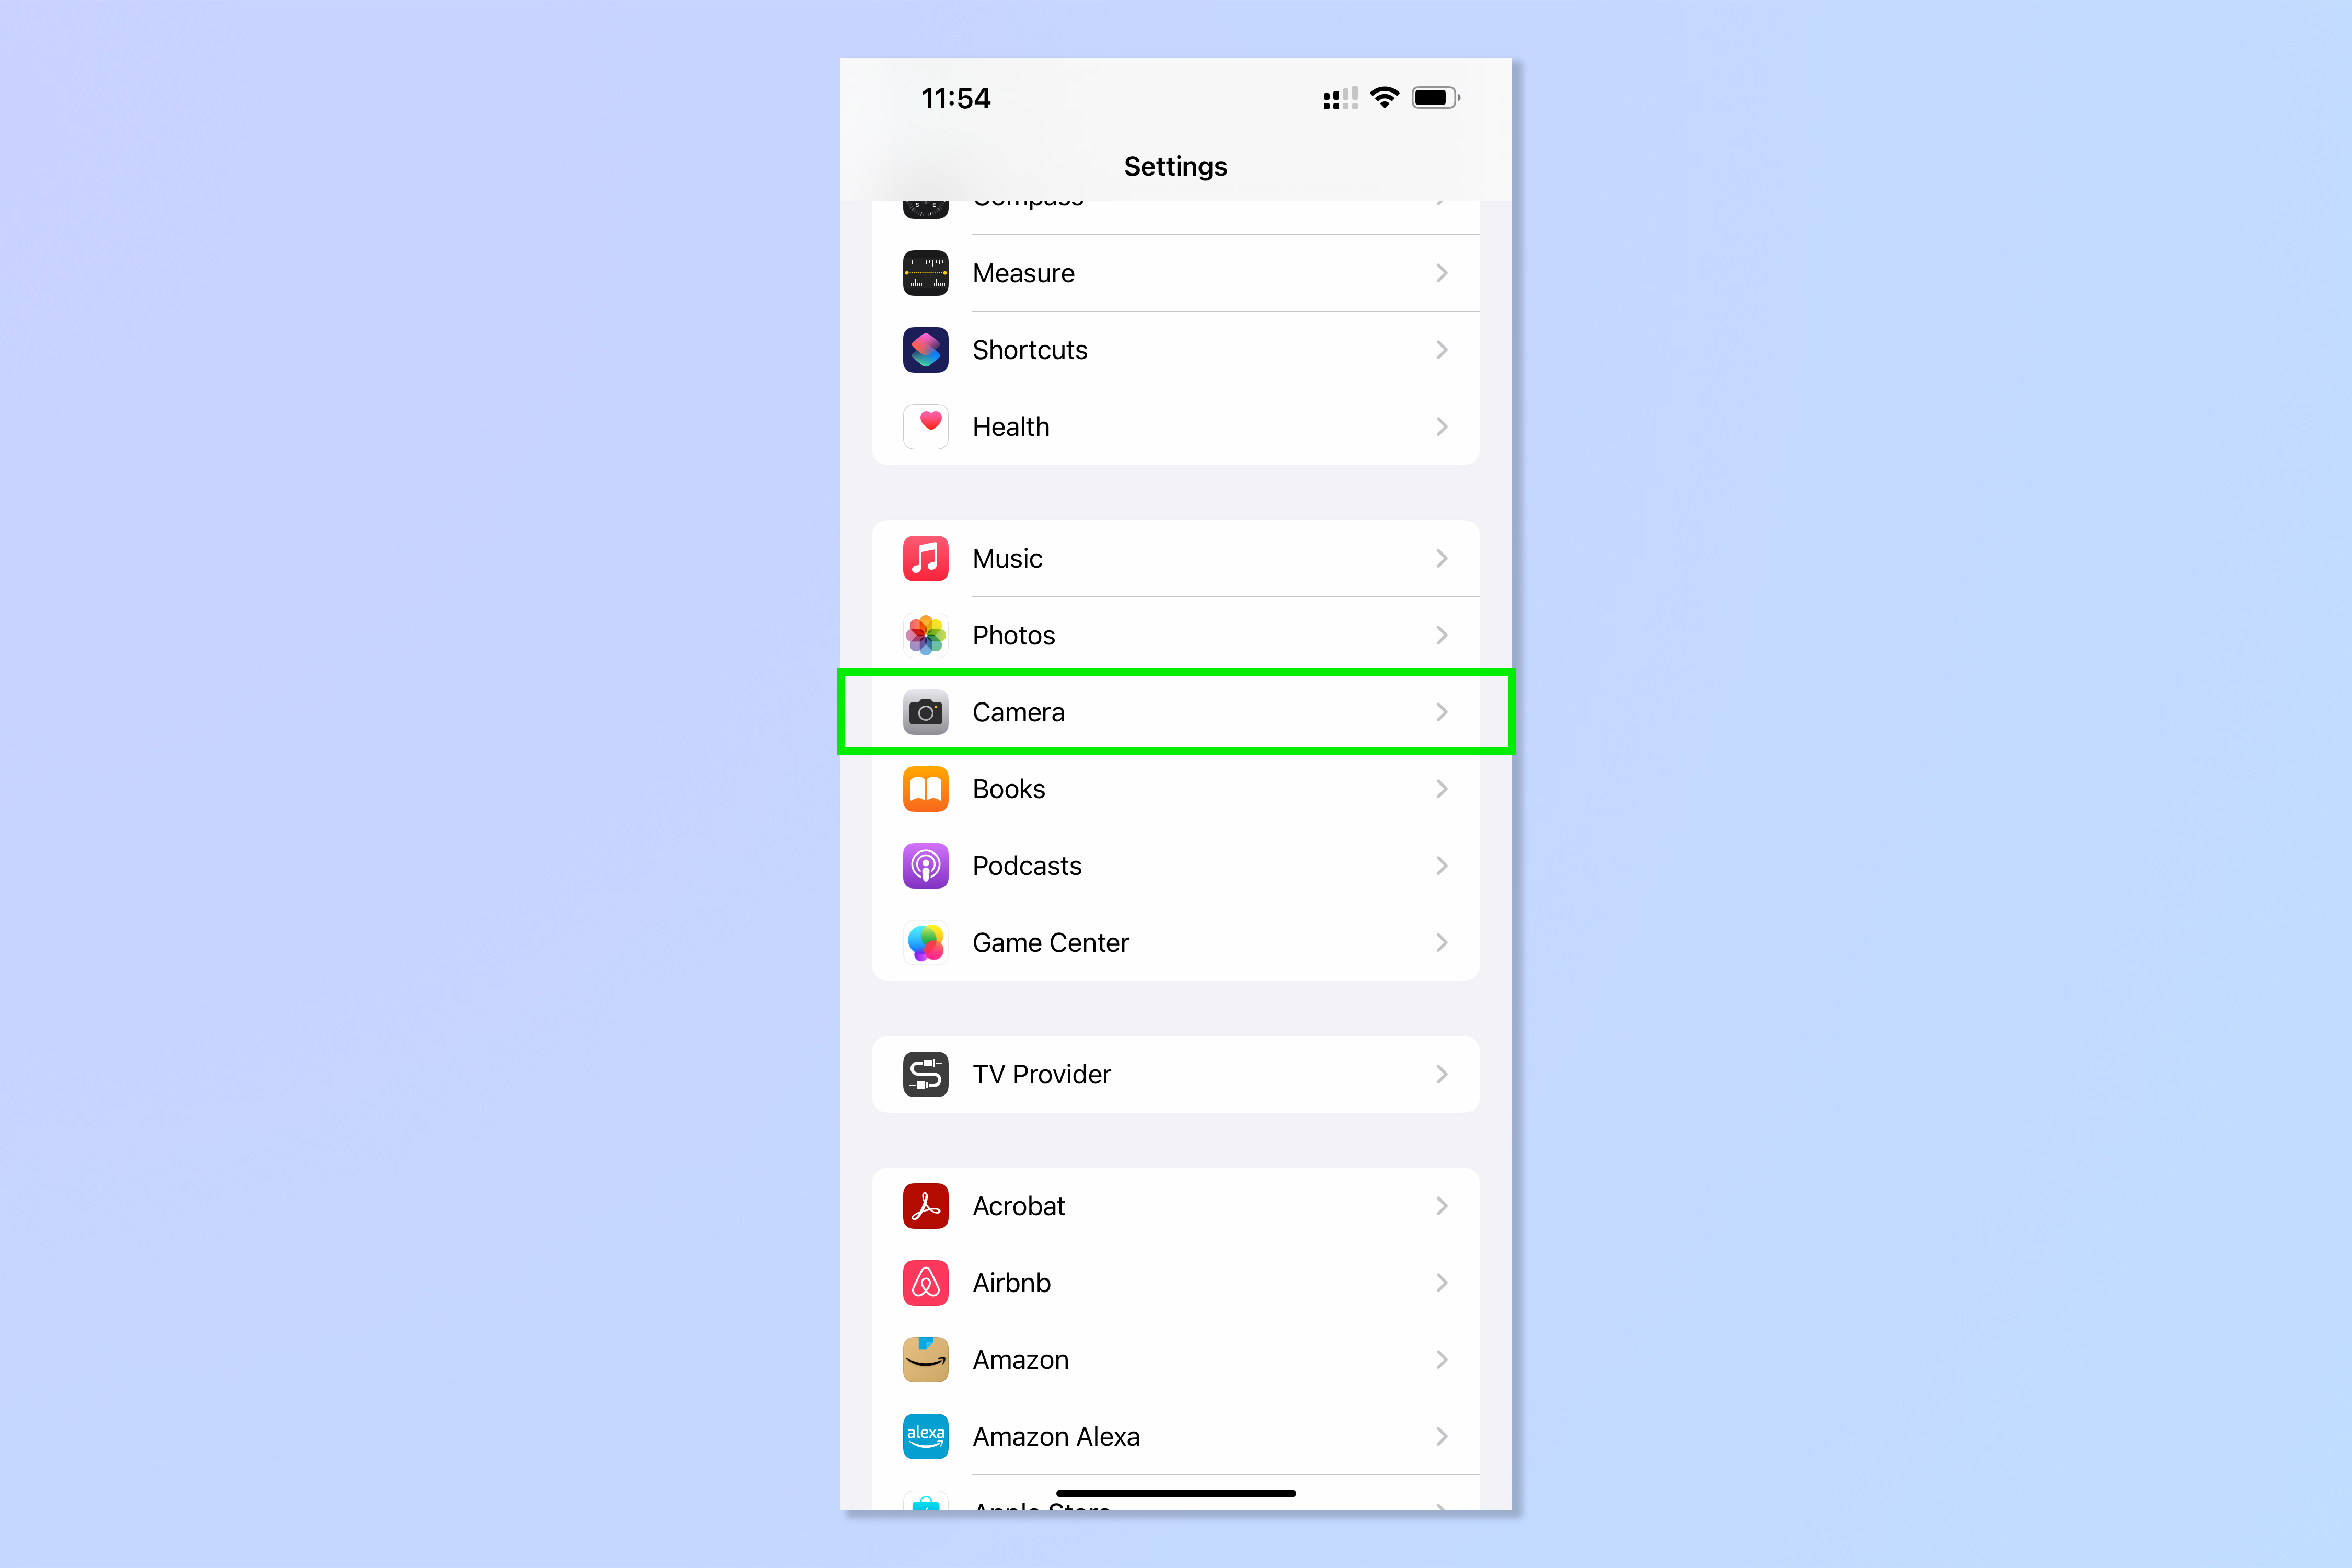
1. Open Settings, then scroll down and select Camera.
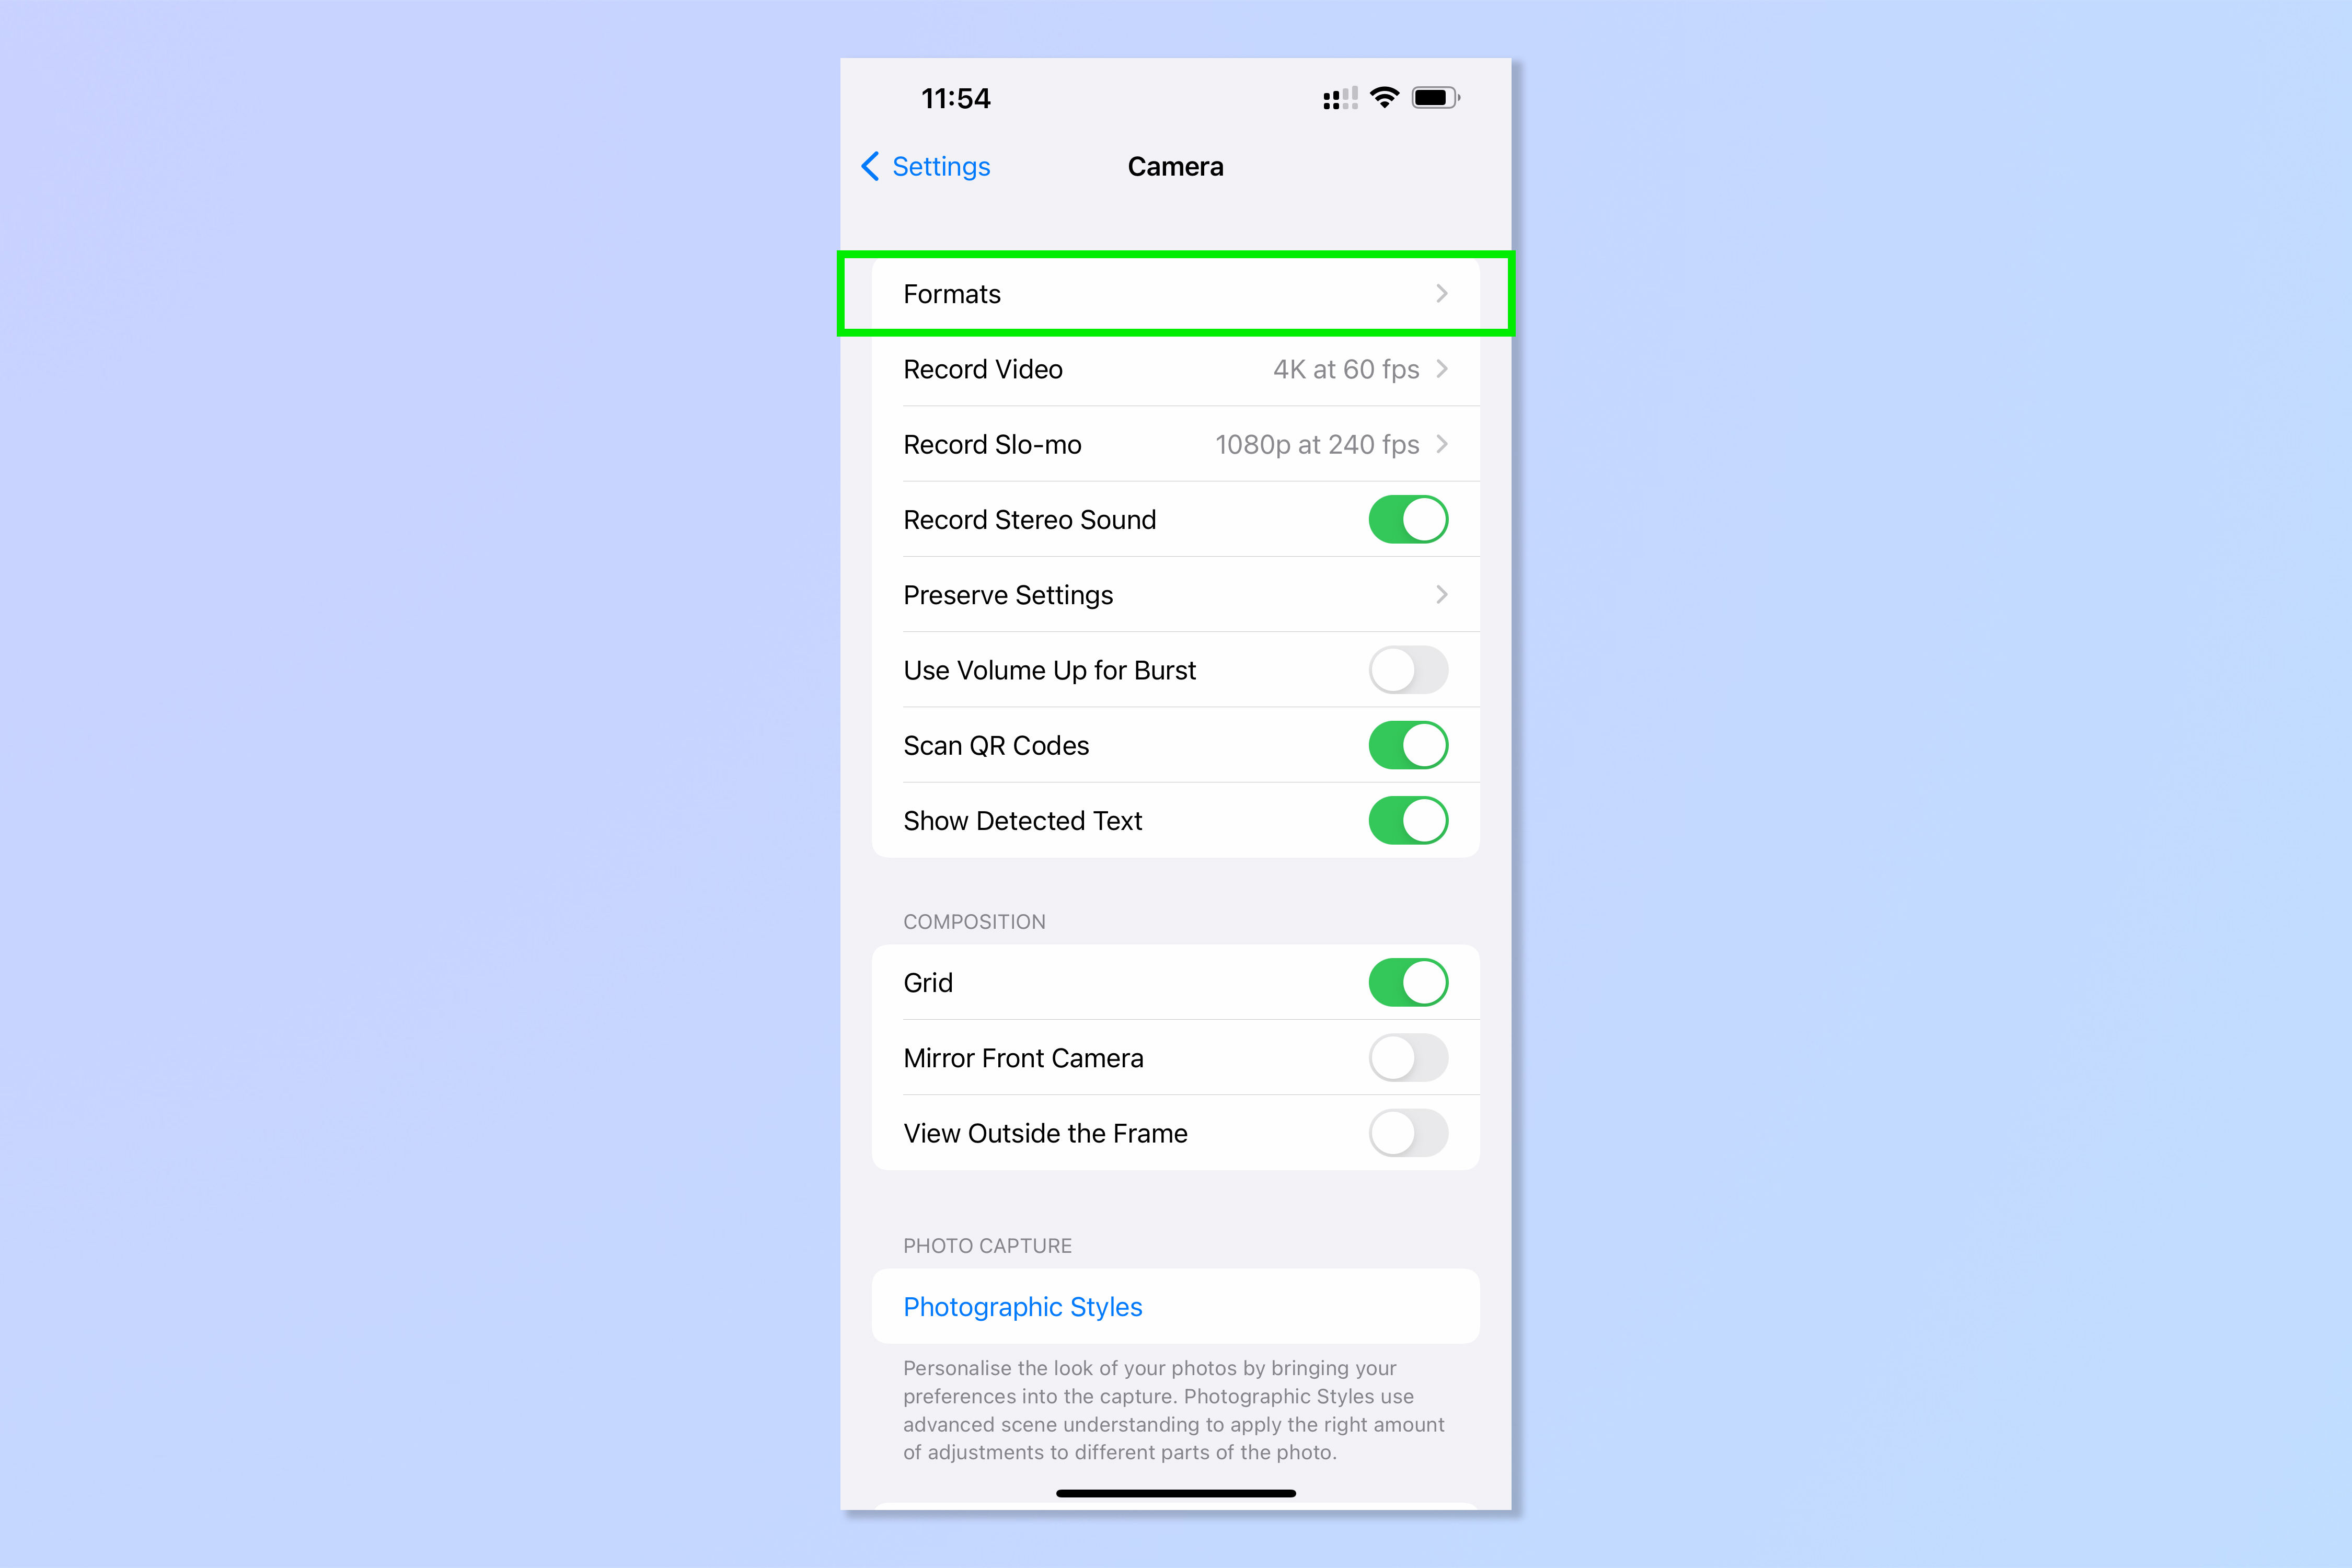
2. Tap Formats.
Get instant access to breaking news, the hottest reviews, great deals and helpful tips.
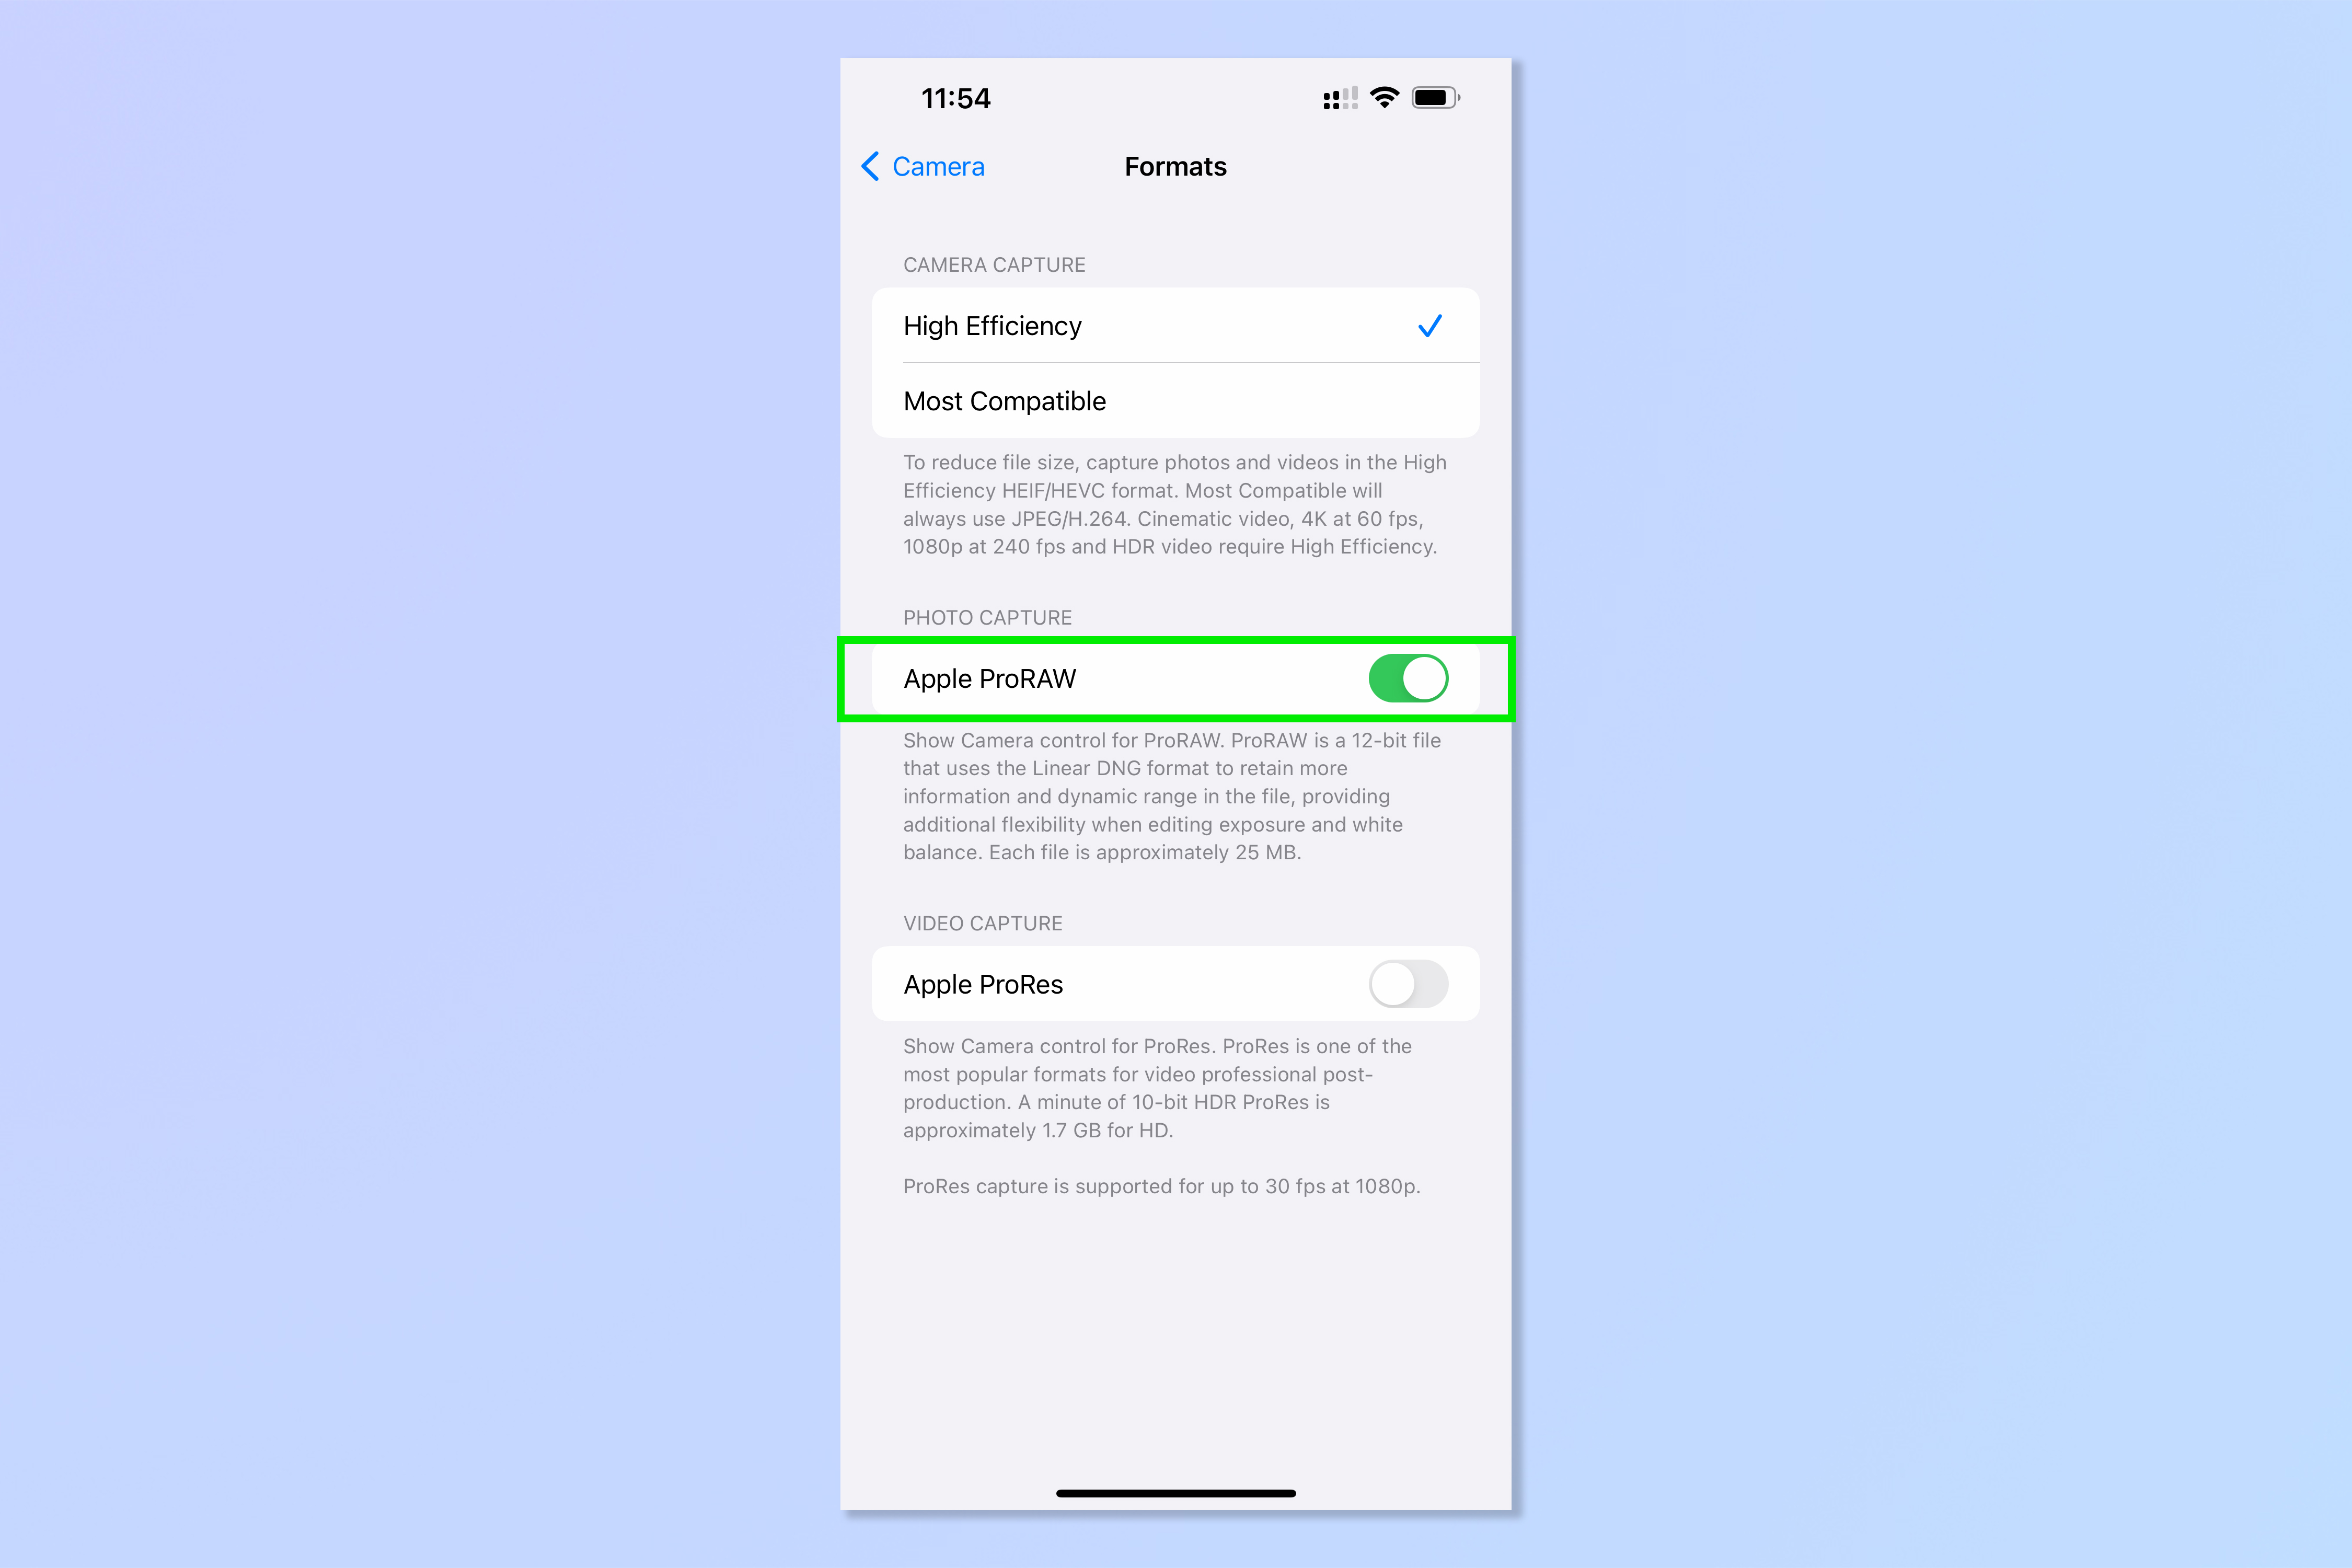
3. Under Photo Capture, tap the Apple ProRAW switch to toggle it on.
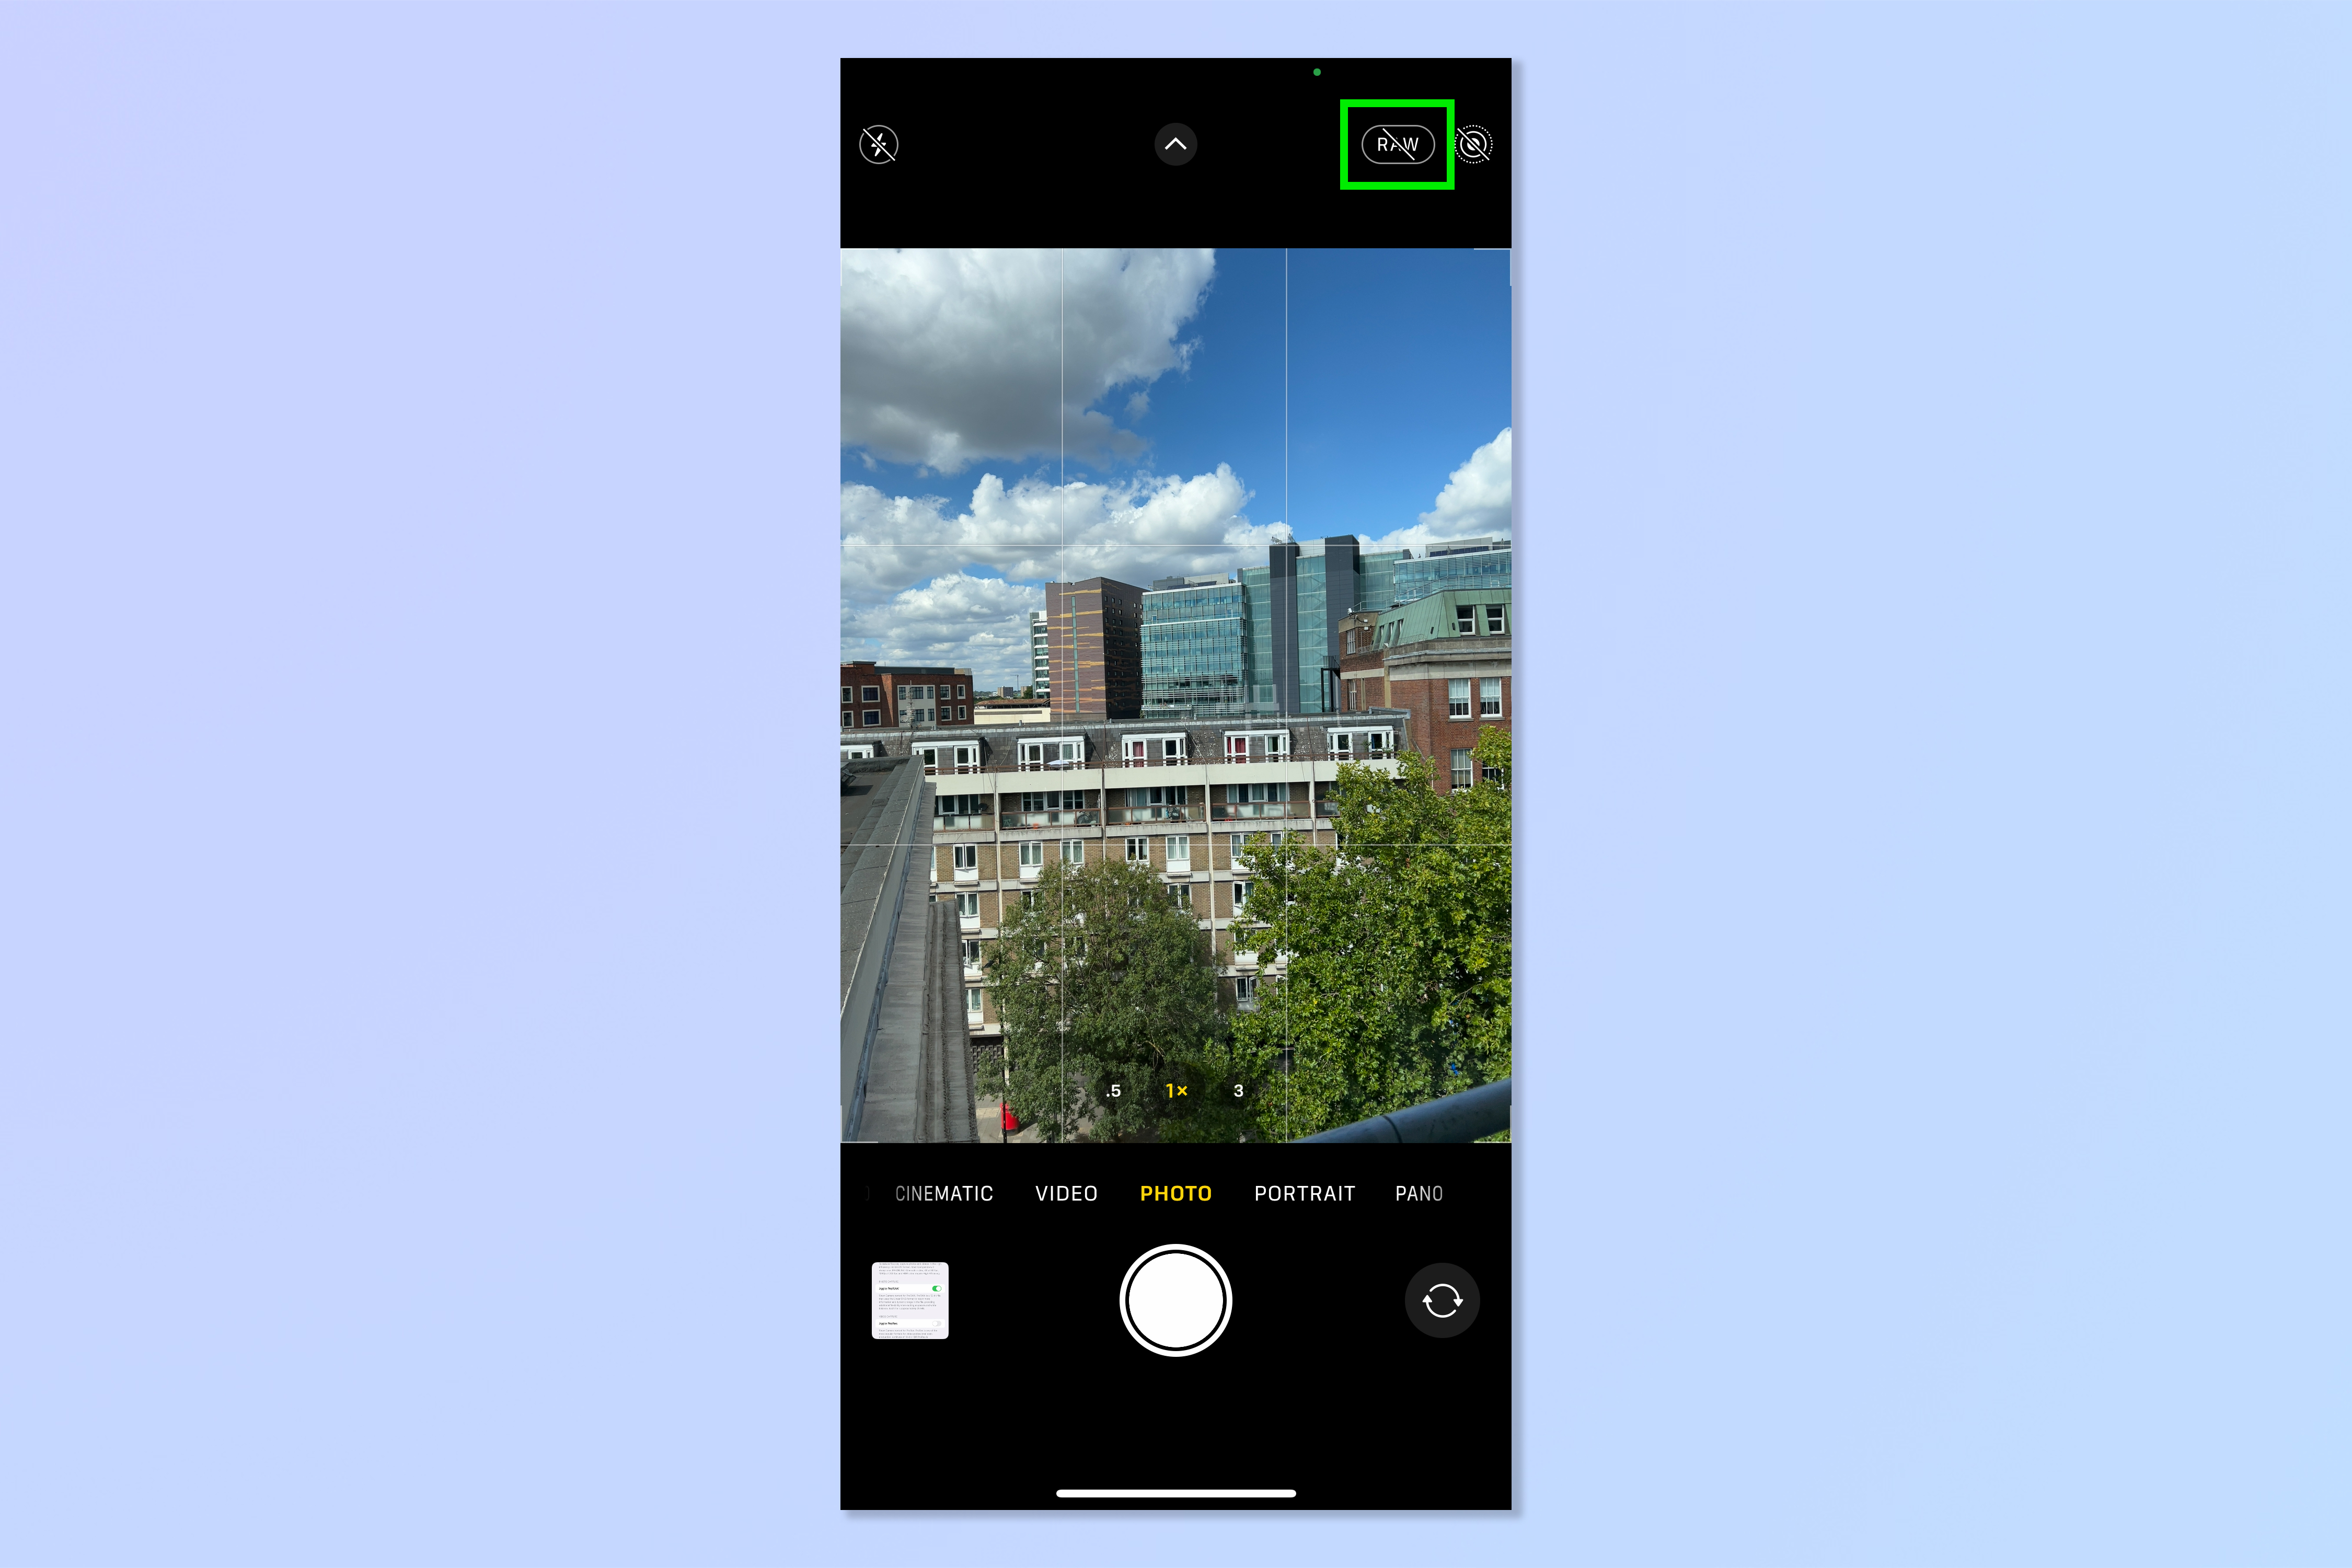
4. Open the Camera app and tap the RAW icon, top right. When you first open the camera the icon will feature a strikethrough. When tapped the strikethrough will disappear, signifying that you are taking photos in RAW mode.
You're now taking photos in ProRAW. If storage space is a concern on your device, bear in mind that each RAW photo will take up around 25MB of space, compared to the 1MB that HEIC files use. You may need to upgrade your iCloud storage if you plan on taking lots of photos in RAW.
After taking your RAW photos, the next step is to get editing. Thankfully, we have a range of Adobe Photoshop tutorials to help you get started with that too, so why not check out how to add a border in Photoshop, how to add a background in Photoshop and how to add a drop shadow in Photoshop.
Having trouble opening HEIC files on you computer? Make sure you read how to open HEIC file on Windows. Want to blur the background of an iPhone photo? You'll want to read how to blur the backgrounds of iPhone photos.
Fancy learning some more general iPhone tips? Start with how to set a ringtone on iPhone and how to transfer data from iPhone to iPhone.

Peter is a Senior Editor at Tom's Guide, heading up the site's Reviews team and Cameras section. As a writer, he covers topics including tech, photography, gaming, hardware, motoring and food & drink. Outside of work, he's an avid photographer, specialising in architectural and portrait photography. When he's not snapping away on his beloved Fujifilm camera, he can usually be found telling everyone about his greyhounds, riding his motorcycle, squeezing as many FPS as possible out of PC games, and perfecting his espresso shots.
 Club Benefits


