Hard Drive Optimization Tips and Tricks
Optimize your Hard Drive or SSD with these tips and apps!
Intro
The magnetic hard disk is now a venerable storage medium but it still delivers the best storage space bang for your buck. While not as fast as new-fangled SSDs, there are many simple ways to improve the performance and reliability of the classic hard disk. Even, if you're already running a solid state drive in your machine, there are still a few optimization tweaks to improve the reliability of your zippy new storage device. Read on for tips, tricks, and utilities to get the best out of your HDD or SSD!
HDs: Partition your drive!
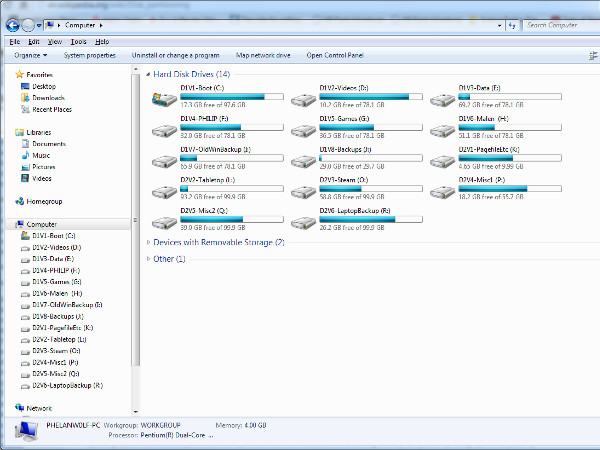
One of the most useful tweaks for traditional hard drive is to partition it into multiple volumes. Partitioning has many benefits, such as keeping your OS files separate from your other data (allowing for cleaner and safer installs with less risk to your other stored files), keeping your page file separate from your other files, increased reliability (file system corruption errors that might knock out one partition may not affect other partitions), the ability to set up multi-boot systems (such as Windows 7 on one boot partition and Linux on another), and more. You can read about the benefits (and downsides) of partitioning here.
Windows already comes with partition management tools, and can partition your drives on installation. We'll also feature a few third party partition management tools at the end of this article.
Regular Maintenance: Defragment regularly
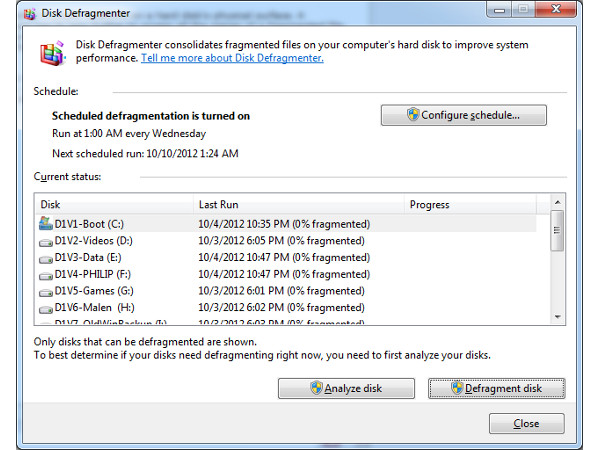
File fragmentation occurs when pieces of a particular file are scattered in multiple locations on a hard disk's physical surface. A fragmented file takes longer to access and read as the hard disk head has to spin further to access all of the file's the fragments. You can prevent excessive file fragmentation by running a defragmenter program that will physically piece the files back together. The program copies the scattered parts of files and then moves them into a solid block on the physical surface of the drive, thereby making file access faster and more efficient.
To access Windows' default defrag tools, simply right click on a drive in Explorer, go to the Properties-> Tools tab and look for Defragment. From there, you can select analyze drives for fragmentation, run a defrag, or set Windows to run a defrag on an automaticschedule (highly recommended). That's more than enough for many users, but we'll also feature other third-party defrag software at the end of the article.
Regular Maintenance: Empty Recycle Bin & Browser Cache
Windows stores files you delete in the Recycle Bin, allowing you to recover them in case of accidental deletion. Regularly checking and emptying the Recycle Bin will allow you to save even more space. You can also skip the "delete to Recycle Bin" part of the equation by Shift+Clicking on the "Delete" option when deleting a file in Windows Explorer. This permanently deletes selected files and folders, rather than dumping them into the Recycle Bin. However, be sure that you want those files and folders dead and gone, because once you do this, there's no turning back.
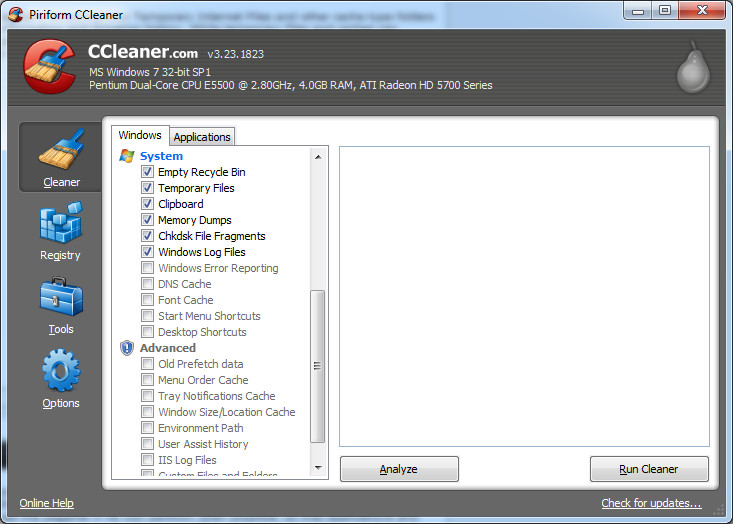
Another space-saving maintenance step is to regularly empty your Temporary Internet Files and other cache-type folders that programs (like your browser) use to store temporary information and browsing history. While temporary files and caches can improve performance and surfing speed, they can also use up hundreds of MB or even a GB or two if not regularly emptied. You can usually automate this in your browser's settings, or manually dump these, along with the Recycle Bin, using a utility like CCleaner.
Leave space for the Pagefile
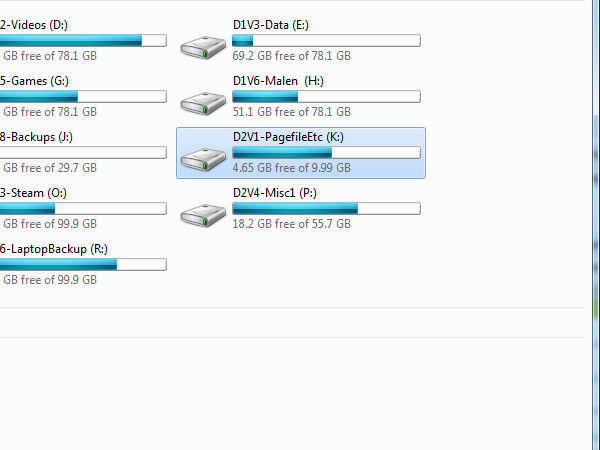
The Pagefile is a type of virtual memory Windows uses to store data used by an idle application so that more space is freed up in the system's RAM. Advice on whether to turn the pagefile on or off varies wildly online but, odds are, you should leave it on unless you know exactly what you're doing. Try to set the pagefile in its own partition when possible. This means applications and data won't impinge on space the pagefile might need to use. Better yet, set it in a partition on a different physical drive than your boot drive.
More on the Pagefile
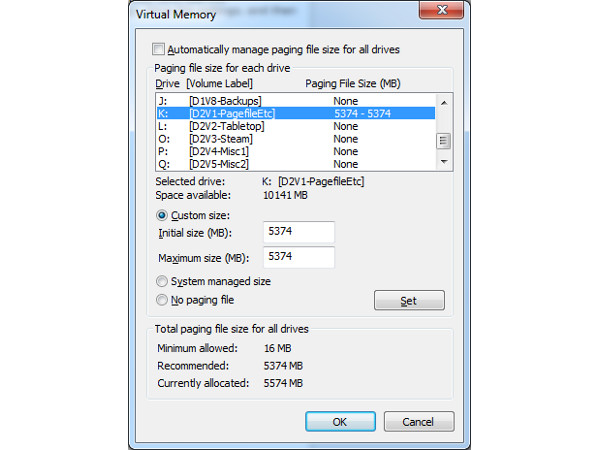
Moving the Pagefile calls for some digging around in the Control Panel (and will require admin privileges). Go to Control Panel-> System-> Advanced System Settings-> Advanced-> Performance-> Settings-> Advanced-> Virtual Memory-> Change. This will bring up a window listing all your partitions and any pagefiles located therein. You'll want to move the majority of your pagefile space to another drive partition, but will need to keep a minimum of 800MB pagefile on C:\ if you care about crash memory dumps. Select C:\ and then either set it to Custom Size 800MB (initial and maximum size) or no paging file. Click "set" to save and then go to the drive you want to allocate your pagefile to (In my case, K:\) and either set the pagefile size to "System Managed Size" or "Custom Size" (use the recommended setting that the window provides or check out the copious amounts of online lit for a custom setting). Save the settings, and then restart to have these changes take effect.
SSD Tip 1: No need to defragment!
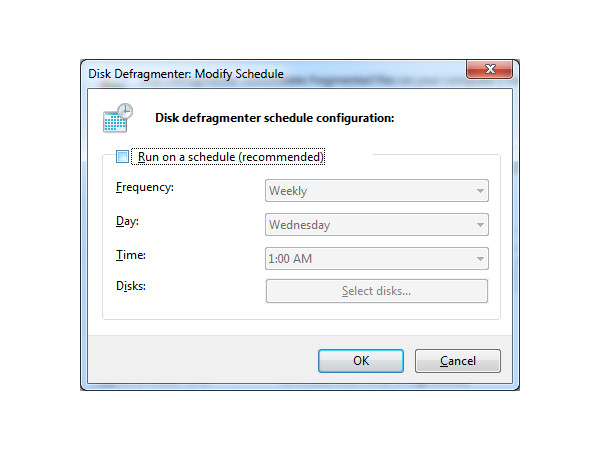
Now we move on to solid state drives, which function differently from traditional HDDs and therefore require different optimization methods. One of the major changes is that defragmenting, which is an important maintenance habit to form when using HDDs, has little to no effect on an SSD and may actually reduce your drive's total lifespan with numerous small write operations. Windows should automatically disable scheduled defrags for a drive that it recognizes as an SSD but that isn't always the case. As a result, you may want to double check your defrag tools to ensure that it doesn't automatically schedule defrags for an SSD. You should still defrag your HDDs, though.
SSD Tip 2: Disable System Restore
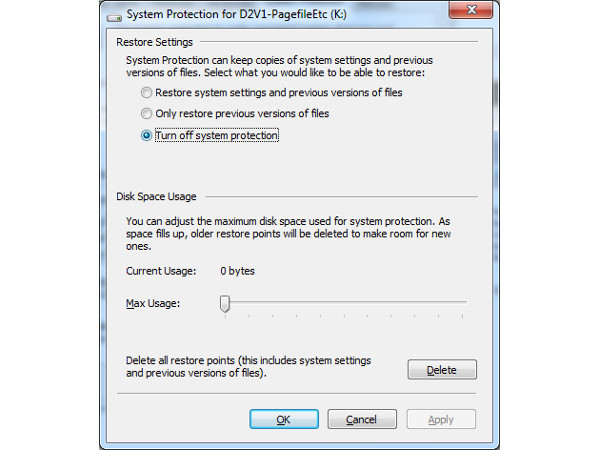
There's plenty of online discussion as to the merits of System Restore on an SSD. Many online reports say a System Restore may markedly slow down SSD performance and interfere with the vital TRIM operation over time. You may want to turn off System Restore but be warned: the lack of a Restore point may make it harder to recover from things like a bad driver, install error, etc. You can still mitigate the risk to your data by regularly backing up with third party software, though. If you already do, turning off System Restore may reduce the number of write operations on an SSD (always a good thing for longevity) and free up some disk space to boot!
To turn off System Restore, go to Control Panel-> System-> System Protection-> Configure-> Turn off System Restore.
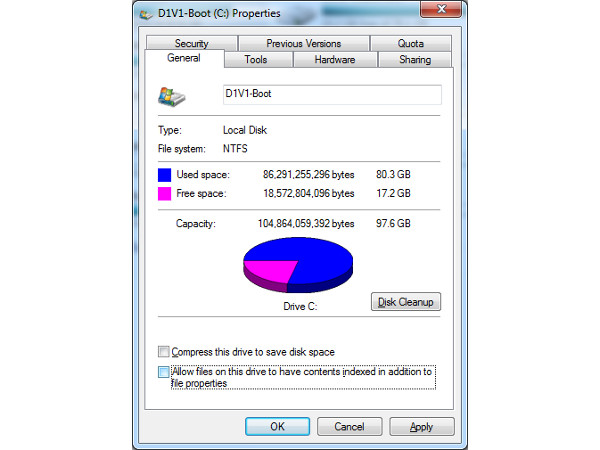
SSD Tip 3: Disable Drive Indexing
Drive Indexing allows for a jump in access speeds in a traditional hard disk but the effects are negligible with an SSD and may result in numerous unnecessary and small write operations (which again, reduce device lifespan). You can disable Drive Indexing and doing so is much less risky than disabling System Restore. To do so, right click on your SSD in Explorer and go to Properties. Un-check the box marked "Allow files on this drive to have contents indexed..." You may encounter a popup saying that there has been an error in applying attributes. This is normal. Ignore all, and continue on.
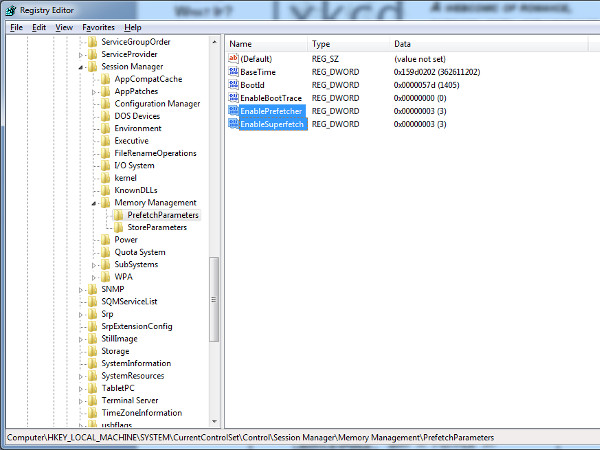
SSD Tip 4: Disable Prefetch & SuperFetch
SuperFetch and Prefetch cache frequently used programs and files, again, adding extra write operations. With the speed of SSDs, gains are minimal and, if you're concerned about drive longevity, you'll want to reduce unnecessary write operations. You can turn both of these off with the Registry Editor. Fair warning, when doing anything with Registry Editor, be absolutely sure with what you're doing and touch nothing else in the Registry to avoid complications.
Run regedit and select the file path: "HKEY_LOCAL_MACHINE\SYSTEM\CurrentControlSet\Control\SessionManager\Memory Management\PrefetchParameters" . Right-click on "EnablePrefetcher" and "EnableSuperFetch", select Modify, and change the values from 1 (or 3) to 0. Afterwards, restart.
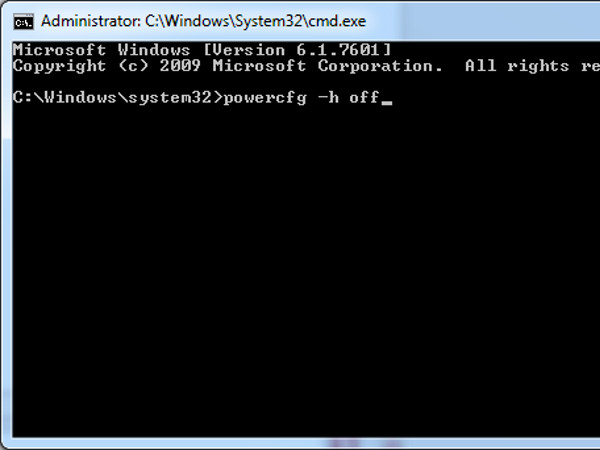
SSD Tip 5: Disable Hibernation
Hibernation allows you to power down and quicklyrestore your session by saving the contents of RAM to the file Hyberfil.sys, with its size equivalent to your RAM. Desktop SSDs don't actually gain much with hibernation, as the boot cycle is already fast enough and the extraspace can be put to good use on smaller SSDs.
To disable Hibernation, type "cmd" in the start menu search box, right-click on cmd.exe, and select Run as Administrator. Then type "powercfg -h off" (no quotes), and press enter.

SSD Tip 6: Again with the Pagefile!
Finally, we return once more to the Pagefile. We've already recommended moving the Pagefile away from your boot drive and this goes doubly so if your boot drive is an SSD. Using a Pagefile requires many small read and write operations and we've already noted that these can reduce an SSD's lifespan. So, moving your Pagefile away from a boot SSD and onto, say, an old HD not only increases the efficiency of any pagefile, but will also reduce wear and tear on your precious solid state drive.
We've only listed easy and serviceable suggestions for tweaking HHDs and SSDs but there's a lot of good (and bad) advice floating around the web, so read up. For SSD users in particular, we'd like to recommend Tom's Hardware's SSD Optimization guide as well as The SSD Review's Optimization guide. if you know of any other good guides, feel free to share them in the comments section below! Next up are utilities that can help with drive benchmarks, defragging, partitioning, and other functions.
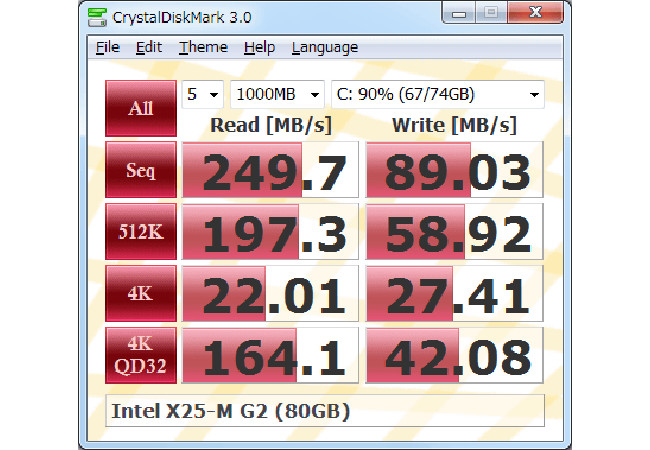
CrystalDiskMark
CrystalDiskMark, previously featured in our benchmarking software recommendations, is a no-nonsense utility that allows you to measure your drive's read and write speeds and other critical indicators. It's a tight, elegant utility with few bells and whistles, and is a great tool for measuring the performance of your drive.
CrystalDiskInfo
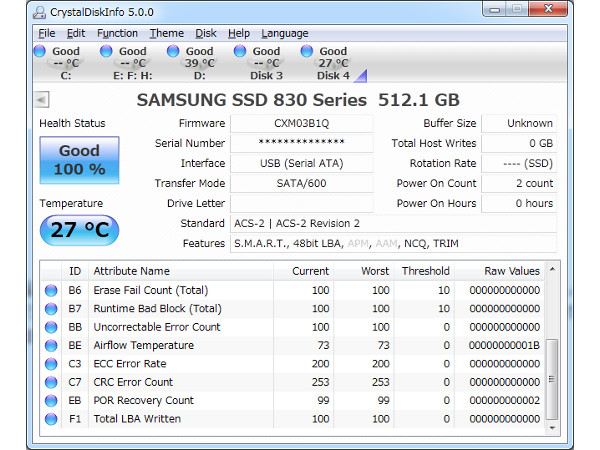
CrystalDiskInfo, from the same developer as CrystalDiskMark, reads your drive's SMART (Self-Monitoring & Analysis Reporting Technology) information and presents it in a simple graphical form. As with its drive performance measuring sibling, CrystalDiskInfo is a light, no-nonsense program that elegantly presents the stuff you need to know about your machine's mechanical health.
Note that CrystalDiskInfo is bundled with OpenCandy, which will recommend extraneous programs to your install. CDI is a stand alone program and does not require any other programs on the side.
Parted Magic Livedisk
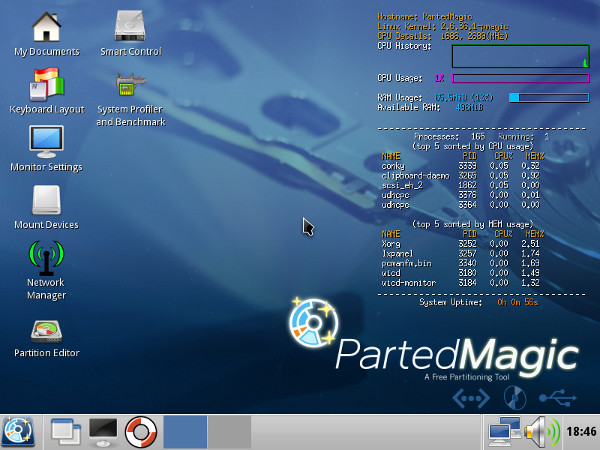
There are a plethora of tools out there for partition management and among the more popular ones is GParted. We've chosen to feature the Parted Magic Livedisk because it comes with the core elements of GParted as well as a whole host of other diagnostic tools and tests for hard disk and partition management and recovery. Parted Magic's light Linux-based kernel recognizes and can work with many file systems, including Windows NTFS, and is a great addition to an amateur or professional's toolkit of recovery and managementtools.
Parted Magic is donationware, so if you like this little program, feel free to donate to the developer to aid the maintenance and development of the program!
Defraggler
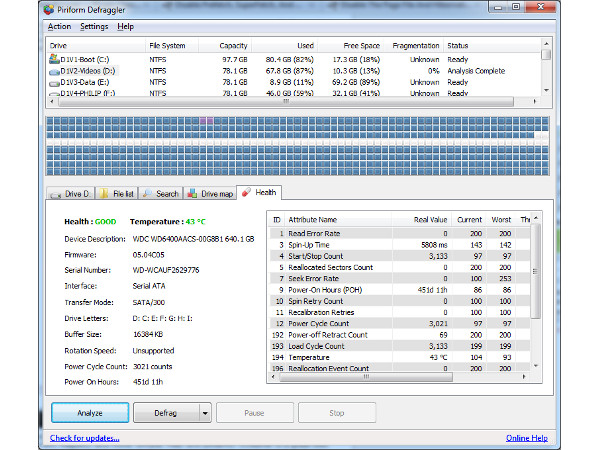
Piriform's Defraggler is a free defrag utility that allows you to defragment entire drives or even pinpoint specific files and folders to refragment. It contains options to shift large files to the end of the drive, making it easier for a hard drive to access smaller files more quickly, and the option to do Quick Defrags to save time. It also offers defrag scheduling operations to automate your hard drive maintenance. All of this is presented in a clean and neat interface that is great for power users and home consumers alike.

CCleaner
CCleaner is another excellent Piriform utility. The free disk cleaning utility clears the contents of your web browser's cache, history, and temporary internet files as well as cleaning the Recycle Bin, Registry, and more. Simple, free, and powerful, CCleaner is a great disk maintenance tool.
SSD Tweaker
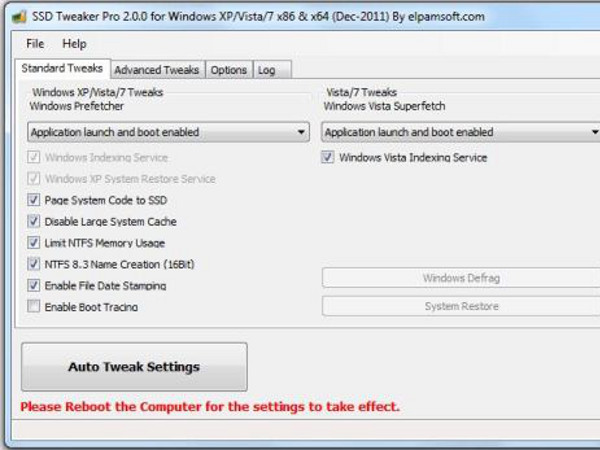
SSD Tweaker takes a lot of common advice for optimizing SSD performance in a Windows environment and places it all into a single program that allows you to run many of the tweaks mentioned in SSD optimization guides (such as Disable Large System Cache, Disable 8.3 filenames, Date Stamping, Prefetching and SuperFetching, and more) in an easy to use package. While you can execute many of these tweaks manually, SSD Tweaker puts them all in one place, saving you time and effort.
Have any HDD and SSD optimization tools that you feel should have been on the list? Have your own tips or tricks for getting more performance out of your hard disk or solid state drive? We'd like to read your thoughts in the comments section below!
-
nukemaster While I have seem many of theses partitioning tweaks. I have never gone that overboard.Reply
For single drive systems
c:\
d:\
For multi drive
Drive1(fastest) Windows
Drive2(Slower) Files
Drive3(depends on work load) Image/Video editing input (output if smaller can do to drive 2 or add another drive if you need more speed)
With SSD's
SSD1 Windows
SSD2 Games :)
SSD3 Win8
HDD (Slow) Files+Docs+Cache+any other constant writes.
As always
External slow drive. Backup. -
silverblue As an addendum to the pagefile tips, it not only benefits having one on a separate HD, but I've heard that putting it right at the start of said drive maximises access speed.Reply -
CaedenV With Win8's 'shut down' option really being hibernate in disguise I kinda wonder if you can turn off the hibernate feature at all, or if it would make shutdown act like a traditional shutdown option. Personally I only ever sleep or reset during day-to-day use, and only shutdown when making hardware changes.Reply
@article
Modern versions of windows already have many of these parts you have partitioned sandboxed in the registry so that if they fail then it is fine and Windows will simply over-write the file. Making a separate partition for everything just makes a mess, it does not add to performance or reliability. Also, having a ton of partitions (each with it's own free space at the end because Windows freaks out of you fill a partition or drive) wastes premium edge platter space by forcing information to be written in the middle of the drive where things run slower. It is a lot of work and headache for something that will help very little at best, or make things slower at worst.
@nukemaster:
For single drive systems:
Agreed, one contiguous partition is generally best. If anything maybe a separate hidden partition with a system image on it, but most likely if the drive is toast it won't do much good anyways.
For 2 drive systems:
SSD: Windows, program, and small files (office documents, pictures, possibly music collection, etc., this is purely so the HDD can go into sleep mode more often, not for performance)
HDD part1: program overflow (if needed). Guarantees that programs get the edge of the drive where they will perform best.
HDD part2: user files (documents, videos, and other bulk files)
HDD part3: system image and file backups
For many-drive systems:
SSD RAID0 part1: drive with OS, Programs, documets, music etc.
SSD RAID0 part2: 60GB Intel RST SSD cache for HDDs (read cache only)
(For content creators) SSD RAID0 part3, or seperate SSD: Render drive, or active project space
HDD RAID1/5 part1: Bulk files such as multimedia, CD/DVD images, network shares, etc.
HDD RAID1/5 part2: system image and file backups
Gives extra space and peak performance to the SSDs on the system drive, while allowing protection of personal files in the event of a virus requiring a system wipe, SSD failure, or a single HDD failure. If done correctly the RAID1 or 5 will also give the HDDs a performance boost to the file storage, but this is not a guarantee, especially if using dissimilar drives. -
omnimodis78 SSD Tip 4: Disable Prefetch & SuperFetch: this is absolutely a terrible advice, and has been demonstrated to be a misguided and incorrect "optimization". Firstly, the rationale is that turning these off will save writes on the SSD. The fact of the matter is that the writes used for these are so minimal as to be insignificant (practically and mathematically), but the benefits are so measurable that it makes no sense at all to disable them. Firstly, having "fetching" technology enabled means that programs/services load faster and more efficiently into RAM. Windows knows what it needs to "fetch" into RAM even before you trigger the event to open said program/service. Meaning that when you do double-click on that porno link, things are already fetched in RAM to open everything that is needed to make the process as fast and responsive as it can be (very basic example, but that's the essence) Turn these off, and it has to do it crudely each and every time...Reply -
techcurious All these "disable this.. disable that" tips that are meant to "increase lifespan of SSD drives" are so incredibly pointless! Forfeit the benefits of System Restore just to presumably increase the lifespan of an SSD?? For what? My 120GB SSD boot drive is now almost 5 months old and it's SMART status still reports that 100% Life Left, after total writes of 1585GB! So even if we round that up to 1% worn out, I want to keep using this same SSD for how long, 41 Years!?? (5months x 100=500, 500/12months). Even if the circuit board doesn't fail long before that, neither the capacity, nor the speed of this SSD will be very useful after 5 years, let alone 10 years.Reply
-
techcurious Oh, and I forgot to add that I have both my pagefile and hibernate file enabled on the same SSD.Reply
I prefer not having a Pagefile as I have enough RAM, but some programs/games don't like to run without a Pagefile no matter how much RAM you have... pity.
But since when is hibernating just about shutting down and starting up quickly? No matter how fast you can boot up with an SSD, only Hibernate can preserve and restore the state your PC was in, with the same open programs, files, games, etc! (Fortunately, new browsers can restore their previous session/tabs anyway). So, I still use my Hibernate sometimes, so I wont have to remember and reopen all the different PDF, Word, Excel, etc files that are open and I am not finished with before having to leave my PC for an extended period. -
omnimodis78 @techcurious - you are 100% correct! I used to be one of those people who spent hours upon hours of "optimizing" my SSD after a Windows installation. But the more I looked into it, and the more I experimented, the more I realized that a lot, too many in-fact, of those so called optimizations were coming from people who were merely stuck in the old Windows XP days when some things were worthwhile tweaking. Firstly, most of the optimizations today are actually counter-intuitive, and some are downright wrong to even suggest! Not to mention, this idea of actually disabling very advanced and practical things in order to add a theoretical amount of time (nobody has ever stated how much) to the 3,000,000 hours (that's over two centuries...228.1591052 years to be exact) of life expectancy (G.Skill FM-25S2S-60GBP2) is laughable! How many people would ever dare to go outside to their cars and say "unplug this, and this, and this" in order to add a few minutesworth of life to their engines. That's what these inaccurate optimizations are actually doing. Yes, I have disabled some stuff but not for the misguided reason to save SSD life, but because I don't need, or use some (file indexing is one, windows back-up is another).Reply -
Agree that almost all of these "optimizations" are pointless. It might have made sense if it was an older SSD, but today's SSDs handle write cycle conservations well enough for average consumer, and by the time those SSDs wear out, you'll probably be getting a new computer anyways. Did I mention that Windows 7/8 already performs these optimizations when SSD is detected? Just re-run the Windows Experience Index Assessment from Control Panel -> System.Reply
Don't waste your time with these "optimizations" and enjoy your SSD. -
Flyfisherman The Microsoft Pagefile should of course be on the SSD, preferable use two of them and put second pagefile on the HDD, since Windows will automatically read/write from the disk that is not used at the moment. The SSD/HDD cannot read/write on the same disk at the same time.Reply
Microsoft http://blogs.msdn.com/b/e7/archive s-and.aspx
Quote:
Should the pagefile be placed on SSDs? Yes. Most pagefile operations are small random reads or larger sequential writes, both of which are types of operations that SSDs handle well.
In looking at telemetry data from thousands of traces and focusing on pagefile reads and writes, we find that Pagefile.sys reads outnumber pagefile.sys writes by about 40 to 1,
Pagefile.sys read sizes are typically quite small, with 67% less than or equal to 4 KB, and 88% less than 16 KB.
Pagefile.sys writes are relatively large, with 62% greater than or equal to 128 KB and 45% being exactly 1 MB in size.
In fact, given typical pagefile reference patterns and the favorable performance characteristics SSDs have on those patterns, there are few files better than the pagefile to place on an SSD.
End quote.
This article on Tom's should be re-written, since it has some wrong suggestions about what is best to do.
http://www.computing.net/howtos/sh 7/552.html -
Seriously - BAD ADVICE with regards to putting swapfile on seperate partition!!!! Different drive, yes, but different partition (ala Unix/Linux), stupid. You force your head to move between distant cilinders (Head travel time) and then to seek again for every swap IO that follows or before normal access IO. This not only slows it down, but wears it out. It's best to keep regularly accessed disk locations, such as system files, temp files, cache files etc. in close proximity therefore minimizing head travel and seek times. Yes, most are going to complain that your swap can then also become fragmented which will be even worse, unless you set your swap size a static, fat provisioned size (Min 1.5x RAM to max 2x RAM).Reply
PS: Also, read up on thin and thick stroking. Thin stroking means that you use only the outside tracks of your disk as the linear speed (Opposed to rotational speed), or the percieved speed of the passing by under the head, would be the highest obviousy tracks (The first tracks): Ideally for performance, this is exactly where you want your swap. Partitioning your drive for swap, means that you force your swap to be further from your highest performance tracks.
Also, Unix actual intend is that your swap be on an entirely seperate disk (If possible).
 Club Benefits


