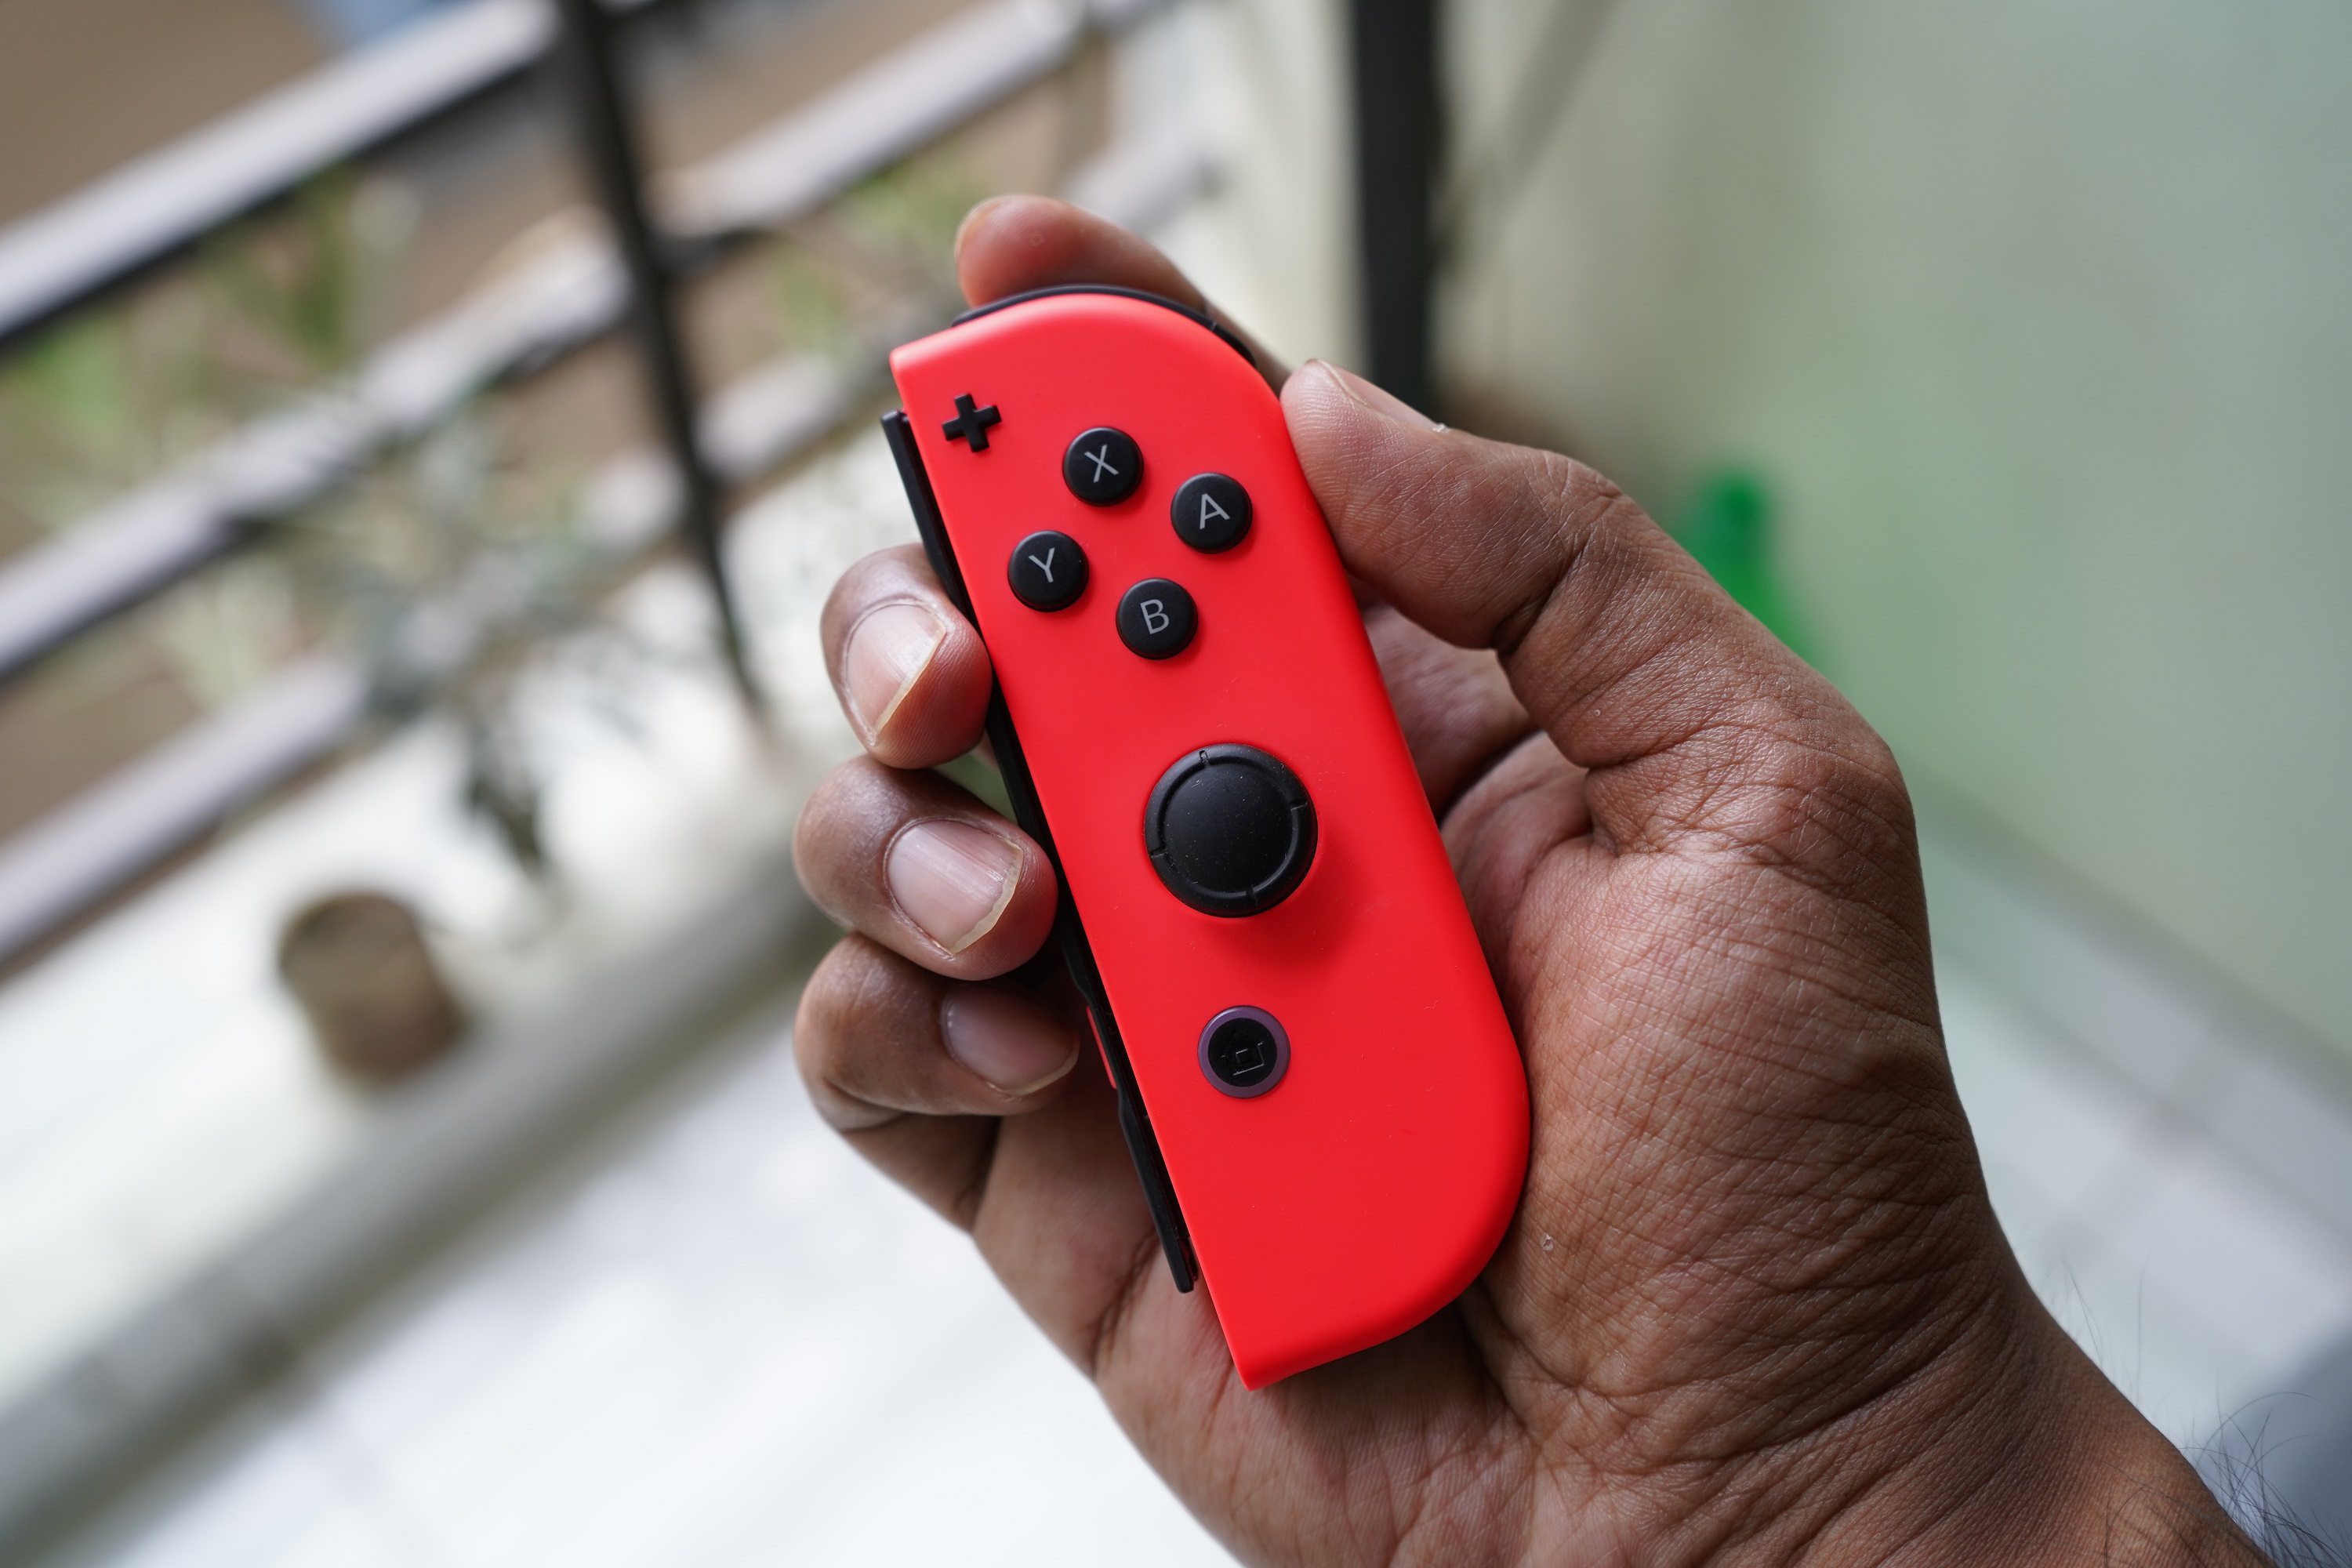
Nintendo Switch owners have been dealing with Joy-Con drift for years. It's when the analog sticks on the Switch controllers begin to come off center, causing a character on screen to randomly begin moving without player input.
It's frustrating when you're positioning a shot in Splatoon 2 or when you try to land a tricky jump in Super Mario Odyssey. Finite precision is lost because of random deviation that's no fault of the user.
- What you need to know about the Nintendo Switch OLED
- Nintendo Switch OLED vs Original Switch: Which should you buy?
- Plus: How to check if a Steam game works on Steam Deck
Unfortunately, Nintendo has done very little to try and fix the Joy-Con drift issue. Even on the upcoming Nintendo Switch OLED model, the Japanese video game giant will continue to use the same analog sticks, with potentiometers designed by Japanese firm Alps Alpine. This has led to much frustration from Switch fans hoping that the problem would be fixed by the third console revision. It's become such a problem that "how to fix Joy-Con drift" has become a popular search phrase on Google.
Below is everything you need to know about the dreaded Joy-Con drift along with videos that can show you how to fix it without sending it in for repairs.
What is Joy-Con drift?
To put it simply, Joy-Con drift is what happens when you move your character on screen one way, but the character moves a different way. A more bookish answer is that Joy-Con drift happens when an analog stick on the controller deviates from the central neutral position, leading to unwanted player input.
For example, when trying to position your character in Animal Crossing to dig, your avatar may begin walking forward, even though you're not pushing up on the analog stick.
To understand what's going on, we need to open up the analog stick and look inside.
Get instant access to breaking news, the hottest reviews, great deals and helpful tips.

To understand what an analog stick is, we first have to break down what a potentiometer is. That's a device used to measure resistance. Think of the volume knob on a stereo. By turning it, the device knows to either increase or decrease the volume.
Here's the important part: the potentiometer uses a resistive element to measure movement. So that stereo dial is running alongside an electrically resistive material — in the case of analog sticks, usually graphene — to then know how much input is being given.
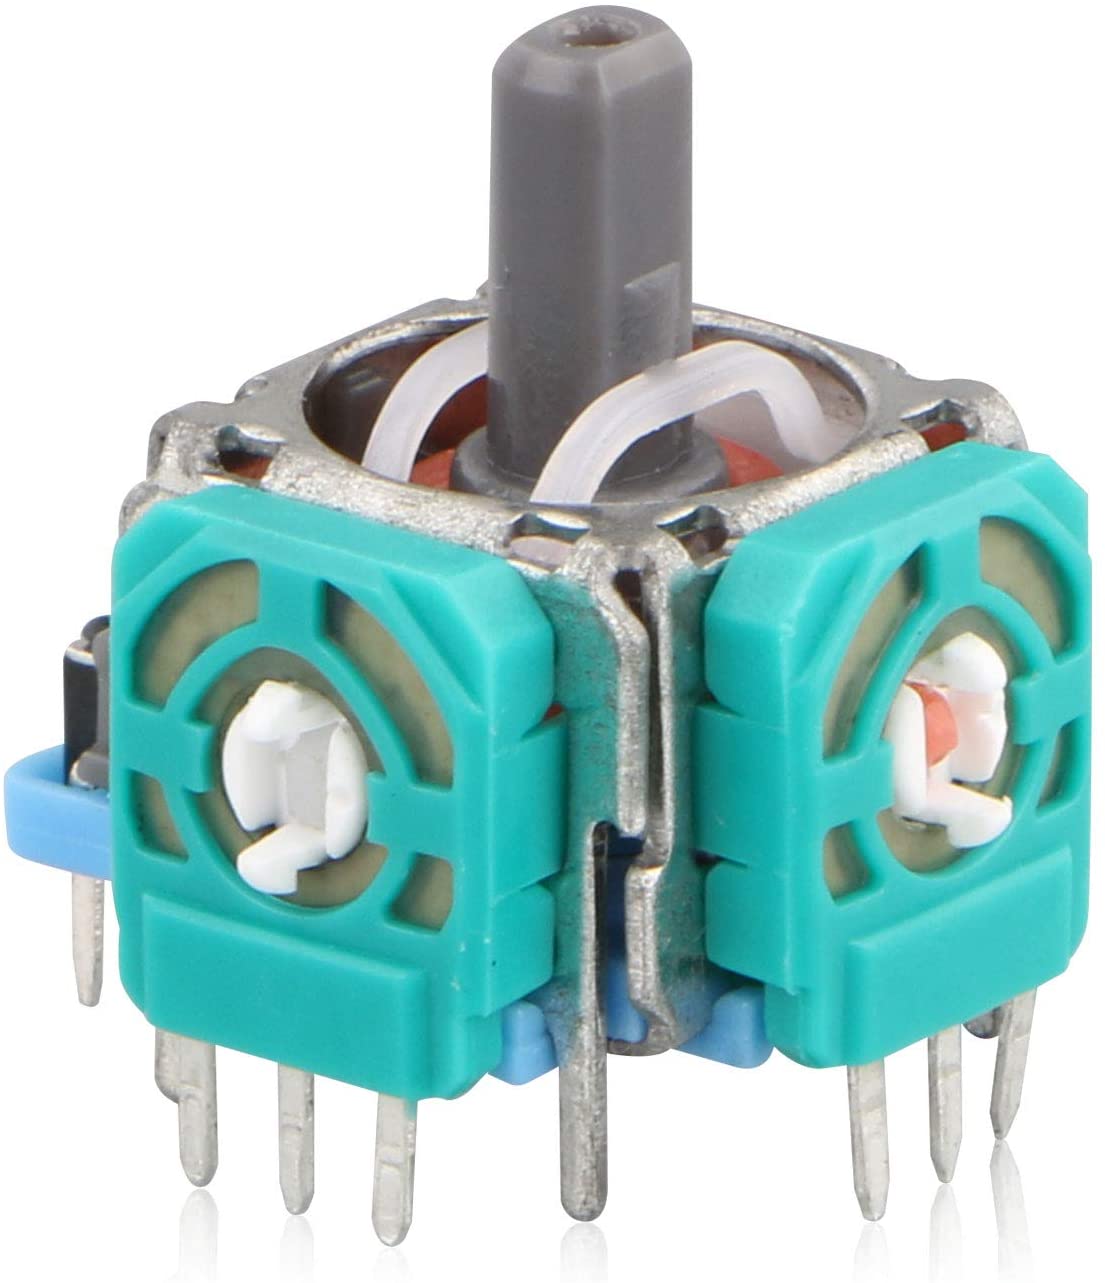
In the image above, the teal plastic structure contains the graphene pads. As the analog stick moves, the white part rotates, and inside a "wiper" — a metal ring with a small indentation — rubs against the graphene pads.
The YouTube channel Branch Education has an excellent video that visually breaks down how the inside of an analog stick works.
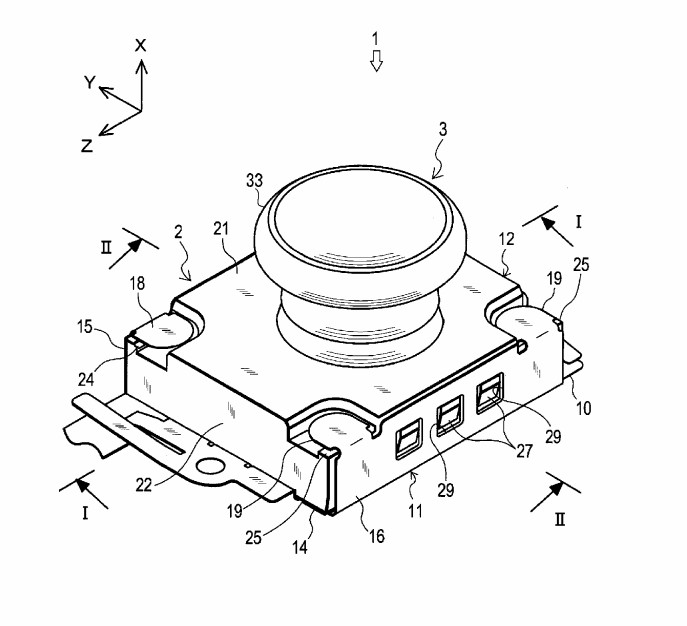
Here's where problems arise for the Switch analog sticks. While the potentiometers for most controllers are on the sides of the analog stick, to maintain the Switch's compact design, Nintendo opted for a potentiometer that sits at the bottom of the stick.
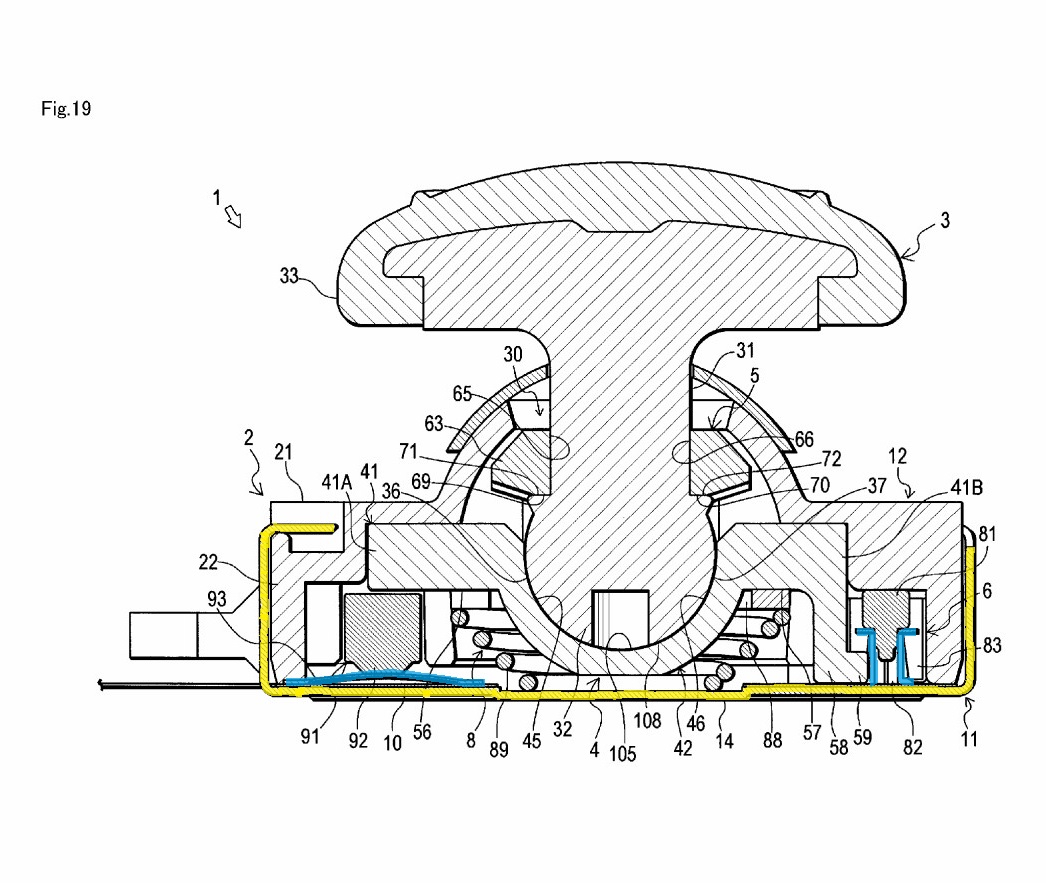
Thanks to patents filed with the U.S. Patent and Trademark Office, we have an inside cross-section of how the analog sticks work. It seems that this truncated design is what's to blame for the Switch's Joy-Con drift.

In the Switch patent image above, you don't see a potentiometer where it normally would be. That's because Nintendo opted for a completely different design in which the graphene pads sit below the analog stick.
Victorstk, an aspiring game developer who published a video that solved the Joy-Con drift issue, posits that over time, pressure that normally ensures the graphene pads are in contact with the analog stick's metal actuators begins to loosen.

Essentially, the metal frame (highlighted in yellow in the image above) puts pressure against the graphene pads and the mental actuators (highlighted in blue). Over time, the metal frame begins to loosen, causing weaker and imprecise contact.
Victorstk noticed that when he applied pressure to the Joy-Con with his thumbs, all of a sudden the drift would stop. He does a great job of explaining this in his video, and how he was able to fix it.
Victorstk was able to use a piece of cardboard, adding just enough material that would help give additional pressure when the Joy-Con was screwed back together. It's an ingenious, though simple, solution.
Of course, to do this yourself, you'll need to disassemble the Joy-Con. This video by YouTube channel TronicsFix is a great guide to opening up the Joy-Con yourself. Luckily, you won't need to fully disassembly the controller, just enough to where you can see the back of the analog stick to attack a small square of cardboard.
Before you begin, though, know that opening up the Joy-Con voids your warranty.
If you don't want to open up the Joy-Con, it is possible to use a can of compressed air along the analog stick. This should help dislodge any dust or particles interfering with the graphene pad. A few drops of isopropyl alcohol, above 90%, should work as well. But do note, these are all temporary solutions that won't last.
Joy-Con drift: why not have Nintendo repair it for free?
For those not wanting to go through the hassle of repairing Joy-Cons at home, sending it to Nintendo is the easiest option. Not only is the service fast, more often than not, users are sent a new or refurbished Joy-Con, free of charge.
To file a ticket with Nintendo, all you have to do is fill out the information on the company's Joy-Con repair support website.
Unfortunately, Nintendo does not guarantee that you'll get your original controller back. Meaning that if you have a special edition Joy-Con, like the Super Smash Bros. Ultimate or the Animal Crossing: New Horizons variants, then there's a chance you might not get your specific color. In these instances, it's best to hold off on sending your Joy-Con back to Nintendo.
This problem might not be even limited to those that own a limited edition Joy-Con either, but those that have a non-standard color. On the bottom of Nintendo's Joy-Con repair site it states, "Please note that if your Joy-Con can’t be repaired, it may be replaced with a standard color Joy-Con (Gray, Neon Blue, or Neon Red)."
This means that if you bought colors like neon yellow, neon green, neon pink, neon orange, neon purple or blue, all of which are readily available at multiple retailers, there's a chance your replacement controller will be gray, neon blue or neon red.

Imad is currently Senior Google and Internet Culture reporter for CNET, but until recently was News Editor at Tom's Guide. Hailing from Texas, Imad started his journalism career in 2013 and has amassed bylines with the New York Times, the Washington Post, ESPN, Wired and Men's Health Magazine, among others. Outside of work, you can find him sitting blankly in front of a Word document trying desperately to write the first pages of a new book.
 Club Benefits


