How to set up StandBy Mode in iOS 17
Customize iOS 17's StandBy Mode screen just how you want it to be
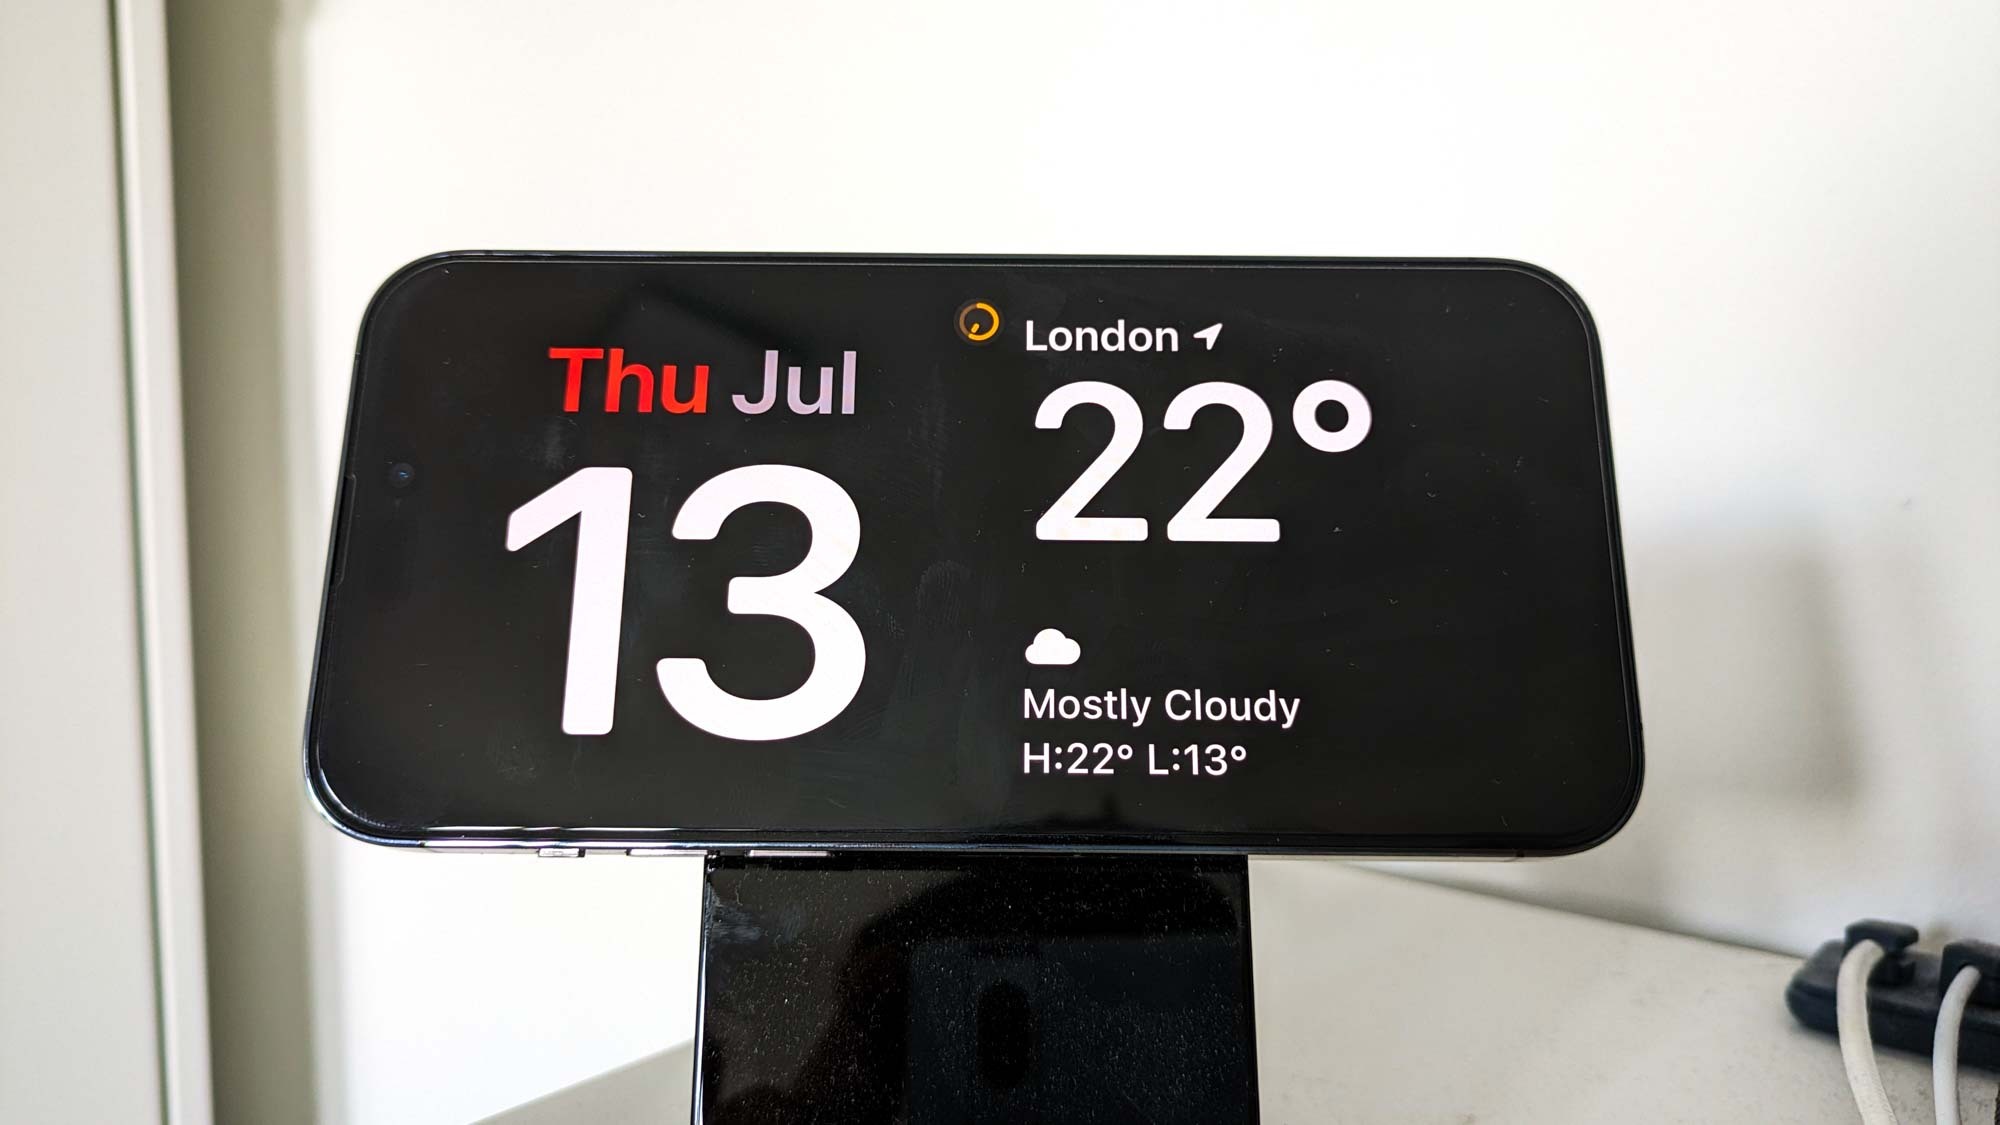
Once you've downloaded iOS 17, you should definitely try StandBy Mode. It's one of the new OS' biggest new features, and one that's more customizable than you'd think, as this guide will show you.
There's two ways to change how StandBy mode looks. The first is in the Settings menu, and the second is with StandBy mode actually active. We'll cover both here so you can have full control over the smart display-style interface.
Just check how to download iOS 17 if you've not already got it installed, then read on for the lowdown on how to configure StandBy mode.
How to configure StandBy Mode in iOS 17
- Open the StandBy section of the main Settings app
- Adjust the settings toggles as needed
- With StandBy Mode enabled, swipe left and right or up and down to change what's on the display.
Read on for full instructions and illustrations
1. Open the StandBy section of the main Settings app
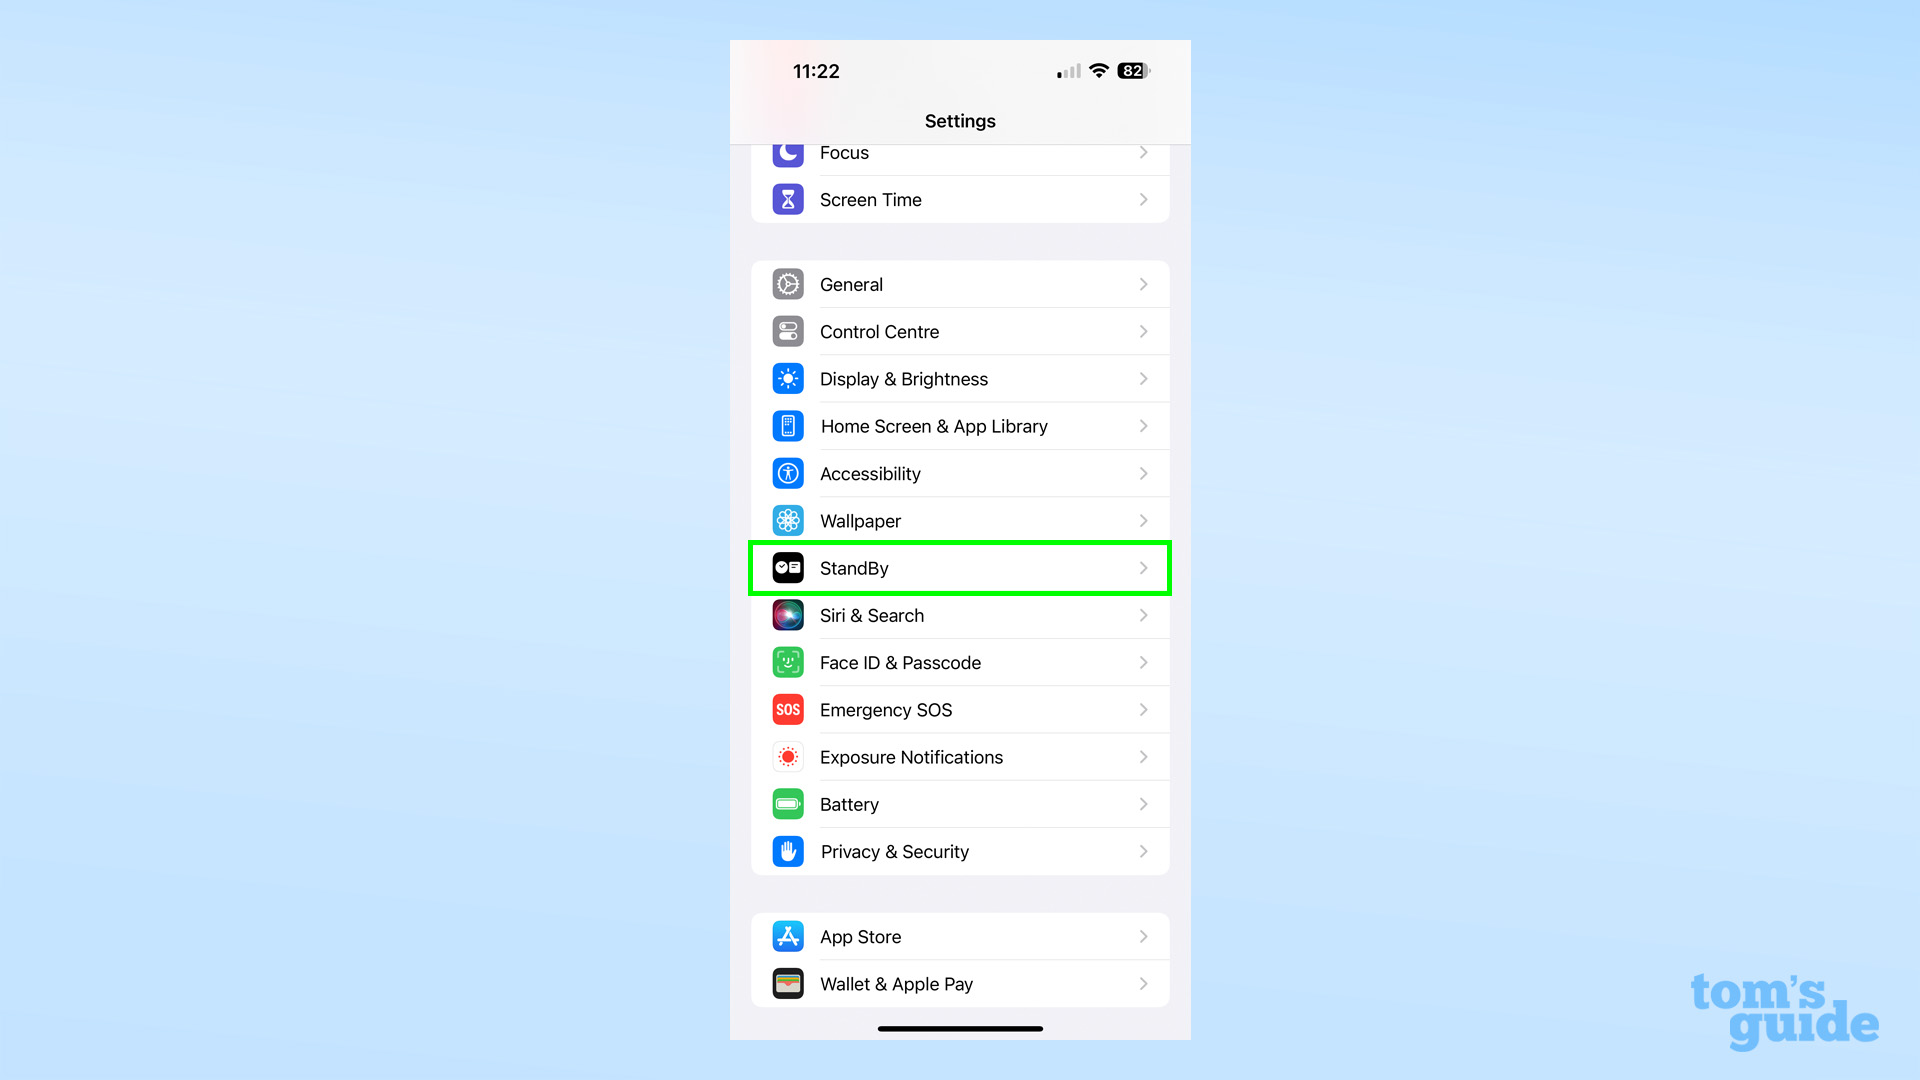
There's a new heading for StandBy in the big block of options a short way down from the top of the Settings app page.
2. Adjust the settings toggles as needed
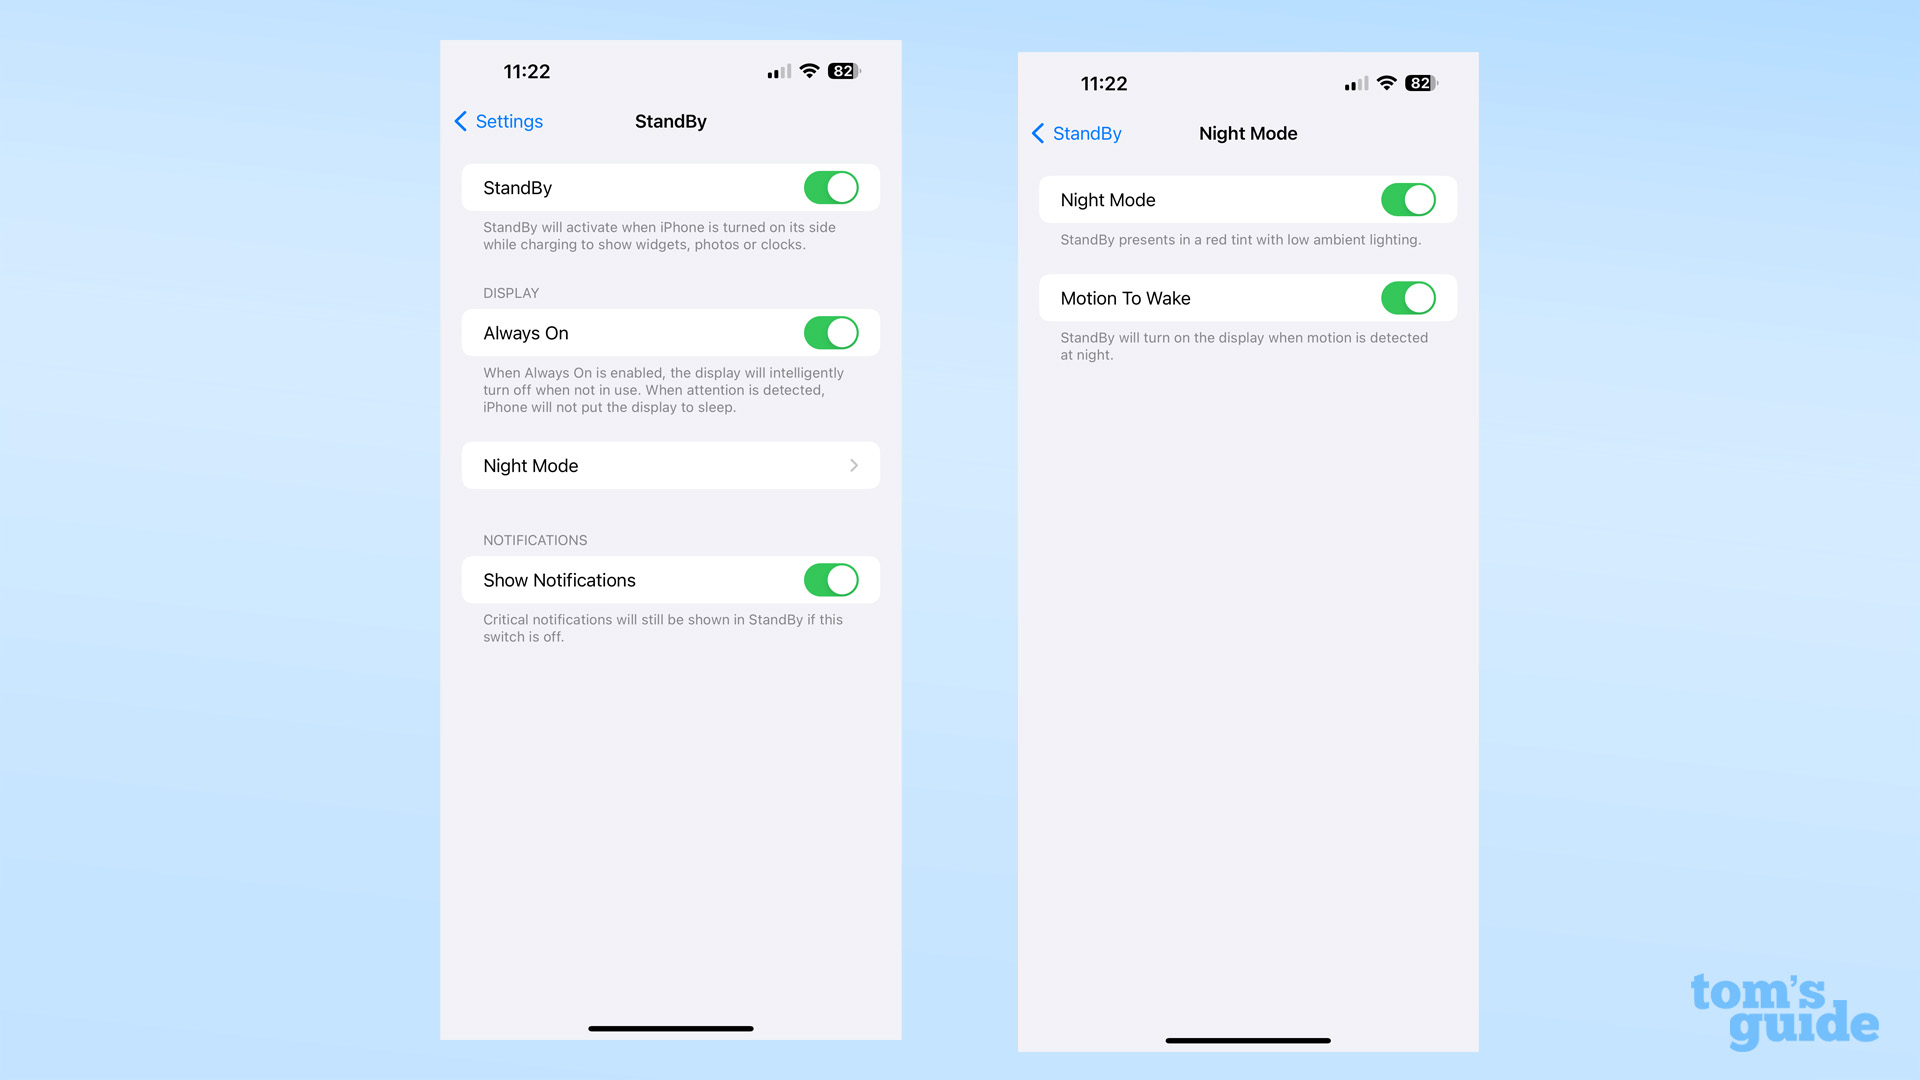
Here's where you can enable or disable StandBy, whether it uses the Always On display (for iPhone 14 Pro and iPhone 15 Pro models), and whether it shows your notifications. Under Night Mode, you can enable red tinting to the display during the night, and an automatic wake-up when motion's detected that will show the main display.
3. With StandBy Mode enabled, swipe left and right or up and down to change what's on the display.
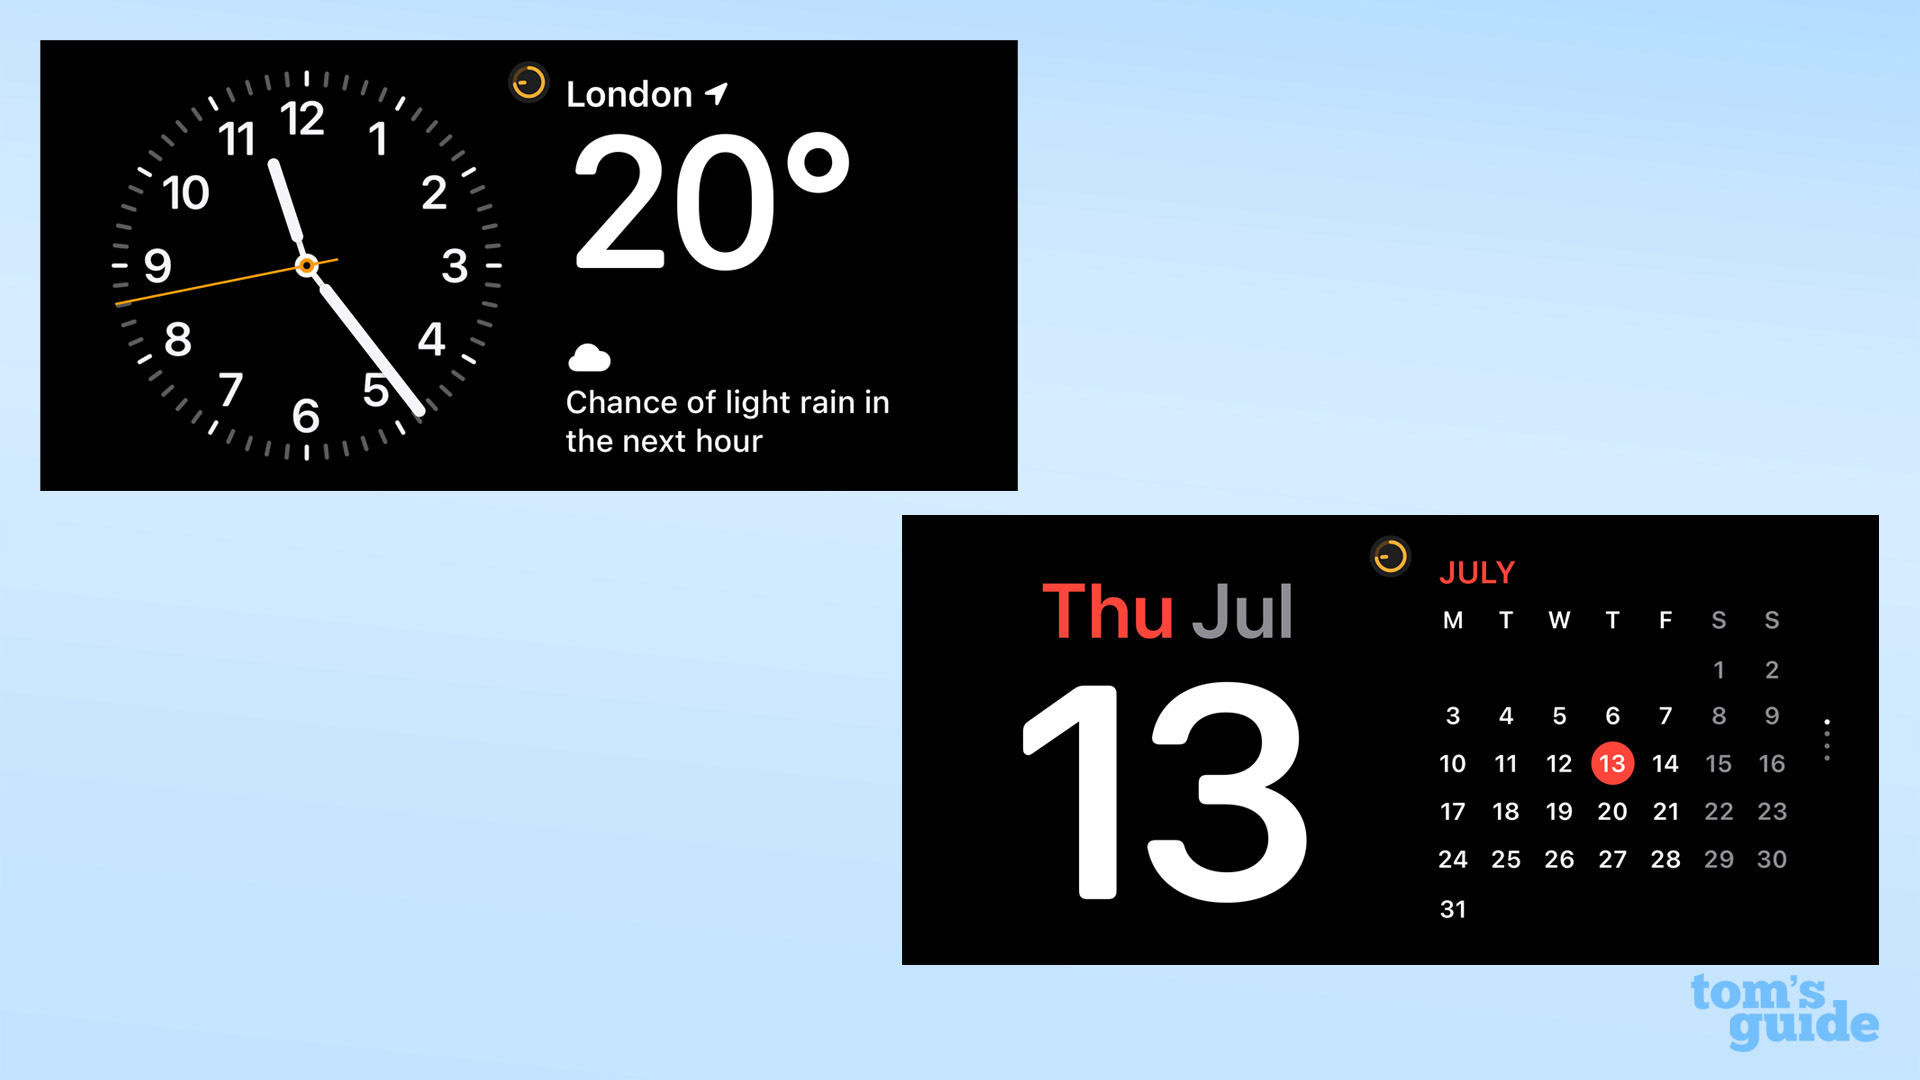
Enable StandBy Mode by charging your iPhone (wired or wirelessly) and turning the display horizontally. From here you can change what's shown on your screen, with the iPhone remembering which screen you used last between StandBy sessions.
In essence, there are three different types of display you can have in StandBy mode, which for lack of official terms we'll call the Widgets, Photo and Clock screens.
The Widgets screen (above) can be found by swiping leftwards from the other screens. It contains two different clock types, as well as a stock tracker and the day and date in its left column, and Weather, Reminders and either a month view or today widget for your Calendar. You can swipe up and down to swap between them to show your preferred widgets, and tap and hold them to change the position and type of widgets on offer from supported apps.
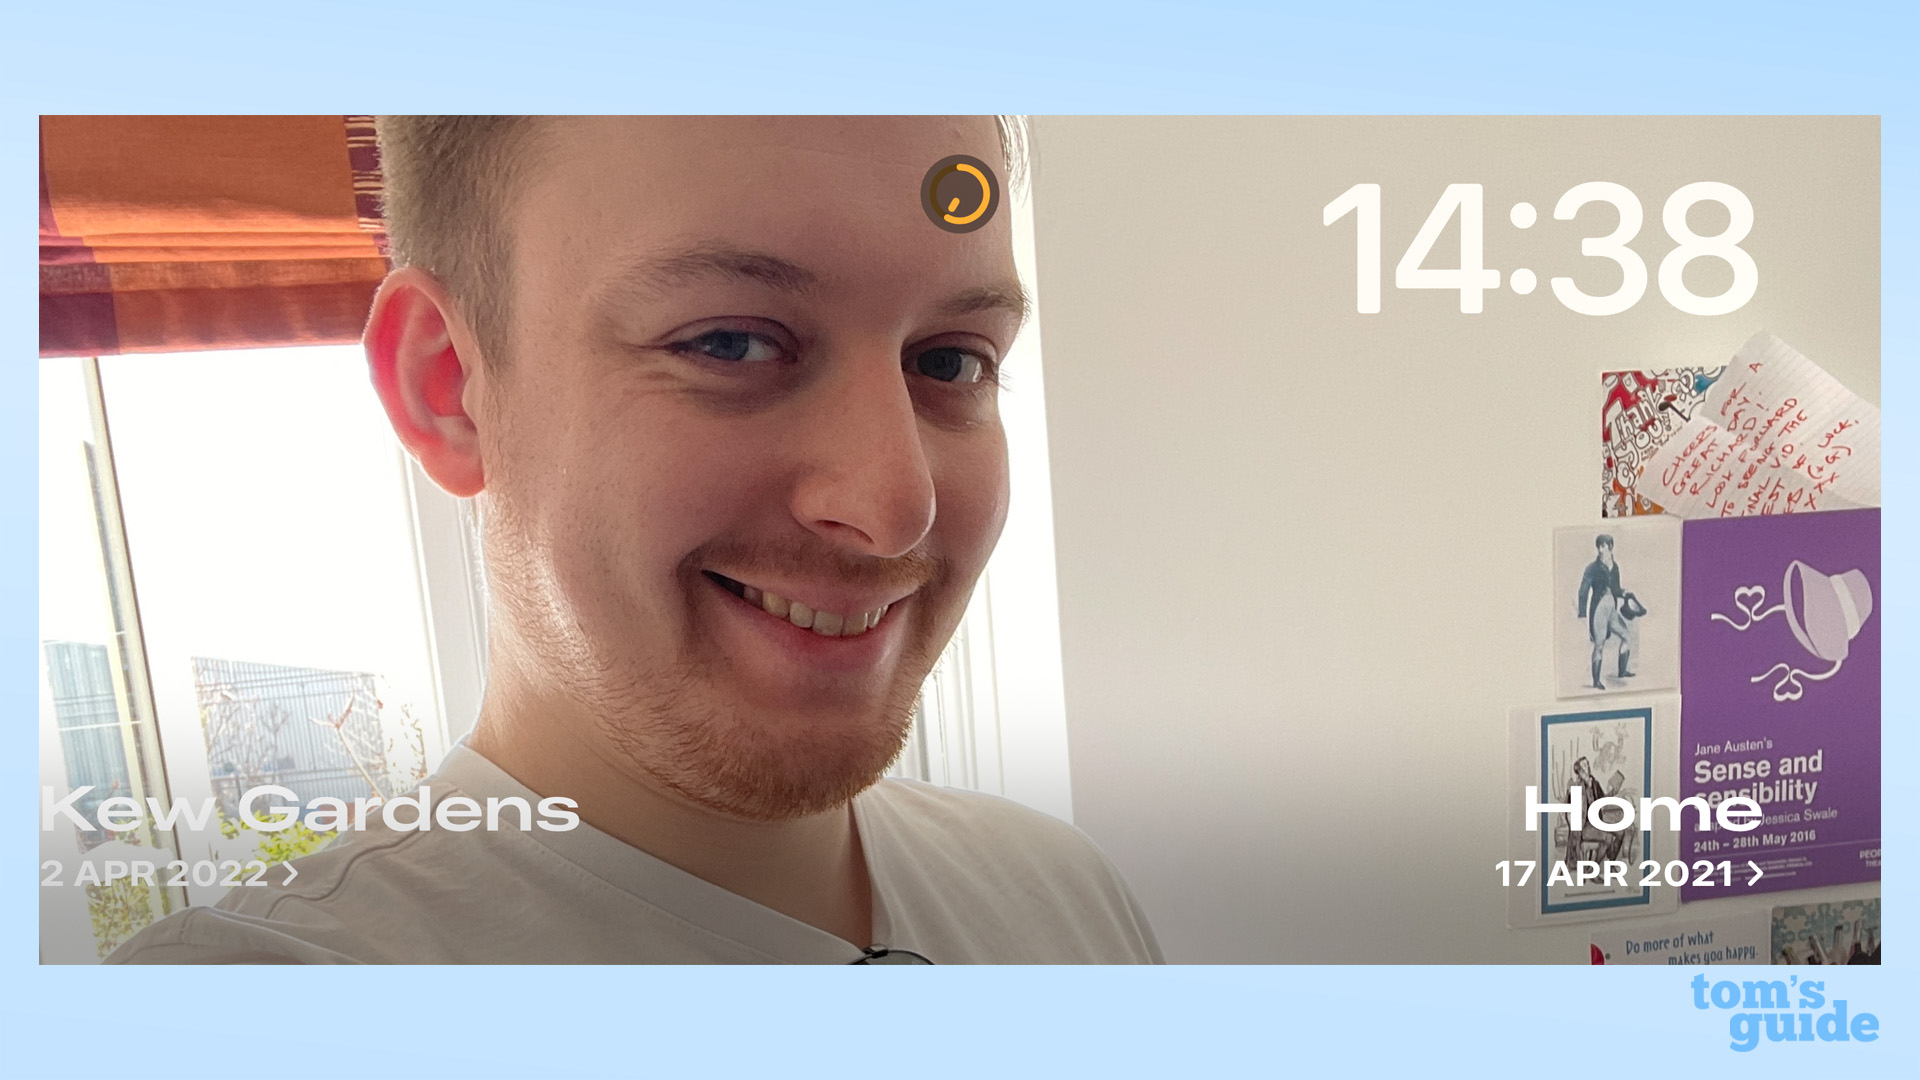
You'll find the Photo screen by swiping to the left from the Clock screen or to the right from the Widgets screen. This automatically shows photos from randomly selected albums in your Photos app, animating and transitioning between them. You can still see the time in this view but it's a lot less prominent.
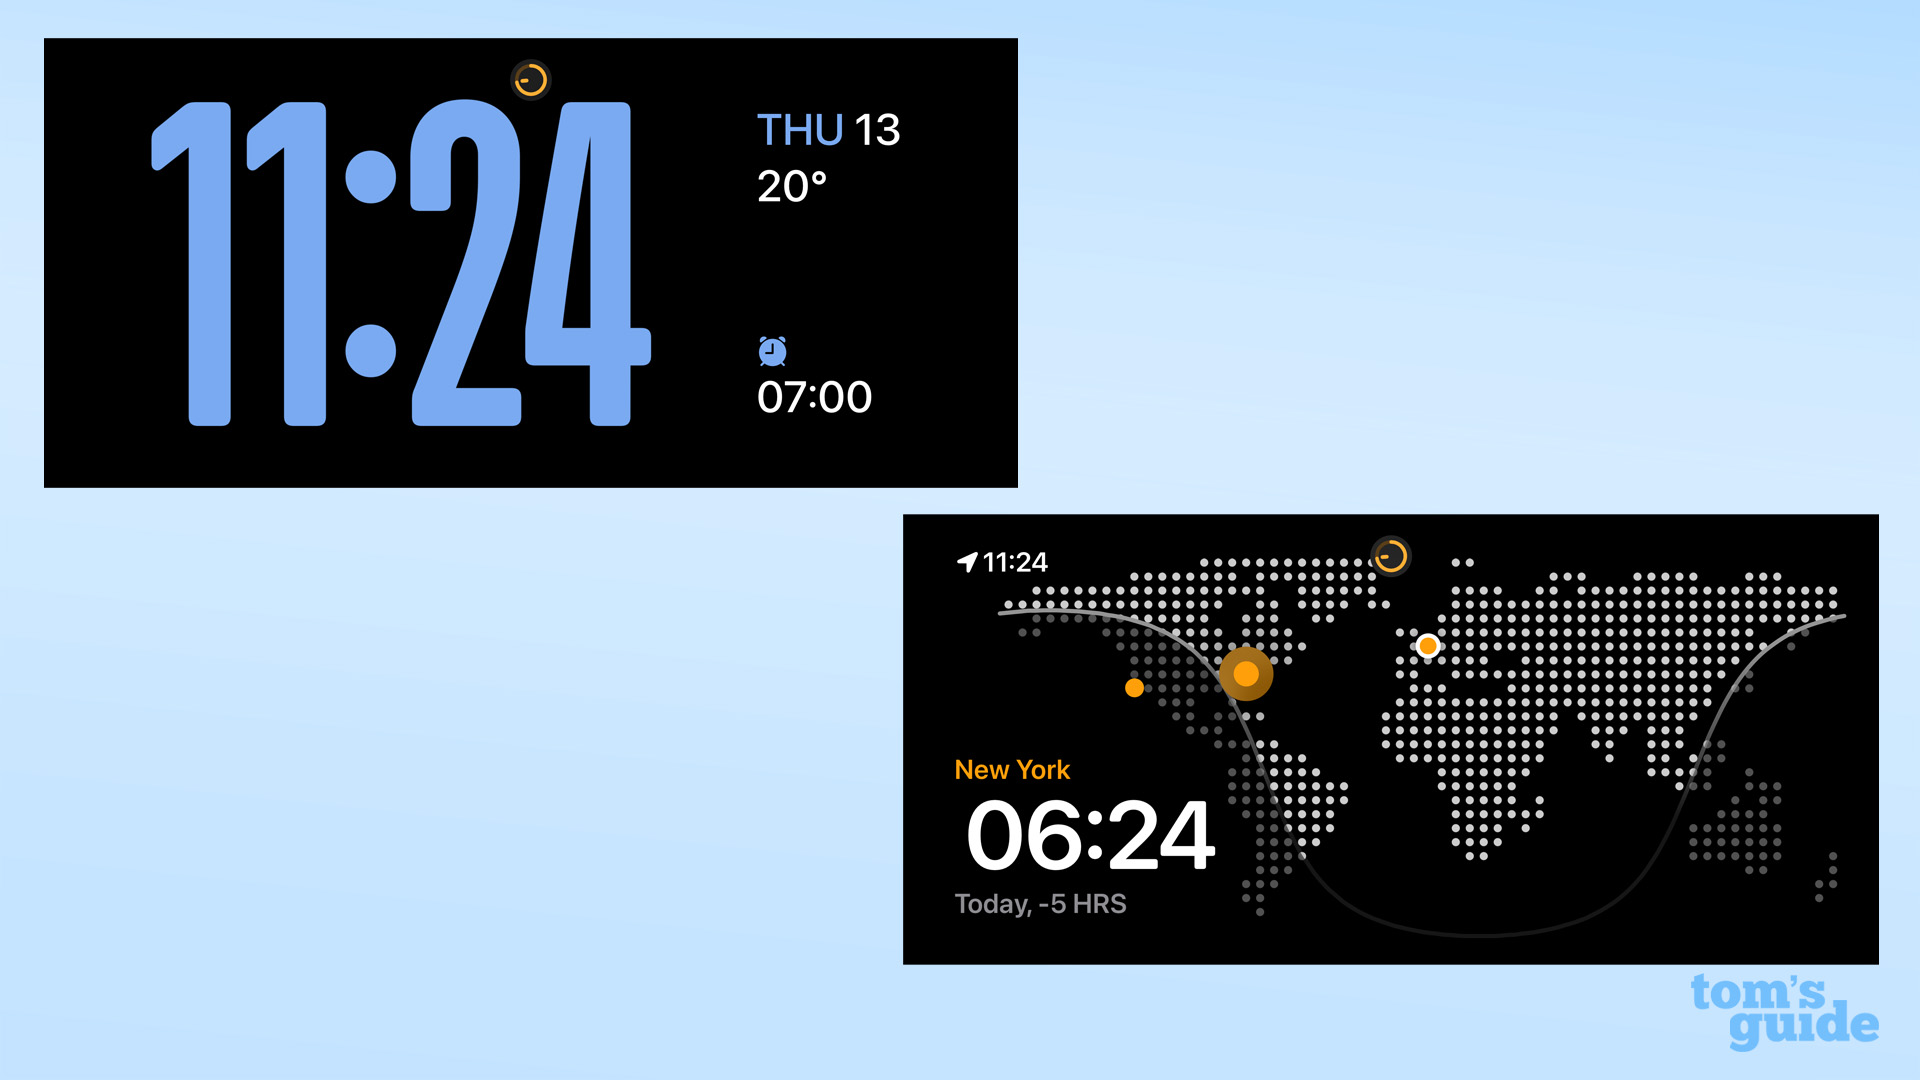
Swipe all the way to the right to get to the Clock screen. You can pick from five different clock types, including ones that display the day and date as well as the time, plus a World Clock which lets you display different times based on locations you added in the Clock app.
Get instant access to breaking news, the hottest reviews, great deals and helpful tips.
If you're looking for some iPhone tips you can make use of right now, then take a look at our guides on how to create and open zip files on iPhone, how to remove the background from a photo on iPhone or how to identify any song on iPhone.
More from Tom's Guide
- iOS 17 public beta is out — here are the 5 features you should try first
- The Zenfone 10 makes me want to ditch the iPhone — here’s why
- Apple patches zero-day bug used in cyberattacks — update your iPhone now

Richard is based in London, covering news, reviews and how-tos for phones, tablets, gaming, and whatever else people need advice on. Following on from his MA in Magazine Journalism at the University of Sheffield, he's also written for WIRED U.K., The Register and Creative Bloq. When not at work, he's likely thinking about how to brew the perfect cup of specialty coffee.
 Club Benefits


