So you’ve bought one of the best Apple Watches, and want to use it to track your daily runs around the park. Whether you’re getting in shape for your first 5K, or doing more serious training for your next half marathon, there are many ways you can elevate your Apple Watch from a smartwatch to one of the best running watches on the market.
Ready to find out more? I’ve rounded up some of the best Apple Watch running tips that will help you get the most out of your watch. They apply to the Apple Watch SE, the Apple Watch Series 8 and the Apple Watch Ultra, as well as any older Apple Watch with watchOS 9 installed.

1. Start by updating and calibrating your Apple Watch
In order to collect the right data on your run, your Apple Watch needs to know a little bit more about who you are. If you’re setting up your watch for the first time, you’ll be asked to input your gender, weight, height, and age, so your watch can accurately calculate calorie burn and distance travelled. Try and be as accurate as possible with your measurements.
If you haven’t set these up, or your information has changed since then, make sure your profile has the correct information. To do this, go to the Watch app on your iPhone or iPad, select the My Watch tab, go to Health, and press Edit on the top to make changes.
You’ll also want to calibrate your running watch to get more accurate data from your runs. Calibrating the watch teaches it about your stride, so if GPS drops out when you’re running around the city, it can make a more accurate guess. If you’ve been using your Apple Watch for runs around your local park for months now, you’re probably fine, but if you’re skeptical about some of the data, Apple recommends re-calibrating it and starting again.
To do this, head to the Watch app on your iPhone, click on the My Watch tab, then Privacy, then Reset Fitness Calibration Data. Then put your Apple Watch on properly (make sure it’s sitting tight against your wrist — if it’s too loose, the data won’t be accurate), and head for a 20-minute run, in a flat area that you know has good GPS reception. Make sure you record the run using the Outdoor Run activity profile on the watch, not a third-party running app.
2. Build your own running workouts
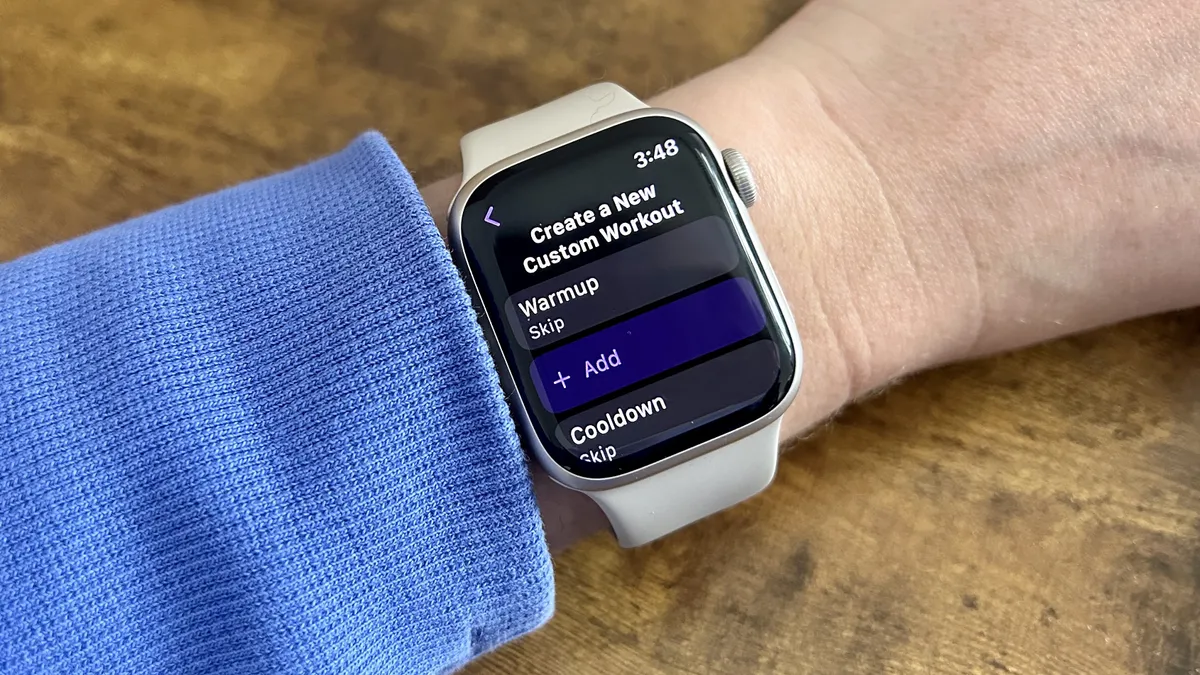
A new watchOS 9 feature every runner should know about? Custom workouts. You can now set up a custom workout from your Apple Watch. Apple has some running workouts already pre-loaded, but if you’re following a training plan, you can now create your own workouts by doing the following:
- Open the workout app on your Apple Watch
- Click on the three dots in the upper right corner
- Use the digital crown to scroll down to the bottom, then select Create Workout
- Tap Custom, then create your workout. This is where you can build the workout, including a warm-up, work and recovery intervals, then a cooldown.
- For each section of the workout, your goal can be Time, Distance, or Open.
- You can also add alerts to Custom Workouts, for example, if you have a pace goal, you can select an alert to tell you when you’ve dropped out of your target pace. To do this, tap into the custom workout section, and scroll down to Alert. For pace, there’s the option to set a target pace, or a target range.
3. Customize your data screens
Another fantastic watchOS 9 update was the option to use the digital crown mid-run to scroll through different data screens and to customize the data you see on the run. You can now keep an eye on your heart rate (more on that below), and see your split data on the watch, rather than relying on Apple’s rolling mile pace. You can also hide metrics you’re not interested in — I never exercise for calories, so hide this data from my strength workout screen.
Here’s how to change what you see on the run:
- Enter the Workout App
- Select the Outdoor Run setting (you can also tweak the data screens for your indoor runs), then tap the three dots.
- On the Open option, click on the pencil editing tool in the upper right corner.
- Click Workout Views
- Click Edit Views
- Clicking on the Pencil on each Metrics screen allows you to change the data displayed on each.
- You can also toggle Metrics screens on and off from here — for example, if you’re not interested in checking your Elevation or Power from your wrist, you can click on the Include slider to remove them from your scroll-down options mid-run.
There are a number of performance-based metrics you can add to this screen like cadence, stride length, ground contact time and vertical oscillation. If all this is a bit much from your wrist, you can also view these afterward — more on that below.
4. Turn Auto Pause on
Another key feature to turn on if you’re using your Apple Watch in the city — Auto Pause. If you find you spend a lot of time waiting at stoplights to get to your local park, it can get exhausting trying to press the Digital Crown and side button at the same time. It can also really mess up your data if your watch keeps ticking while you’re waiting to cross the street.
To turn auto-pause on, head to your Watch app on your iPhone, then My Watch, then select the Workout option. You can turn Auto Pause on for Running and Outdoor Cycling, and your watch will automatically pause your workout when it detects a change in pace, then re-start it once you get moving again.
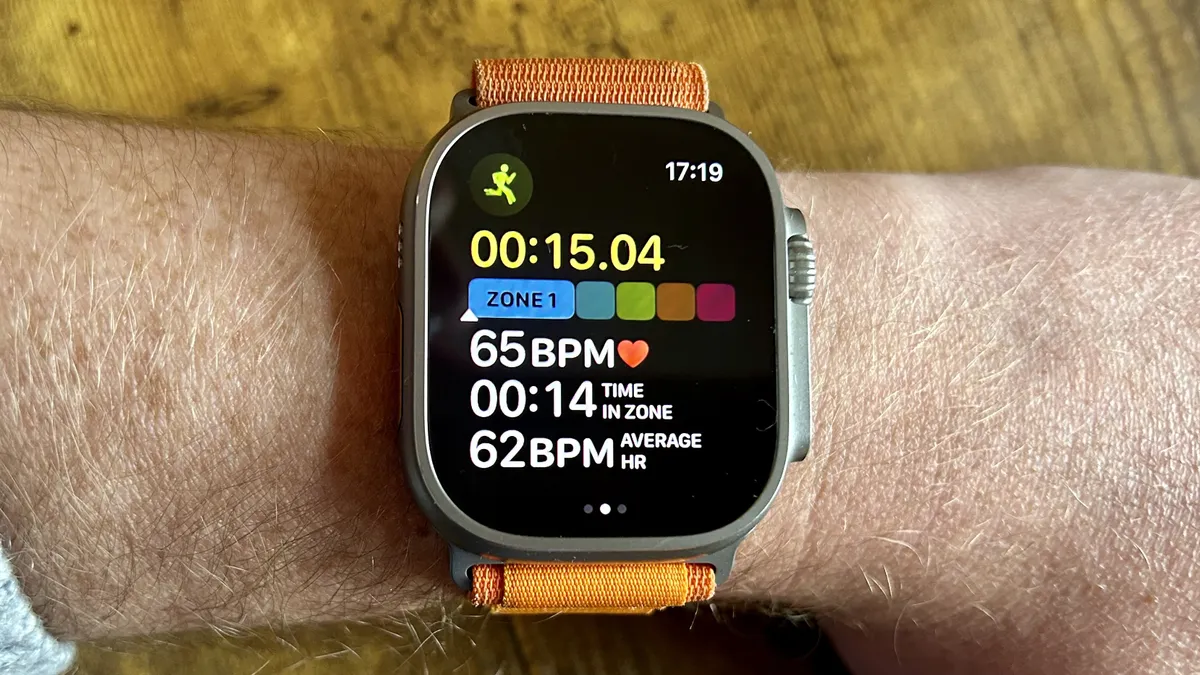
5. Use heart rate zones
A lot of runners train to heart rate, and now it’s easier to see which heart rate zone you’re in when you're running with the Apple Watch. The zones can be added manually, or automatically calculated using Health data and used to monitor the intensity of a workout. To view your heart rate zones when running, simply use the Digital Crown once you’re in a run to scroll down and see the heart rate screen. Your Apple Watch will show you what zone you’re in, how long you’ve been running in the zone, and your average heart rate.
If you’ve just switched from one of the best Garmins, or you think your heart rate zones are a little out, open the Settings app on your Apple Watch, then go to Workout, then Heart Rate Zones. From here tap Manual, then tap zone 2, 3, or 4 and enter new upper and lower limits. You can also do this from the Heart Rate tab on your Watch app on your iPhone.
6. Race yourself
Another cool feature on the Apple Watch is the ability to race against yourself. After you’ve completed the same route two or more times (because us runners are creatures of habit, right?), you can click on the Race Route option. Here’s how:
- Open the Workout app
- Scroll to Outdoor Run
- Tap the More button, or the three dots in the upper right corner
- Tap the Route you wish to race against, then select Last or Personal Best.
As you complete the run, you’ll be able to see how you’re doing against past you, as well as seeing how far behind or ahead you are, and how long you have left in the run.
If you don’t quite know the route by heart yet, you’ll also get ‘Off Route’ notifications if you run off course.
7. Silence that Group WhatsApp on the run
One of the best things about wearing an Apple Watch on your wrist is that it’s an extension of your iPhone, but when you’re trying to switch-off and get lost in a podcast, that group chat can really get on your nerves mid-run.
One easy fix is to set up a ‘Focus for Fitness’ profile on your iPhone. When this is switched on, you can decide exactly what you want to see, or not see, while you’re running. Here’s how to set it up:
- Go to Settings, then Focus on your iPhone.
- If you don’t see a Fitness option, click on the plus tab in the upper right corner.
- From here, you can allow notifications from select individuals and apps — all others will be silenced.

You can also set this up on your Apple Watch itself:
- Go to Settings
- Then Focus
- Toggle on ‘When starting a workout’
All calls and messages will be silenced until you have completed your workout.
Personally, I prefer tweaking things from my iPhone, because I like to know I’d still see my Mom or partner were calling in an emergency, but either way, it’s a neat way to keep your focus on the run.
8. Set up reminders to record your run
There’s no doubt about it — runners are a data-driven bunch, and there’s nothing worse than forgetting to start your workout. As the saying goes, if it’s not on Strava, it didn’t happen, right? Luckily, your Apple Watch will sense when you’re working out, and notify you if it thinks you’ve forgotten to start recording.
To make sure this setting is turned on, head to Settings on your Apple Watch, then Workout, then make sure ‘Start Workout Reminder’ is toggled on. There’s also ‘End Workout Reminders’, for those of us who often forget to stop our watches when we get back in the front door!
9. Turn low power mode on
If you’re marathon training with your Apple Watch, you’re probably going to want to use the Power Saving Mode mode, which extends the battery life of the watch. Power Saving Mode mode disables the always-on display, and you can choose to automatically turn it on every time you use the workout mode on the watch if you are worried about your watch running out of charge.
This is different from the Power Reserve mode you can switch on when your Apple Watch is down to less than 10% of the battery.
To activate Power Saving Mode from the Apple Watch, go to Settings, then General, then Workout, and toggle Power Saving Mode option on.
There is a downside to this — the Power Saving Mode shuts off the heart rate sensor, so you won’t get heart rate data unless you’re wearing a Bluetooth-enabled chest strap that’s been paired to the Watch. You’ll still get an accurate read of how far, and fast you’ve run, however.
10. View advanced training metrics when you’re finished

Last, but by no means least, the Apple Watch gives you a hell of a lot of data to crunch once you’ve kicked your best running shoes off and done a cooldown stretch. As mentioned above, you can choose to see your power, cadence, stride length, ground contact time and vertical oscillation from your wrist should you wish.
That said, unless you’re really dialing into your form, I’d argue none of these metrics are all too useful on the run but are interesting to look back on afterward. Your cadence, for example, is one of the easiest ways to check in on your running form — runners who overstride are more likely to get injured. Runners with a shorter, quicker stride are more likely to run faster. If you’re a beginner, these aren’t worth getting too hung up on, but if you’re training for a marathon PR, it’s good data.
Once a run is uploaded, click on the Show More option next to the Workout Details in the iPhone Fitness app, where you will be able to see the data. At the bottom of the page, there’s the option to reorder the metrics.
More from Tom's Guide