Use Safety Check to instantly wipe toxic apps (and people) from your iPhone
Know how to use Safety Check on iPhone and immediately guard against privacy threats

Knowing how to use Safety Check on iPhone can offer peace of mind, barring people (and apps) we no longer trust, or perhaps never trusted, access to the most sensitive information stored on your iOS device.
The Safety Check feature was introduced with iOS 16 and allows anyone who believes their personal safety is at risk to immediately review what information is shared with people and/or apps. In more pressing situations, it also allows users to perform an emergency reset. This feature immediately removes sharing access for all people and apps, and offers a rapid process for resetting account credentials, such as your Apple ID password.
While it won't solve every emergency out there, it's nice to know that Apple are conscious of the potential even the best phones have for nefarious purposes, and that they're taking steps to address safety concerns.
As you'd expect from a feature designed to be used in pressing situations, Safety Check is easy to find and use. You can use the feature to perform an emergency reset or to manage your sharing settings in one go. We'll show you how to do both.
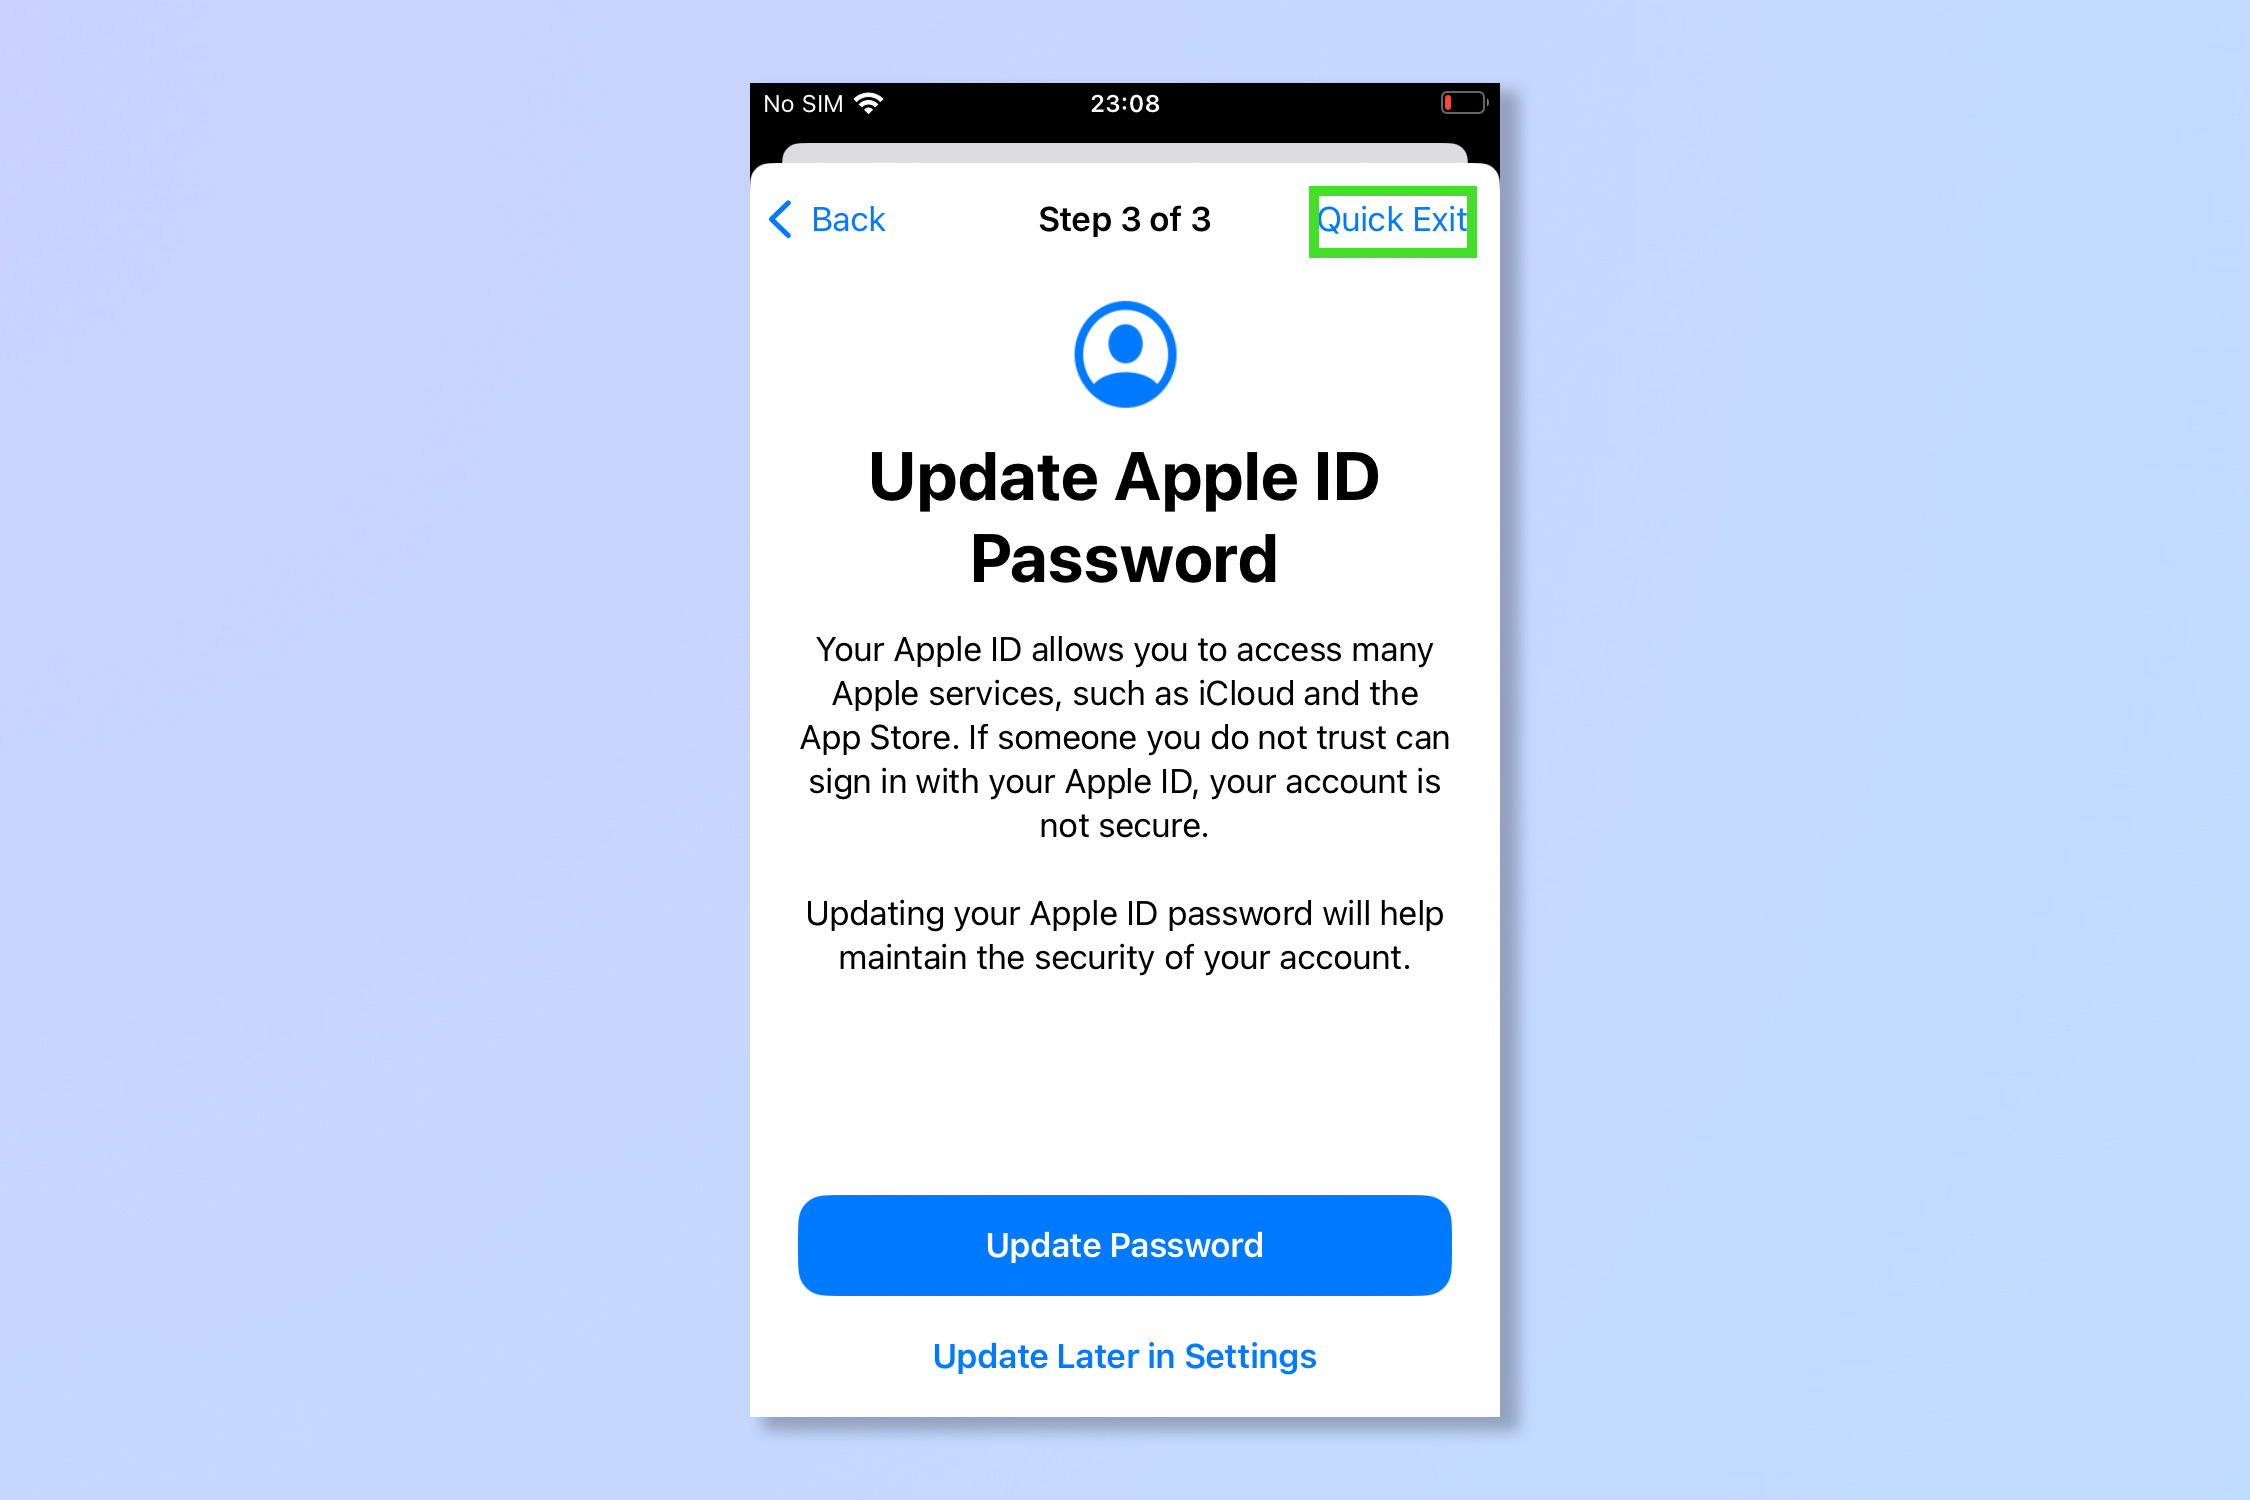
Note: If you are worried about someone catching you changing their permissions and access to your information, the Safety Check feature has an instantaneous exit feature constantly available. Simply tap Quick Exit in the upper right corner to be taken straight back to the Home Screen.
How to use Safety Check on iPhone to conduct an emergency reset
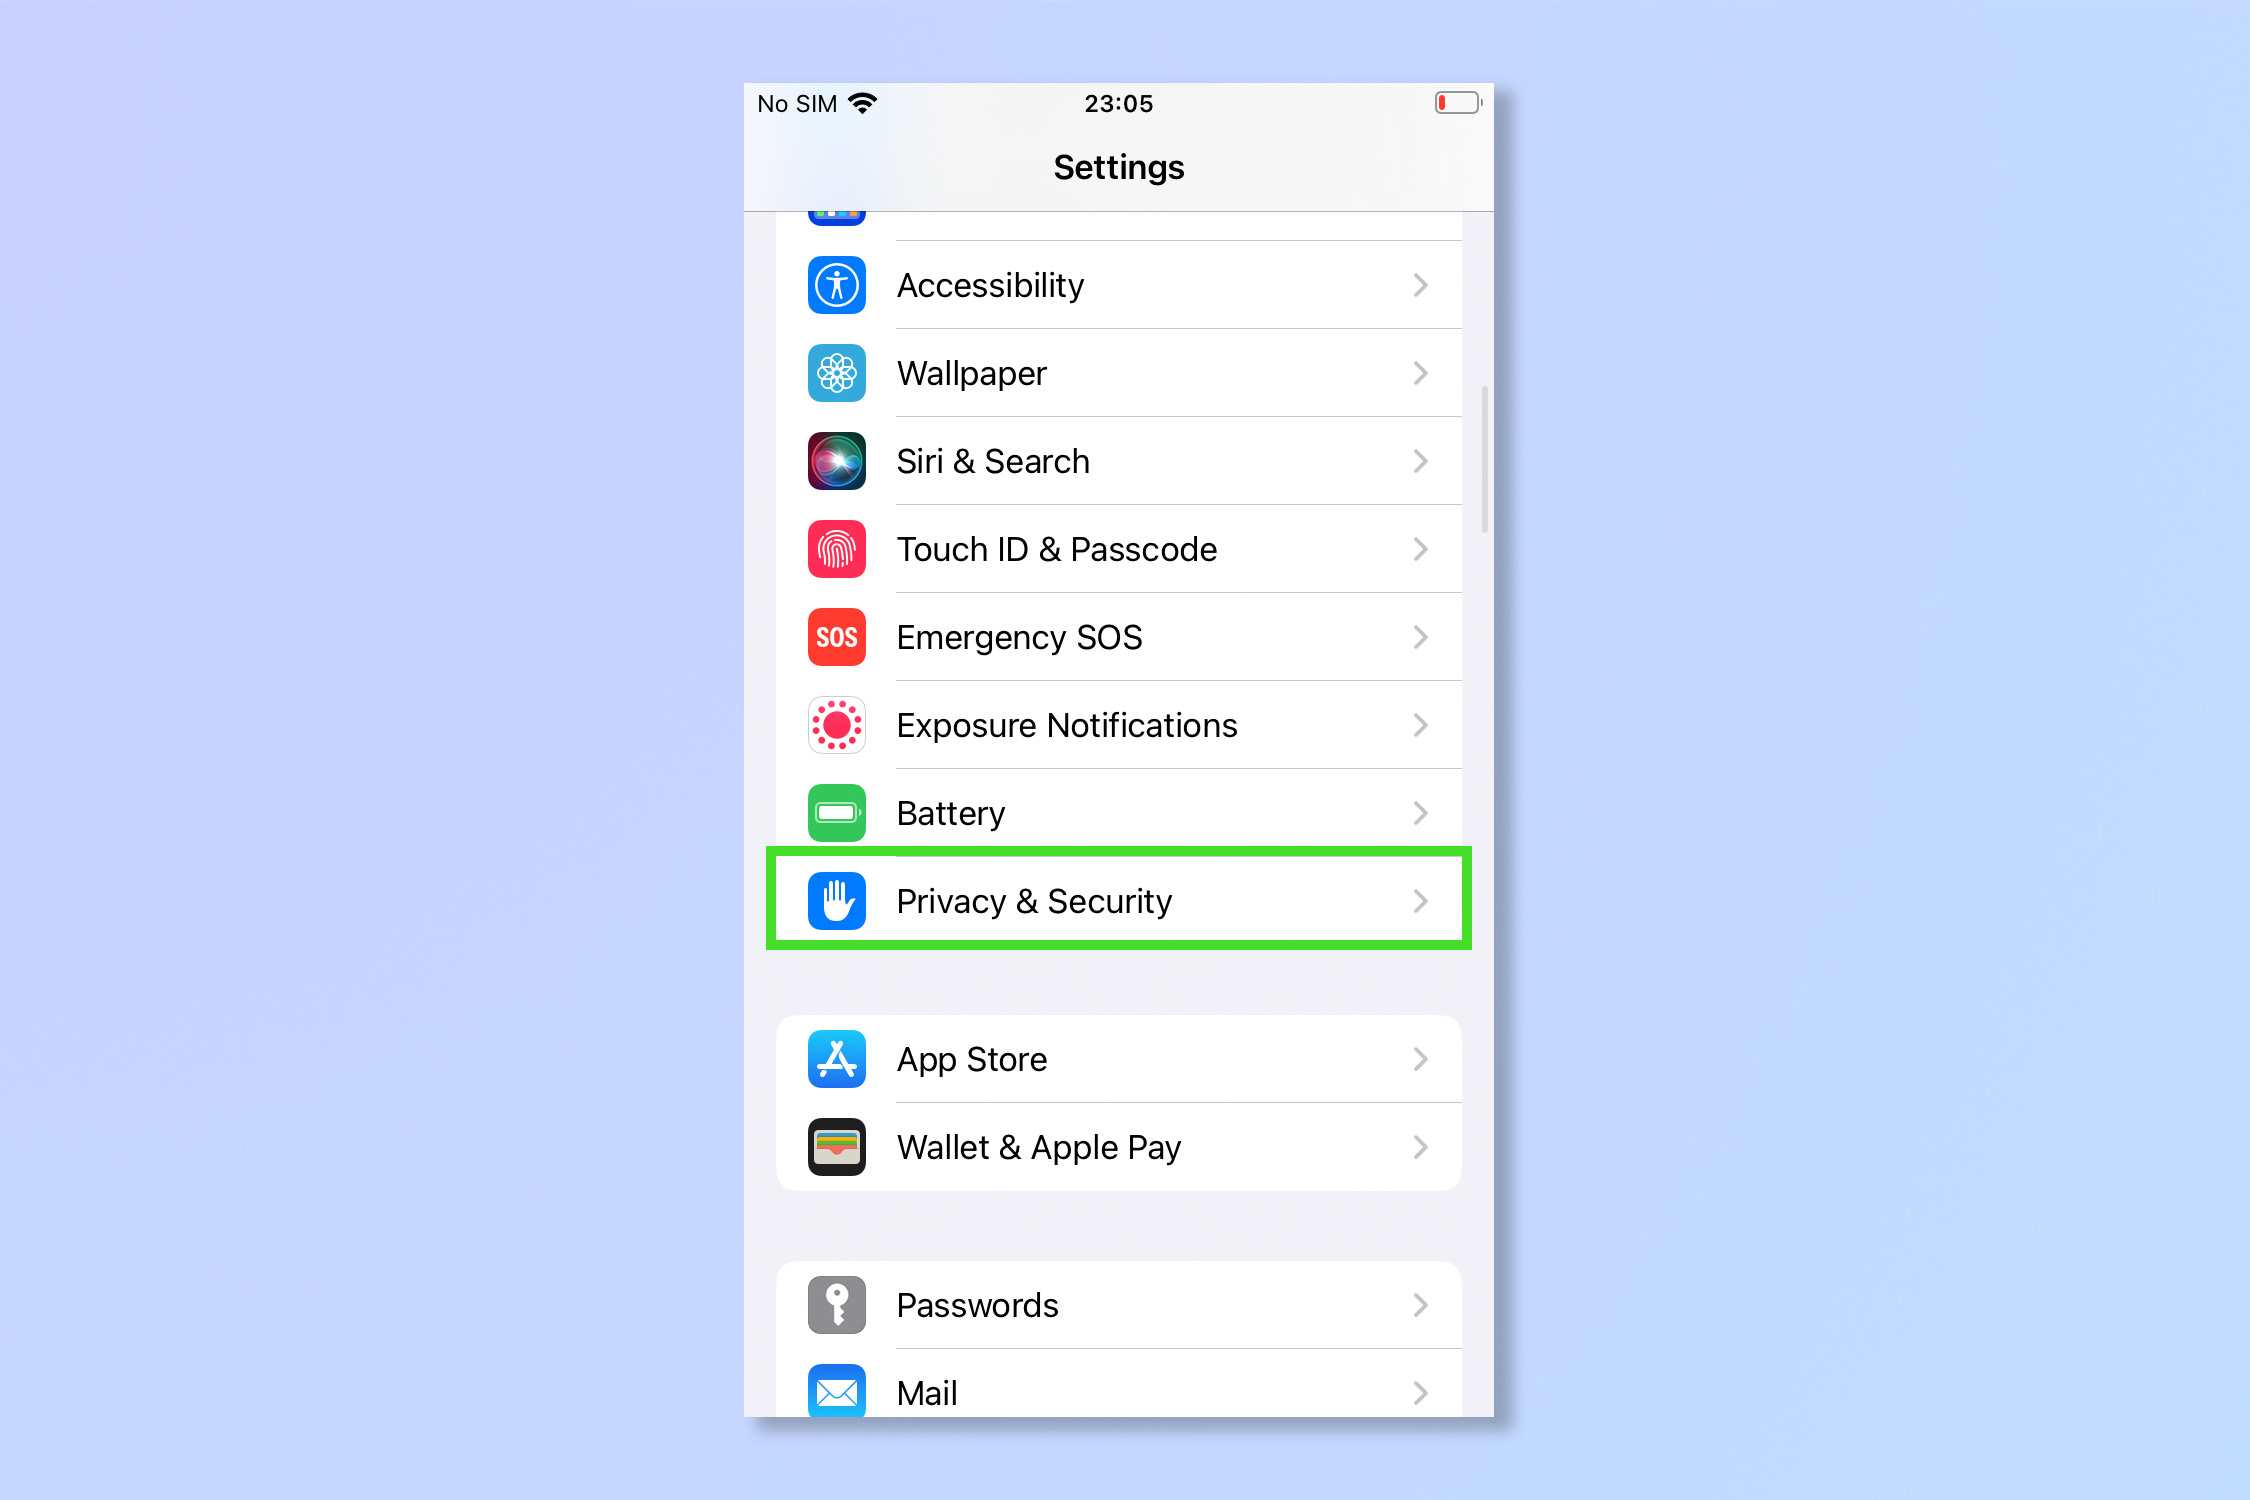
1. Open the Settings app and tap Privacy & Security.
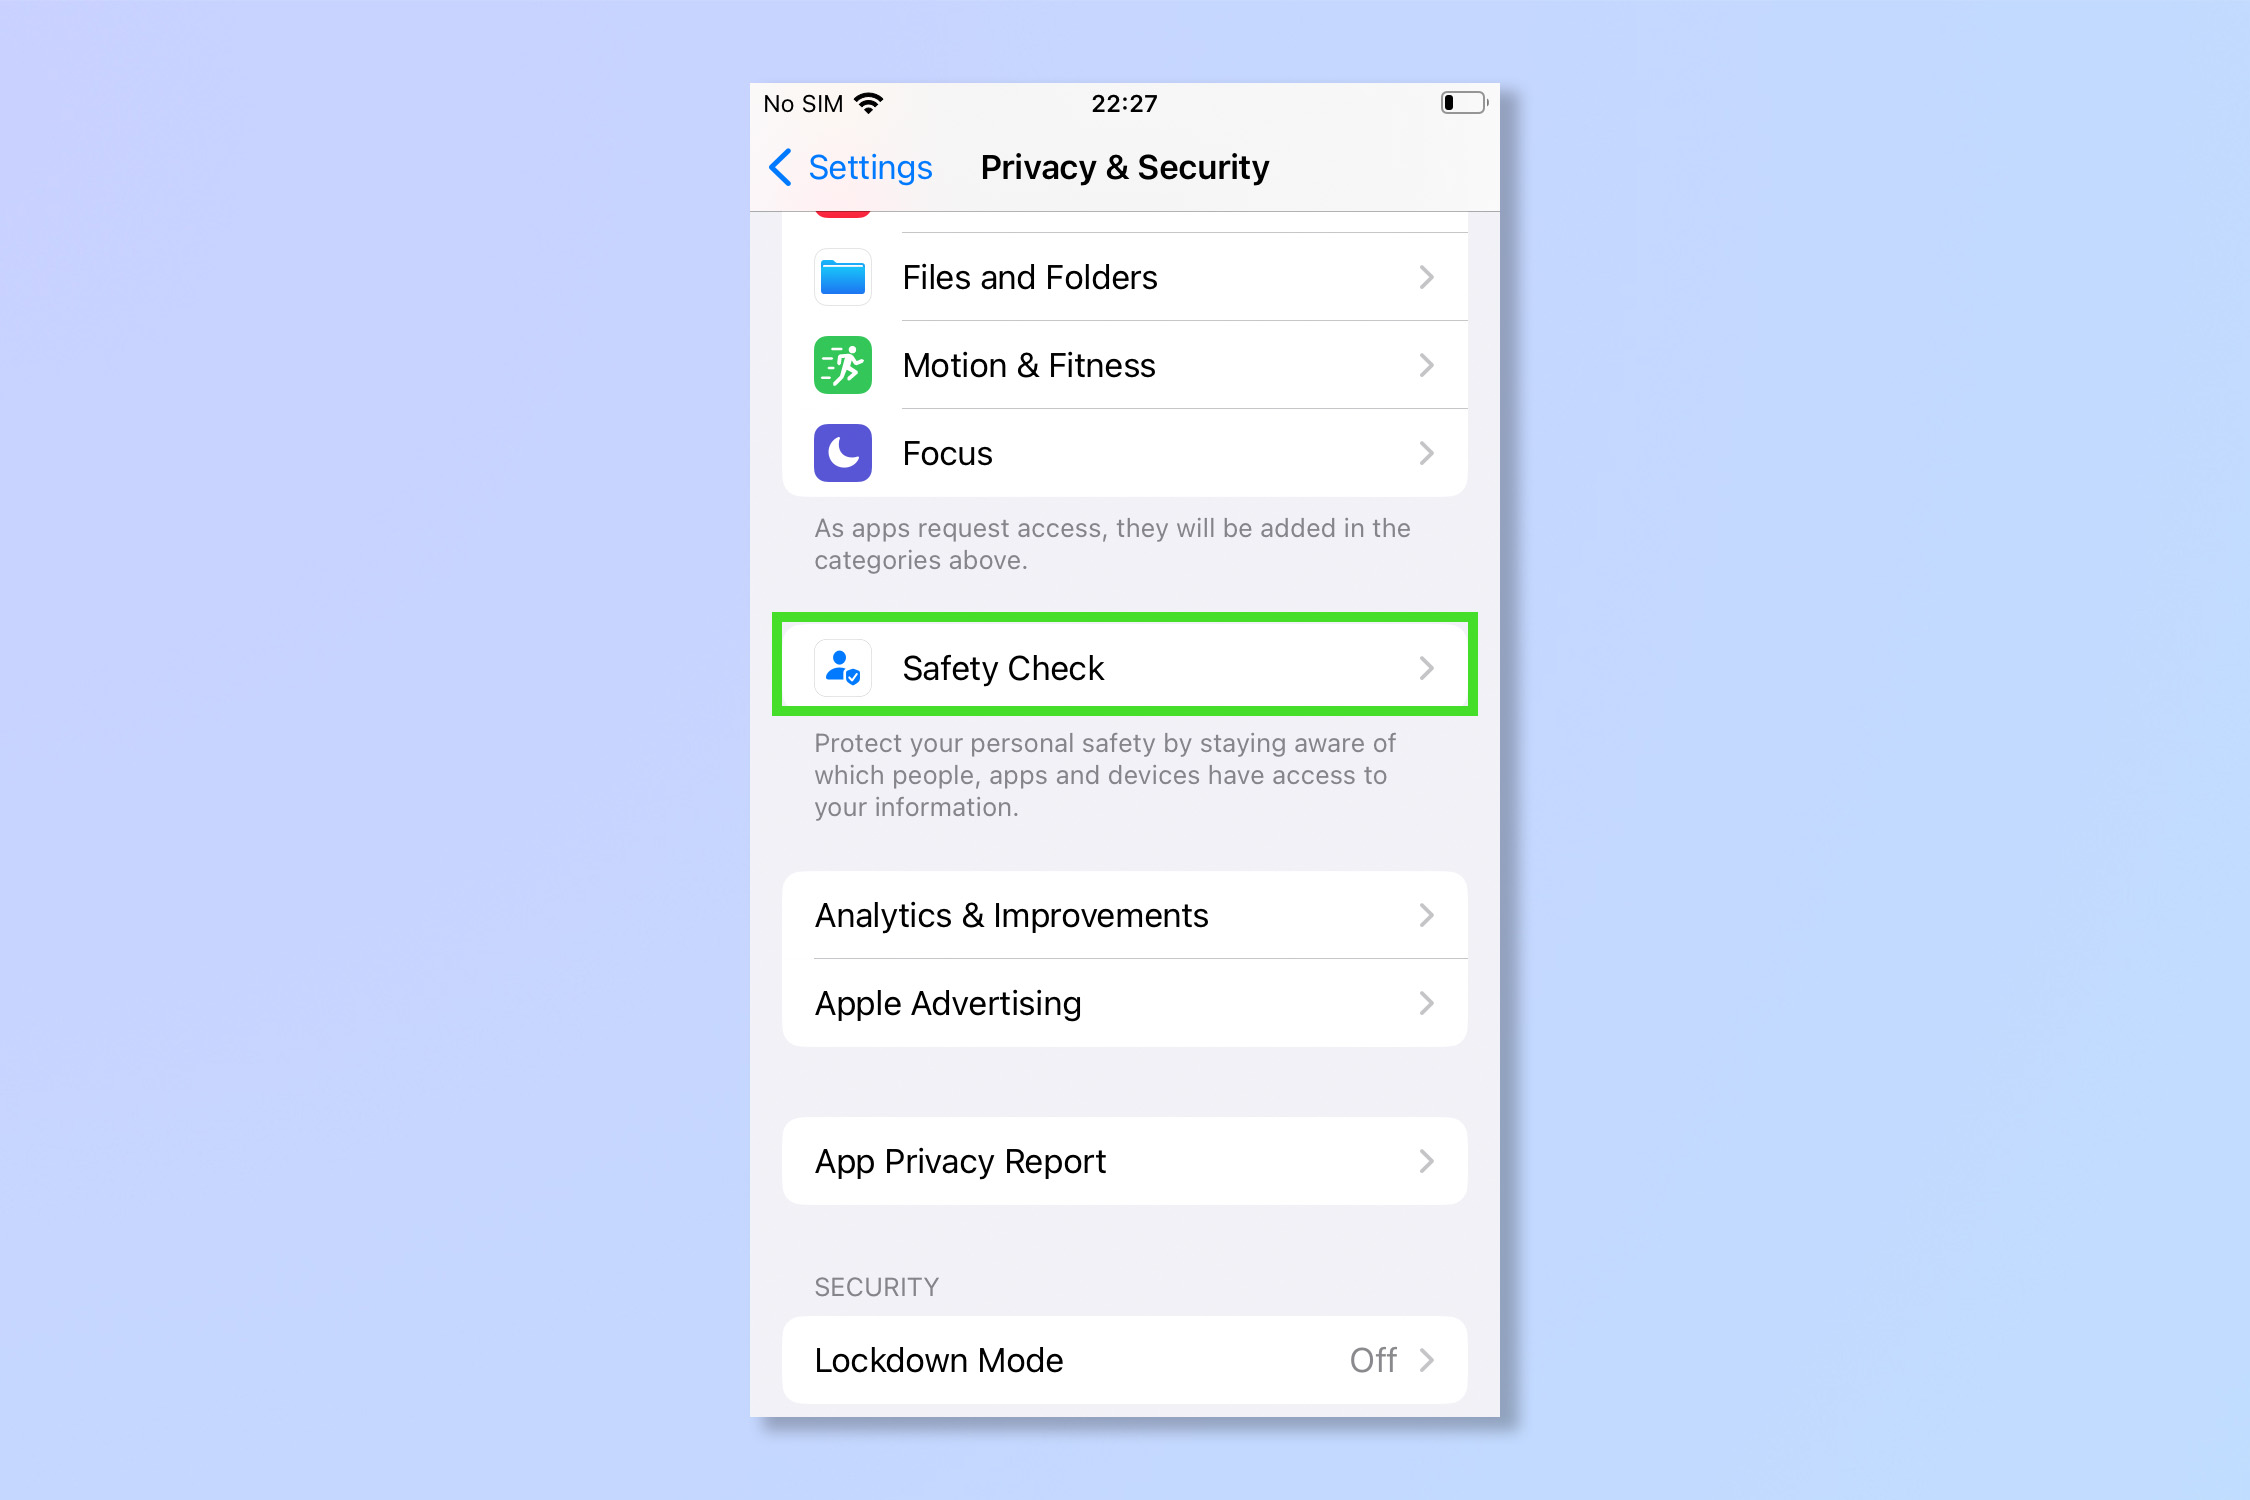
2. Tap Safety Check.
Get instant access to breaking news, the hottest reviews, great deals and helpful tips.
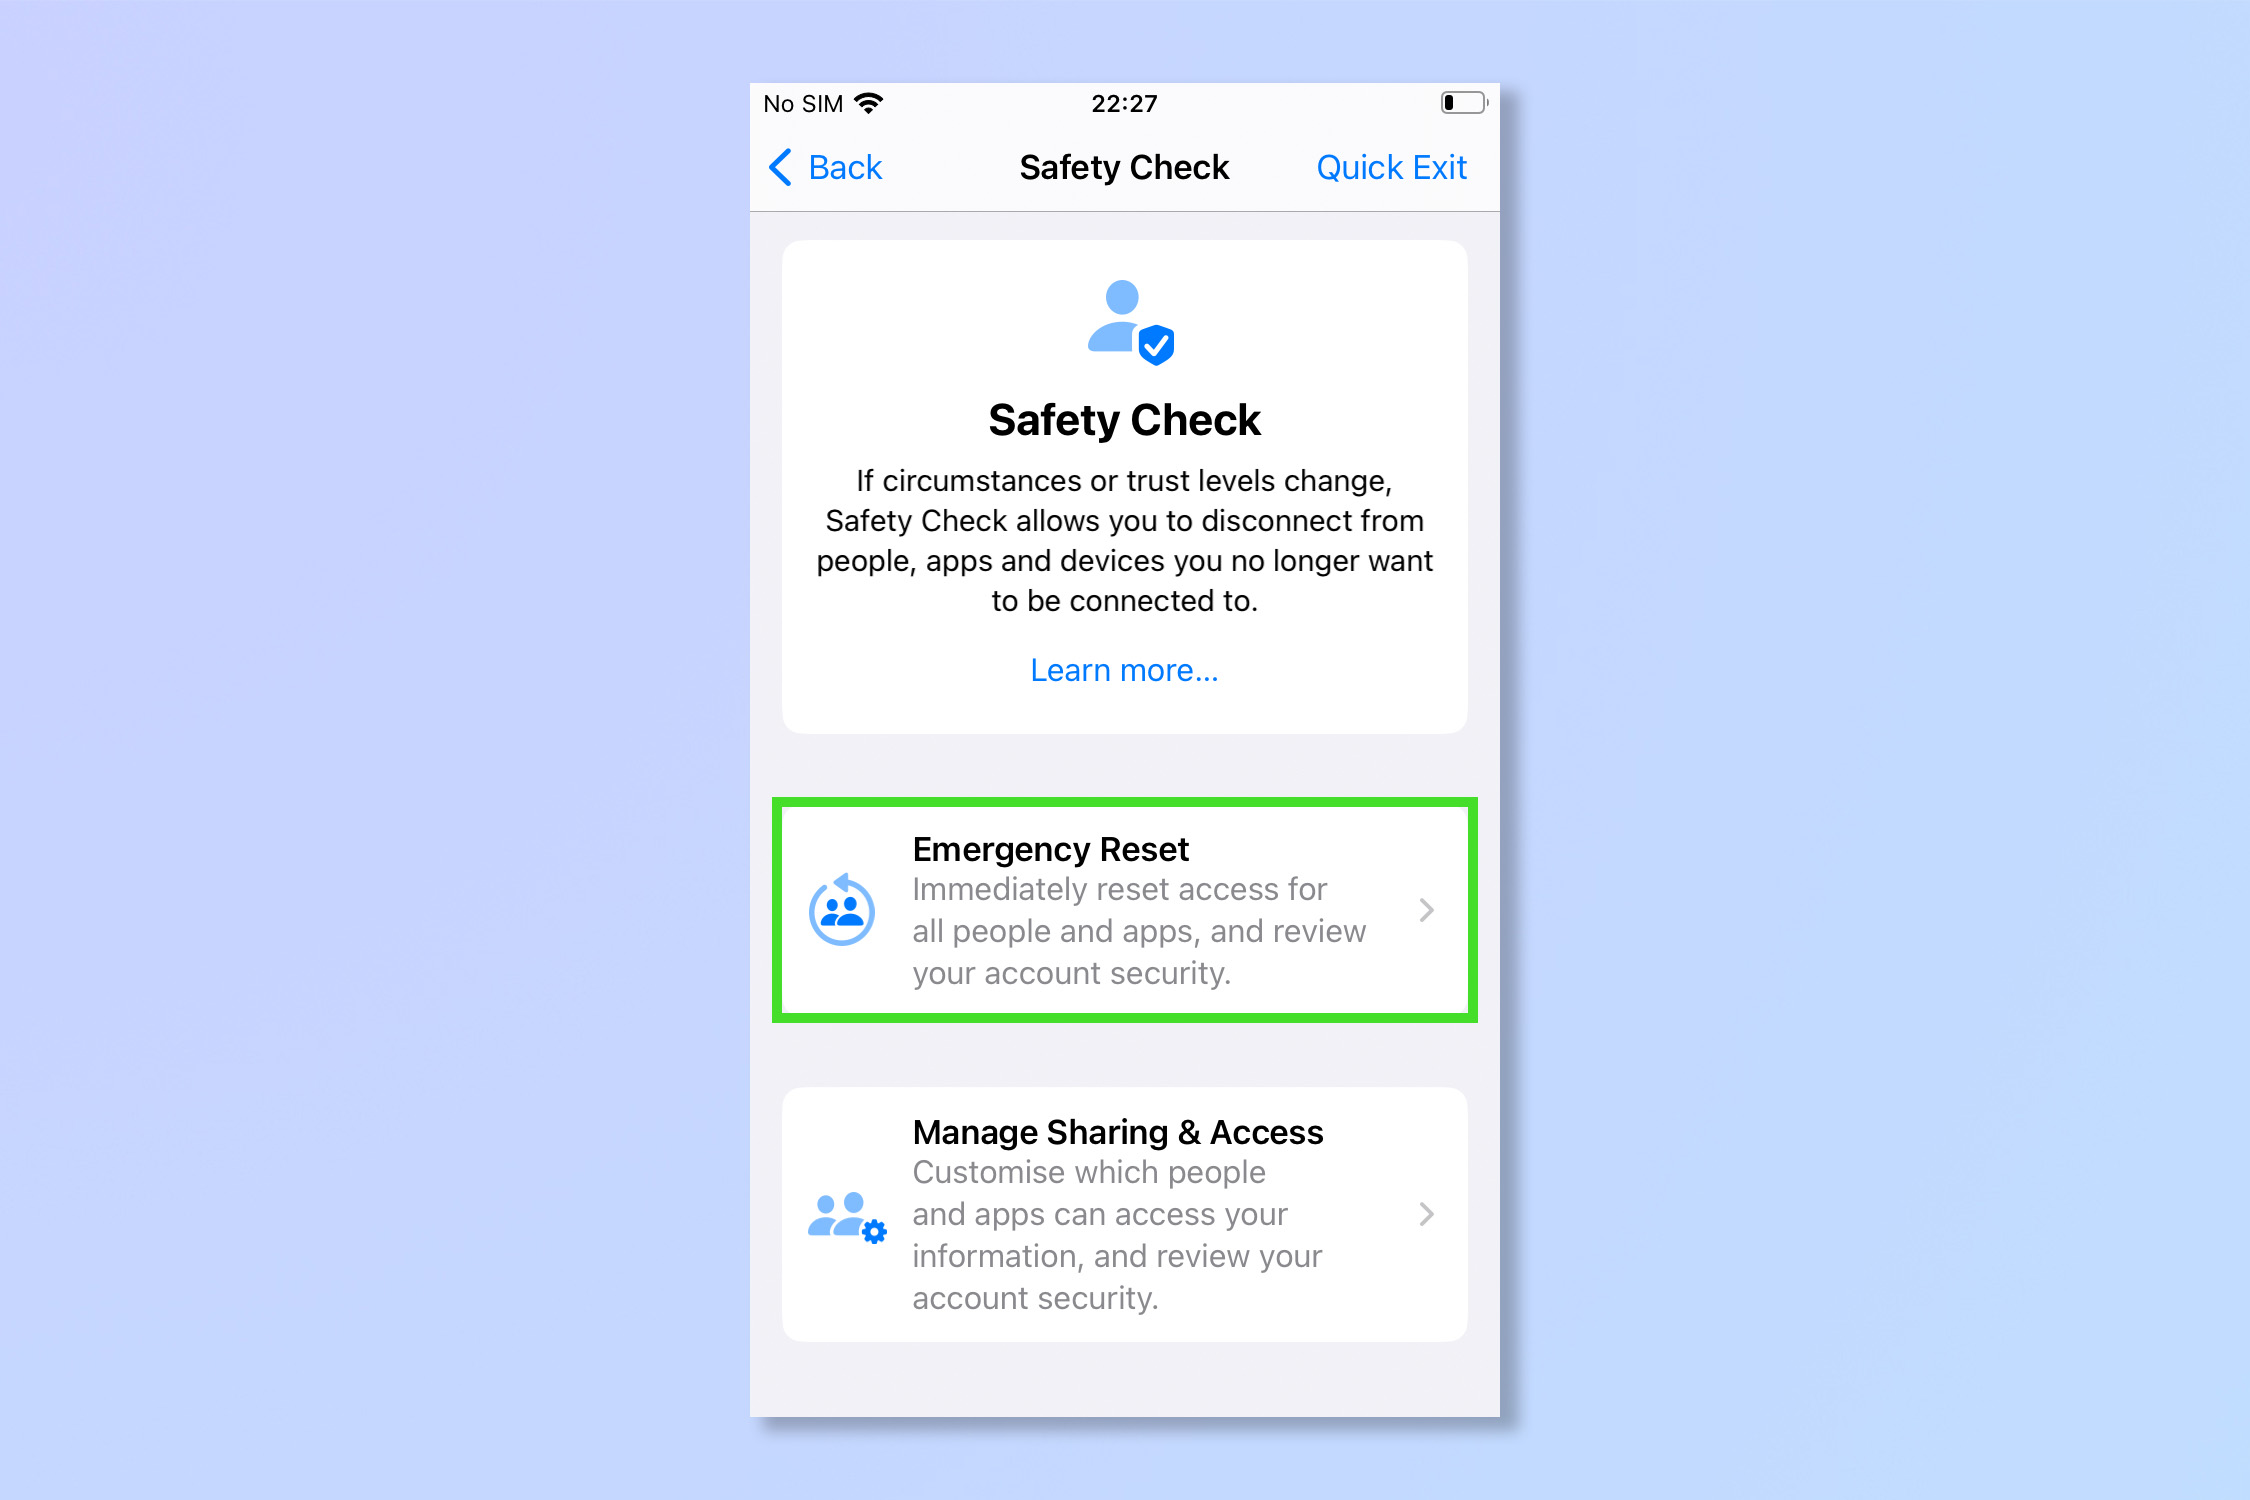
3. To begin removing permissions and shared information in their entirety, tap Emergency Reset.
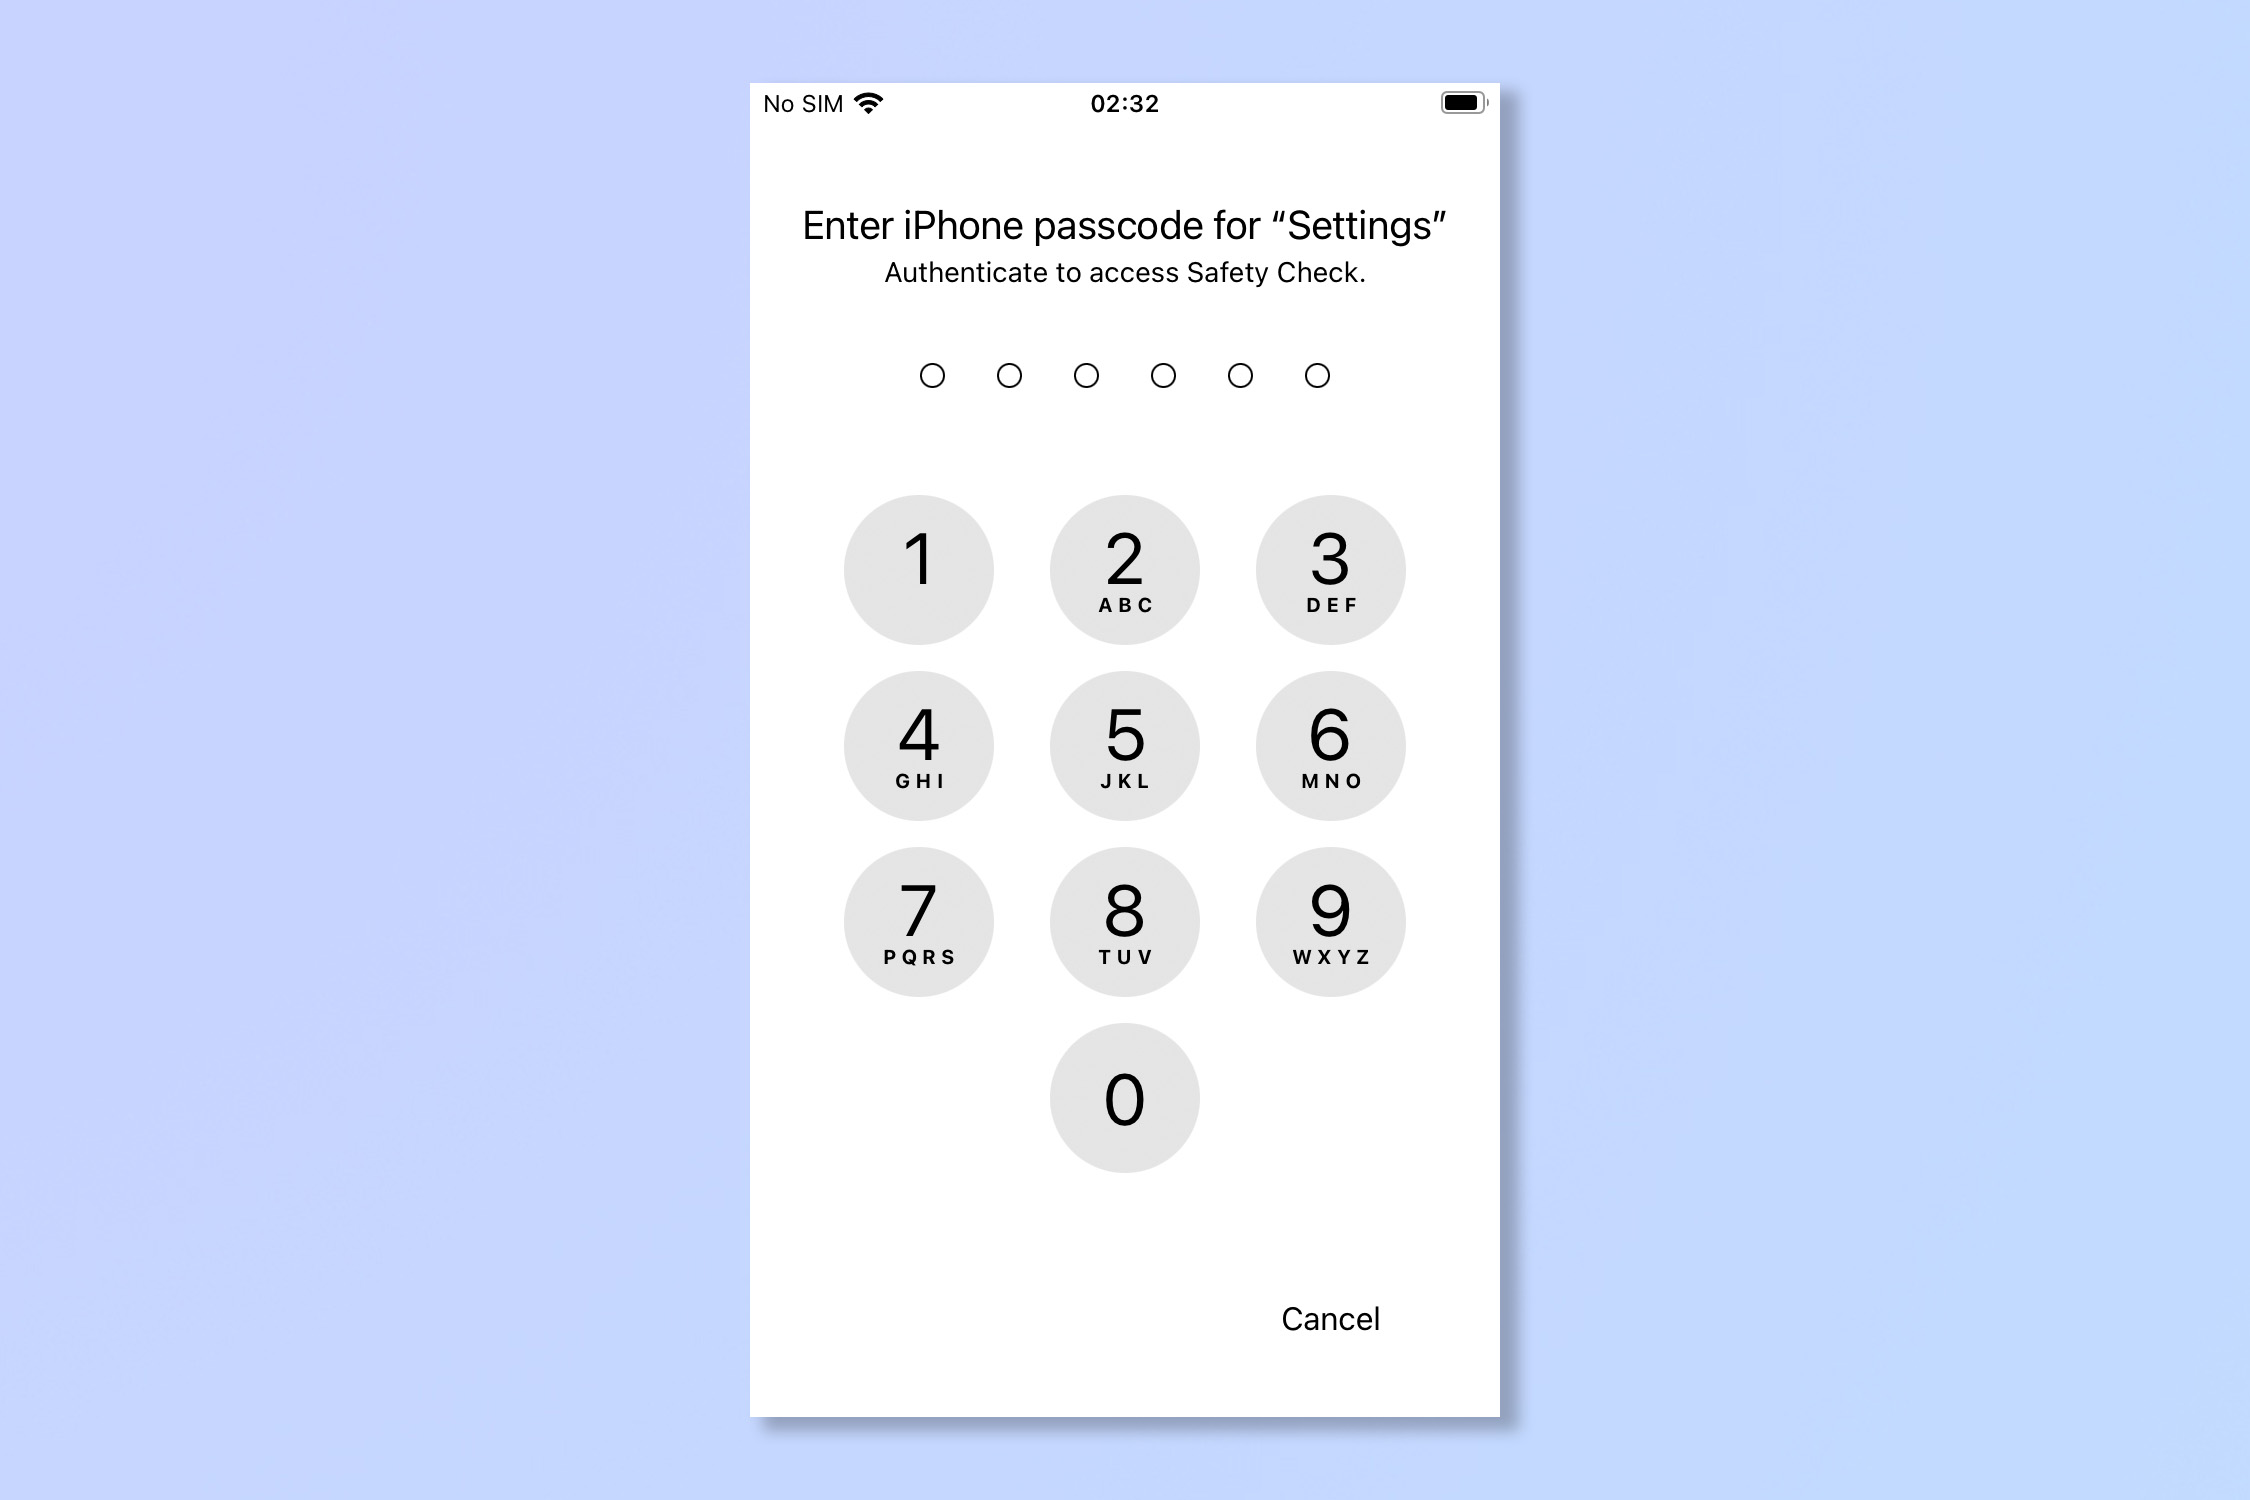
4. Use FaceID, TouchID or enter your Passcode to proceed.
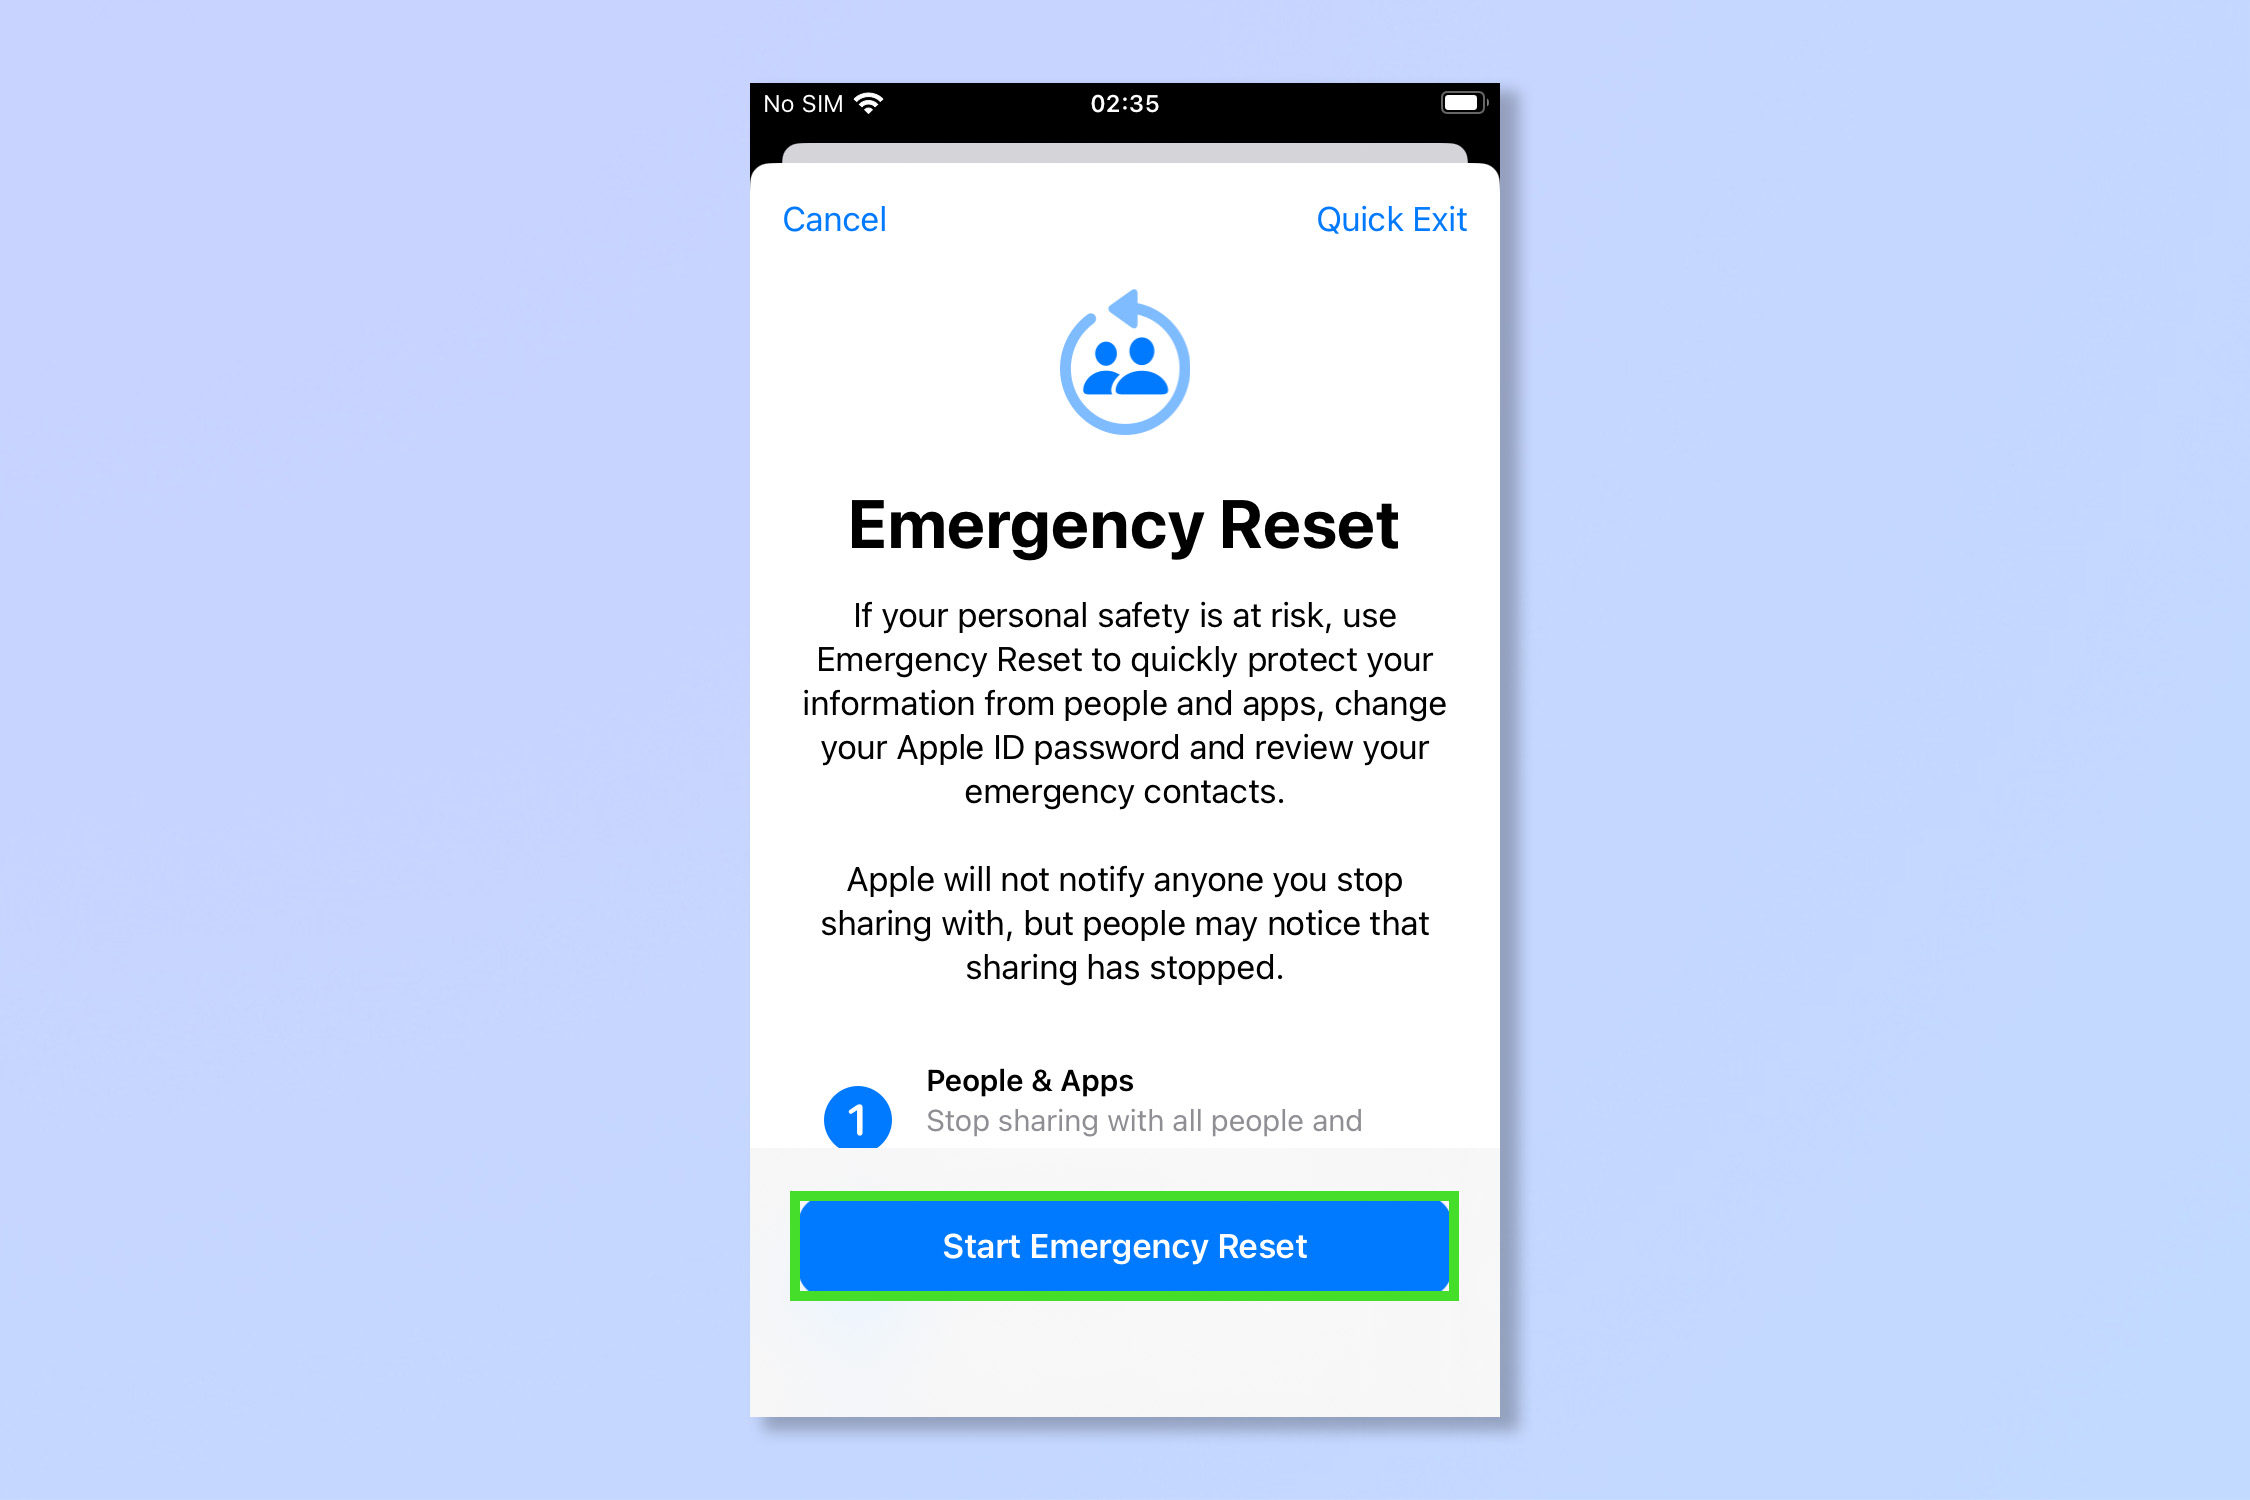
5. Tap Start Emergency Reset.
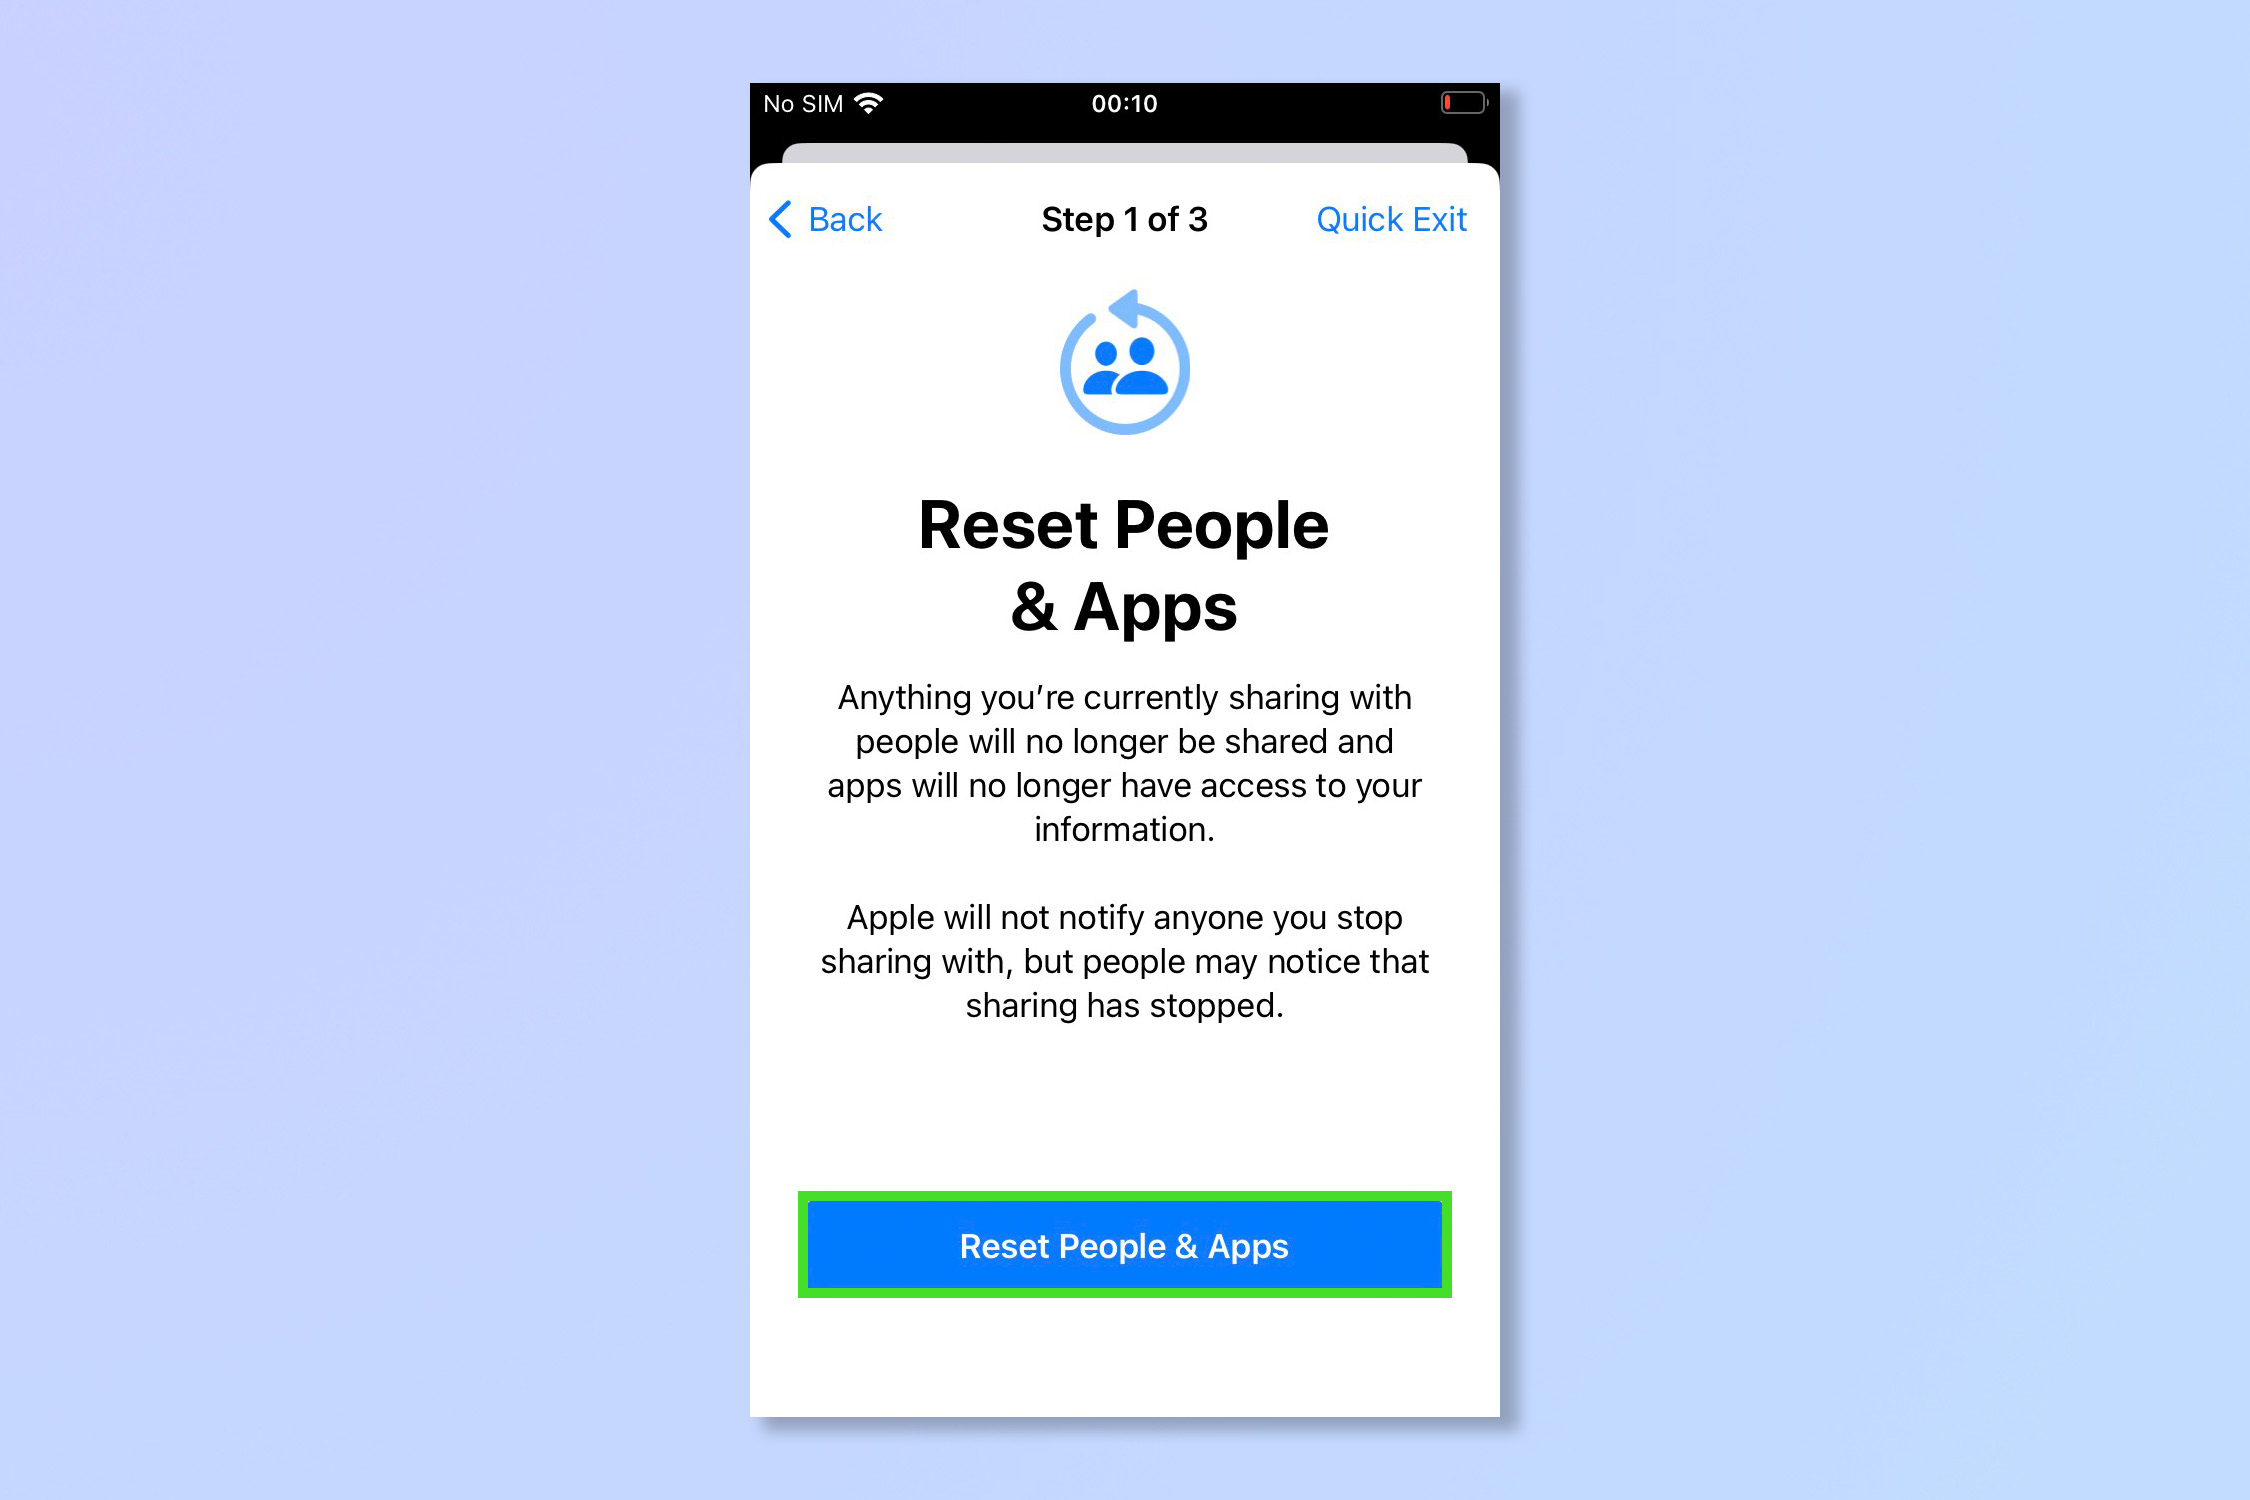
6. Tap Reset People & Apps.
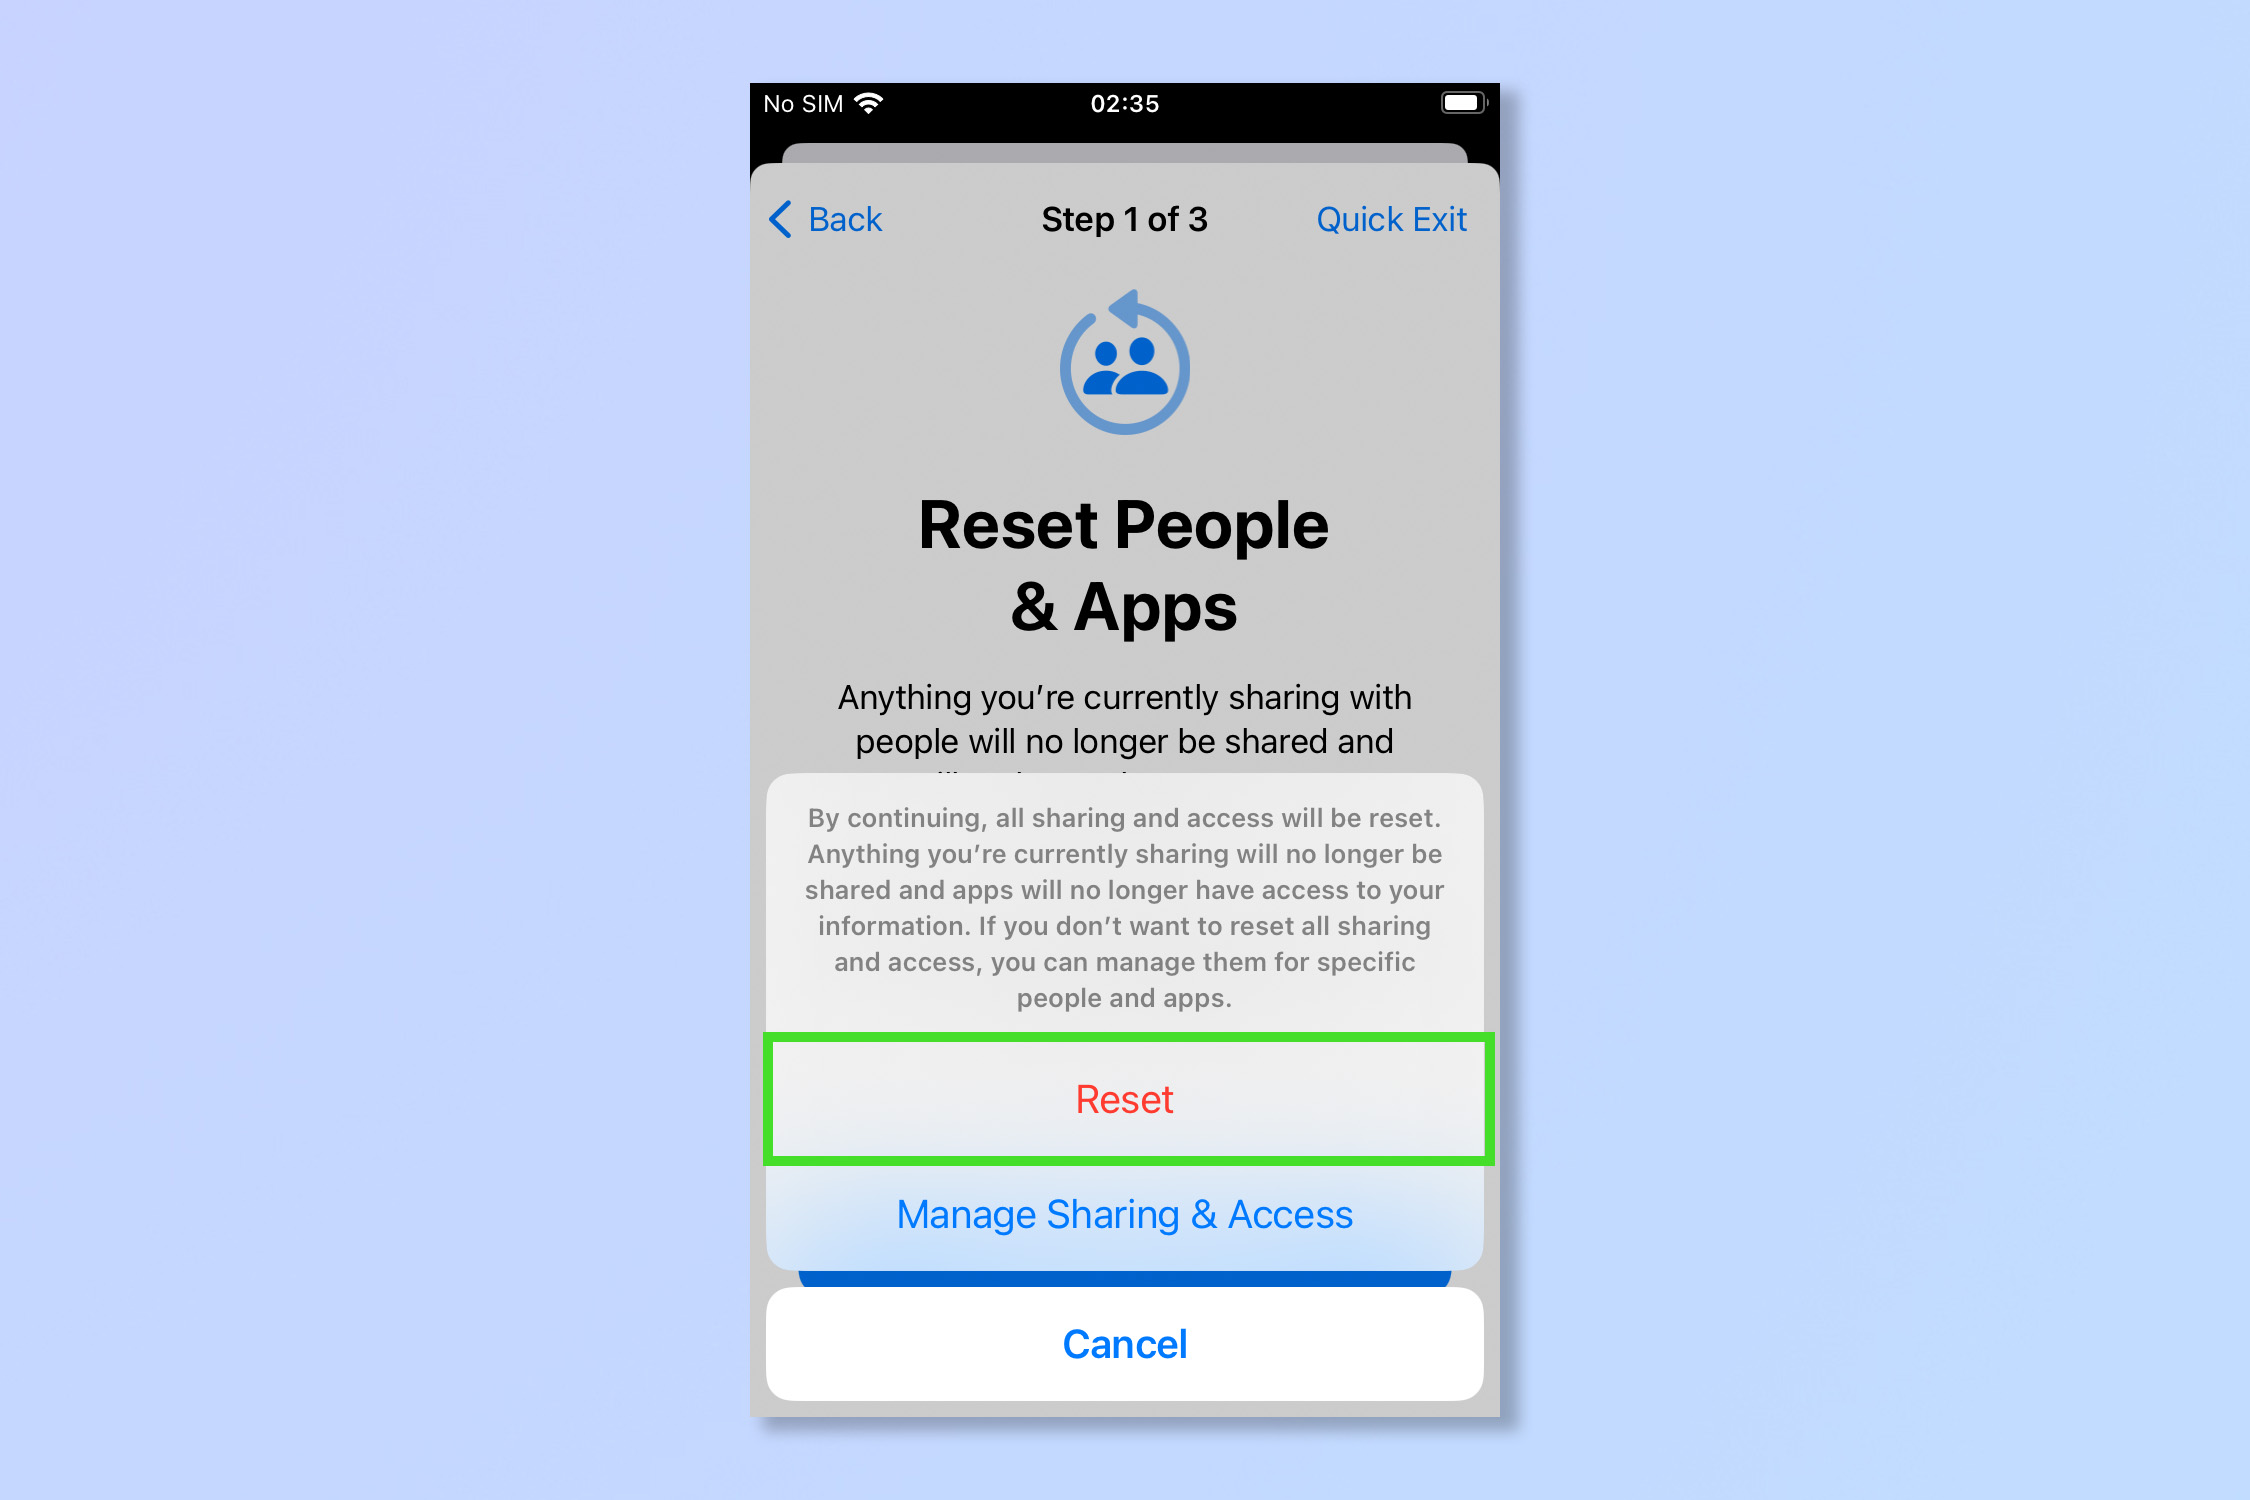
7. Tap Reset. Selecting manage sharing and access will take you to the other, more selective Safety Check method, which we cover in the second part of this article. If you'd like to manage your sharing and access in one go, skip to the second section, otherwise read on.
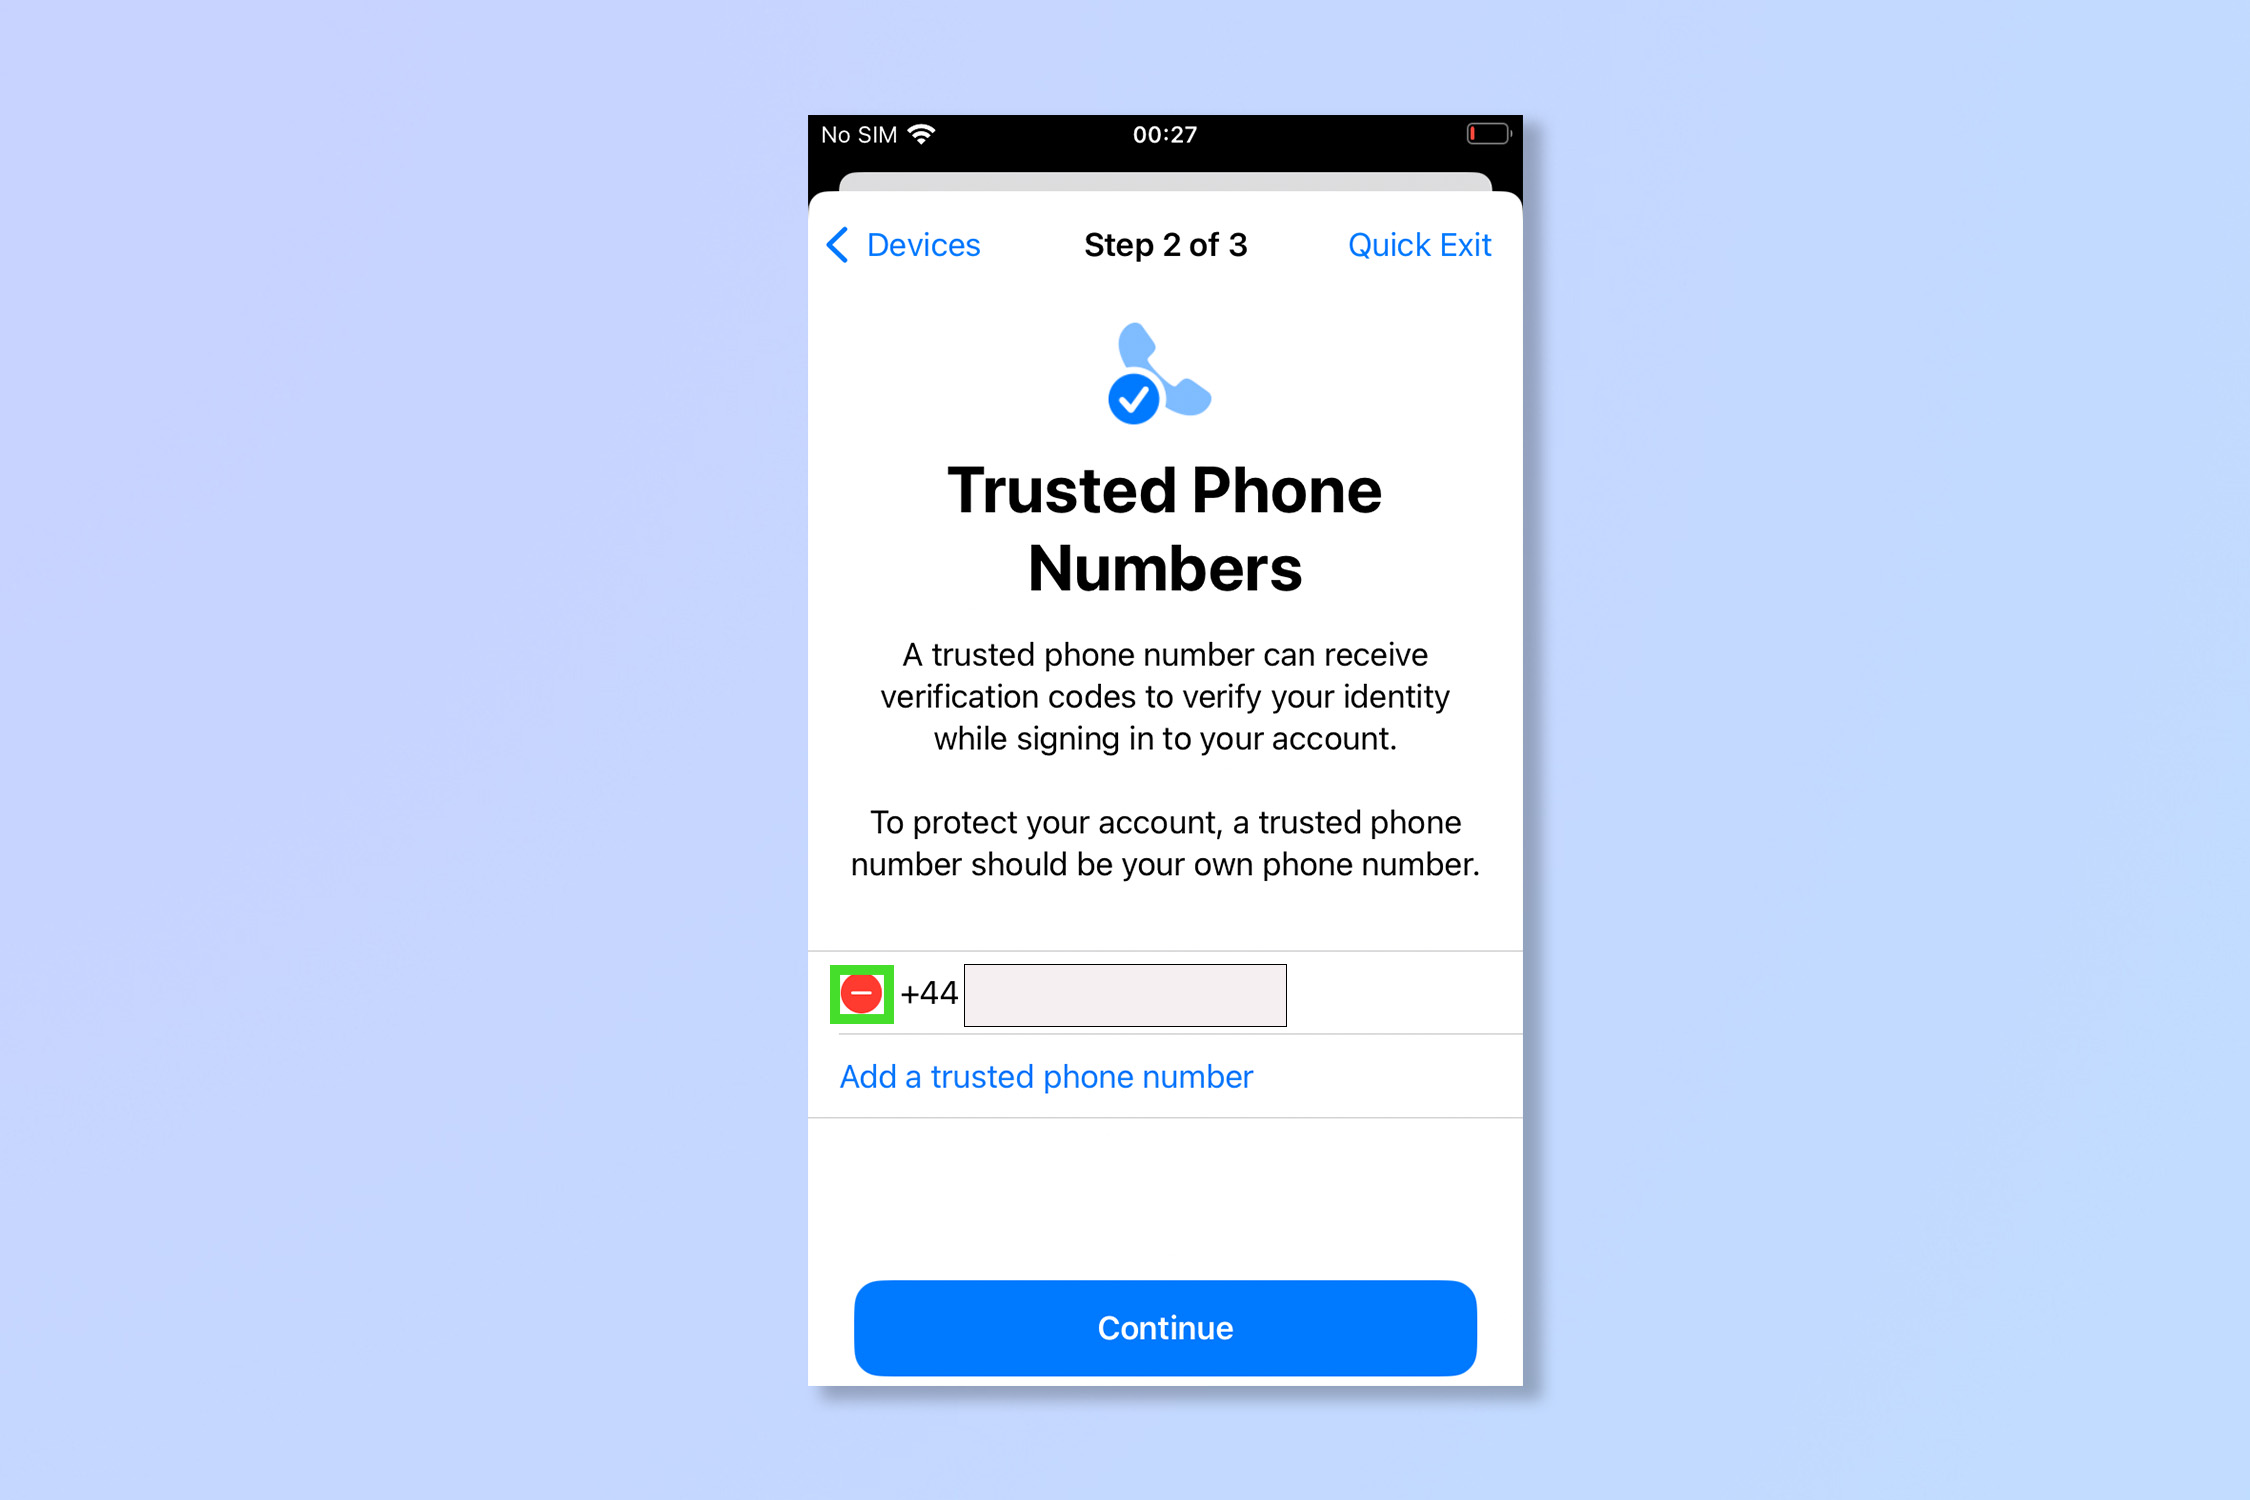
5. Trusted Phone Numbers are numbers that can receive verification codes to allow access to your AppleID. To delete a no longer trusted number, tap the red button next to the number and then tap delete.
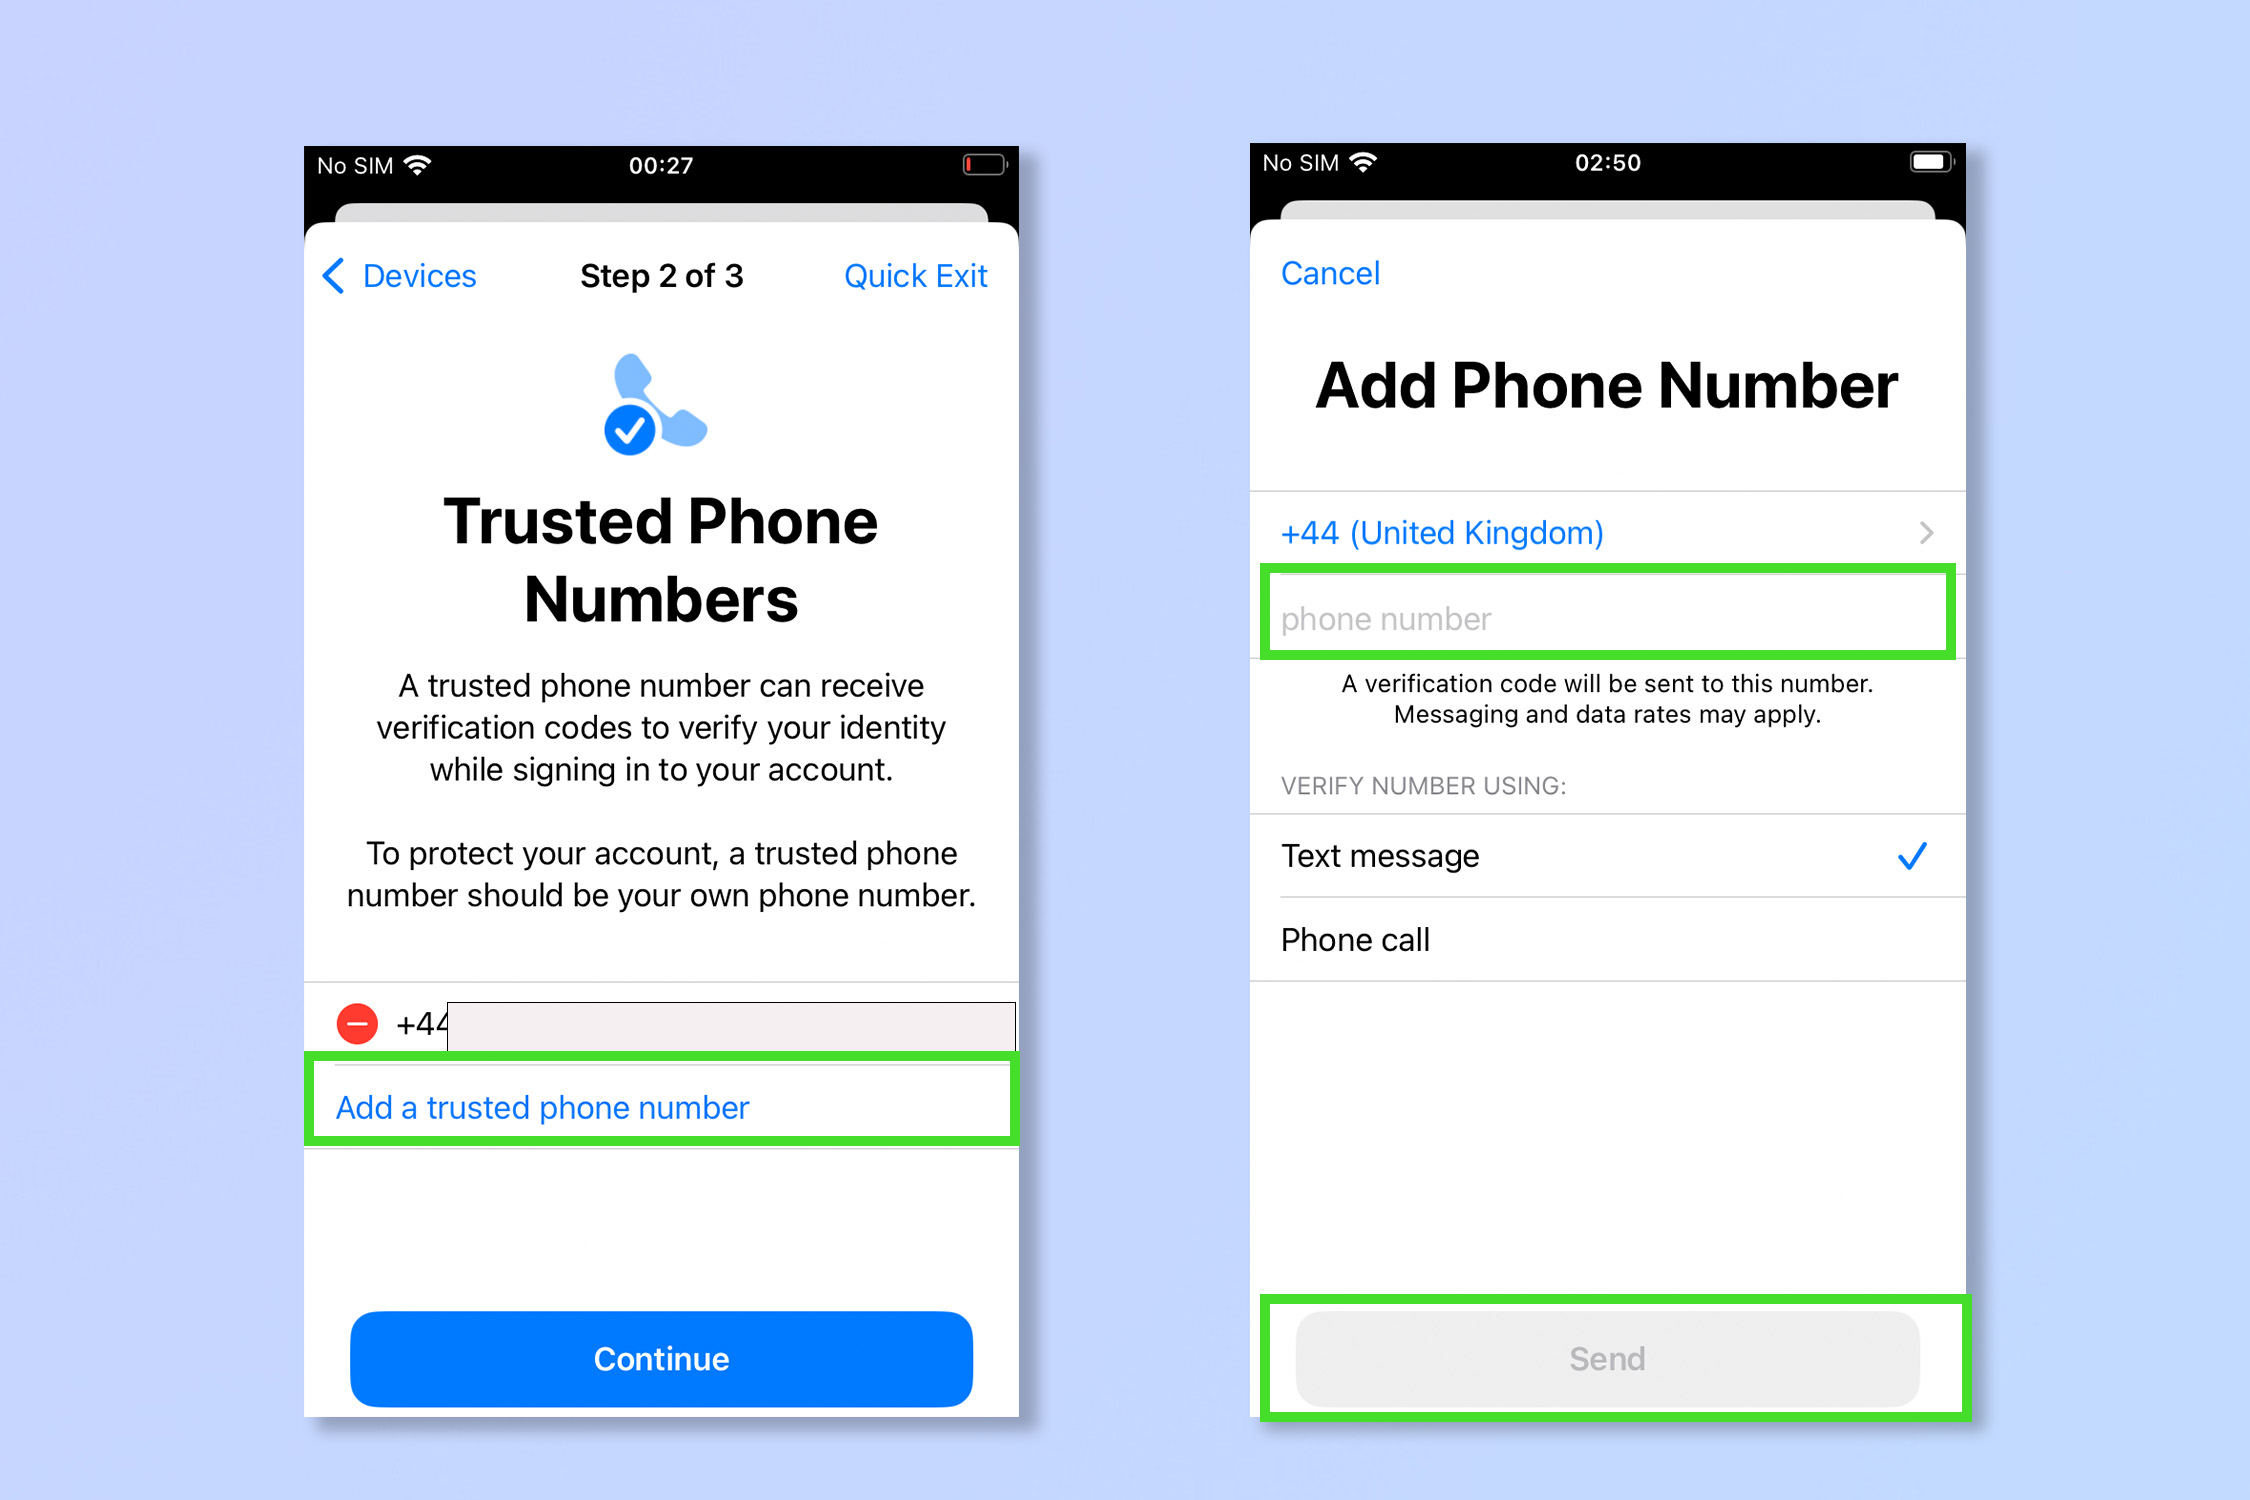
6. To add a new trusted number, tap Add a trusted phone number, then enter a phone number and whether to receive a text or call, then tap send. This will add a new number for verification codes. Respond to any notifications on the newly set up trusted device and enter any codes required.
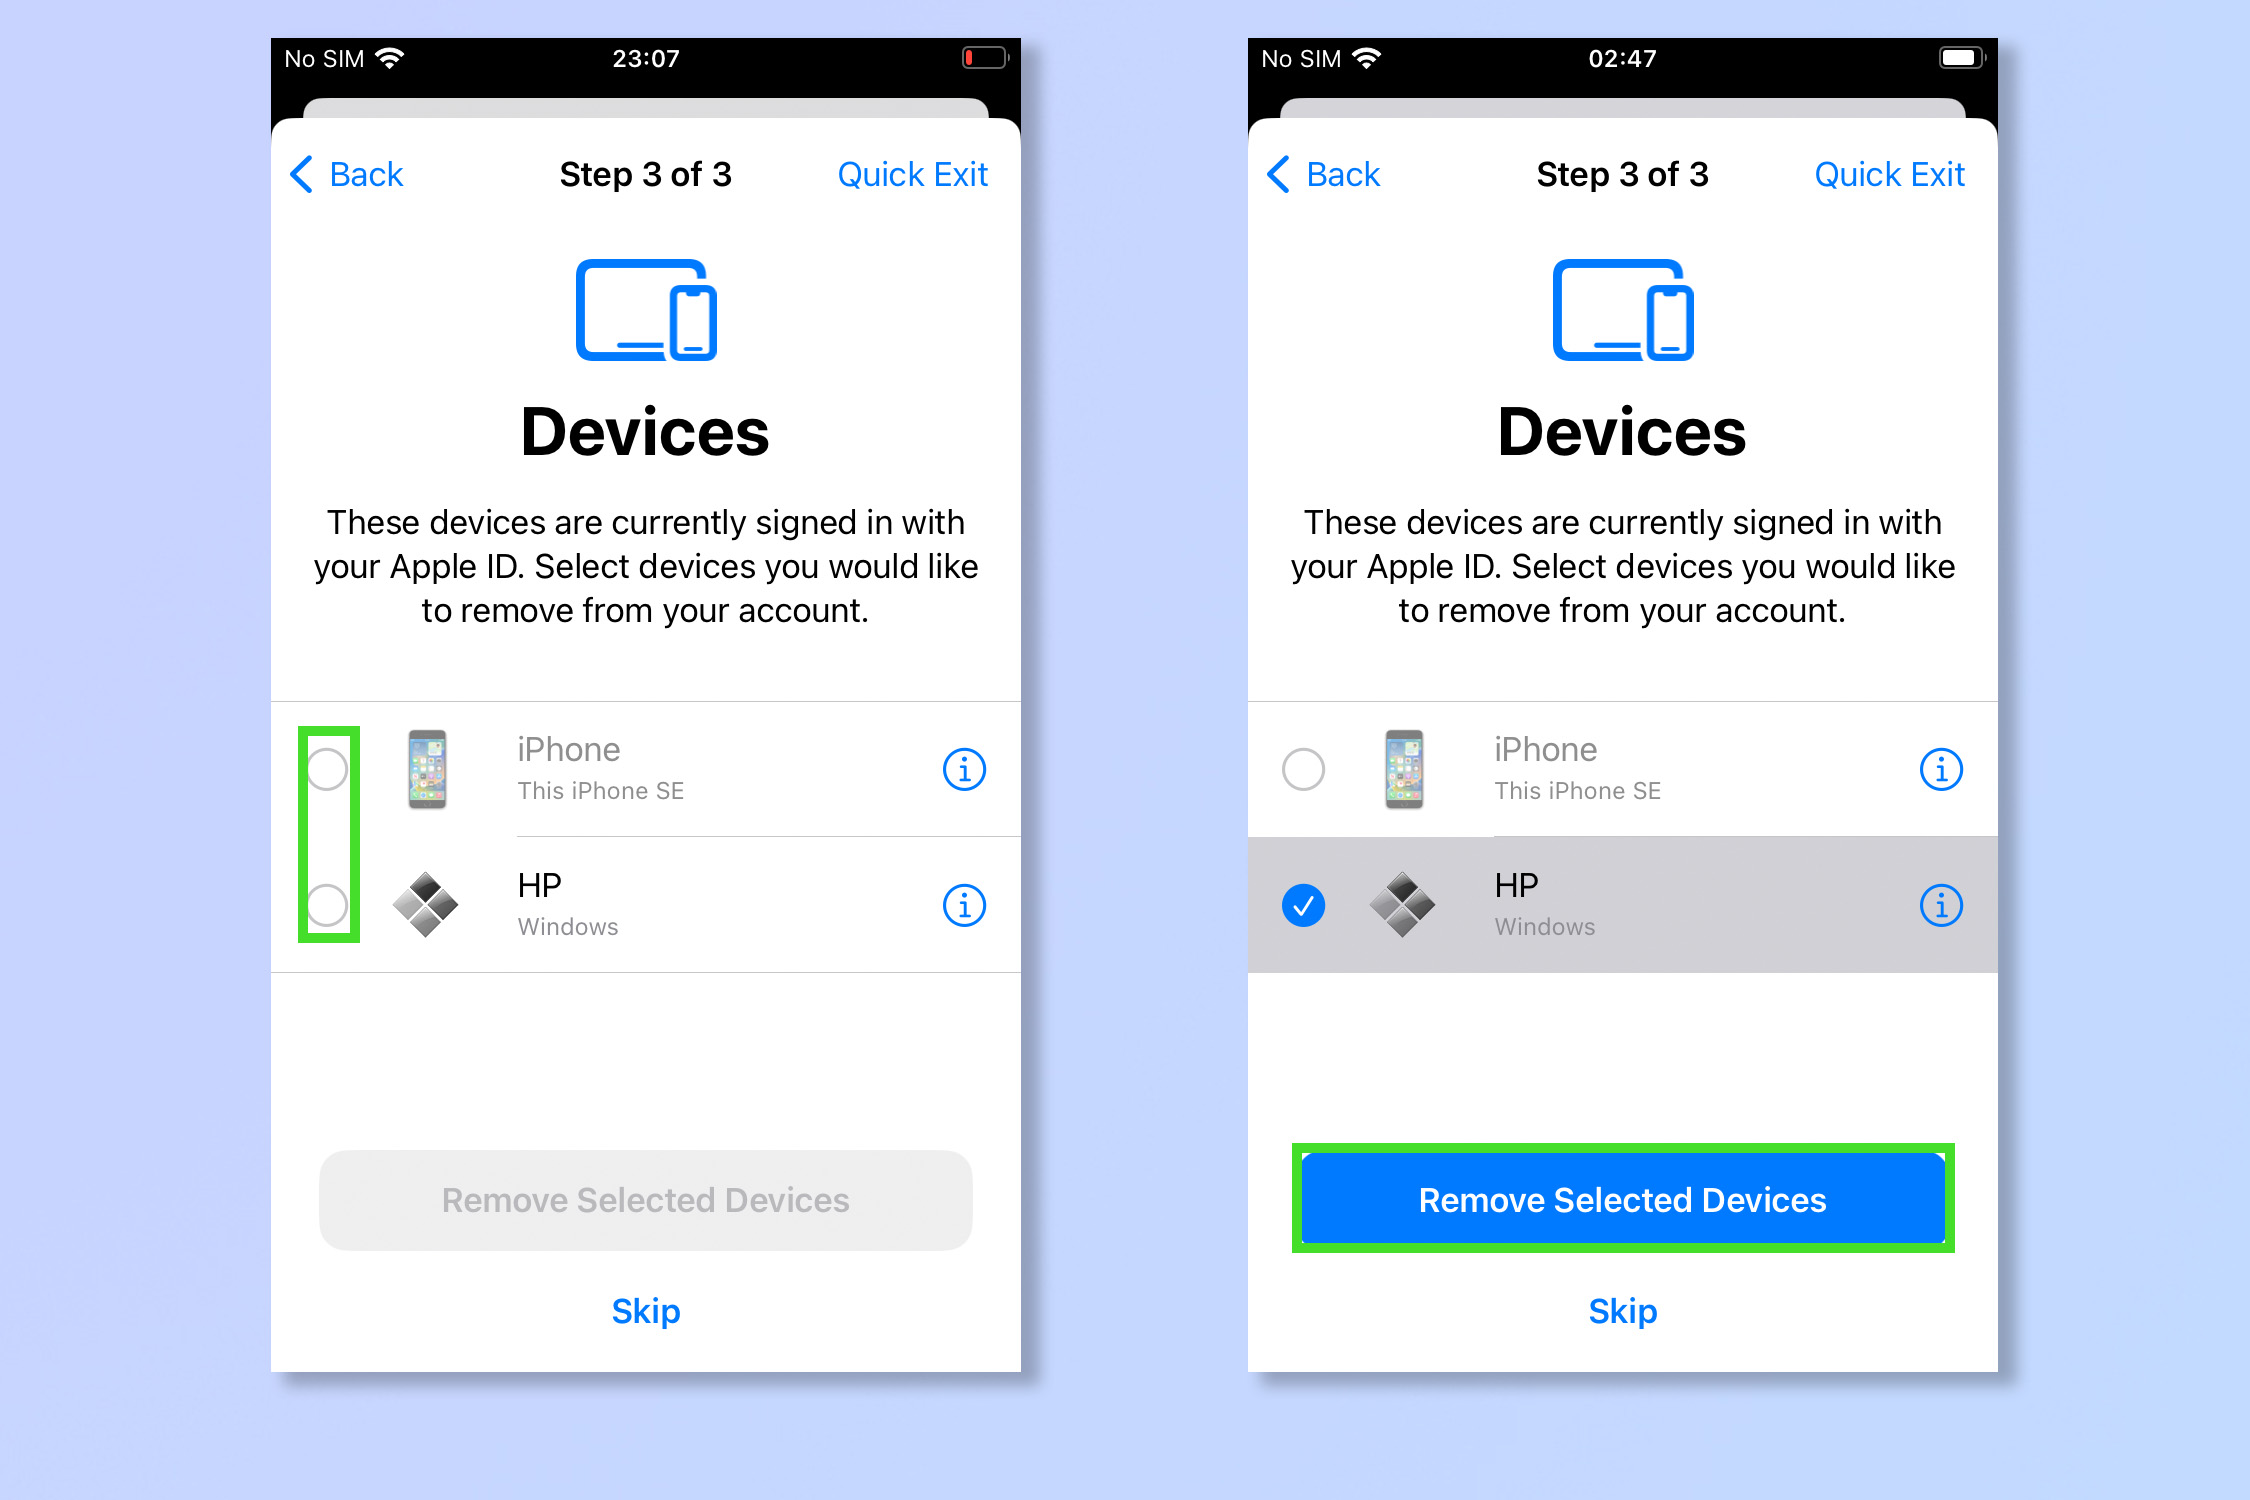
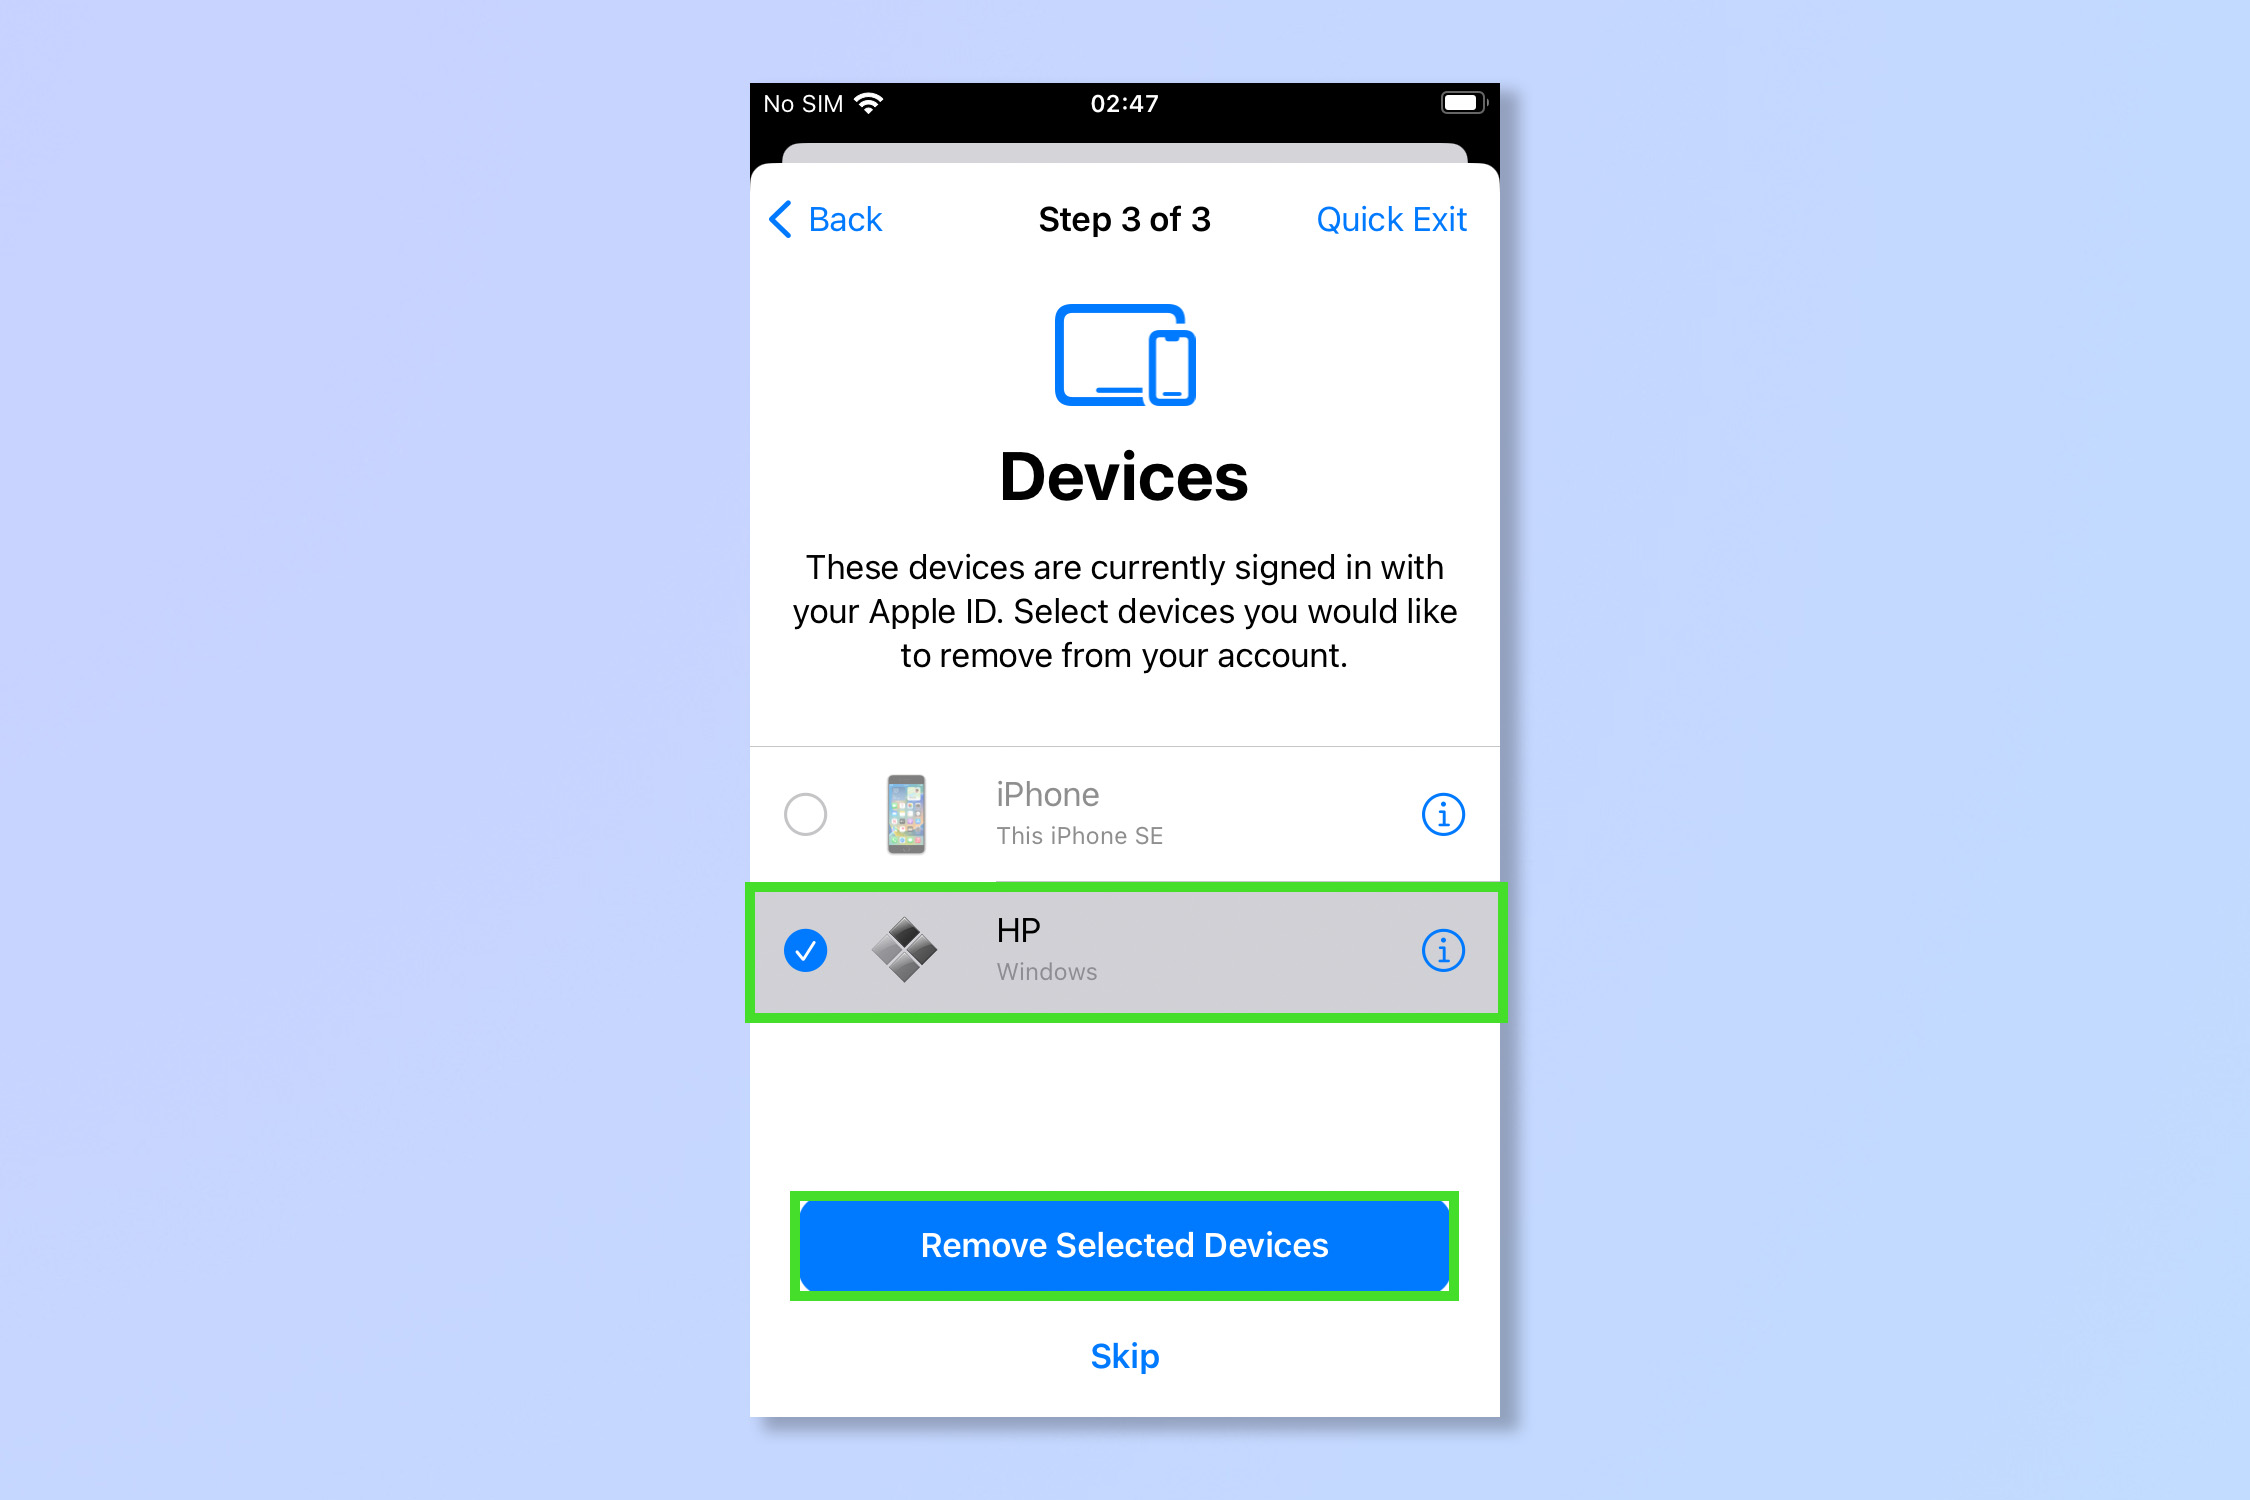
7. To log any devices you don't trust out of your AppleID, tap the circle next to any devices you don't trust, then tap Remove Selected Devices.
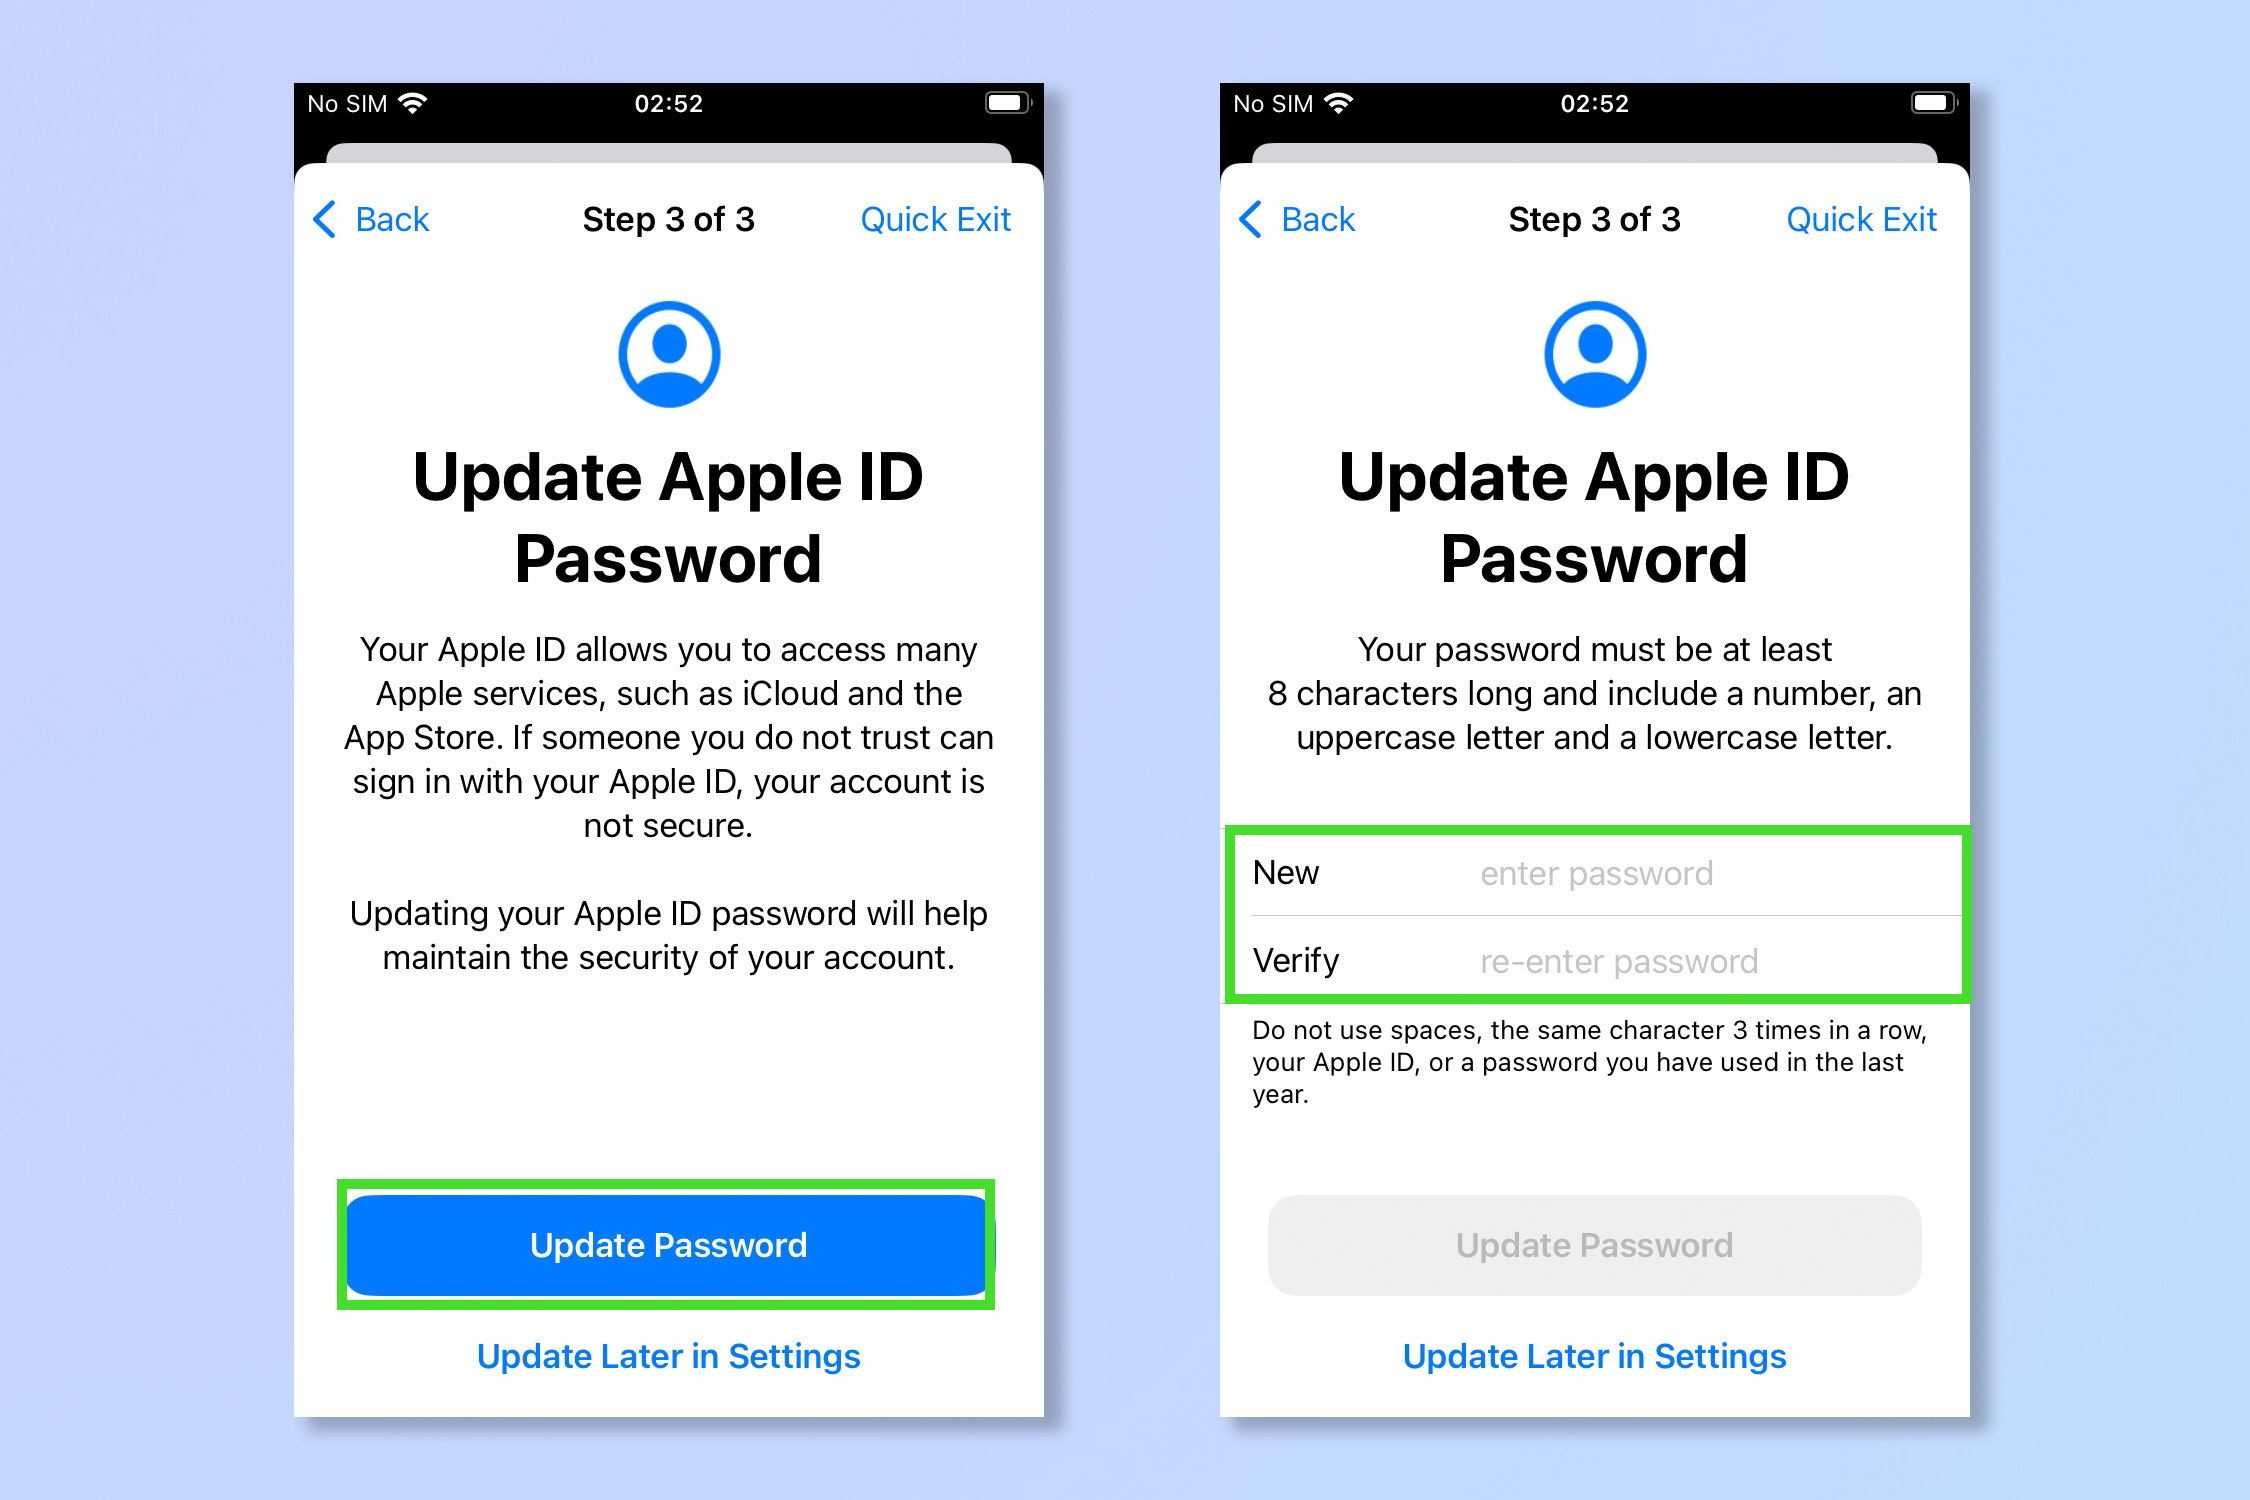
8. If you think your AppleID has been compromised, tap Update Password and change your Apple ID password. This will ensure anyone that knows your existing password won't be able to log in, or back in, to your AppleID account. Then tap Update Password again.
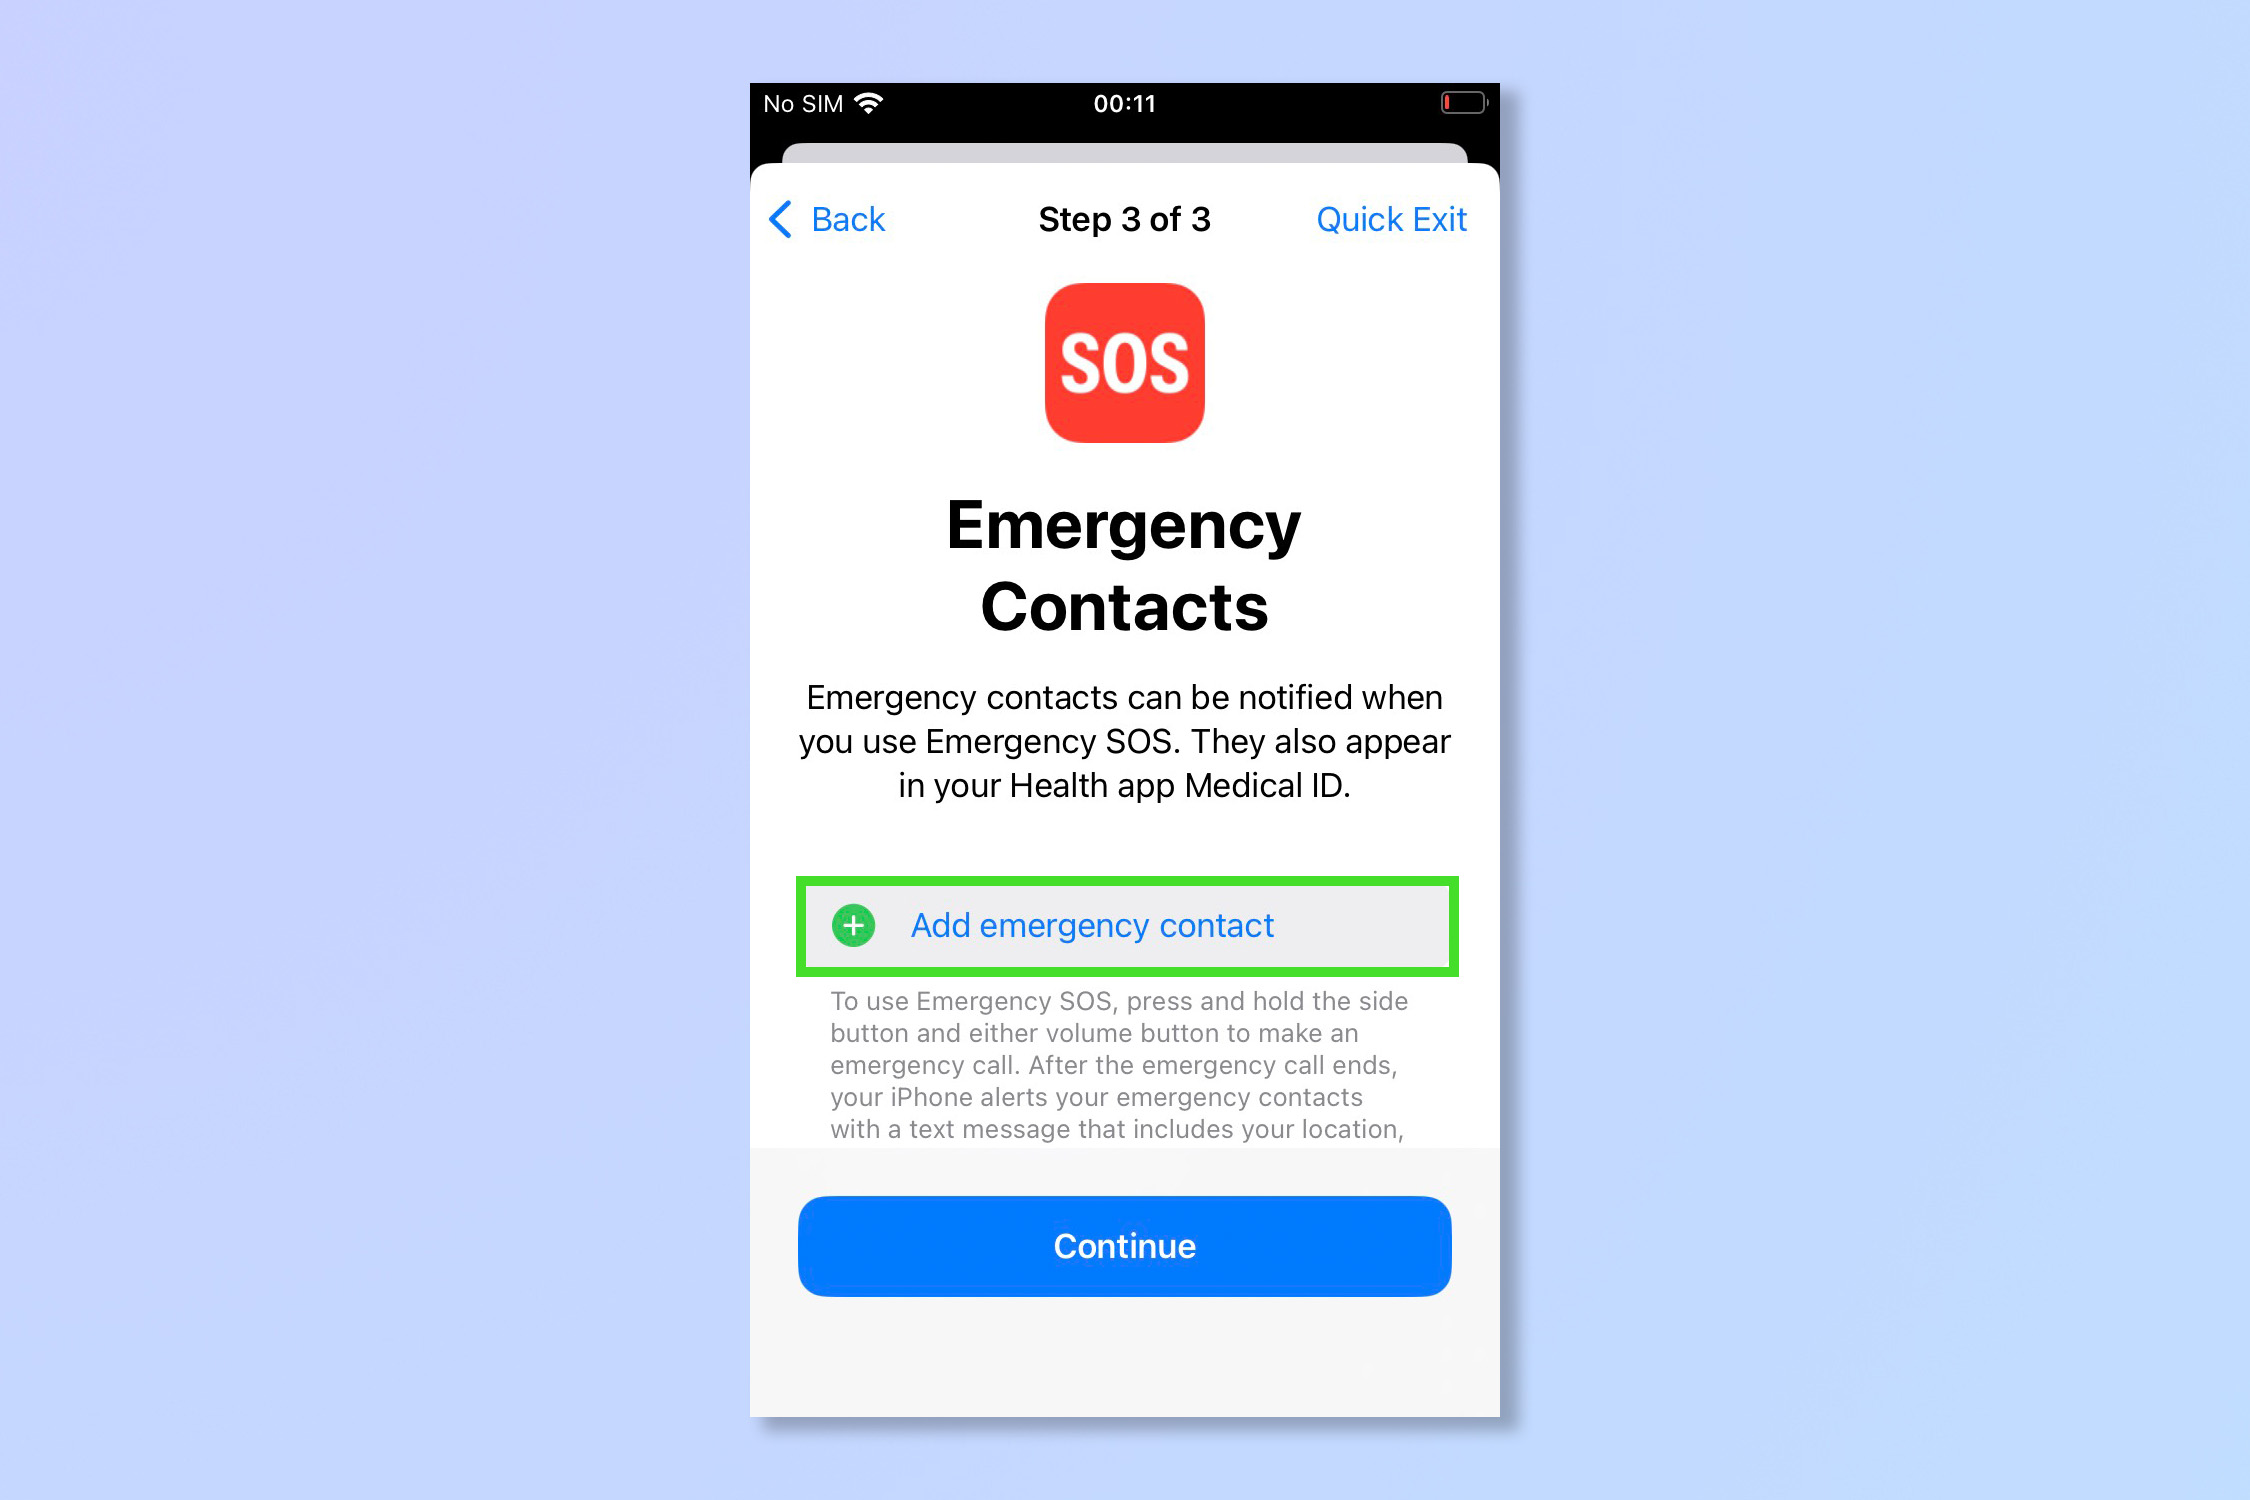
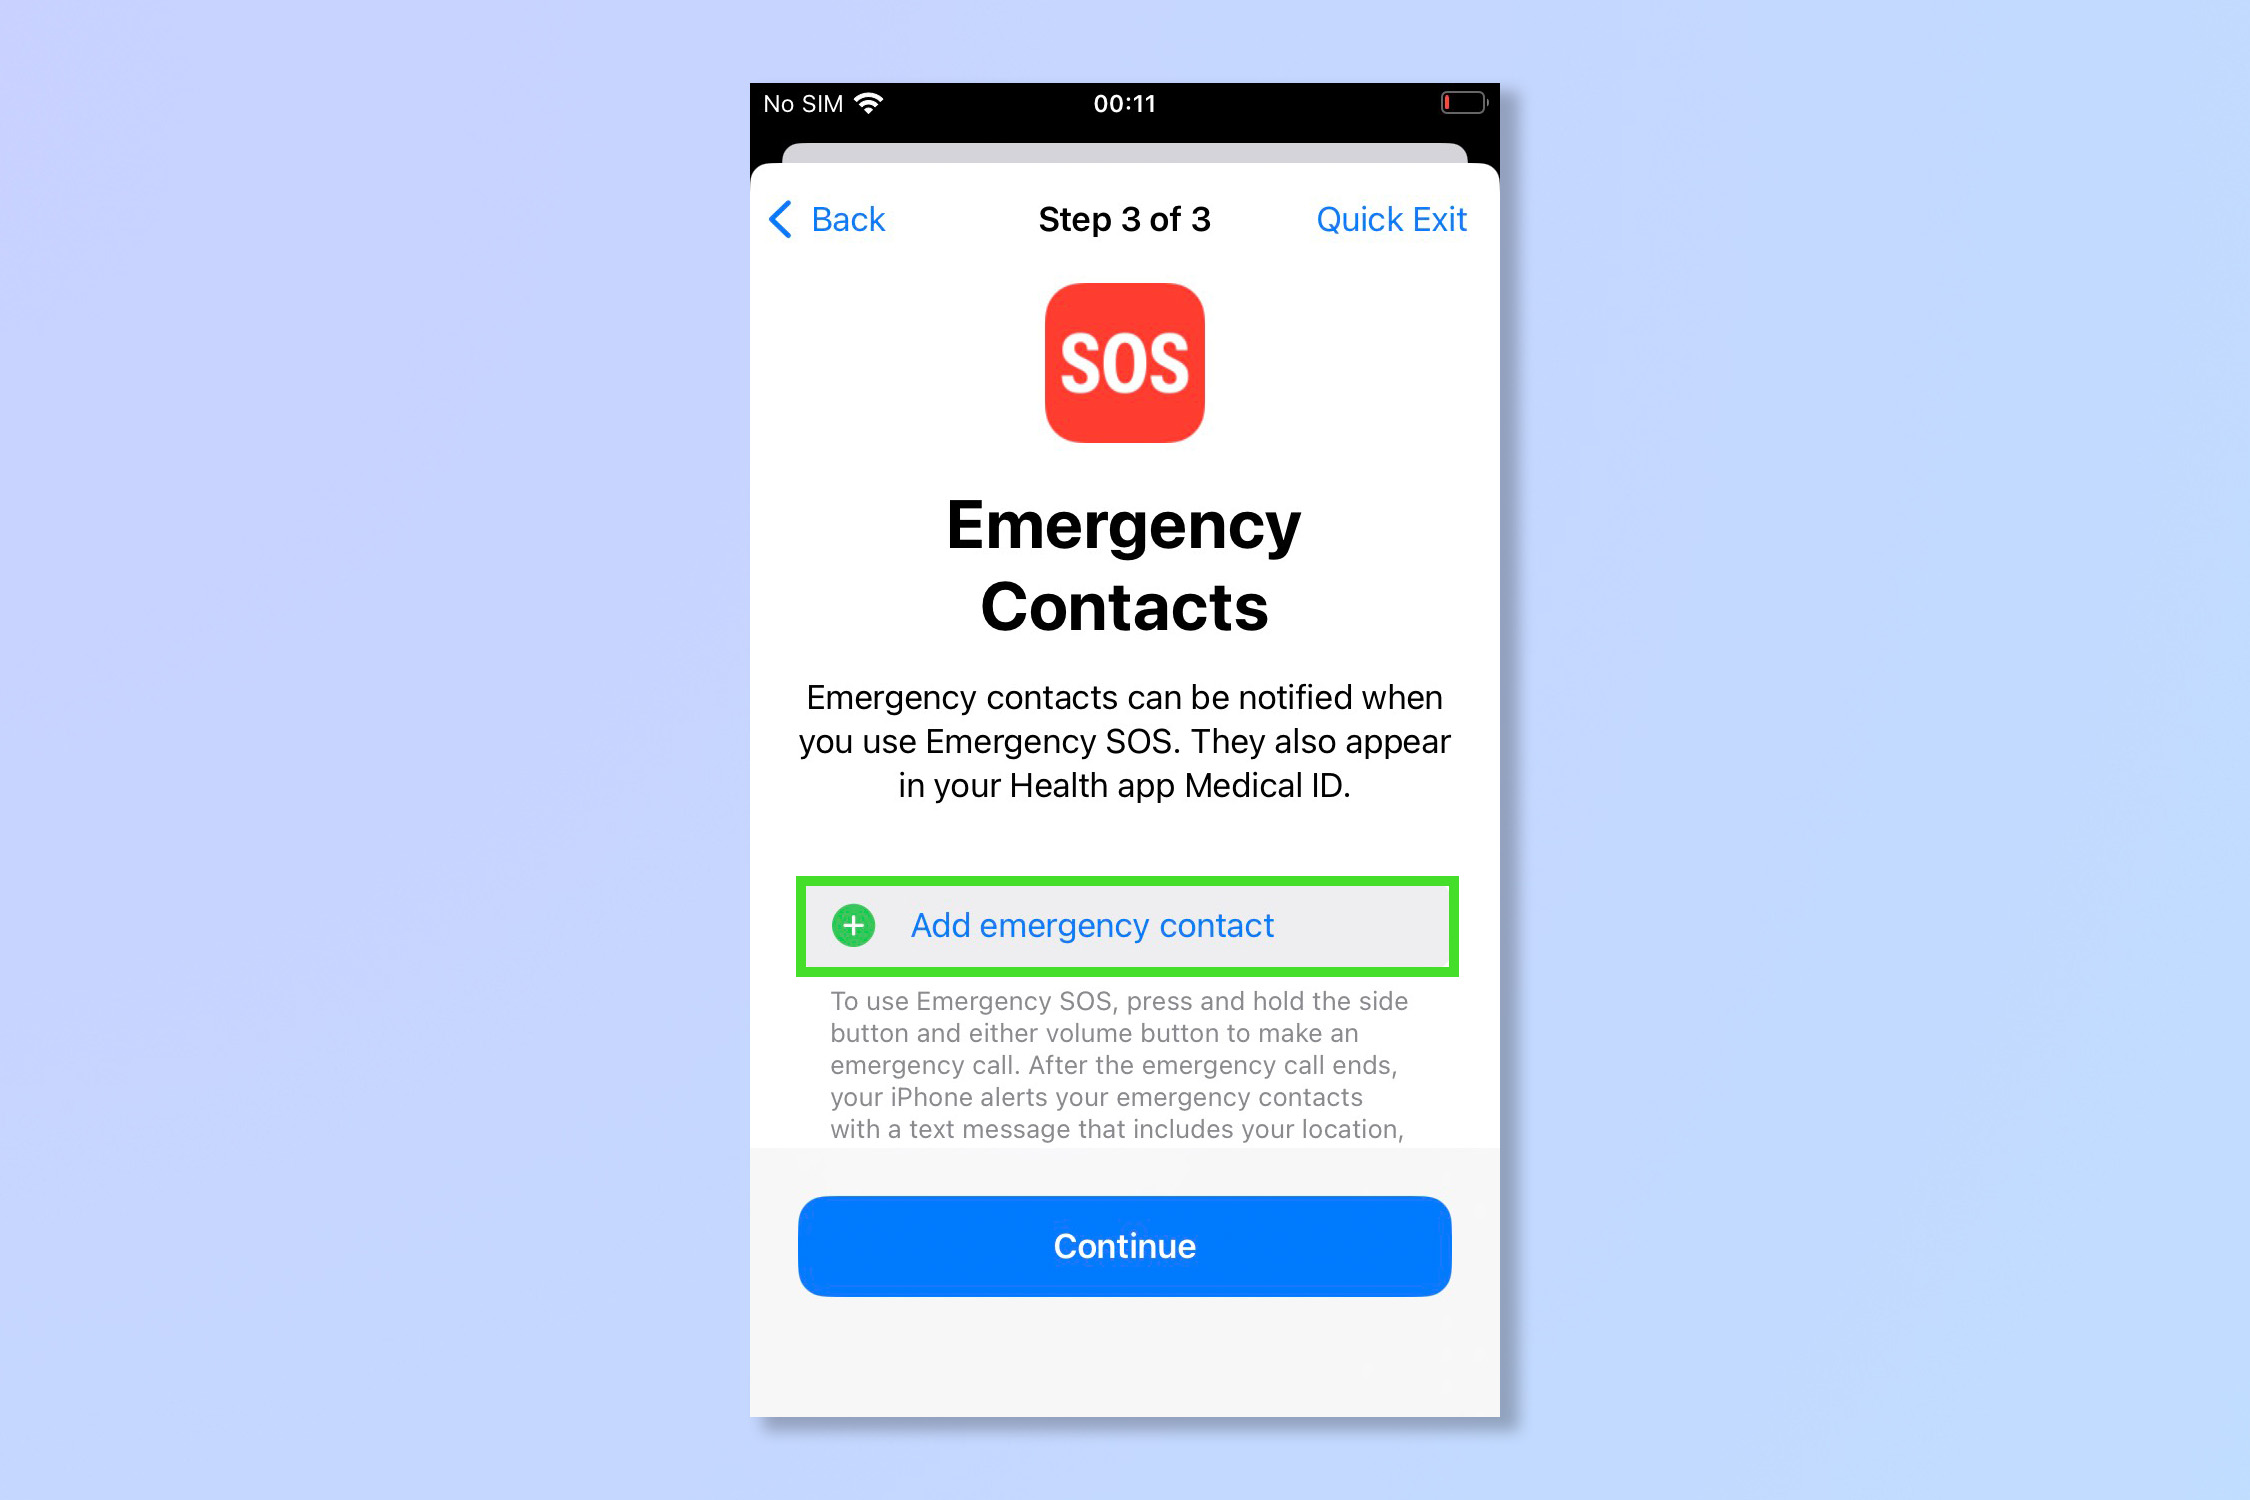
8. Finally, if you'd like to add a trusted contact who will be notified in the case of using the SOS function, tap Add emergency contact.
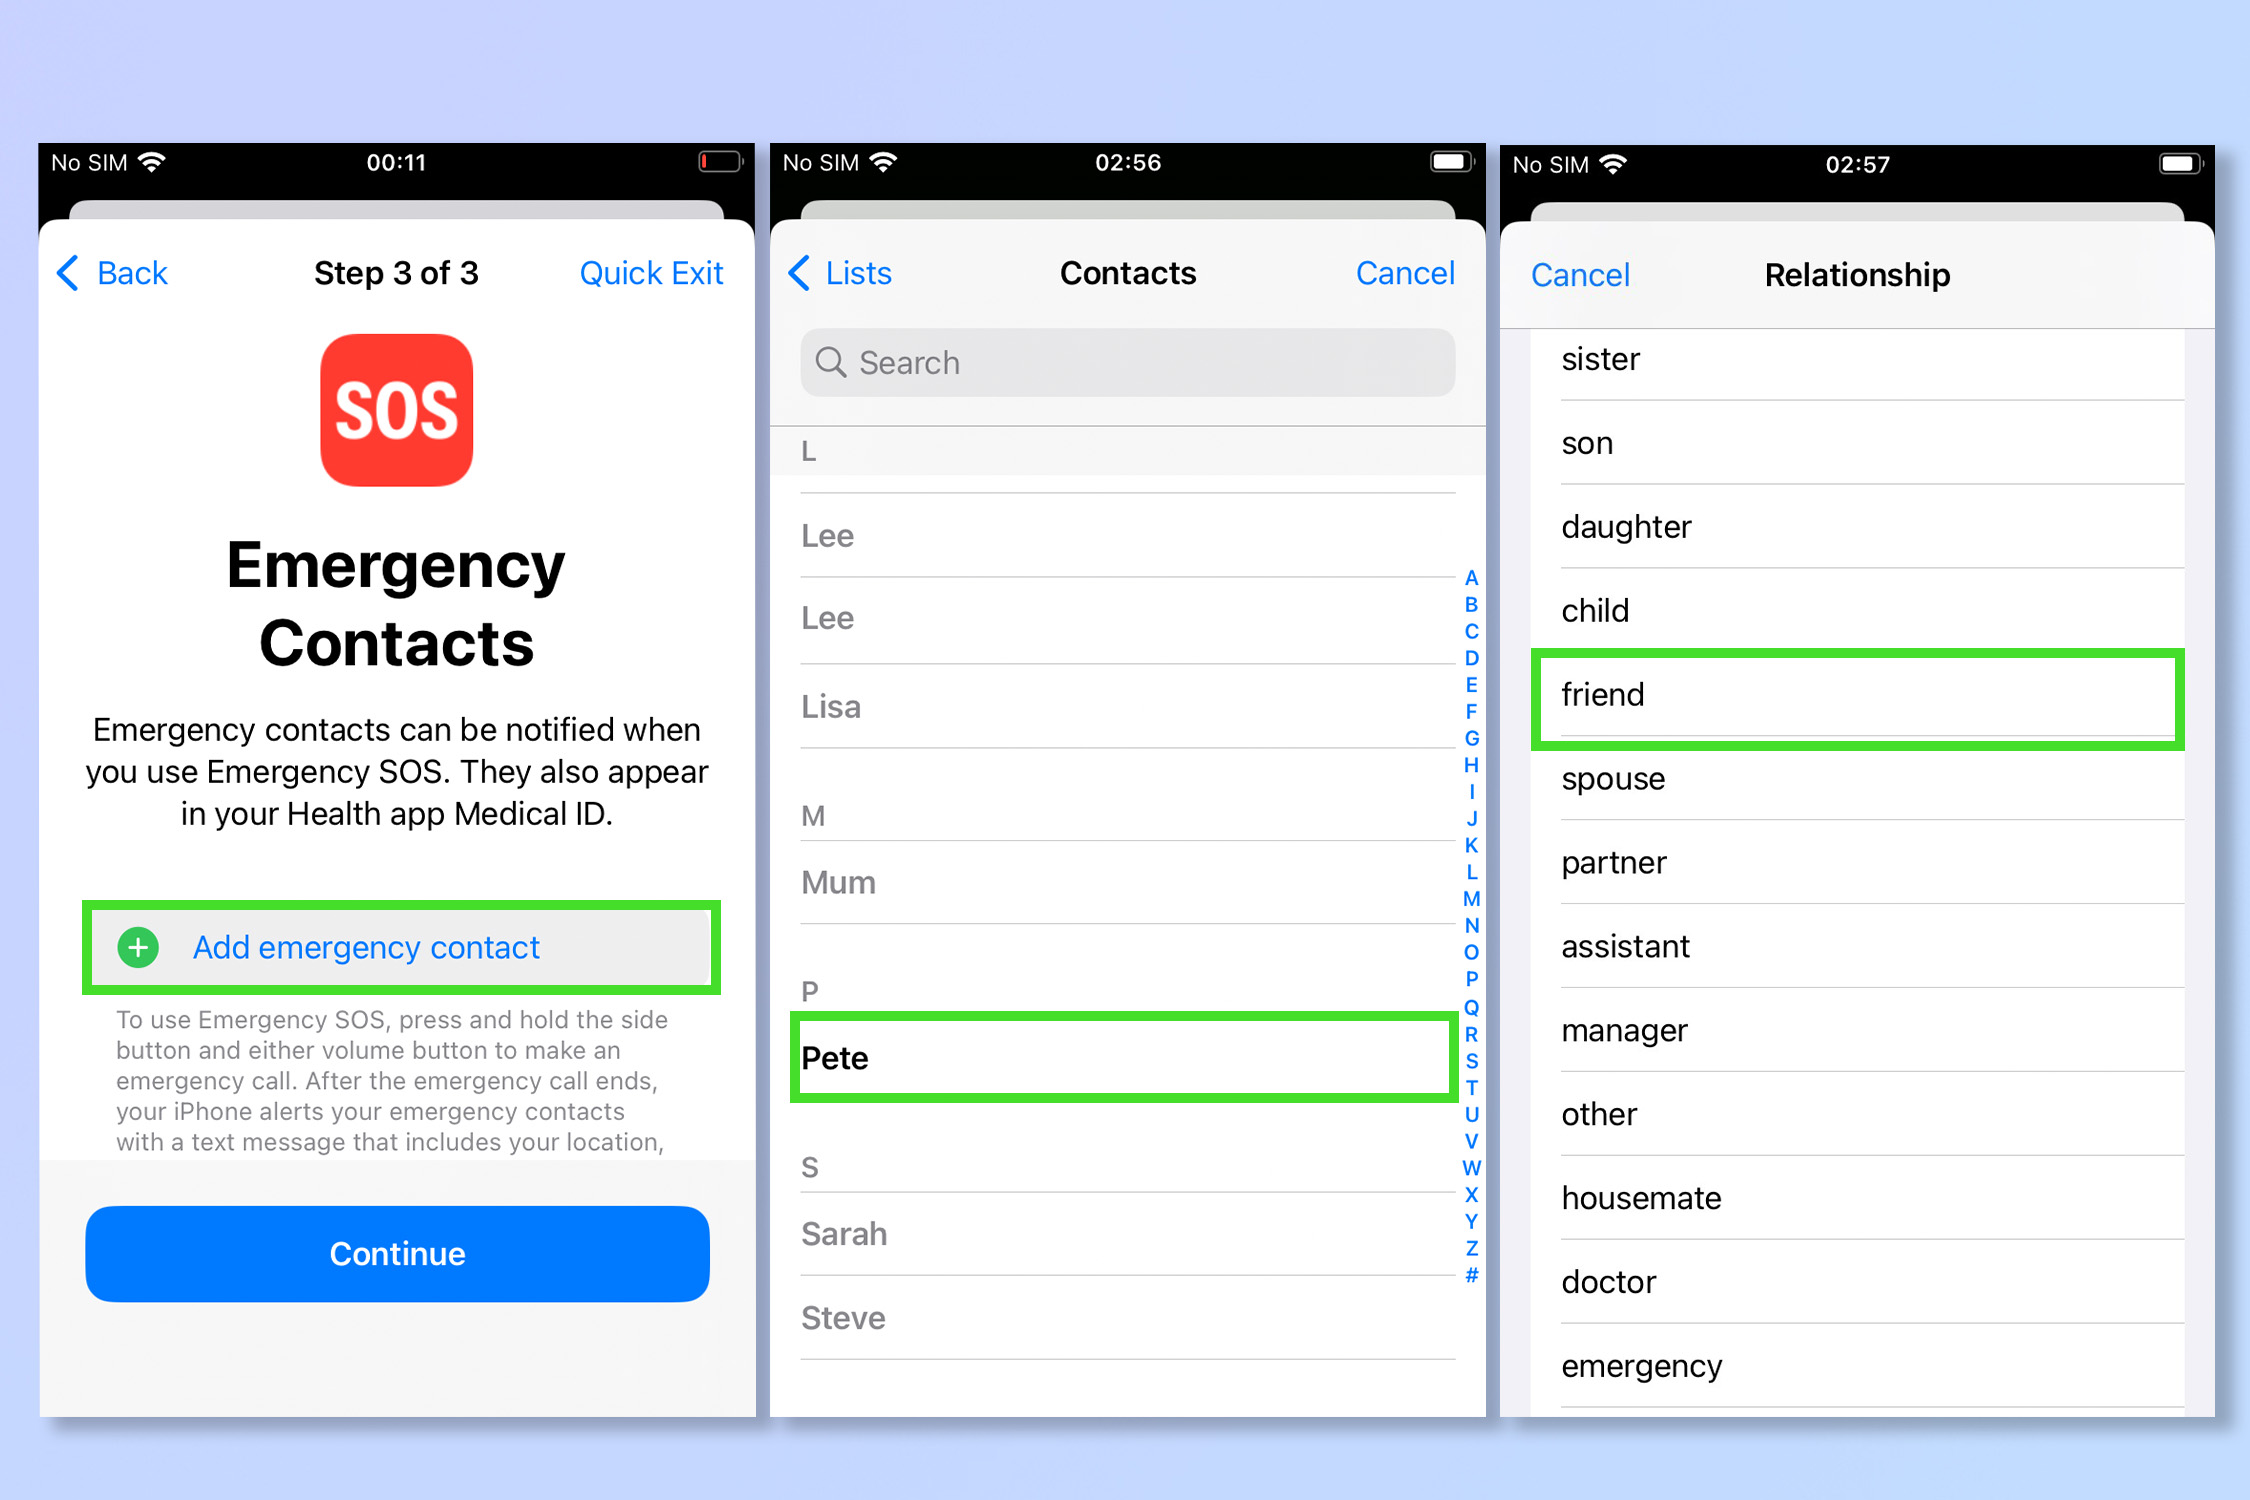
9. Select a contact to be notified when you use Emergency SOS. This should be someone you have the utmost trust in. Select them from your contacts and then select their relationship to you. They will appear in your Health app.
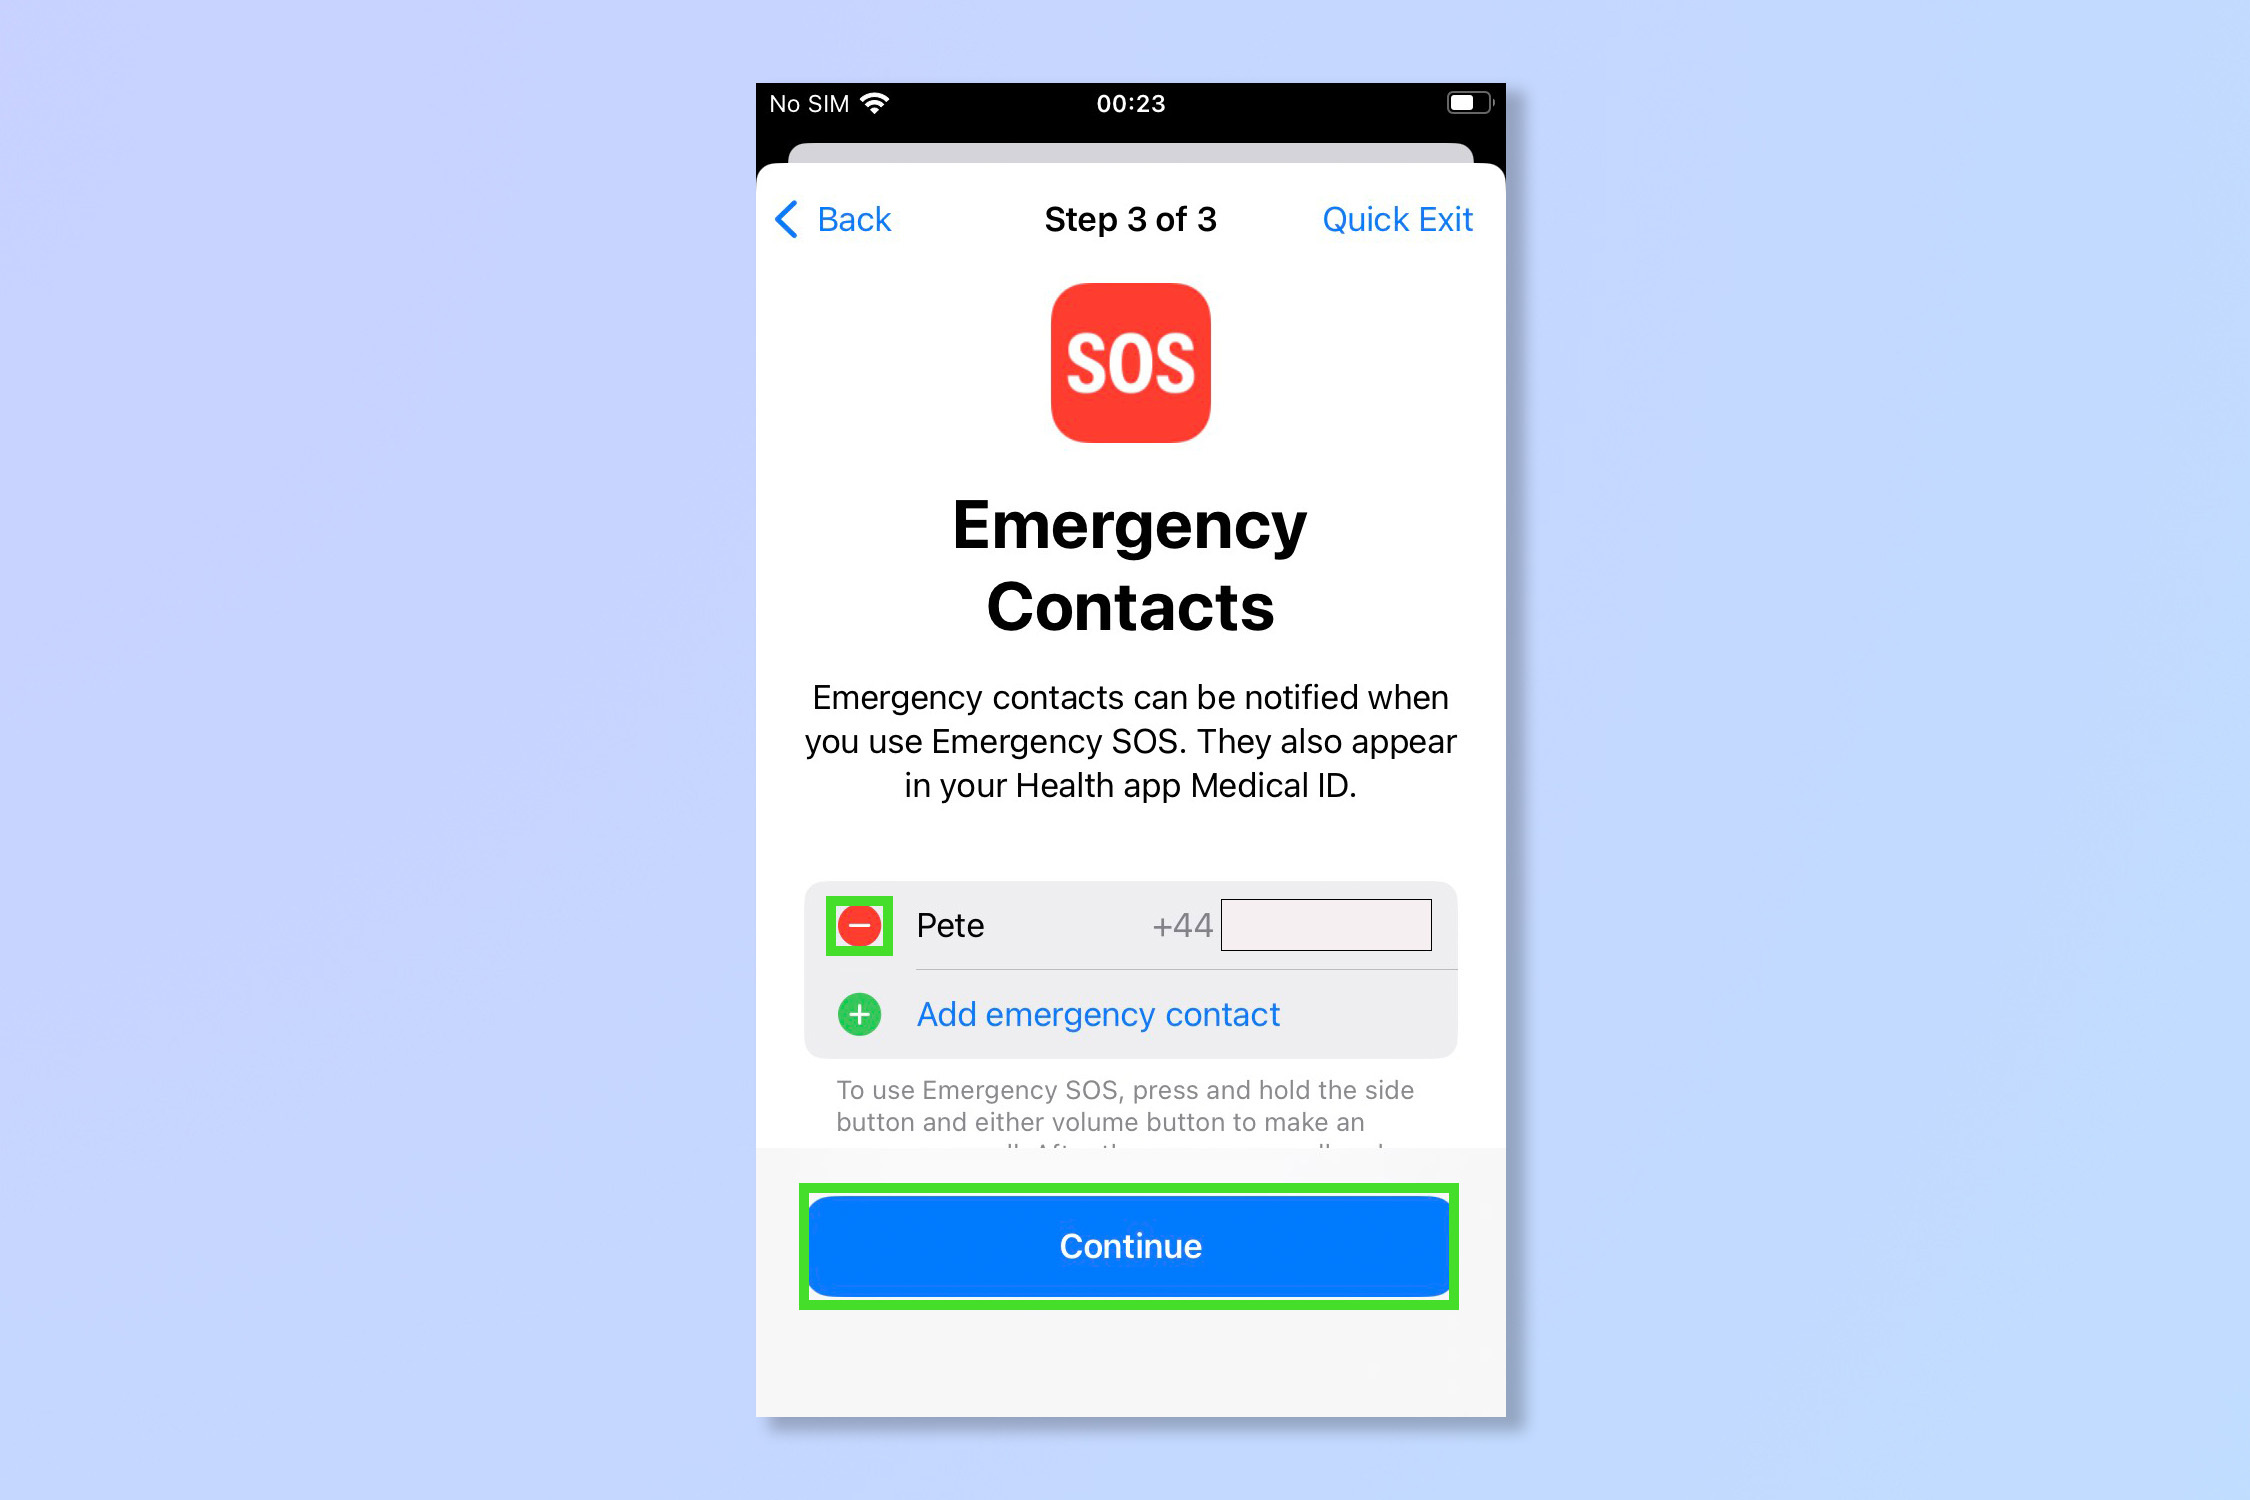
10. If you would like to remove someone already set as an emergency contact, tap the red delete symbol next to their name and then tap Delete. Tap Continue when finished.
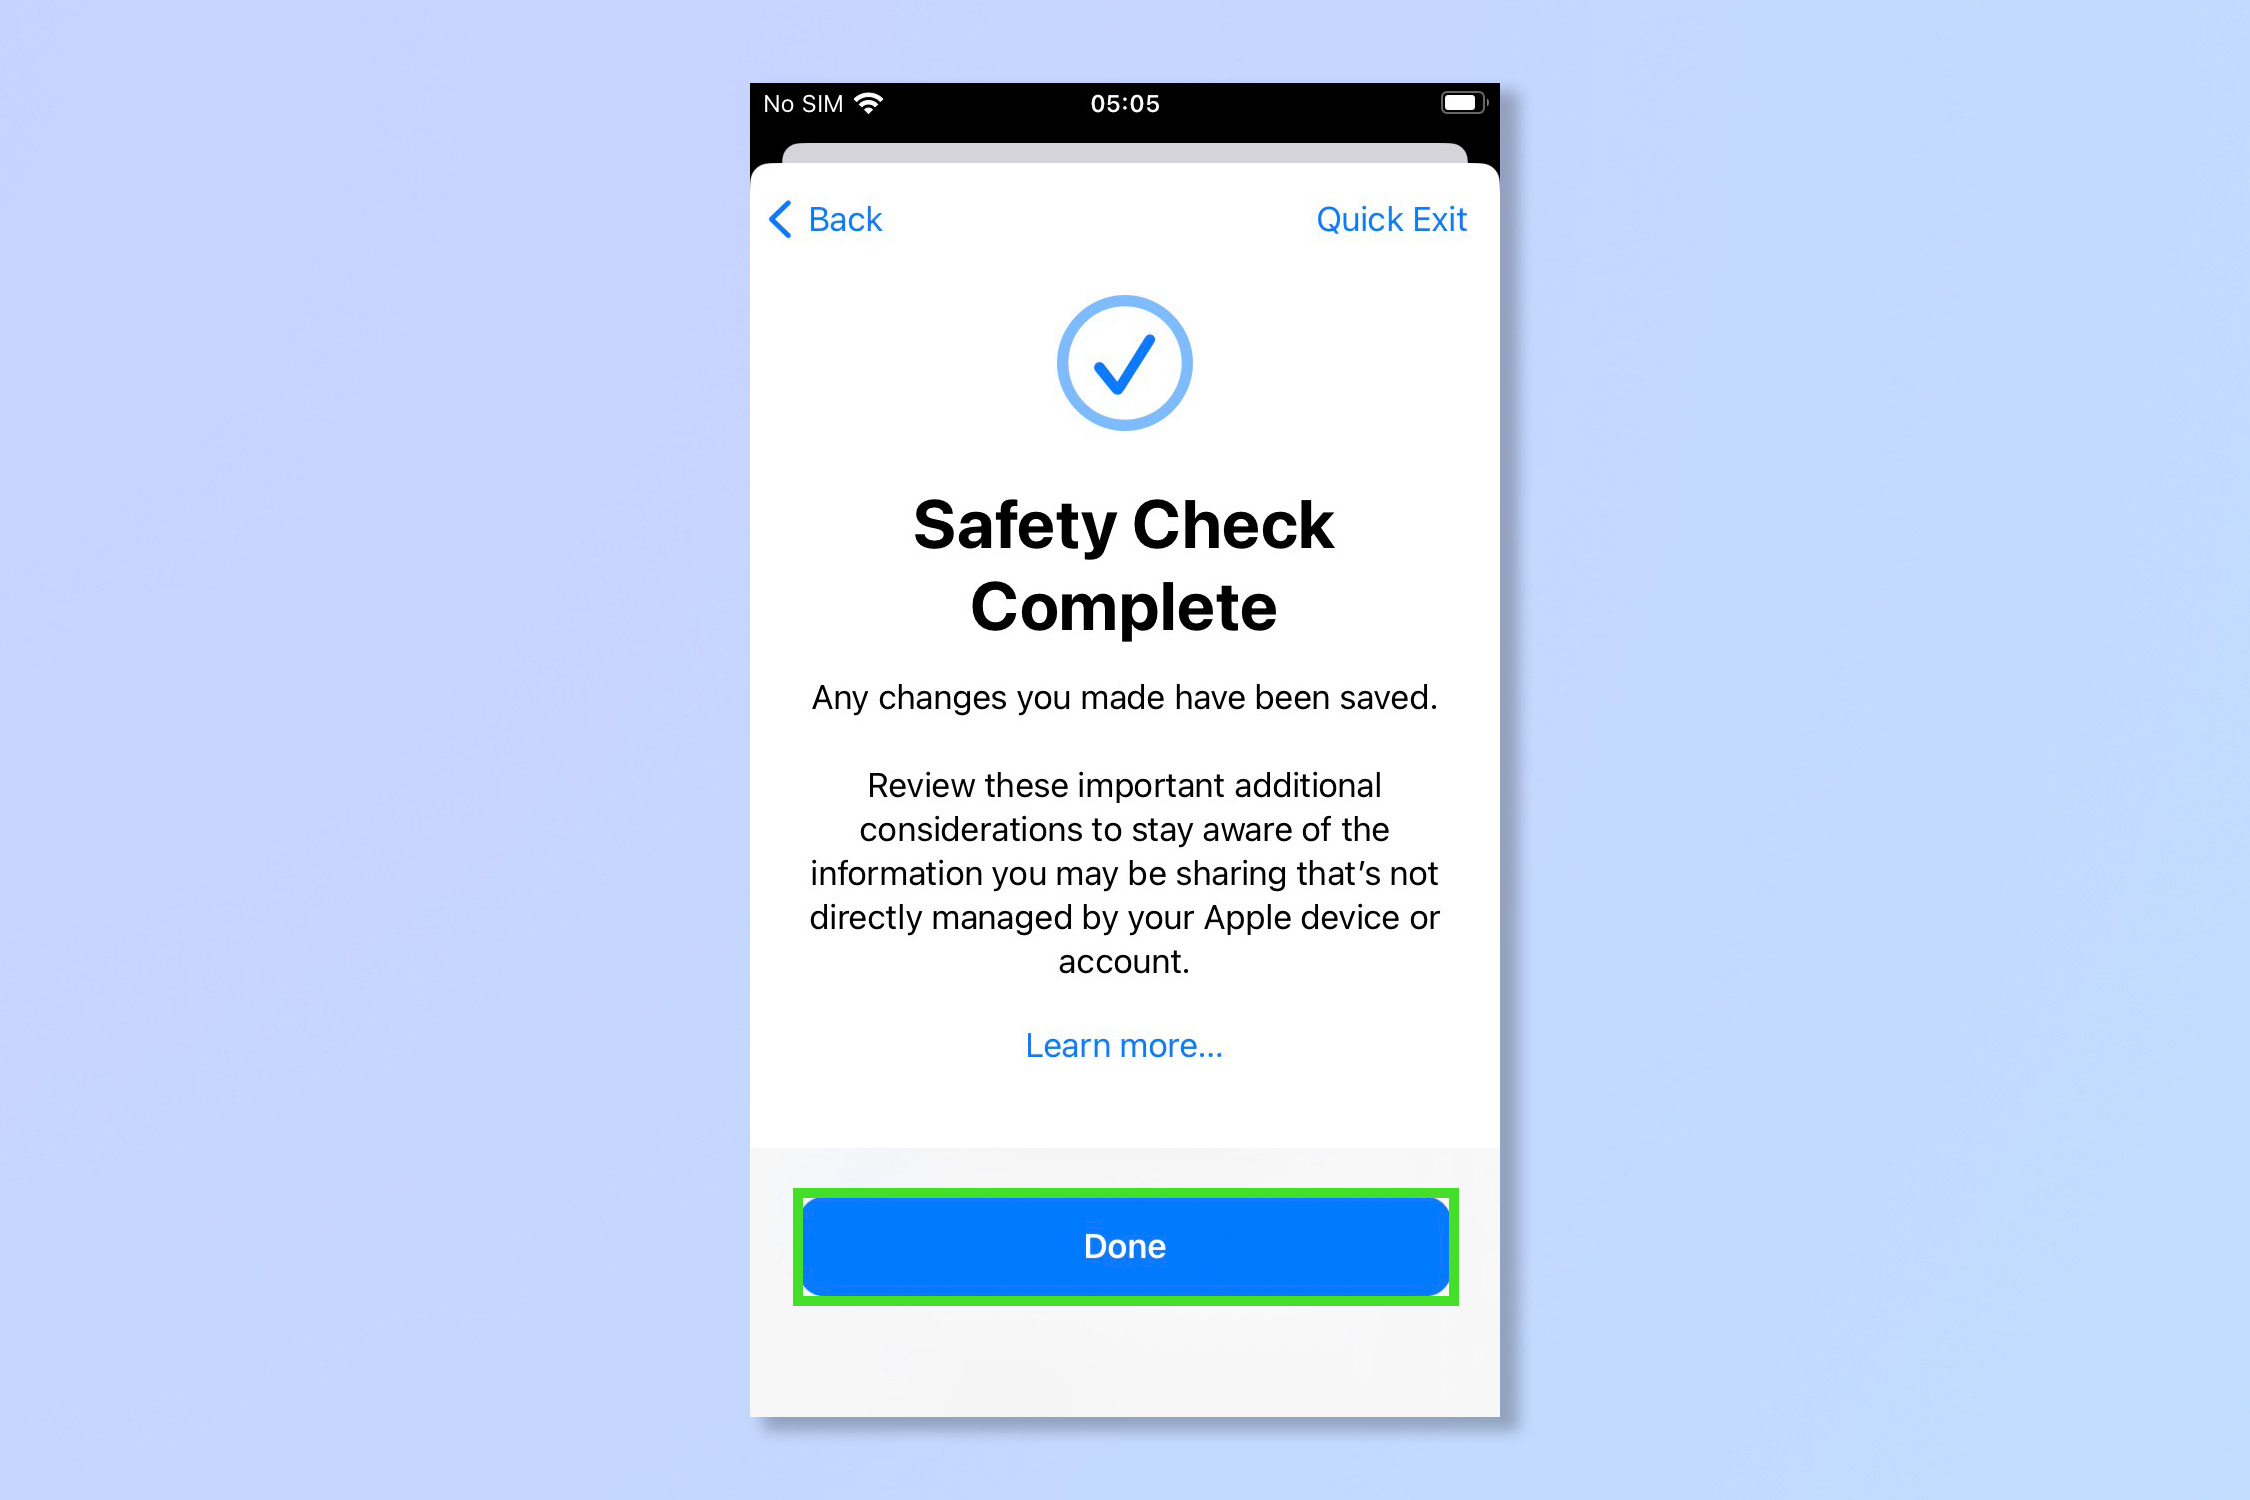
11. Tap done
How to use Safety Check on iPhone to manage sharing & access
1. Open the Settings app and tap Privacy & Security.
2. Tap Safety Check.
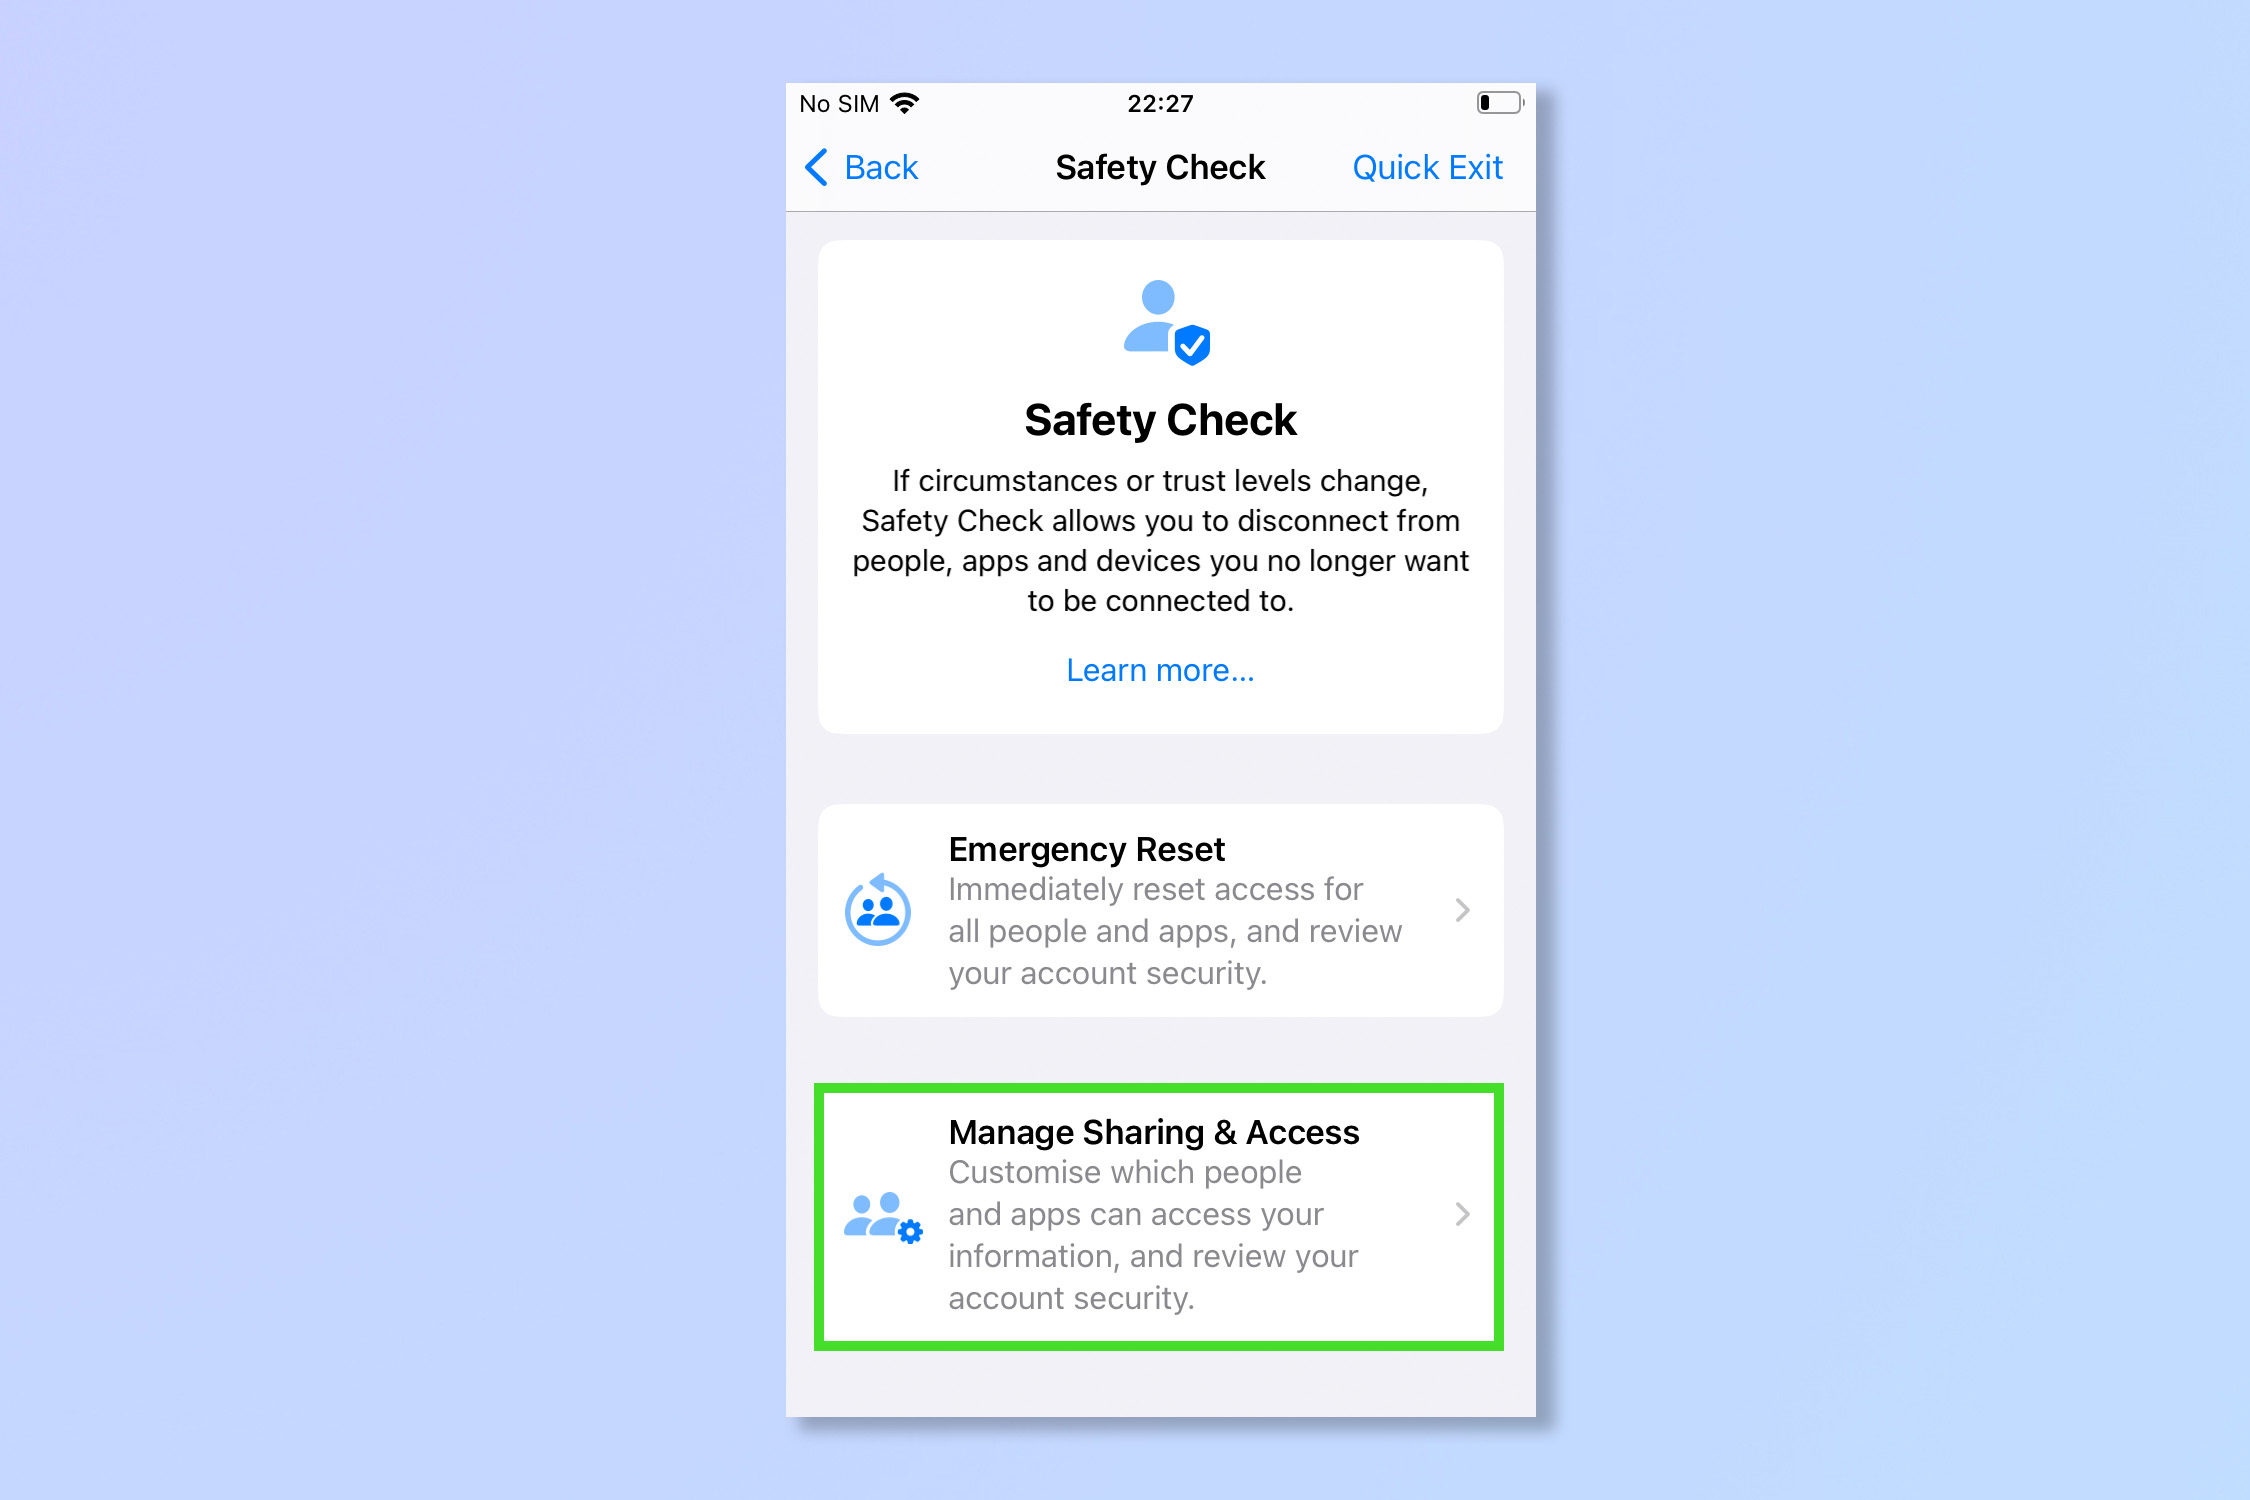
3. To curate which people and apps have access to your private details, tap Manage Sharing & Access.
4. Use FaceID, TouchID or enter your Passcode to proceed.
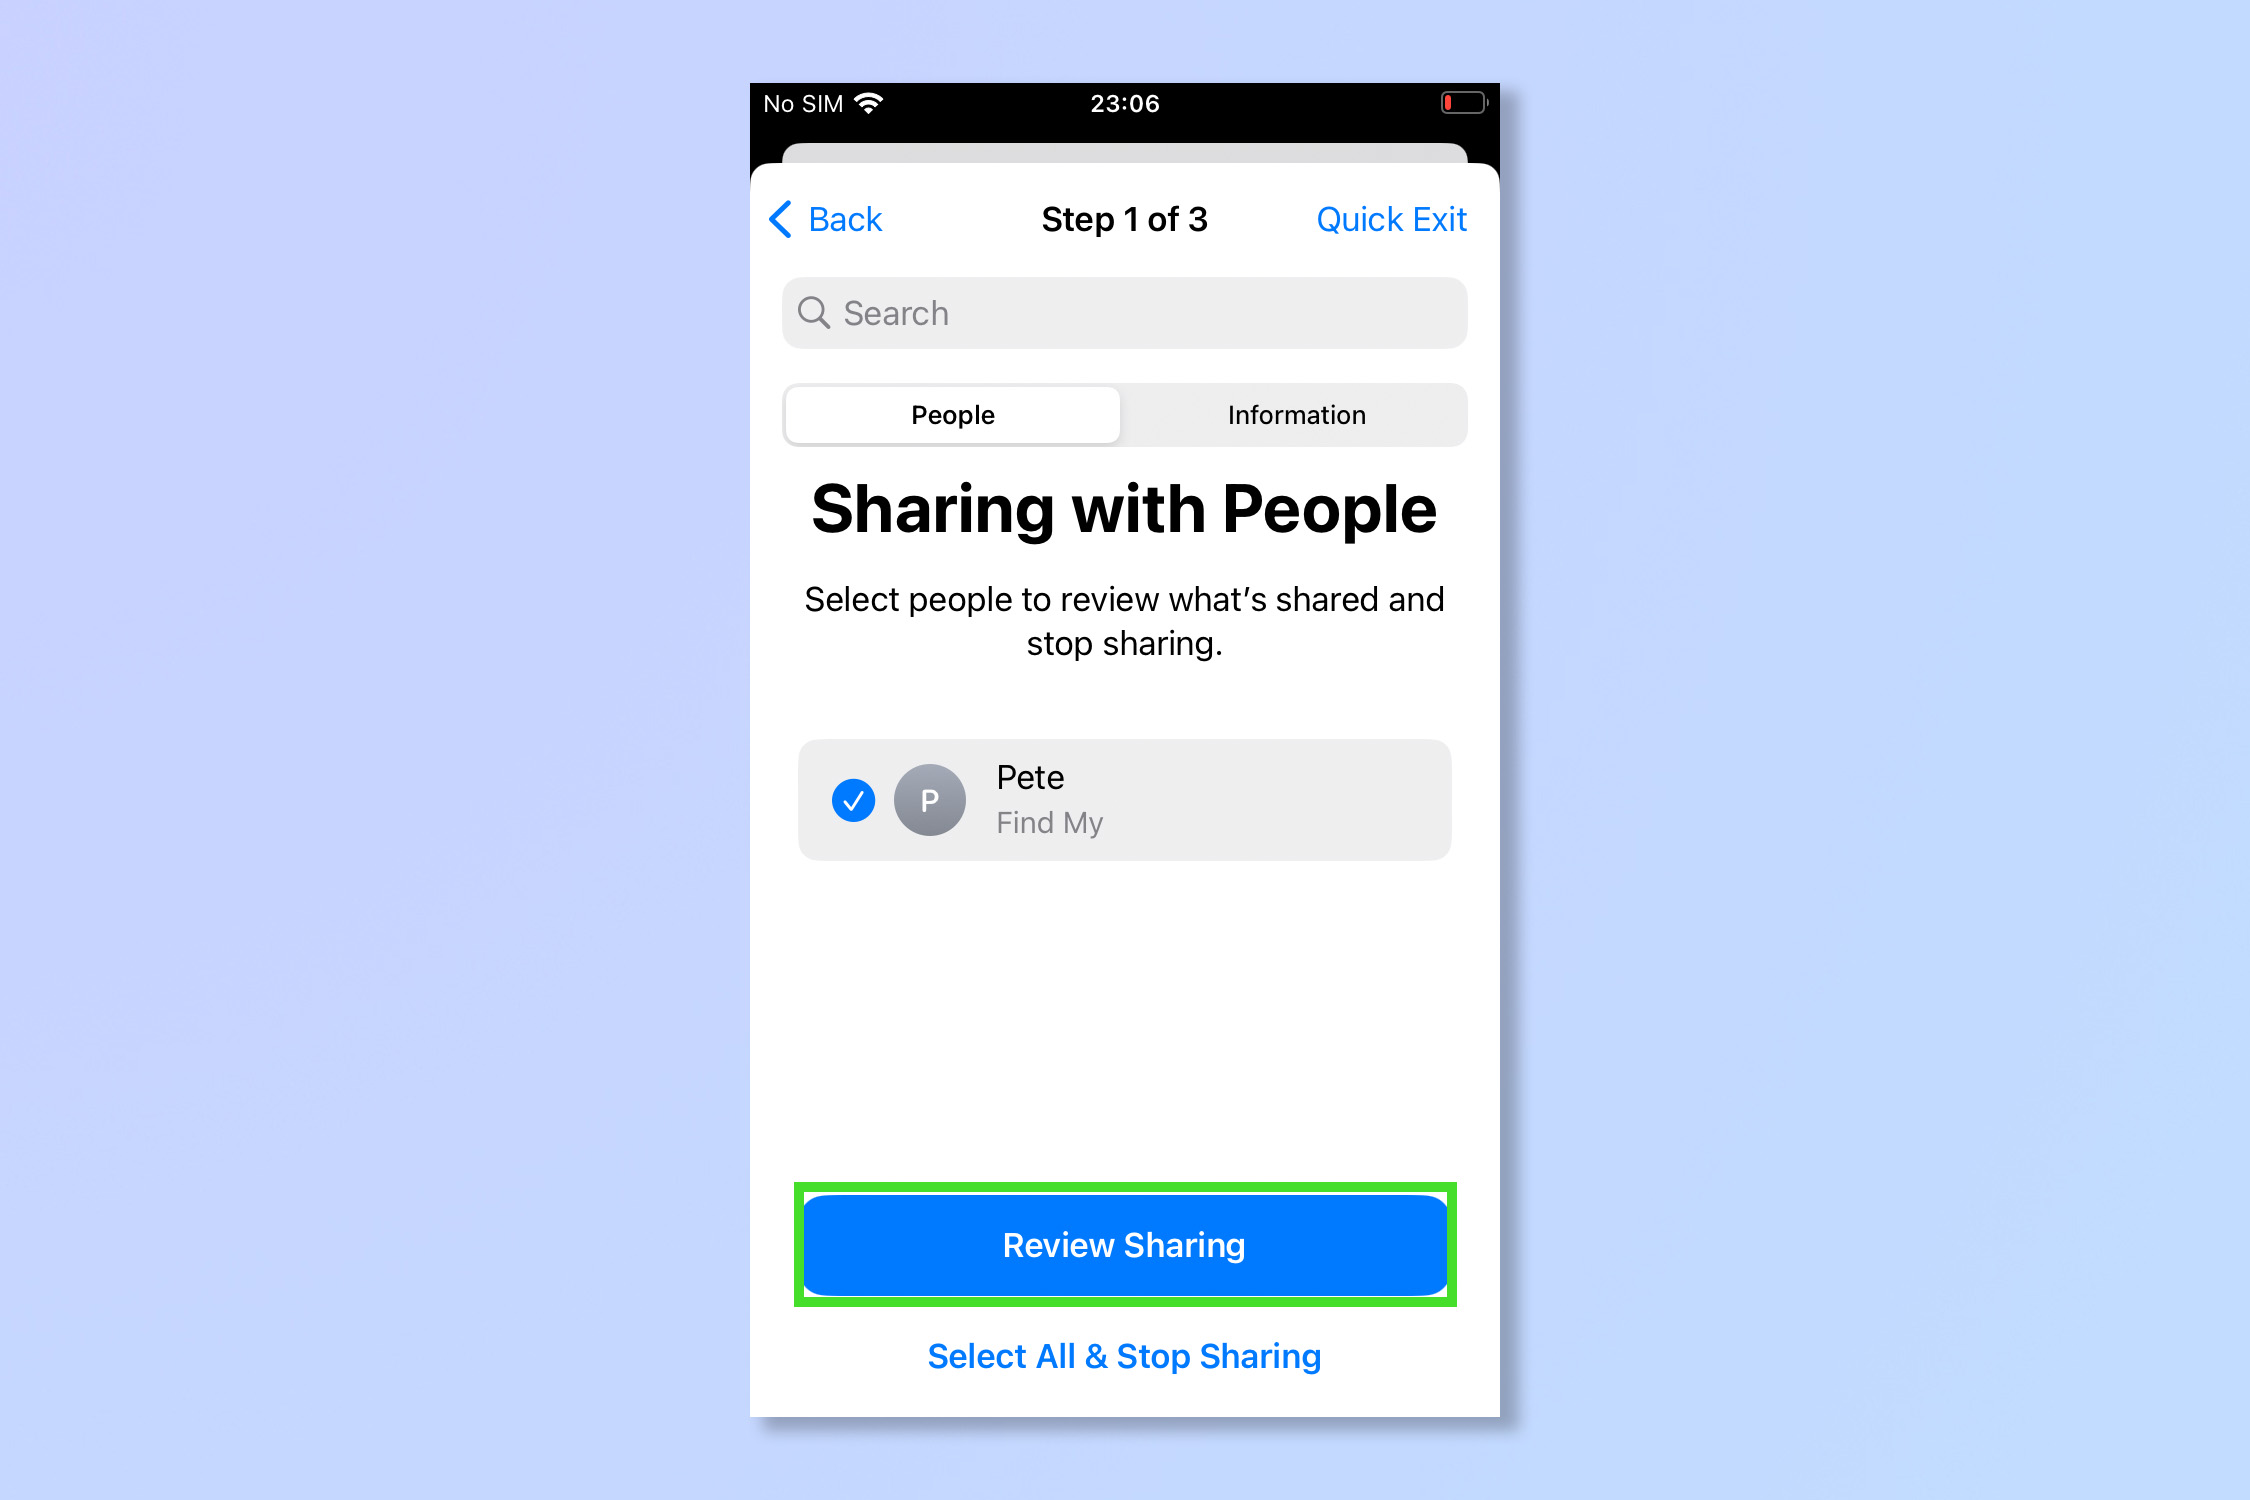
5. Select the people you wish to alter access for and tap Review Sharing to curate the permissions they currently have.
Alternatively, if you'd like to remove all access to everyone in one go, tap Select All & Stop Sharing.
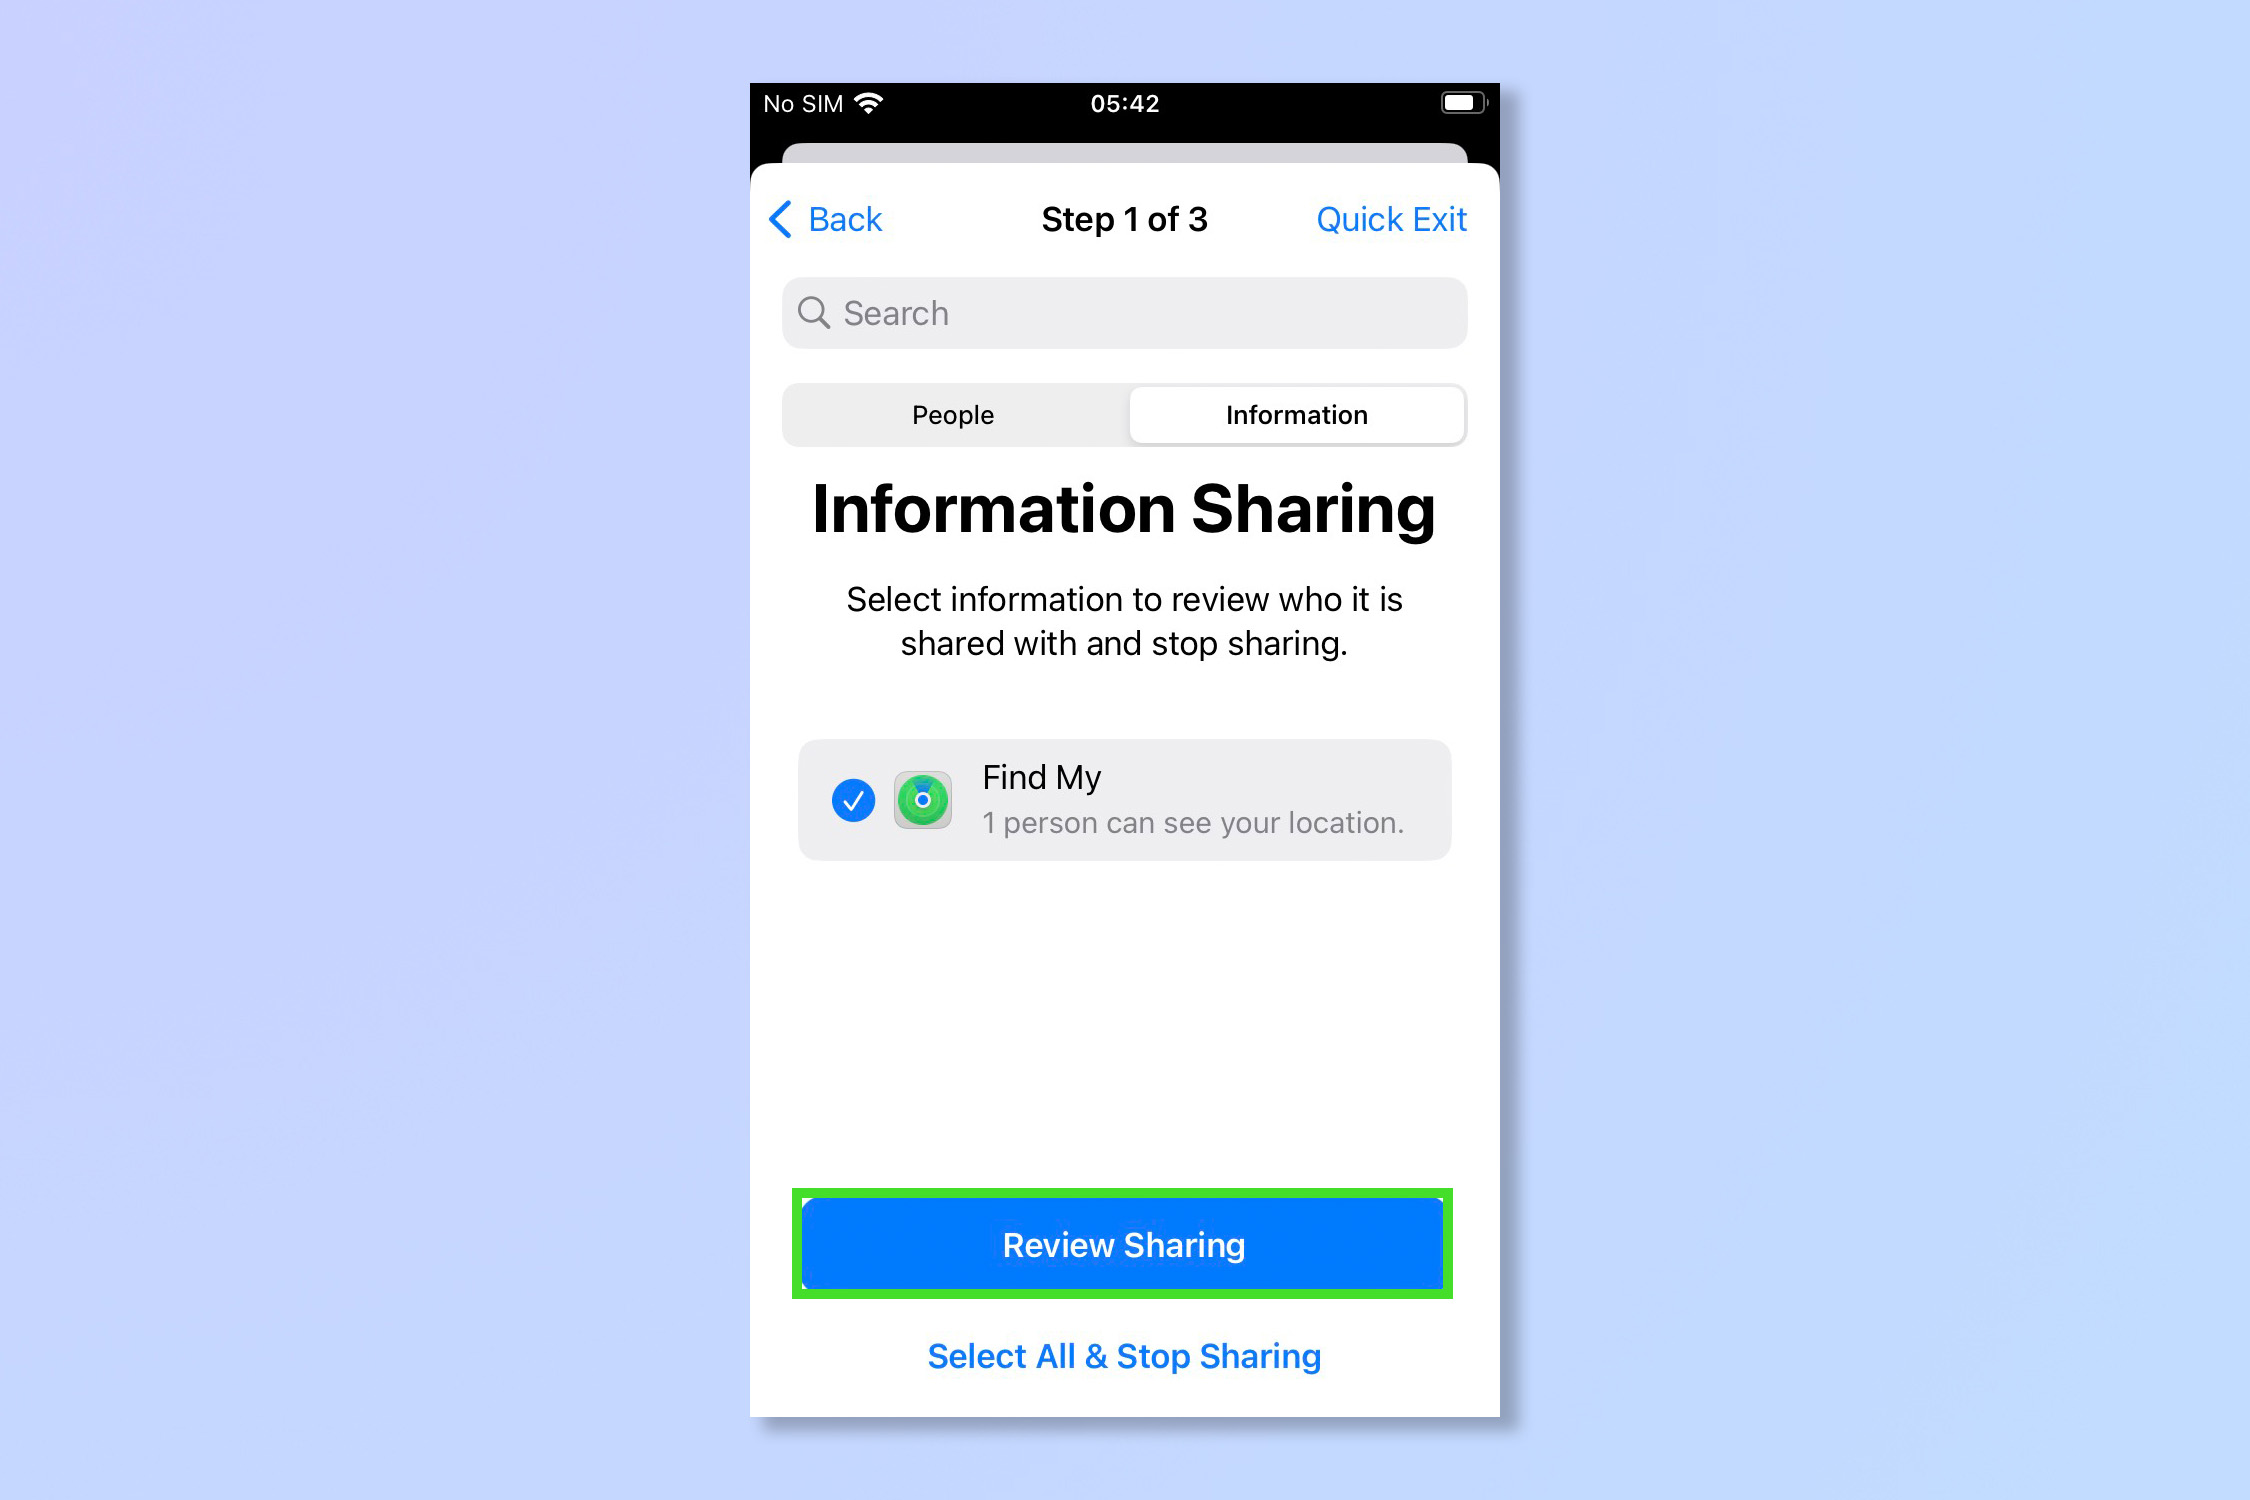
6. If you'd rather filter by what information you're sharing (such as location information or medical data), instead of the people you're sharing with, tap Information. Select the information you'd like to change and tap Review Sharing to curate the permissions.
Alternatively, if you'd like to stop sharing all information in one go, tap Select All & Stop Sharing.
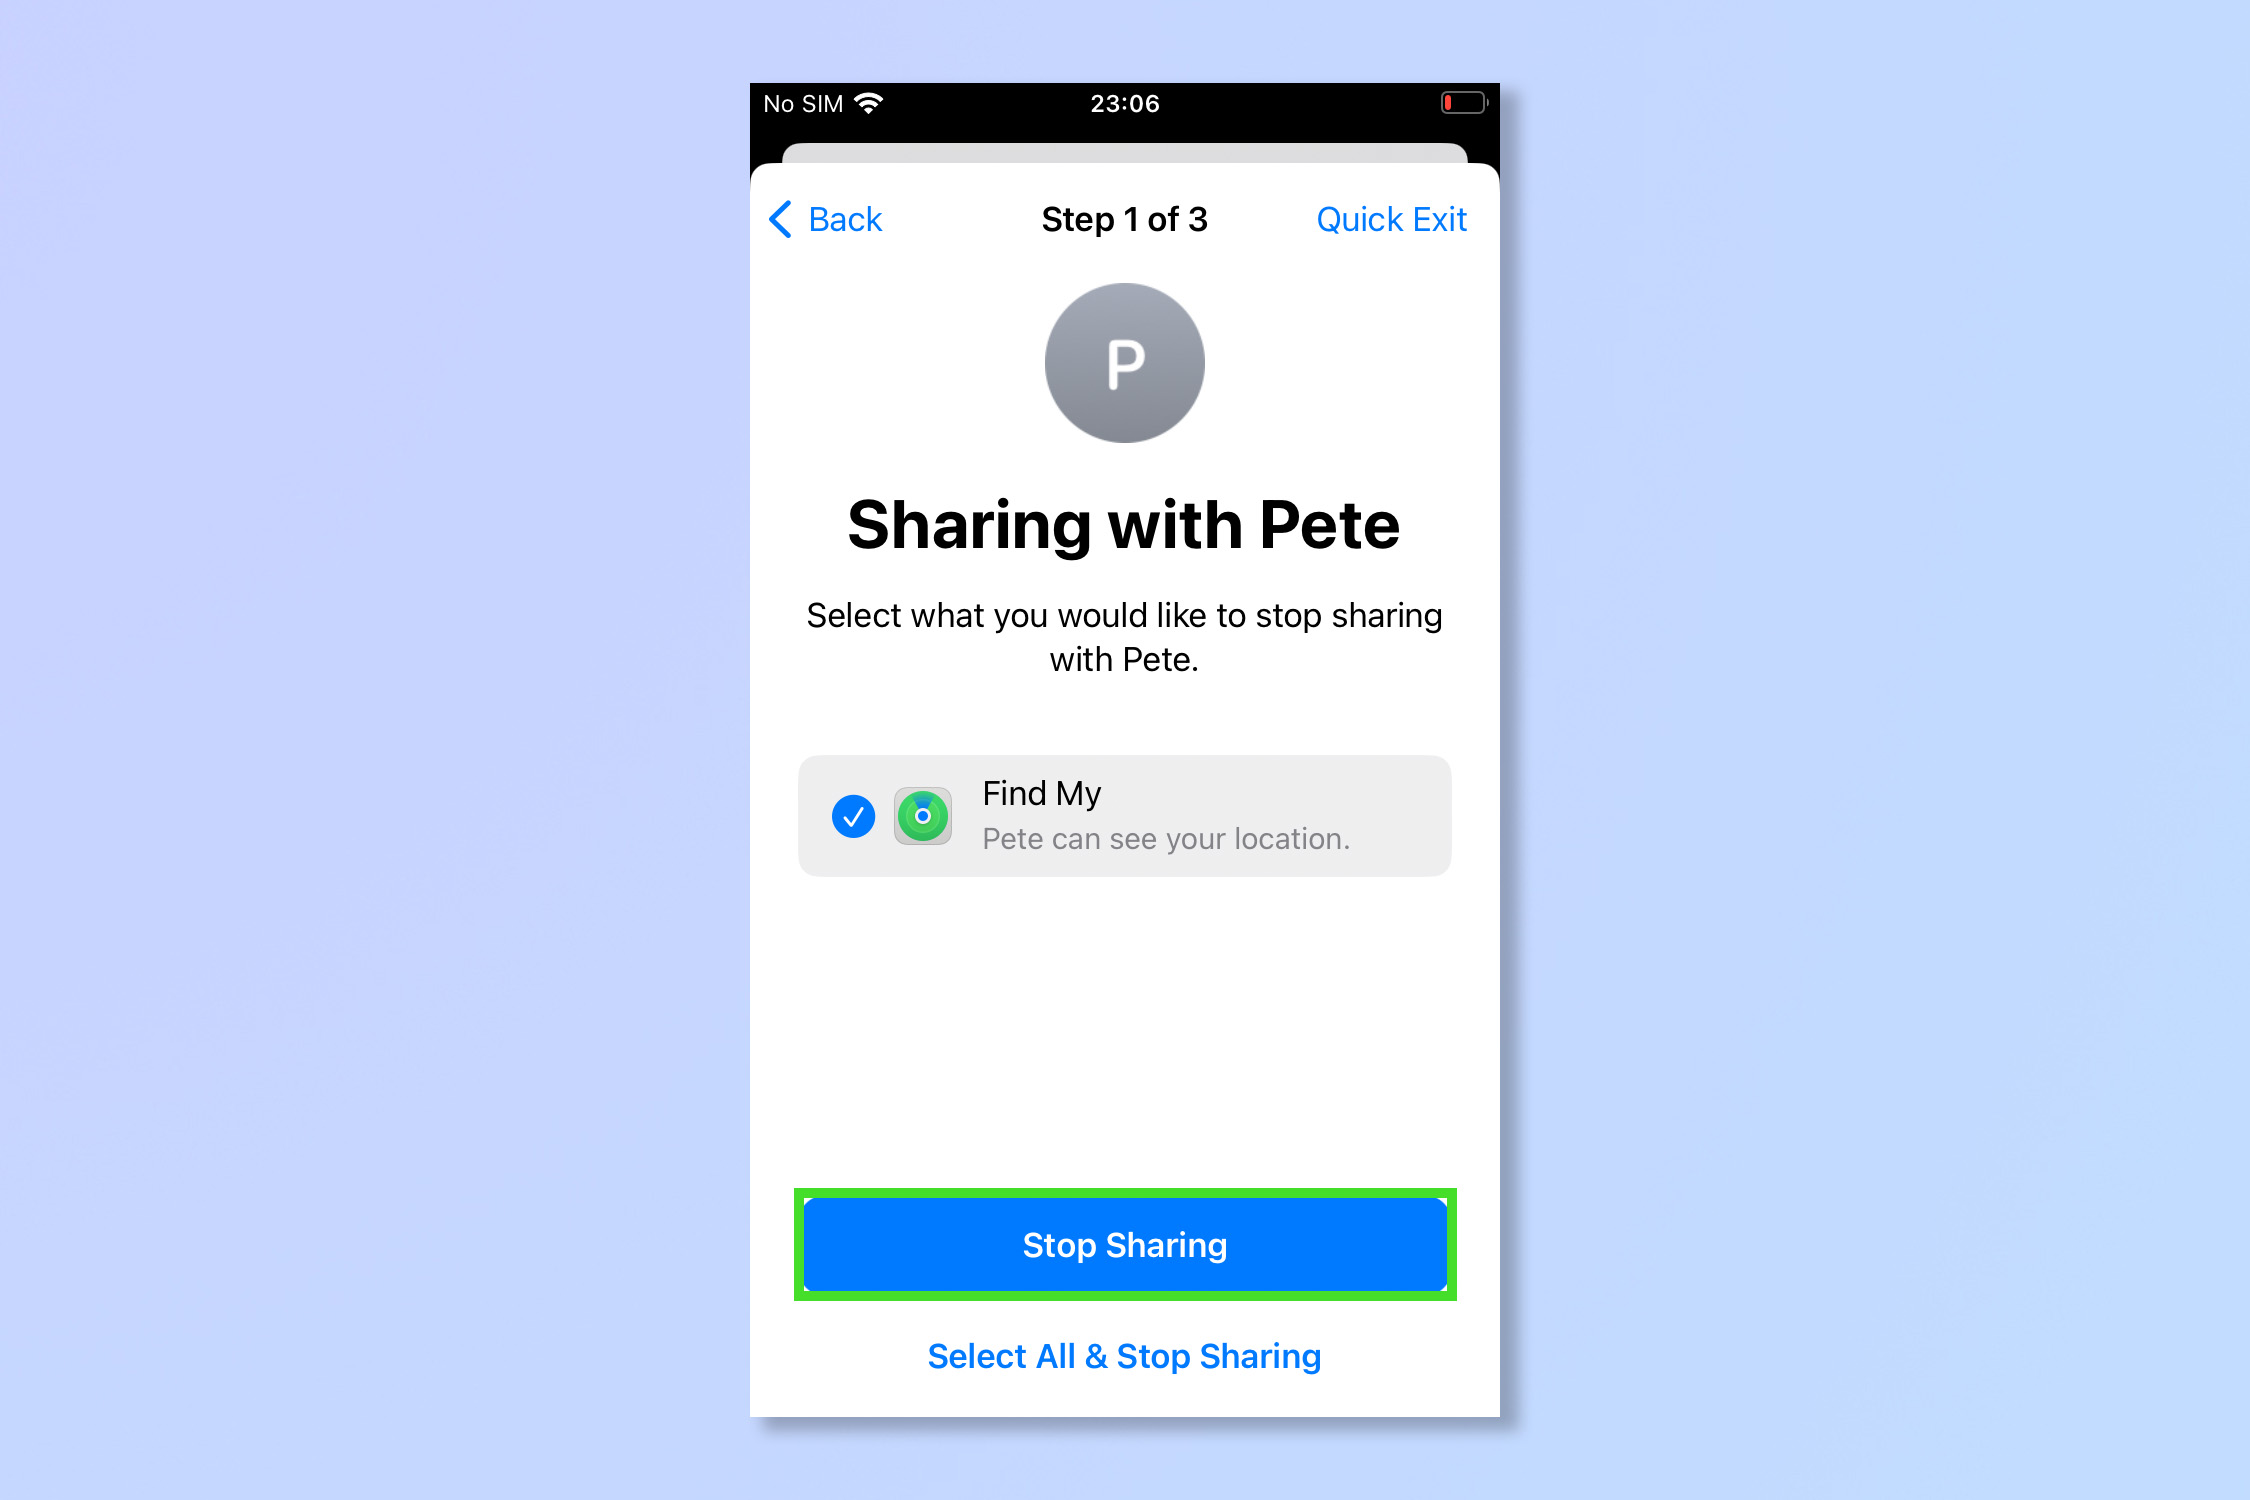
7. On the review screen, tap Stop Sharing. Then Tap Continue on the next screen.
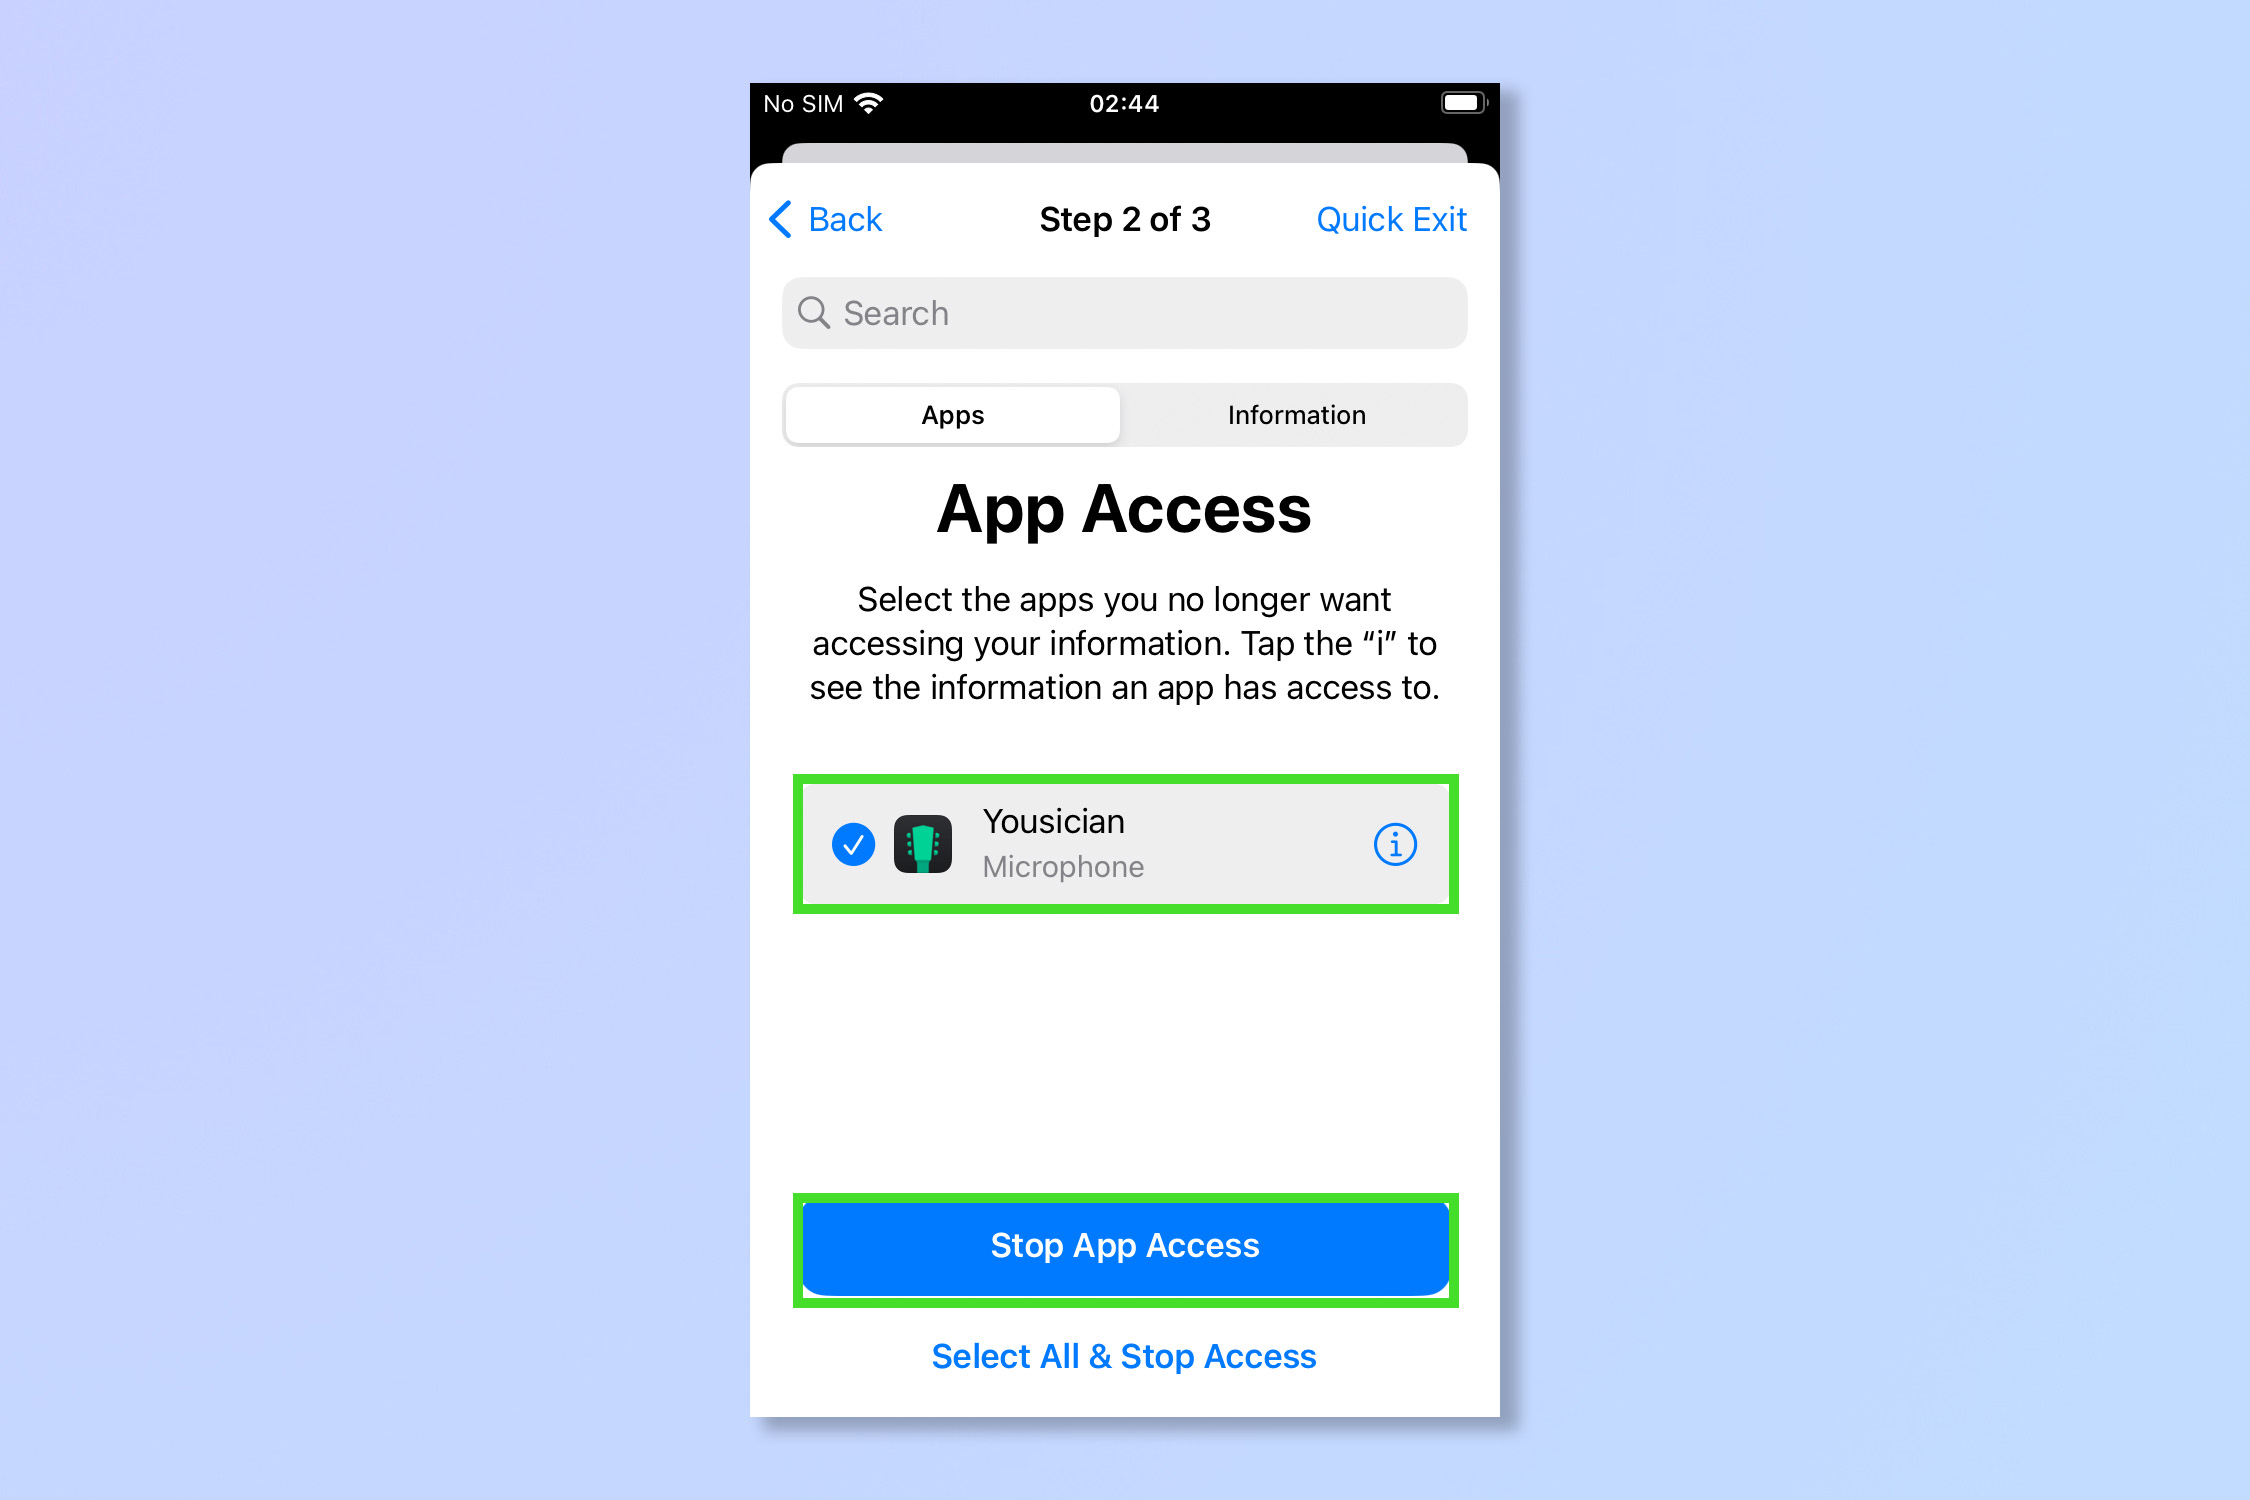
8. Now select apps to remove permissions for and tap Stop App Access. Alternatively, tap Select All & Stop Access to remove all app permissions in one go.
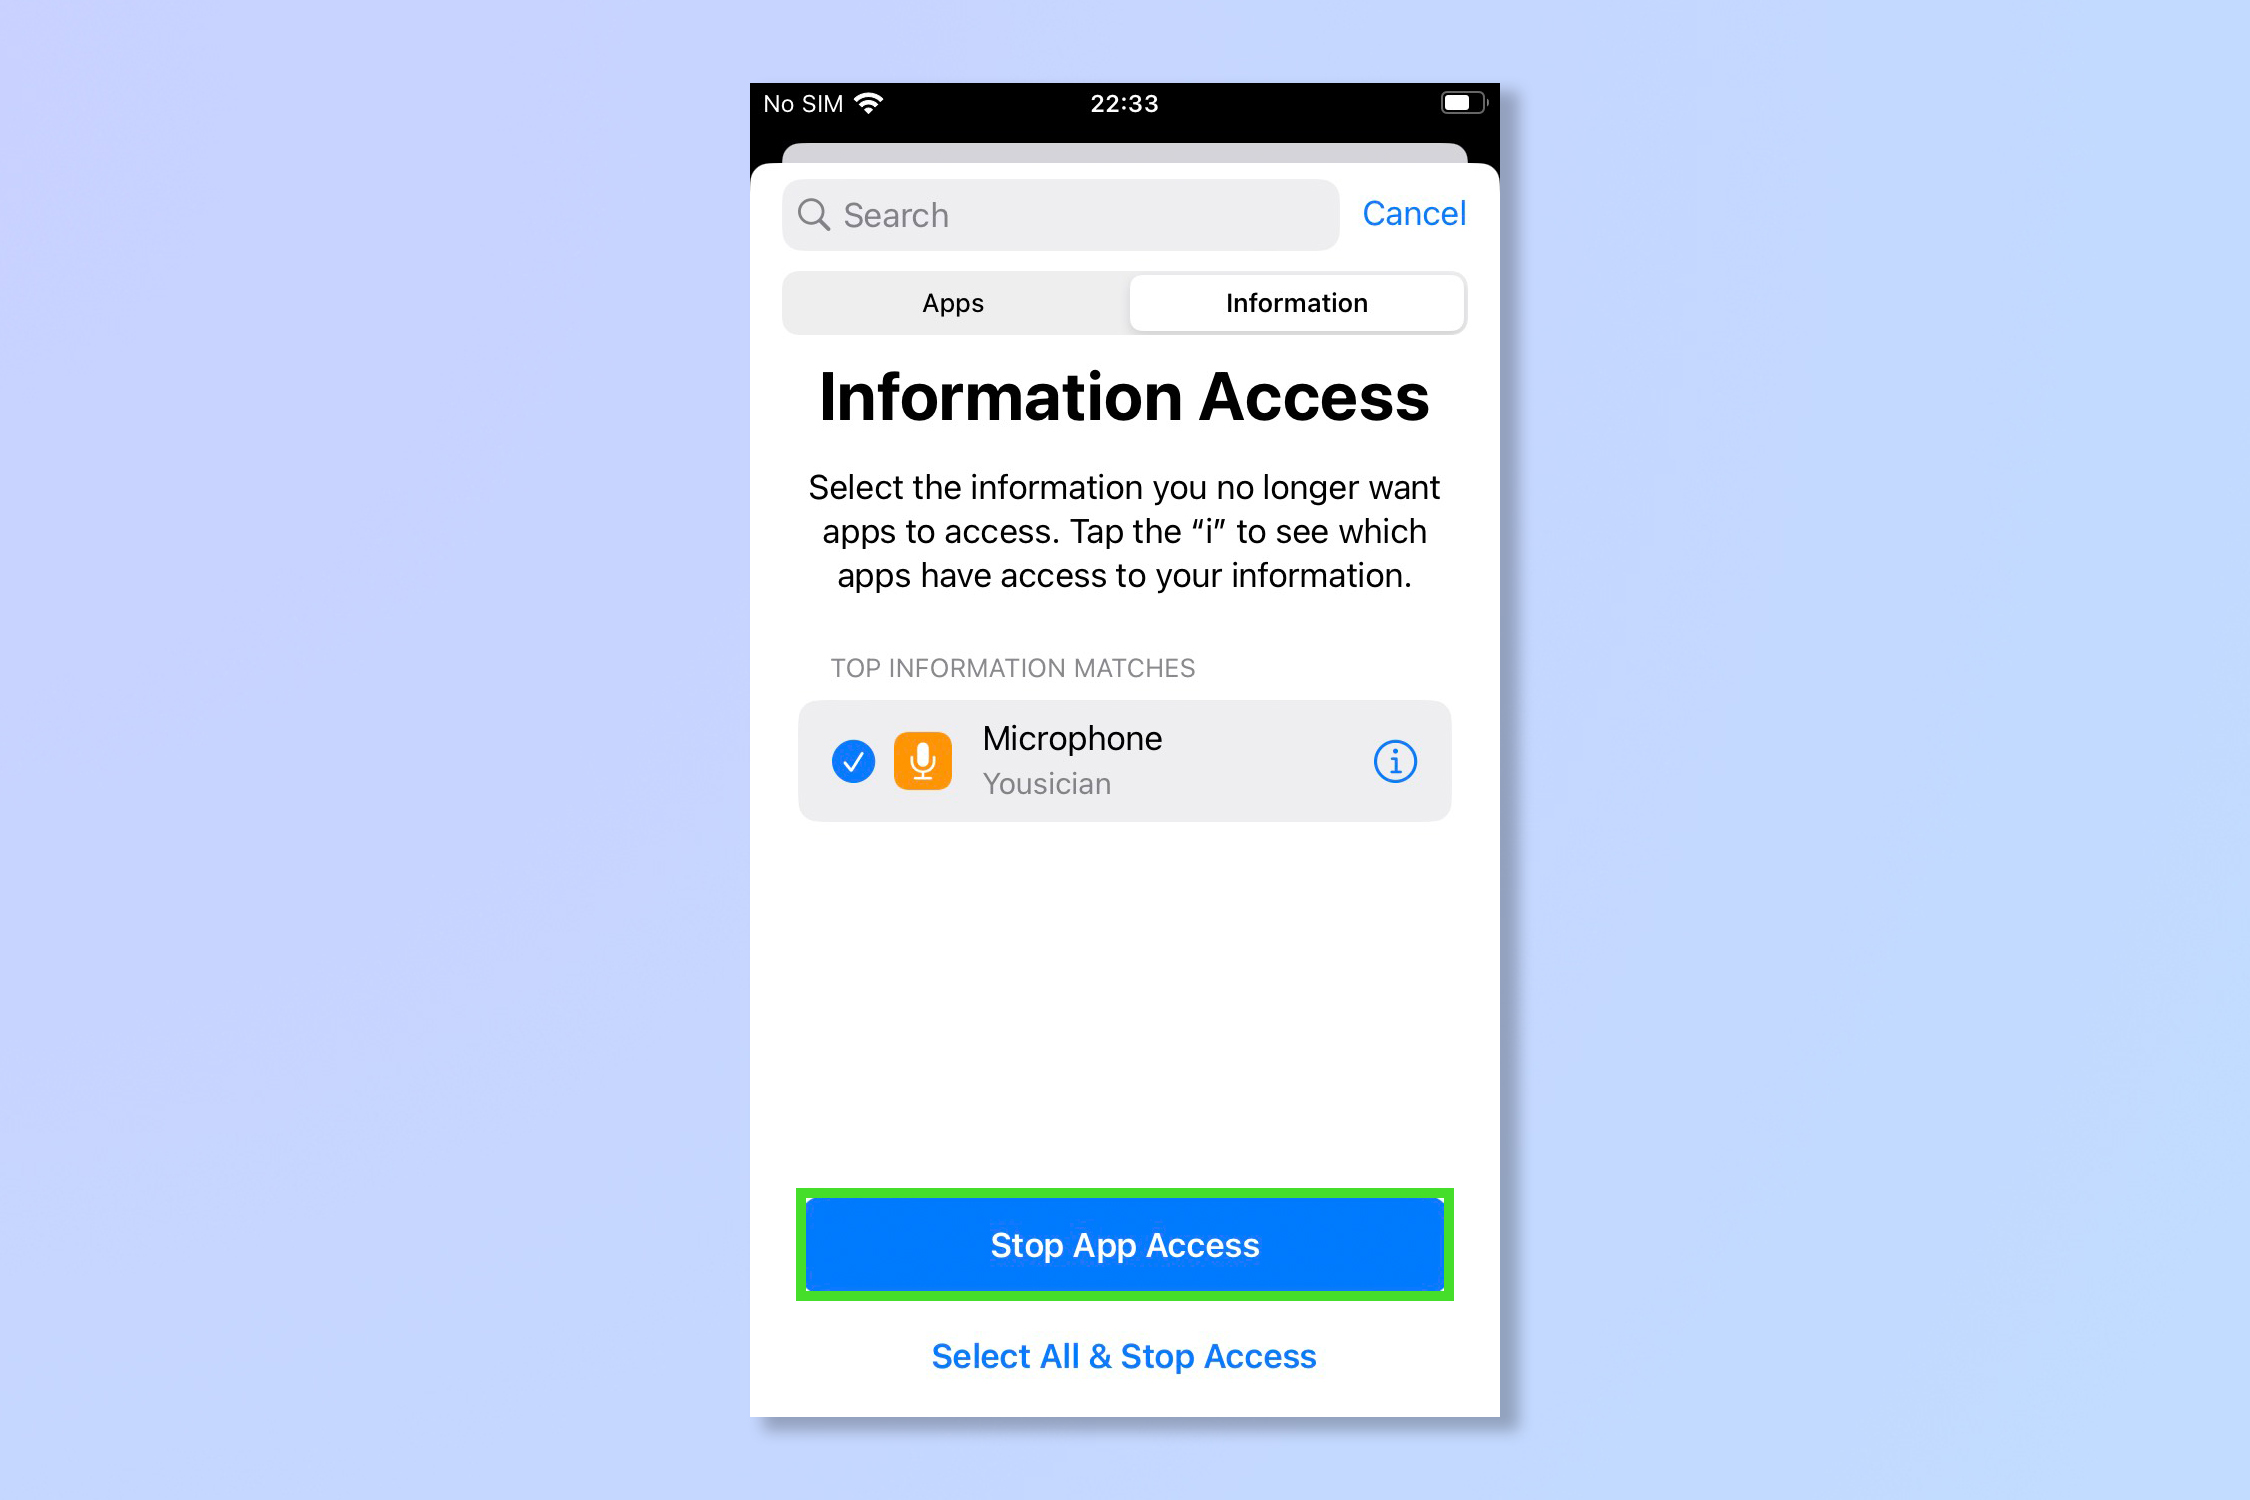
9. Tap Information to view what information each App is sharing. Select a specific function and then tap Stop App Access to stop access being shared. Alternatively, tap Select All & Stop Access to remove all app permissions in one go.
11. Select devices that you would like to remove from your account and then tap Remove Selected Devices.
12. Trusted Phone Numbers are numbers that can receive verification codes to allow access to your AppleID. To delete a no longer trusted number, tap the red button next to the number and then tap delete. To delete a no longer trusted number, select the red button next to the number and then tap delete. Then tap Continue.
13. To add a new one, Tap Add a trusted phone number, then enter a phone number and whether to receive a text or call and tap send. When you're happy tap Continue. Respond to any notifications on the newly set up trusted device and enter any codes required.
14. If you think your AppleID has been compromised, tap Update Password and change your Apple ID password. This will ensure anyone that knows your existing password won't be able to log in, or back in, to your AppleID account. Then tap Update Password again.
15. If you'd like to add a trusted contact who will be notified in the case of using the SOS function, tap Add emergency contact.
16. Select a contact to be notified when you use Emergency SOS. This should be someone you have the utmost trust in. They will appear in your Health app. Tap on their name in your contacts and then tap on their relationship to you.
17. If you would like to remove someone already set as an emergency contact, tap the red delete symbol next to their name and then tap Delete. Tap Continue when finished.
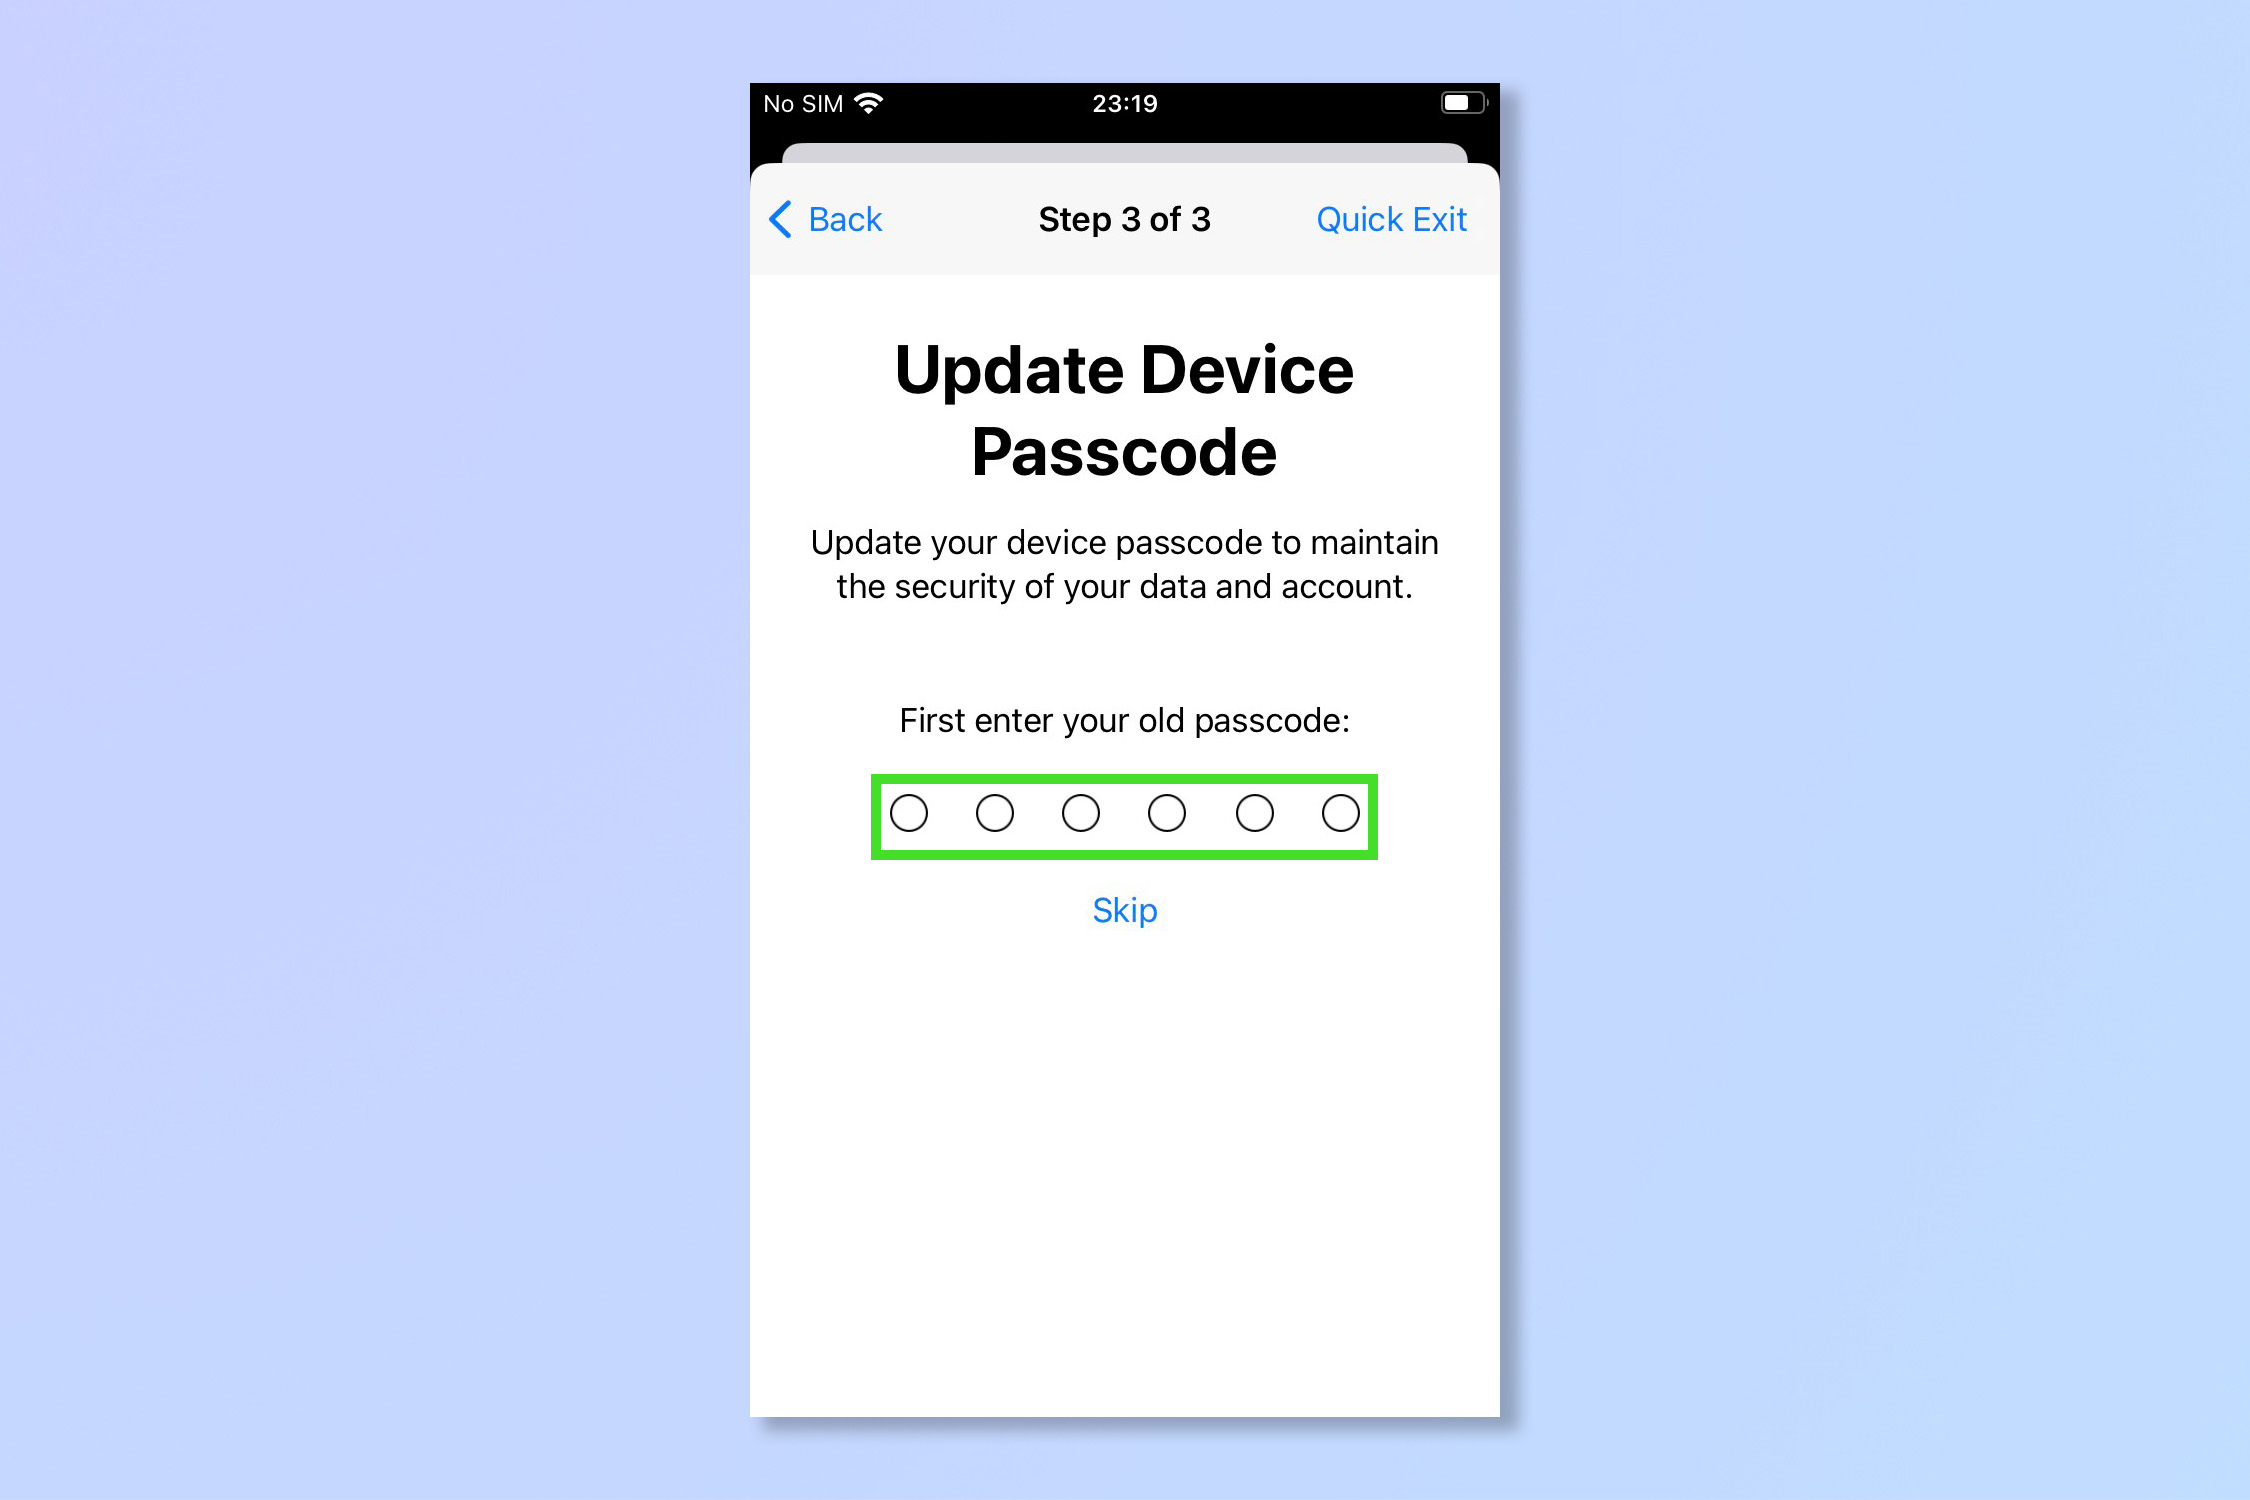
18. Enter a new passcode if you'd like to change your device passcode, otherwise tap skip.
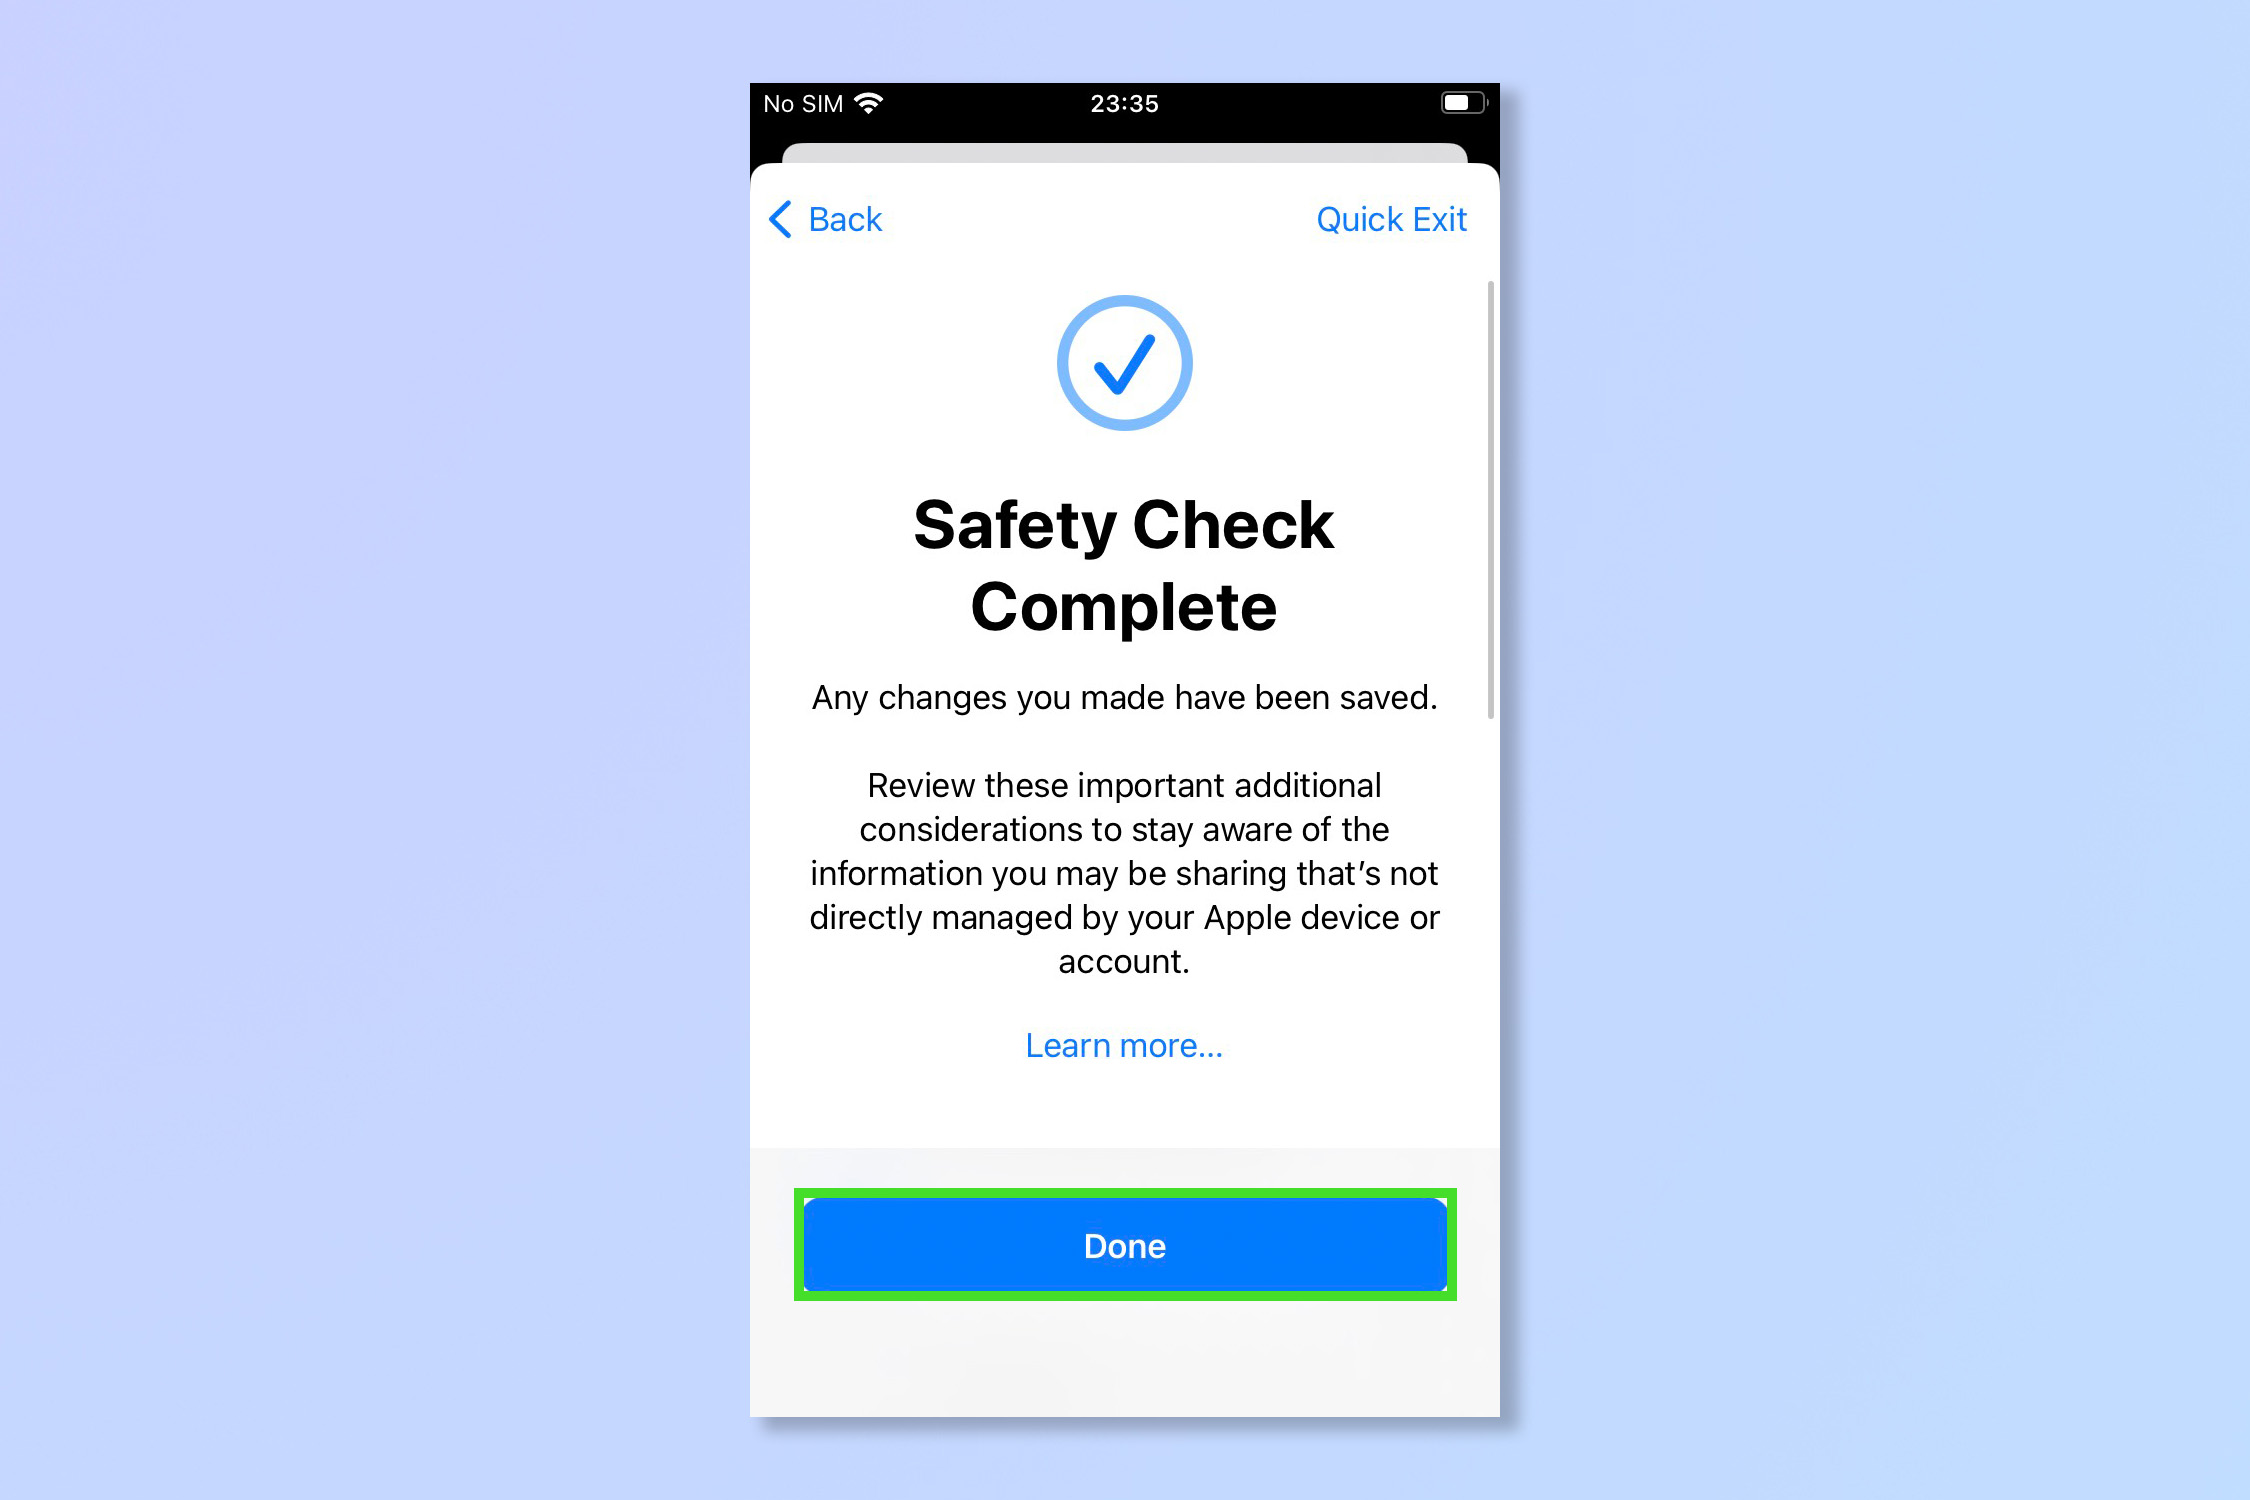
19. Tap Done to finish.
And that’s it, a couple of different ways to wipe unwanted accounts and users from your iPhone. If you are worried about the security of your iPhone, check out our guide on how to create strong passwords or how to disable location tracking on iPhone. It might also be worth checking out how to stop spam texts on iPhone. If you'd like to find a loved one's location to make sure they get home safely, read how to find someone's location on iPhone.
As well as our security guides, we also have plenty of general iOS guides to help you get the most of your Apple tech. Get started by learning how to enable Action Mode on iPhone for professional-looking video.
Andy is a freelance writer with a passion for streaming and VPNs. Based in the U.K., he originally cut his teeth at Tom's Guide as a Trainee Writer before moving to cover all things tech and streaming at T3. Outside of work, his passions are movies, football (soccer) and Formula 1. He is also something of an amateur screenwriter having studied creative writing at university.
 Club Benefits


