iOS 12 Complete Guide: Tips, Tricks and How-Tos for Your iPhone
iOS 12 is available today. Find out how to make the most of all the new features with our step-by-step advice.
How to Set App Limits in iOS 12
Spending too much time staring at your social media timeline? Discovering that those casual games are eating up a significant chunk of your day? Or are you just hoping to impose a little discipline into your digital life? iOS 12 adds a little trick to help you along in the form of Time Limits.
Time Limits are part of iOS 12's Screen Time feature, in which Apple hopes to help you put down that iPhone every now and again. You're able to place limits on specific apps or entire categories of apps, with your phone warning you when you're about to go over your self-imposed limit.
Here's how to put limits on your app usage, based on the iOS 12 public beta. (These steps may change by the time the full version of iOS 12 ships this fall.)—Philip Michaels
Limit App Categories
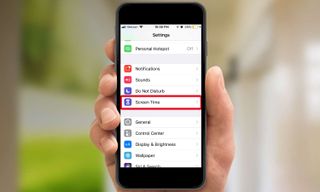
1. Go to Settings and tap Screen Time.
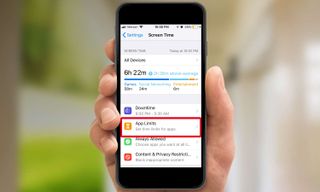
2. Tap App Limits.
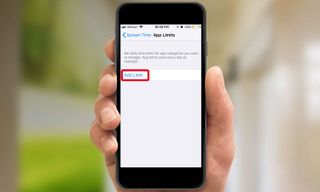
3. Select Add Limit.
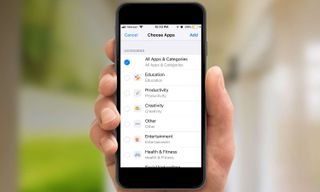
4. App Limits will show you a list of nine categories. Select the one you want to place a time limit on. (For this example, we're picking Games.) You can select multiple categories at once or pick the All Apps & Categories at the top of the screen for a universal time limit
Sign up to get the BEST of Tom's Guide direct to your inbox.
Get instant access to breaking news, the hottest reviews, great deals and helpful tips.
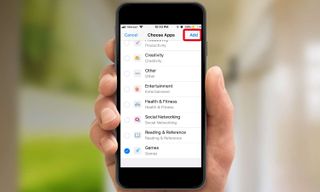
5. Once you've picked the categories you want to place a limit on, tap Add in the upper right corner.
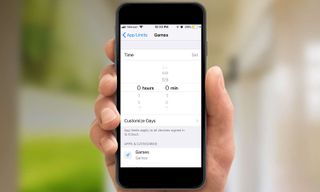
6. Use the scroll wheel to set the time limit, selecting hours and minutes. If you've selected multiple categories, the time limit you set applies to all those categories.
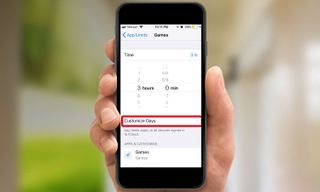
7. That will be your daily allotted time for the app category you've selected. If you'd like to schedule different times for different days — allowing more time on the weekend, for example, tap Customize Days and tap the time limit on the day you wish to adjust.
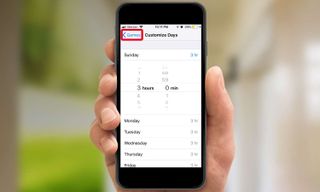
8. When you've made your adjustments, hit the back arrow in the upper left corner; hit it the back arrow again on the subsequent screen to return to the main App Limits page.
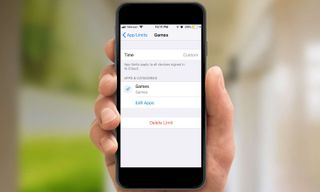
Your app limit will now appear for your selected category. Add Limit repeats the process for other categories.
Limit Specific Apps
If you prefer more fine-tuned limits, it's currently a slightly different process.
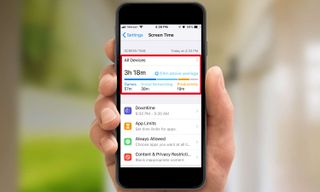
1. From the main Screen Time screen, tap on the graph showing your app usage for all your iOS devices.
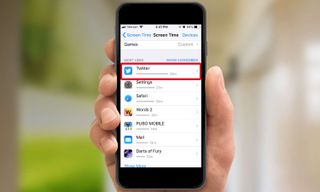
2. On the subsequent screen, scroll down to the list of your most used apps. Select the app you wish to limit. (In this example, we're picking Twitter.)
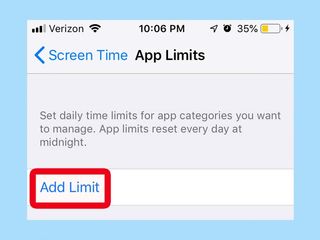
3. Scroll down to the bottom of the subsequent screen, and select Add Limit.
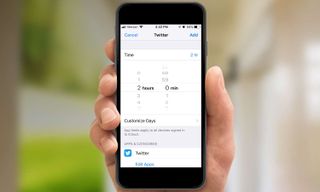
4. Use the scroll wheel to set a daily time limit for the app.
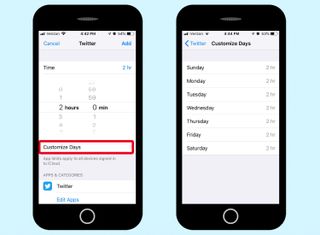
5. If you want different time limits for different days of the week, select Customize Days, and make an adjustment by selecting the day you want to adjust.
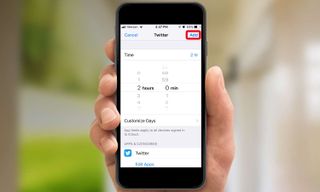
6. Tap Add in the upper right corner.
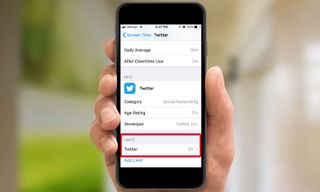
Your app-specific time limit will now appear.
Let's say you find your newly imposed time limit too... limiting. Go back to the App Limits screen in Screen Time where all your limits appear in one place.
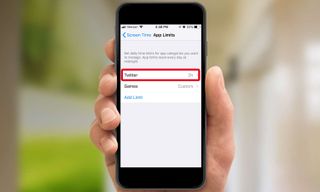
1. Select the limit you want to adjust. (Again, let's pick Twitter.)
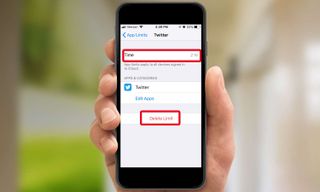
2. On the subsequent screen, tap on the time to add or subtract from your limit. Tap Delete Limit if you want to remove it entirely.
What Happens When You Hit a Time Limit
Apple doesn't intend for App Limits to be inflexible (at least not unless they're imposed by parents on a child's phone). Rather, the aim here is to help you not overuse your phone, so you can get more time if need be.

When you get within five minutes of your time limit, a notification will flash on your screen.
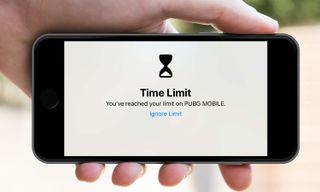
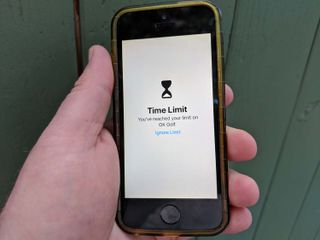
Hit your time limit while using an app, and a message pops up telling you that time's up.
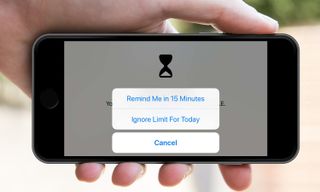
You can tap Ignore Limit if you want to keep going — you'll have the option of tacking on 15 more minutes or just scrapping your time limit for the day altogether. Screen Time will note that you've gone over time if you do.
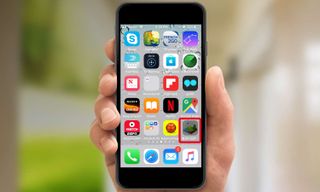
Once you're hit a time limit for a given app, its icon will appear grayed out. Tap the icon, and you'll get the same message as above notifying you that you've gone over time while giving you the option to ignore your self-imposed limit.
Current page: How to Set App Limits in iOS 12
Prev Page How to Use Screen Time in iOS 12 Next Page How to Set Downtime in iOS 12Tom's Guide upgrades your life by helping you decide what products to buy, finding the best deals and showing you how to get the most out of them and solving problems as they arise. Tom's Guide is here to help you accomplish your goals, find great products without the hassle, get the best deals, discover things others don’t want you to know and save time when problems arise. Visit the About Tom's Guide page for more information and to find out how we test products.
-
cothirteen "You don’t need to do anything special to use Google Maps or Waze on CarPlay, though of course, those apps first need to be installed on your iPhone. Once they are, you will see them on the CarPlay home screen alongside all of your other CarPlay-compatible apps. "Reply
Can anyone confirm this? I have the public beta installed but regular versions of those apps and it does not show up on CarPlay. From what I am reading the betas are needed. -
cazdabear Most likely, those versions of the apps that you have... don't support Carplay. I read from a Waze Community post, that Waze has only likely released this to their own pool of Waze Beta testers.Reply -
cothirteen Makes sense and that's what I've read too. Just didn't want to miss out on information I wasn't privy to!Reply -
otisjuhl I just downloaded the new, full iOS 12 to my iPhone and connected it to my CarPlay (2017 Subaru). Neither WAZE for Google Maps showed up. Does anyone have any idea how to get it appear? (I have them both on my iPhone and opened them while connected). Thanks!Reply -
rotolosc You need to make sure to update google maps in the app store. Waze is not supported as of yet but comingReply
-
otisjuhl Very helpful - thanks! I did update Google Maps and it appeared on my cars's screen yesterday and works! As noted, WAZE isn't there yet.Reply -
ashwincampbell I’m not sure if anyone else is experiencing this but under screen time > always allow, some apps show up as only numbers with no icon. There’s no way to tell what those apps are. Any idea what is causing this?Reply -
diem2222 After half an hour recording it is not possible to stop it, just the option restart and stop.Reply -
Jason3022 While details/specifics are great, they could have made this much simpler - it is overly complex.Reply
Here's why:
I simply want to know how much 'Screen Time' I've used since I unplugged my Ipad from the wall. That information is not available - it does not coincide with 'Battery' either, which is pure lunacy.
I'm not sure what these techs. are thinking but it positively is not with the average end-user in mind.
I am not alone in this thought.
