What Makes Photoshop So Expensive?
Why does the upcoming Adobe Photoshop CS5 cost $600? We tested out its features to find out what you’re paying for.
Get HDR Effects Without Multiple Images
If you look at the vibrant, glowing images from professional photographers and wonder why you can’t get the same colors in your own photos, it’s probably because they’re combining multiple exposures into one HDR image. Combining images that capture the shadows, the highlights, and what you’d consider the standard exposure for the scene means you can show bright sunlight in the background without bleaching or blackening out details in the foreground–your eye can see a much wider range of tones in an image than your camera can and HDR puts some of that back in your photos.
HDR is far from new, but it isn’t usually easy. There have been various add-ons and extras to simplify merging multiple exposures into HDR images in Photoshop or you could do it with the multi-step HDR tool in versions of Photoshop from CS2 onwards (or do it by hand with layers). The HDR Pro feature in CS5 gives you a lot more controls in a simpler interface, including making it easier to work with multiple exposures taken without a tripod. There’s also an option for faking an HDR image when you only have one exposure.
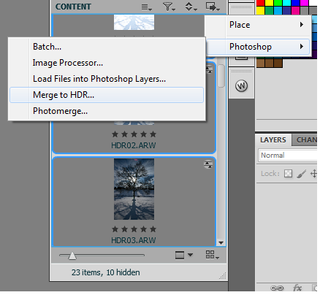
HDR is a demanding process. It’s one of the few areas we had any problems with in the beta (along with 3D) and you’ll have to wait for Photoshop to work through the sequence of steps to merge the images, but this is still far easier than the previous multi-step and manual processes. The HDR merge in CS5 is a little better at aligning multiple images and removing "ghosts" where the same feature moves between two exposures. The HDR Pro dialog shows you the exposure of the source images and which one it’s using as the reference for removing those errors–and you can pick a different source image by clicking it.
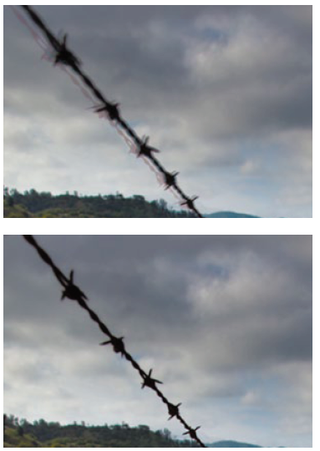
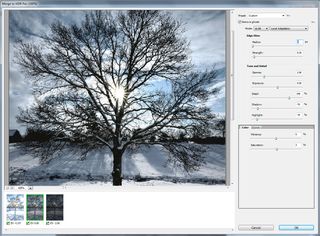
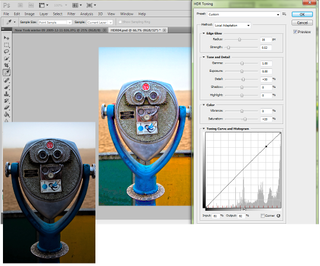
The default HDR image is weighted to look vivid but realistic–you can adjust how vibrant and saturated the colors are; tweak the exposure overall and the balance of tones in the shadows, highlights, and details; or control how much the edges of objects in the photo "glow" to get the specific effect you want.
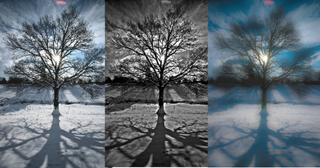
When you don’t have multiple exposures and your photo is dark or uninspiring, HDR Toning mimics the increased tonal range of HDR. The effects aren’t as good and you’ll have to spend more time tweaking the settings–unless you’re an expert, don’t expect the real look of HDR but you can certainly get more attractive images.
Sign up to get the BEST of Tom’s Guide direct to your inbox.
Upgrade your life with a daily dose of the biggest tech news, lifestyle hacks and our curated analysis. Be the first to know about cutting-edge gadgets and the hottest deals.
Current page: Photoshop CS5 HDR Merge - Effect - How It Works - Tom’s Guide
Prev Page Photoshop CS5 Retouching Tools - How They Work - Tom’s Guide Next Page Photoshop CS5 Paint Tools - How They Work - Tom’s GuideMary Branscombe is an experienced freelance journalist, editor and author, who has been writing for more than three decades. Her work has appeared in The Financial Times, The Guardian, Tom's Guide, and many more. She has also written several novels — including the Cassidy At Large technomysteries — and two IT guides alongside her writing partner, Simon Bisson.
