What Makes Photoshop So Expensive?
Why does the upcoming Adobe Photoshop CS5 cost $600? We tested out its features to find out what you’re paying for.
Do More with RAW files
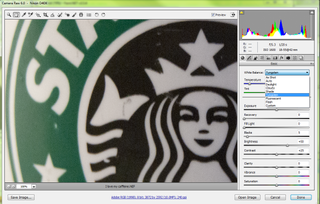
Digital SLRs let you save files not just as JPEGs but in a RAW format that is exactly what the camera sensor captured, before the camera processes the image. This way you can do your own processing. The Camera Raw 6 plugin in CS5 (which will also be available for Lightroom in the future) works with RAW images from around 275 cameras (RAW formats vary between cameras) and it has new tools that make it easier to get what you want from RAW files more easily.

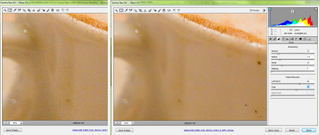
The higher the ISO at which you shoot your photos, the more likely you will see noise in the image that makes lighter areas in particular look grainy–with some consumer digital cameras, you’ll see a lot of noise even if you’re not taking a long exposure. The Raw Plugin lets you adjust the noise in both the grayscale and color information, so you can take noise out of shadows and get rid of the false color splotches that can appear on white areas. However, we found that the luminance slider for removing grayscale colors wasn’t available with all RAW images, but we’d expect this to be fixed in the final version.

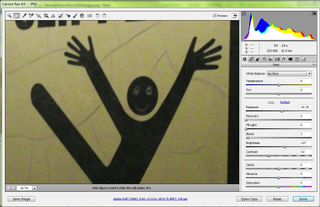
Unusually, you aren’t restricted to loading RAW files in the Raw Plugin and you can now open JPEG and TIFF files too, so you can clean up noise in any photo.

The new version of the plugin promises improved sharpening compared to previous versions and it also lets you add noise. If you want to combine two photos shot under different conditions or with different cameras, you can add grain to make them match or you can just get a stylized film effect.
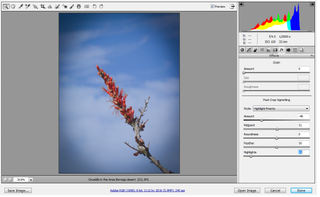
If you use a wide-angle lens, you can sometimes get unusually dark corners even in an otherwise bright image (this is called vignetting, because it gives a similar effect compared to when a vignette crop or fade is applied). You can now remove vignette corners from a wide-angle image or you can add them to photos as an effect to make the area of interest stand out even more. There are other ways of creating a vignette in Photoshop, but the controls here are simple and it can be convenient to do it at the same time as your other image adjustments. You can control how dark the vignette corners are, how far in they come, how sharp the edges are, and how bright any highlights in the vignette area should be.

Sign up to get the BEST of Tom's Guide direct to your inbox.
Get instant access to breaking news, the hottest reviews, great deals and helpful tips.
Current page: Photoshop CS5 RAW Update - New Features - Tom’s Guide
Prev Page Photoshop CS5 Puppet Warp - How It Works - Tom’s Guide Next Page Photoshop CS5 Lens Correction - How It Works - Tom’s GuideMary Branscombe is an experienced freelance journalist, editor and author, who has been writing for more than three decades. Her work has appeared in The Financial Times, The Guardian, Tom's Guide, and many more. She has also written several novels — including the Cassidy At Large technomysteries — and two IT guides alongside her writing partner, Simon Bisson.
-
mitch074 Nice. Photoshop sure is quite the package.Reply
However, I wonder why, along with all the tools you cite, there is no mention made of the Gimp...? After all, it is available on Windows, Mac and Linux, it doesn't cost a dime, and it also includes:
- HDR effects (in script-fu): Tone Mapping and Exposure Blend
- painting effects (programmable brushes)
- GEGL (yes, 3D in Gimp)
- lens correction
Now, all of these aren't as advanced nor are they as easy to use as the Photoshop versions, but they are here and they work. For free. -
marybranscombe Mitch - to fit in as much information about Photoshop CS5, I only had room to mention a tiny fraction of all the image editing tools out there ;) I'm quite a fan of Paint.Net and Irfanview, personally...Reply -
mitch074 Paint.NET, iPhoto, WL Photo Gallery are not exactly professional-grade applications - while the Gimp (with colour profile management capabilities, layers-based approach, programmable filters, vector graphics capabilities, advanced stylus management, etc.) is, actually, used by some professionals... And a direct competitor to Photoshop.Reply
Thus why I found its absence (Paint.NET isn't quite there yet, it does have the merit of being free for use -but not open source- ) a bit surprising. -
Traciatim "Digital SLRs let you save files not just as JPEGs but in a RAW . . . "Reply
So does my point and shoot from 2002 . . . and (I believe all new) Interchangeable Lens Digital Cameras, and lots of point and shoots available today. You could have just said "Many Digital Cameras" rather than implying that Digital SLRs do something that other cameras don't, which is not true. -
marybranscombe Traciatim - true, but 1) the CS5 emphasis is very much on the DSLRs judging by the minimal list of cameras covered by the cusotm lens correction (and Adobe refers to only 275 cameras whose RAW formats are supported) and 2) my feeling is usually that point and shoot cameras with small lenses and sensors tend to need the in-camera processing to deliver good imagesReply -
cadder Photoshop is the ultimate consumer image editing tool. There are lesser tools sold by Adobe that will do for most people with digital cameras, and they are a lot less expensive- Photoshop Elements and Photoshop Lightroom. Of course Gimp and Irfanview are much cheaper options than that for the average person too.Reply -
anthropophaginian If it was for sale for half-price $300, I doubt sales would double. The same universities and design companies would buy it, but it would still be out of many consumers' price range. At this price range, with spreading of costs the time saved and final quality of the product will justify the price.Reply
...Also you're paying for the ostentatious value. -
punditguy Student discount FTW! Adobe Creative Suite Design Standard, $299 at Amazon. Won't be available until June 30, though...Reply -
Tomsguiderachel Traciatim"Digital SLRs let you save files not just as JPEGs but in a RAW . . . " So does my point and shoot from 2002 . . . and (I believe all new) Interchangeable Lens Digital Cameras, and lots of point and shoots available today. You could have just said "Many Digital Cameras" rather than implying that Digital SLRs do something that other cameras don't, which is not true.I would argue that most point and shoots today do not offer RAW. And, most interchangeable lens cameras ARE DSLRs (not all).Reply
