Tom's Guide Verdict
Serious and industrial users who need to produce big 3D prints quickly should turn to the blazing-fast TAZ 5, if they're not put off by the steep price tag.
Pros
- +
Large build area
- +
Fast printing
- +
Supports wide range of materials, including polycarbonate
- +
Prints stick well to print bed and are easy to remove.
Cons
- -
No auto-leveling of print bed
- -
Some printing glitches
- -
Expensive.
Why you can trust Tom's Guide
Lulzbot's TAZ 3 has been the 3D printer to beat. And now an update to version 5 delivers on Lulzbot's claims of faster printing and more flexibility. Priced at $2,283 (which is typical of high-end 3D printers of this type), we found the TAZ 5 to be the fastest printer we’ve tested, cranking out attractive 3D prints at high speed.
That said, the TAZ 5 isn't perfect: the setup process is frustratingly manual in an age of auto-leveling print beds, and we found a few odd printing glitches on some prints. Overall, though, this is an excellent 3D printer.
Design: Open Frame Industrial
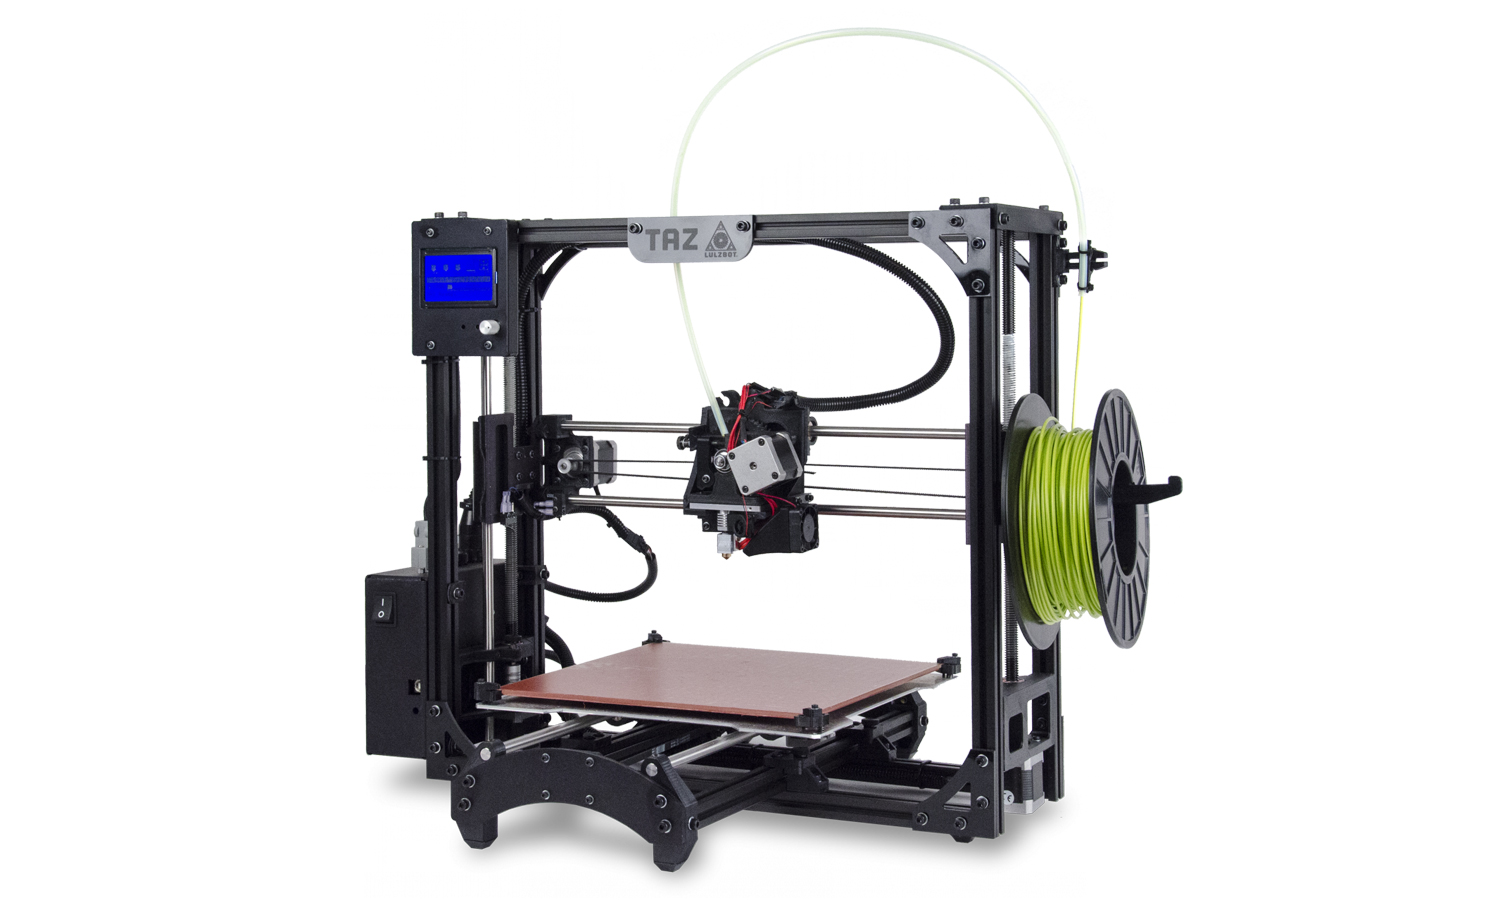
The TAZ 5 looks like a piece of industrial machinery: it is all about form over function. The whole thing is built around a tough aluminum frame that provides rigidity, but without taking up too much space. This isn't a small printer, though: measuring just under 27 inches high and 21 inches wide, it needs a good amount of desk space, especially with the moving print bed at the bottom of the printer that slides forward and back. Most printers that can handle large prints like this require similar amounts of space, though.
The TAZ 5's print bed is large (at just over 12 x 11 inches, with a print area of 11.7 x 1.8 inches) and is made of PEI plastic-coated glass. Above the large print bed, the print head moves up-down and left-right. This print head offers layer heights of between 0.075mm (0.003 inches) and 0.35mm (0.0138 inches): a very wide range that means it can produce both detailed and fast prints.
Most of the business end of the print head is metal, including the hexagonal print nozzle that releases the molten print material.
The print head has an opening for the melted filament that’s 0.5mm across; it's bigger than most 3D printers, which have a standard opening of 0.35mm. The TAZ 5's wider opening allows more of the molten print material to flow out, making printing quicker. But it can also make the flow of plastic more difficult to control, and we did find a tendency to leave thin whiskers of plastic behind during printing.
Print Materials: A Huge Range

The range of materials supported by a 3D printer depends on two things: the temperature that the print base and print head can manage and the willingness of the manufacturer to support these materials. The TAZ 5 scores top points on both of these fronts, with a print bed that can be heated up to 248 degrees F (120 degrees C) and a maximum temperature for the print head of 572 F (300 C). Lulzbot also actively supports users trying out new materials, providing details of the best settings for printing with a wide range. This wide temperature range also puts some new materials in the sights of the TAZ 5, including polycarbonate (the stuff used to make bulletproof glass) and Nylon. The latter material includes new food and dishwasher-safe Nylons, which you can use to print cups, glasses or your own flatware.
Get instant access to breaking news, the hottest reviews, great deals and helpful tips.
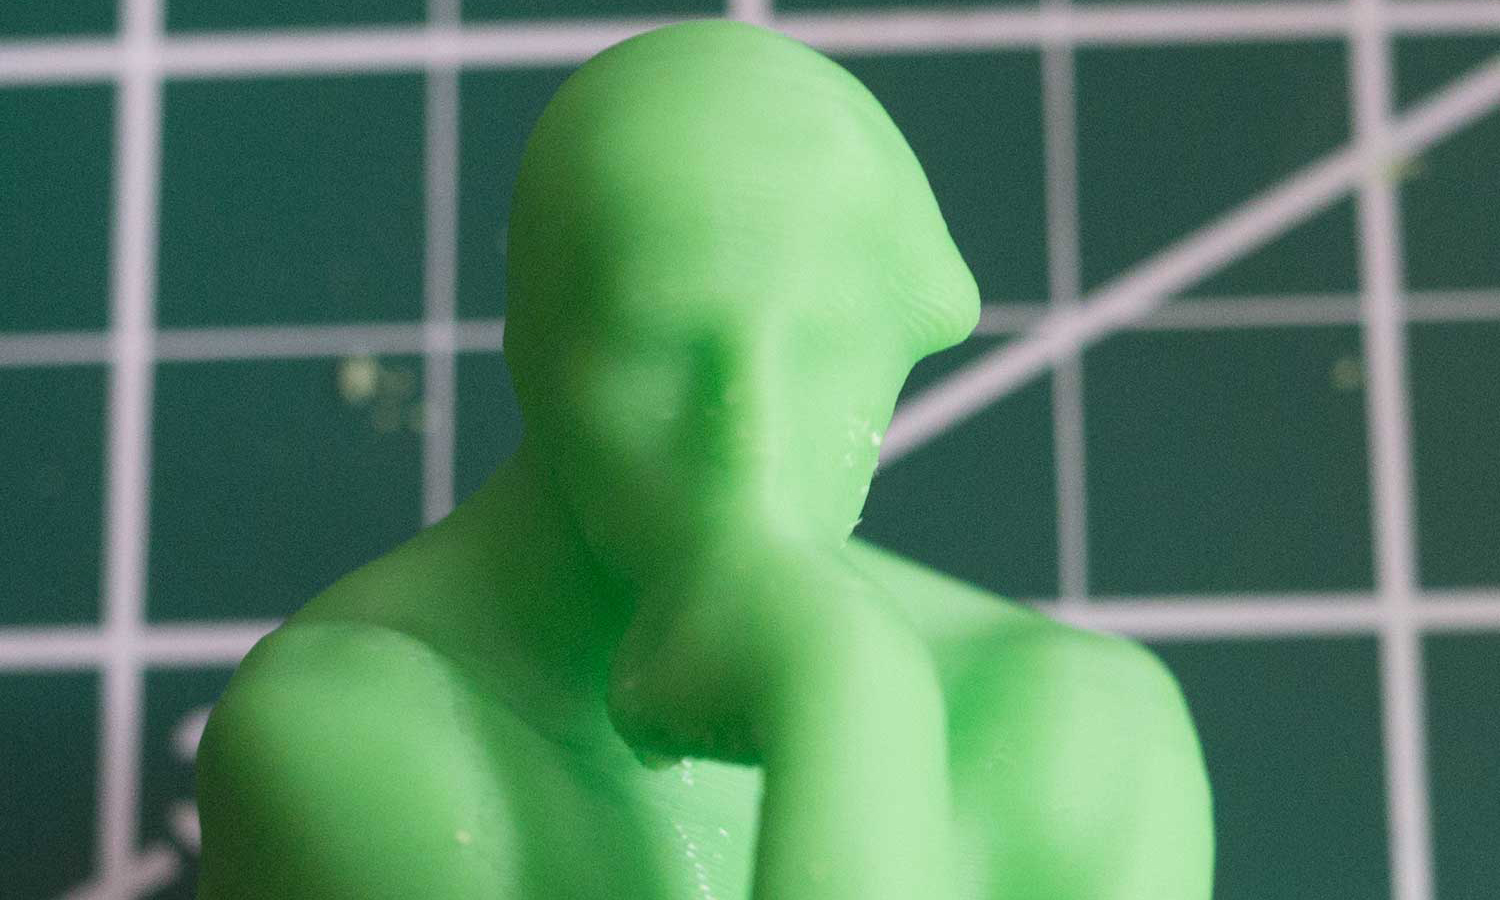
Lulzbot itself favors a new material called HIPS (High-impact Polystyrene), which is light, tough and easy with which to print. We used this on most of our test prints, and it produced impressive prints, with clean detail. The TAZ 5 also supports flexible materials like Ninjaflex, which we found produced very attractive, flexible models. We were able to print in this material with the standard print head, but the filament did have a habit of kinking and blocking the print head. To get around this, Lulzbot offers a dedicated print head designed for printing with flexible materials. Lulzbot also offers a dual extruder as a $495 add-on, which can print two materials at once.
MORE: 3D Printer Buyer's Guide
Print Quality: Impressive But with Flaws
We were generally impressed with the quality of the prints from the TAZ 5: it produced clean, smooth prints in most of our tests. There were a few issues, though, with a tendency to leave thin wisps of filament stretched between parts of some prints. Prints also had a tendency to sag slightly, making holes and other features smaller than what we intended.
We use three test models to judge print quality: a 3D scan of Rodin's thinker, a set of planetary gears and a complex geometric sculpture.
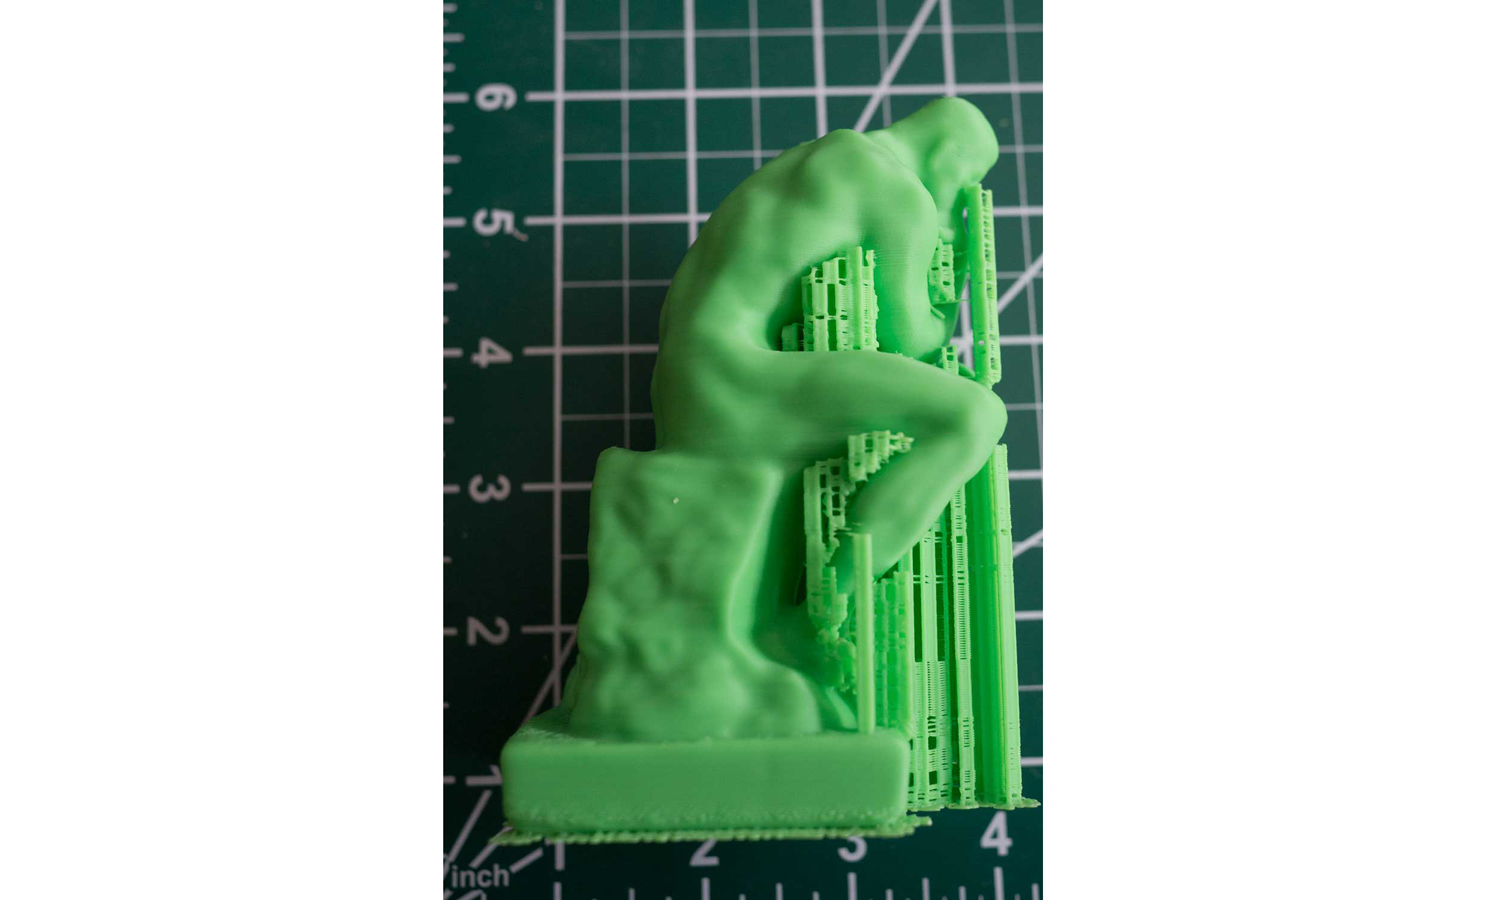
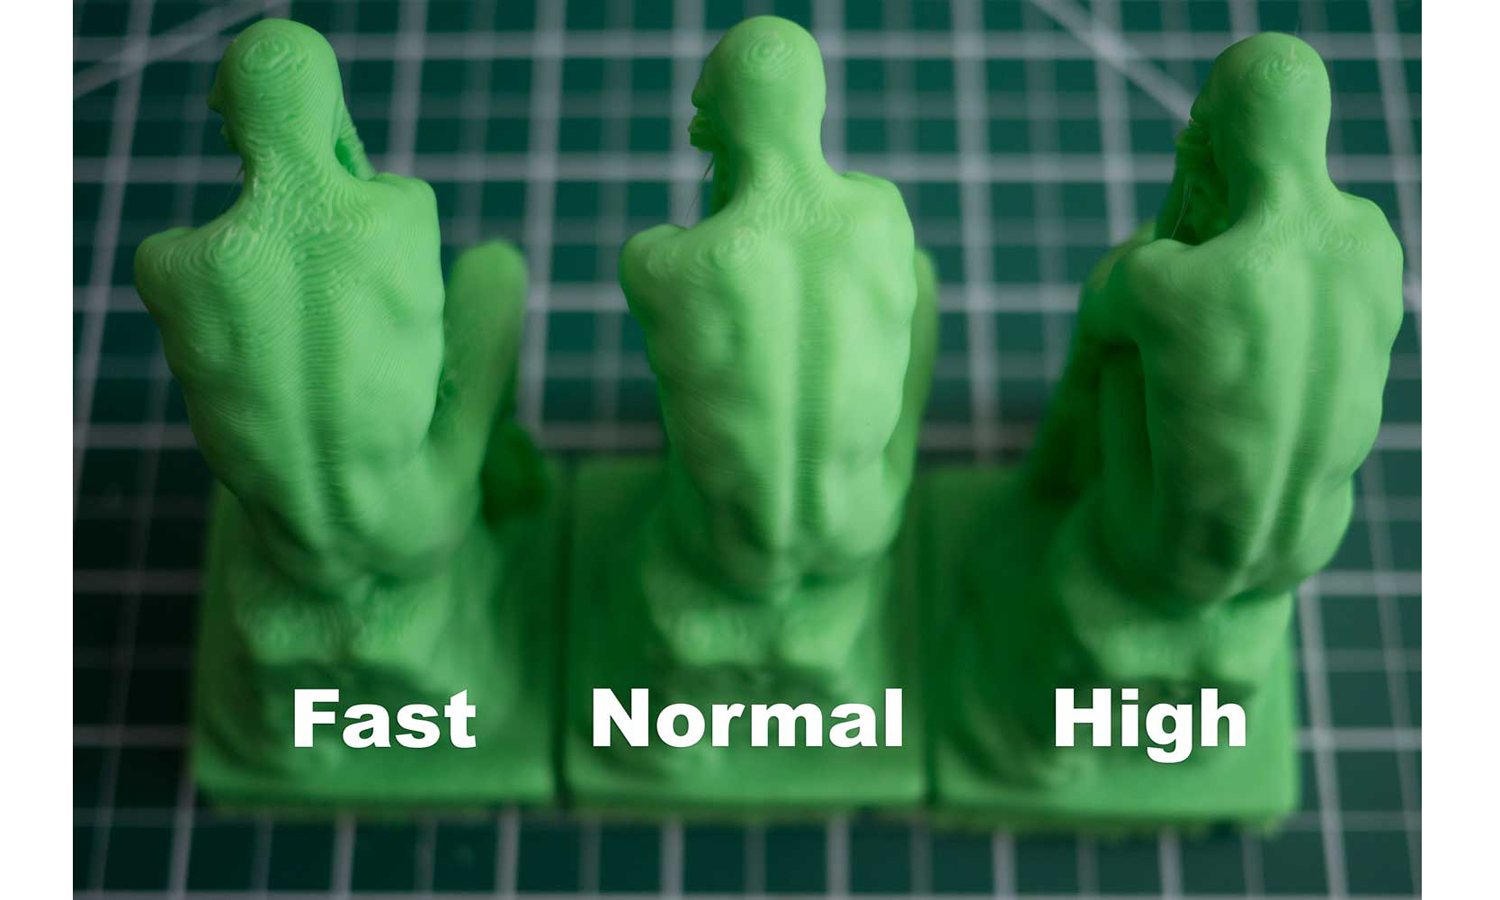
The smooth and complex curves of the Thinker statue test the ability of the printer to control the flow of plastic, and the TAZ 5 obviously has this under control. The shoulders and features of the statue were well reproduced in our test prints, although there was some layering visible at all of the print quality settings. The highest print quality (on the right in the image below) produced the most attractive print with the least layering, but it is still visible.
The TAZ 5 also did a decent job of producing the supports that hold the print in place where parts of it overhang. These supports were easily removed, and left little trace on the final print.
The TAZ 5 did struggle a little with our planetary gears set. The TAZ 5 is a fused deposition modeling (FDM) printer, which works by melting the plastic and fusing the layers together. For many printers, this process means that the bottom layer of the prints slumps: the plastic in this layer is heated by the print bed to make sure it sticks, but this means that the plastic remains slightly melted and spreads a little as the other layers are piled on top.
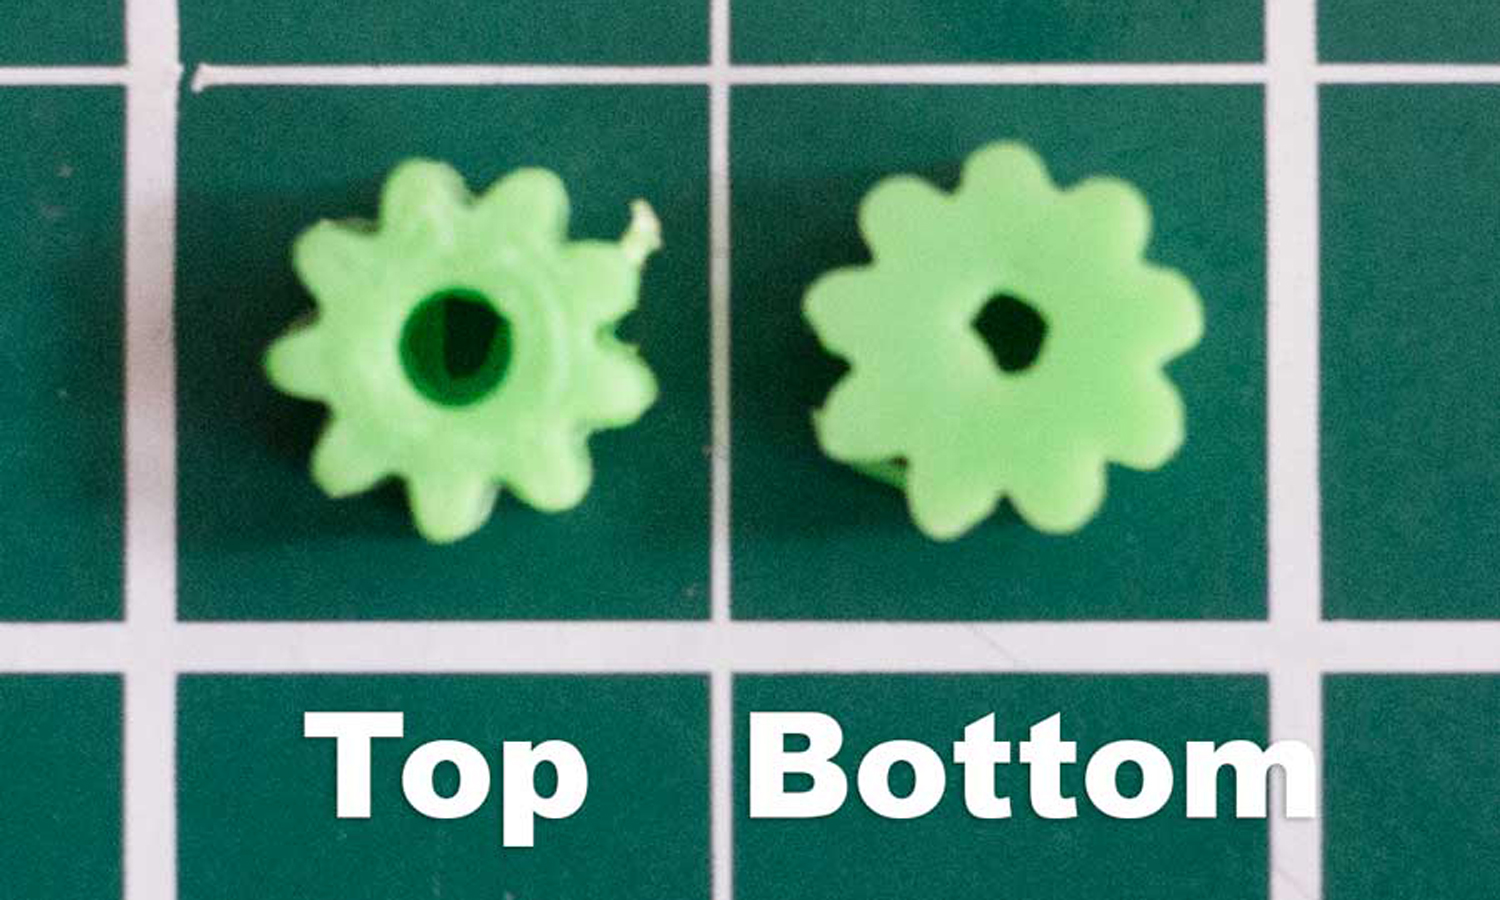
For models like our gear set, the holes in the gears turn out slightly smaller than required, because they are filled with this spreading plastic. You either have to trim the plastic to get the hole to the required size, or tweak the settings. We found tweaking to be the most effective: if we lowered the print bed temperature to 90 C (about 194 F) from the default of 110 C (about 230 F), the gears were printed with less slumping and spreading, and didn't require much trimming.
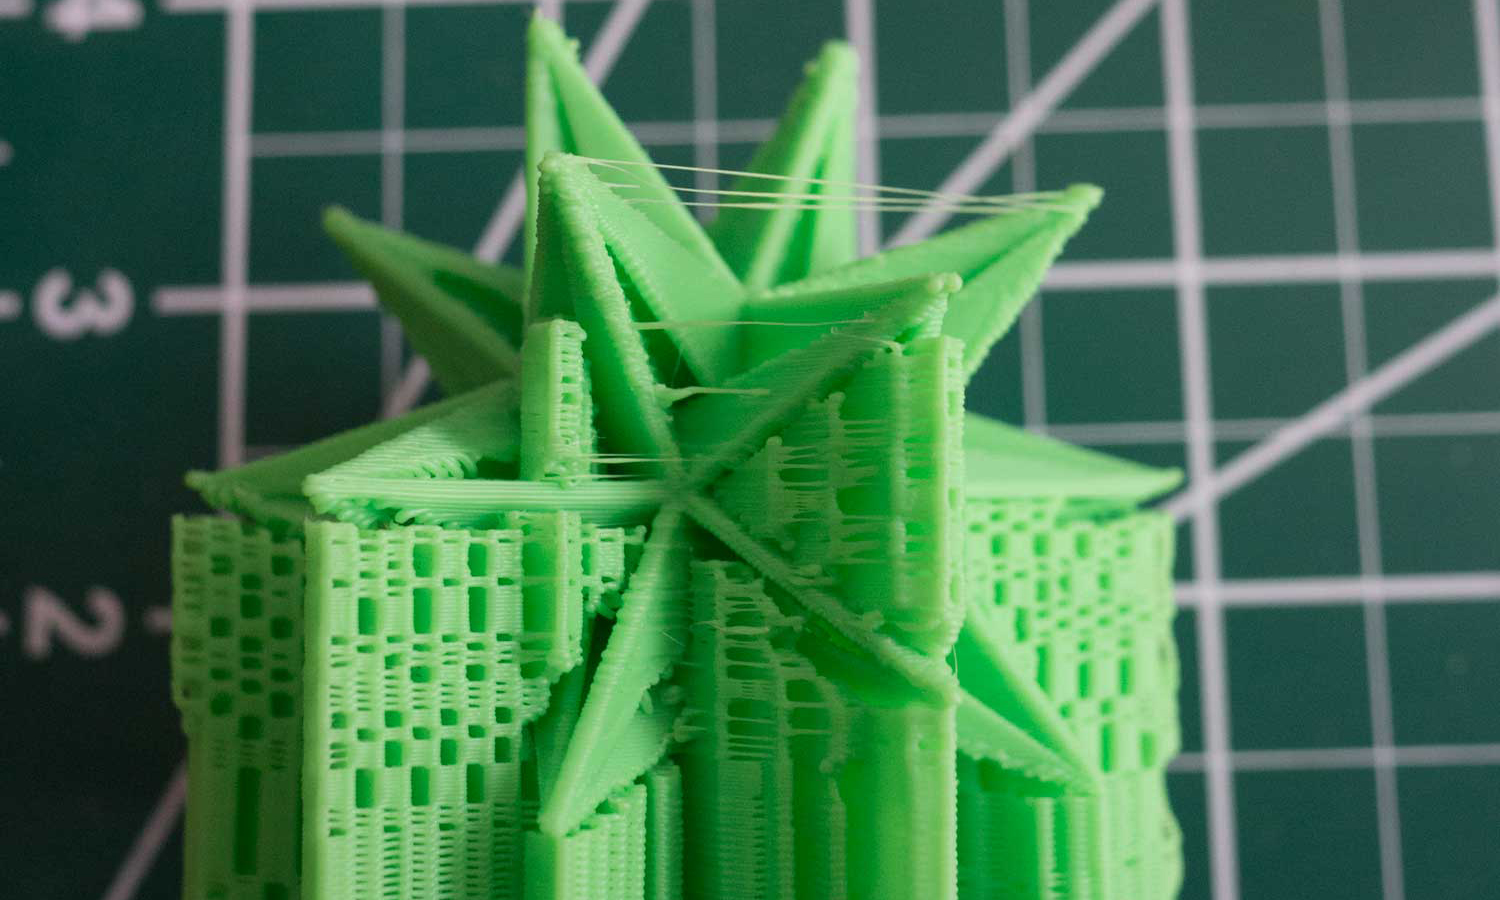
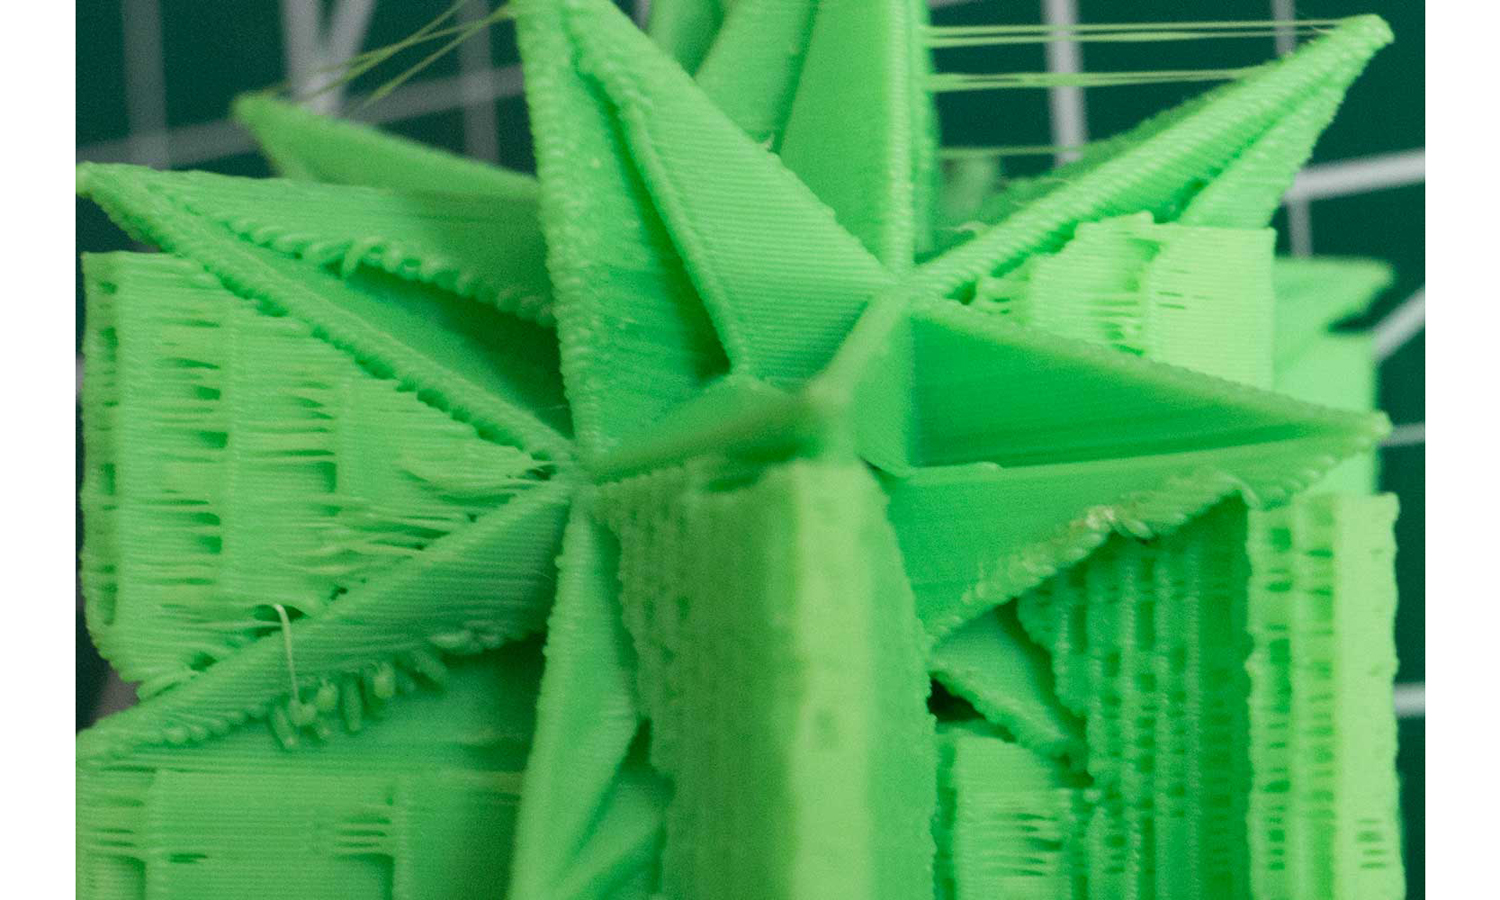
The TAZ 5 produced a good-quality print of our geometric sculpture. Most of the edges looked clean and sharp, but there were a lot of thin wisps of plastic between the tips of the model, where the print head dragged a thin piece of melted plastic with it as it rapidly moved from one part of the print to another. Since these can be easily trimmed off, they're more of an annoyance than a problem. Some of the edges were also a little rough, though, with obvious stepping between the layers of the print and the odd glitch that lead to a missing section of an edge.
Setup: Some Assembly Required
The TAZ 5 ships partly constructed, requiring you to mount a part, turn a thumbscrew and plug in a few cables. We were up and running in about an hour after first opening the box.
There is one odd omission with the TAZ 5. The TAZ Mini included a very neat auto print bed leveling feature, where the printer would touch the print head to the four corners of the print bed to see how high it is, and if it's level. This feature isn't present on the TAZ 5: instead, you have to manually adjust a thumbscrew for the print bed height, and then move the print head around and adjust a screw on each corner to level it. You then run a test print to make sure everything is working correctly. None of that’s difficult to do, but the automatic system would be preferable.
Also missing on the TAZ 5 from the Mini is the brush that cleans any stray bits of fabric off the print head before each print: a very useful feature when a stray bit of filament can ruin a print.
Lulzbot told us that it's working on adding both the auto-leveling feature and the print head cleaner to a future version. The features are in development, and the company's open-source approach will allow handy users to download plans for these features and make their own. Details of the in-development version are available here.
Interface: Two Ways to Control Prints
You control the TAZ 5 via its screen and a dial on the printer itself, or through the free Cura software download for Windows, Mac and Linux systems.
The printer screen is a simple LCD display that usually shows the status while printing; the selection knob alongside it also allows for stand-alone printing. A simple menu structure provides access to every aspect of the printer controls, from changing a temperature to loading and unloading filament, though it can involve a lot of dial-turning and button-pressing, since some features are buried under several layers of menus.
Printing from the screen is straightforward. After inserting the SD Card with the file into the slot behind the screen, you select Print From SD on the menu, and select the file you want. That means you can start a print with just a couple of button presses and a bit of knob twiddling.

The open-source Cure software allows you to load 3D models in the two most commonly used formats (STL or OBJ), do some basic editing (scale, move and load several models to print at once) and then process the model for printing. It also gives you an estimated print time (which is usually fairly accurate) and a preview of the printing process.
When you are ready to print, press Cura’s control button, and go into the printer control screen. From here you can set the temperature of the extruder and print bed and set the print going (or cancel it if it goes wrong). You don’t get much feedback on the progress of the print, though: the only indication is a simple progress bar at the bottom of the screen.
Print Process: Reliable, Easy to Remove Prints
3D printing is not an error-free process, but the TAZ 5 gets pretty darn close. While making more than 20 prints, we had only one print failure when the print material failed to stick to the layer below part way through a print. Every other print was completed without problems, and we had no issues removing the final print from the print bed afterwards. We didn't even need to work to remove these completed prints: when printing with HIPS and ABS, the prints popped straight off the print bed once the print bed had cooled. That is unusual: on most printers, we had to scrape or pry the finished print off the print bed.
MORE: Best 3D Printer
Print Speed: Faster Than the Rest
The TAZ 5 is one of the fastest FDM (filament deposit manufacturing) printers that we've tested. It could print our 4.5-inch high Thinker test model in the Fast mode (using a 0.38mm layer height) in an impressive 2 hours and 38 minutes. Contrast that with the fastest speed of the UpBox (5 hours and 8 minutes) or the Orion Delta (6 hours 22 minutes). In the highest quality mode (using a 0.18mm layer height), the same print took 6 hours and 49 minutes on the TAZ 5. The upshot here: the best-quality print mode of the TAZ 5 was nearly as fast as the lowest- quality print modes of other 3D printers we have tested.
Bottom Line
The TAZ 5 emerges as the filament 3D printer to beat: it is the fastest 3D printer of its type that we have tested and produces very high quality prints in a wide range of materials. We did see some issues with these prints, but most of these could be addressed easily by cleaning prints or by tweaking settings.
We do wish that some of the features that we saw on the smaller (and easier to use) TAZ Mini had made their way up to the TAZ 5, though. It would be nice to have an auto-levelling print bed and print head cleaner on this model. Casual users might be better off with a smaller, easier-to-use printer like the TAZ Mini, but if you’re serious about printing large models as quickly as possible, the TAZ 5 is your best pick.
Richard Baguley has been working as a technology writer and journalist since 1993. As well as contributing to Tom's Guide, he writes for Cnet, T3, Wired and many other publications.
