How to save photos to your iCloud Shared Photo Library from the iPhone Camera app
Save photos to your shared library the moment you take them
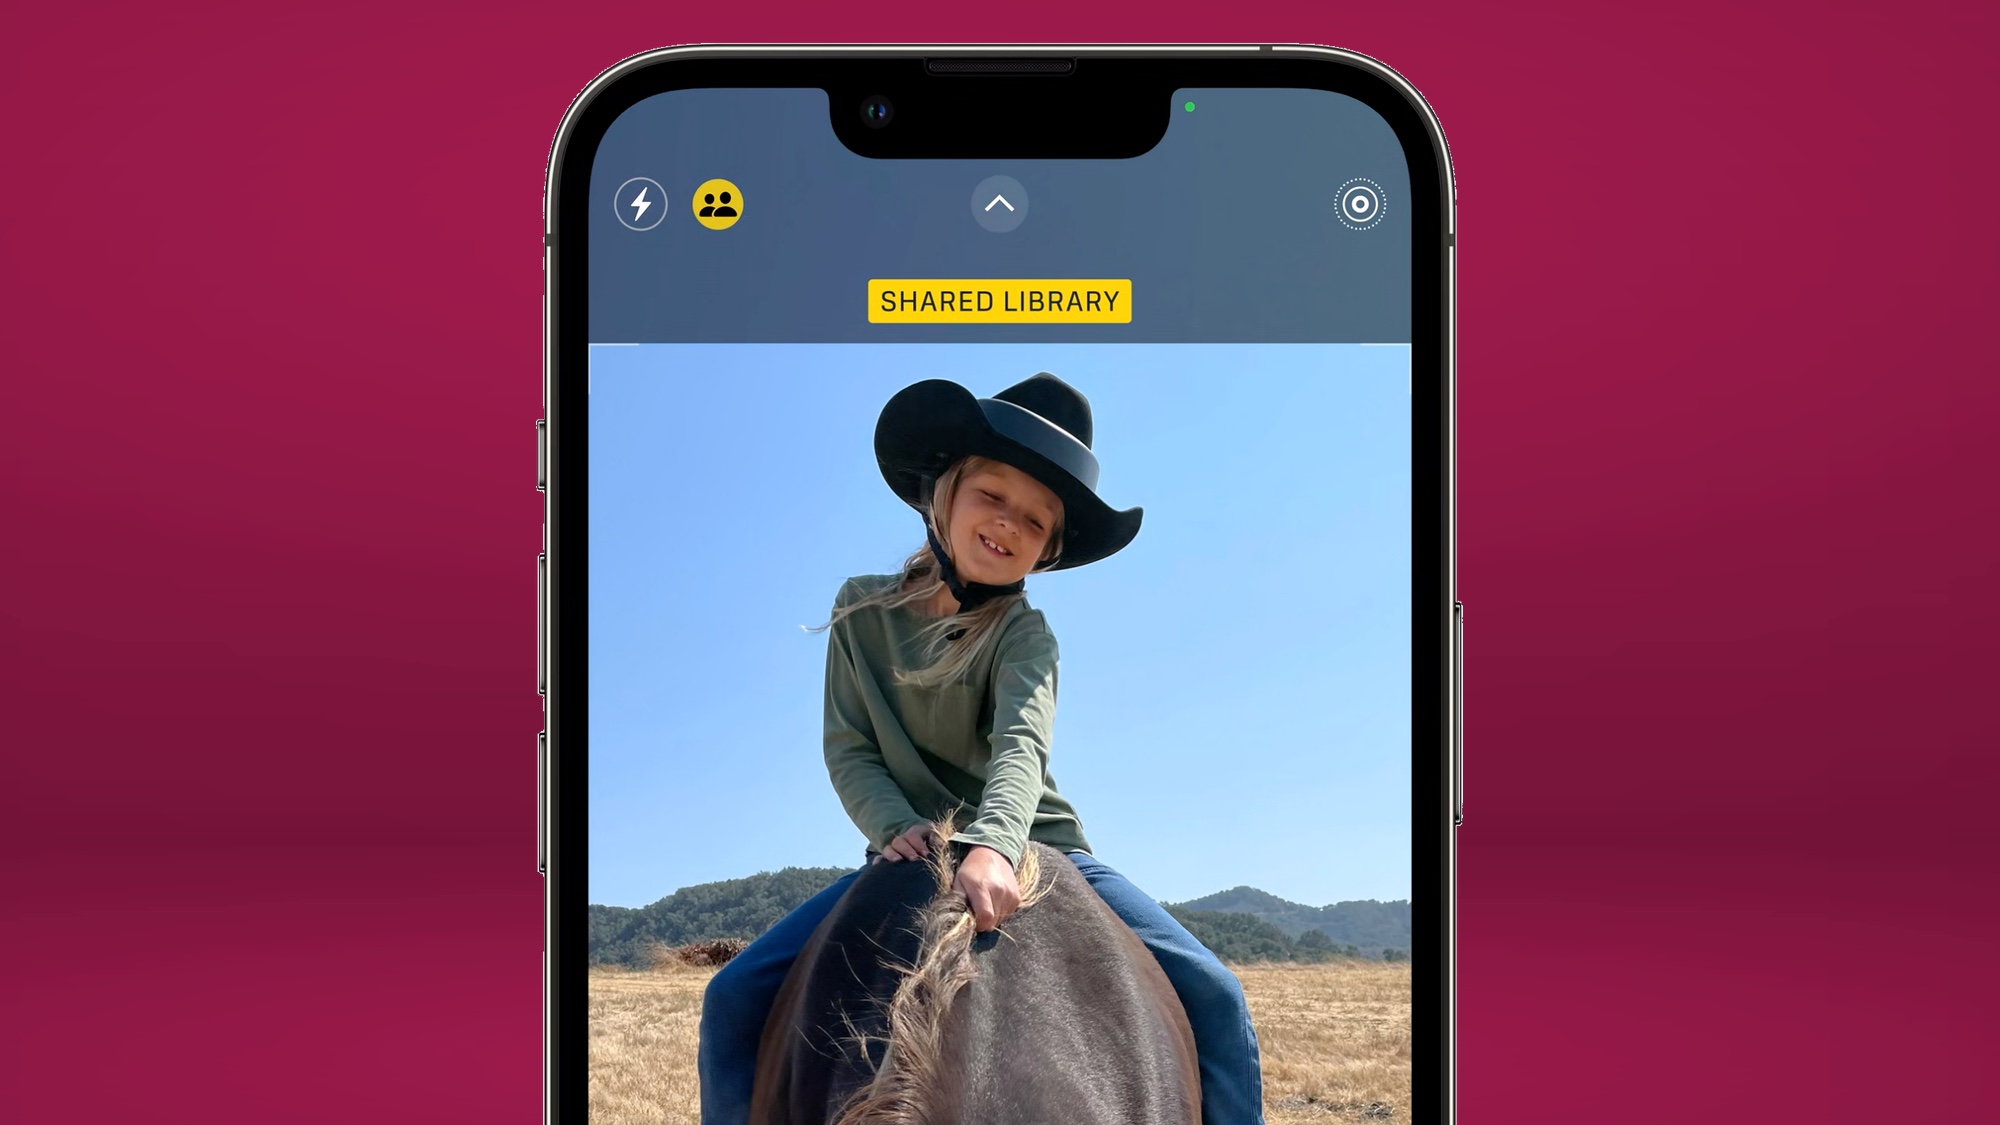
As of iOS 16.1, you can set up an iCloud Shared Photo Library that lets you and five other people easily share and edit photos. Shared photos libraries are nothing new, of course, but with the iCloud Shared Photo Library feature, Apple is looking to simplifying the sharing process. And that includes the ability to save photos to an iCloud Shared Photo Library directly from the iPhone's Camera app.
With this feature enabled, you don't have to remember about dragging over photos from your personal library to a shared one later on. Instead, when you take a picture, it will save directly to the iCloud Shared Photo Library.
It's a great time-saving feature when you're taking photos you want to share — but you'll also want to know how to turn if off for those times when you capture photos of things you don't necessarily want to include in your iCloud Shared Photo Library.
We can show you how to save photos to your iCloud Shared Photo Library from your iPhone's Camera app — and how to turn that feature off. It's quite a simple thing when you know where to look.
1. When you go take a picture in the Camera app, tap the icon featuring silhouettes of two people. (It's located next to the icon for turning the camera's flash off and on.)
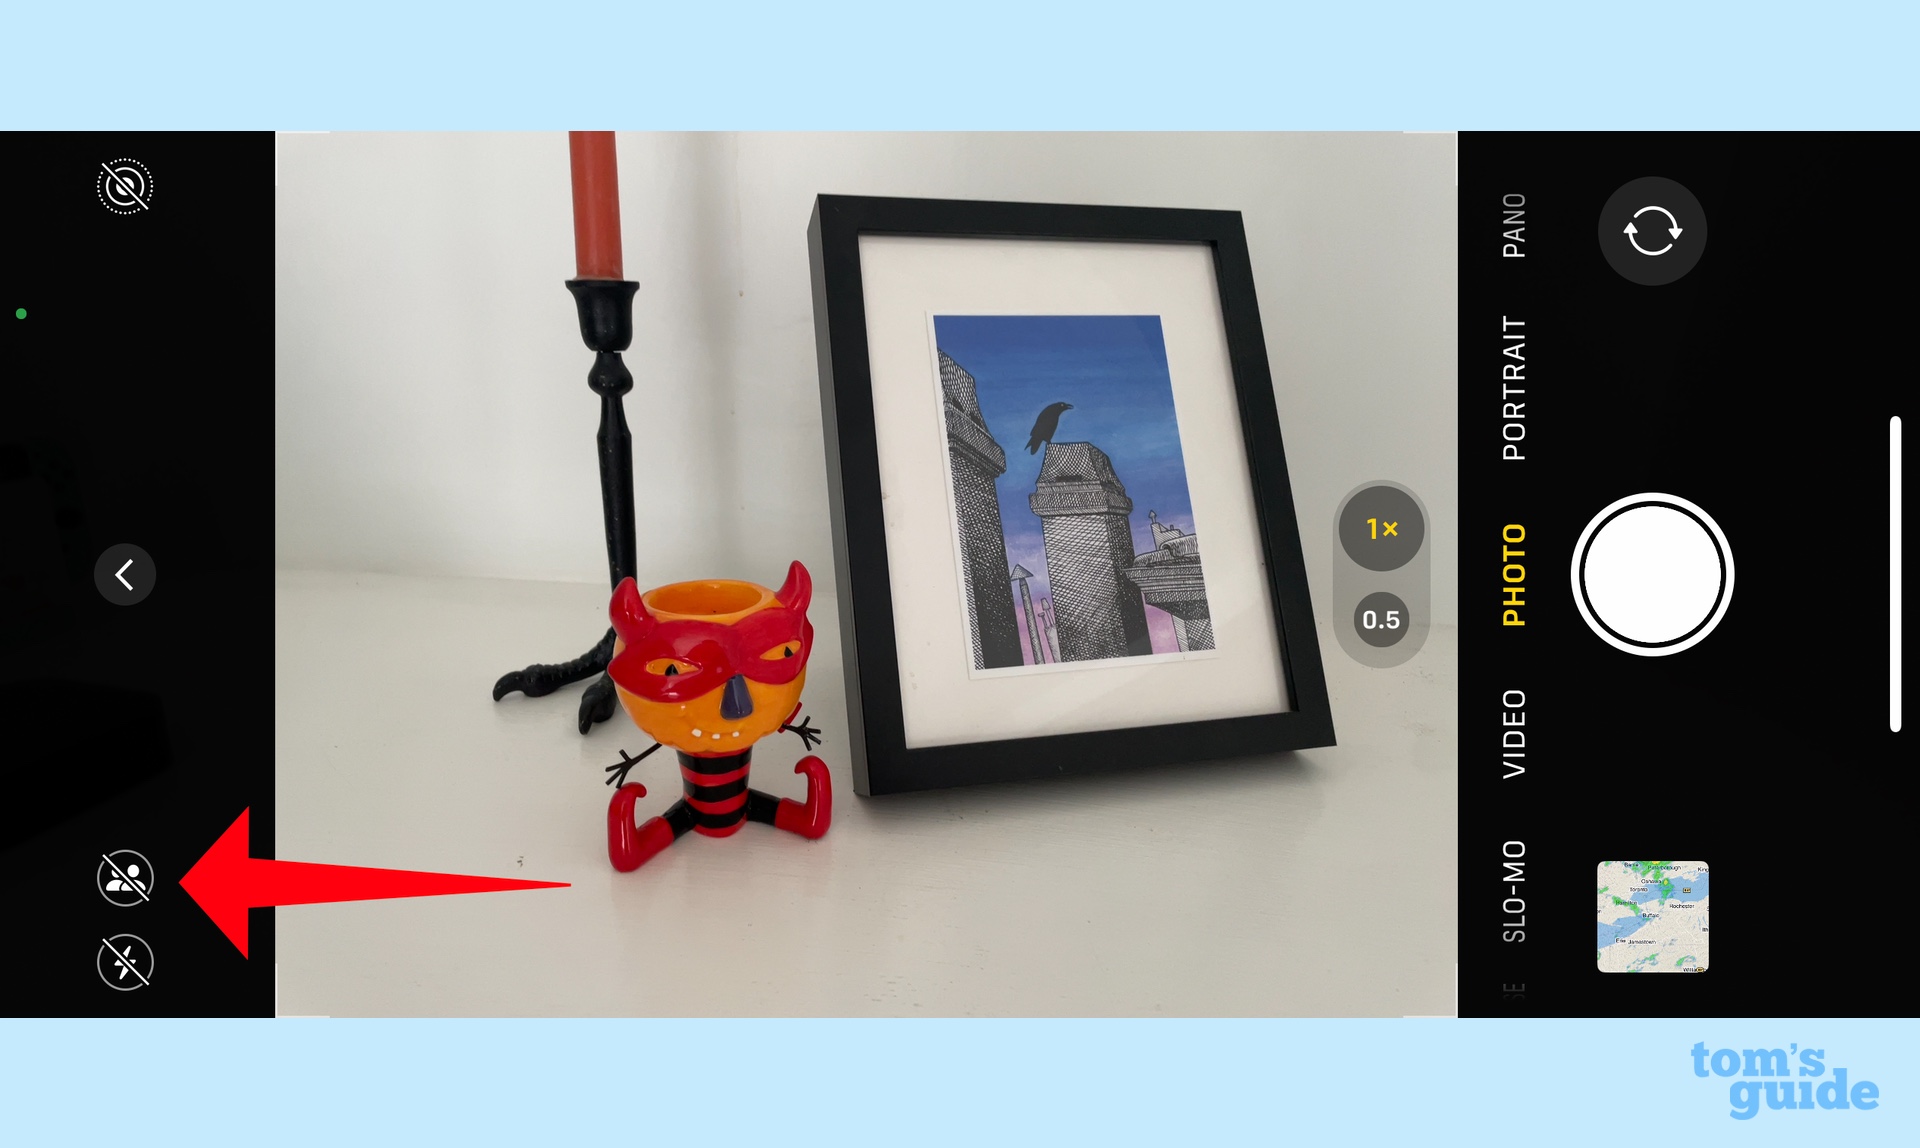
2. Once tapped, the silhouette icon will turn yellow. A Shared Library title will briefly flash across the top of the Camera's view finder. Any photo you now take will be saved to your iCloud Shared Photo Library.
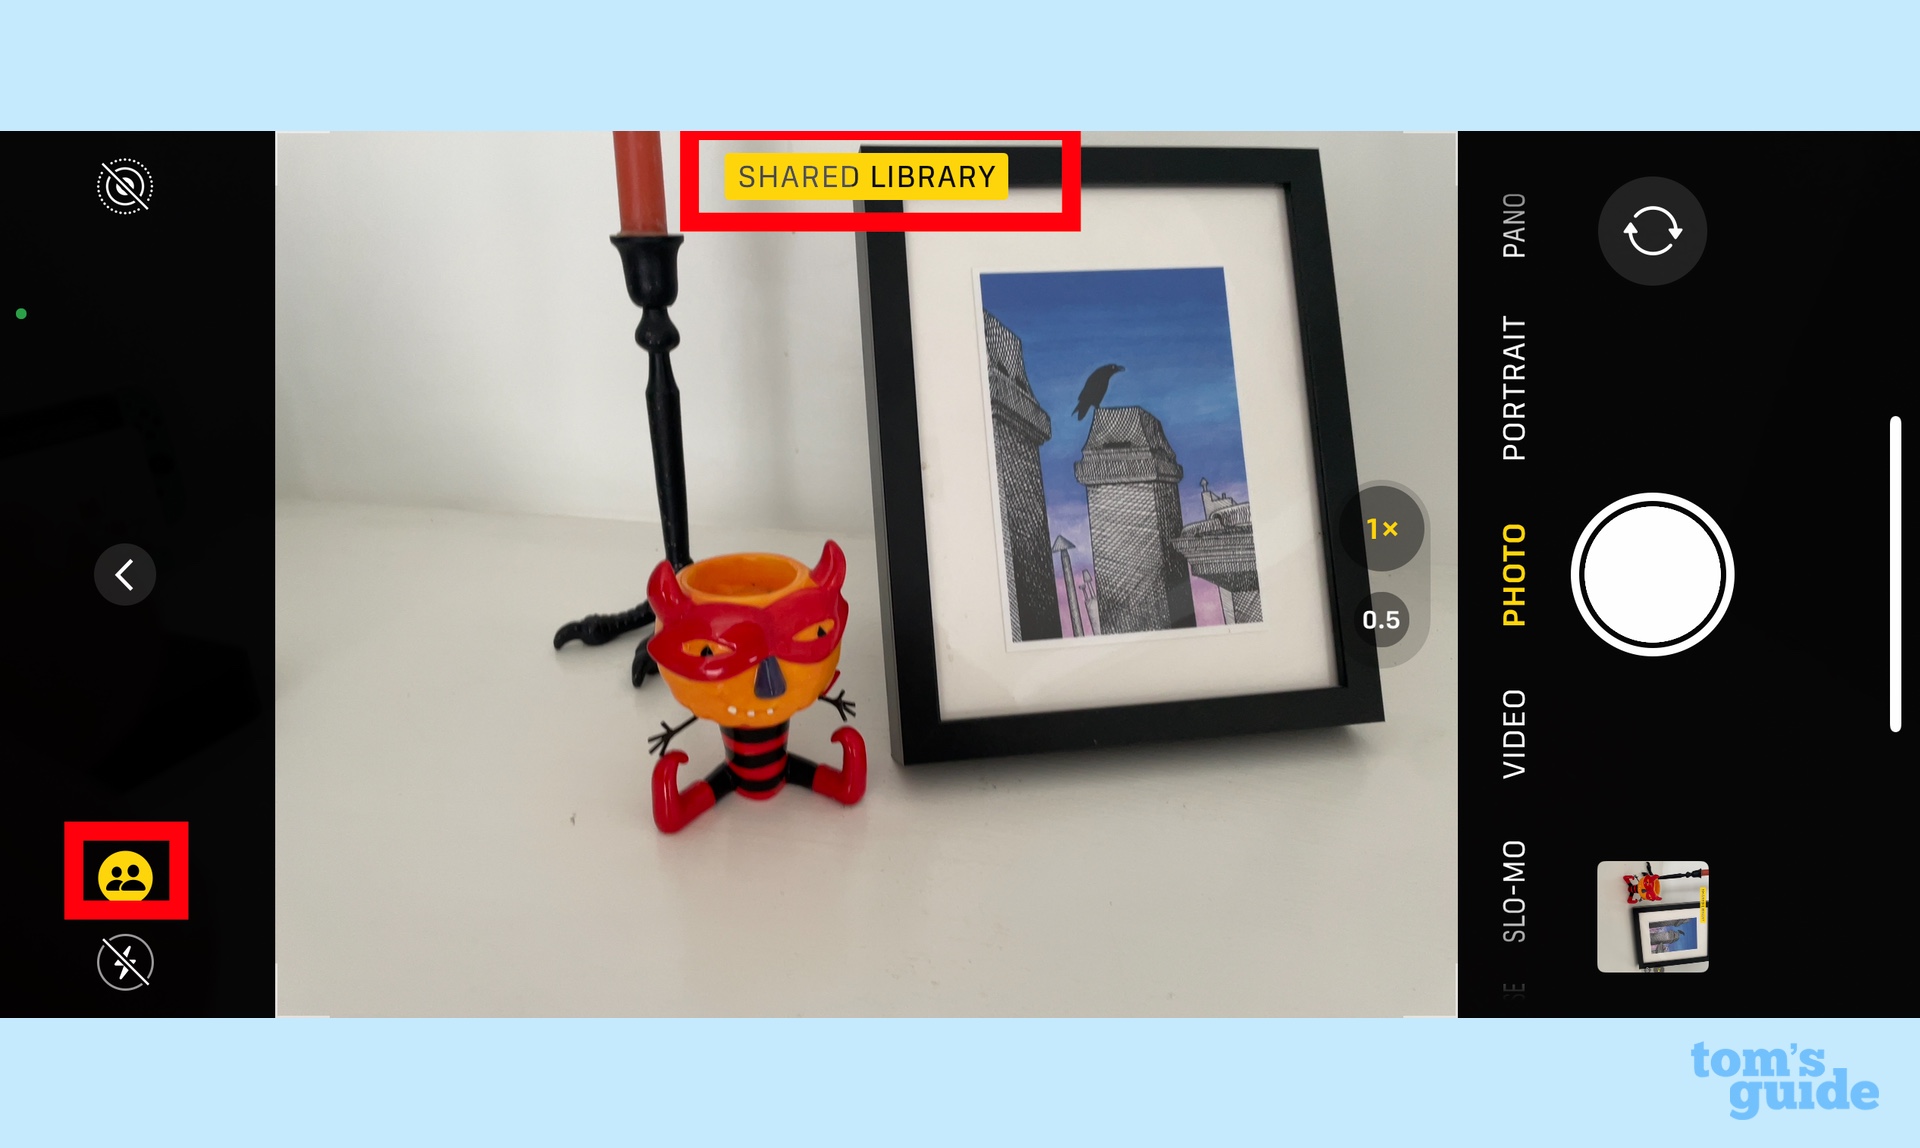
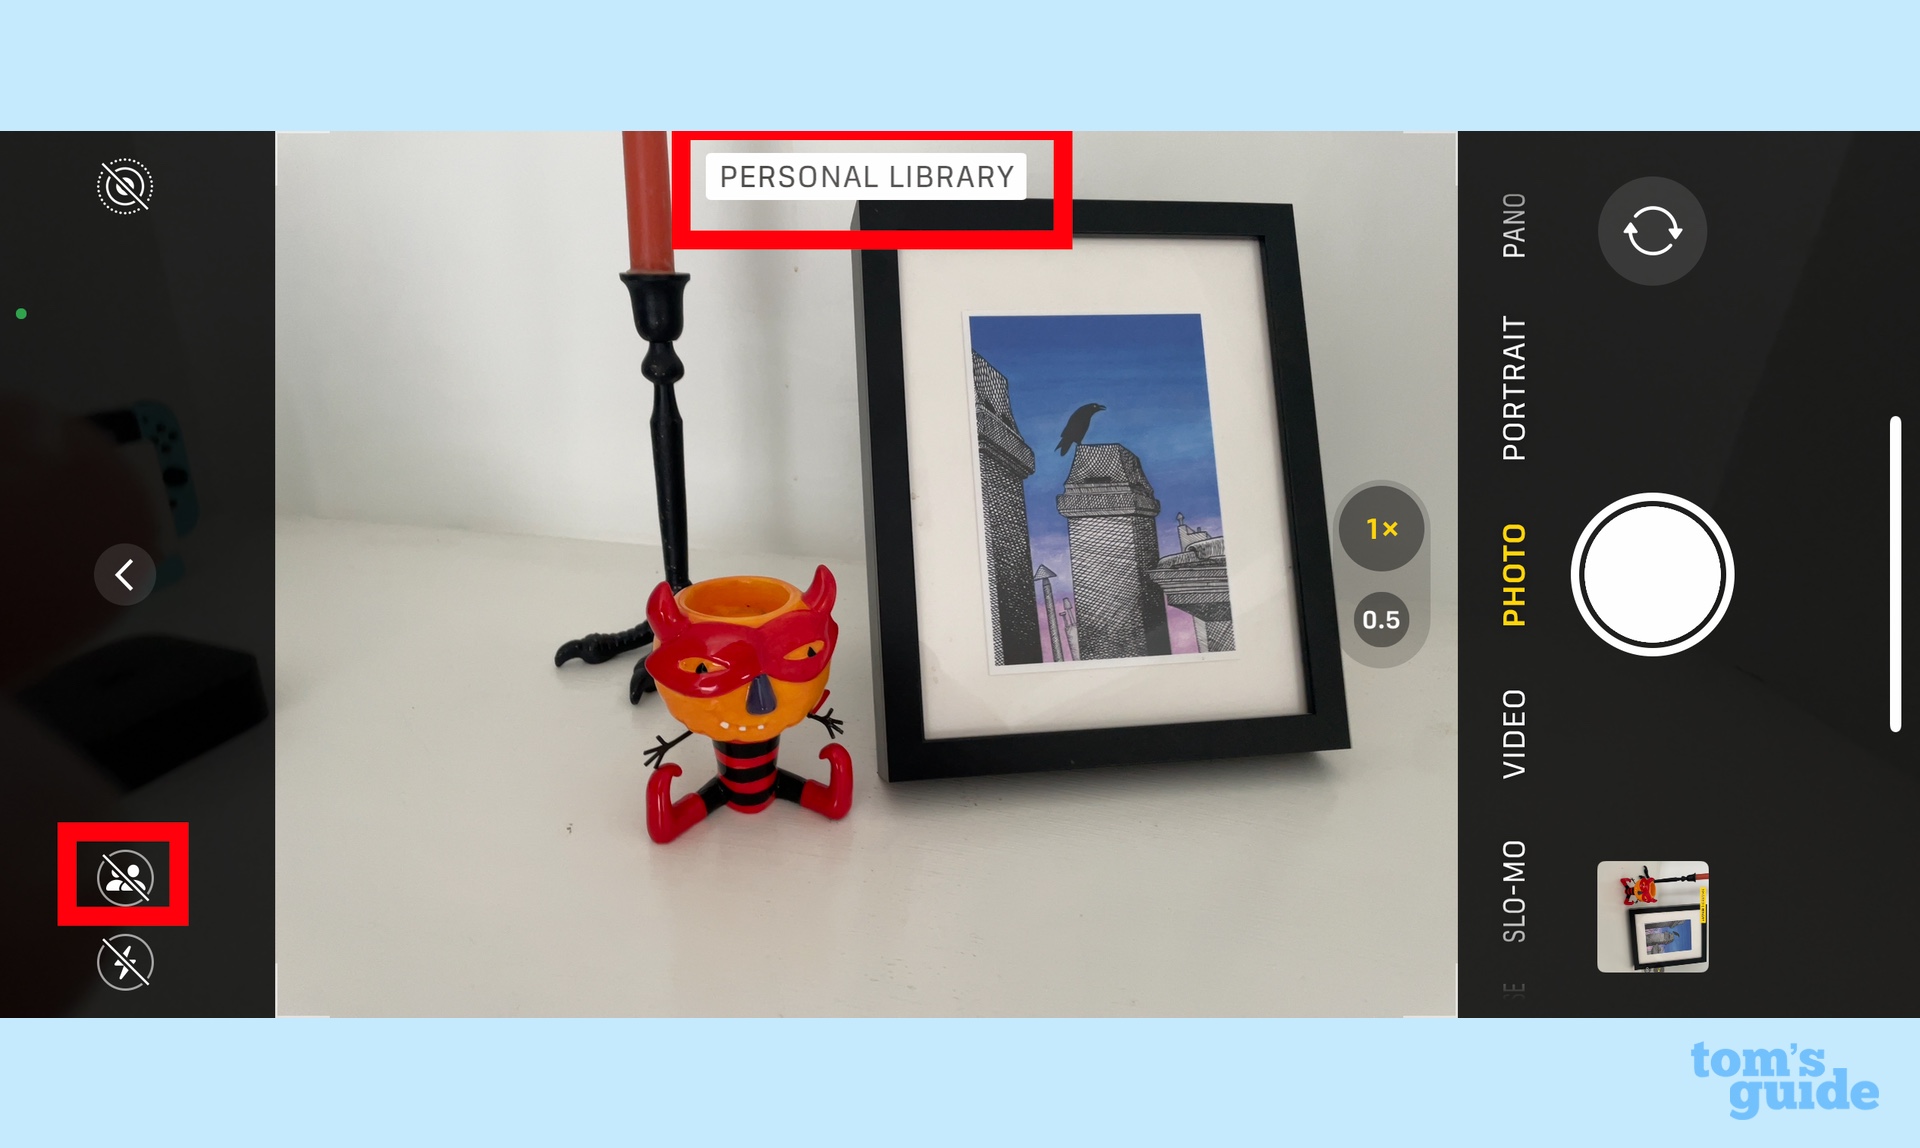
3. To turn off the feature, tap the silhouette icon again. A slash will appear through it, and the Personal Library title will flash in the view finder. Photos you take in the camera app will now only save onto your own library and won't appear in the iCloud Shared Photo Library.
Get instant access to breaking news, the hottest reviews, great deals and helpful tips.
You still have the option to manually move photos from your library into an iCloud Shared Photo Library. Here's how that works.
1. In the Photos app, find a photo you wish to save to your iCloud Shared Photo Library and select it.
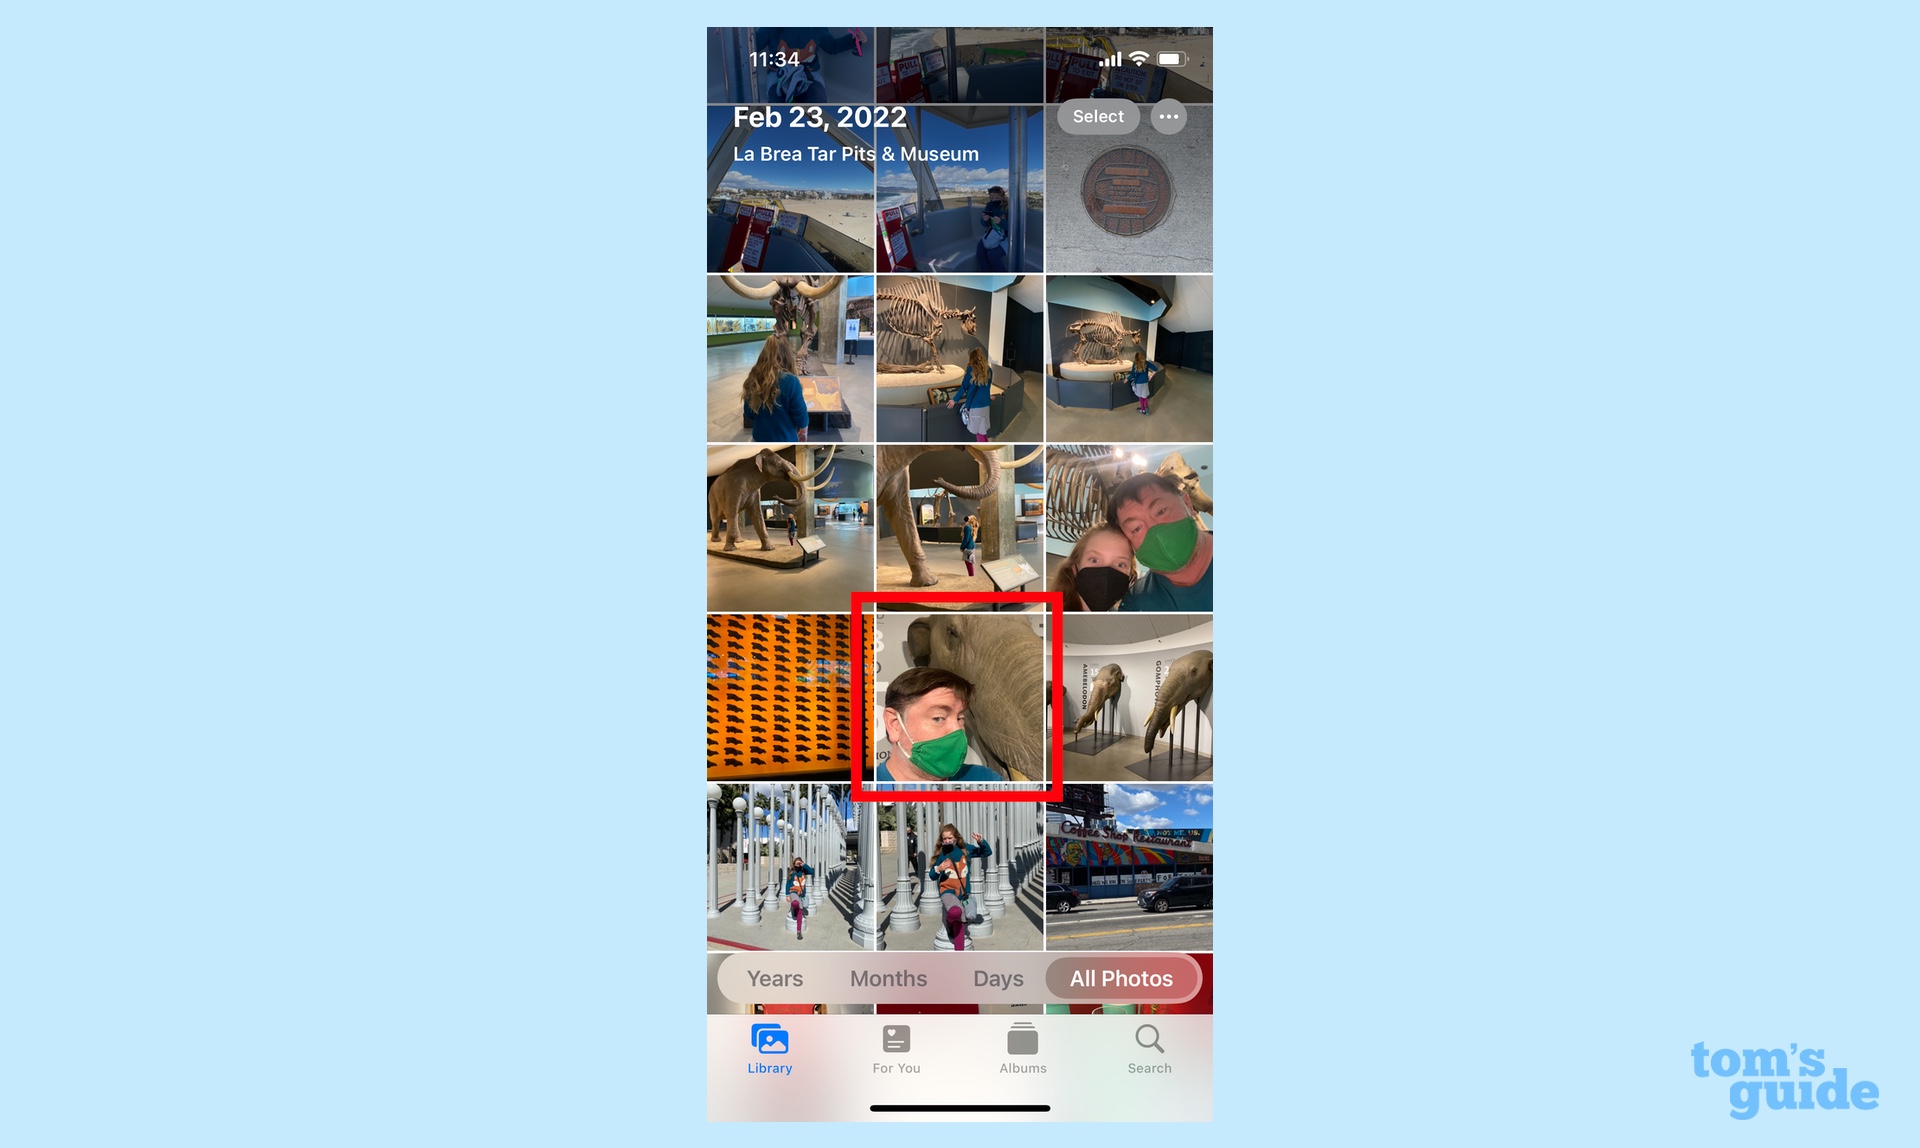
2. Tap the drop-down menu by the person icon on the right side of the screen.
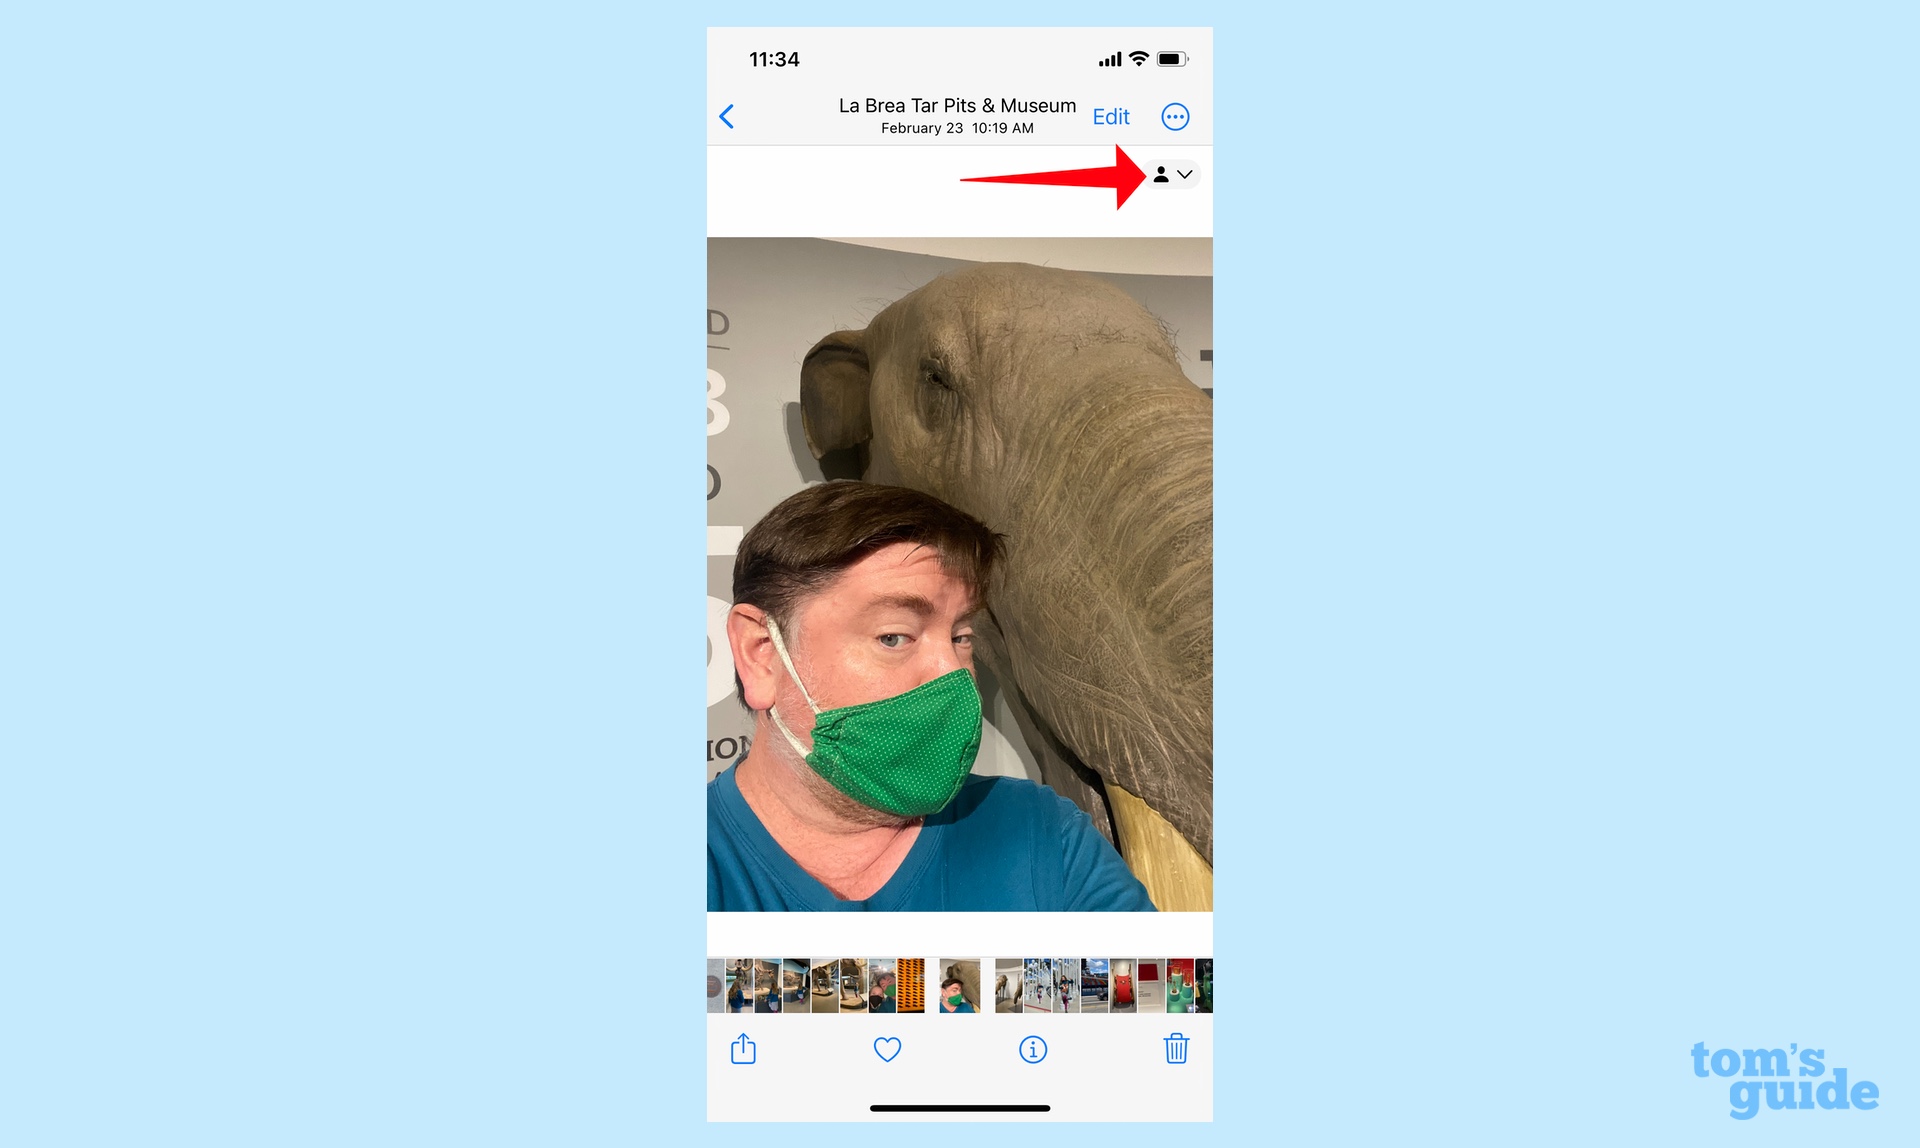
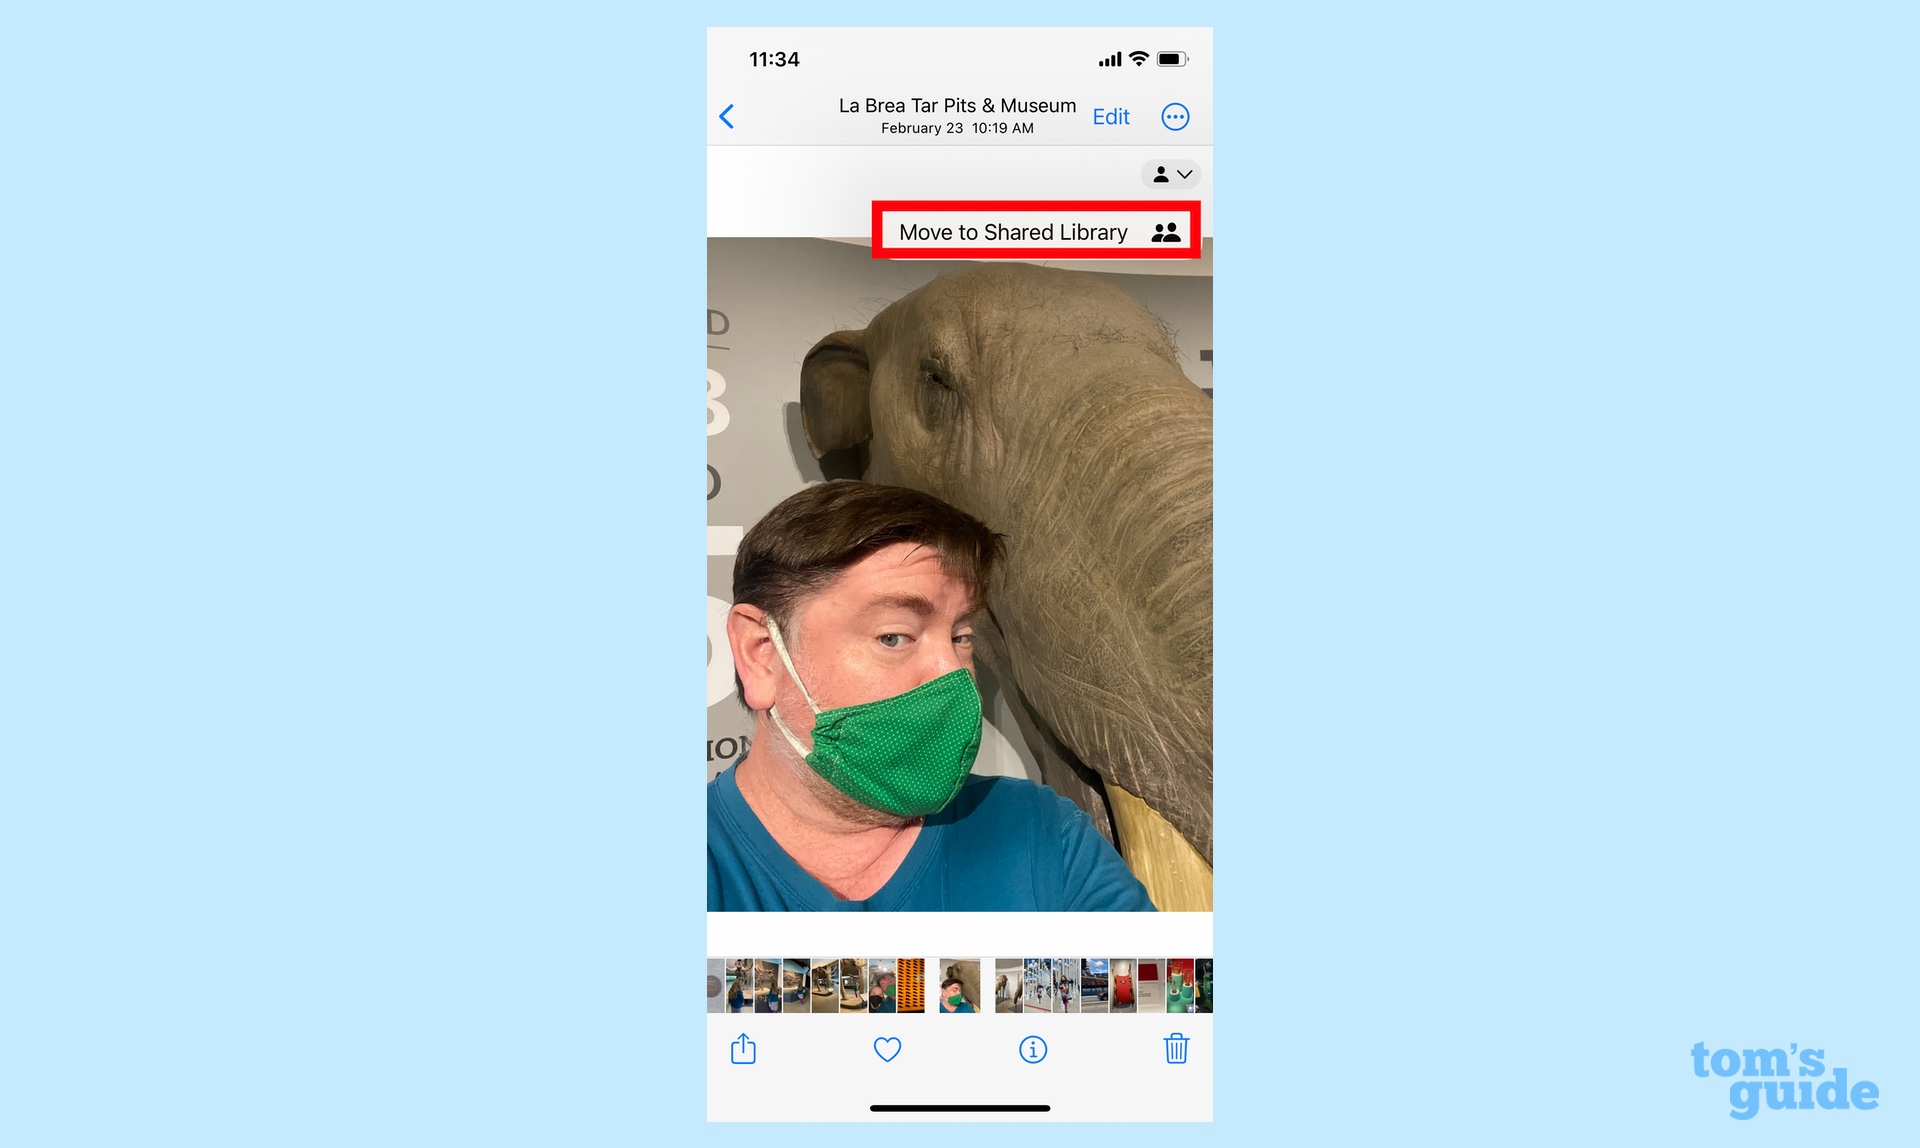
3. A Move to Shared Library option will appear — tap on that.
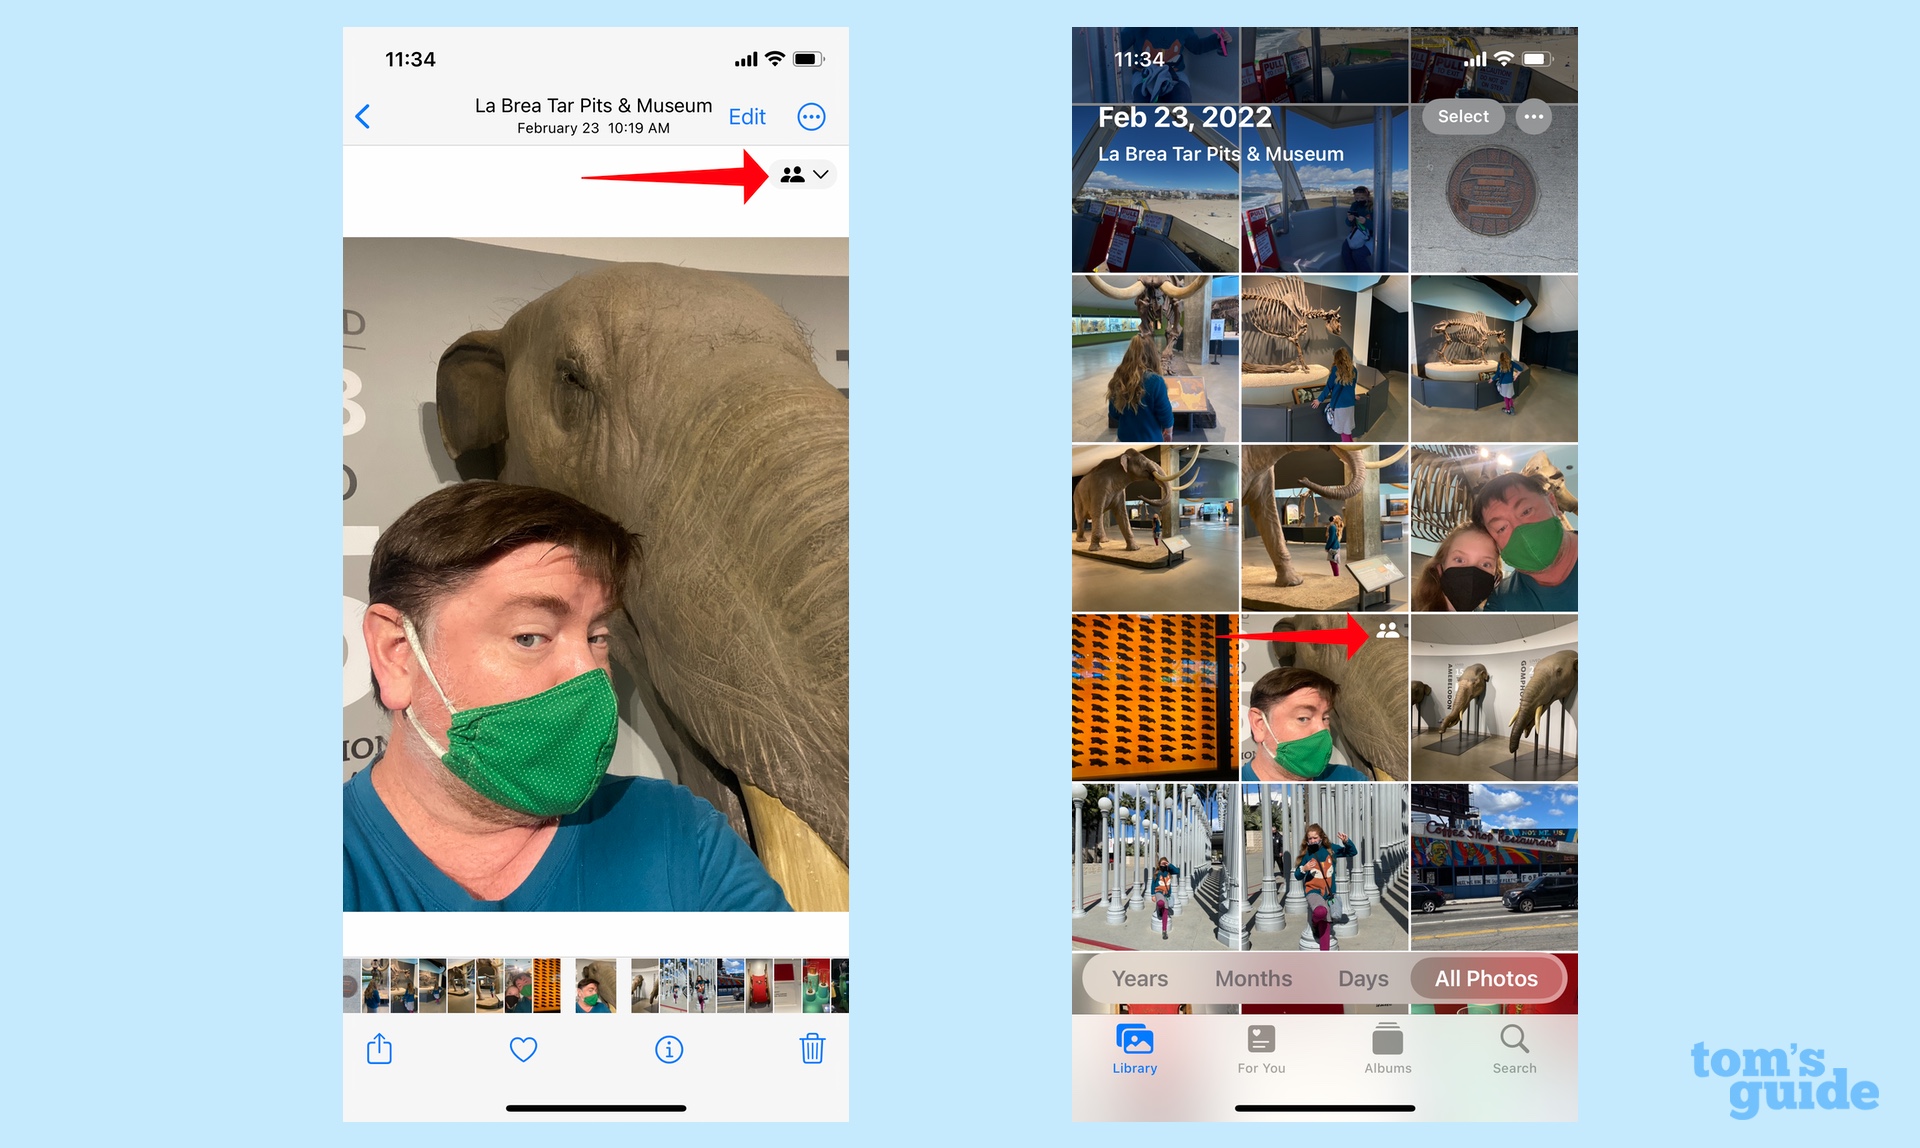
4. The photo will now be marked with a two-person silhouette indicating it's part of your iCloud Shared Photo Library; you'll also see that icon superimposed on thumbnails of shared images in your Photos library.
And that's all there is to sharing photos to your iCloud Shared Photo Library, whether you do it automatically or manually. That's just one of the many iOS 16 features we can help you out with. Check out our other how-tos on customizing your iPhone lock screen, editing texts you've already sent in Messages and using Visual Look Up to copy the subject of a photo for pasting into other apps. (That latter iOS 16 capability is great for making memes, by the way.)
Philip Michaels is a Managing Editor at Tom's Guide. He's been covering personal technology since 1999 and was in the building when Steve Jobs showed off the iPhone for the first time. He's been evaluating smartphones since that first iPhone debuted in 2007, and he's been following phone carriers and smartphone plans since 2015. He has strong opinions about Apple, the Oakland Athletics, old movies and proper butchery techniques. Follow him at @PhilipMichaels.
 Club Benefits


