Apple Maps just got smarter in iOS 18 — here's how to use the new features
Navigate smarter in iOS 18
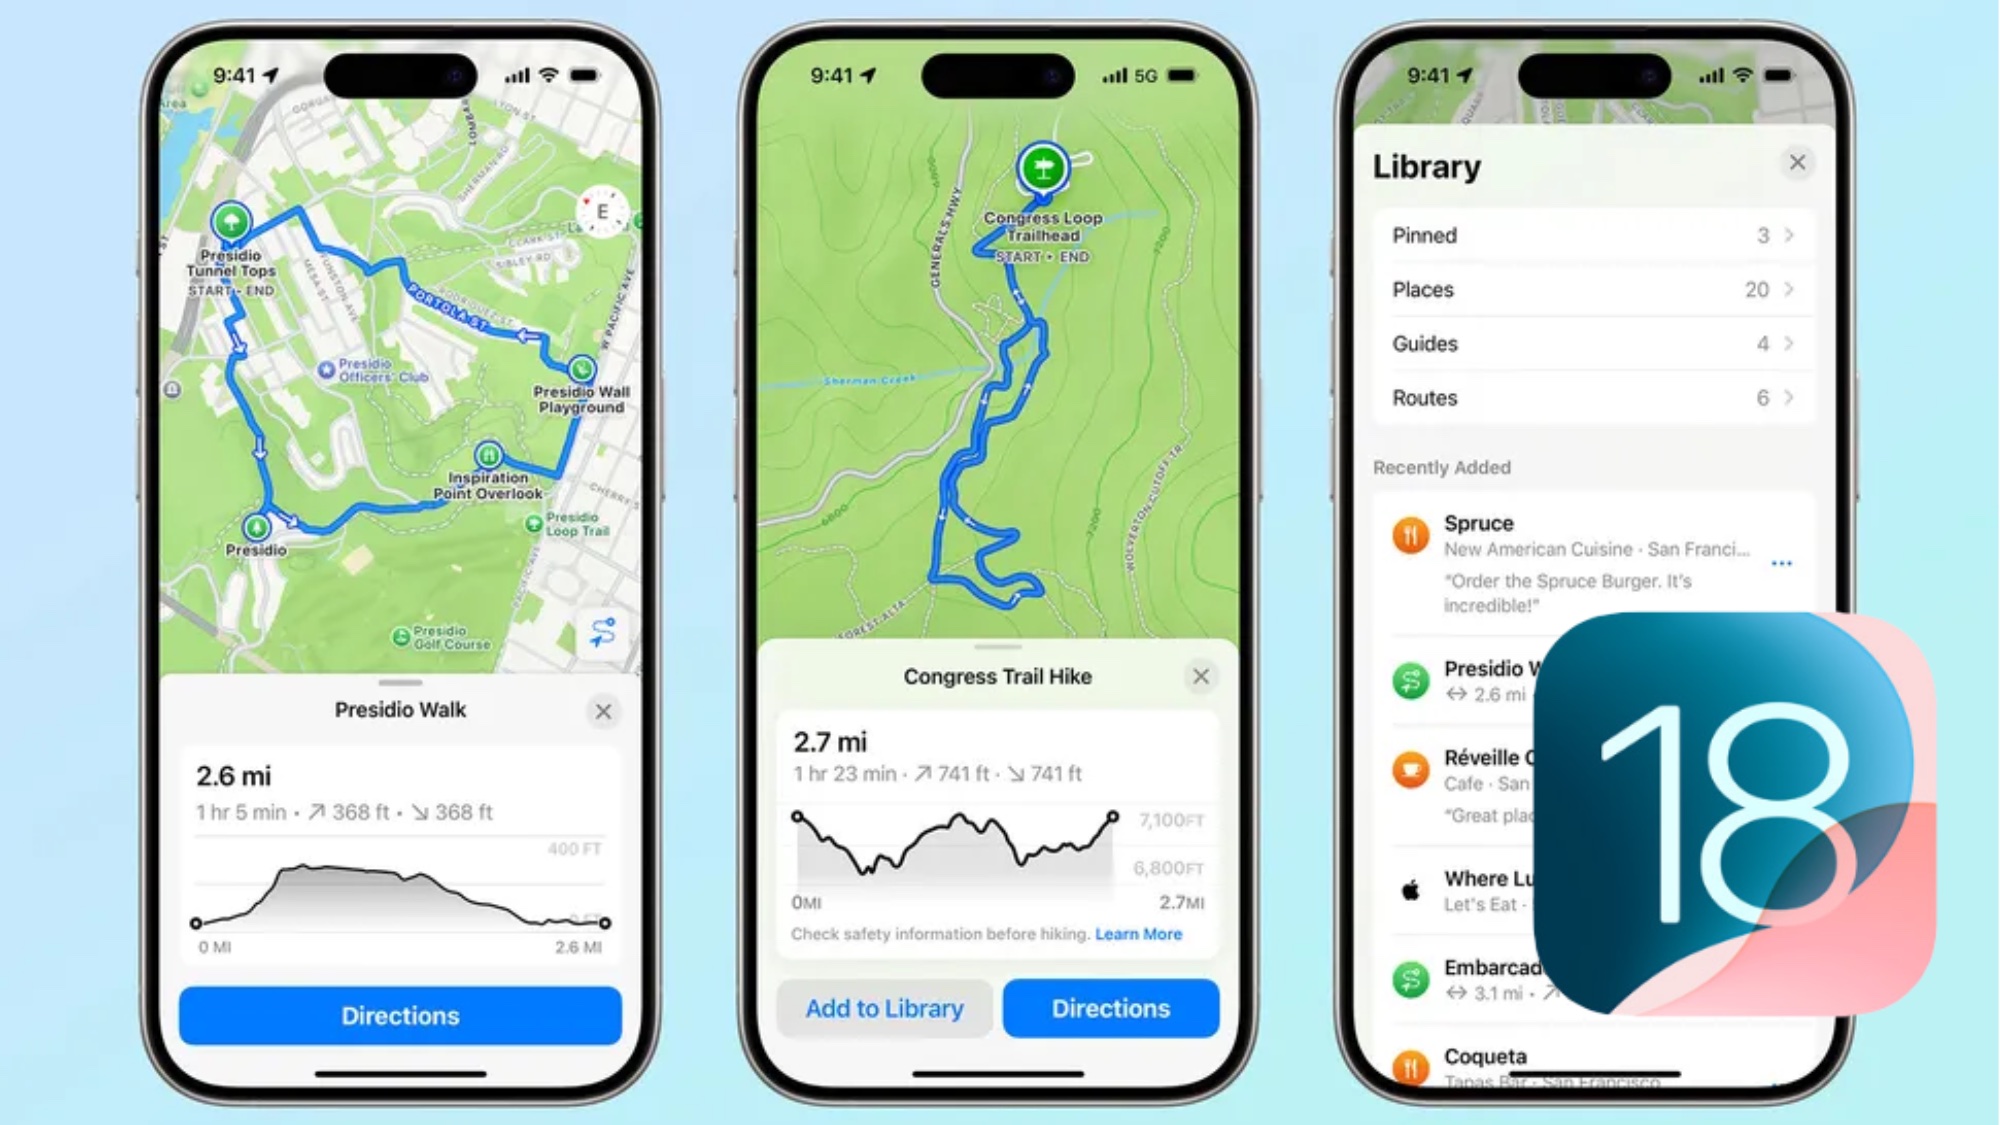
Although there has long been a debate surrounding Google Maps vs Apple Maps, there is no denying that both are extremely useful tools. It’s also safe to say that they’ve both improved vastly over the years with Apple in particular having bolstered its offering with the introduction of iOS 18.
You’re now able to view topographic maps, trail networks and hikes, drop multiple pins, and create your own walking routes. it’s always worth playing around with such features to see just how versatile they truly are.
We’re exploring these additions in more detail, guiding you through how they work so you can begin to use Maps in fresh new ways. You can also take advantage of these features on your iPad and Mac, if you’ve updated to iPadOS 18 and macOS Sequoia.
View topographical maps
Topographic maps are available on iOS 18 in the US and Japan and they cover all 63 US national parks. Among the features are contour lines and trail details.
1. View a rural area
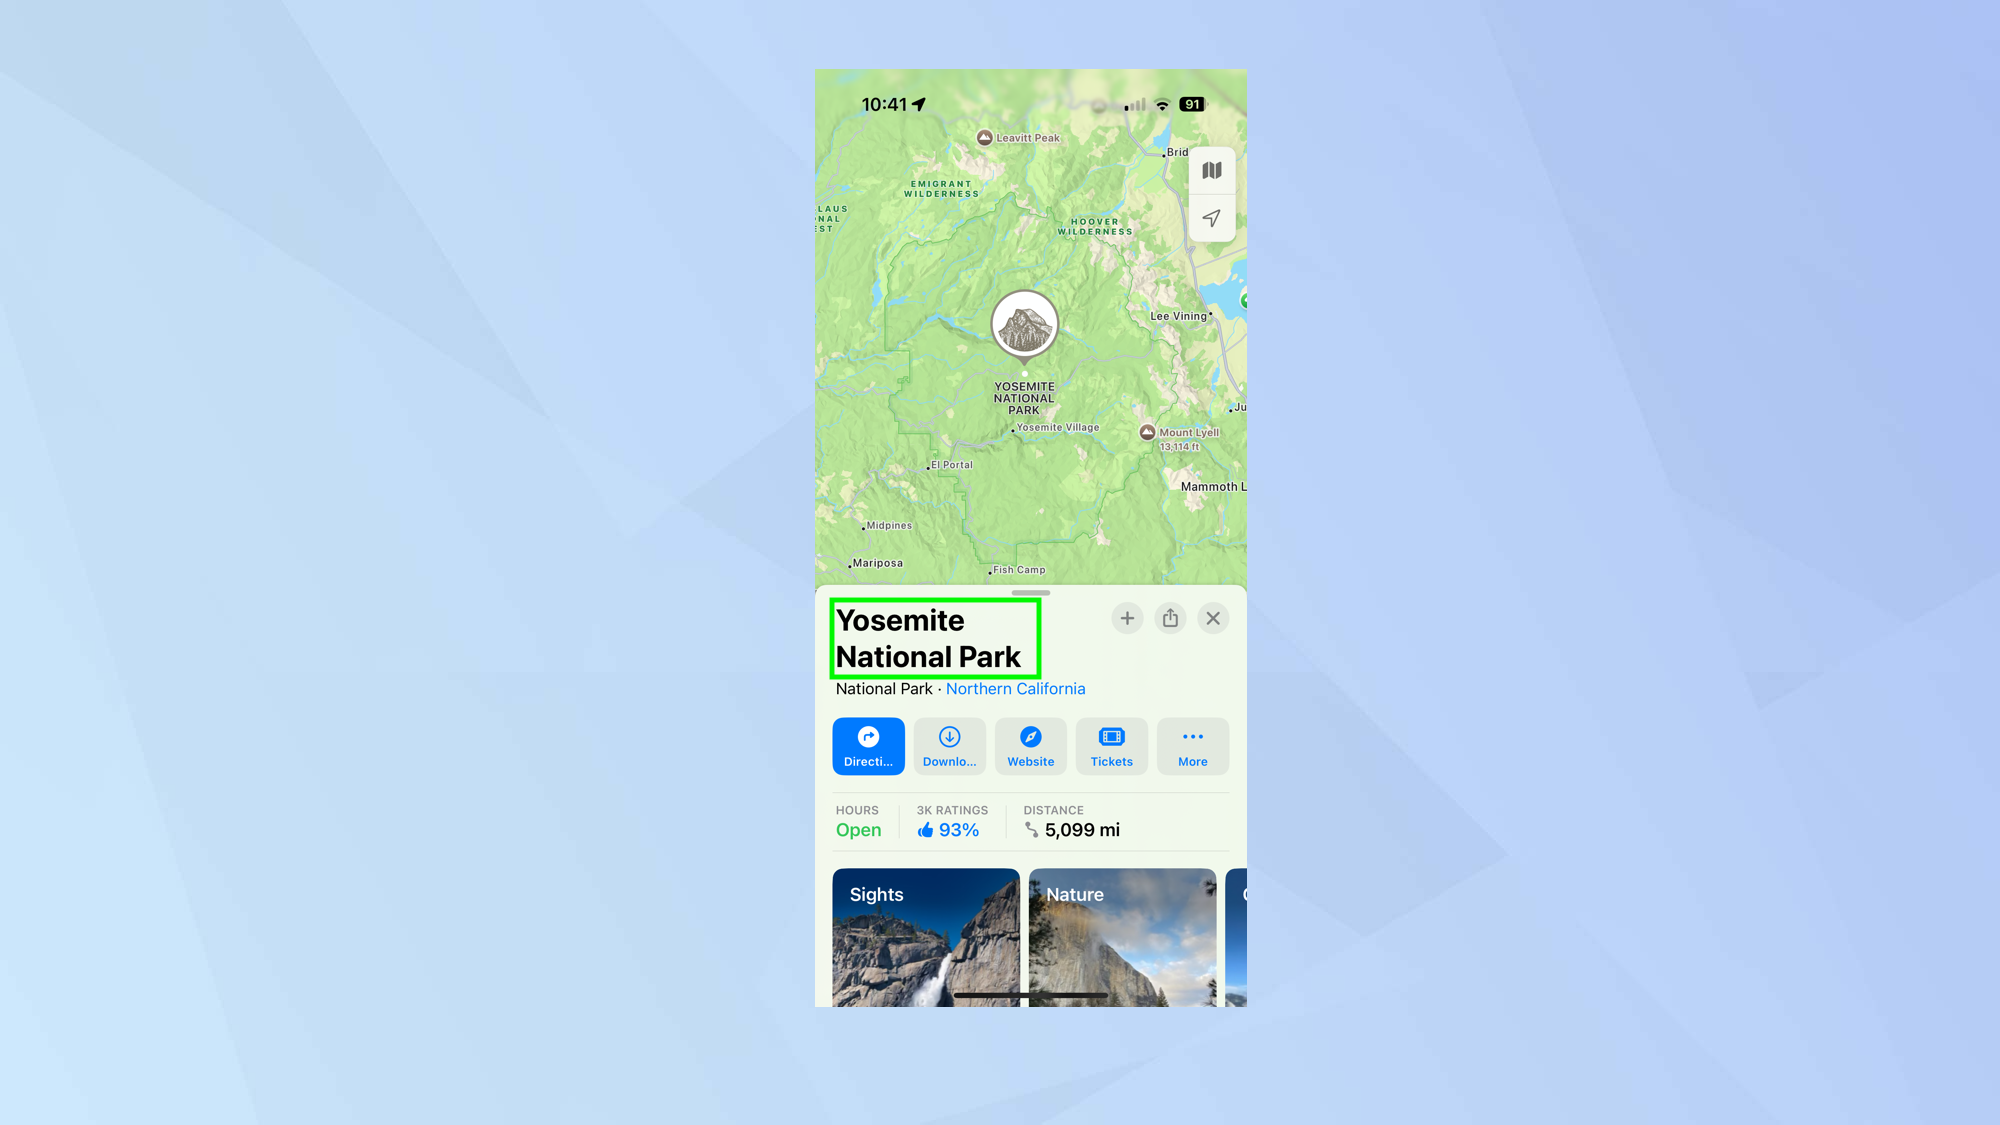
Open Apple Maps and search for a location such as Yosemite National Park.
2. Zoom in
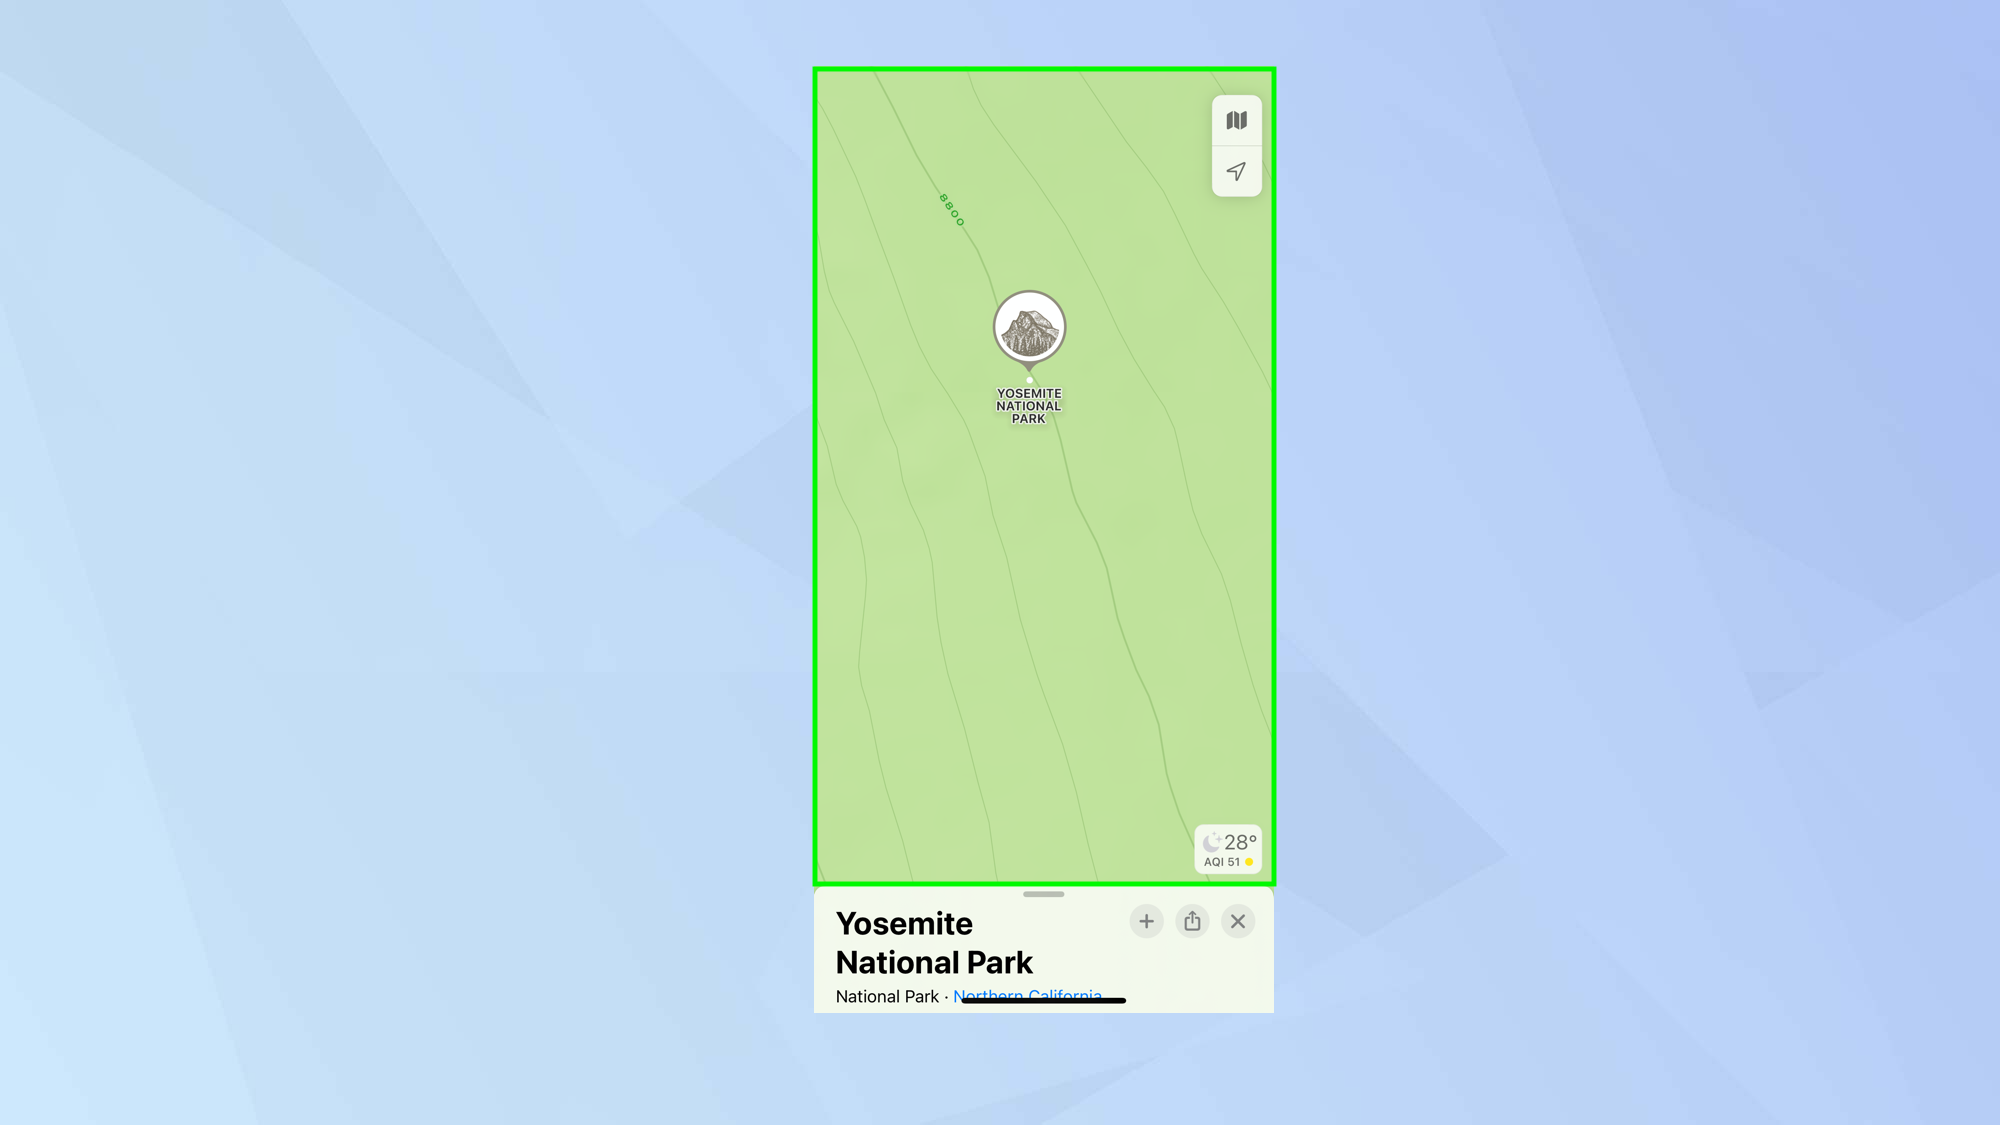
Now use your fingers to zoom into the map and you will get more and more detail ultimately seeing contour lines and elevation numbers.
Discover hikes and trails
It is also possible to find hikes, filtering them by their length, the type of route and the elevation you feel comfortable with.
1. Find a location
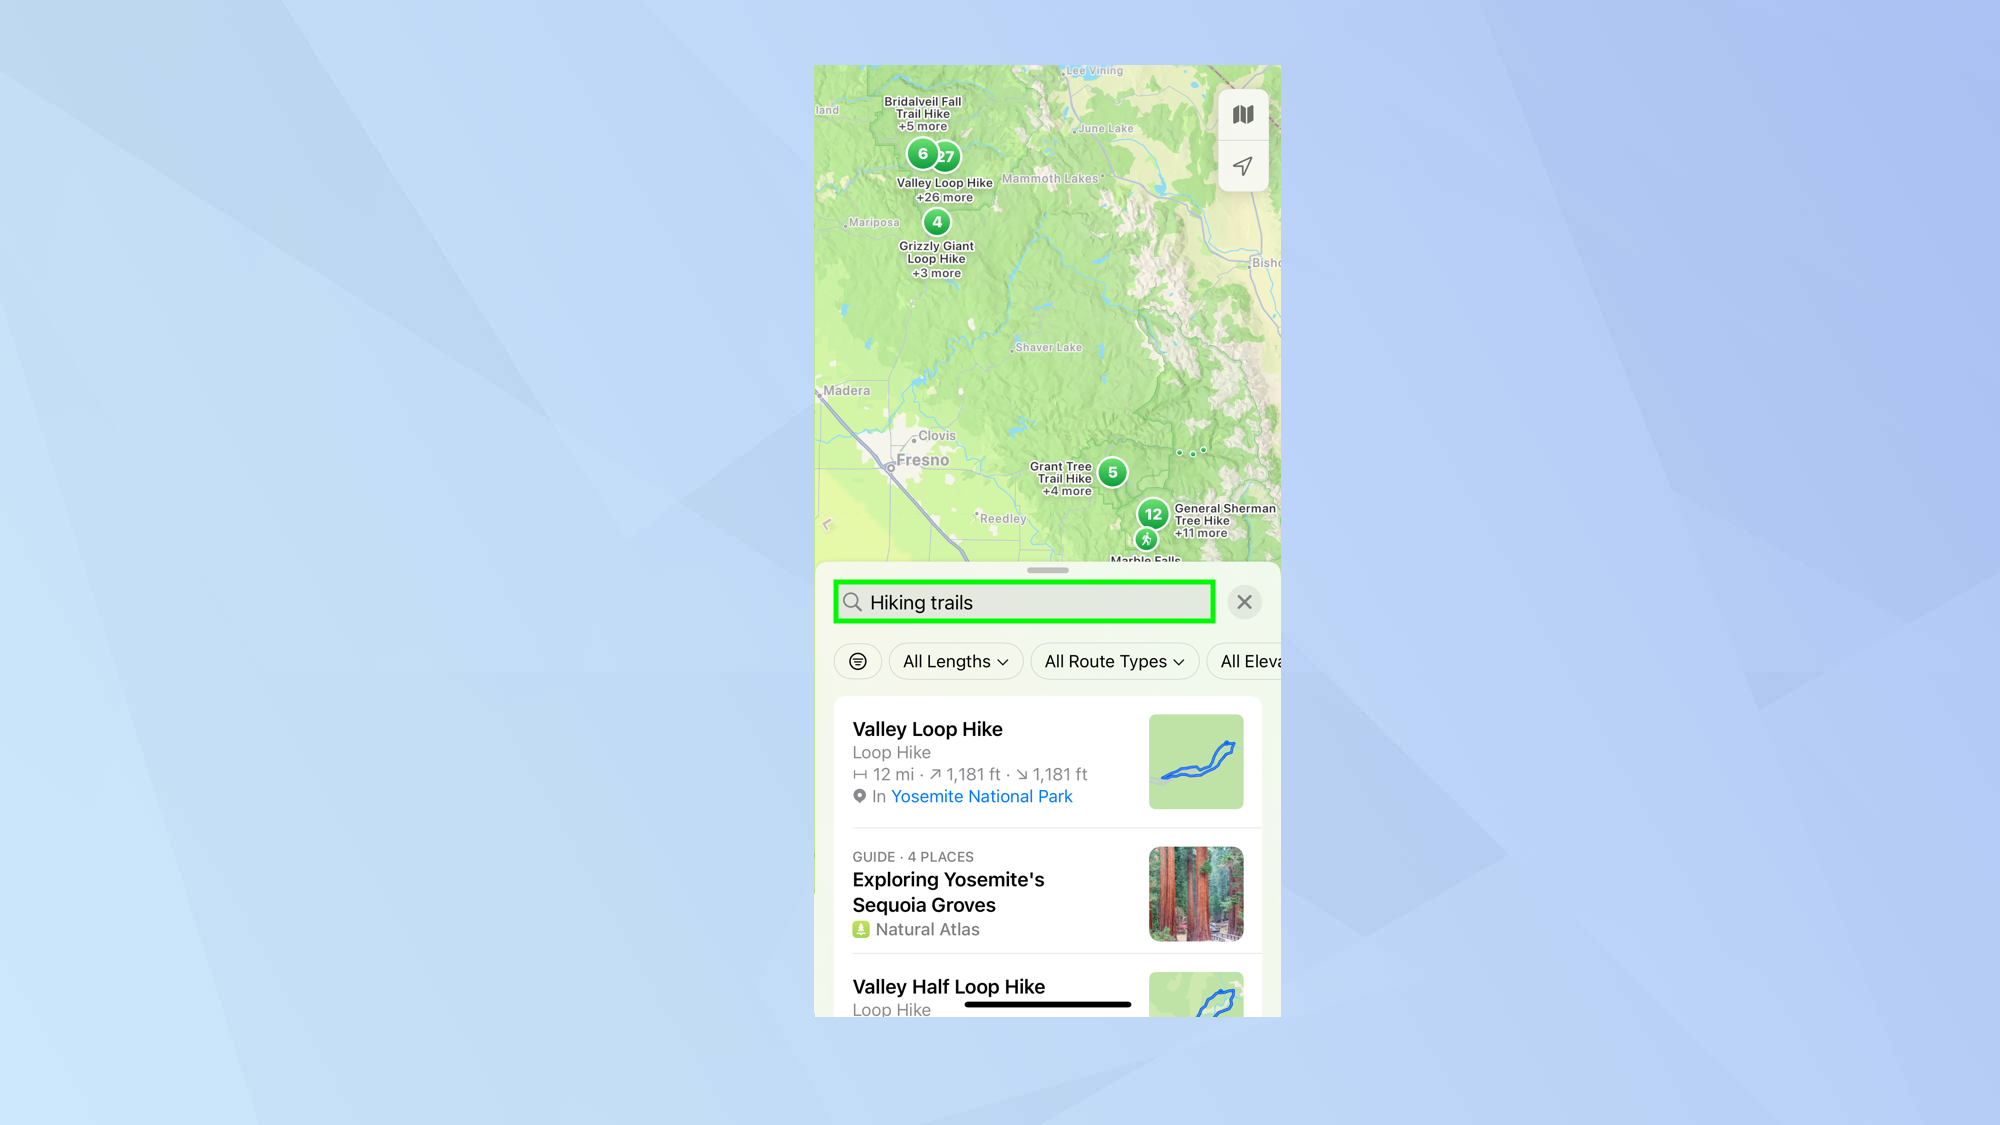
Use Apple Maps’ search box to find a location or use the location you’re currently situated in. Scroll down on the card to see recommendations listed under Hikes (tap More to see them all) or type “hiking trails” to see a list of local hikes and trails.
2. Filter the results
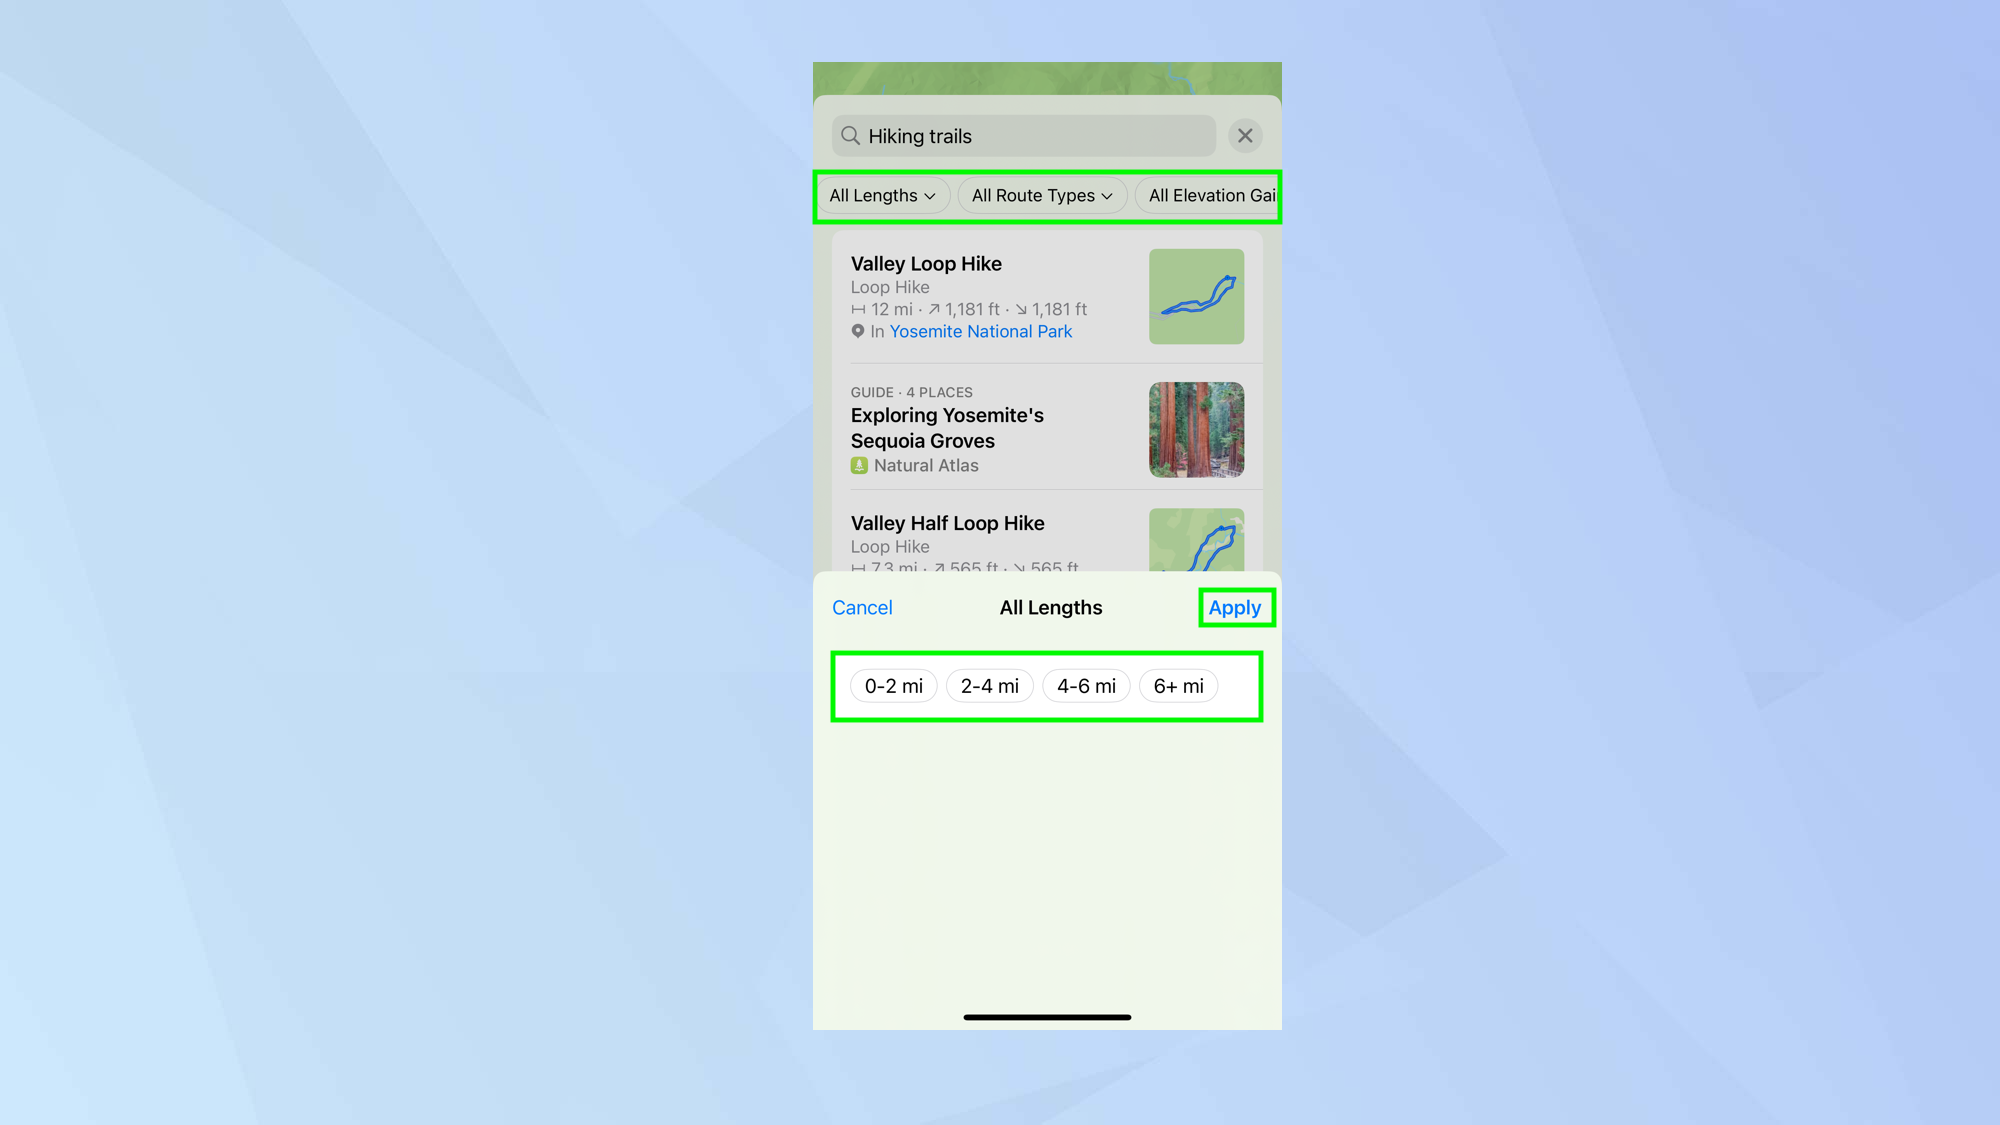
To filter the search, tap the options at the top of the card. You can determine the length, route type and elevation. Just tap the buttons that best suit your needs and tap Apply.
3. Select a hike
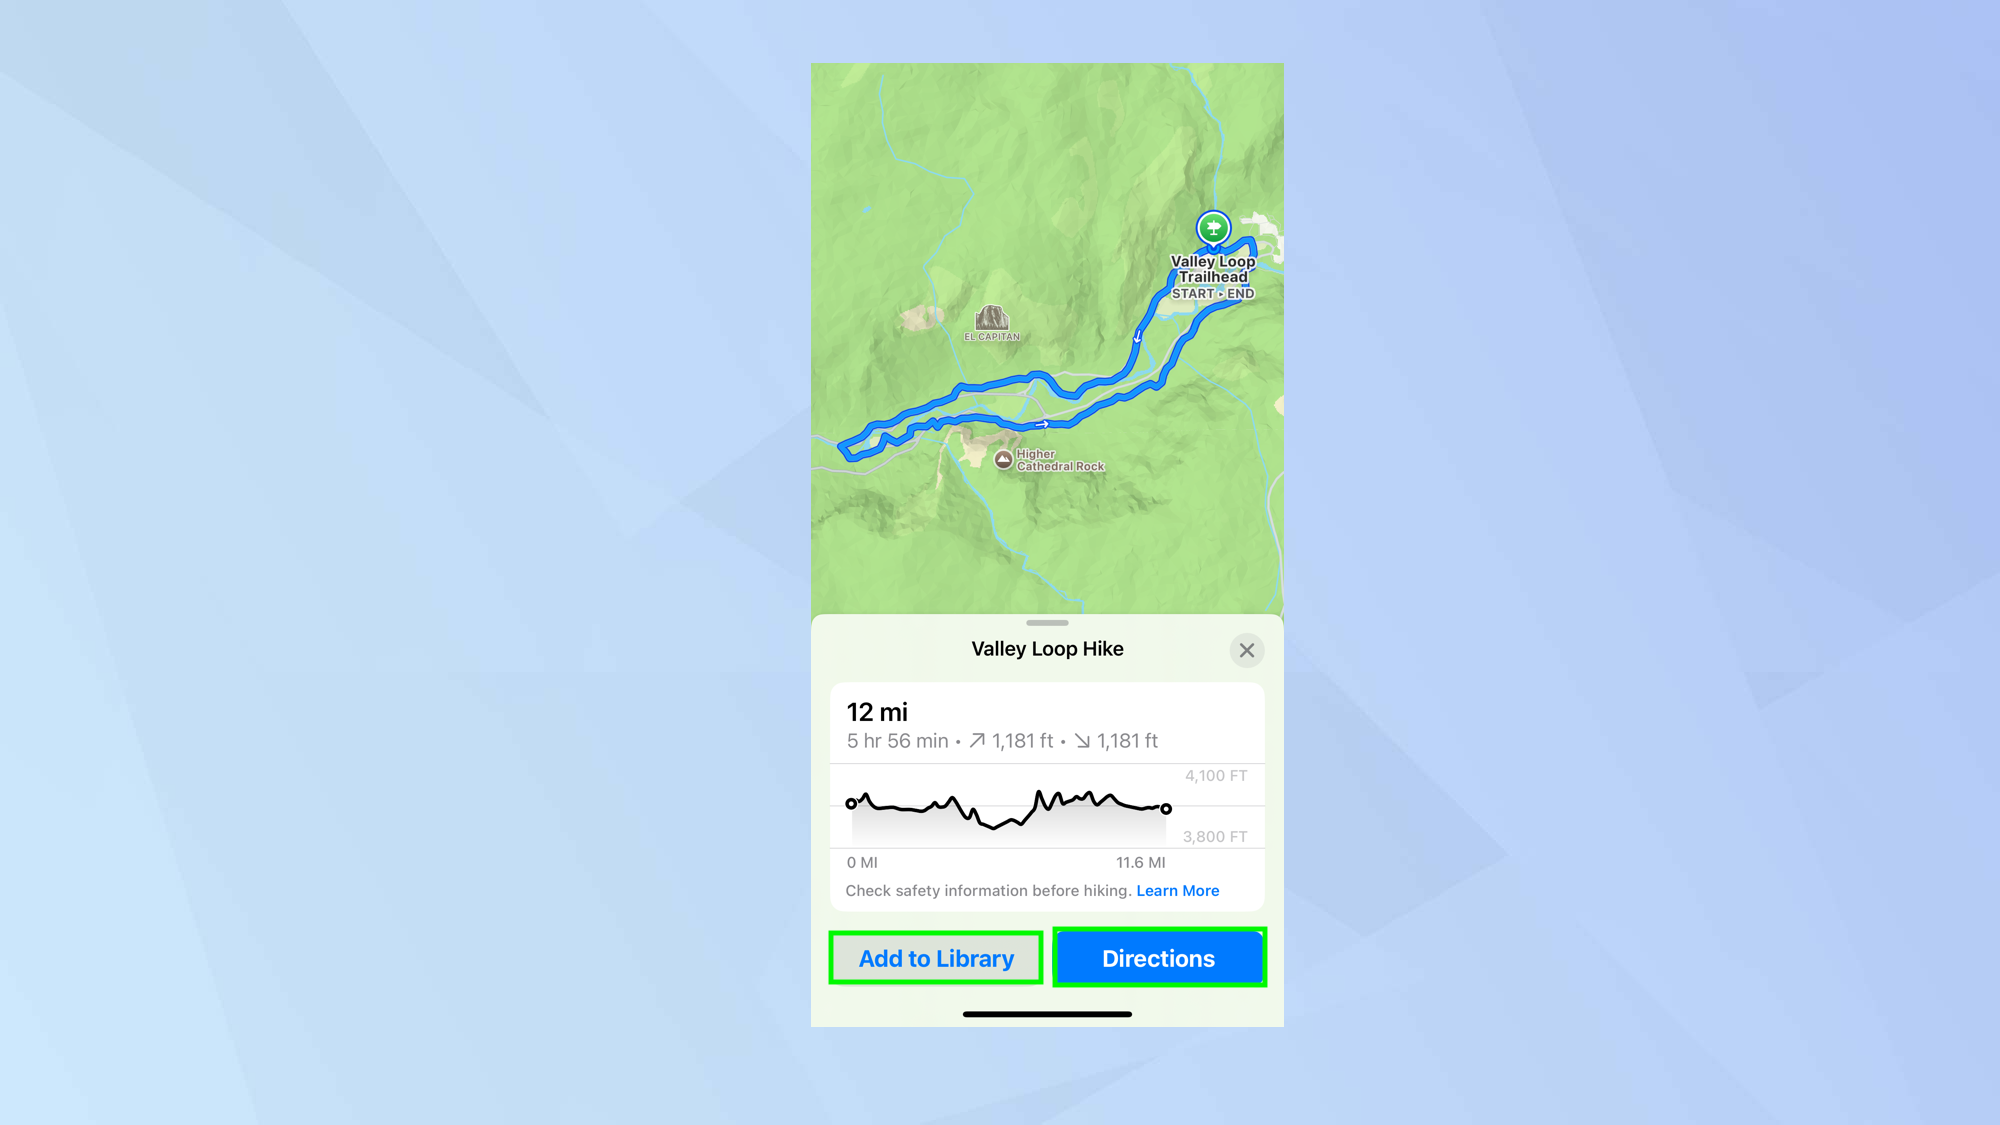
If you like the idea of a particular hike or trail, simply tap the recommendation. You will be shown the route and you can either tap the add to library button to save it or tap Directions when you’re ready to walk. You will be able to see the length of the trail, how long it will take and the elevation.
Create a bespoke hike
You may already have a hike or walk in mind that isn’t included in the recommendations but just because it’s not there, doesn’t mean you can’t use Maps to guide you. You can create your own routes whether you’re in the country or walking around a city.
1. View the Library section
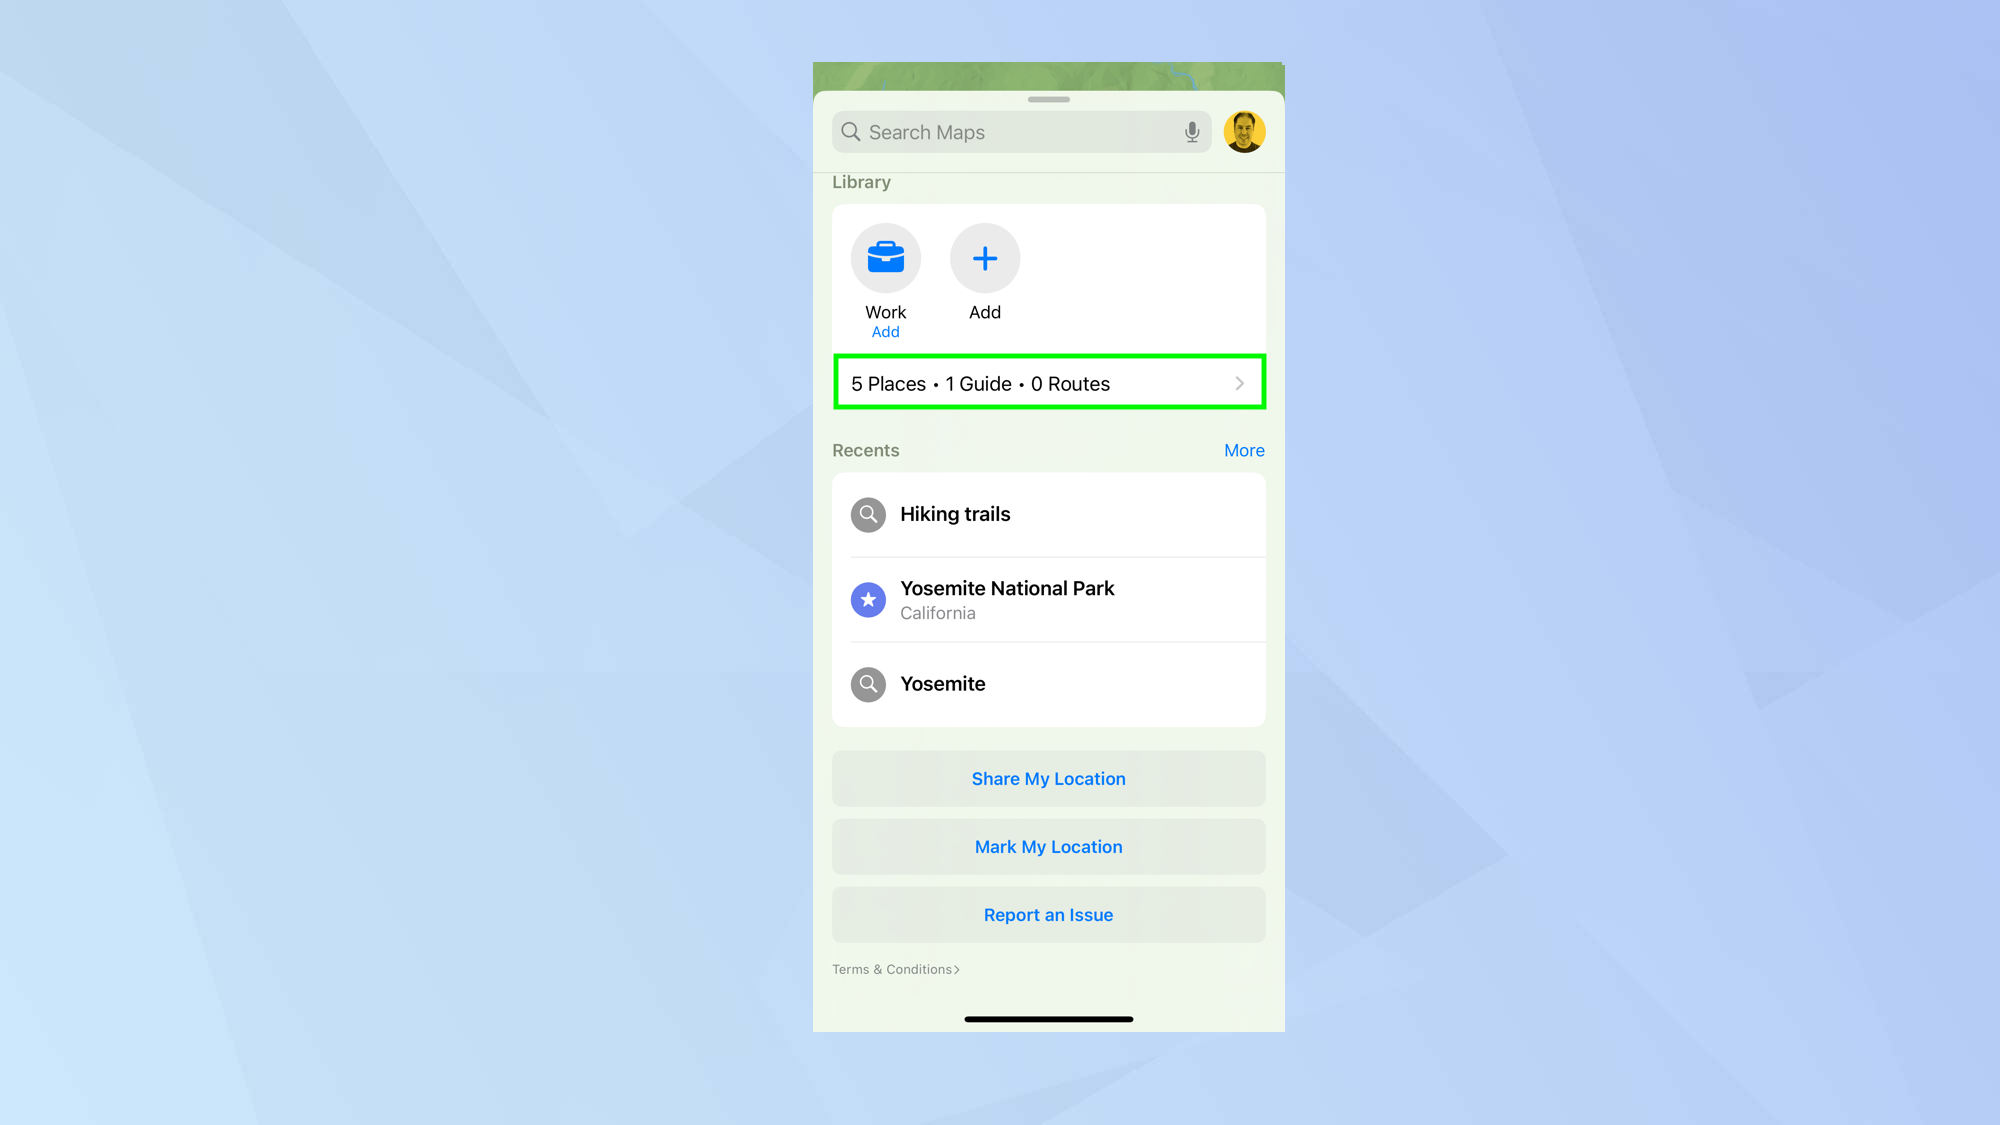
Rather than enter a search, scroll down to the Library section and tap the option at the bottom of the section (it’s the one which lists your number of places, guides and routes).
2. Create a Route
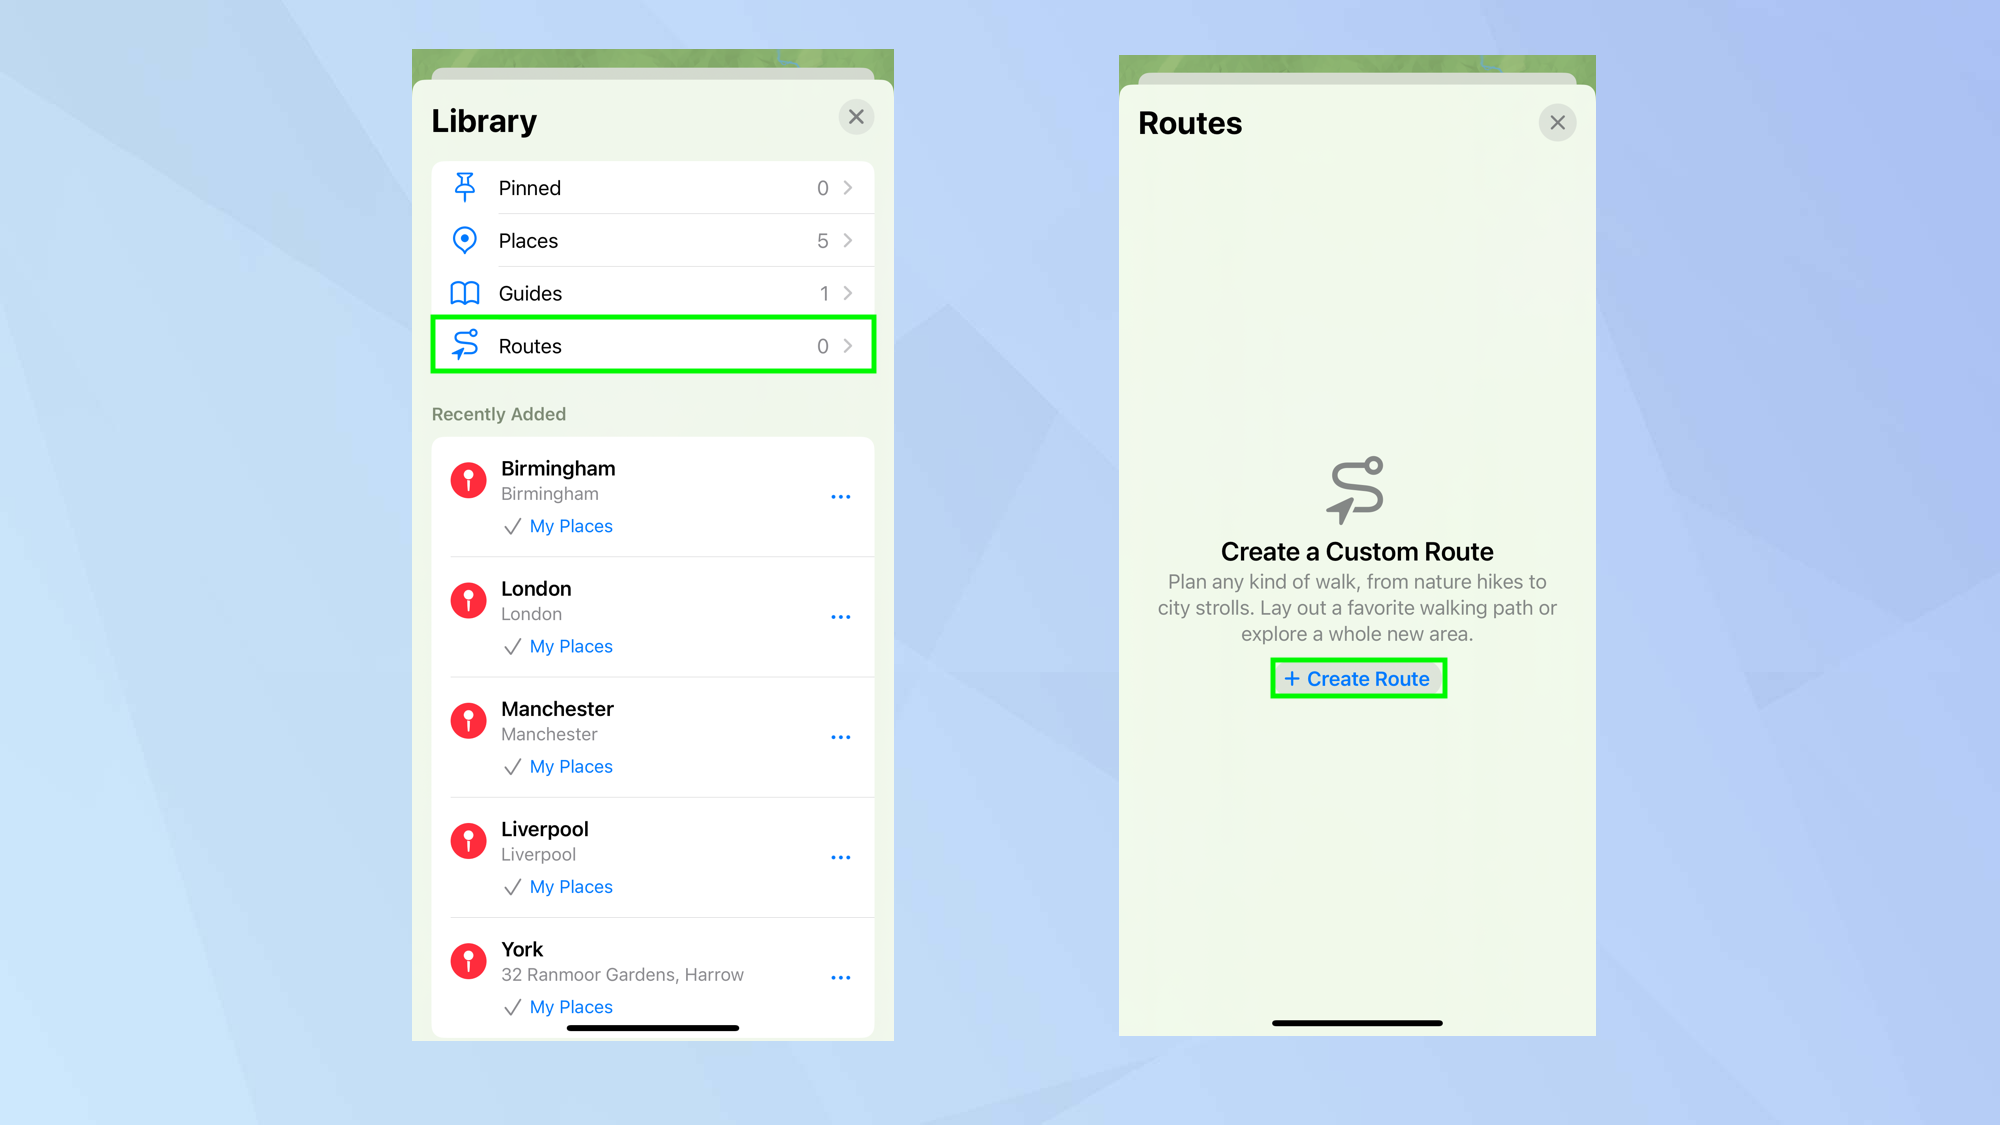
Tap Route in the list of options and then, on the next page, tap Create Route.
3. Enter the positions
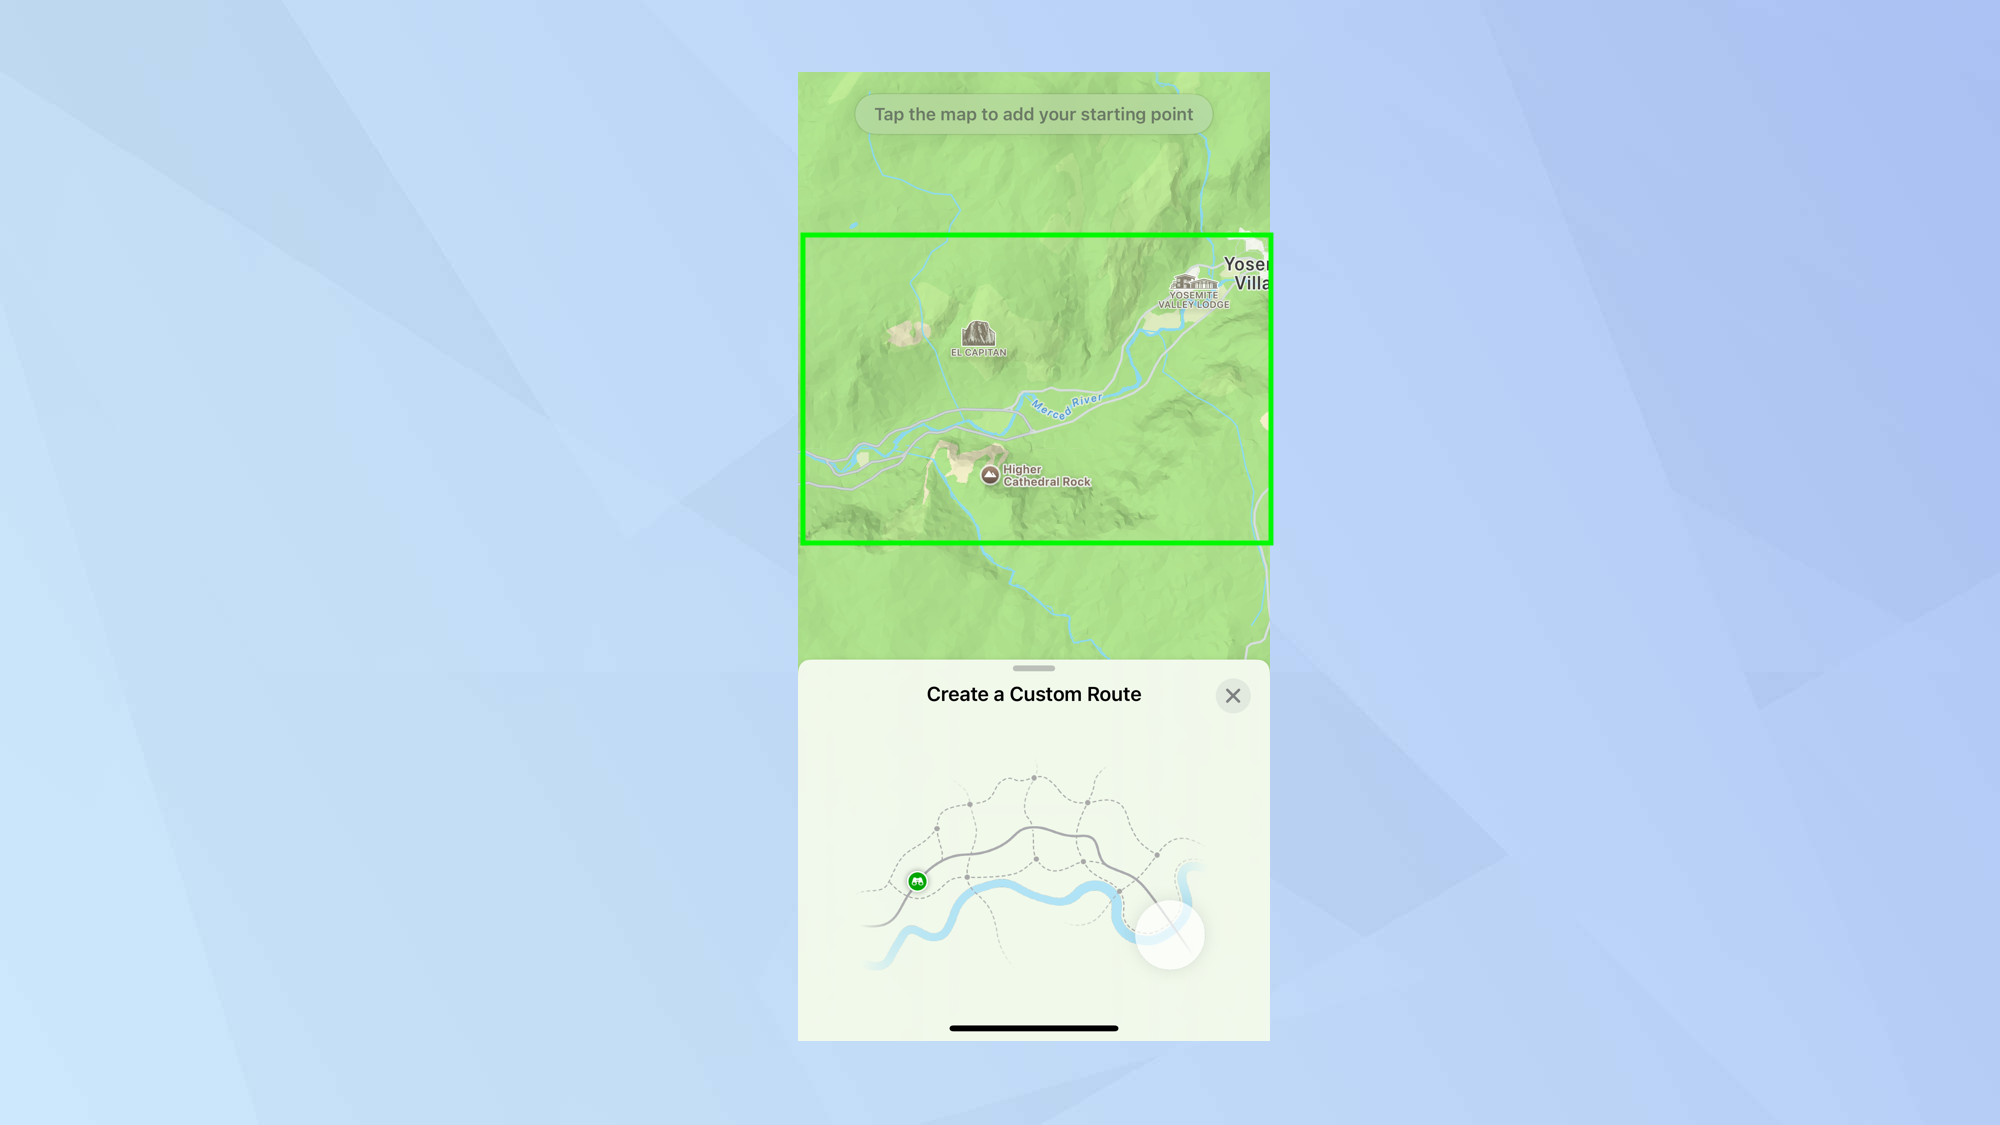
Now tap the map at the starting point and begin to add more points to build up your route. Apple Maps will offer guidance along the way as it creates directions for your route.
4. Complete the instructions
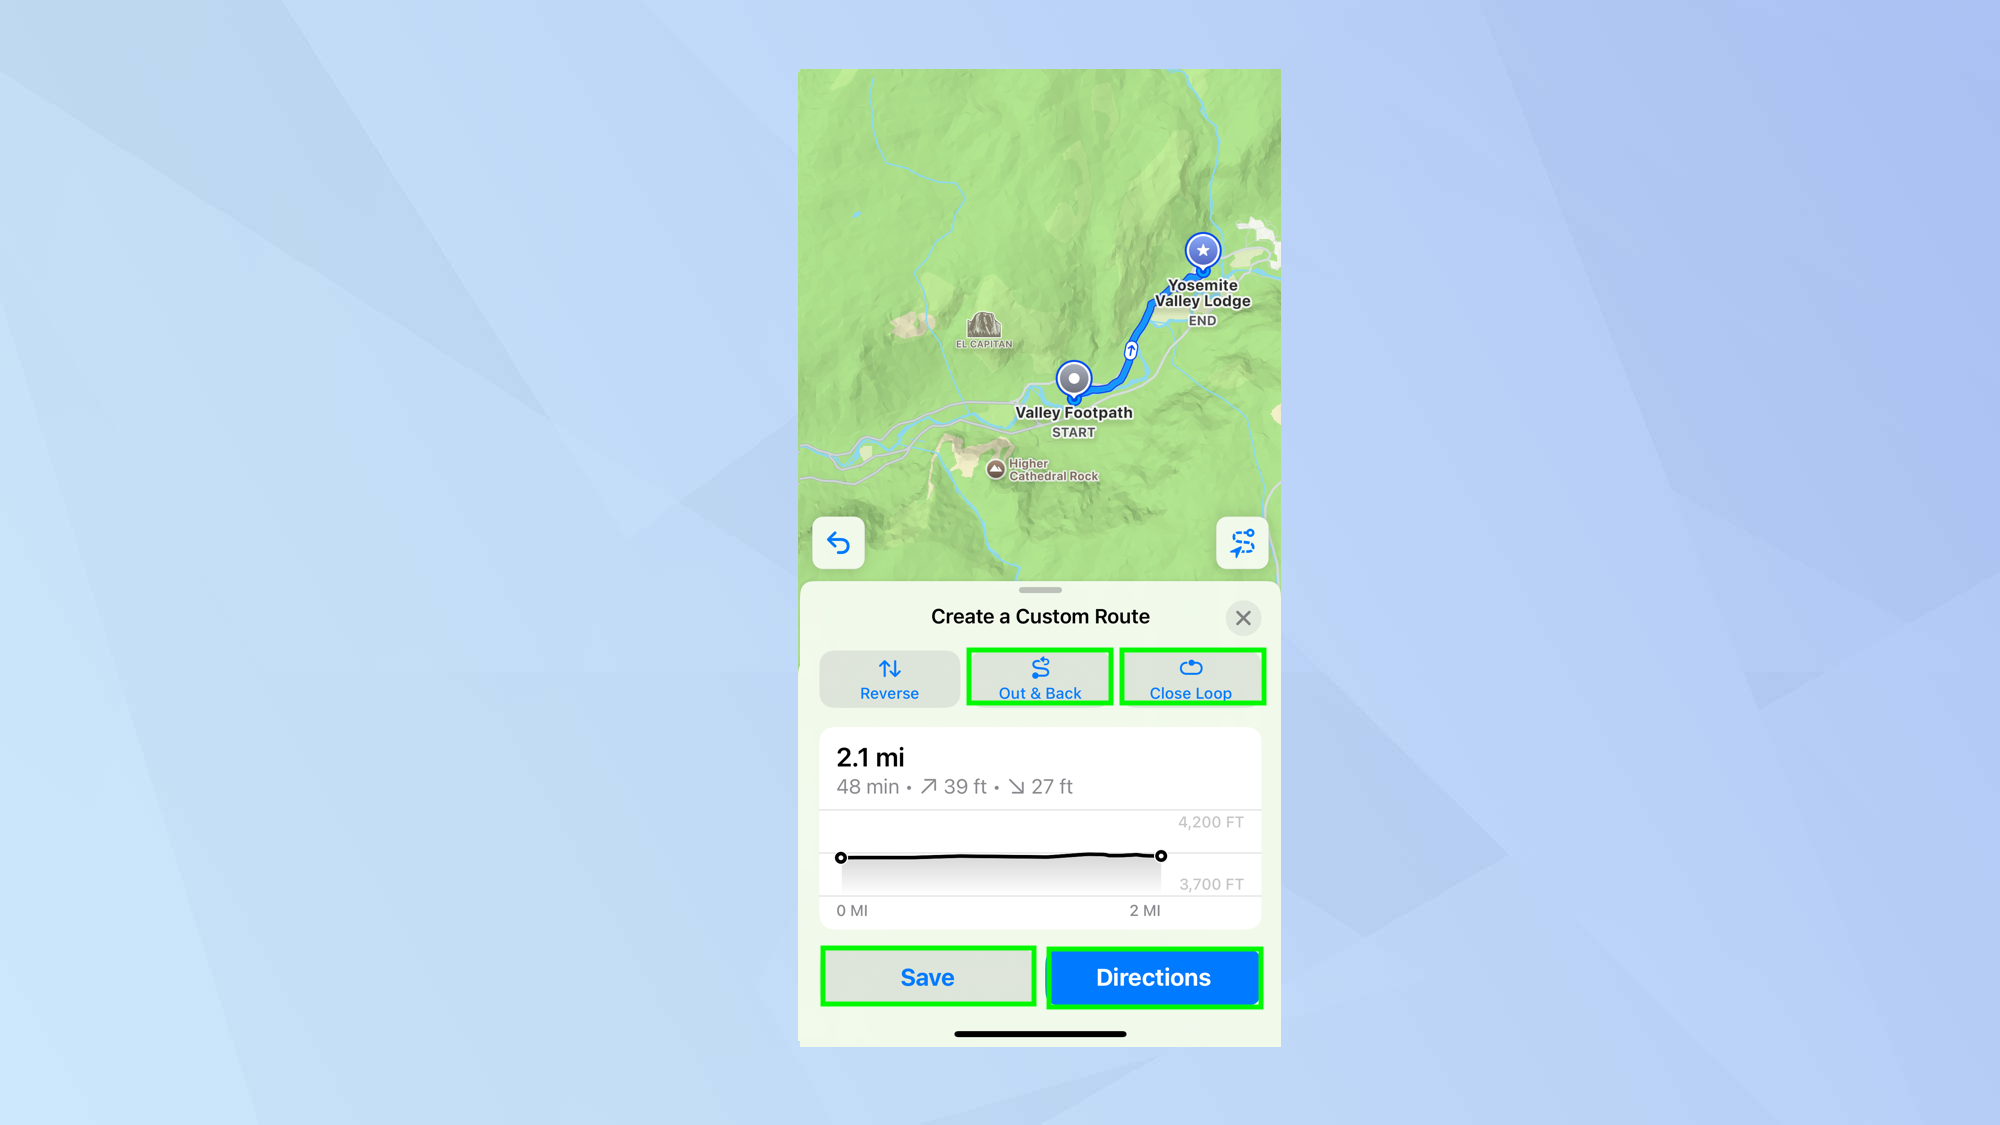
When a route has been plotted, you’ll be able to determine how you’ll enjoy it. You can follow the route, finish and head back — if that is what you want, tap Out & Back.
If you want to go in a circle, tap Close Loop. Tap Save if you wish or tap Directions to immediately start the hike.
Use multiple pins
It’s now possible to drop more than one pin on a map so you can find your way to different spots.
Get instant access to breaking news, the hottest reviews, great deals and helpful tips.
1. Drop a marker
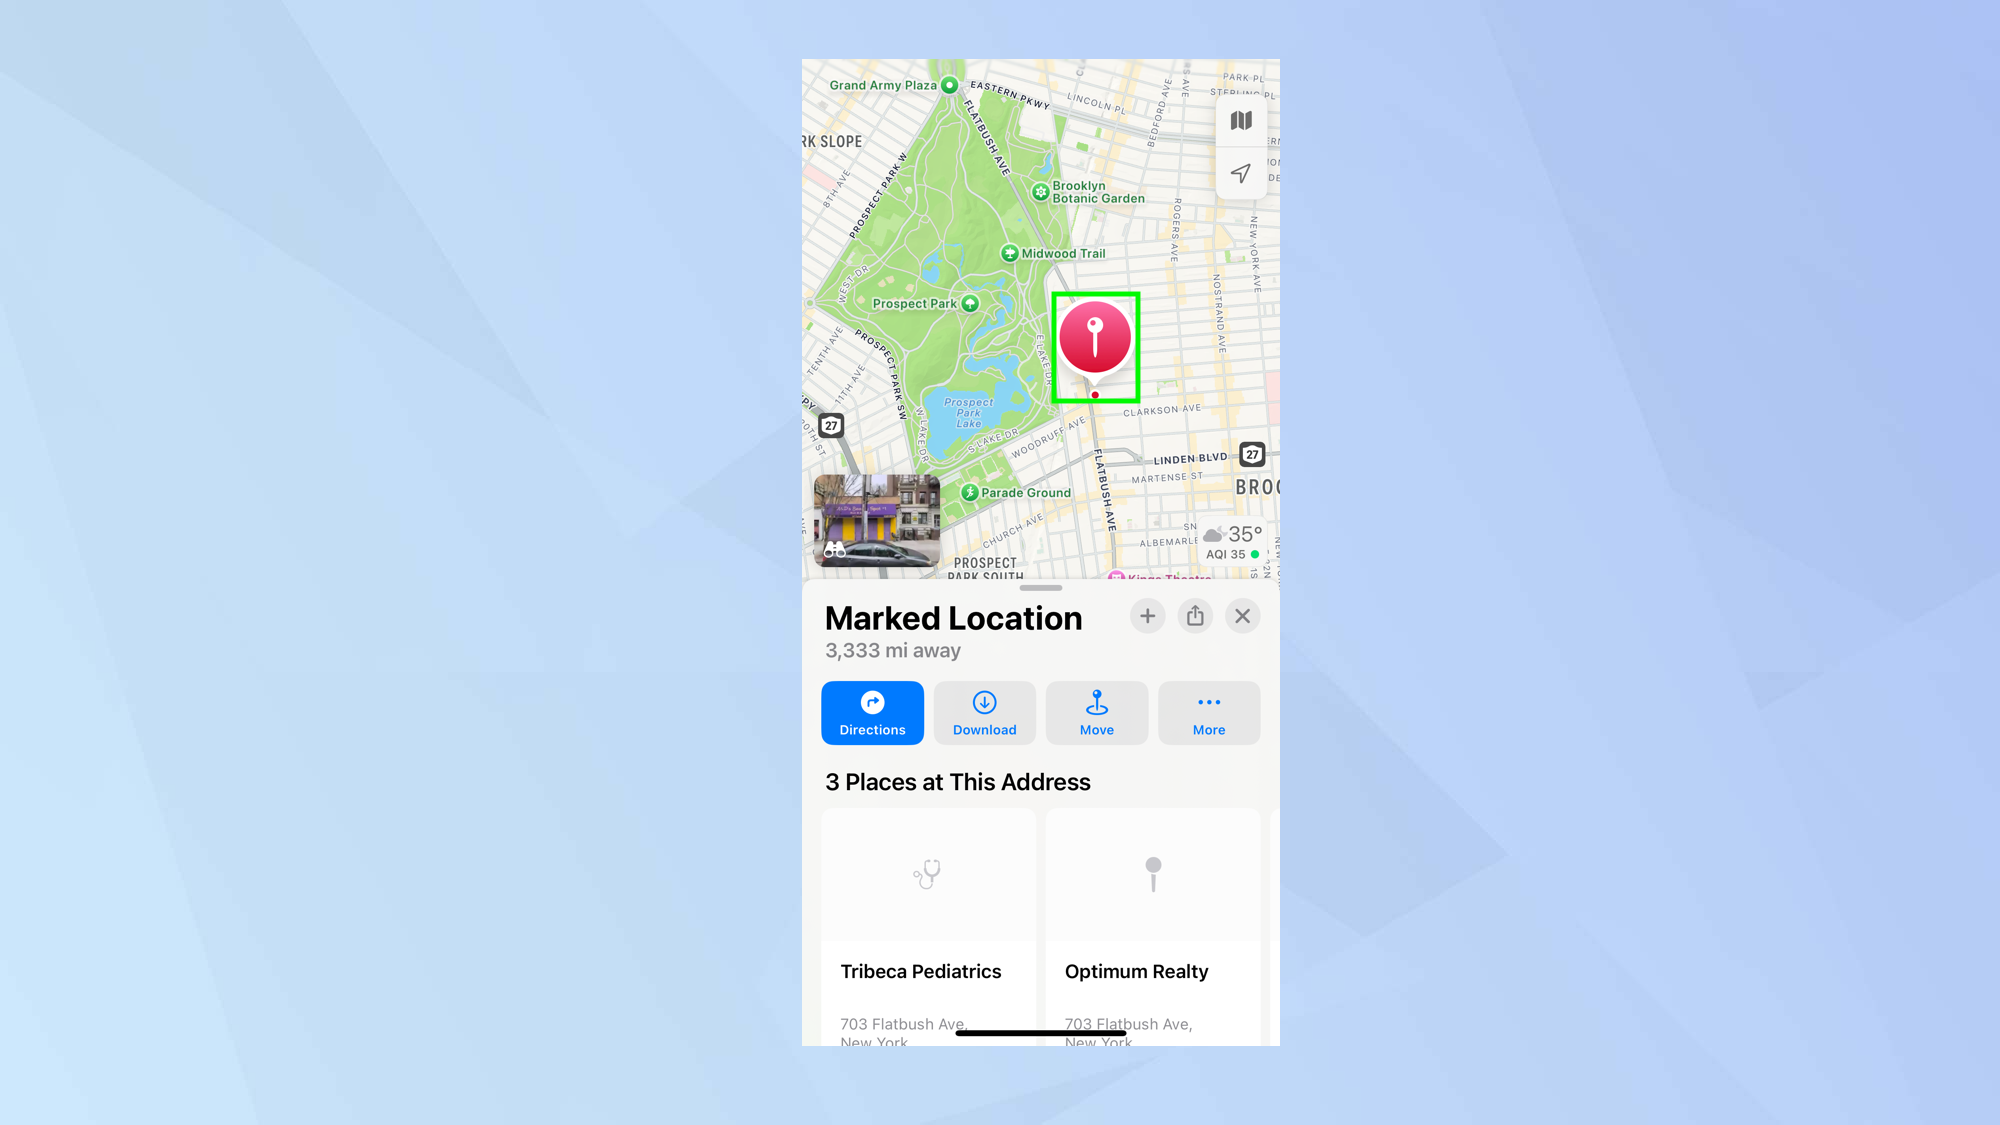
Touch and hold on a map location to make it a marked location.
2. Make it a pin
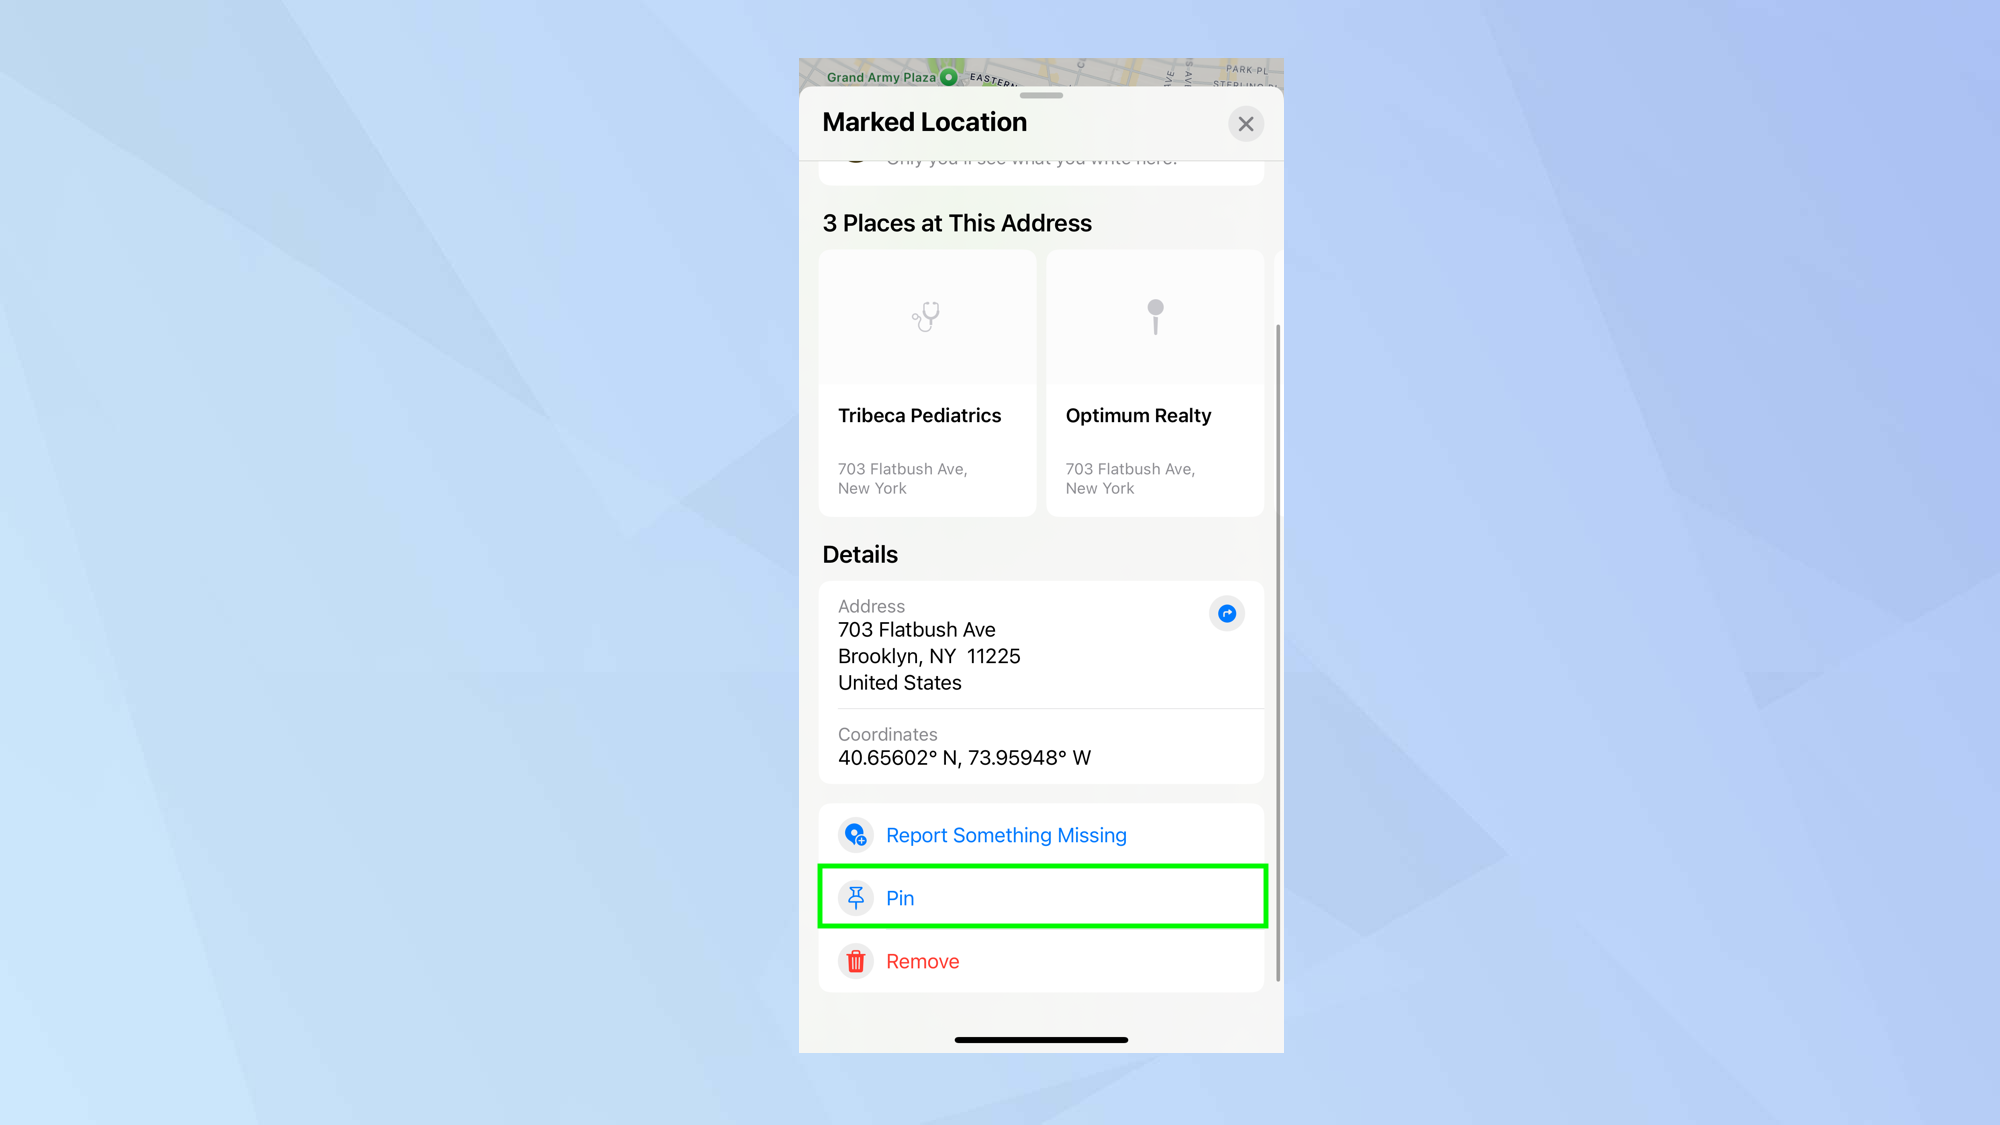
Scroll down on the card and select Pin from the options close to the bottom.
3. Add more pins
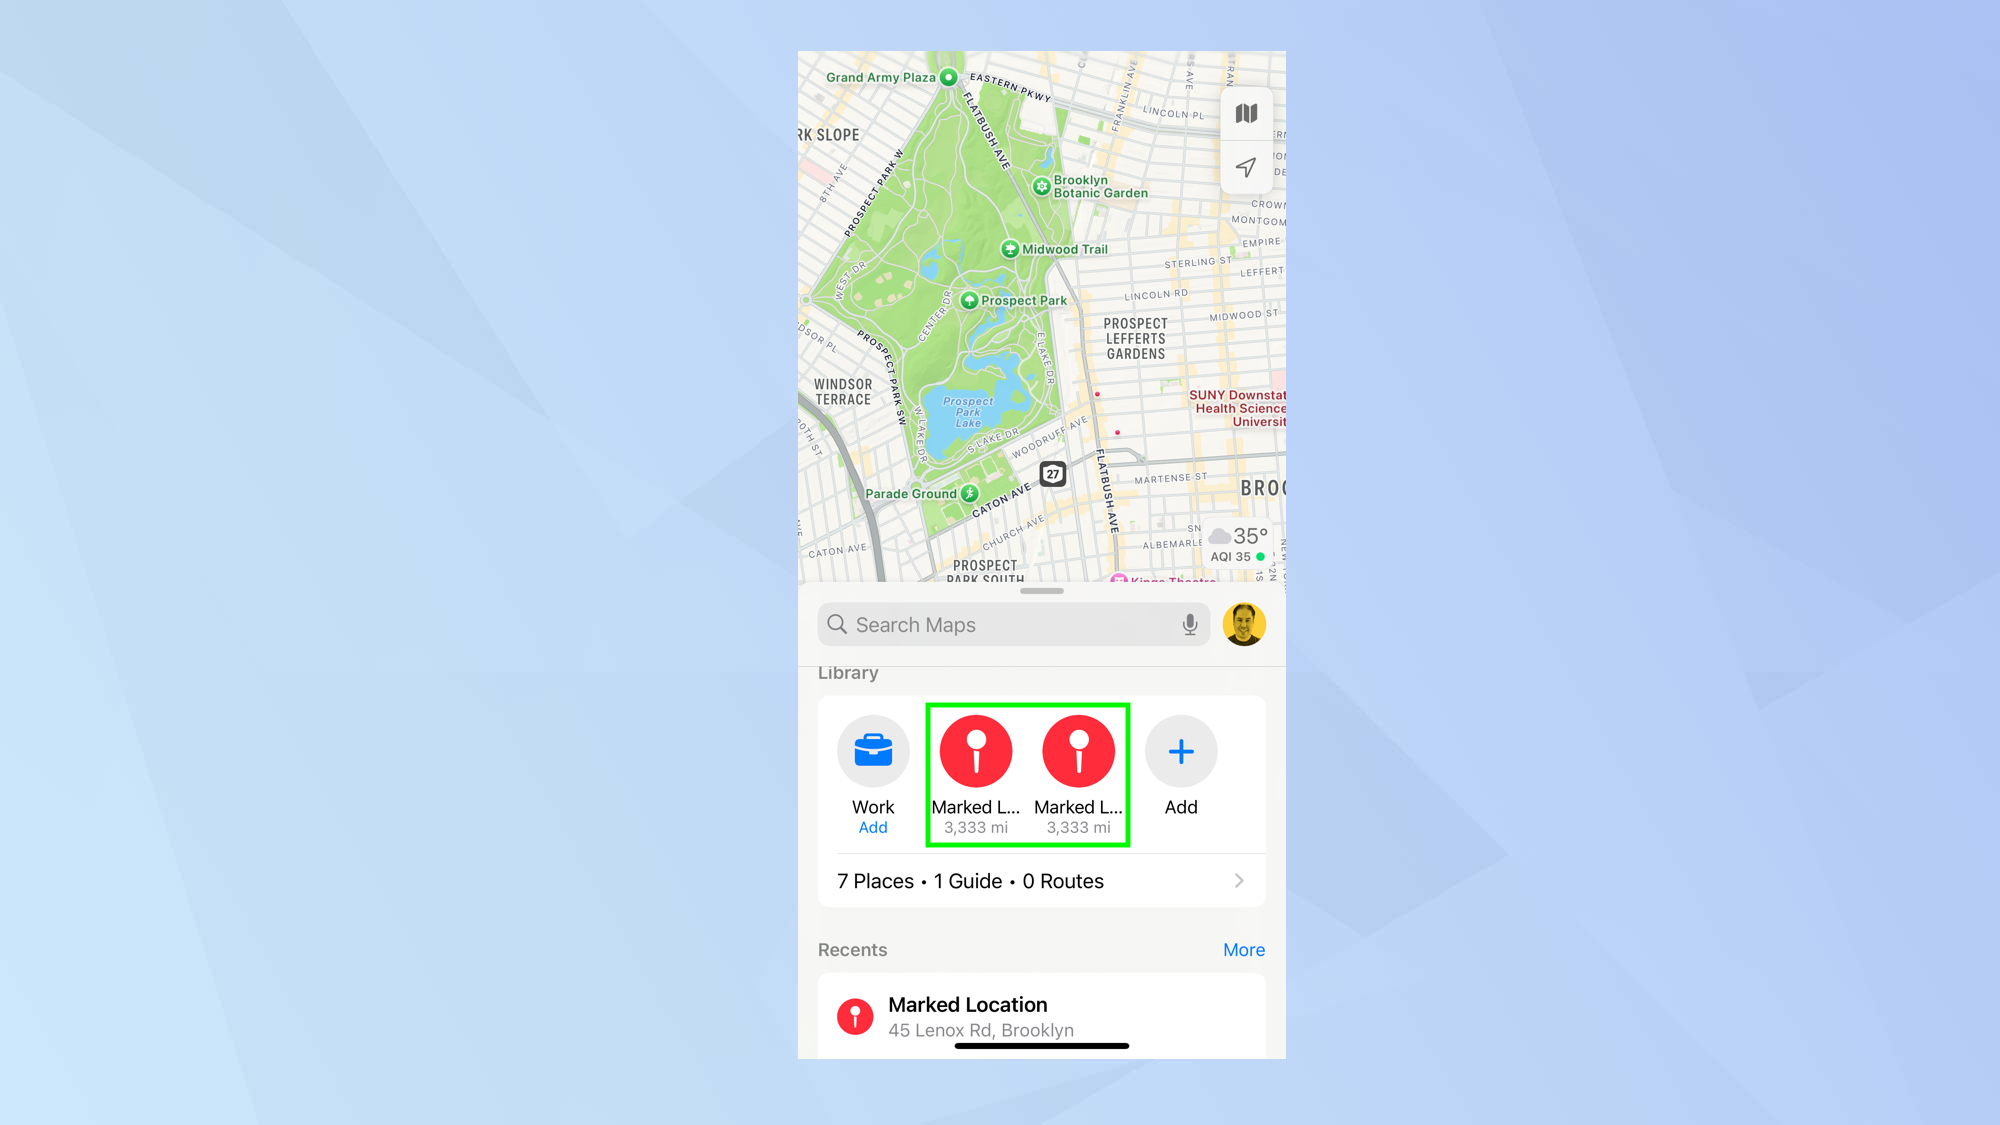
Now do the same with another location and the different pins will appear under Library.
Use the new Places Library
You can save curated Maps Guides, national park hikes, custom routes and places, all of which appear in the new Places Library.
1. View the Library section
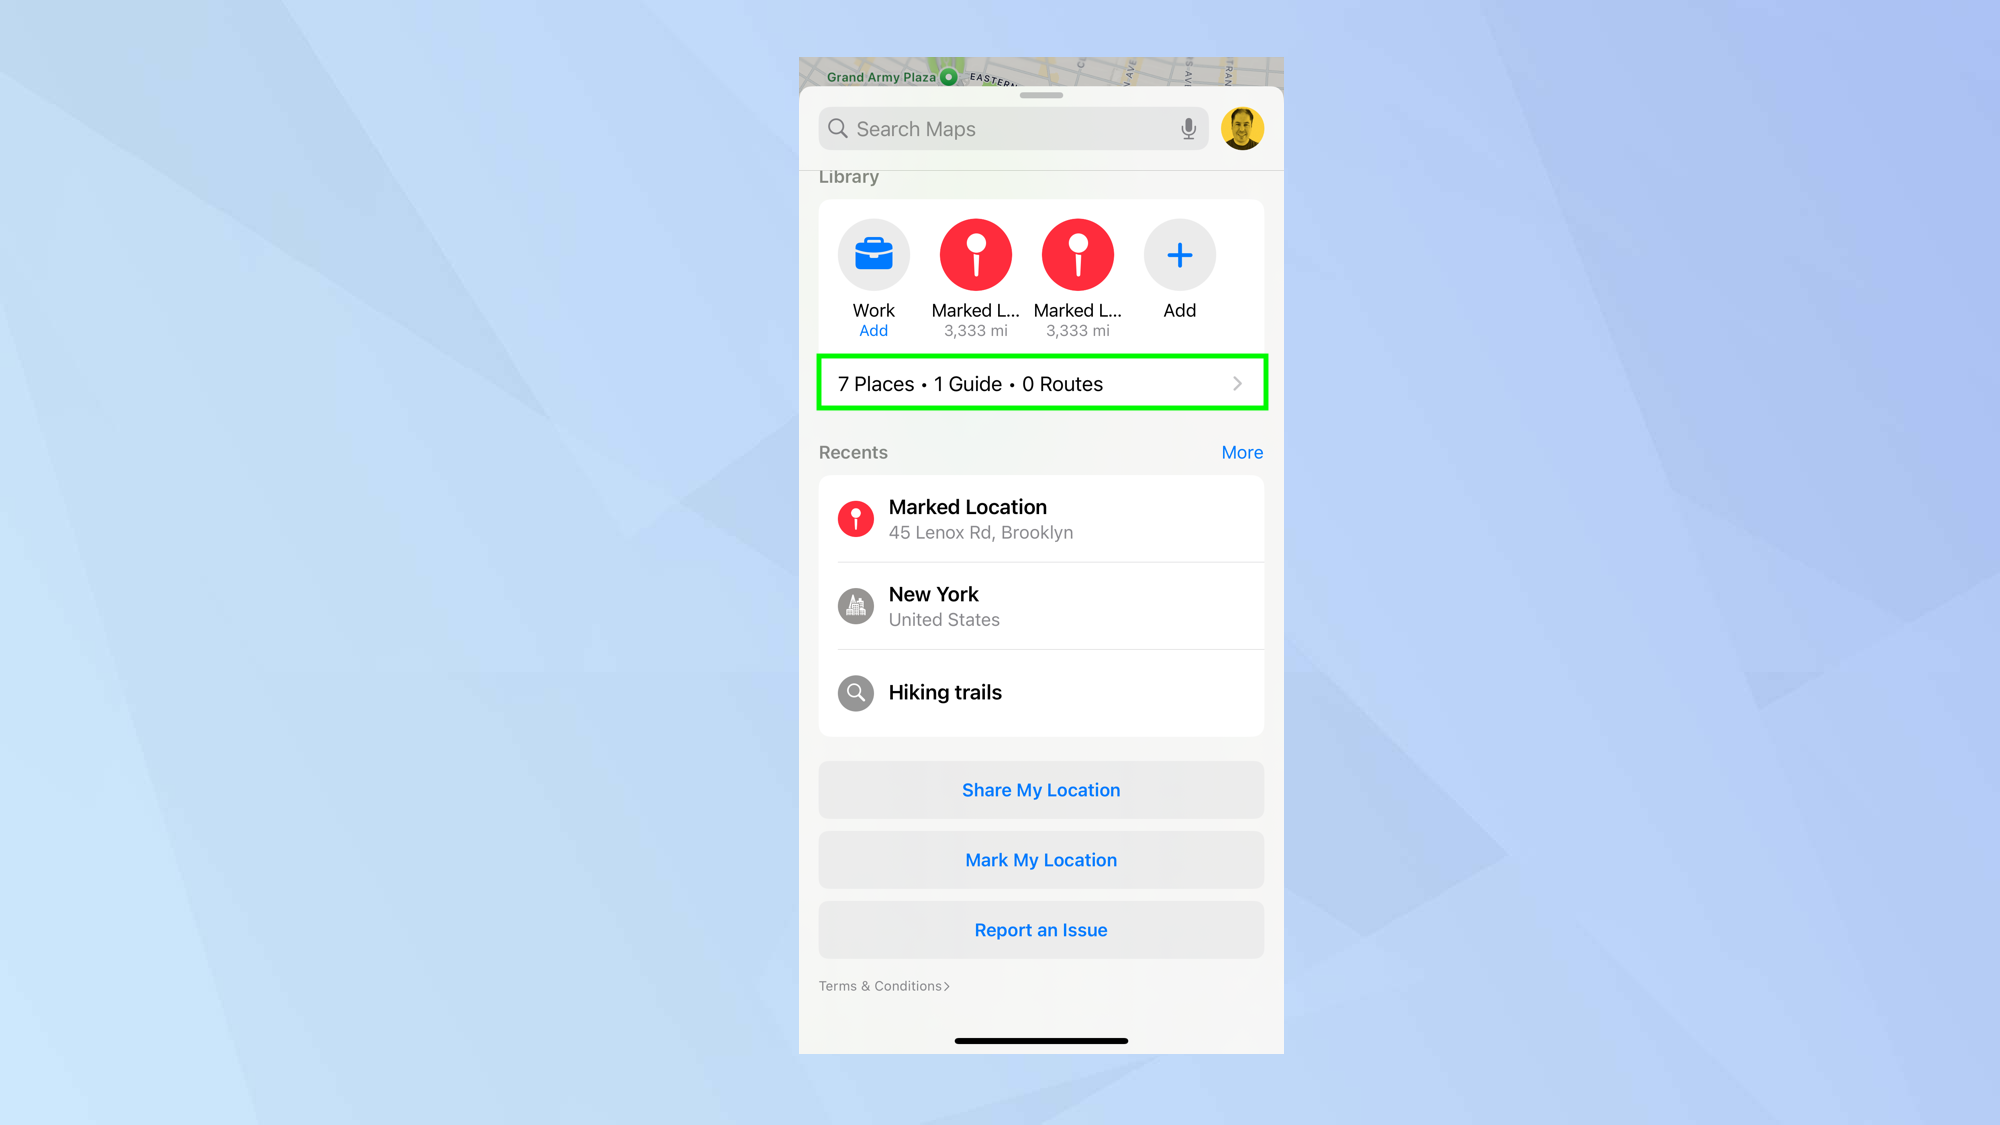
Rather than enter a search, scroll down to the Library section and tap the option at the bottom of the section (it’s the one which lists your number of places, guides and routes).
2. Check the categories
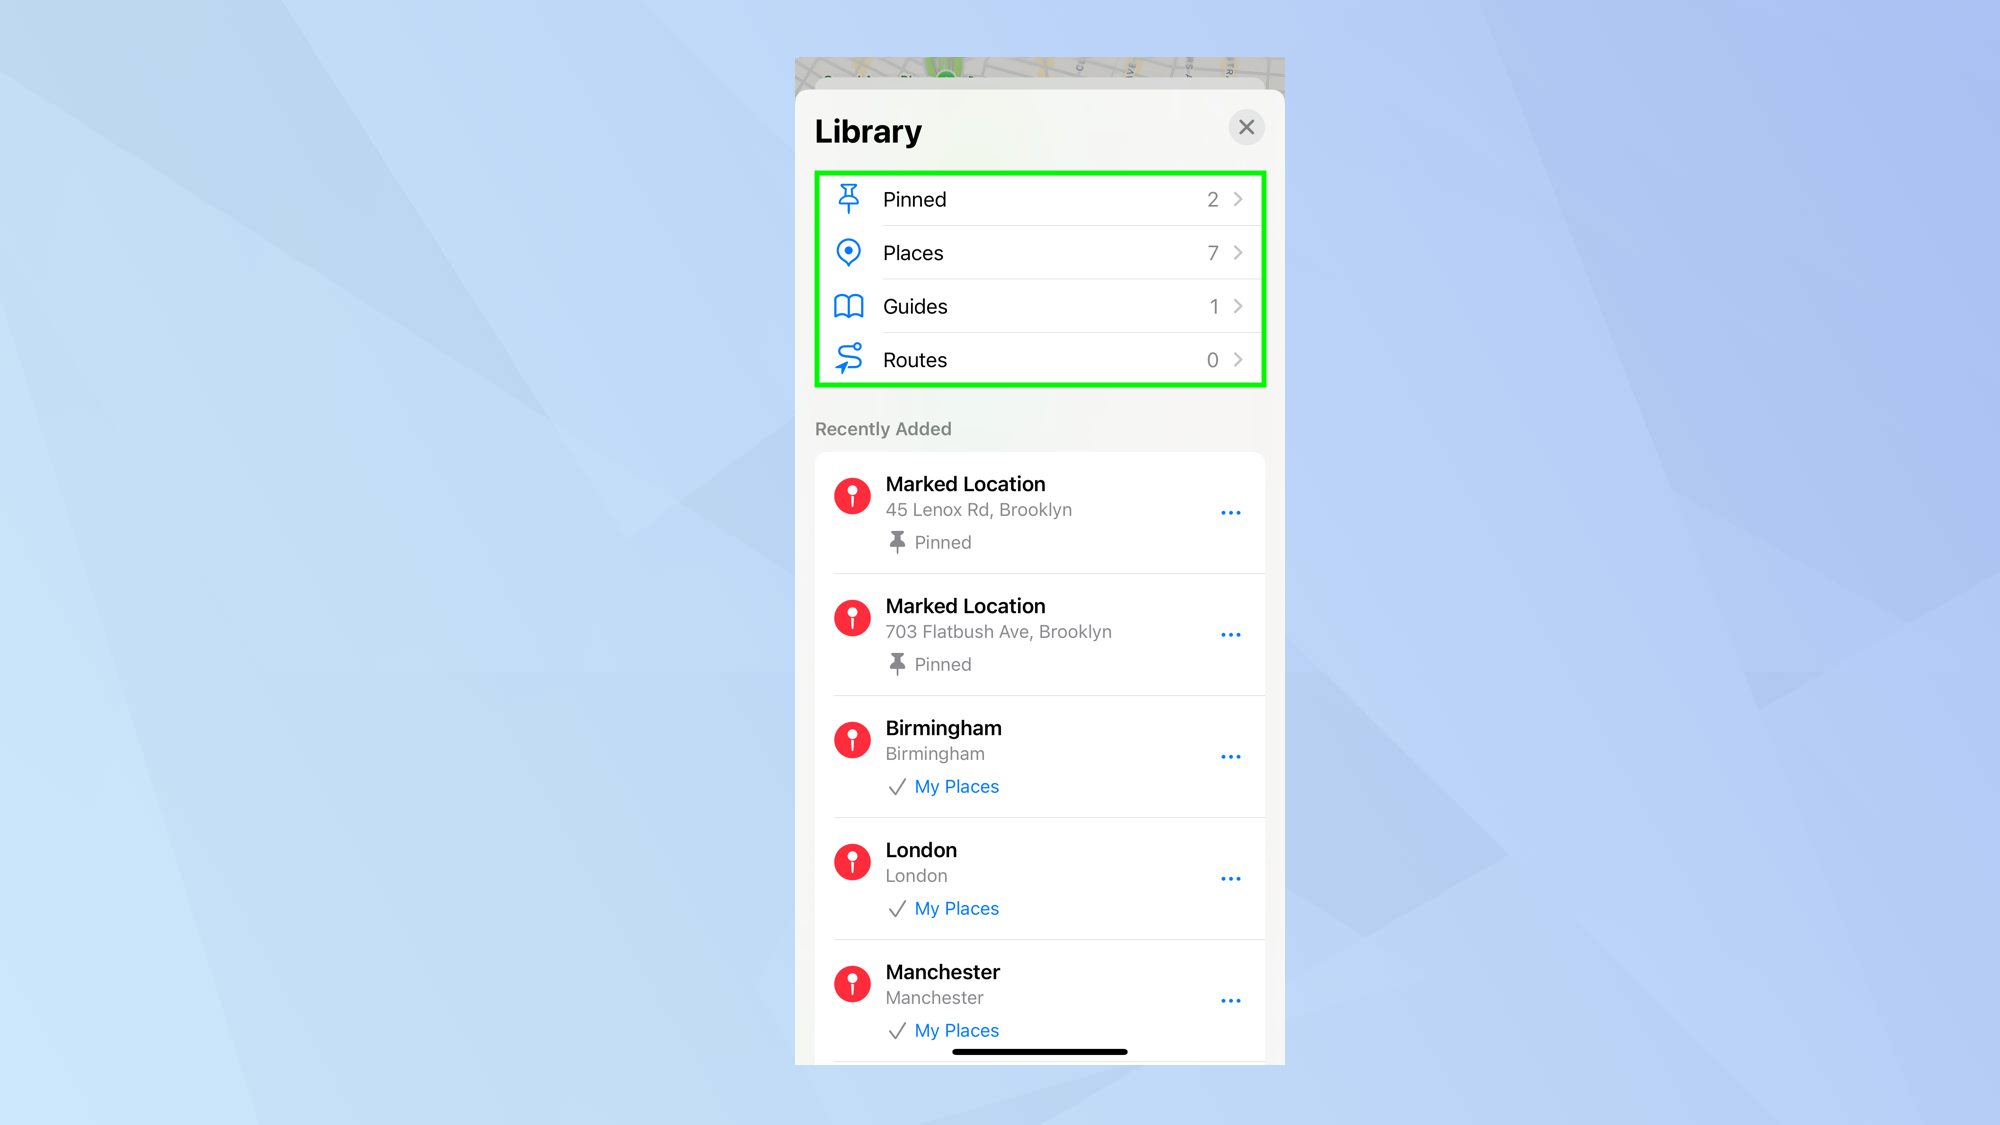
You will see categories for Pinned, Places, Guides and Routes and these will help you to find the items you have previously saved or created.
And there you go. But there are so many more things you can do with Apple Maps. You can learn how to create your own guides in Apple Maps and how to change your starting point for directions. You can also discover how to download offline Apple Maps with iOS 17.

David Crookes is a freelance writer, reporter, editor and author. He has written for technology and gaming magazines including Retro Gamer, Web User, Micro Mart, MagPi, Android, iCreate, Total PC Gaming, T3 and Macworld. He has also covered crime, history, politics, education, health, sport, film, music and more, and been a producer for BBC Radio 5 Live.
 Club Benefits


