How to benchmark your graphics card
Here's how to benchmark your graphics card to ensure you get the best performance
Want to know how to benchmark your graphics card? It’s a reasonable question. After all, you’ve just spent a hefty sum of money on an NVIDIA or AMD GPU, so why not let that beast fly and see what it can really do?
You could, of course, choose to ignore the dangerously addictive rabbit hole of frame rates and clock speeds and simply get on with why you bought the card in the first place (namely, having fun playing games), but where’s the joy in that?
(You can also check out our five essential tips for buying a new graphics card if you plan to buy one).
- How to find out which graphics card you have
- The best gaming PCs currently available
- Learn how to rotate your screen in Windows 10
Benchmarks are a fun way to compare your setup with other people's rigs, and can be used to help you tweak and tinker with your GPU to ensure it's running at the best possible performance. It’s a bit like measuring the performance of a car on a track, before tinkering with its engine to squeeze out every last bit of power.
It might sound intimidating, but it’s really not. Don’t believe us? Fine. We’ll show you, but let's quickly cover what a GPU benchmark actually is before blindly diving in.
How to benchmark your graphics card: what is a GPU benchmark?
A GPU benchmark typically involves a bit of software that throws intense graphical challenges at your GPU, to see how it performs under stress. These challenges are often in the form of 3D environments, and you can tweak settings such as the resolution and quality to raise or lower the load.
The absolute bare minimum acceptable frame rate for most gamers is 60 fps, though many enthusiasts accept nothing less than 144 fps or even 244 fps, to keep up with their high-end gaming monitors.
Get instant access to breaking news, the hottest reviews, great deals and helpful tips.
If your GPU can run an intense test without dropping below 60 fps, it should be able to handle anything you throw at it without losing performance. This means all your gaming experiences will be smooth and stable, so you can enjoy games as their developers intended.
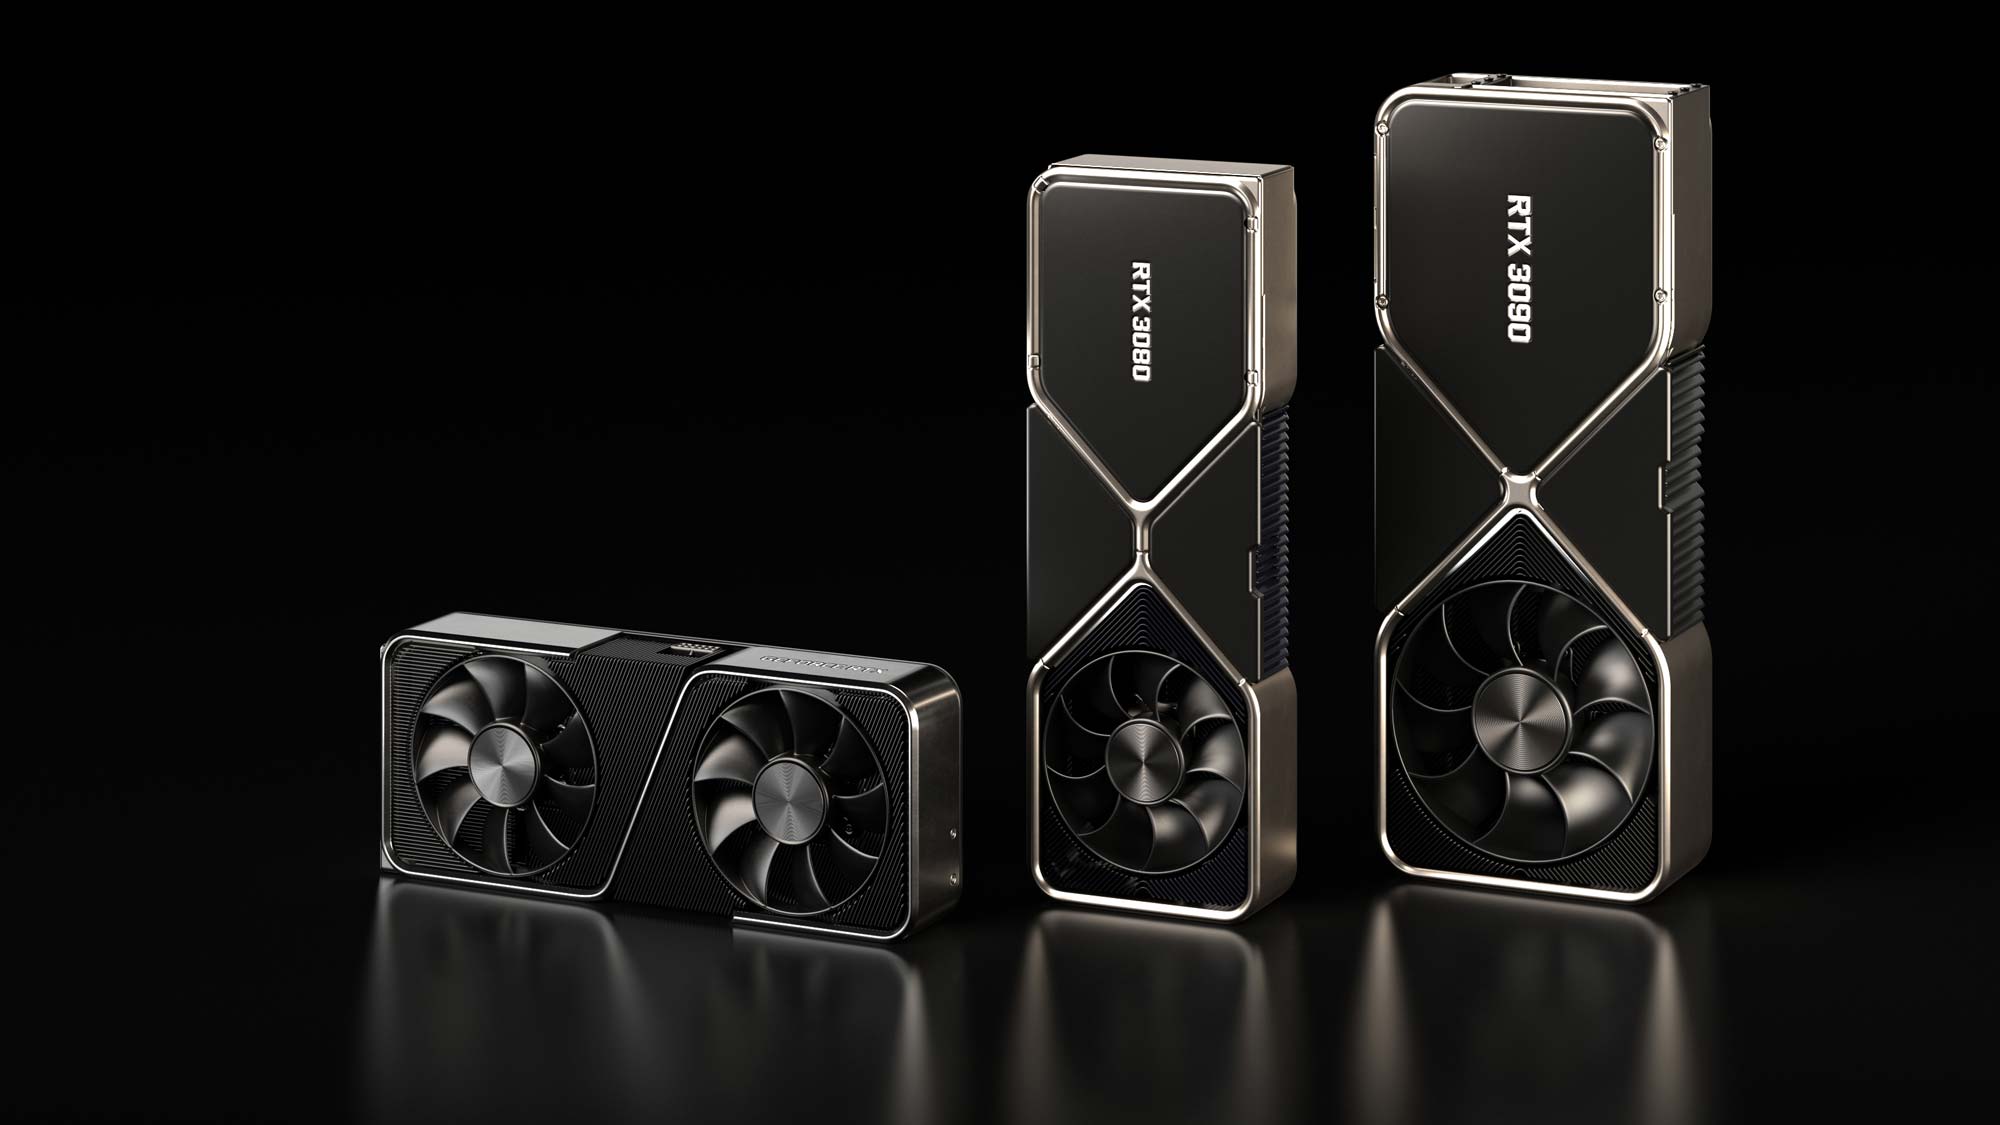
Obviously the higher the resolution and graphical detail you select, in both benchmarks and the games themselves, the more strain will be put on your GPU. If you’re lucky enough to own an insanely powerful card like the Nvidia RTX 3080 or 3090, it should be able to handle most things at Ultra settings.
With that out of the way, let’s crack on with how to benchmark your graphics card.
How to benchmark your graphics card
There are lots of different benchmarking options out there. One of the most popular is 3DMark benchmark, which offers numerous specialized benchmarks for all devices, ranging from standard GPU tests to VR-specific benchmarks and more.
While there are free versions available, they come with limited options (although you’re more than welcome to buy the full versions too.) For this guide, we’ll be using Heaven Benchmark, which has a free version with a generous amount of settings that still let you test everything properly.
Just to warn you in advance that, due to GPU shortages at the time of writing, this writer was unable to complete his gaming PC build. As a result, the below screenshots were taken running a benchmark on an Asus Ultrabook, with an Nvidia MX150, which is nowhere near as powerful as a regular desktop GPU.
It won’t make a difference to you in terms of the step-by-step instructions, but we wanted to explain our poor results just in case you wonder.
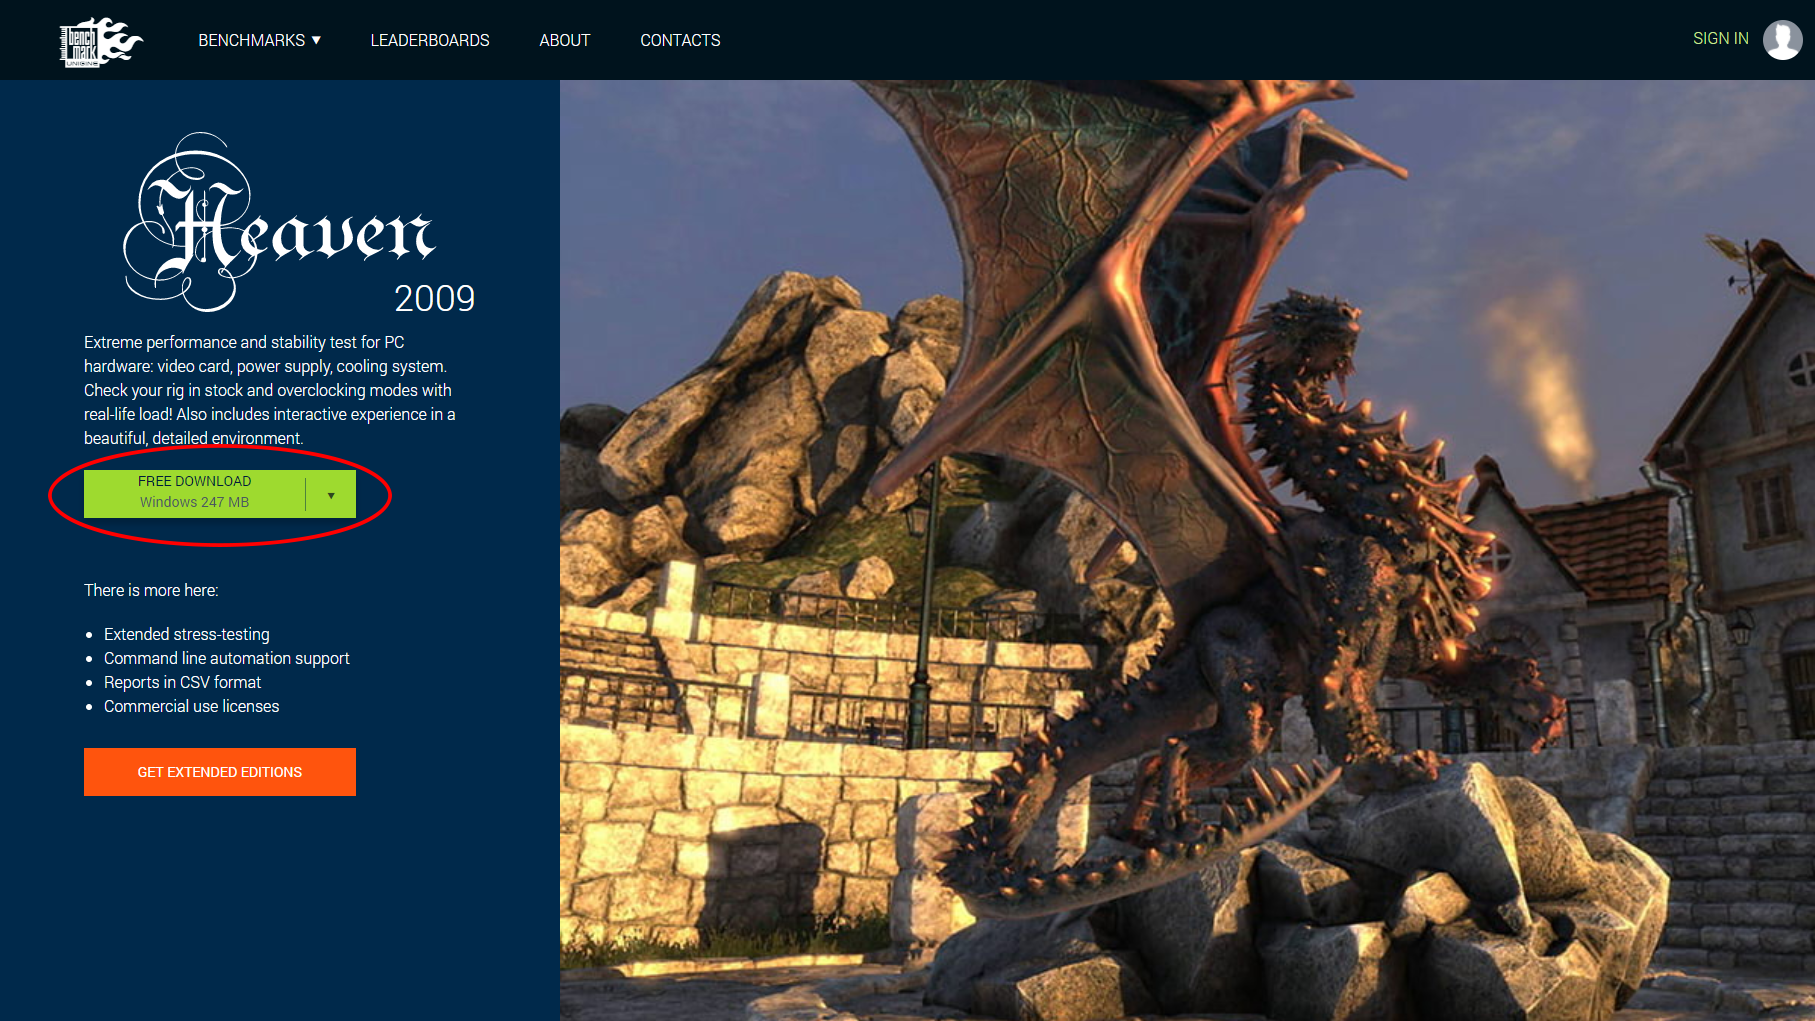
1. Download Heaven Benchmark to your PC from the official Heaven website. While you’re welcome to snap up the paid version, the free one is a great place to start and can be downloaded by clicking the green button on the left.
Once the file has downloaded, double click it, and install. It’s as easy as that.
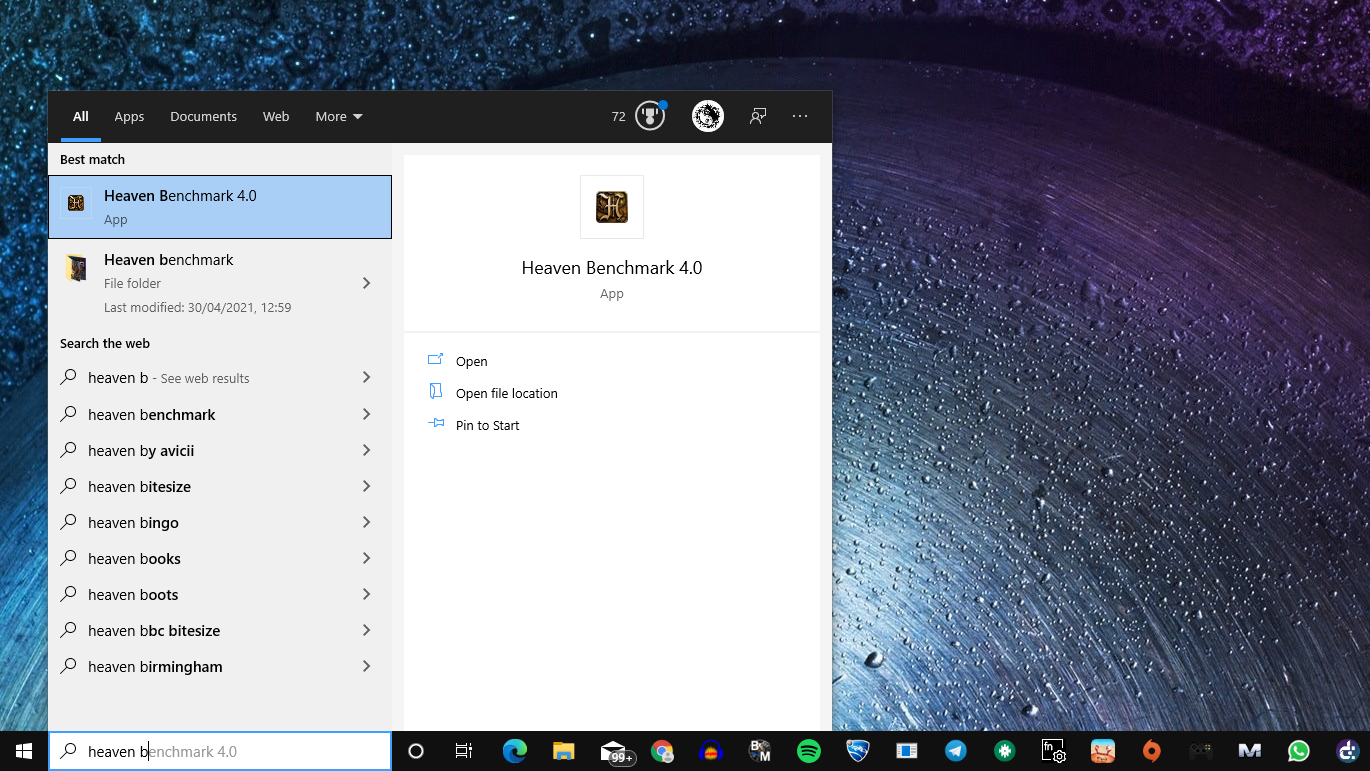
2. Once Heaven Benchmark has installed, you’ll want to launch the program. The easiest way to do so is to type "Heaven Benchmark" in the Windows search bar.
When the name appears in your search results, double click it to open the benchmarking tool.
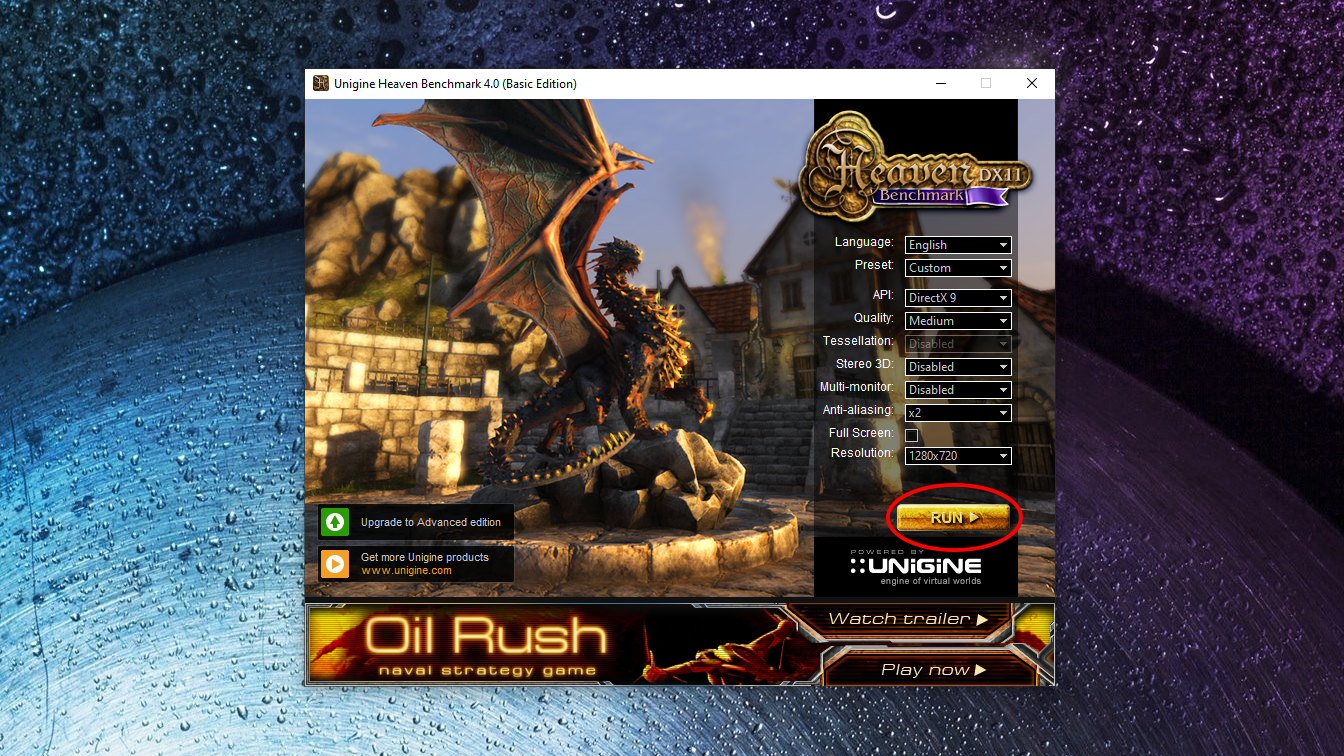
3. The main screen in Heaven Benchmark lets you set a few things up before the actual benchmark starts. For beginners, we’d recommend leaving everything as it is on the default Custom setting, which chooses the best settings for your machine.
If you want to tweak things here, you’re more than welcome to, though if you do things like increase the resolution, amount of anti-aliasing and graphical quality, your numbers are obviously going to take a hit.
You can also change these settings during the benchmark itself, via a Settings button at the top, which will appear as one of the options when it’s running. There’s also a Quality button next to it that lets you change the graphical quality during the benchmark.
Note: In our screenshots we ran the benchmark in windowed mode at a very basic 720p resolution rather than selecting Full Screen at Full HD, due to lacking a proper desktop GPU. As almost every gamer would play in full screen at their monitor’s native resolution, we’d recommend that you opt for Full Screen when benchmarking yourself.
Once that’s all sorted, click the Run button at the bottom of Settings to begin.
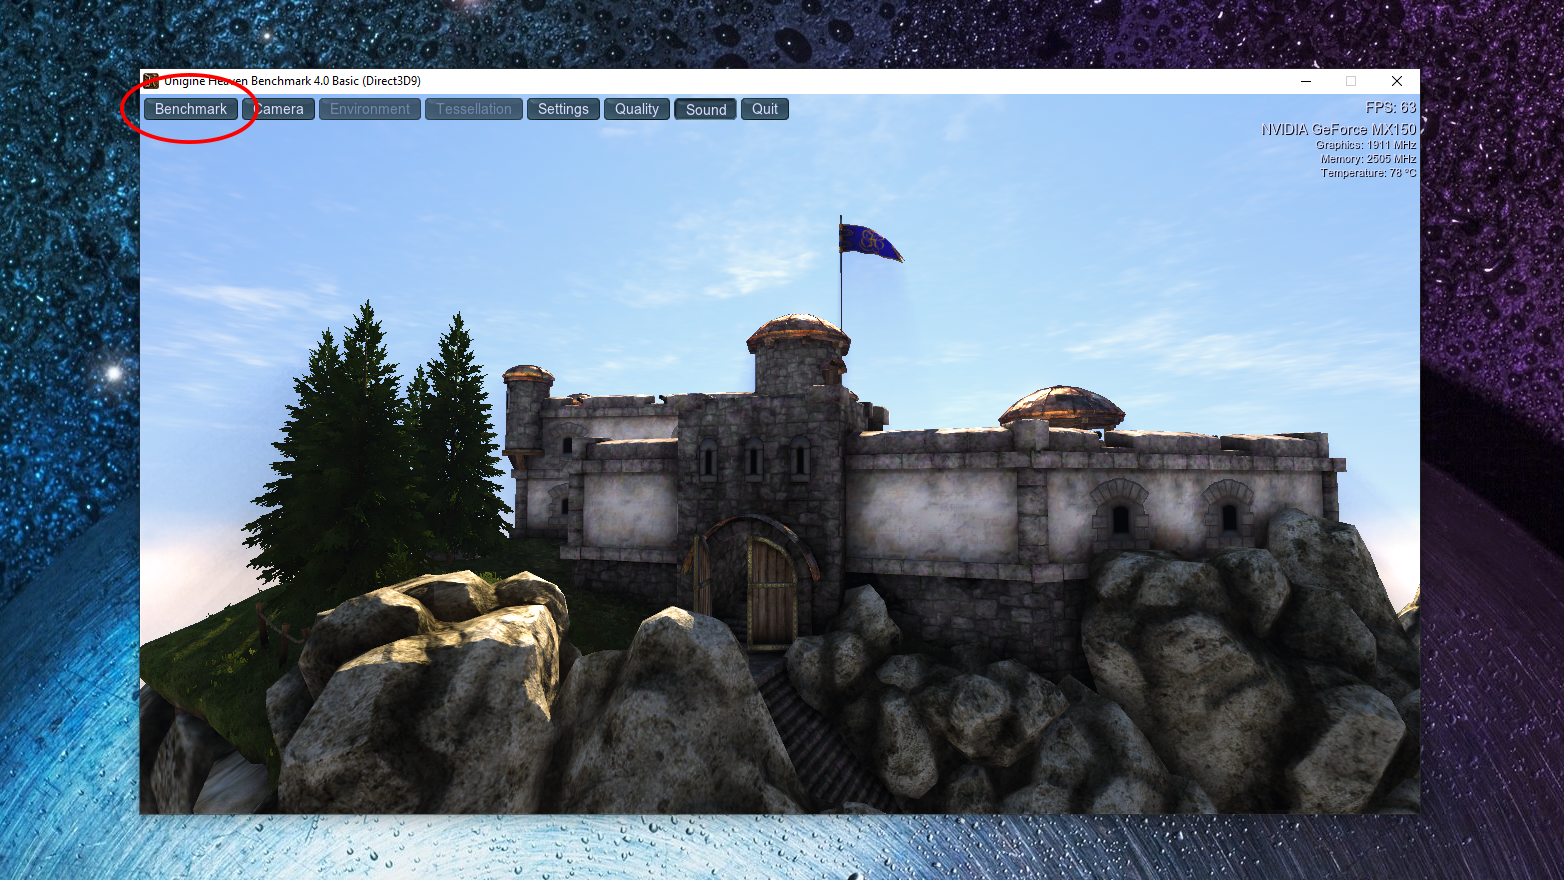
4. When the benchmark runs, you’ll be taken on a virtual tour of a medieval village. How good this village looks will depend on your settings from earlier. Running at maximum resolution and ultra quality will obviously look better than anything at lower settings.
Throughout the test, you should keep an eye on the FPS counter in the top right, along with the temperature. The FPS counter is pretty self explanatory — it provides a figure for the frames per second your card is achieving, in real time.
The temperature is the temperature of the GPU itself. Benchmarks are therefore a good way to stress test the cooling of your PC build. If you’re getting temps of 100+ degrees Celsius, then you’re going to need to sort out the airflow. Most games won’t see you get anywhere near those temperatures.
Elsewhere along the top of the screen, you’ll notice buttons that let you tweak things on the fly. To start the actual benchmark, click the Benchmark button in the top-left corner.
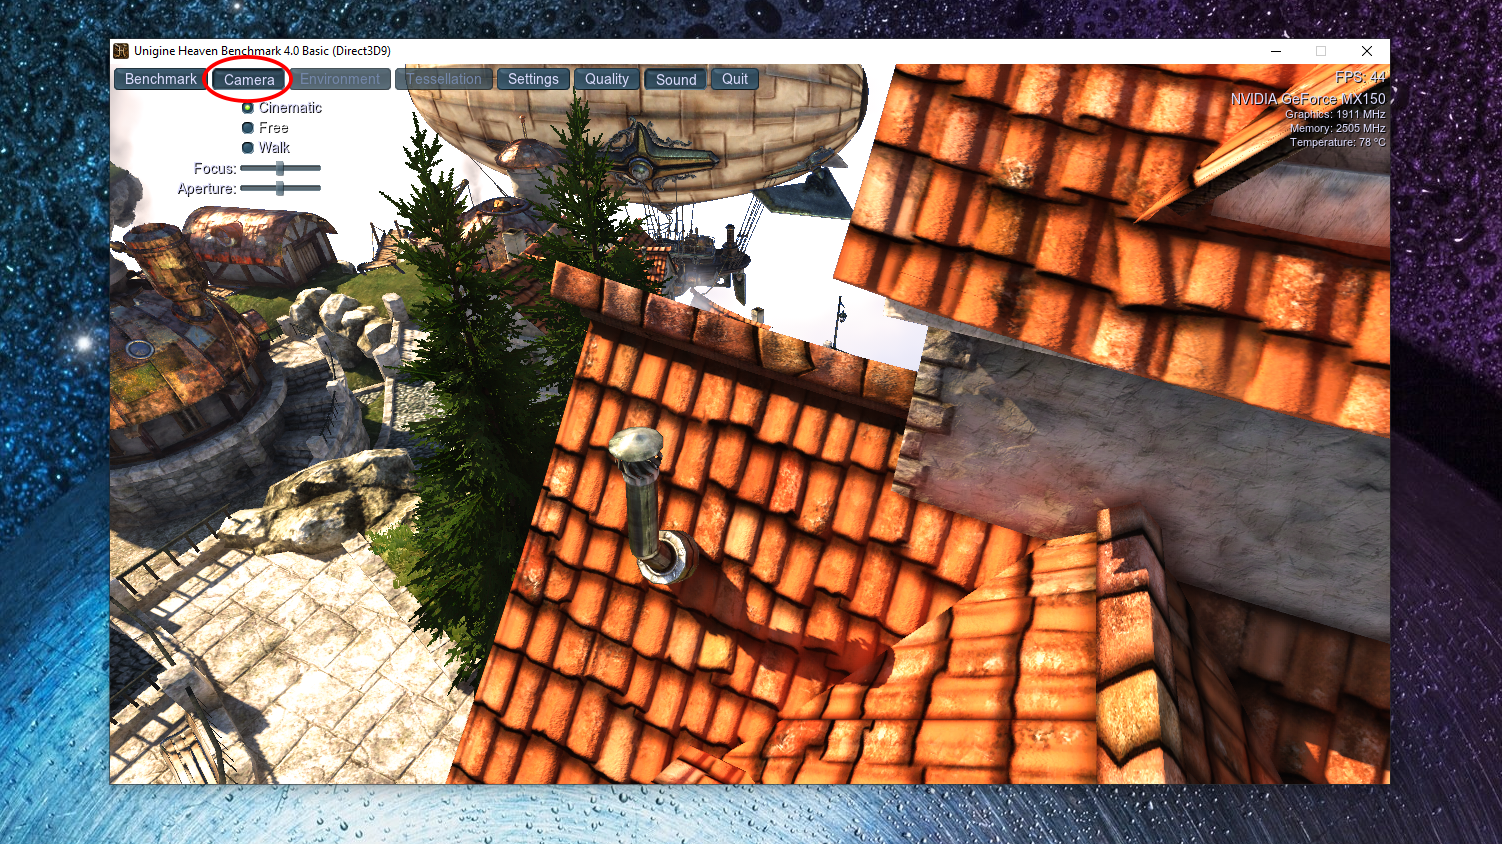
5. As the benchmark runs, you have the option to let it automatically do its thing, or manually control the camera settings so that you can freely fly around the world, or even walk, simulating in-game activities. This can be done by selecting the Camera button in the top left.
As mentioned earlier, you can also change various other settings during the benchmark by pressing the buttons at the top. These include the graphical quality, resolution, and more. Play around with these options to see how it affects the performance.
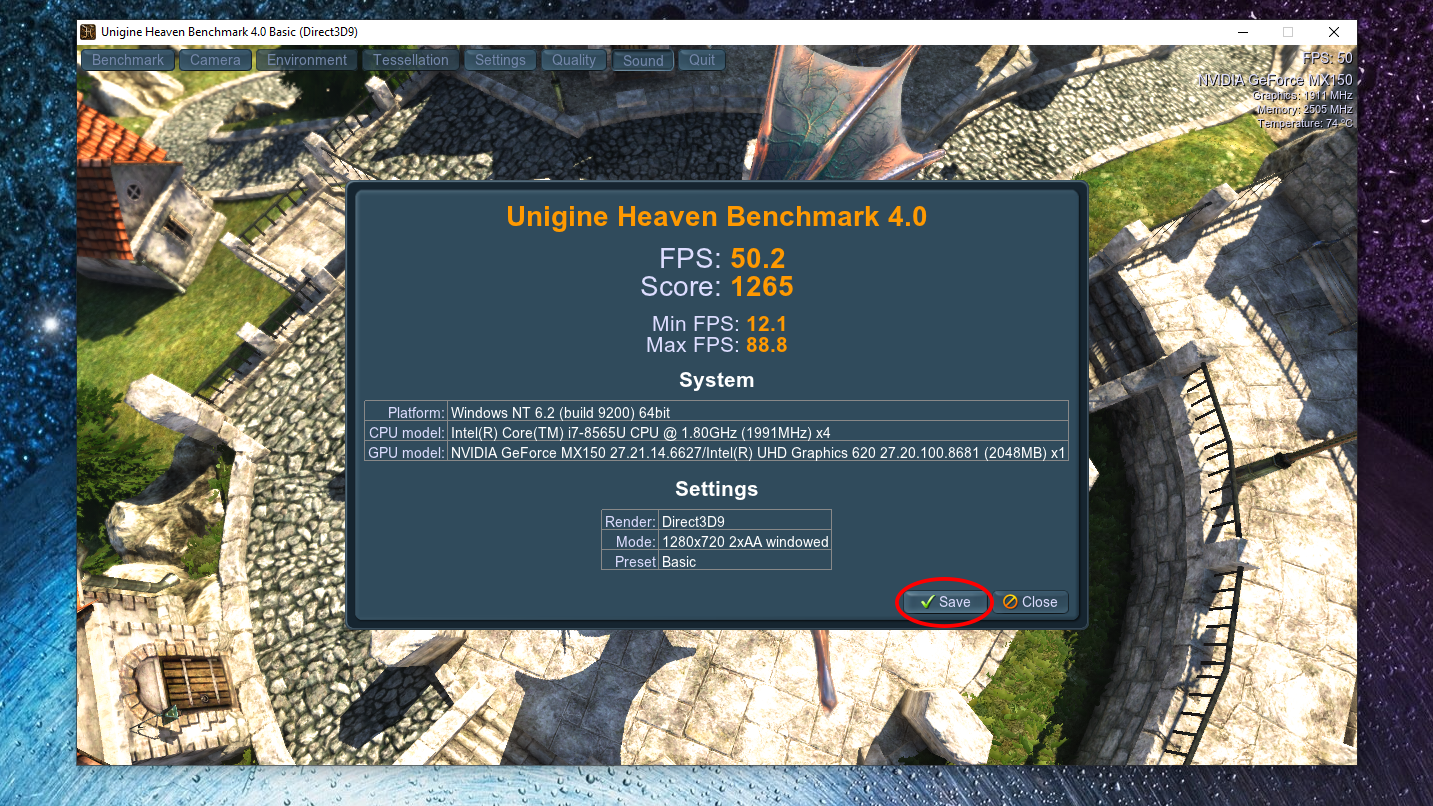
6. You don’t actually have to do anything to end the benchmark, as the test will end itself, presenting you with the overall score. You can click Save in the bottom right if you want to store your results for later comparison.
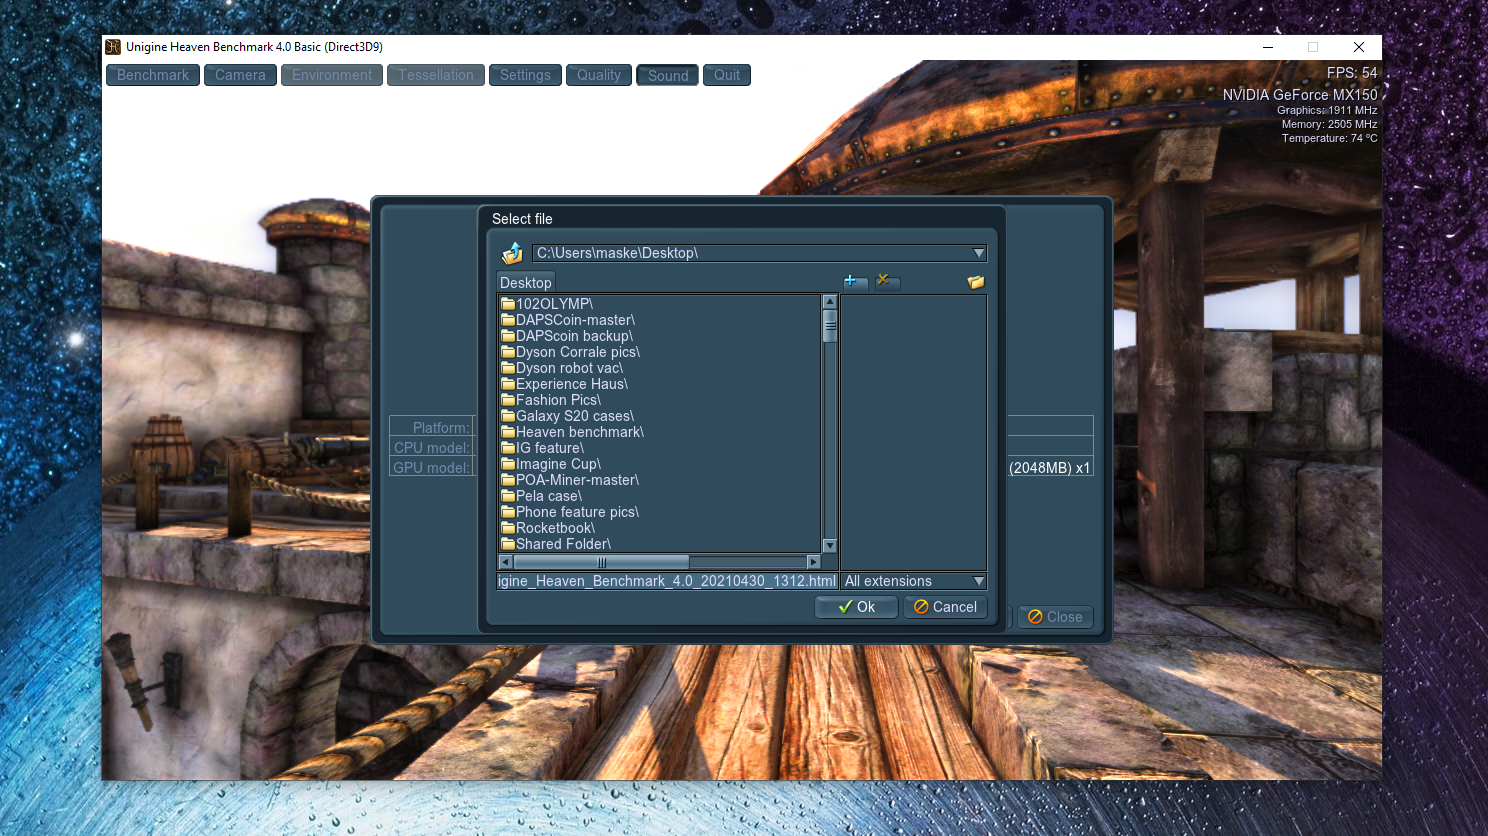
7. When you click Save, you’ll be presented with a screen that lets you save the results file to your preferred location. In our case, we did the classic lazy move of saving straight to desktop.
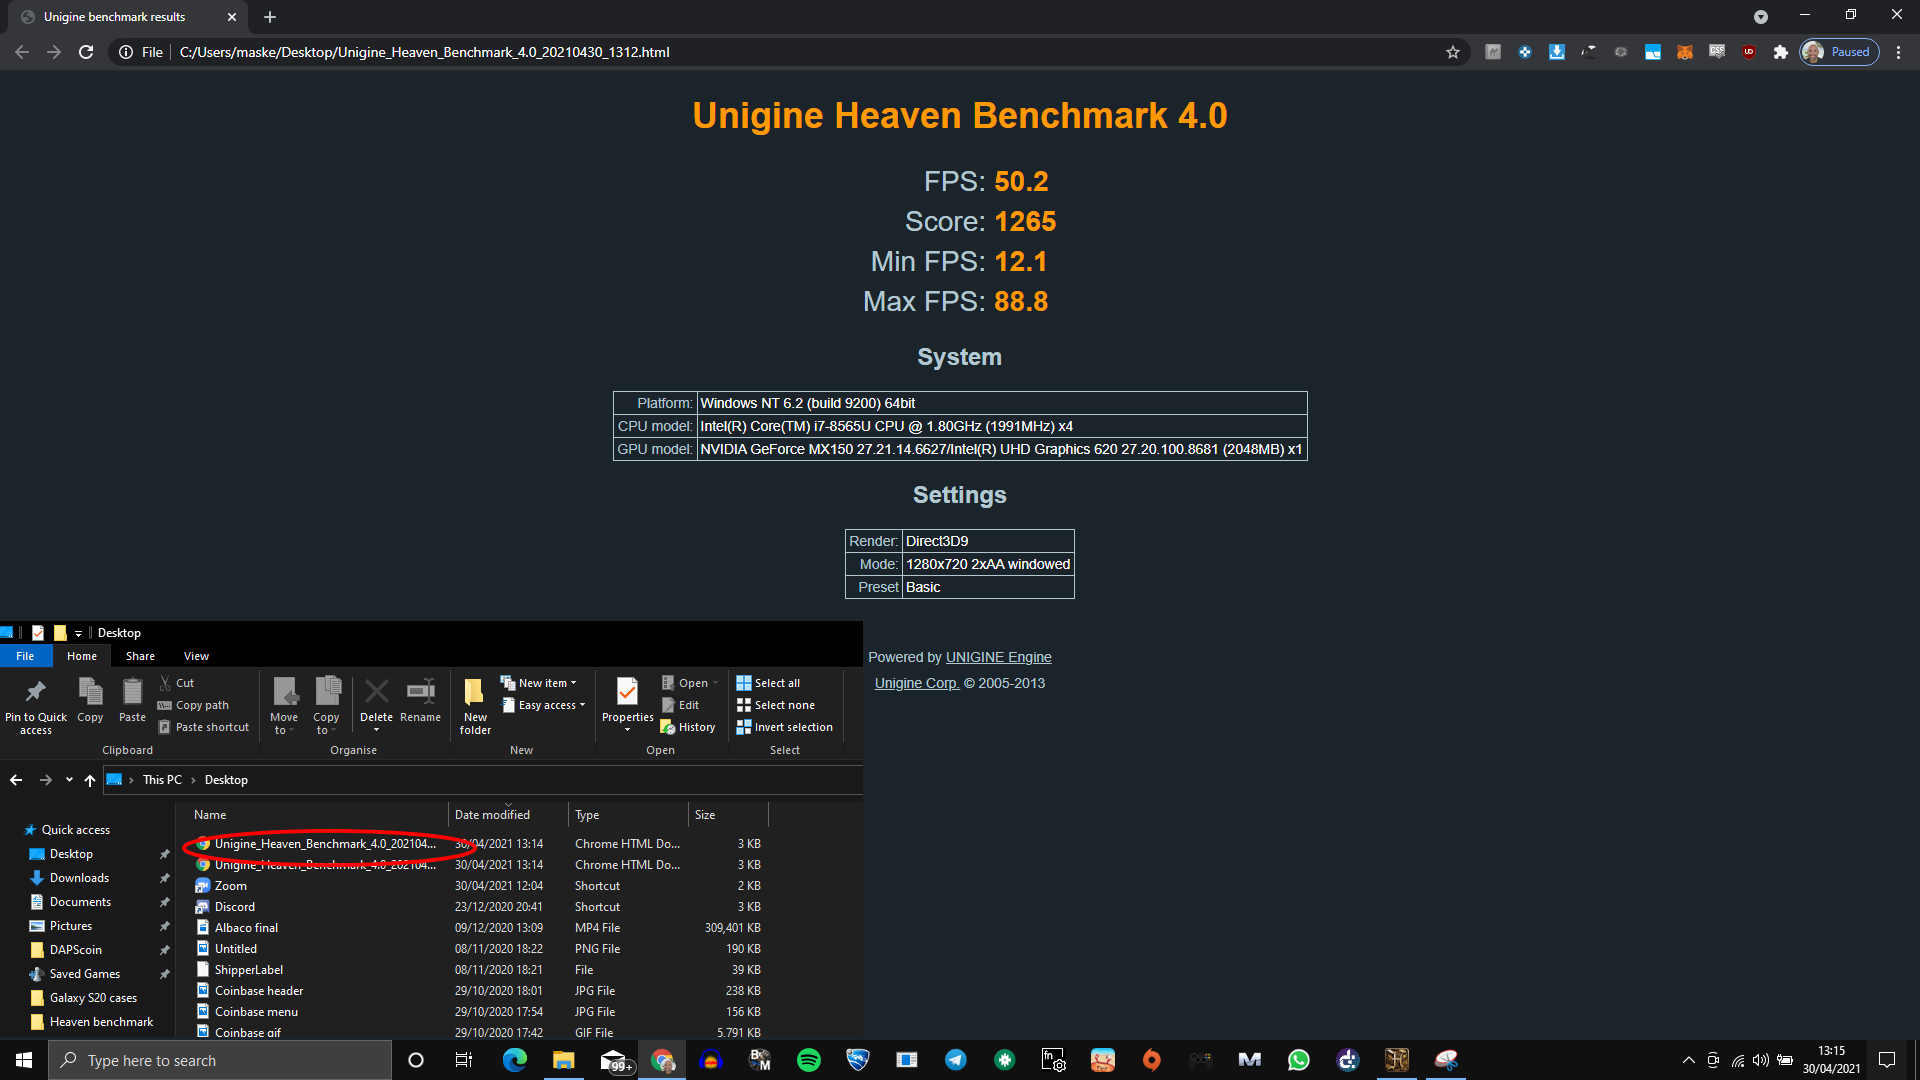
8. Once you’ve saved your results, you can view them at any time simply by locating and double clicking the file. They’re saved as an html file, so you can open them in any browser.
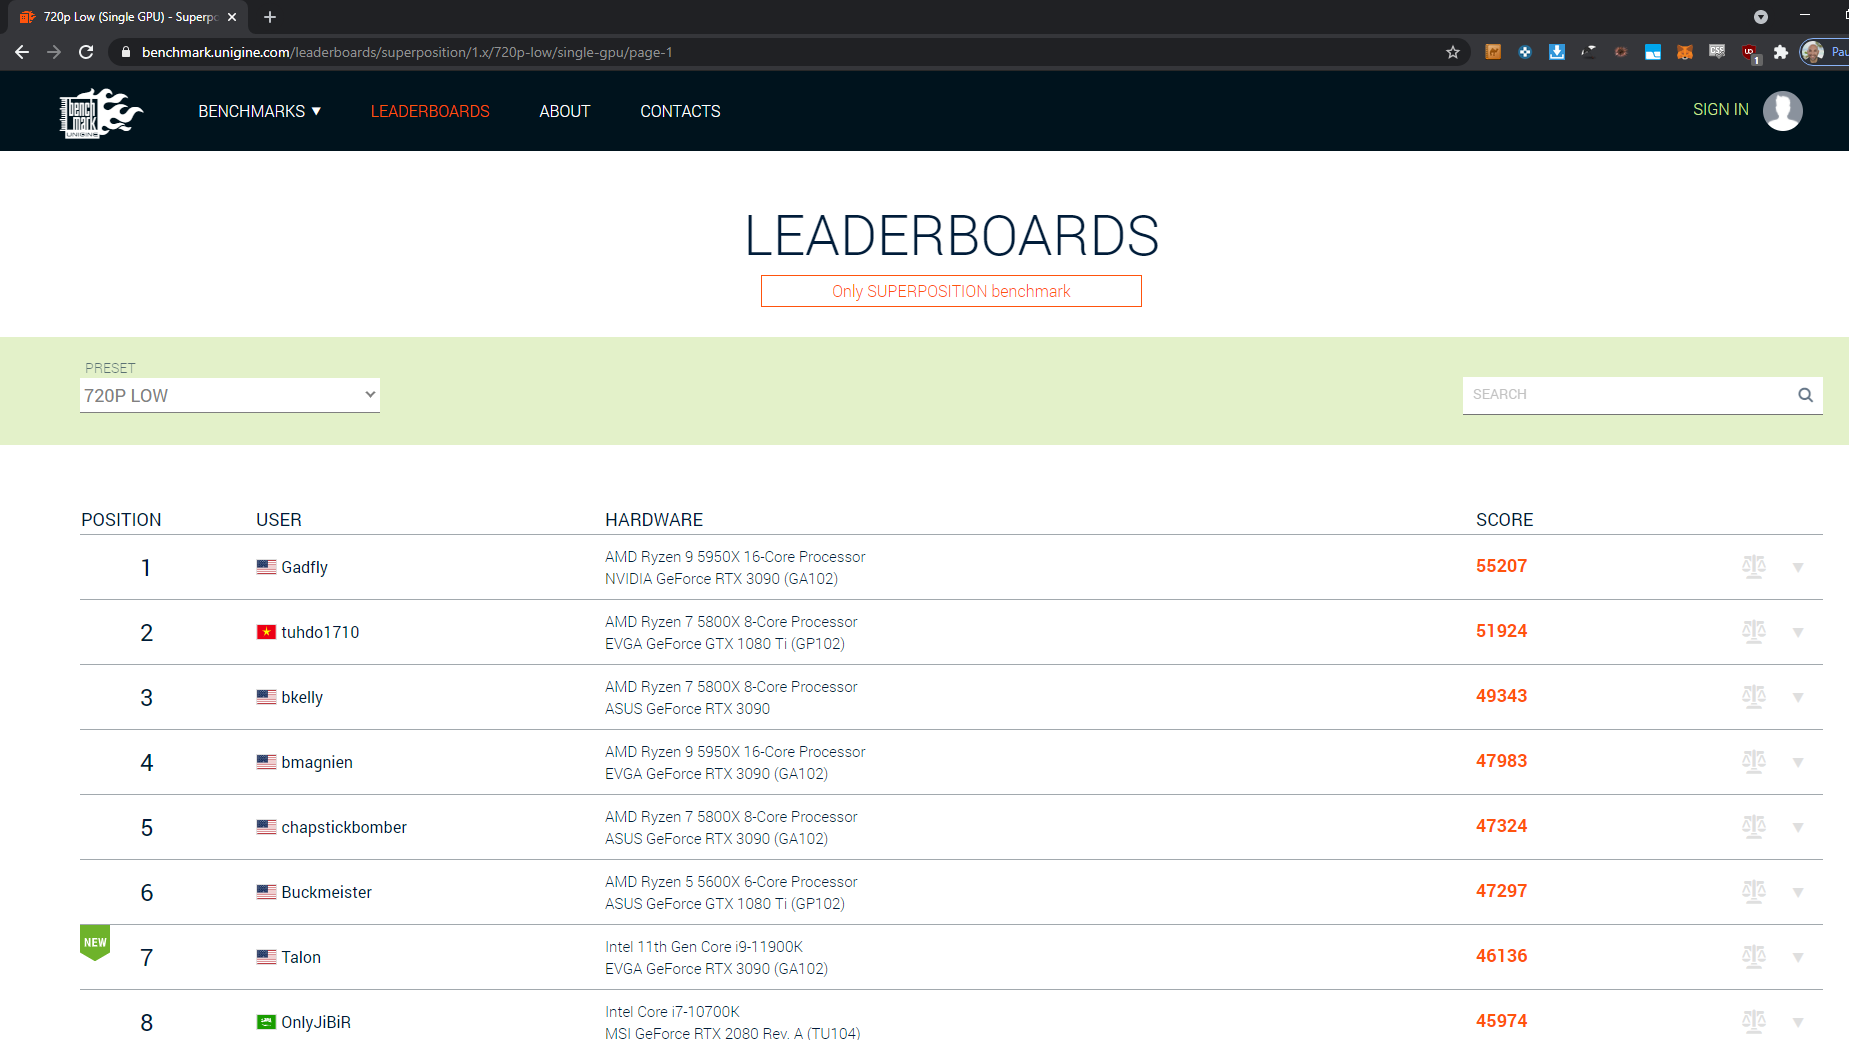
9. If you want to see how your graphics card compares to others, visit the Unigine Leaderboards page, which has multiple leaderboard lists with thousands of scores. You can choose the relevant preset to see how your score compares.
Warning: this may prove pretty demoralising, as there are plenty of people out there who treat nabbing the highest benchmark scores as a serious hobby.
After that, there’s nothing left to do but have fun gaming. Or, of course, keep benchmarking and constantly tweaking settings and case components, forever chasing higher and higher numbers. The choice is yours.
- More: The best PC games of 2021 — so far
- How to update your Nvidia graphics card
 Club Benefits


