Samsung TV 2018 Settings Guide: What to Enable, Disable and Tweak
We walk you through the menus and features of Samsung's 2018 TVs so you can outsmart your new smart TV.
How to Set Up Your 2018 Samsung TV
Setting up a new TV may sound daunting, but Samsung's smart TVs are made to be user-friendly, including the out-of-the-box setup process. Once you power on the TV, it will walk you through the initial setup one step at a time, so follow the on-screen instructions to pair the remote to the TV, select your language and connect any external devices.
If you want to start over with your existing TV, you can reset your Samsung smart TV to factory defaults in the system settings.
Initial Setup
Samsung's smart TVs are made to be user-friendly, starting with the out-of-the-box setup process. If you purchased a floor model or a refurbished set, you can still go through this initial setup process by resetting the TV in the settings, letting you set up your new TV as you like.
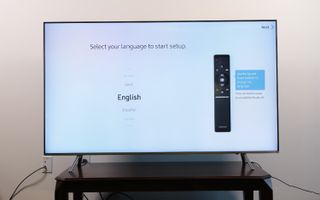
1. Select the language. Once you power on the new TV, you'll be taken right into the initial setup, which begins with selecting your language.

2. Get connected with devices. Next, the TV will identify any connections to an antenna, cable box or other devices. You don't need to connect everything right away, but it is helpful to start with live TV sources connected.
For anything you want to connect, simply plug in the device to an HDMI or RF connector, and power on the device. The TV will detect each device, including what sort of device it is, such as a Blu-ray player or a gaming console.

3. Select your wireless network. Even if you plan to use a wired connection, it's a good idea to sign in to your Wi-Fi network for the initial setup, which lets you access all of your connected features before having to run an Ethernet cable to the TV.

4. Agree to the terms and conditions. Before you can enjoy the various smart features of your TV, you'll need to agree to Samsung's terms and conditions. If you want to review the specifics of the agreement, you can do so here, but be ready for a long read — there are more than 100 screens of dense legal text to go through.
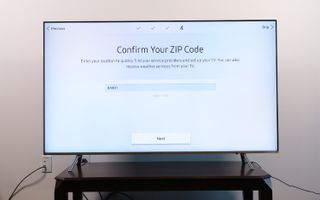
5. Enter your ZIP code. Doing this lets your TV find program information for over-the-air content and sets your location for weather information.

6. Sign in to your Samsung account. If you have a Samsung account or use a current Samsung smartphone, like the Galaxy S9, you can log in to that account here, and your favorite apps will automatically log in using the same credentials as the apps on your phone.
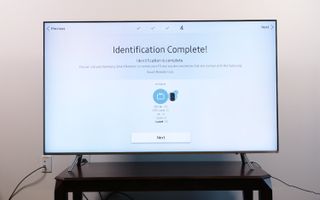
7. Complete initial setup. Once the TV has both your location info and your Samsung account information, you've finished the first part of initial setup. Once it's completed, you can begin adding apps and using services on the smart TV, or using alternative controls, like your smartphone, instead of the usual remote.
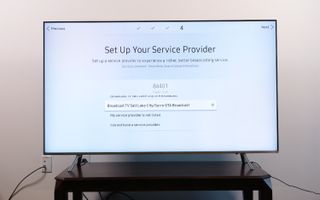
8. Select your service provider. But we're not quite done, as you will also want to provide information about your cable or satellite service provider. This lets your TV pull in data for on-screen guides and voice search.
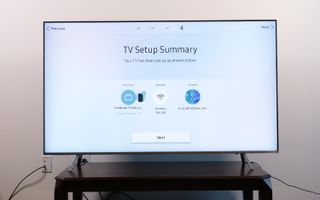
As you finish the basic setup, you get an opportunity to review the information that's been collected. If you need to fix something, now's the easiest time to do it, simply by navigating back through the previous screens.

9. Select and install apps. Once the initial setup is done, you'll be presented with a list of apps to install. This list isn't exhaustive, but it highlights only a few specific apps. If you already know what apps you want, such as Netflix or Hulu, you can install them here. If you want an app that's not offered, you can find many more later through the Samsung app store.

10. Test the remote. A final check has you test the volume and channel buttons on the remote, which should have automatically paired with the TV at the start of the setup.
If the remote is not paired properly, you can do it manually. Simply point the remote at the TV, and press and hold the Return and Play/Pause buttons (found on each side of the Home button) simultaneously.

With your apps installed and your remote tested, you've successfully finished setting up the TV.
Current page: How to Set Up Your 2018 Samsung TV
Prev Page Samsung TV 2018 Settings Guide: What to Enable, Disable and Tweak Next Page How to Find and Install Apps on 2018 Samsung TVsSign up to get the BEST of Tom's Guide direct to your inbox.
Get instant access to breaking news, the hottest reviews, great deals and helpful tips.
Brian Westover is currently Lead Analyst, PCs and Hardware at PCMag. Until recently, however, he was Senior Editor at Tom's Guide, where he led the site's TV coverage for several years, reviewing scores of sets and writing about everything from 8K to HDR to HDMI 2.1. He also put his computing knowledge to good use by reviewing many PCs and Mac devices, and also led our router and home networking coverage. Prior to joining Tom's Guide, he wrote for TopTenReviews and PCMag.
