How to update AirPods firmware
Learn how to update AirPods firmware to make sure you’re running the latest version

Let’s get one thing straight — you don’t generally need to learn how to update AirPods firmware. When updates are released by Apple, the firmware is automatically installed on your AirPods, whether you're using the standard 3rd Gen AirPods or the AirPods Pro 2. But — and it’s a big but — things don’t always go to plan. Sometimes, your AirPods are not kept up to date so it’s always worth checking that all is working well. You can then force an update should something have gone wrong.
But why bother? Well, firmware updates have many benefits. They’ll introduce enhancements and bug fixes while ensuring ongoing compatibility with your devices. In simple terms, they keep your AirPods running as they should, ensuring you don’t compromise your listening enjoyment. So, to make sure that you’re covered, we’re going to look at how to determine if you have an updated pair of AirPods and what to do if you haven’t, checking out the process on an iPhone, iPad and a Mac.
How to check your AirPods’ current firmware version on iPhone or iPad
You can quickly check to see if your AirPods are up to date in iOS and iPadOS.
1. Go to Settings > Bluetooth
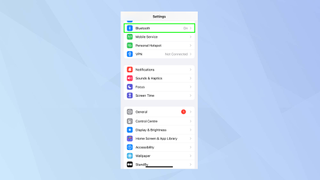
On an updated iPhone or an updated iPad, open the Settings app and select Bluetooth from the menu.
2. Tap the info icon
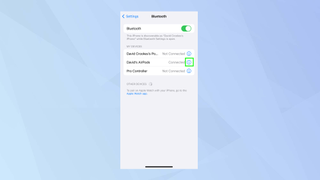
Now, look for your Airpods in the section My Devices — if you can’t see them, then learn how to connect AirPods to an iPhone or iPad.
Next, tap the 'i' icon next to your AirPods.
3. Check the firmware version
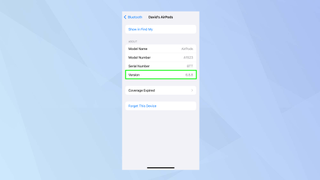
You will see information about your AirPods. Look at the version number then see if it matches the current firmware updates.
4. Force an update
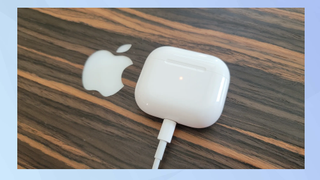
If the firmware version doesn’t appear to be up to date, then pop your AirPods or AirPods Pro into their charging case and insert the charging cable. In the case of AirPods Max, you just need to insert the charging cable.
After you insert the other end of the cable into a power socket simply bring your AirPods close to your iPhone or iPad and the firmware should update.
How to check your AirPods’ current firmware version on a Mac
You can also quickly check to see if your AirPods are up to date on an Apple Mac running macOS Ventura and later (you may need to learn how to update a Mac).
1. Go to System Settings
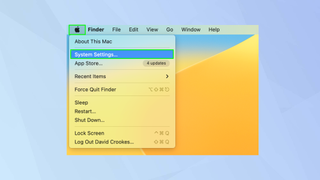
First of all click the Apple menu icon in the top-left of the screen and select System Settings.
2. Select Bluetooth
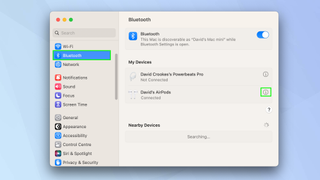
Now click Bluetooth in the left-hand menu and select the 'i' icon next to the AirPods you’re looking to check.
3. Check the firmware version
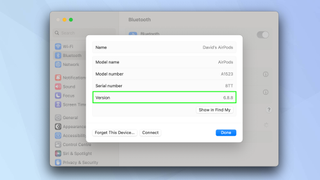
You will see information about your AirPods. Look at the version number then see if it matches the current firmware updates.
4. Force an update

If the firmware version doesn’t appear to be up to date, then pop your AirPods or AirPods Pro into their charging case and insert the charging cable. In the case of AirPods Max, you just need to insert the charging cable.
You can insert the other end of the cable into your Mac. The firmware should update.
And there you go. You now know how to update AirPods firmware. You can also learn how to use AirPods, AirPods Pro and AirPods Max in more detail or discover how to connect AirPods to a Windows PC. Why not find out how to pair AirPods with Apple TV as well so that you can view and listen to your favourite shows in peace. Or check out 10 hidden AirPods Pro 2 features you should be using.
Sign up to get the BEST of Tom’s Guide direct to your inbox.
Upgrade your life with a daily dose of the biggest tech news, lifestyle hacks and our curated analysis. Be the first to know about cutting-edge gadgets and the hottest deals.

David Crookes is a freelance writer, reporter, editor and author. He has written for technology and gaming magazines including Retro Gamer, Web User, Micro Mart, MagPi, Android, iCreate, Total PC Gaming, T3 and Macworld. He has also covered crime, history, politics, education, health, sport, film, music and more, and been a producer for BBC Radio 5 Live.
