Transform your Video Footage with Filmora's AI Smart Cutout
Unless you film exclusively against a green screen, there's a very good chance that you will need to extract something out of your videos. Maybe it’s an unwanted object or weird video glitch. Maybe you're wanting to take things a step further — you've decided your current background simply isn't working, so you want to completely replace it.
Easier said than done, right? Even for editing objects out of a photo, you’ll have to have precise selections to make sure the object/subject is cut out right. But that’s just for a still image, and editing something out of a video is very different from editing it out of a photo. With most video editing tools, you have little choice but to go frame-by-frame—making a series of painstaking, pixel-perfect modifications across multiple hours of work.
Unless… you're using Wondershare Filmora 12.
Get smarter about cleaning up your clips

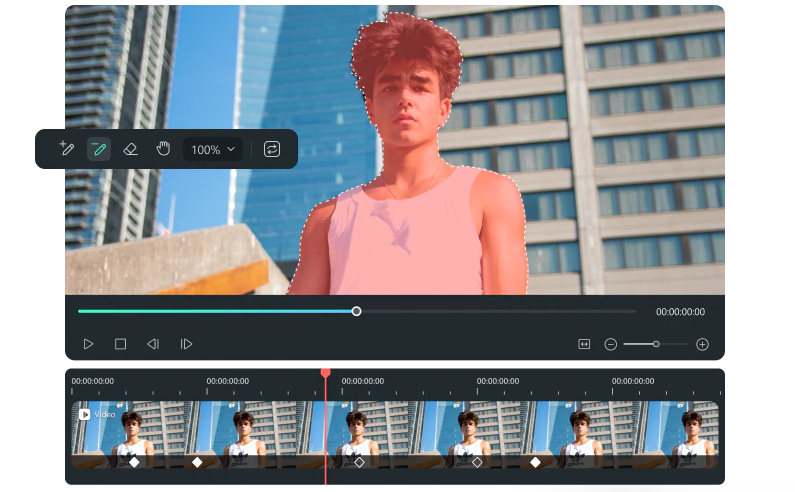
With Filmora's AI Smart Cutout feature, all it takes is just a few clicks to edit something out of your video. Filmora is capable of accurately and precisely removing a wide range of objects, including merchandise, people, furniture, or even an entire background. Just click to select an object, and the tool will intelligently determine the object's boundaries for you.
From there, you can easily modify or remove the object either entirely or for individual frames. Better yet, unlike with most video editing tools, Filmora 12 won't leave you to guess how your video will look post-cutout. Filmora’s AI Smart Cutout includes four different options for previewing your selection:
- Alpha Overlay. This displays the video's original background with a fixed matting range and the cutout is highlighted in translucent blue.
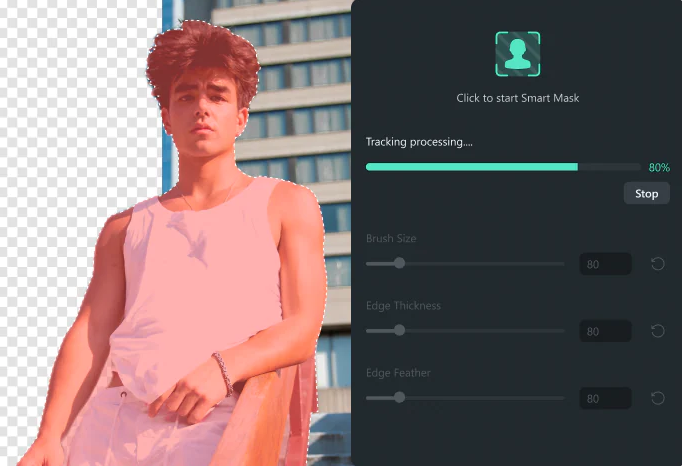
- Transparency Grid. This changes the video background to a transparent schematic grid diagram, making it easy to identify the subject matter.
- Transparency Black. This displays the background behind the cutout in black to provide an easy view of the cutout.
- Alpha Mode. Once matting is complete, this displays the background in black with the area reserved for matting displayed in white.
You've probably already guessed it. Filmora’s AI Smart Cutout is good for a whole lot more than just cleaning up video footage. And you're right. There are a ton of different, creative ways you can use the feature, especially with the massive library of effects available through the Wondershare Filmstock Library.
The possibilities with Wondershare Filmstock are endless:
- Add in-video motion tracking to multiple objects.
- Insert visual callouts and labels.
- Add special effects ranging from explosions to magic spells.
- Create a range of different background effects.
- Completely change your video background.
AI Smart Cutout: A Step-by-Step Walkthrough
As you can see from the video tutorial above, AI Smart Cutout is pretty easy to use — just as it should be. After all, Wondershare’s idea for Filmora is always to be as intuitive as possible. Below is a quick step-by-step walkthrough of the basic process and a few tips and tricks for how to use the tool.
Let's say, for instance, you want to add a new background to your video:
- First, add the foreground footage you want to edit to a timeline.
- Then, add the new background footage to the same timeline, at least one layer below the foreground footage.
- Open the foreground footage and make sure the video is right at the very beginning.
- Select the Smart Cutout tool, then draw a single line across your subject or object. You can change the size of the brush, as well.
- You'll see the blue Alpha Overlay appear over the cutout, which is blue by default — you can change the color in the top right.
- Refine the cutout as much as necessary through a combination of the cutout tool and the eraser tool.
- You can preview how the cutout will look by clicking on the silhouette next to the Alpha Overlay color dropdown. This will allow you to swap between the different preview modes.
- If you don't want to clean up the edges of your cutout manually — something best done in the Transparency Black preview mode — you can use the Edge Feather bar.
- Activate Smart Cutout.
- Do another sweep of your video to see if there's anything you missed. Use either the brush or eraser on the first frame where any artifacts show up.
- Click on Smart Cutout to extrapolate across other frames.
- Repeat steps ten and eleven until you're satisfied with how your cutout looks.
- Once you're happy with the cutout, all you need to do is click Save, and your cutout object will automatically show up against the new background.
- Fine-tune the video using Filmora's Smart Colour Correction and Colour Matching tools.
- Save your video, and enjoy your creation!
As shown in the video below, you can also edit the size of objects you select with AI Smart Cutout by double clicking on their clip in the timeline. Adding foreground objects and visual effects works similarly. You just need to make sure they're in the layer above your video clip rather than the layer below it.
Create professional quality videos with just a few clicks

Video editing can be a painstaking process — so much so that it can often feel like a creative roadblock. That's why Filmora exists. Whether you're a professional videographer or a fresh-faced newcomer, Wondershare's video editing solution is designed to make it easier than ever to take your videos from concept to finished creation.
And as the company demonstrates time and time again, Filmora is only going to get better with time.
Wondershare Filmora is available for purchase starting at $49.99 per year via Wondershare. It is compatible with Windows PC, Mac, Android Phones, iPhone, iPad, and Android Tablets.
For more information or to stay up to date with product announcements, see the official Filmora YouTube channel.
Get instant access to breaking news, the hottest reviews, great deals and helpful tips.
 Club Benefits


