6 Bare Metal Backup and Recovery Options
We look at full disk backup and restore packages for Microsoft Small Business Server and Vista desktops to help you decide what's best for your networks and systems.
Norton Ghost 12.0
When you fire off Ghost, you see a basic task interface that provides various backup and recovery options, as shown in the next figure.
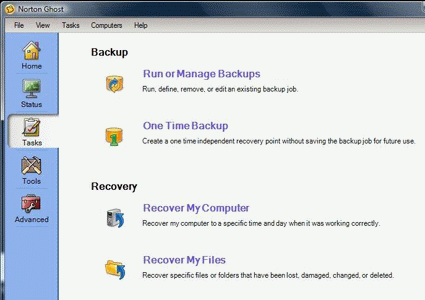
The first time you run the program, you see a set of basic backup and recovery options.
When you choose to create a backup, the Define Backup Wizard launches and steps you through the process. In the next screen, we select an image backup, because that’s what’s needed for bare metal recovery.
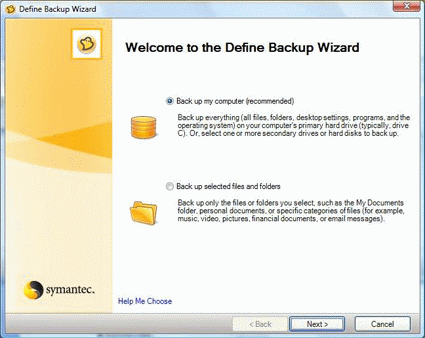
The first step in the backup wizard is to choose your backup type: complete system or selected files and folders.
Next, you select the backup target or targets from a list of visible drives.
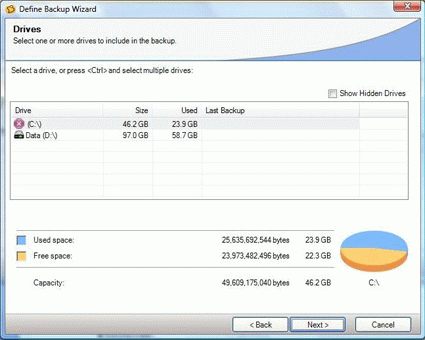
Here, you select one or more drives to image.
After that, you indicate whether this recovery point will belong to a potential series so that incremental images may be added on indefinitely, or if it is a one-time, standalone drive image.
Sign up to get the BEST of Tom’s Guide direct to your inbox.
Upgrade your life with a daily dose of the biggest tech news, lifestyle hacks and our curated analysis. Be the first to know about cutting-edge gadgets and the hottest deals.
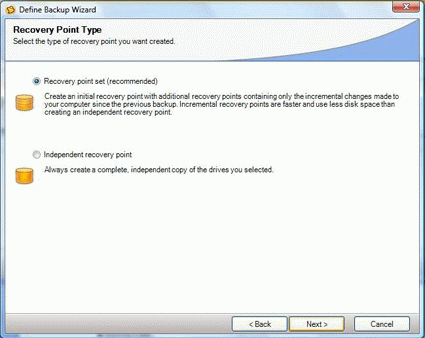
When you create a new image, you indicate if it’s an independent standalone copy or if incremental images may be added to it later.
Next, you select a destination for the backup image file that gets built. Here, we choose a second internal drive in our test system.

You must choose a target location for your drive image file (usually, a different drive than the one you’re imaging).
Now, you can select recovery point options. These include a name, a compression scheme, read-after-write verification, a maximum number of recovery point sets (three is the default value), whether or not you want the backup to be searchable, and whether or not that index should include system and temporary files.
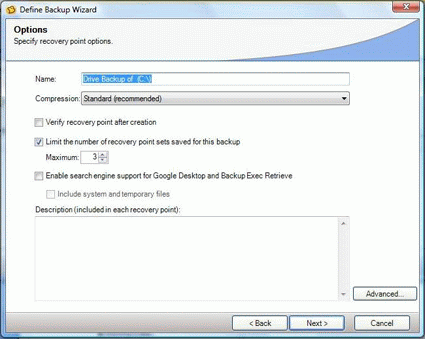
This is where you select the options you want for your recovery point. For a bare metal recovery, we recommend verifying the recovery point after creation, and mentioning bare metal recovery in the description field.
Once again, you can either use the Ghost DVD, or a boot disc of your own making, to initiate bare metal recovery with Ghost. Once launched, the Ghost bare metal recovery environment appears to load a subset of the Vista OS (much like Sysprep does), and takes as long as two to three minutes to boot. Once the environment is up and running, however, it works pretty well, and is also nearly indistinguishable from the native Windows interface.
Current page: Norton Ghost 12.0
Prev Page Acronis True Image 11.0 Next Page Comparisons And Contrasts