Google Sites: How to use Google’s website builder
Getting started with Google’s free website creator

Google Sites is the website builder Google includes as part of its free web-based office suite, Google Docs. It’s a website creation tool with real-time collaboration features and support for responsive designs, which means your site will display well on all mobile devices and desktop computers.
If you think that Google Sites could be one of the best website builders for your project, in this article we'll give you an impression of what’s possible, and go over how to get started with this free tool.
Best paid alternative to Google Sites
Wix: the best all-round website builder
Wix is our choice for the best all-round website builder, catering for every type of website. It has hundreds of templates to choose from, a flexible editor, fairly-priced plans, analytics, ecommerce features, and its drag-and-drop interface can be used by anyone, regardless of technical knowledge.
How to use Google Sites: Preparation
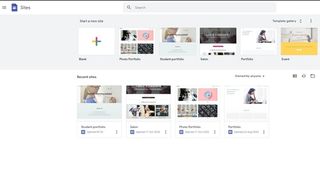
Before starting with Google Sites, you should recognize its pros and cons. First, it’s free to use. Second, it’s easy to build a complete website in no time. Third, Google Sites integrates well with the rest of the Google app family, so if you use other Google tools, such as Google Drive and Google Maps, you can easily use your existing content on your Google Sites website.
However, the simplicity of Google Sites can also be a problem. You can only create basic websites, for example. There’s also no support for ecommerce, and the amount of available customization falls far behind some of the best website builders available today.
In November 2020, Google retired the Classic Sites version of the software. Now you can only build using the new Google Sites website builder. It’s certainly more streamlined and easier to use, but it lacks a few scripting features that were available in the old version.
Therefore, Google Sites remains a tool best suited for small hobby websites. If this is all you require, using Google Sites can be a quick way to get your website online. Let’s look at how to get started.
Step 1: Create a Google account
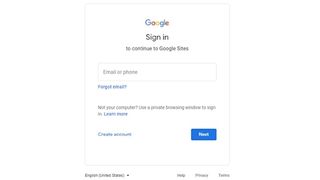
Google Sites requires a Google account to use the service, so if you don’t have one yet or you’d rather create a new account for your website, you’ll be prompted to do so on the first page.
Sign up to get the BEST of Tom’s Guide direct to your inbox.
Upgrade your life with a daily dose of the biggest tech news, lifestyle hacks and our curated analysis. Be the first to know about cutting-edge gadgets and the hottest deals.
To create a new account, you must supply your name and email address or create a new Gmail address as part of the sign-up process. You can optionally supply a phone number and recovery email address, so that you can recover your account if you get locked out of it.
Step 2: Choose a template
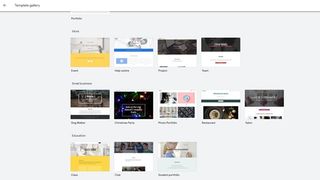
You start your Google Sites website by choosing a template. There are 13 templates to choose from across the categories of work, small business, education, and personal. You can use these templates as a base to start from, or instead choose the Blank template to begin from scratch.
Step 3: Select a theme
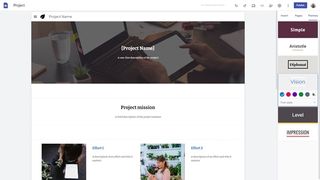
Now that your website is loaded in the editor, all the principal tools are available in menus to the right of the screen. The Insert menu is used for adding elements to the currently displayed page. The Pages menu is used to add, edit, and remove new web pages to your website. The Themes menu is used to alter the look and feel of your entire website.
Click on Themes, and select from the short list of theme options. Besides choosing an overall theme, you can set the dominant color of the website and choose from three pre-selected font styles.
Step 4: Edit on-page text and images
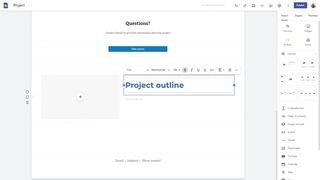
Every element on your web pages can be edited by clicking on it, and a context-sensitive menu will pop up. A different menu will display if you click on text versus an image, for example.
Get started by changing all the text and image elements of your main page. You can choose basic formatting, such as bold, italic, and underlining, and arrange text in lists. You can also add hyperlinks and edit the layout of your text sections. When you click on images, you can change the image, caption, and link.
Step 5: Alter layouts and backgrounds
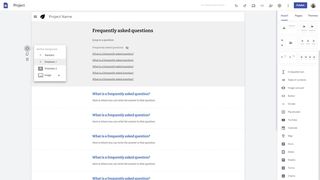
You’re not stuck with the initial layout of the template. By clicking on a menu to the left of each page section, you’ll find options for rearranging, duplicating, and deleting sections. You can select from alternative background options to give emphasis to certain sections, and even set an image as the background.
Step 6: Add page widgets
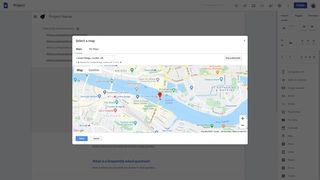
In the Insert menu, you’ll find a list of 14 preset widgets that you can use on your pages. These range from buttons and dividers to charts and forms. To add a new widget to your webpage, click on it and a new section will be added. For most widgets, you’ll be presented with a few setup options that dictate how the widget will look and behave.
Step 7: Add more pages
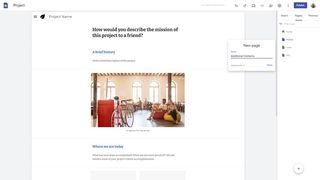
You can add new pages to your website by clicking on the big Plus button on the Pages menu. Pages that you add will be automatically added to the website navigation menu. If you right-click on a page in the list, you can choose to set the page as the homepage, duplicate the page, add sub-pages, hide it from the navigation menu, or delete it altogether.
Step 8: Publish your website
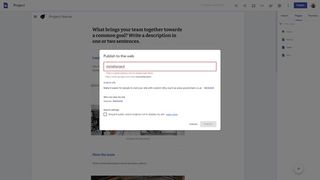
Up to this point, your website hasn’t been accessible to the public. To publish your Google Sites website, click on the blue Publish button at the top right of the interface. You’ll be asked for a unique folder name, where your website will be available - for example, if you set the web address to mymathproject, your website would be available at sites.google.com/view/mymathproject.
You can choose to buy your own top-level website domain that points to your Google Sites website. After buying a domain through a domain name registrar, such as Google Domains or GoDaddy, you will need to point the domain name to ghs.googlehosted.com on the registrar website.
An interesting feature of Google Sites is the option to keep your Google Sites website private and only share it with specific people.
Summary
With Google Sites, it’s possible to make a professional-looking free website, but its limitations restrict it to hobby or school project sites.
Further reading on website builders
To find a more powerful free website creation tool, consider our list of the best free web hosting services, many of which come with a free website-building tool. If you’re willing to pay a subscription, the best website builders have many more features than Google Sites, while the best web hosting services offer more secure and reliable hosting.
Richard is a technology writer with over 20 years experience in website development, marketing, and SEO. A graduate in Computer Science, he has lectured in Java programming and built software for companies including Samsung and Walmart. Richard writes for TechRadar, IT Pro, Tom's Guide, and PC Gamer.


