Monoprice Maker Select Ultimate 3D Printer Review
The Maker Select Ultimate targets the budget-conscious 3D printmaker who wants to experiment with 3D printing without breaking the bank.
Why you can trust Tom's Guide
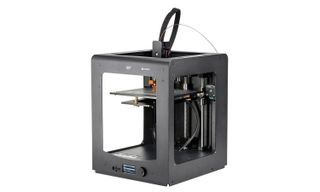
Monoprice has a reputation as a producer of cheap but high-quality accessories for the audio world, but the company is now branching out into 3D printers with the $699 Maker Select Ultimate. The printer does the company's cheap-and-cheerful reputation no harm: It's a well-priced 3D printer that offers strong performance and some surprising features.
In addition to the Maker Select Ultimate, Monoprice offers an even cheaper model, the $199 MP Select Mini. Monoprice claims that the $199 Select Mini takes less than 10 minutes to set up, but can still print in ABS and PLA. We plan to review it to see what features you're giving up in exchange for that lower price tag.
Design: Bulky but practical
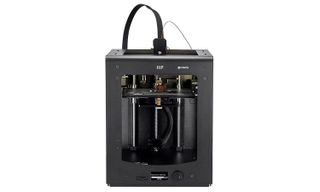
The Maker Select Ultimate is a hefty-looking chunk of a printer. Its frame sports an industrial look made of heavy, black, anodized metal. That won't win any prizes for graceful design, but it is practical: It keeps the moving parts contained and allows you to add covers for the openings if required. The insides of the printer have the same look made of black, anodized metal.

In the middle of the Maker Select Ultimate, you'll find the print bed, a 9 x 9-inch plate covered with a removable plastic coating that you lay print onto. This gives the Maker Select Ultimate a sizeable print volume, measuring 7.8 by 7.8 by 6.8 inches, for a total of about 413 cubic inches. That compares well with the 223 cubic inches offered by the similarly sized LulzBot Mini. This solid construction feels very robust, and doesn't shake or move as the print head swishes back and forth during printing.
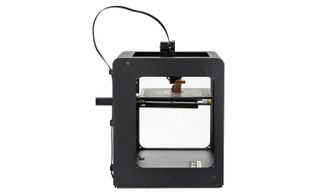
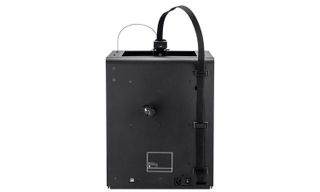
The print head above the print bed is another chunk of heavy metal with a brass nozzle that the print material squishes out of. The filament feeds into the top of this print head from a reel of filament that fits onto the back of the printer frame. I did find some issues here: The print nozzle on my test model had some sort of obstruction in it that impeded the flow of melted filament. I had to remove the print nozzle and clean this out manually, but fortunately, the removable nozzle design made that process fairly easy.
The removable plastic sheet covering the print bed is replaceable, so if the sheet becomes damaged (or you just can't remove a print from the print
bed), you can peel it off. One print got so tightly stuck to the print bed that I ended up damaging the sheet when prying it off. Fortunately, sheets are easy to replace; you get three replacement sheets from Monoprice and can order more from the company, though there's no listed price at the moment.
On the front of the case are the controls: a small LED screen and a combination dial and button. Next to the screen is the SD card slot. The controls are simple to use: Turn the dial to scroll through the on-screen menu, then press it in to select.
The Maker Select Ultimate's solid construction feels very robust, and doesn't shake or move as the print head swishes back and forth while printing.
If you're wondering why this printer is labeled with the name IIIP, this is a rebadge: Monoprice buys its printers from Wanhao and resells them under its own name.
Setup: Manual labor
The Maker Select Ultimate comes mostly assembled. You remove the packaging, install the dial and plug it in. Once the printer starts up, you have to level the print bed. Many recent printers, such as the LulzBot Mini, come with an automatic print-bed leveling system, in which a probe detects the print bed so the print head can hover just over it, but the Select Maker is strictly manual.
To level the print bed here, you have to slide a piece of paper between the bed and the print head and adjust three knobs until the gap is the same thickness as the paper. It's not particularly difficult, but automatic bed leveling is preferable.
Once the print bed is level, you can insert the filament and start printing. This is another simple but manual process, in which you follow a series of on-screen prompts. The reel of print material fits onto a hook behind the printer, then feeds over it and down into the print head. It isn't very obvious where the filament feeds into, but the illustrated manual covers the process well enough.
Print Materials: Flexibility, with some limits
The Maker Select Ultimate doesn't put any restrictions on the materials you can use for prints. The printer will work with any 1.75mm filament material that comes on a reel. The wide range of temperatures that the extruder and print bed can manage (260 degrees Celsius and 100 degrees C, respectively) means it can handle a wide range of materials, including PLA, ABS, HIPS, many nylon filaments and others.
We did most of our testing with PLA filament, but we also tested with ABS filament, another material used frequently for 3D printing. The Maker Select Ultimate struggled somewhat with ABS, with several prints failing because the layers didn't stick together properly. This was disappointing: One of the selling points of the Maker Select Ultimate over cheaper models is this flexibility, so we would have hoped for better performance out of the box with ABS.
Print Process: Straightforward with one catch
The Maker Select works with a software package called Cura IIIP Edition that comes included on an SD card that ships with the printer. This is a customized version of the open-source program Cura, although it is a few versions behind the latest release of Cura. It is pretty simple to use, presenting the user with a rotatable 3D view of the loaded model. You can also move and scale the model, but since it's not a full-on 3D modeling program, you can't create models from scratch. You can view the model in several different ways, including the layer view that provides a preview of the 3D print as it is created layer by layer.
This customized version of Cura also offers the ability to get into the more technical details of 3D printing and tweak them. By setting the software to expert mode, you can get access to a bewildering number of options and settings and create custom profiles for different materials and types of print.
The Maker Select Ultimate struggled somewhat with ABS, with several prints failing because the layers didn't stick together properly.
Once the print is ready to go, you can print it directly over USB, or save the print file to the SD card. If you are doing the latter, you then have to choose Print from the menu on the printer and select the model from the list on the printer LED screen. If you are connected over USB, the software handles most of the process, heating up the print bed and nozzle and starting the print.
Once the printer was configured correctly, the print process turned out to be largely straightforward and trouble-free. I did find that getting the all-important first level of the print right required some tweaking, though. The manual print-bed leveling process described above didn't quite cut it. In my first few prints, the first layer of material didn't stick to the print bed, causing them to fail. To get them to stick, I had to turn the knobs slightly to adjust the print bed, then try a print and adjust again if required.
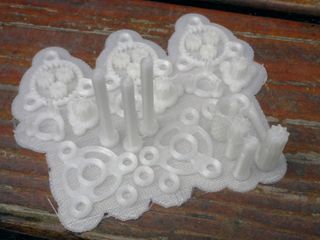
This is an overly finicky process, and another argument in favor of automatic print-bed leveling. Even after adjusting the print bed, I noticed some prints peeling rather alarmingly. This is when the first layer of material doesn't stick to the bed and peels up as subsequent layers are added. This didn't cause the print to fail, but it's somewhat alarming to see.
Print Speed: Nothing out of the ordinary
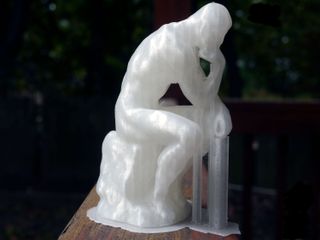
In terms of speed, the Maker Select Ultimate is a fairly average 3D printer. Printing with PLA filament at Normal quality with a layer height of 0.1mm, our 4.5-inch Thinker test sculpture took about 16 hours and 40 minutes to print. A similar print on the XYZprinting da Vinci 3-in1 took about 14 hours and 13 minutes, so Monoprice's printer is a little bit slower. 3D printing is never a speedy process, and the Maker Select Ultimate does nothing to change this.
Print Quality: Decent, not spectacular
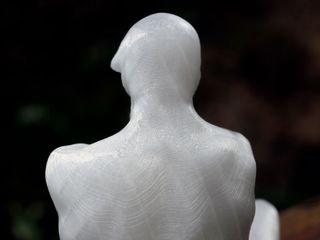
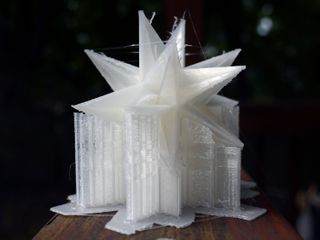
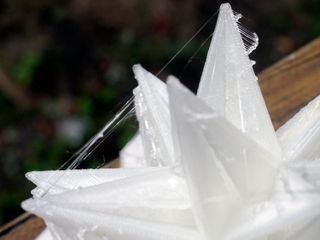
The Maker Select Ultimate offers good, though not spectacular print quality. Most of my models printed cleanly, with some visible layering and a small amount of filament whiskers left hanging from the prints when they were complete. On our angular sculpture print, for instance, a lot of whiskers of melted filament came from the edges, caused by the material stretching into whiskers as the head moved to another part of the print. Layers were clearly visible in the shoulders of the test print of Rodin's Thinker sculpture.
The Maker Select Ultimate offers three print-quality settings: Fast, Normal and High. These use a 0.06, 0.1 and 0.2mm layer height, respectively, which is somewhat smaller than most — and thus slower to print. If you want to produce less detailed but quicker prints, the Expert mode allows you to set the layer height manually.
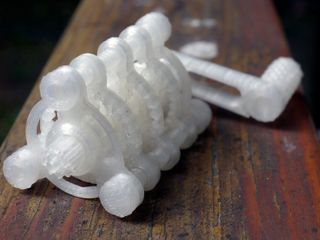
Most of my models printed cleanly on the Maker Select Ultimate, though there was some visible layering and a small amount of filament whiskers left hanging from the prints.
Bottom Line
The Maker Select Ultimate offers a lot for not a lot of money. The printer provides acceptable print quality and a decent range of features. Monoprice's printer is rather slow, though, and is missing some of the more sophisticated features that make a 3D printer like the LulzBot Mini. easier to use: There is no nozzle cleaning, for example, or automatic print-bed leveling. These features make a printer more reliable; without them, you have to do more manual tweaking.
For those who don't mind doing this sort of fiddling, the Maker Select Ultimate is a good pick, especially as it is so much cheaper than the LulzBot Mini and offers the same flexibility with printing multiple materials. But for heavy-duty or educational printing, the LulzBot Mini. remains the better pick.
Sign up to get the BEST of Tom’s Guide direct to your inbox.
Upgrade your life with a daily dose of the biggest tech news, lifestyle hacks and our curated analysis. Be the first to know about cutting-edge gadgets and the hottest deals.
Richard Baguley has been working as a technology writer and journalist since 1993. As well as contributing to Tom's Guide, he writes for Cnet, T3, Wired and many other publications.
